Would you like to customize how events are shown on your website? The Event Filters widget provide some filtering controls when viewing event and calendar lists.
This tutorial explains how to use the Event Filters widget in Sugar Calendar.
In This Article
Before you get started, make sure Sugar Calendar is installed and activated on your website.
Accessing the Event Filters Widget
Note: This widget’s filtering controls only work when viewing all events or specific calendar events in the archive page.
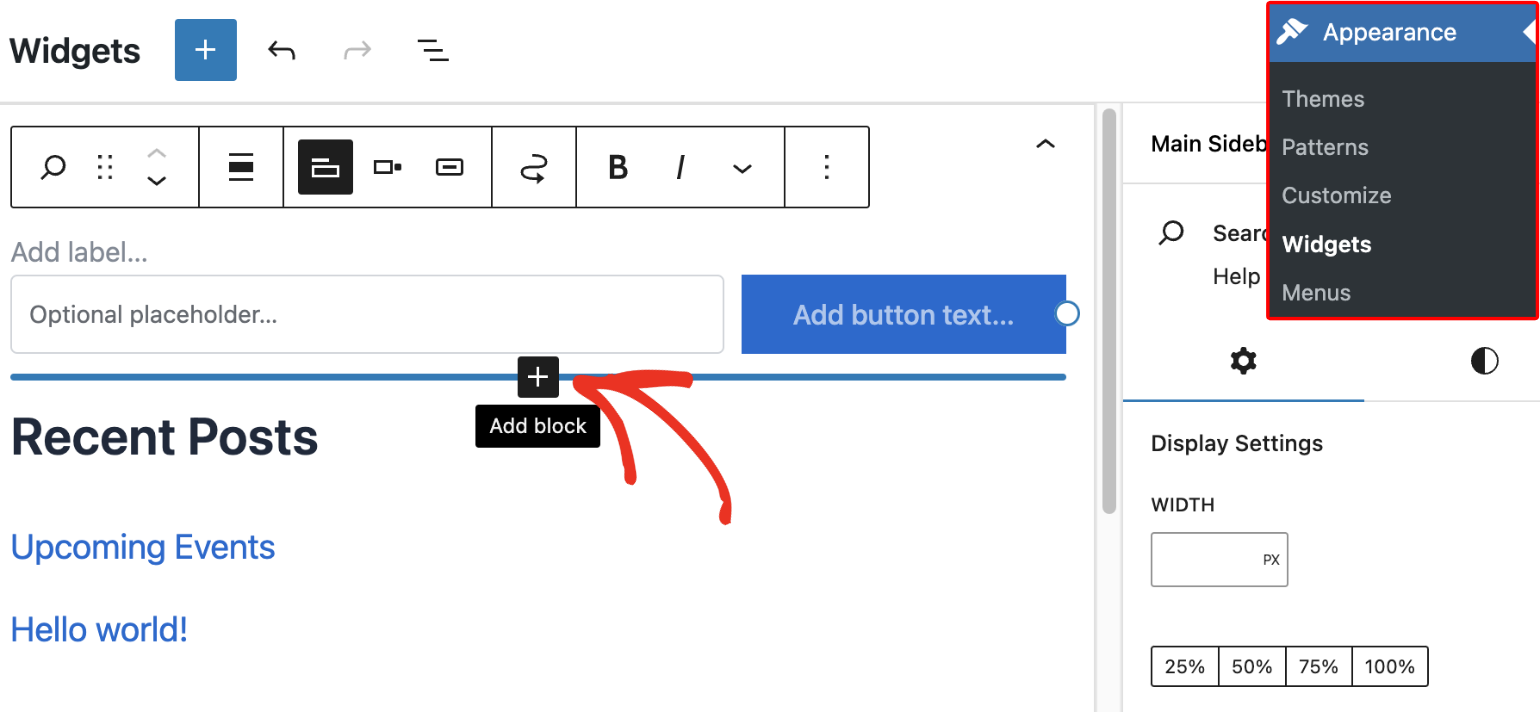
To customize event filters, log in to your WordPress site and go to Appearance » Widgets. Here, click the plus icon next to the area you wish to display the widget to add a new block.

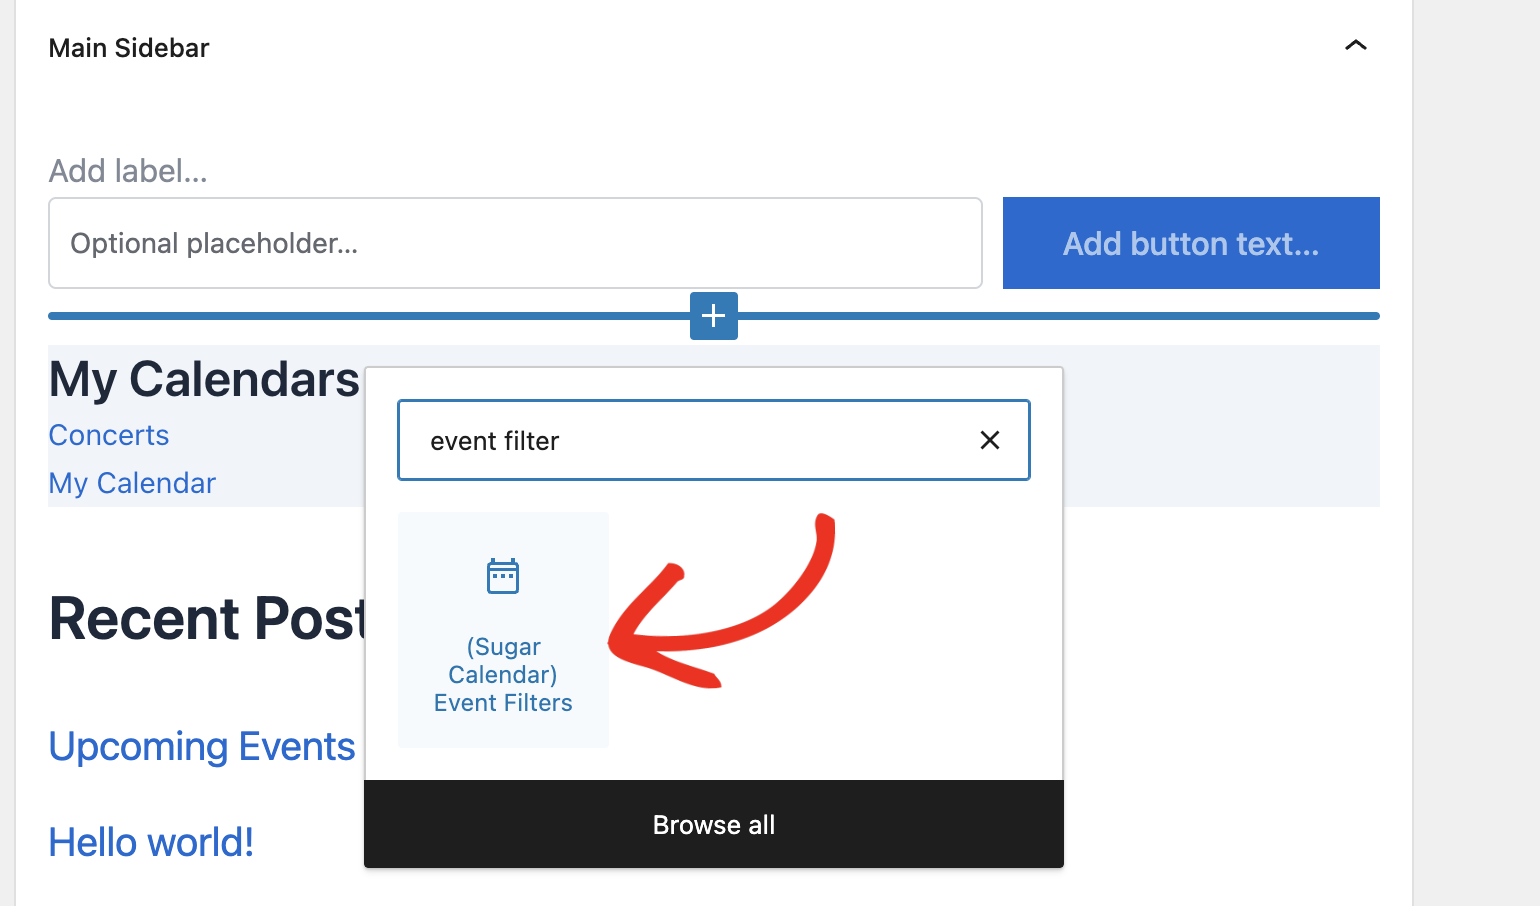
After that, type ‘event filter’ into the search bar and select the Event Filters block.

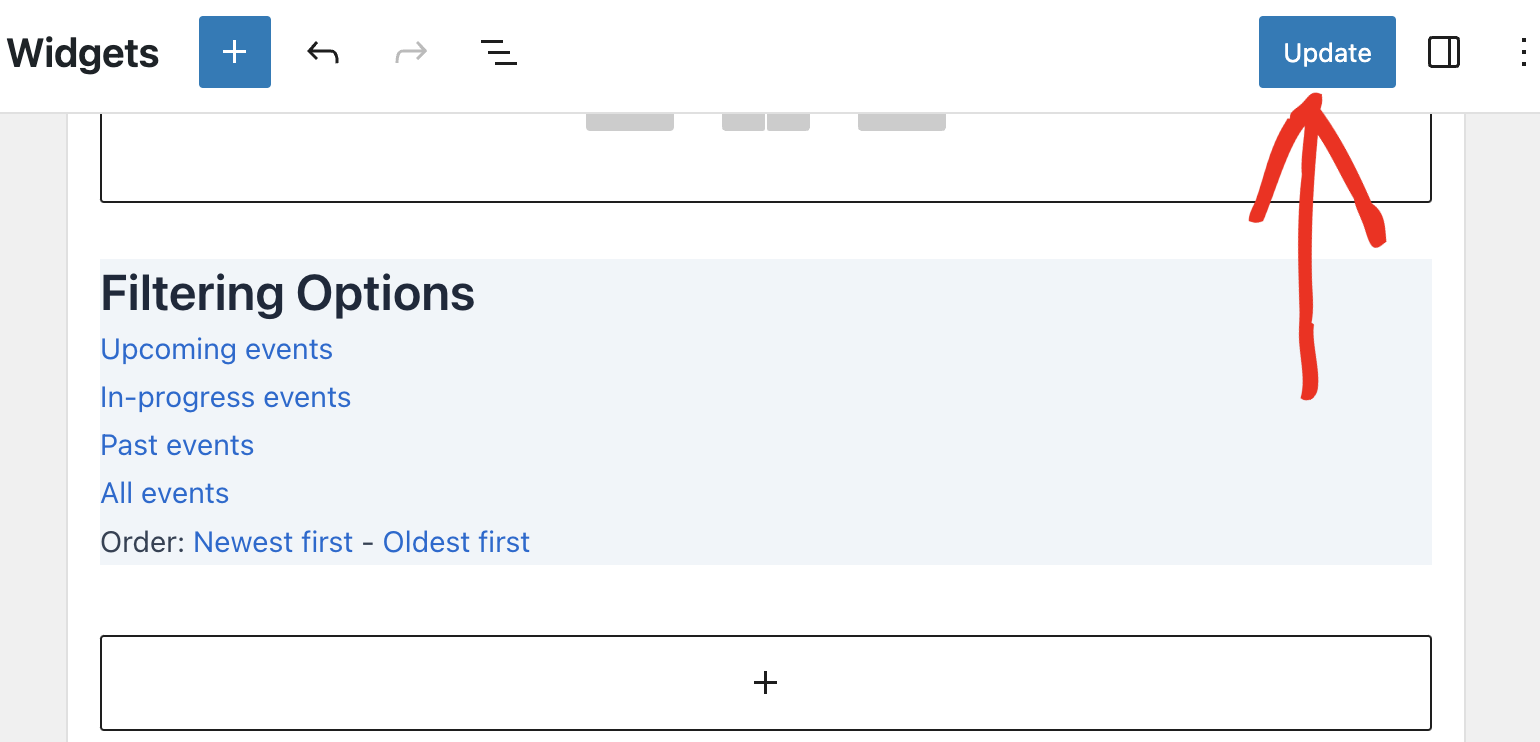
Next, you’ll need to enter a title for the widget. For our example, we used Filtering Options, but you can use any name you like. Once done, click Update to save your changes.

Using Event Filters
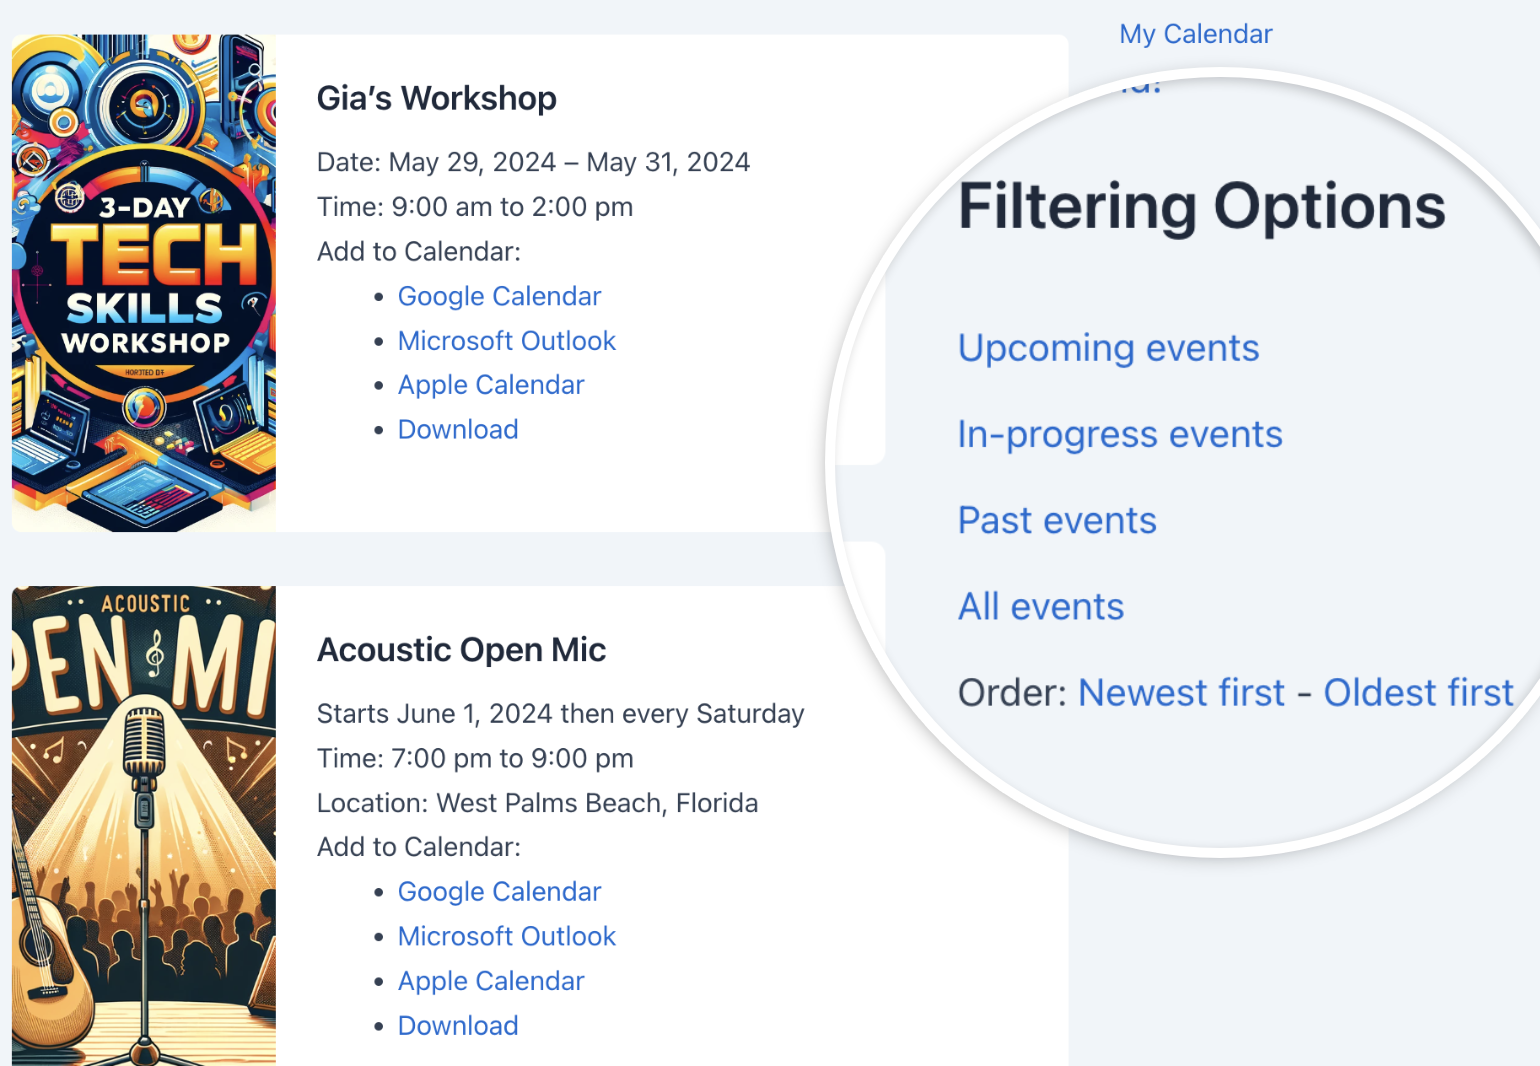
After adding the Event Filters widget, you’ll be able to use it to filter event and calendar lists on your site. Below, we’ll cover the available filtering options.

- Upcoming events: This option will filter the calendar list to only show upcoming events.
- In-progress events: When selected, only ongoing events will be displayed.
- Past events: This option will hide upcoming and ongoing events and only display past events.
- All events: This filter will show all the events you’ve added to your site. If you’ve configured other filtering options, this will also override them.
- Order: The Order filtering option lets you select how events are displayed on your site. You can either filter events to show the Newest first or Oldest first.
That’s it! You’ve now learned about the available event filters in Sugar Calendar.
Next, would you like to create repeating events on your site? Our tutorial on creating recurring events covers all the steps in detail.


