Would you like to test your event ticketing payment before accepting real payments in Sugar Calendar? With the Event Ticketing addon, you can make trial purchases to confirm that the payment gateway is properly configured.
This tutorial covers how to perform test ticket sales in WordPress.
In This Article
Before you get started, be sure to install Sugar Calendar on your WordPress site and verify your license. Then, proceed to install and activate the Event Ticketing addon.
Enabling Stripe Test Mode
When testing your ticketing system, you’ll need to ensure that no real transactions are made in the process.
To enable test mode, go to Sugar Calendar » Settings in the left menu of your WordPress site and select the Payments tab.
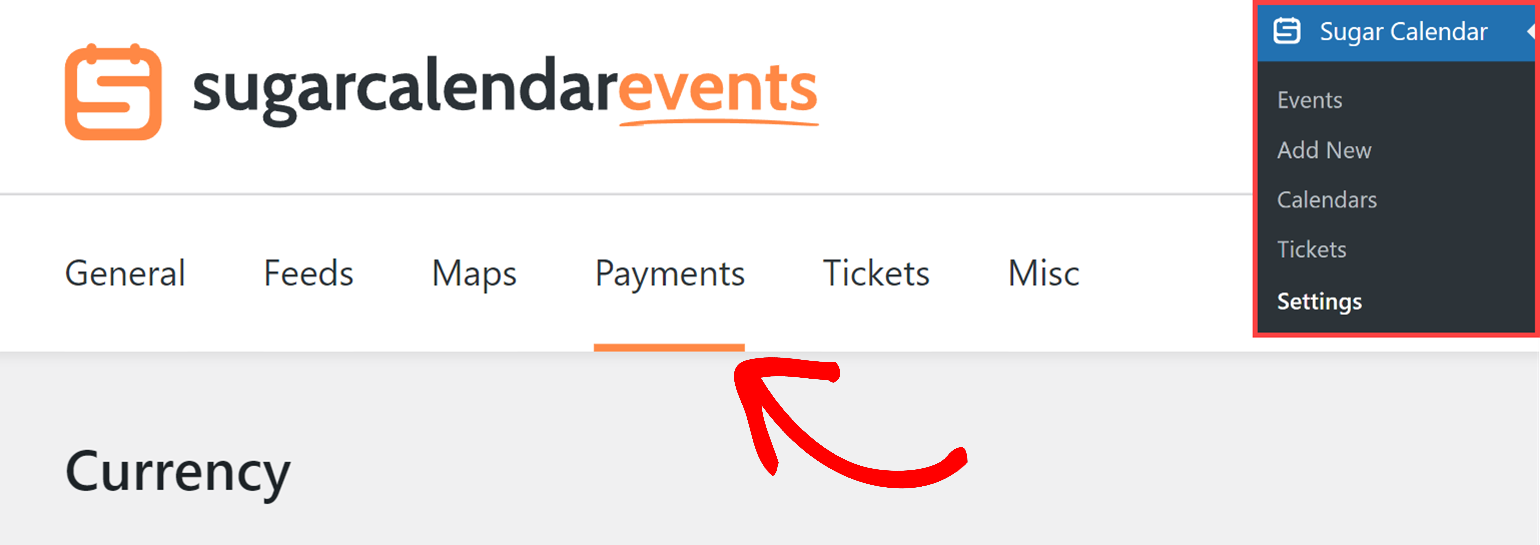
The Currency dropdown lets you choose the default currency your site will use to collect payments. You can click the dropdown and choose the one you’d like to use.

When you’re ready, scroll down to the Stripe section and toggle the Test Mode option to the ON Position.
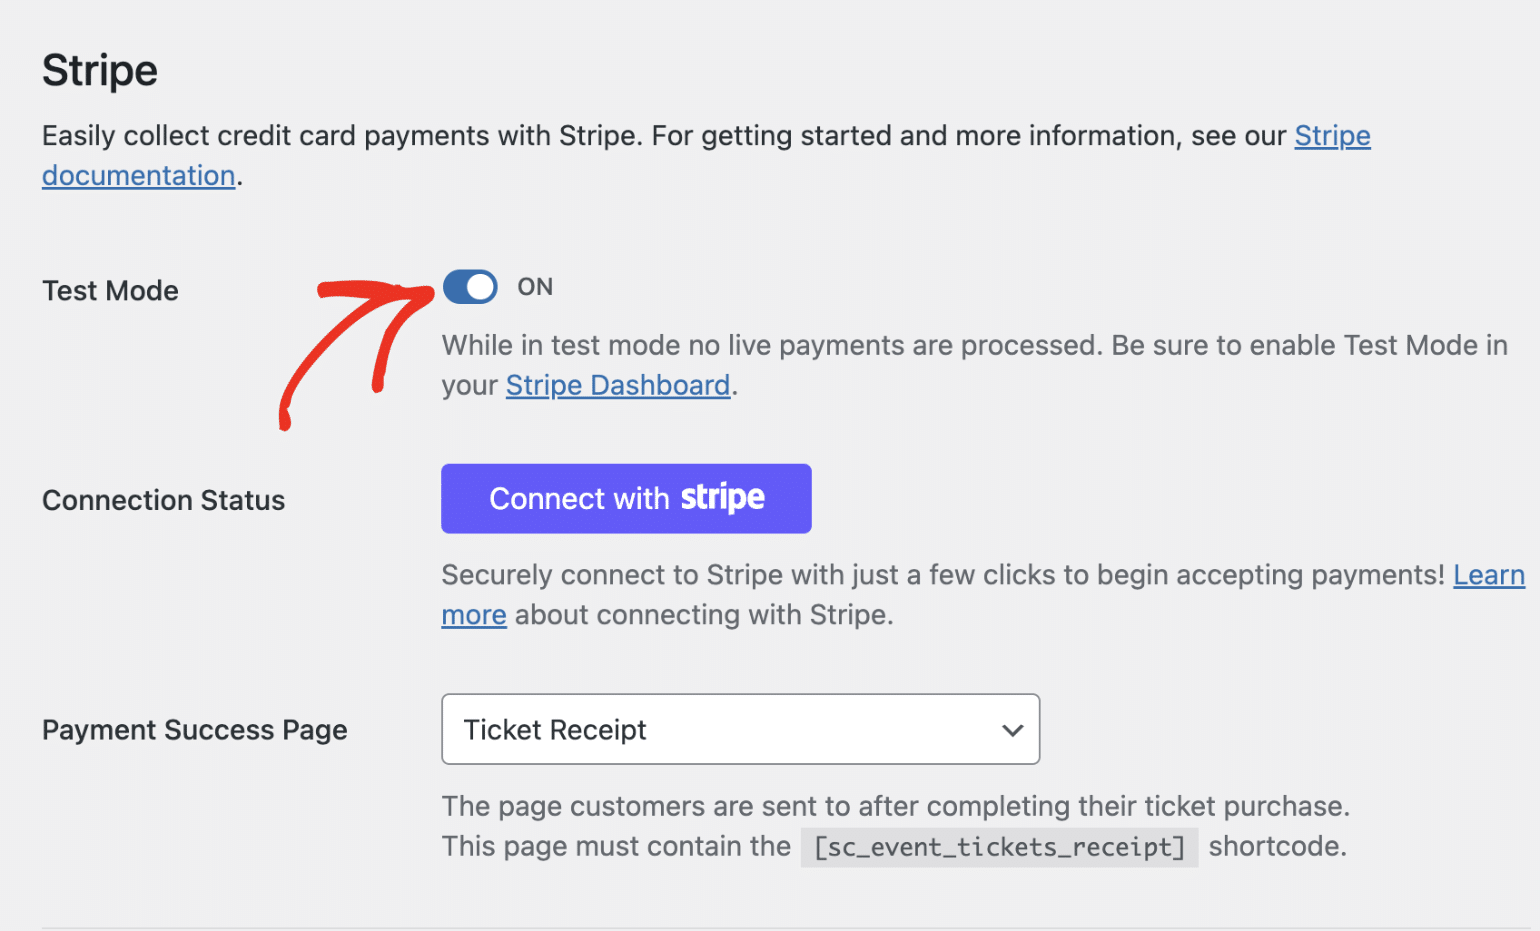
Note: When switching Stripe payments to test mode within Sugar Calendar settings, please note that this change only applies to the Sugar Calendar plugin. If you have other plugins on your site using Stripe, this test mode setting won’t affect them. Ensure you check and configure each plugin’s settings individually to avoid any unexpected payment behaviors.
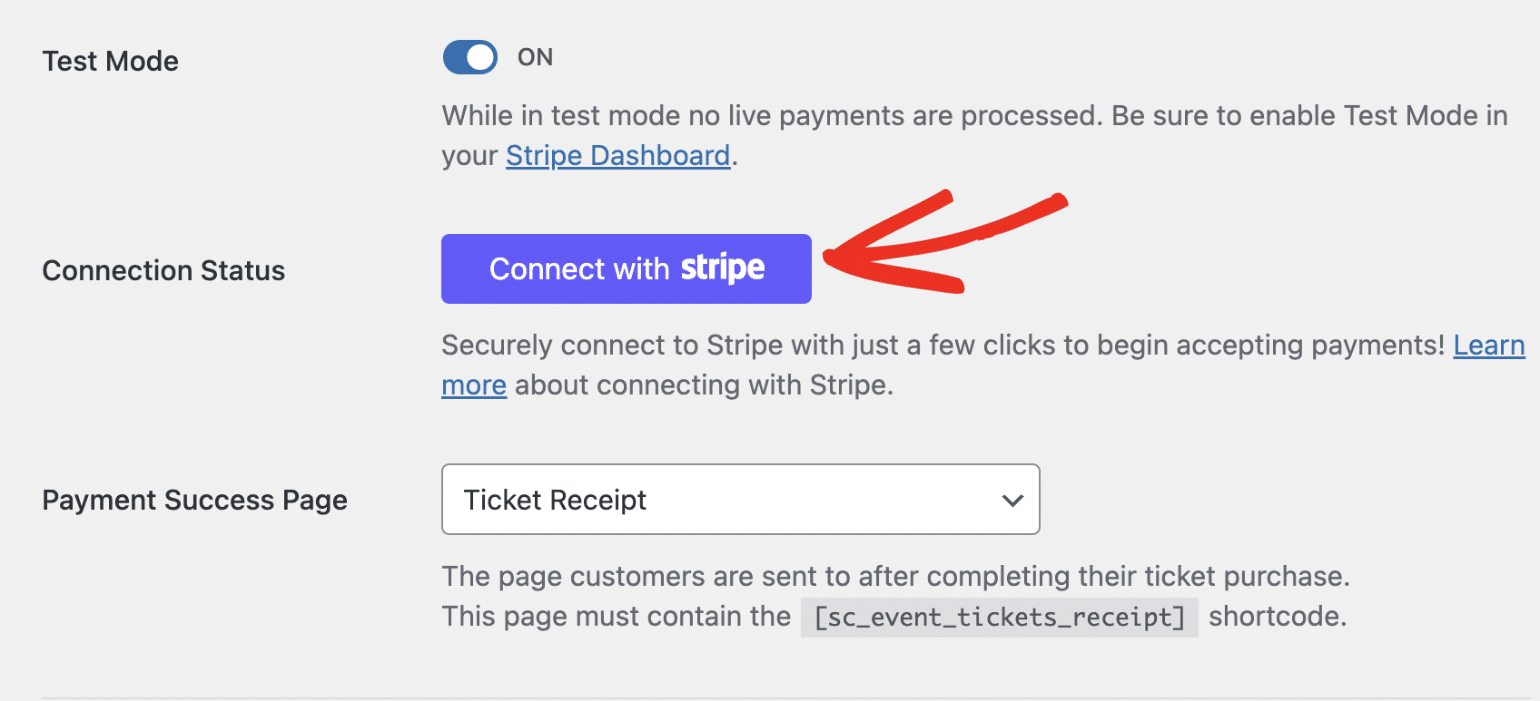
After that, click the Connect with Stripe button to connect your account.
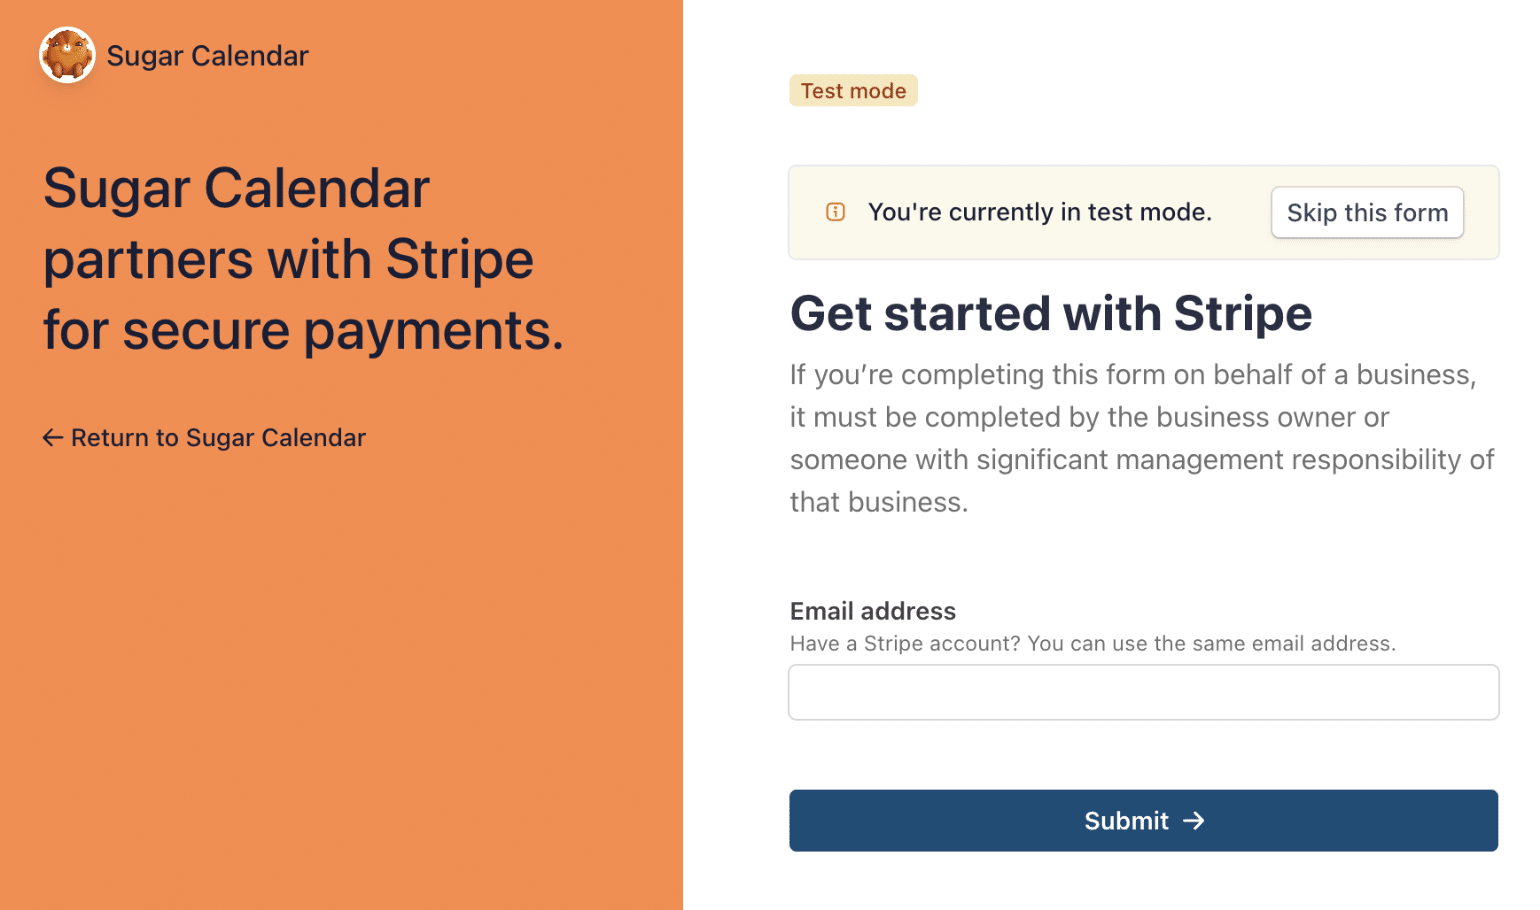
Next, you’ll be asked to authorize the connection between Sugar Calendar and Stripe. The exact content you see on this page will vary based on whether your Stripe account has already been activated.
Once you’ve followed all the steps in the Stripe Connect wizard, you’ll be redirected to your site’s admin area with a confirmation message next to Connection Status.

After you’ve checked that Stripe is connected and test payments are enabled, click the Save Settings button.

Enabling Tickets for Events
Next, you’ll need to create a new event or edit an existing one with Sugar Calendar to access the event editor.
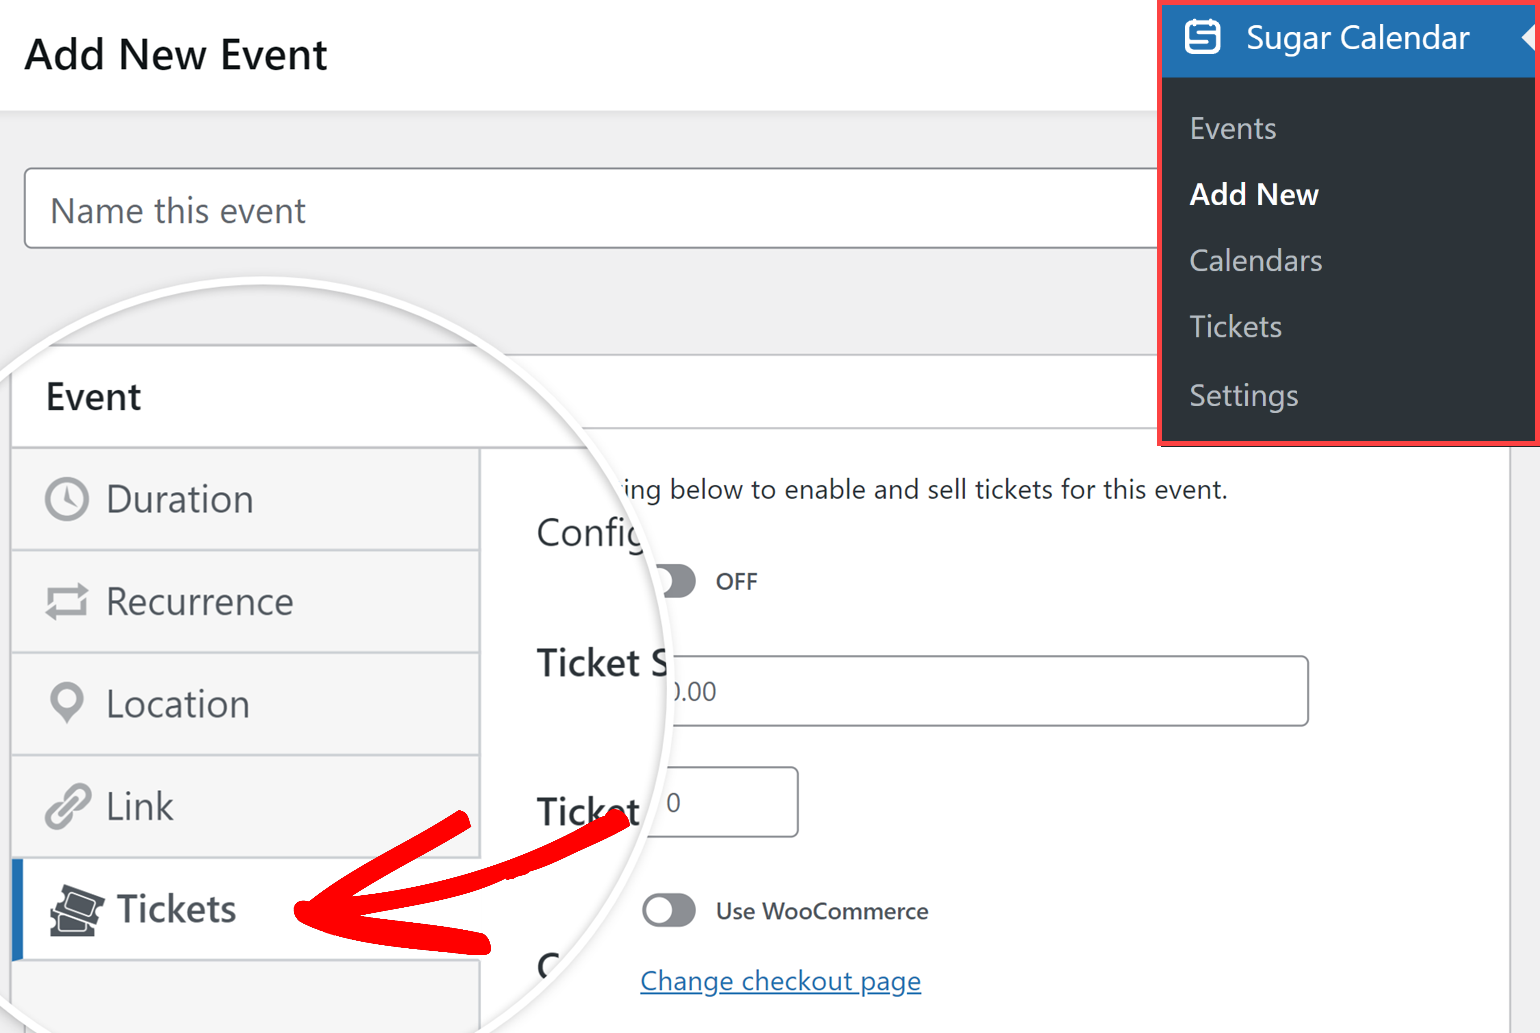
To enable ticket sales for an event, click the Tickets tab from the editor.
Next, toggle the Ticket Sales option to the ON position. After that, you’ll need to set the ticket price and quantity available in the Ticket Price and Capacity fields, respectively. The ticket price is the amount each ticket will cost, and the capacity is the total number of tickets available for sale.
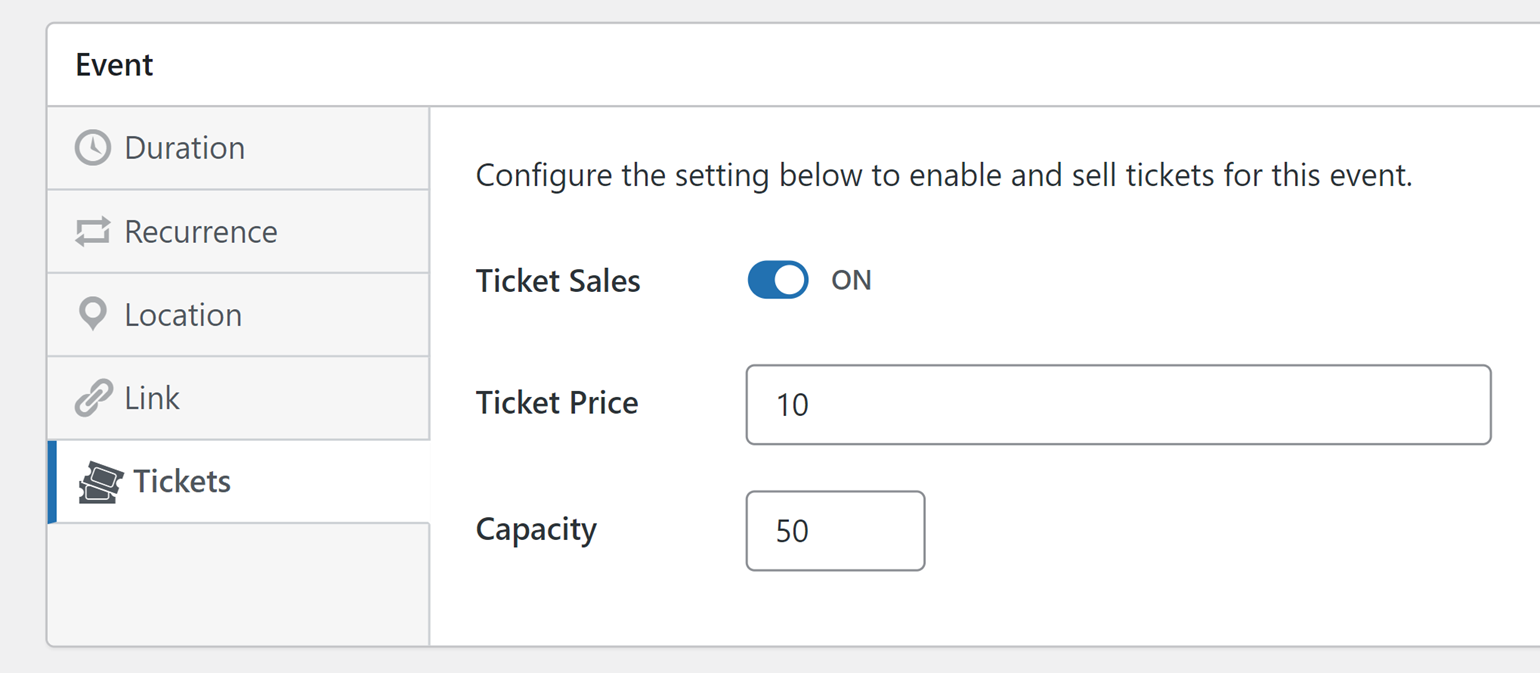
After adding the ticket details, be sure to save or update the event page. This will add a purchase option to the bottom of the event details page, allowing attendees to buy tickets directly from your site.
Purchasing a Test Ticket
Once you’re done configuring your event to accept ticket sales, proceed to test payments on your site’s frontend. To do this without publishing the event to a live page, you can create a private page or post and display the event on that page.
Alternatively, if you’re creating a new event, click the Preview button to test your payment before publishing the event.
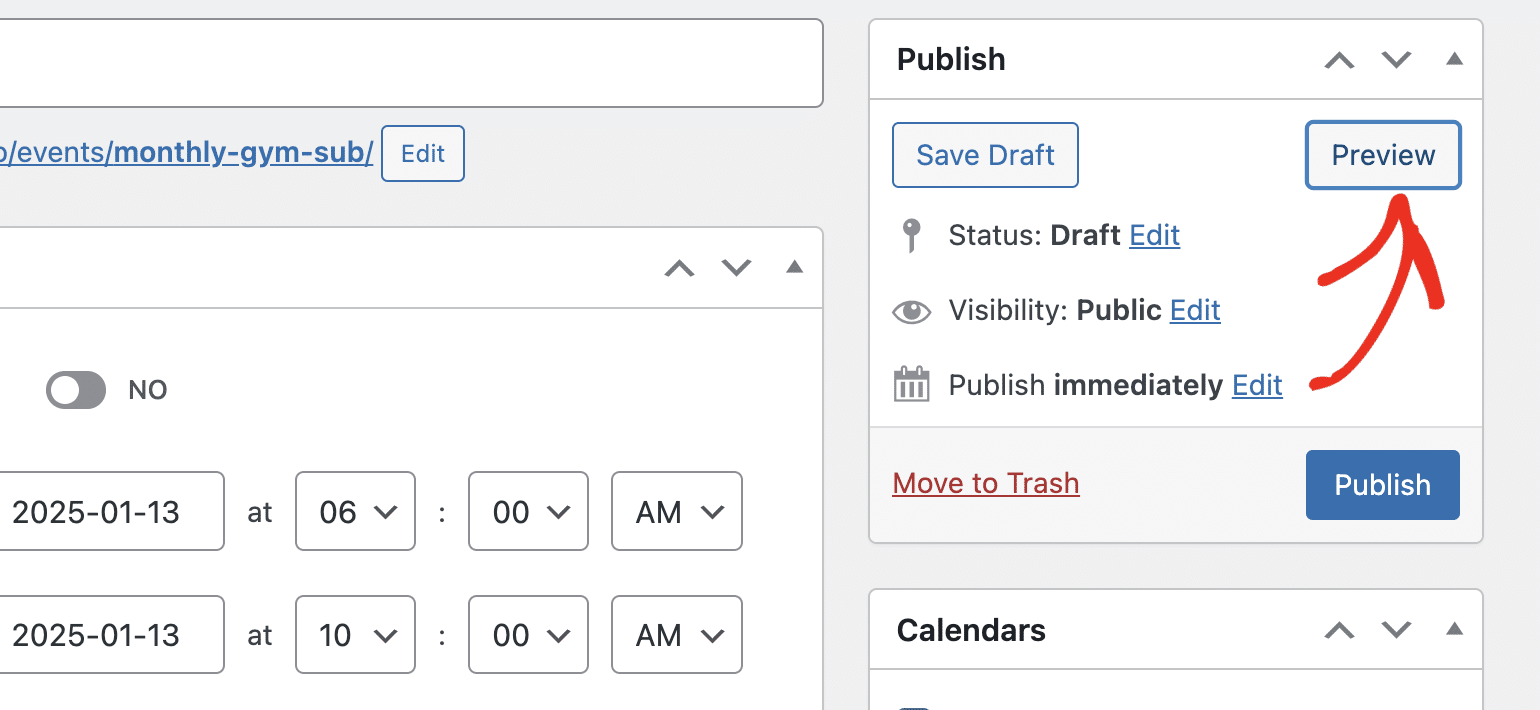
This will direct you to the event detail page on your site’s frontend. From here, click the Buy Tickets button to proceed.

Since you can’t use genuine card information to complete your ticket purchase when Stripe is in test mode, you’ll need to use one of Stripe’s test credit card numbers.
Note: You can enable support for Google Pay and Apple Pay payments on your site to give your users a native checkout experience when purchasing event tickets. For more details, see our guide on enabling additional payment methods for event ticketing.
Viewing Test Transactions in Sugar Calendar
After sending some test payments, you can manage your ticket orders from the Sugar Calendar » Tickets section in your WordPress admin area.
This section is divided into two main tabs: Tickets, where you can view all attendees and their ticket details, and Orders, where you can see a summary of all ticket orders and their statuses.
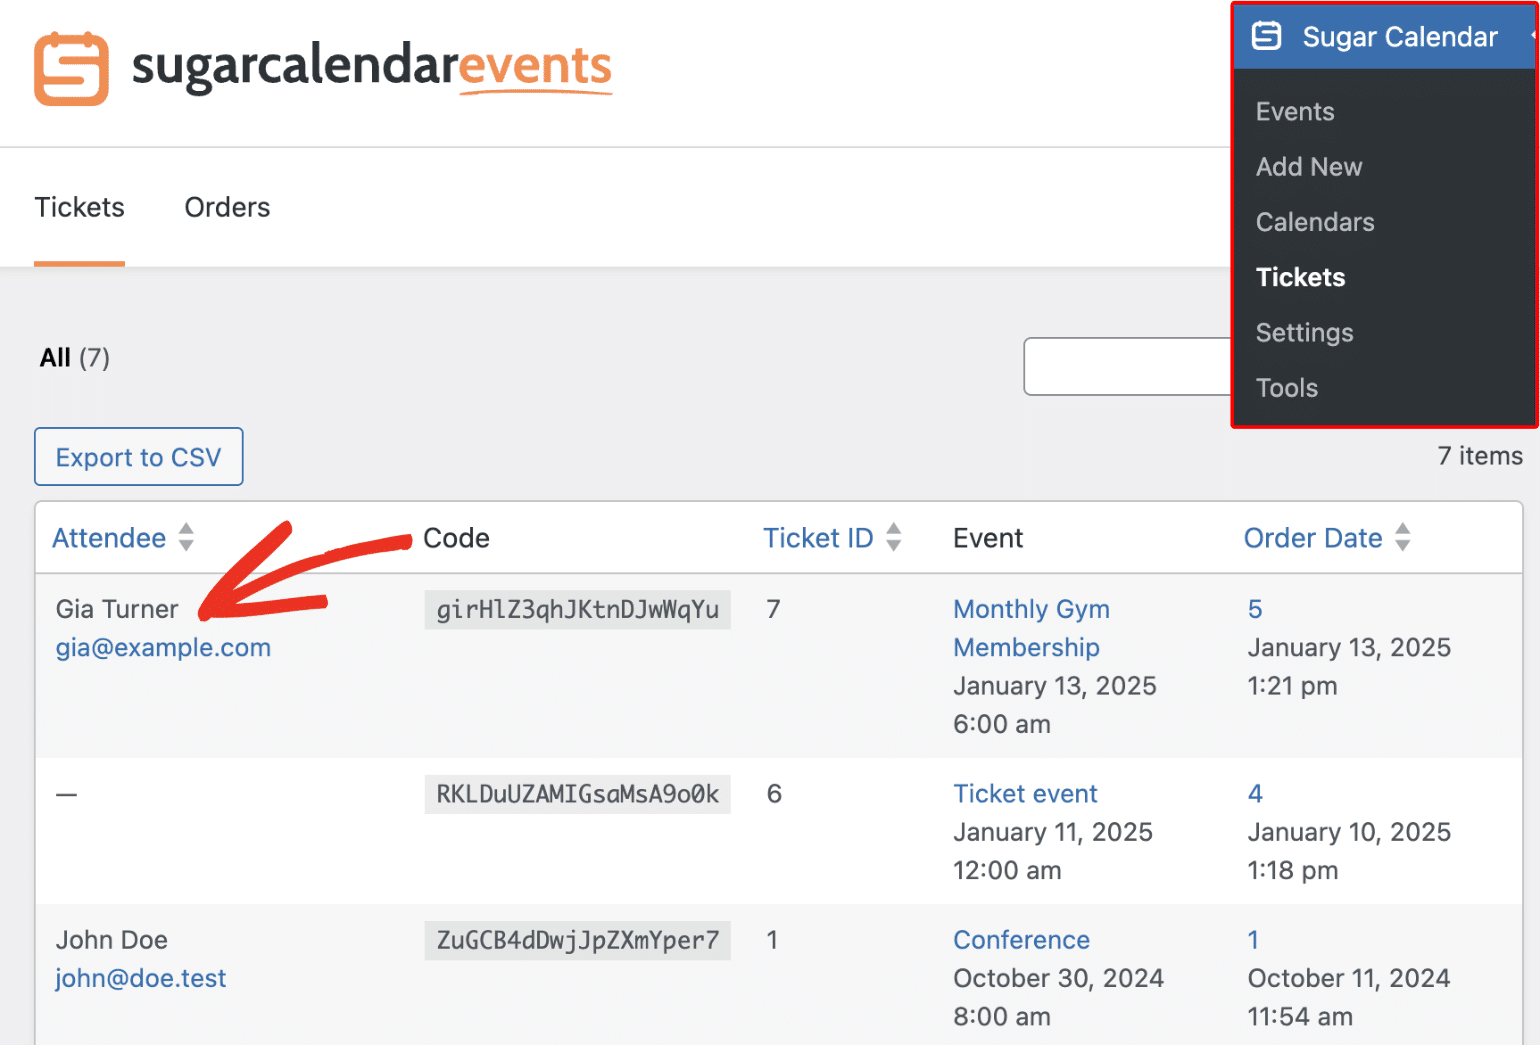
Be sure to check our guide to learn more about viewing and managing tickets in Sugar Calendar.
Switching to Live Mode
When you’re done testing, remember to deactivate Test Mode in Stripe before allowing users to purchase tickets on your site. You can do this by going to Sugar Calendar » Settings » Payments, as in the previous step.
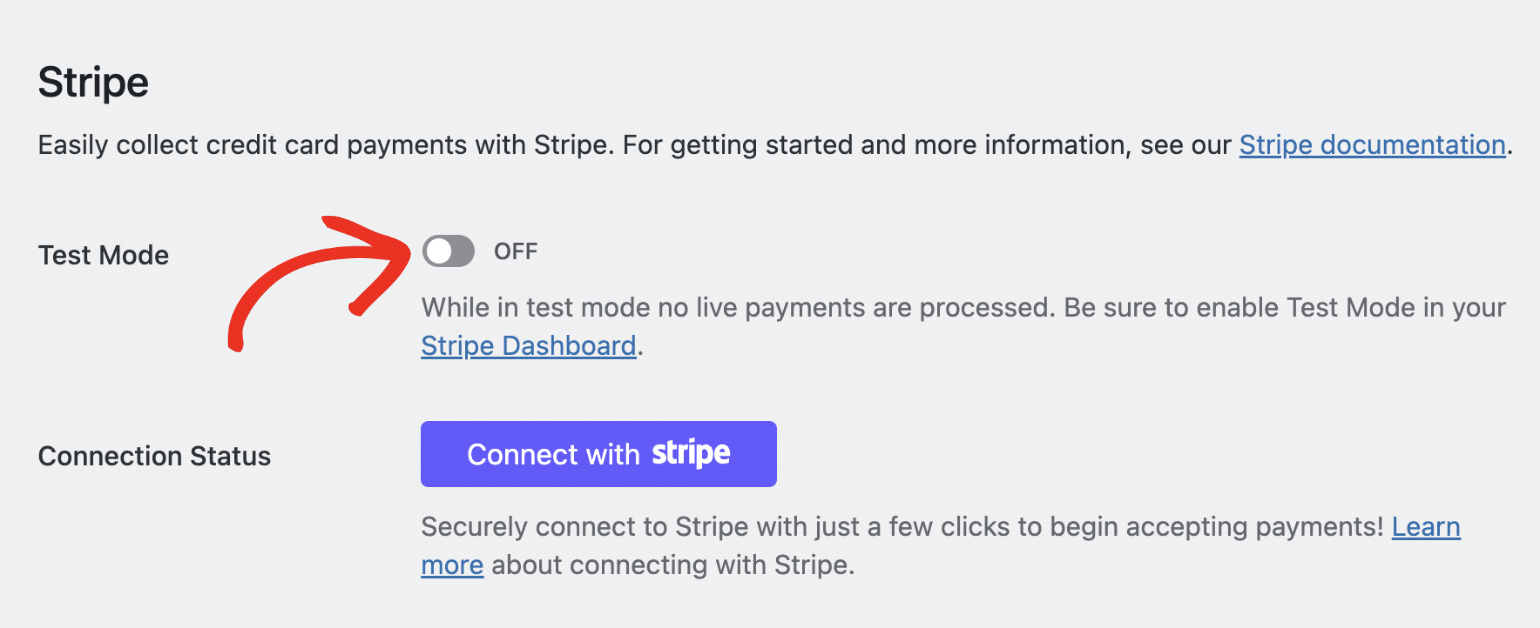
To enable Live Mode, scroll to the Stripe section and toggle the Test Mode option to the OFF position.
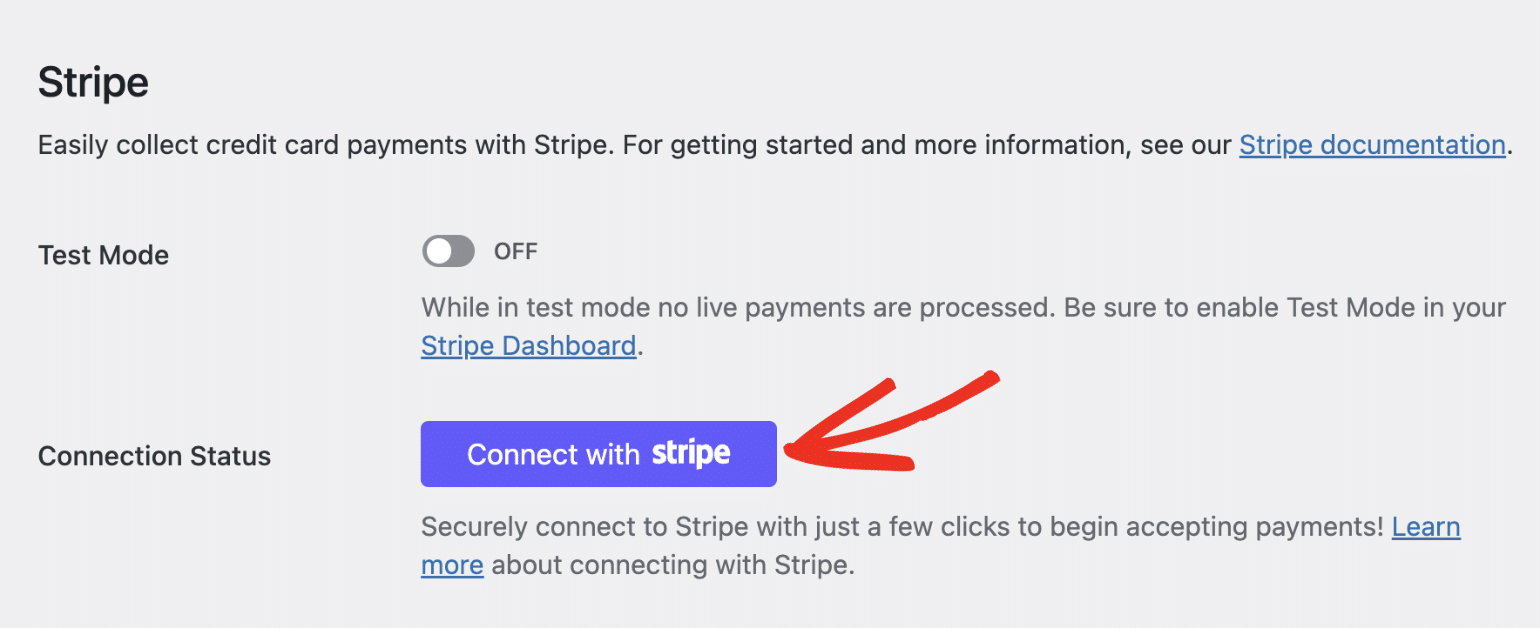
You’ll then need to reconnect Sugar Calendar to Stripe by clicking on the Connect with Stripe button. Don’t forget to save your settings as well.
Note: For more details on connecting your site to Stripe in Live Mode, see our guide to using the Event Ticketing addon.
That’s it! You can now test Stripe payments on your Sugar Calendar event tickets.
Next, would you like to display events on your site? Our guide on displaying event calendars explains different ways to showcase events on your site.


