Would you like to learn how to create events in Sugar Calendar? By following the steps in this guide, you’ll be able to create and publish events on your site.
In this tutorial, we’ll show you how to create your first event in Sugar Calendar Events.
In This Article
Before you get started, make sure Sugar Calendar Events is installed and activated on your WordPress site.
Creating a New Event
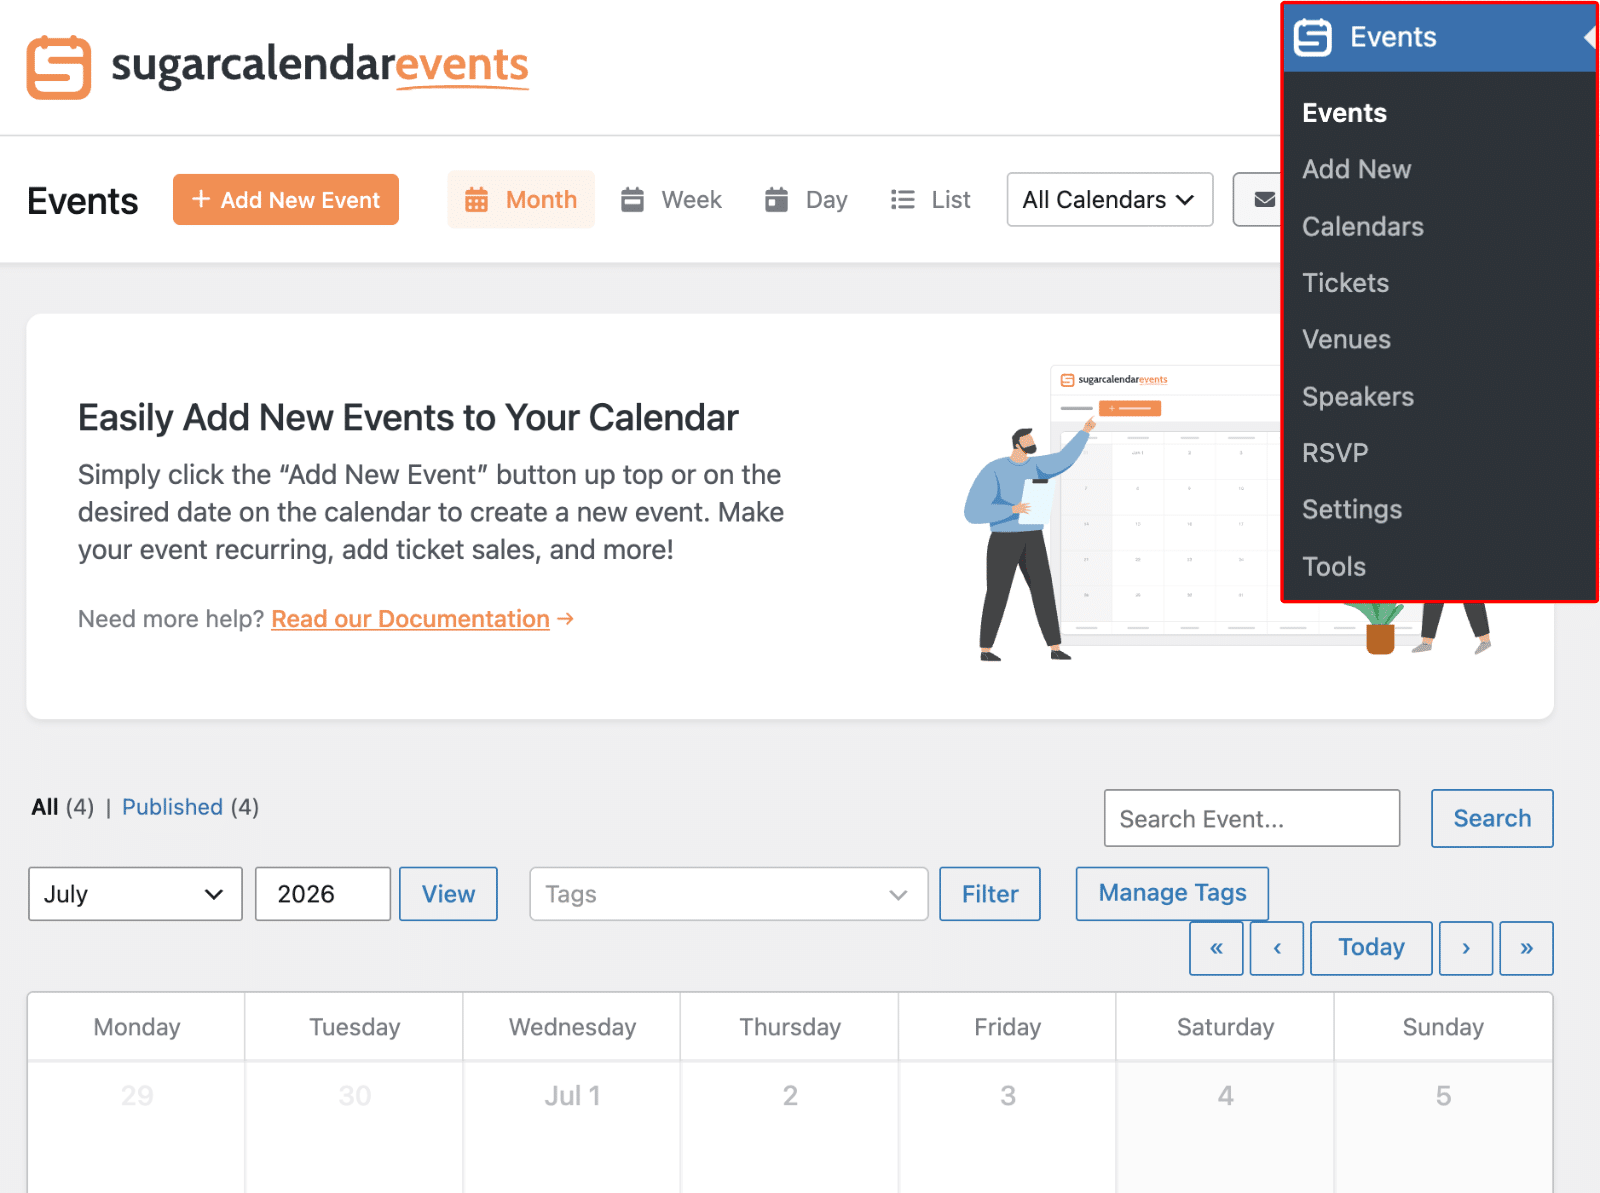
To start, log in to your WordPress admin area and go to the Events sidebar menu. Here, you’ll see a calendar with details about any event(s) you’ve created.
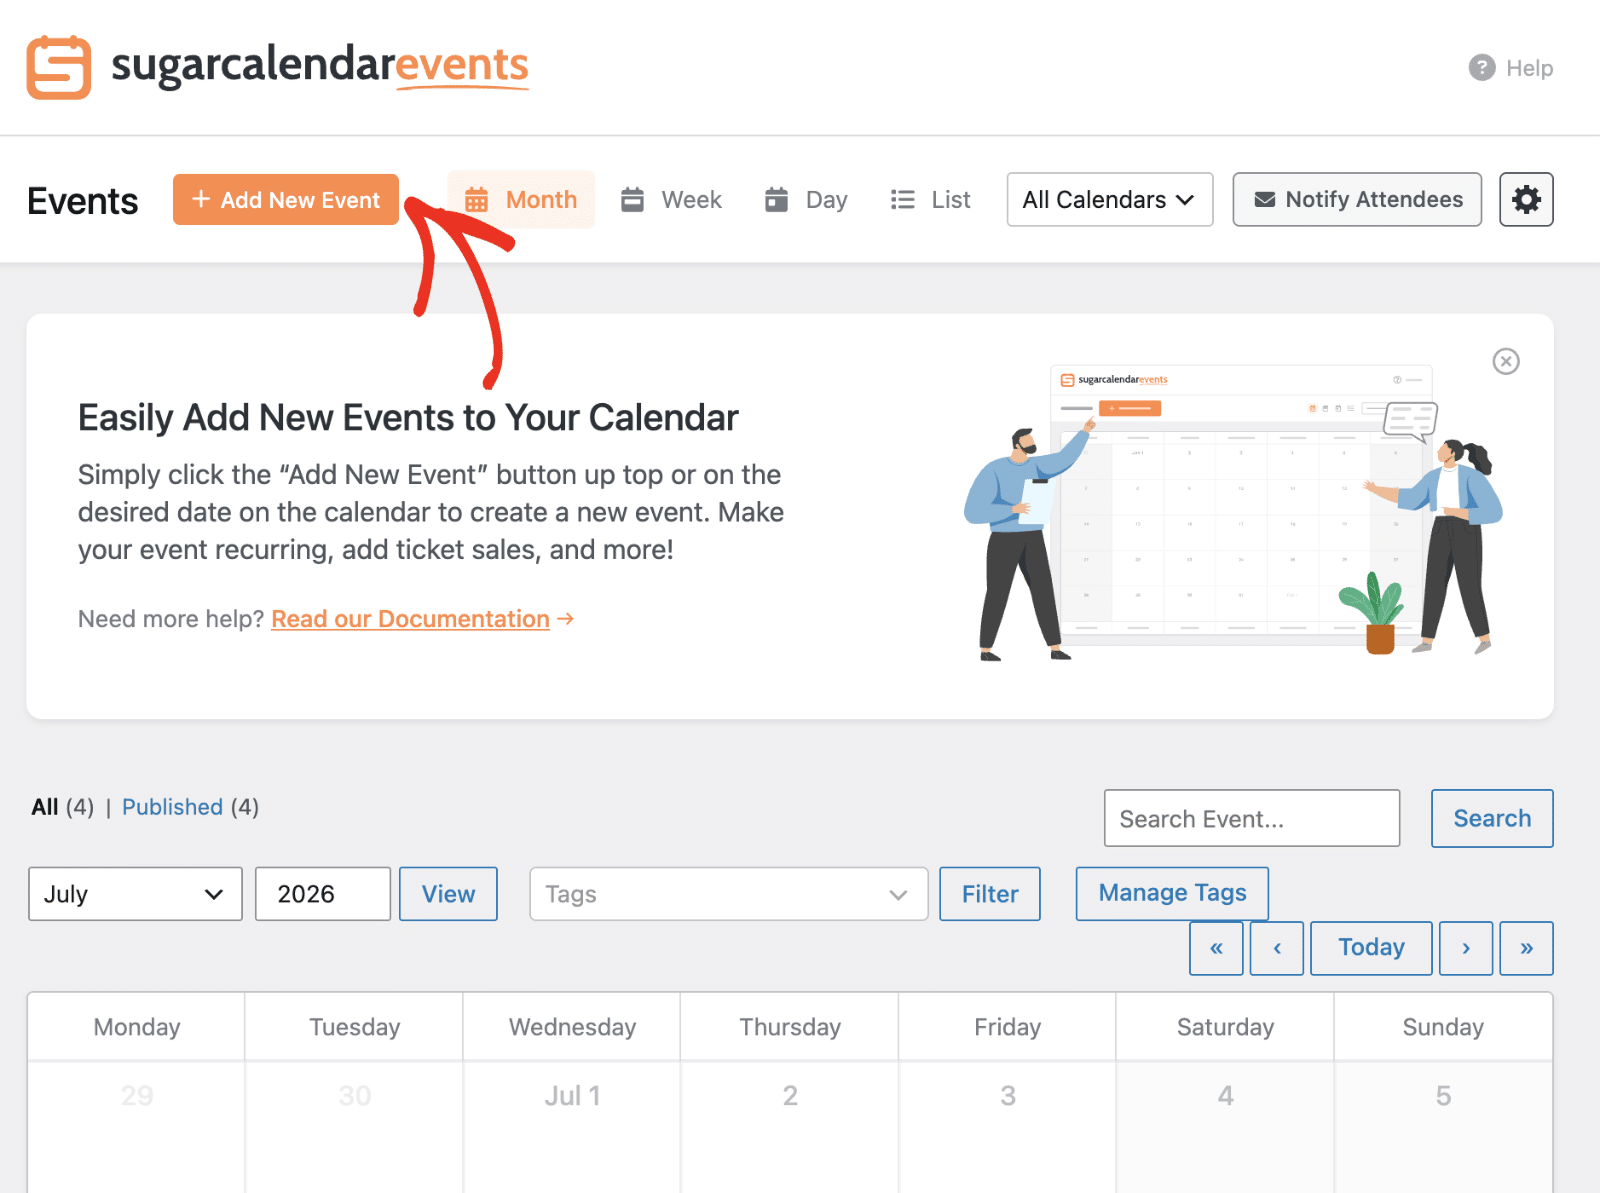
To create a new event, click the Add New Event button.
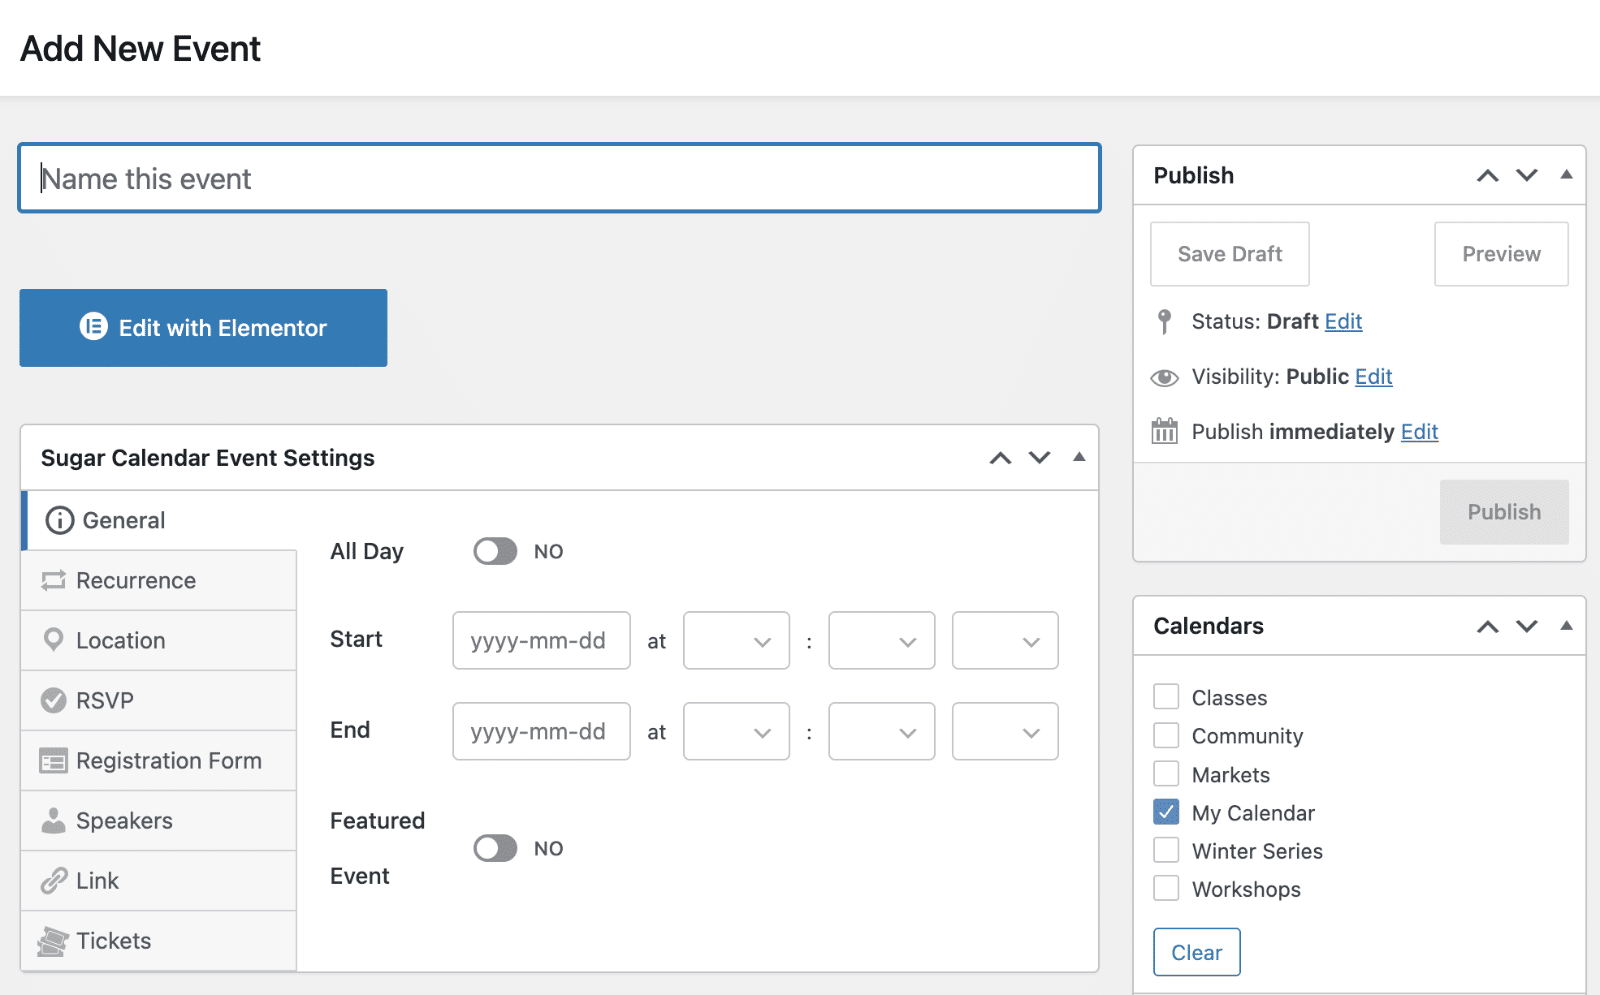
You’ll be directed to the event editor that looks similar to the WordPress classic editor.
If you’ve selected the Block Editor option from the Sugar Calendar settings page, you’ll be directed to the Block Editor to configure your event.
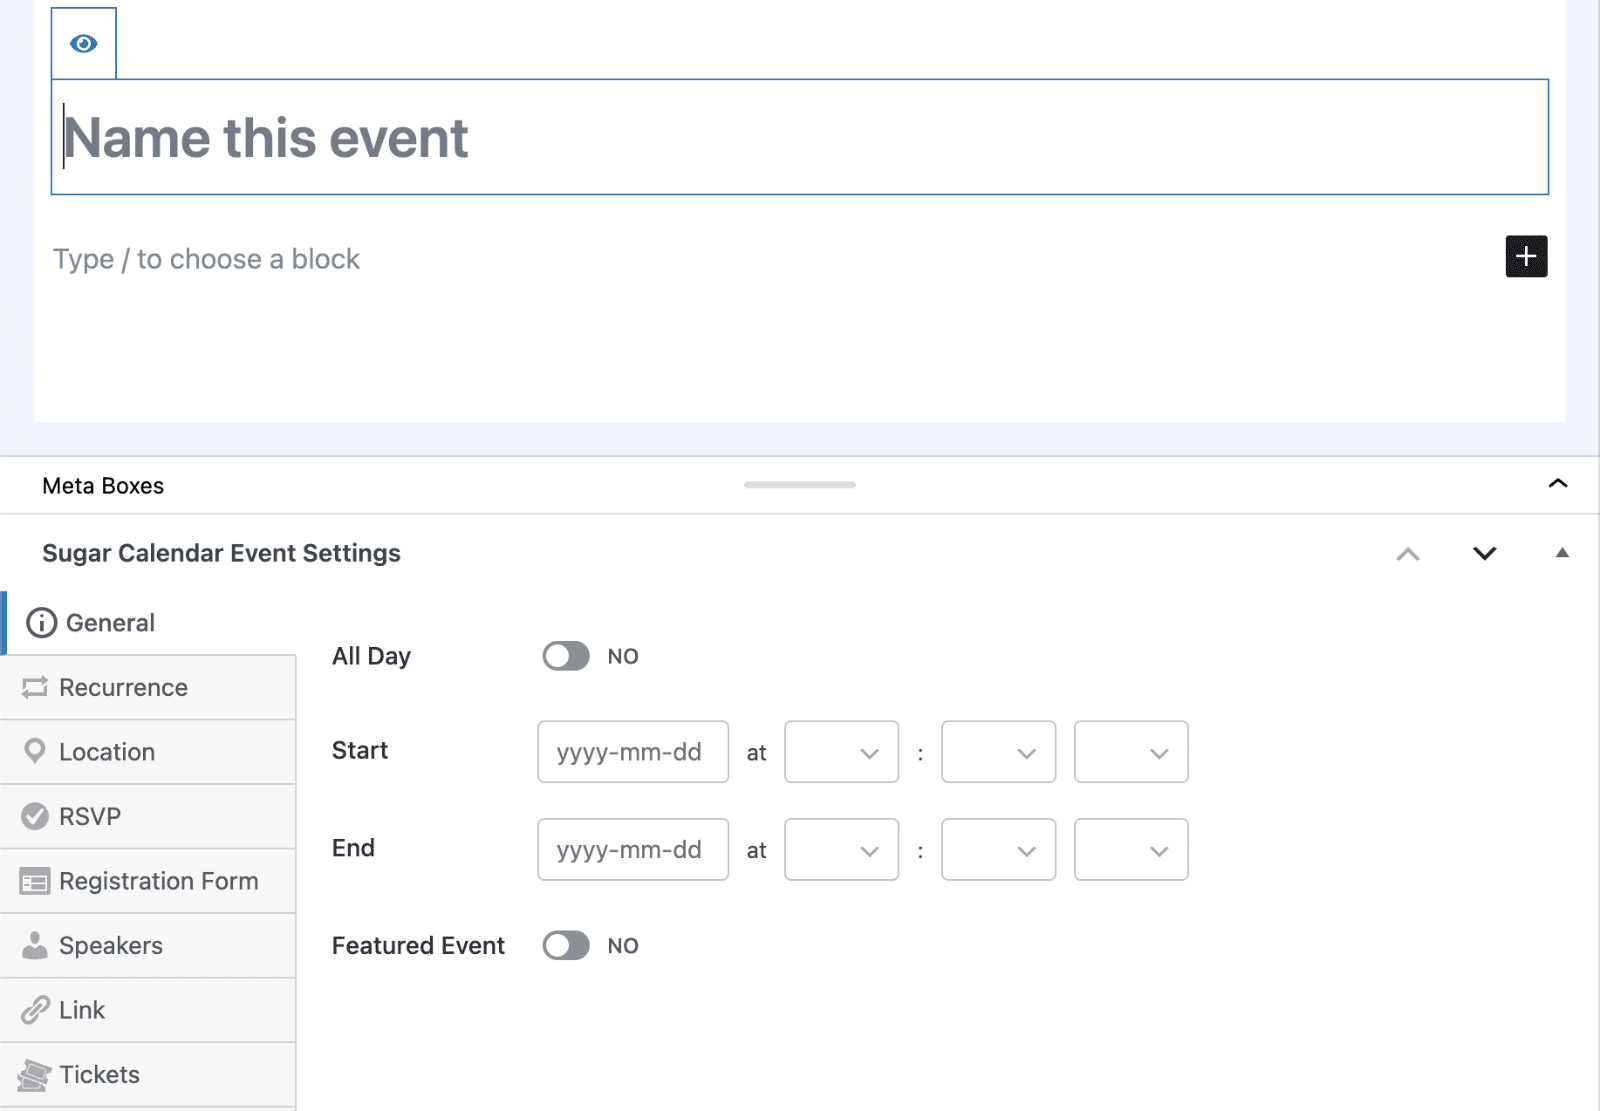
Note: The event settings are similar regardless of the editor you’re using.
Customizing Event Options
Start by entering a title for your event. This title should describe the purpose of the event you’re creating.
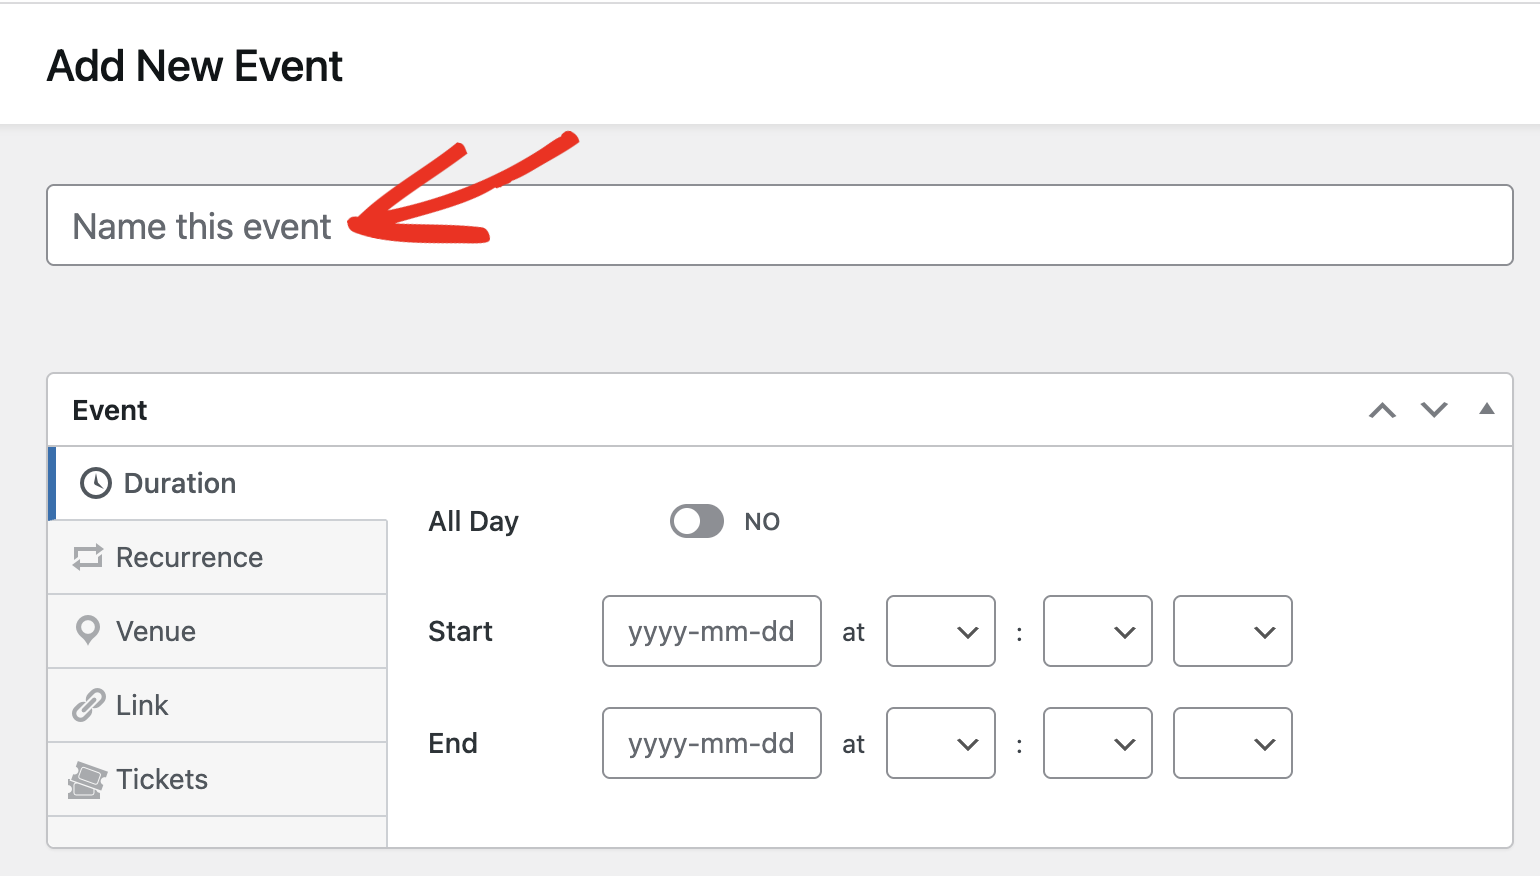
Under the Event section, you’ll see options to set the event’s General details, Recurrence, Location, RSVP, Registration Form, Speakers, Link, and Tickets.
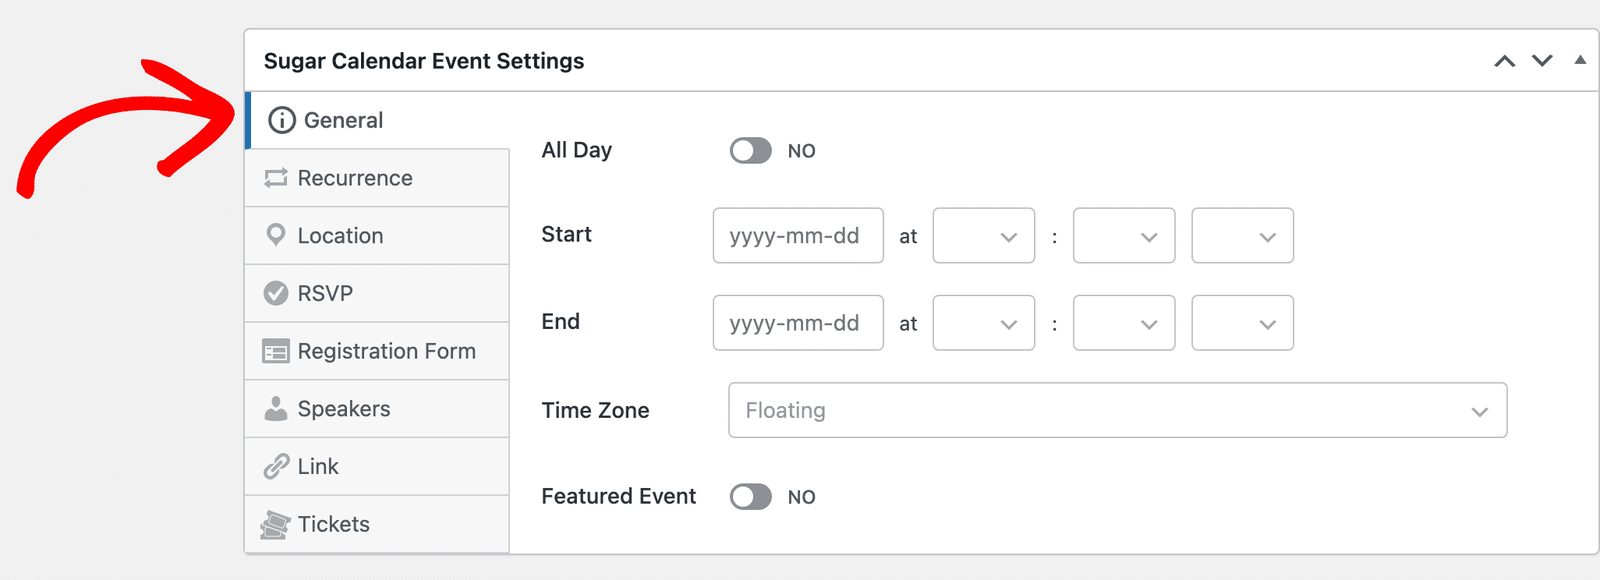
Below, we’ll cover all the available event options.
General
The General tab lets you set the date and time for the event. You’ll need to set the Start and End date and time for your event.
To choose a start date, click the date field next to the Start option to open the date picker. Go ahead and choose the date for the event.
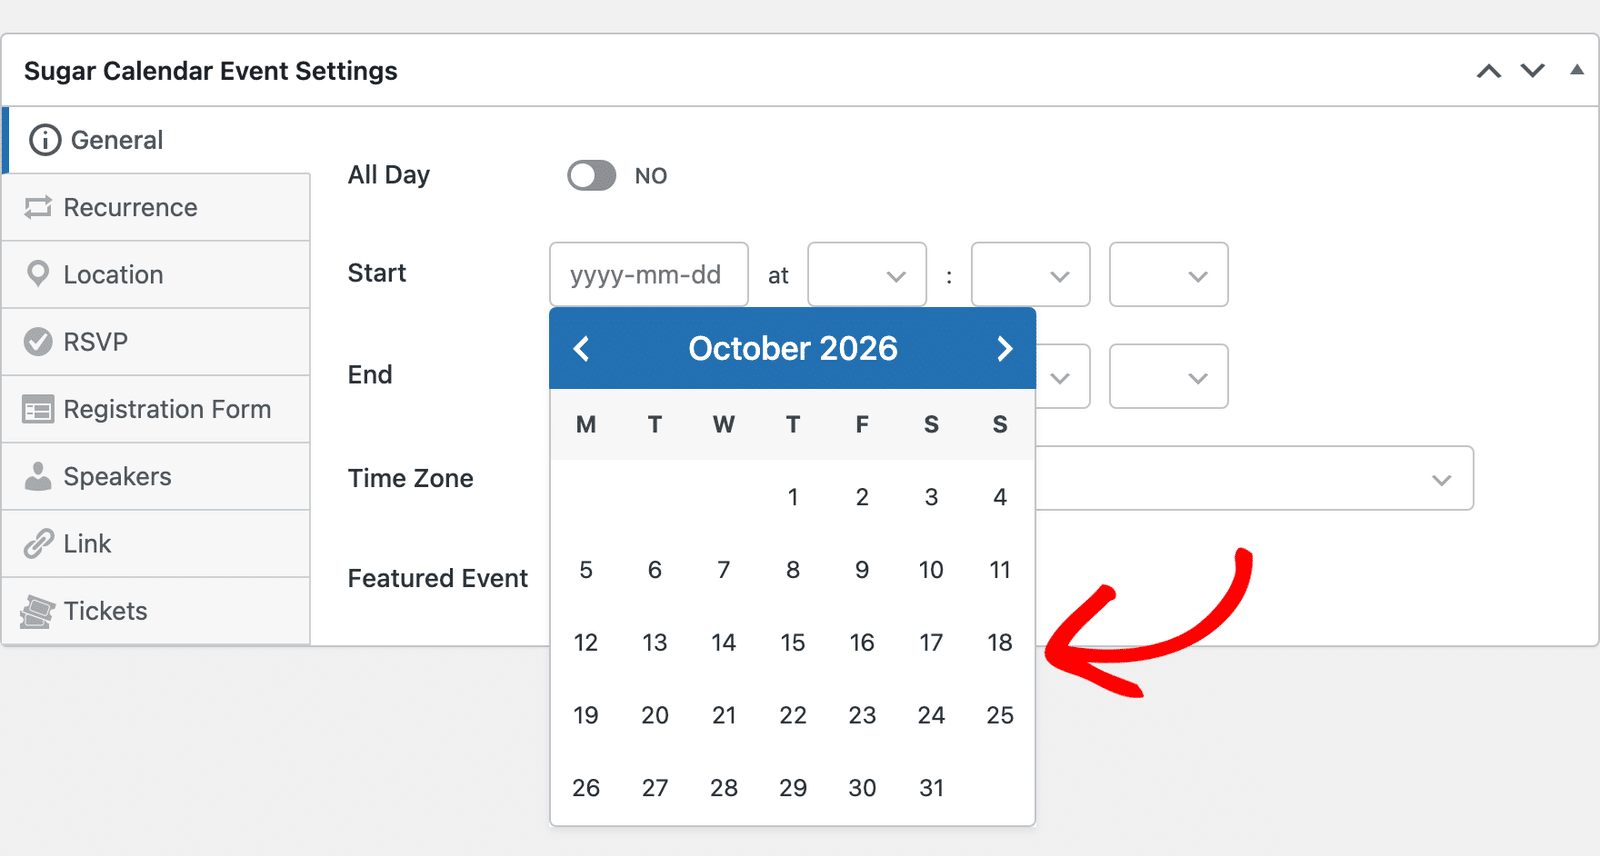
Next, you’ll need to select the time for the event. The three dropdowns next to the date field are used to set the Hour, Minute, and Meridiem (AM/PM) respectively.
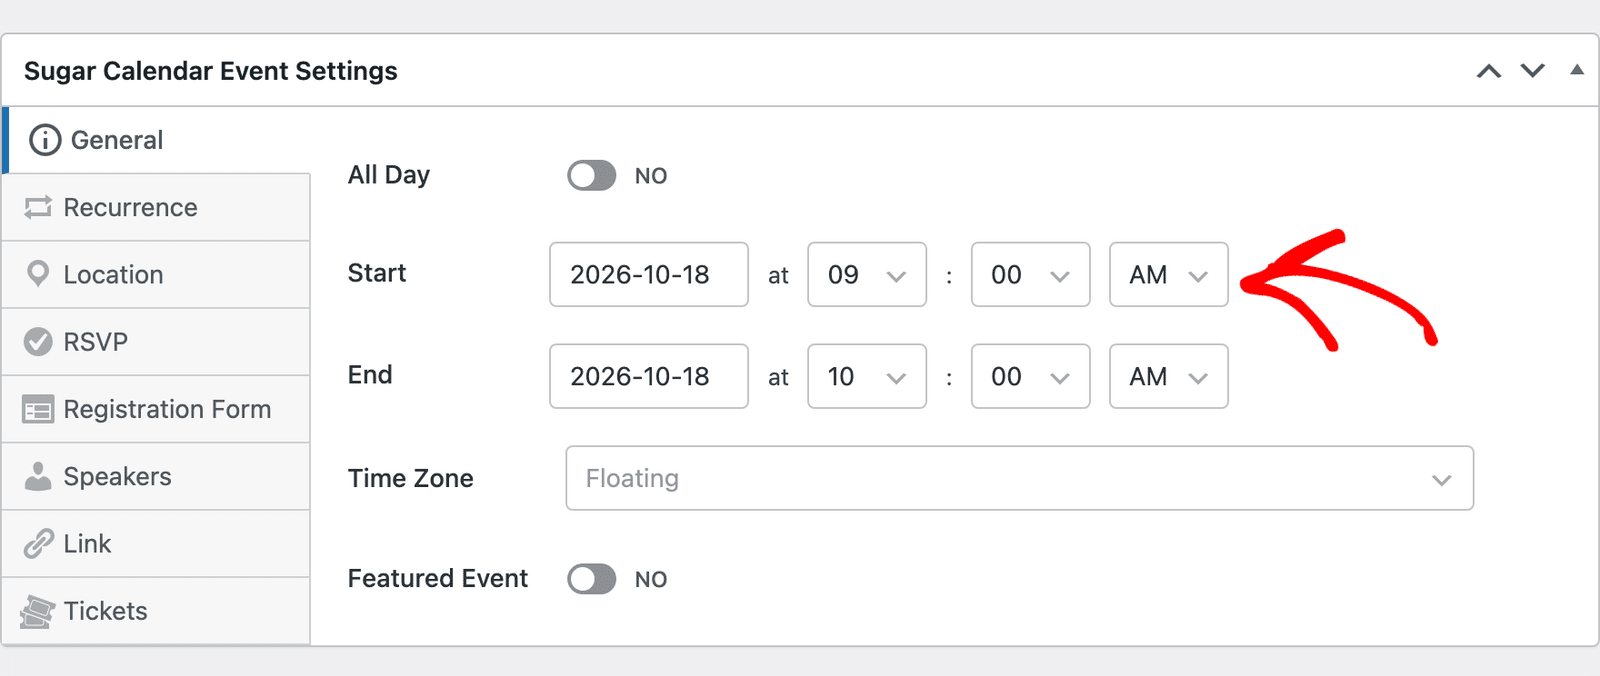
After setting the start date and time, repeat the same process described above to set an end date for your event.
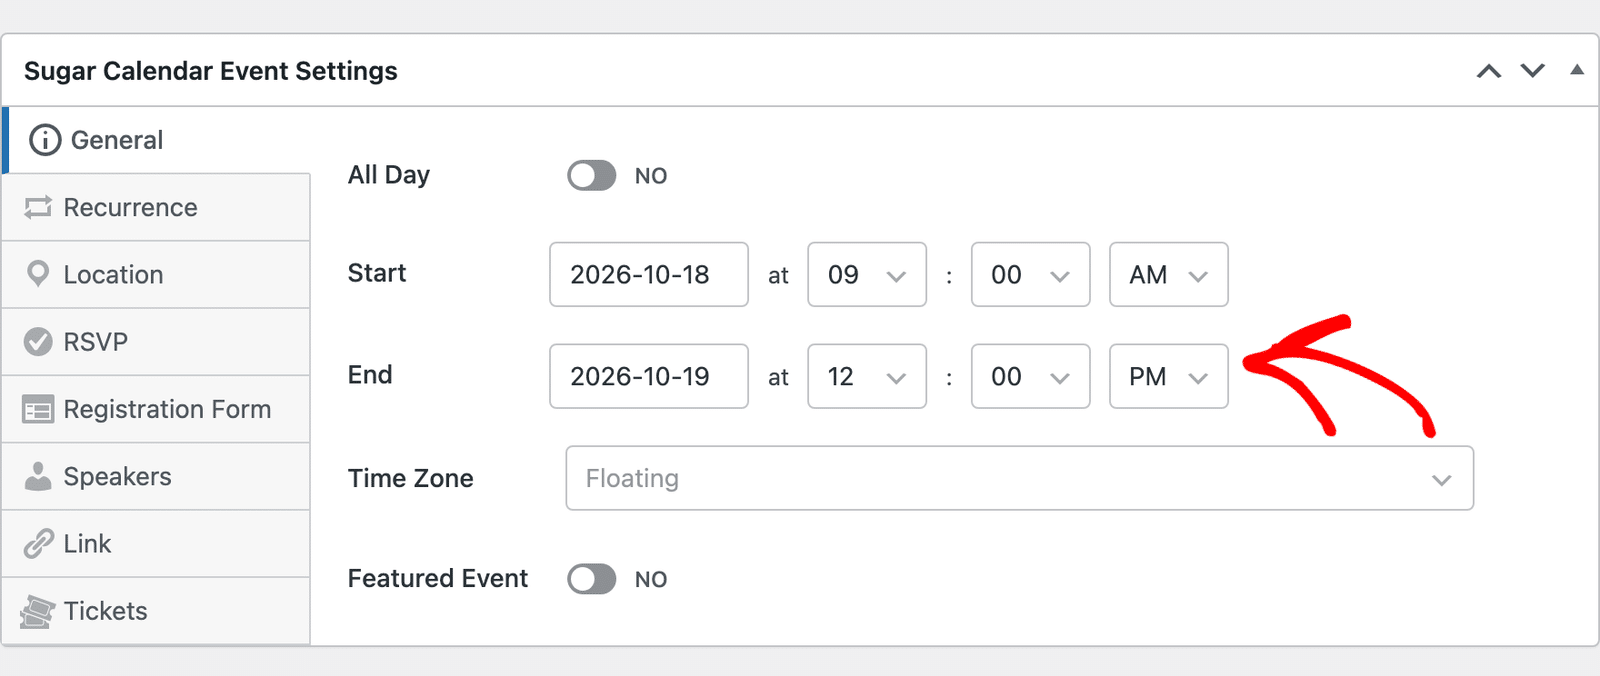
If time zones are turned on for your site, you’ll also see a Time Zone dropdown below the dates. Use it to choose the time zone for the event’s start and end times.
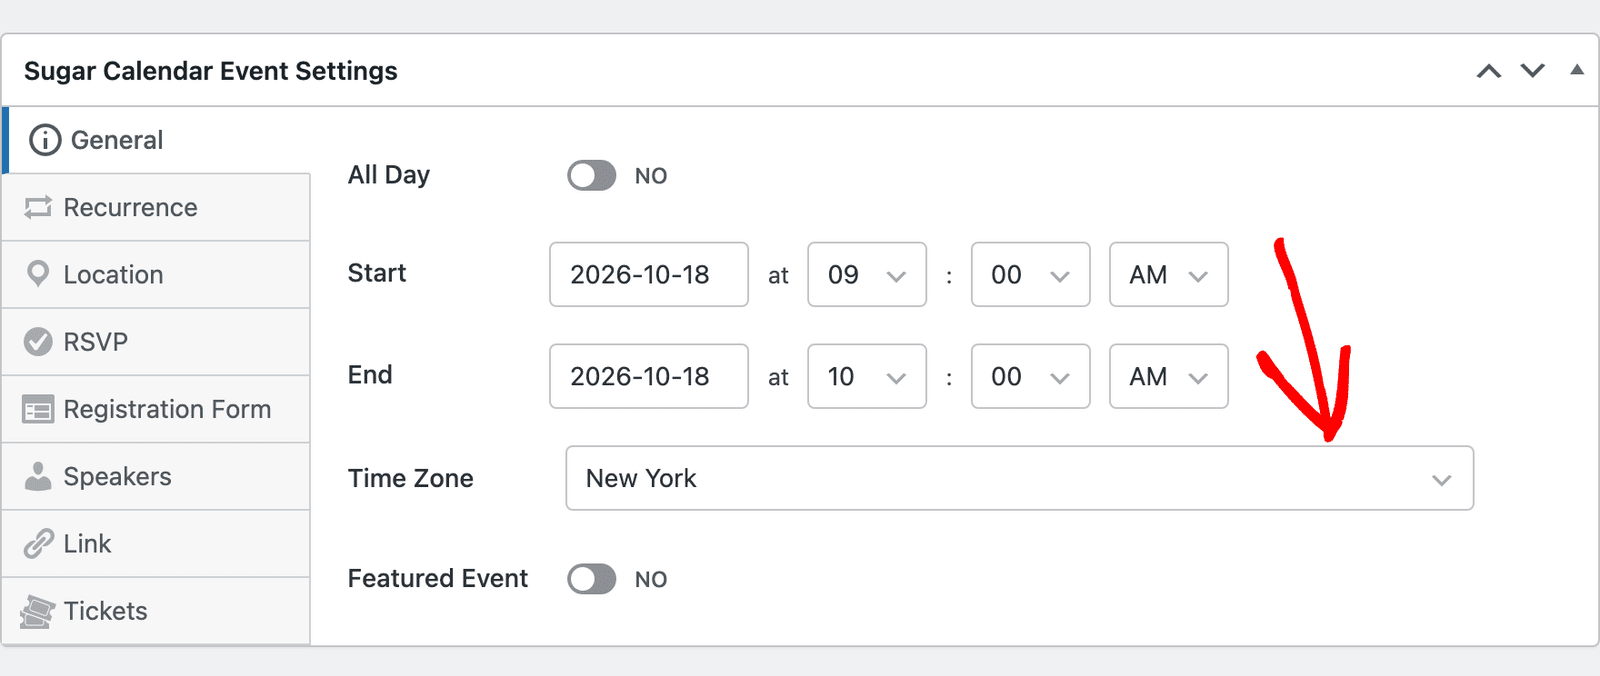
New events start with the Default Time Zone from your Sugar Calendar settings. Floating means the event has no time zone, so it shows the same time to every visitor, wherever they are.
Note: The Time Zone dropdown appears when Time Zones is set to Single or Multi under Events » Settings » General. With Multi, you get a separate time zone dropdown next to the Start and End fields instead. See our guide to Sugar Calendar settings for details.
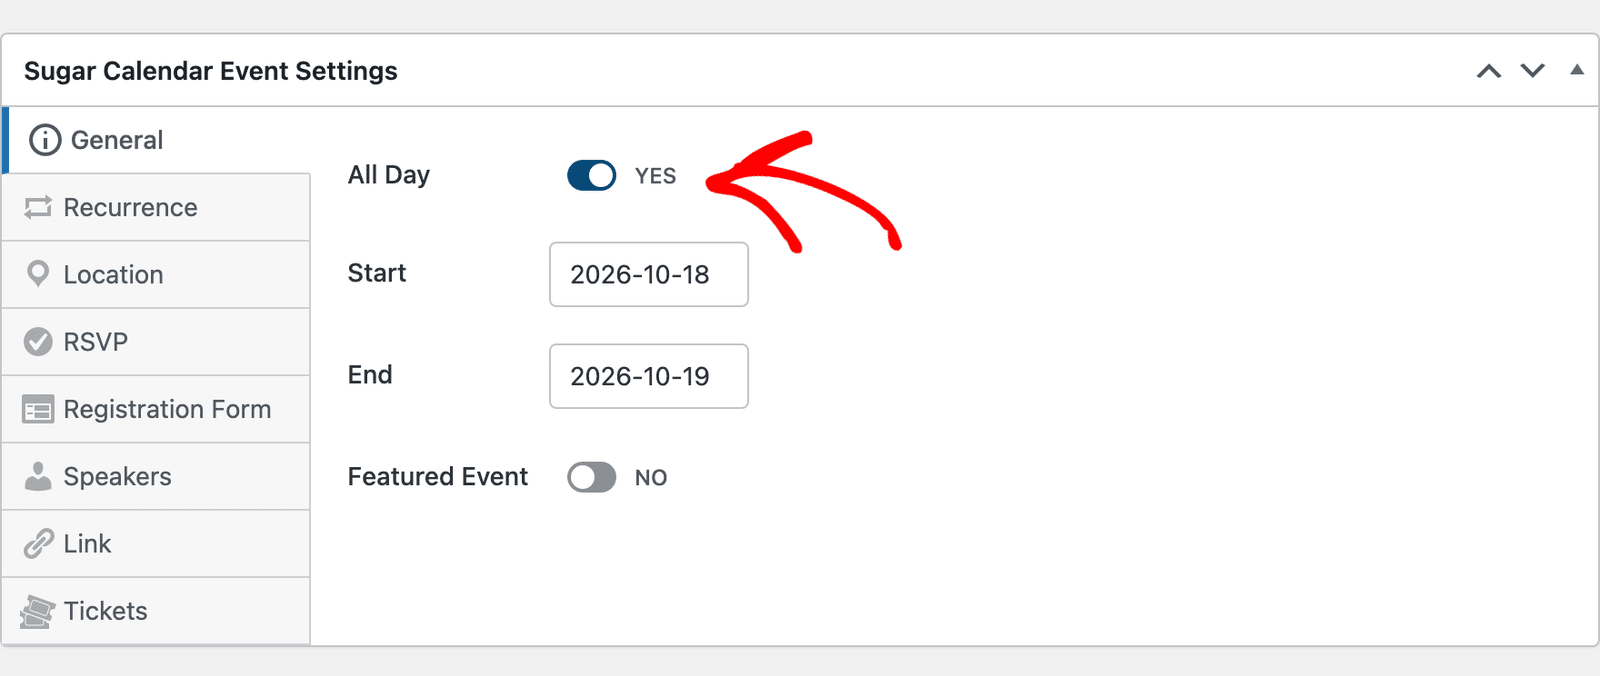
Select the All Day option if the event is scheduled to run through the day. Selecting the All Day option hides the time and time zone fields.
The General tab also includes a Featured Event toggle, which highlights the event on your calendars and in your admin. See our guide to featuring events in Sugar Calendar for details.
Recurrence
If this is a recurring event, click the Recurrence tab to access the settings screen.
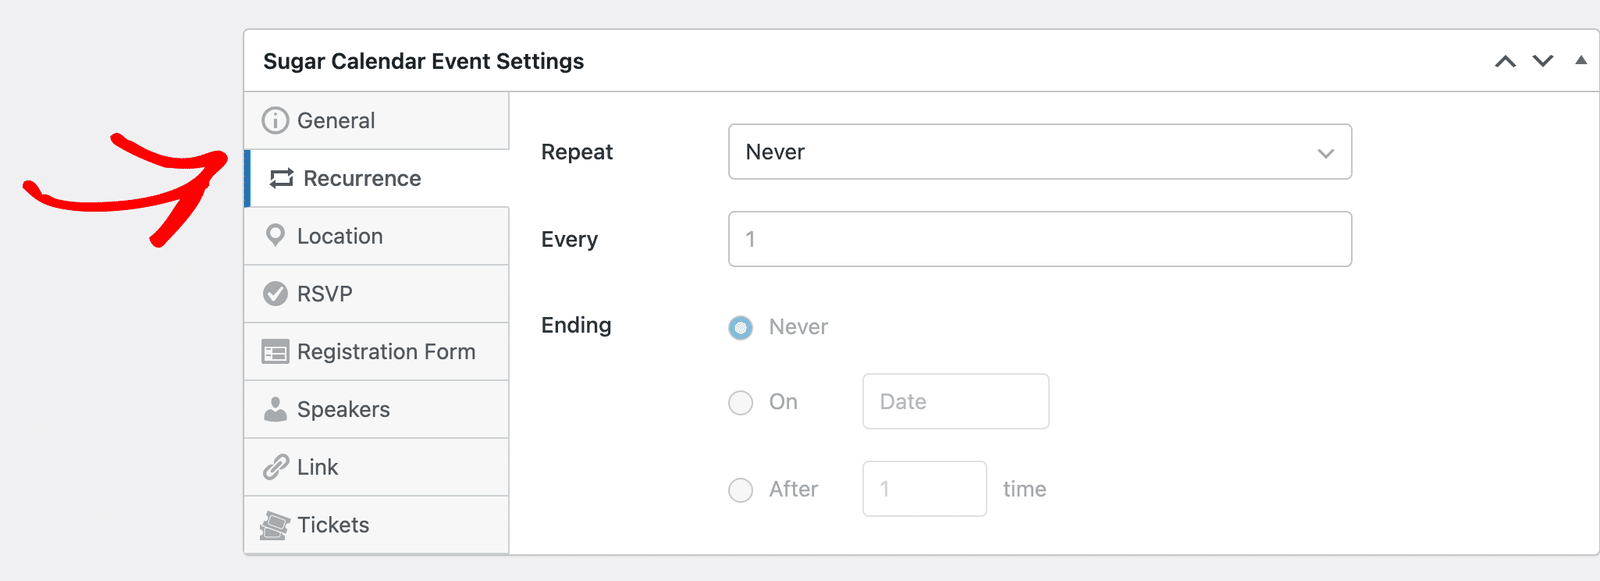
The Repeat dropdown contains options to configure how the event should reoccur. Available options include Daily, Weekly, Monthly, or Yearly.
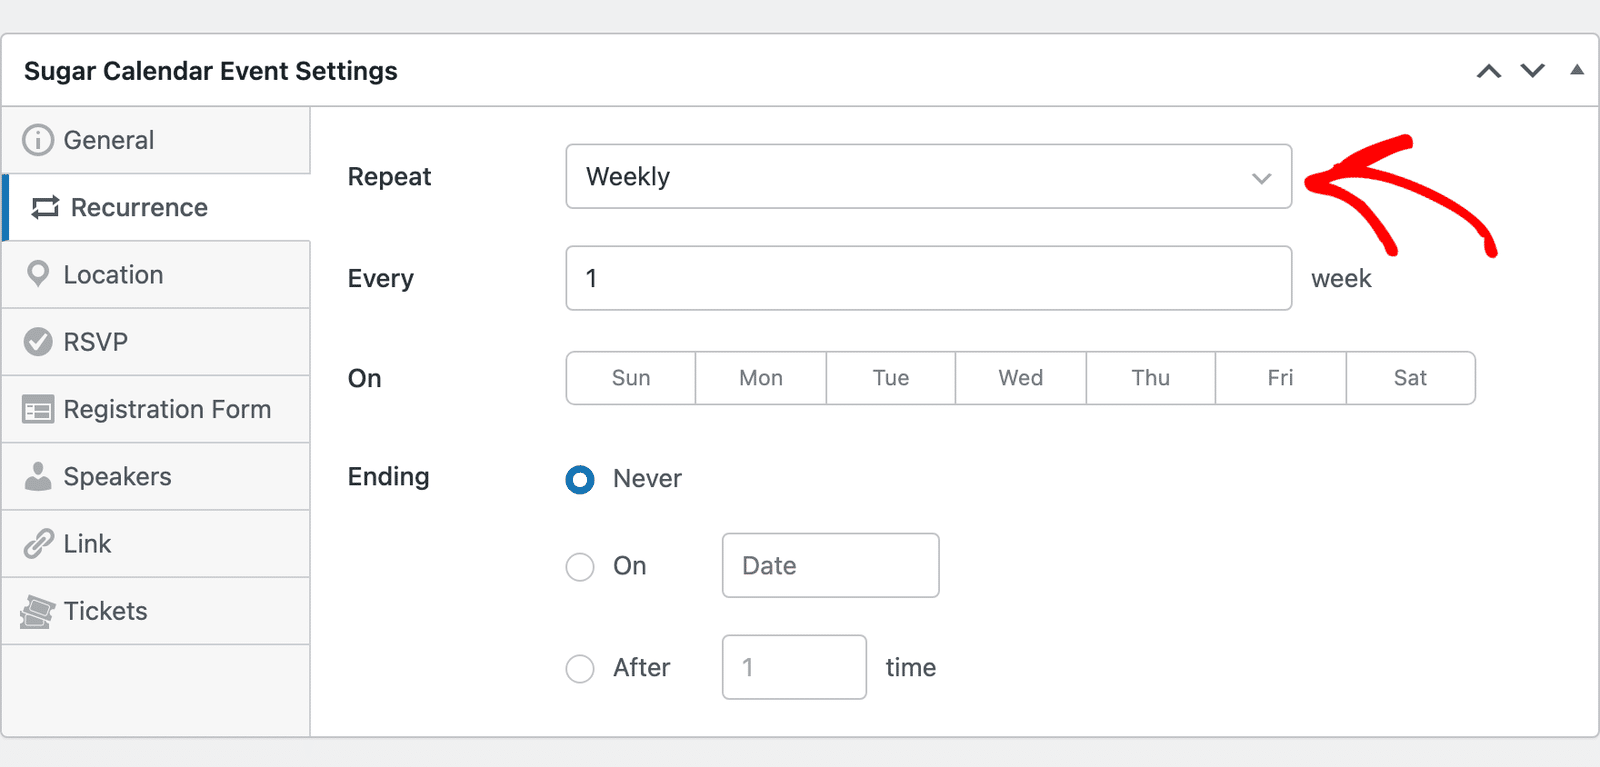
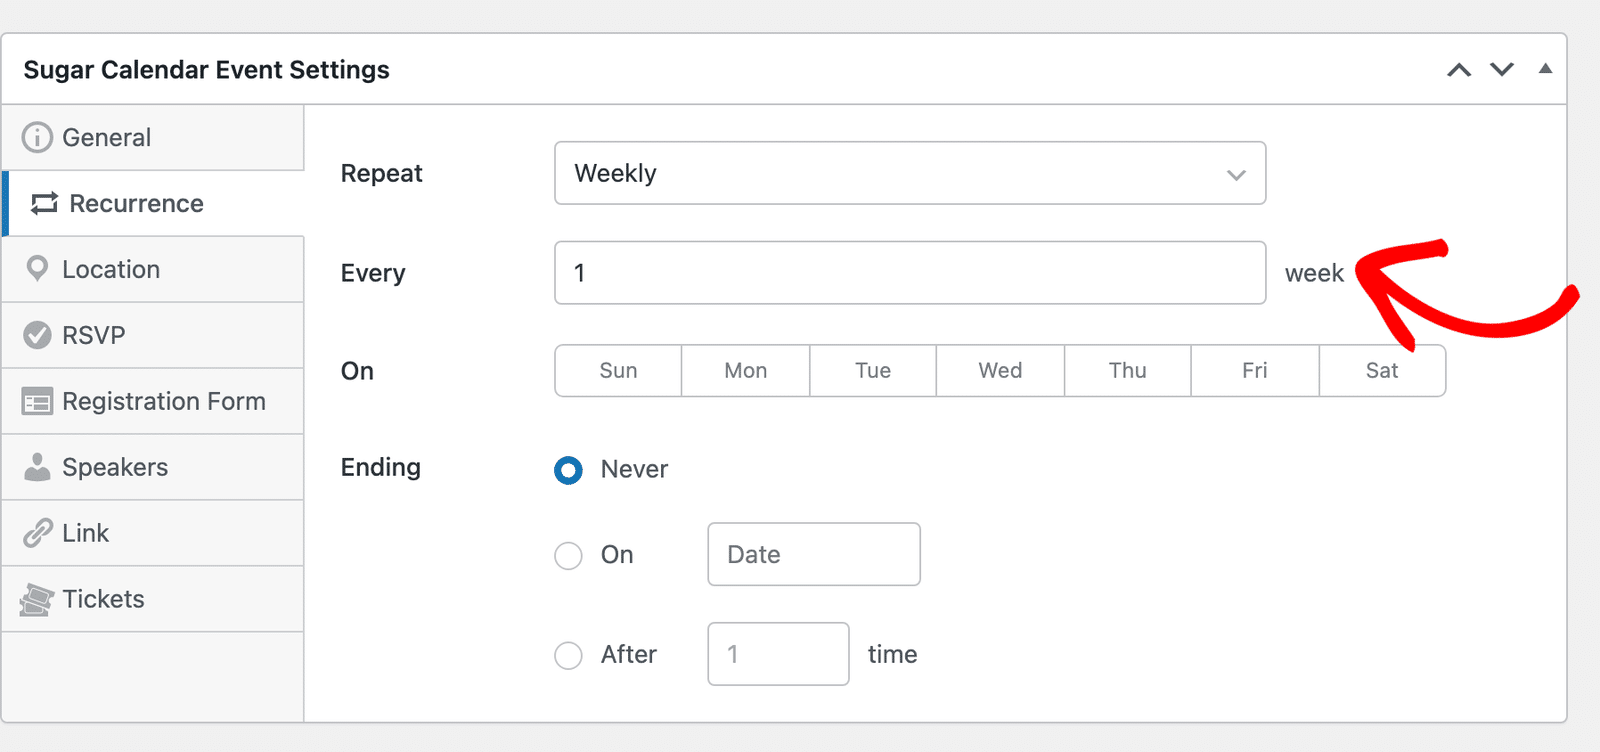
The options you’ll see will depend on the repeat option you select. For our example, we’ve selected the Weekly repeat option. The Every option lets you choose how often the event should reoccur.
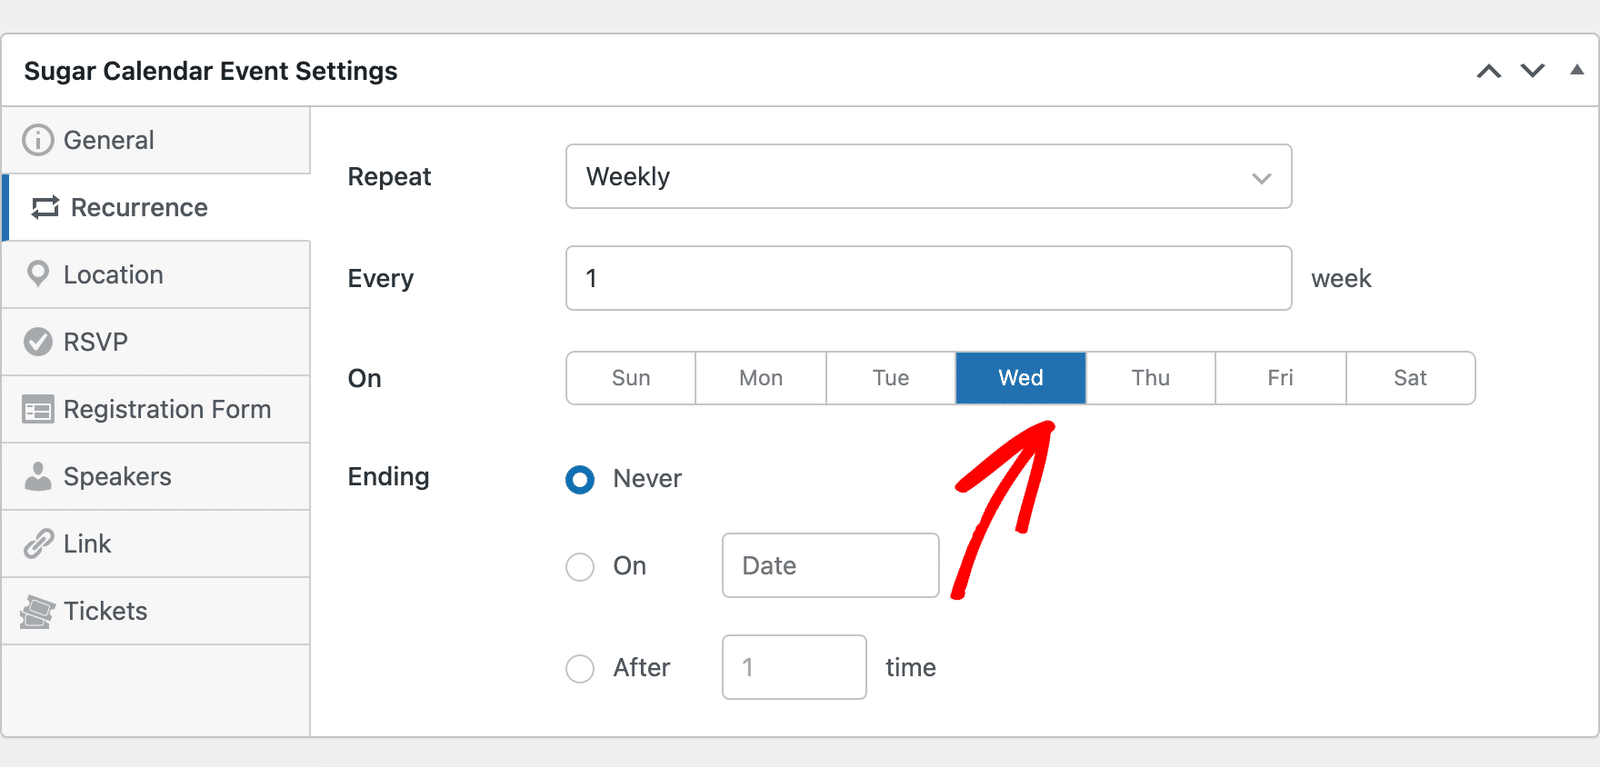
Next, select the day of the week you wish to repeat the event from the On section.
You can also specify the duration for the recurrence by updating the Ending option.
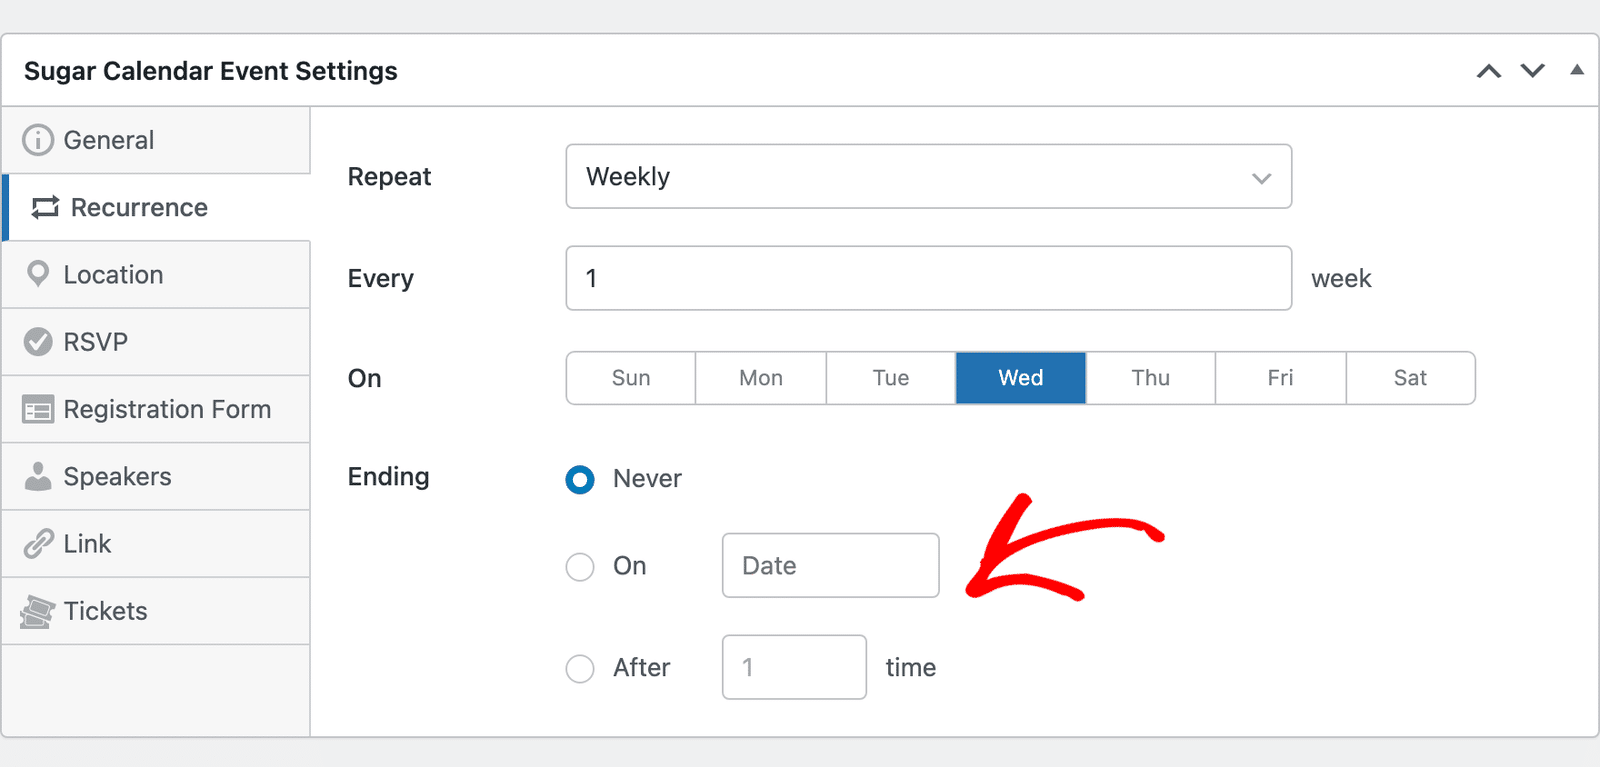
Leaving it set to Never means the event will run indefinitely. Use the On option to choose an end date. Alternatively, use the After option to set it to end after a specific number of recurrences.
Note: To learn more about the available recurrence options, be sure to check our tutorial on setting up recurring events.
Location
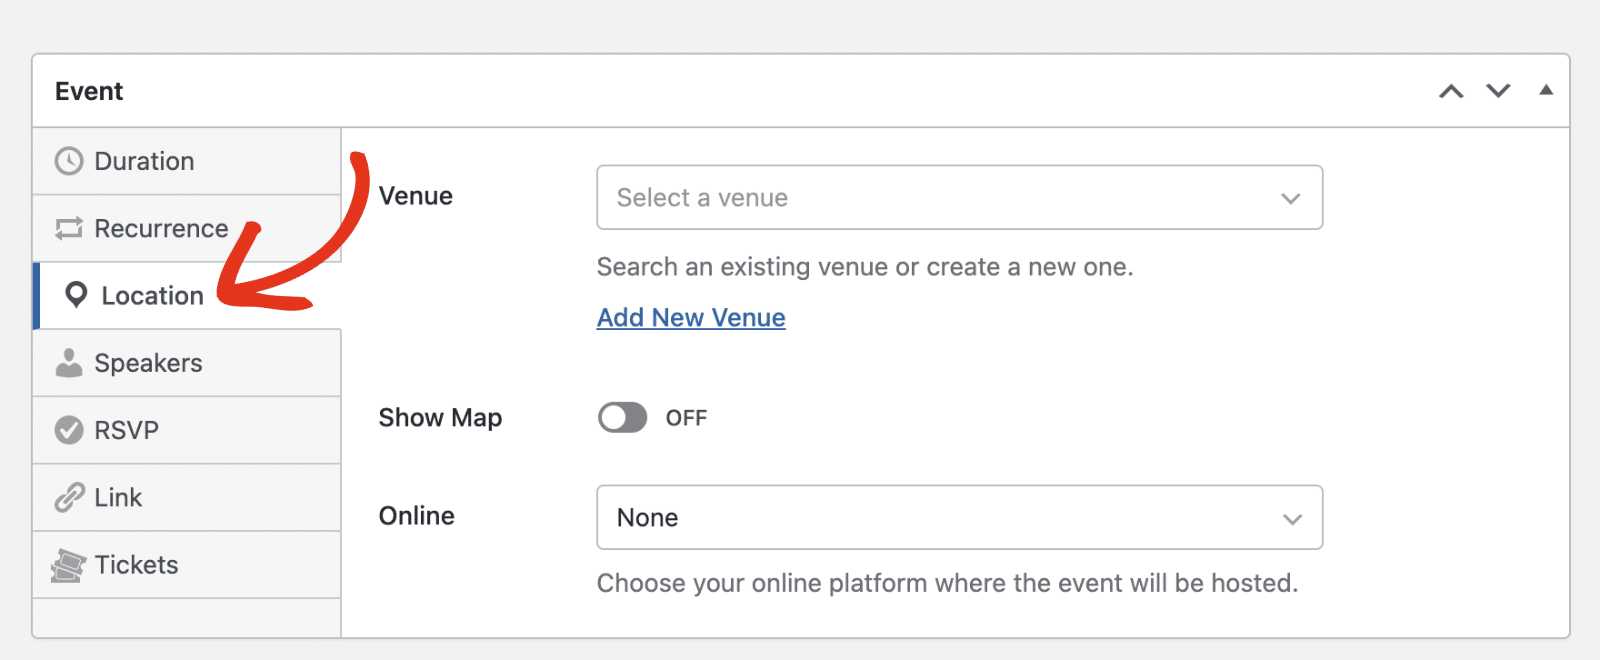
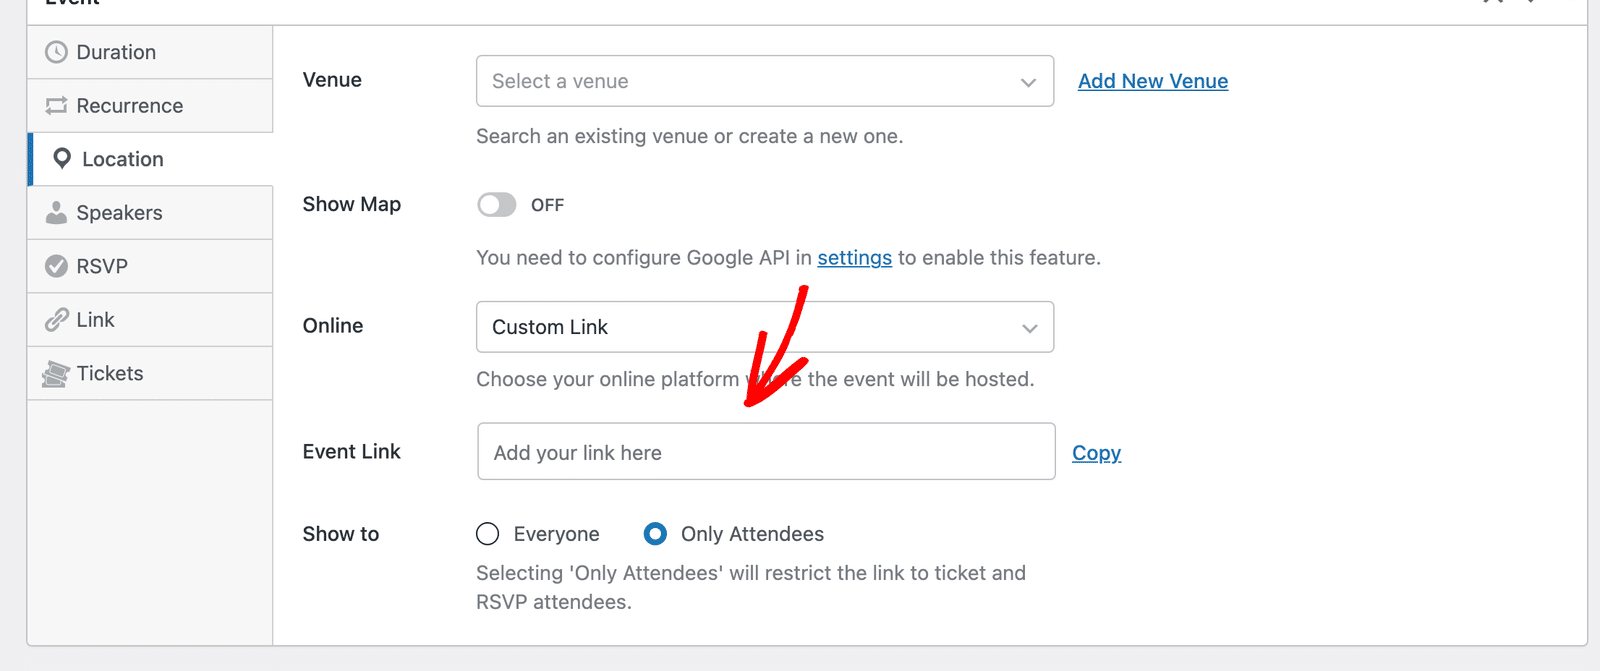
Sugar Calendar Events combines your event’s physical venue and its online location in a single Location tab. Click the Location tab to set where your event takes place.
Setting a Physical Venue
If you’ve created venues on your site, select any of them from the Venue dropdown.
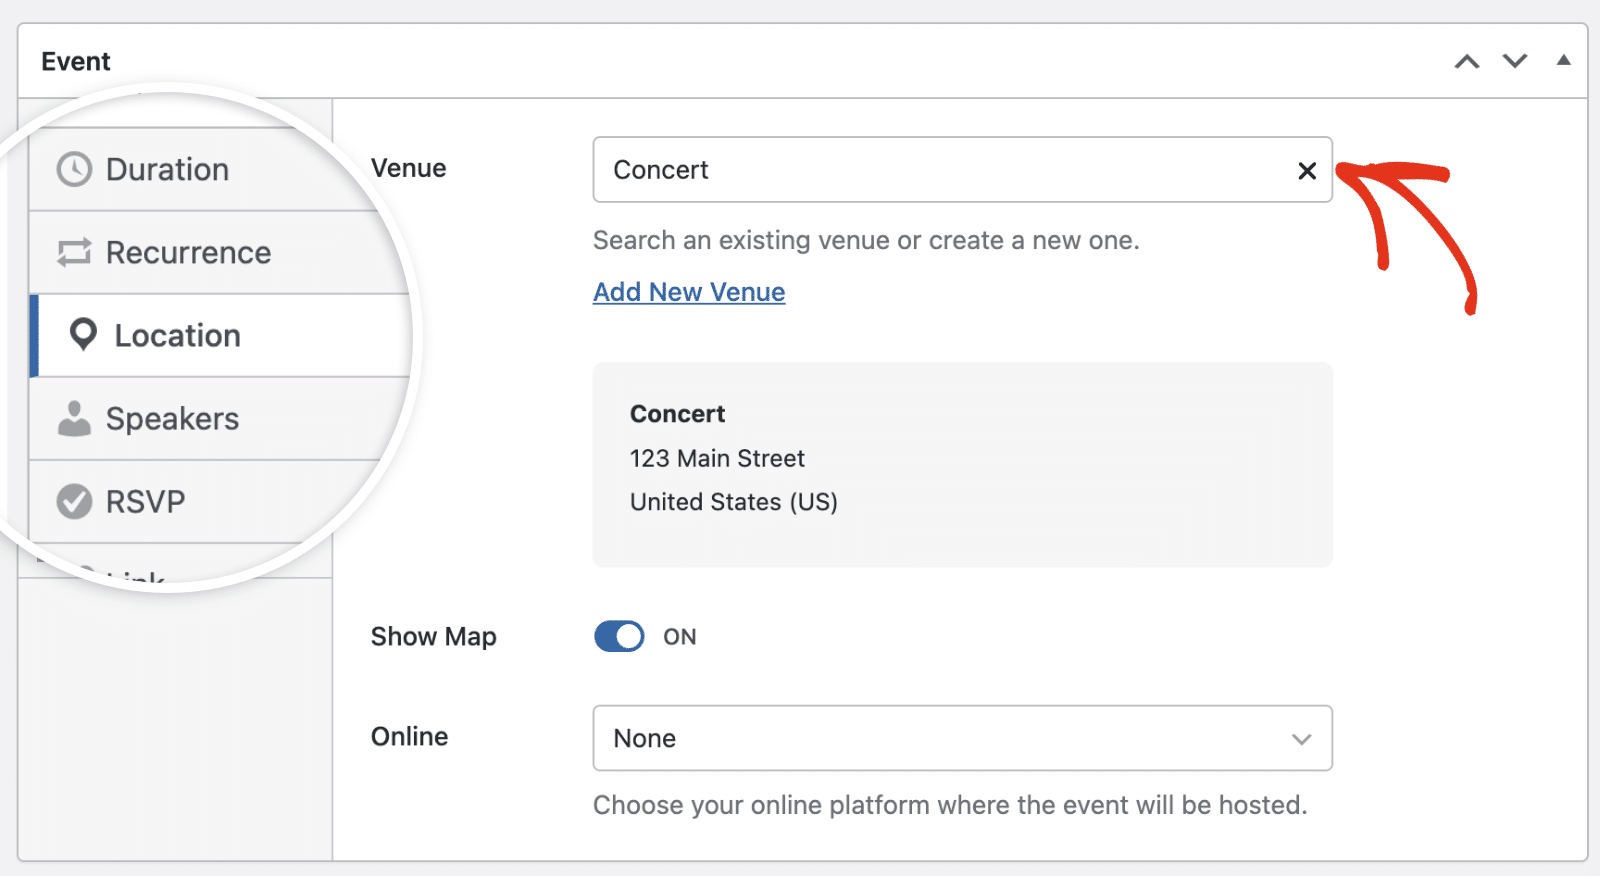
Display an interactive map for the venue you select by toggling the Show Map option to the ON position.
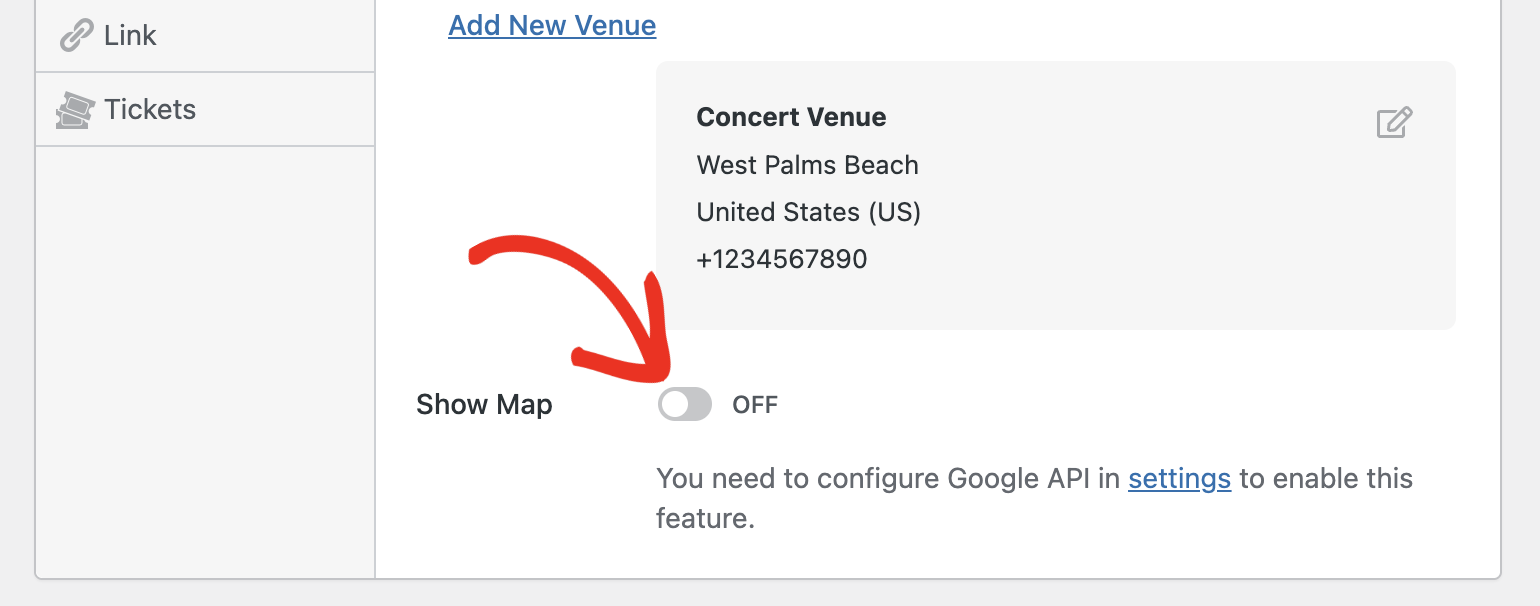
Note: You’ll need to configure the Google Maps integration before you can show an interactive map of your event location.
If you don’t have an existing venue, create one by clicking the Add New Venue button.
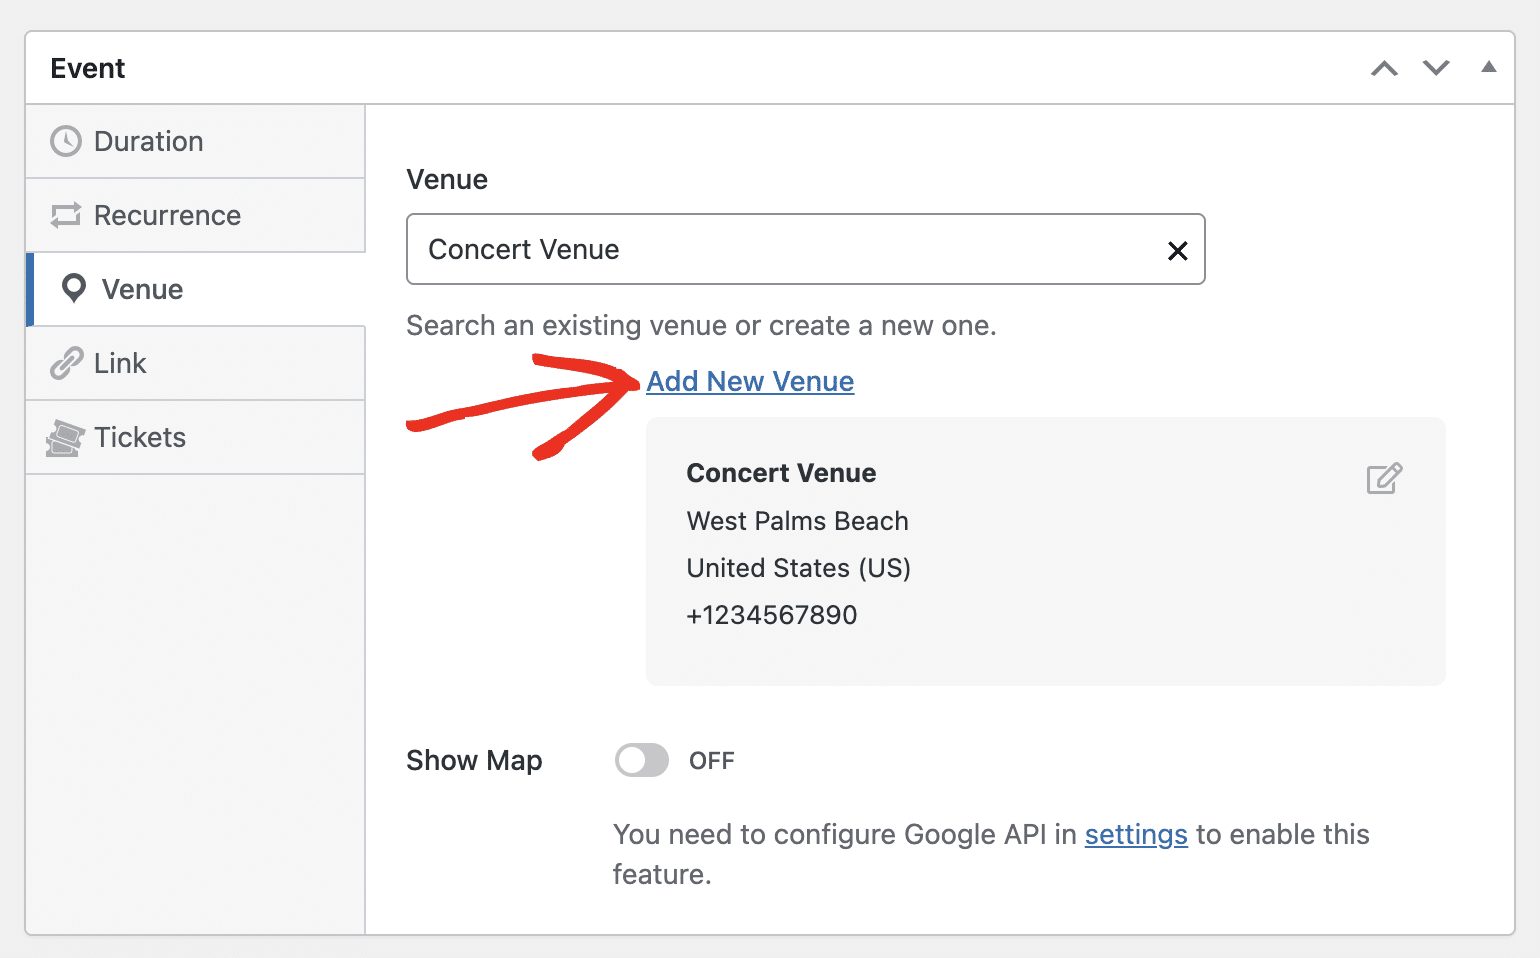
After clicking on it, fill out the form with the venue details and click Save This Venue.
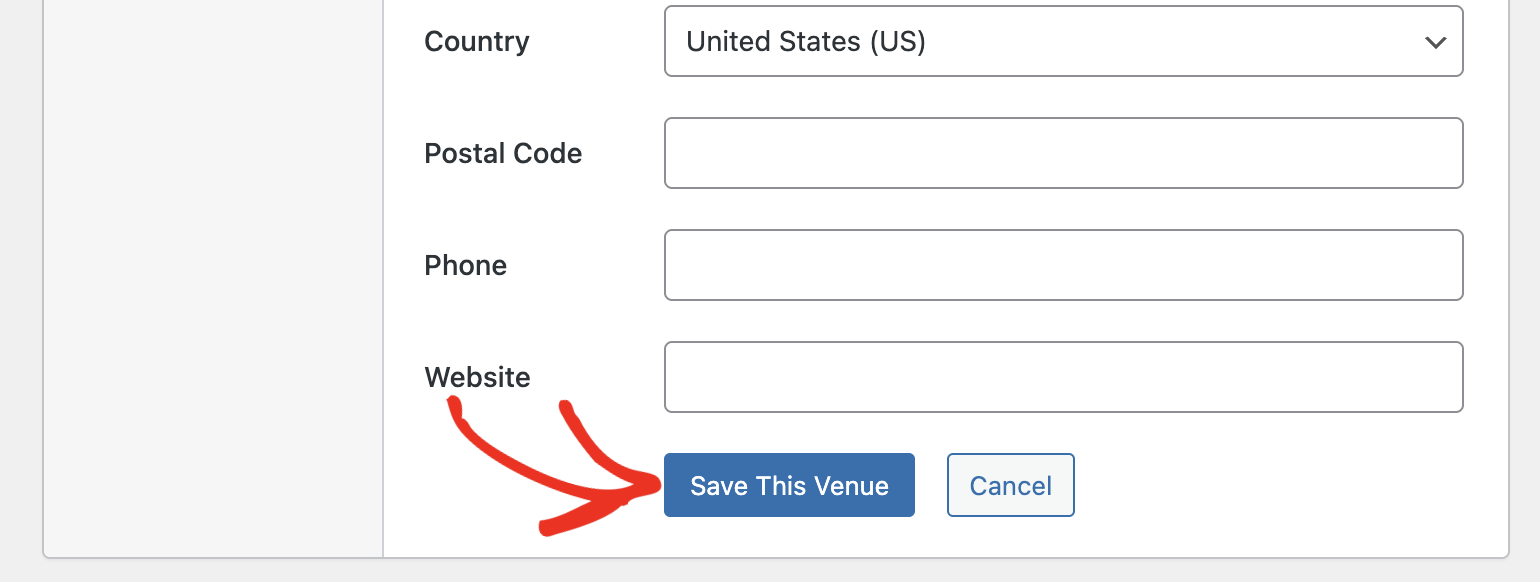
To learn more about using venues in Sugar Calendar, be sure to see our guide on creating and managing event venues.
Adding an Online Location
Below the venue fields, the Online dropdown lets you attach an online location to your event. It’s set to None by default.
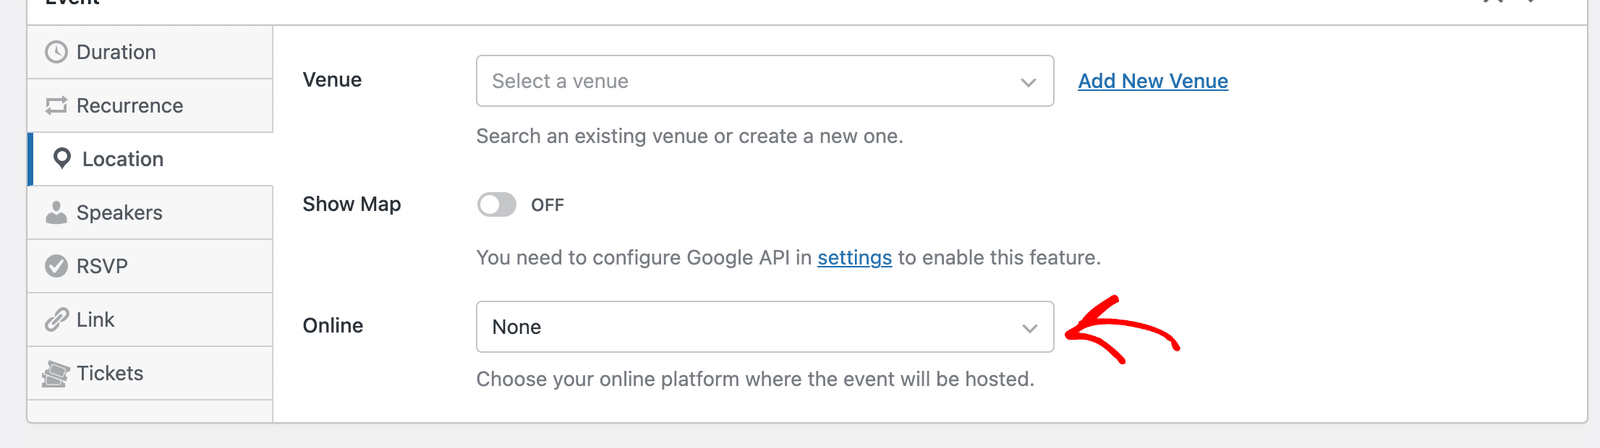
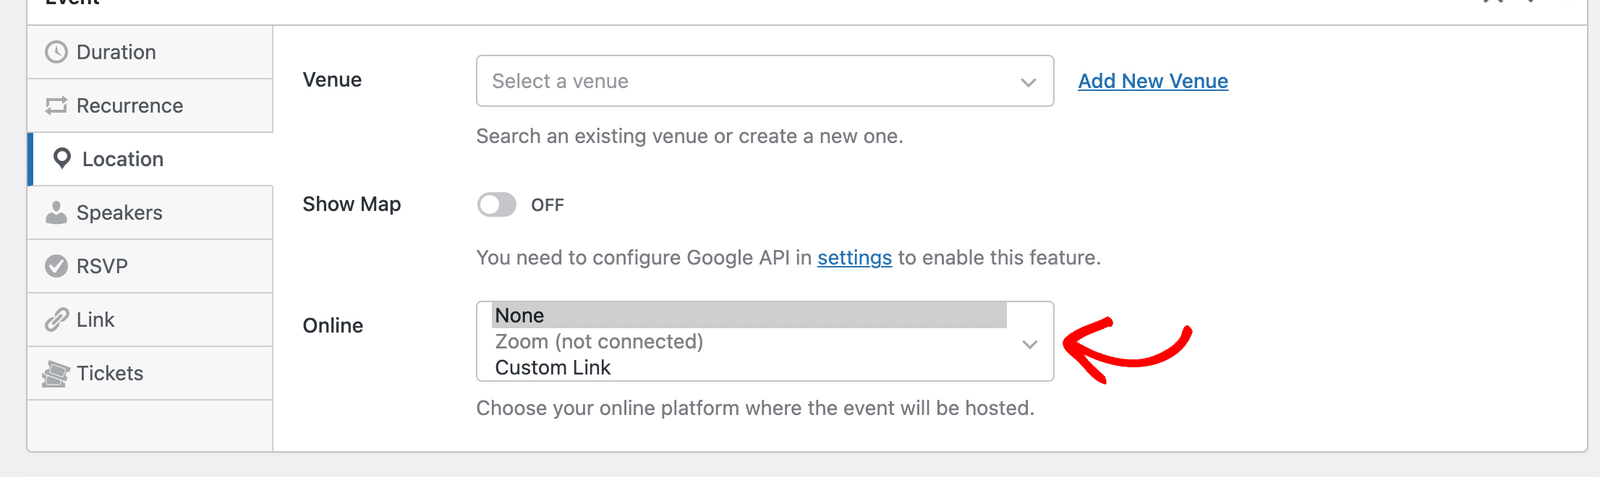
The Online dropdown offers these options:
- None: the event has no online location.
- Zoom: creates a Zoom meeting for the event.
- Custom Link: lets you enter your own meeting link.
Zoom requires the integration to be connected first. Until you connect a Zoom account, the option displays as Zoom (not connected). To connect Zoom, see our guide on using the Events Zoom integration.
Zoom Meeting Details
After you select Zoom, Sugar Calendar Events creates the meeting on the platform and displays its details in the Location tab:
- Host Link: the link the host uses to start the meeting.
- Join Link: the link attendees use to join.
- Password: the meeting password.
Each field has a Copy button to quickly copy its value.
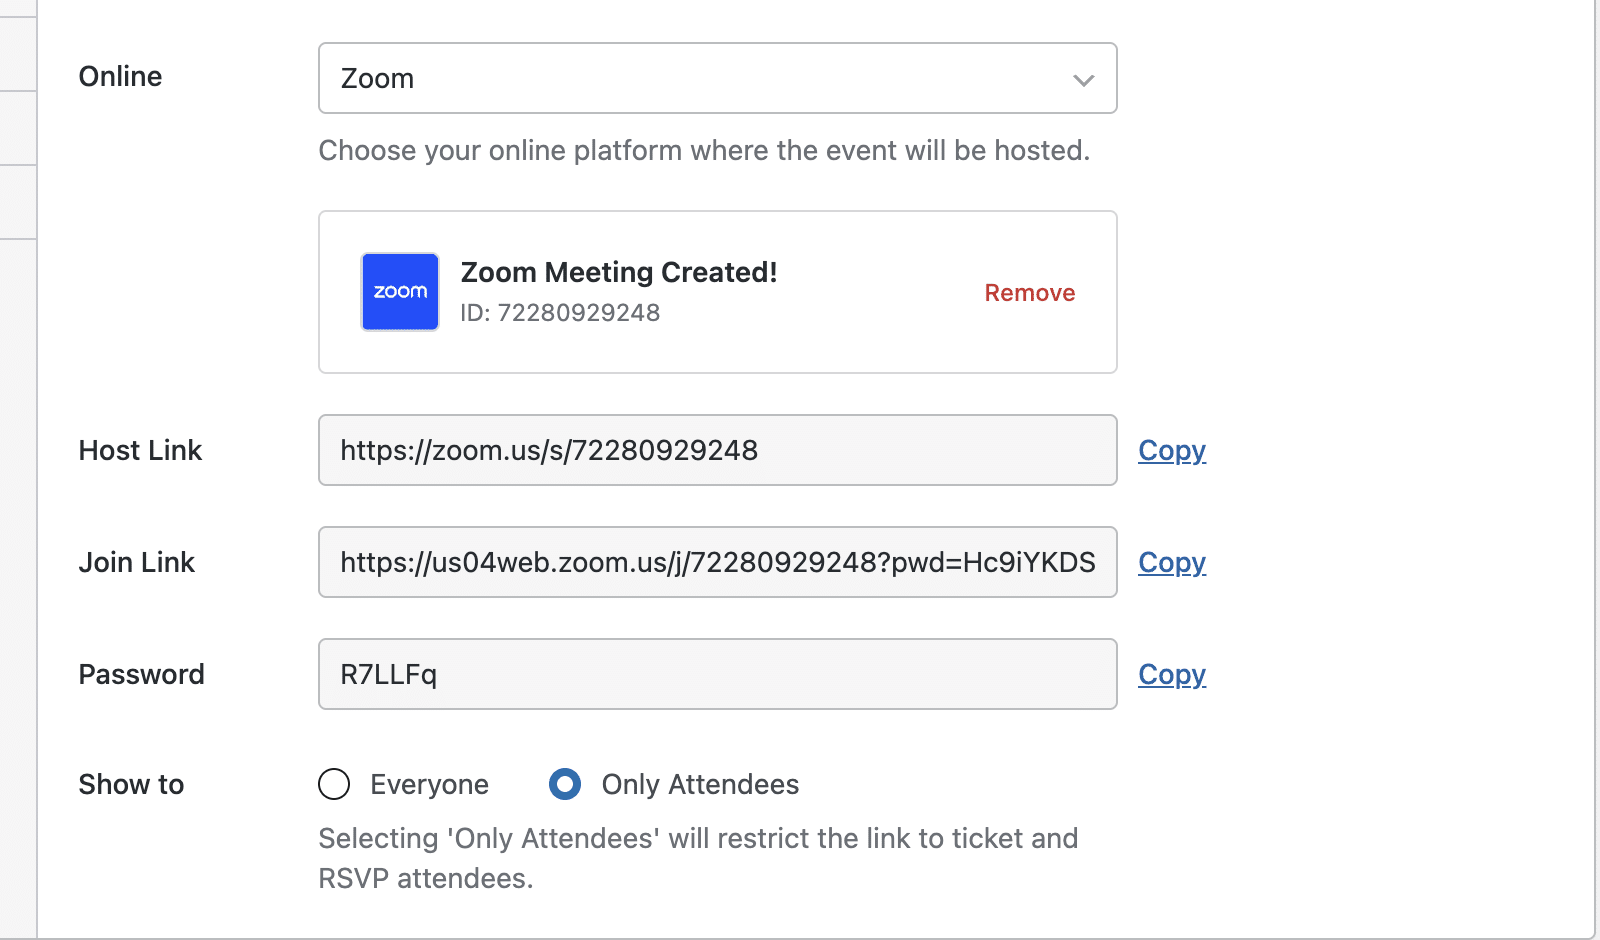
Use the Show to option to decide who sees the meeting links on the event page. Choose Everyone to display them publicly, or Only Attendees to limit them to registered attendees.
For more details, see our Zoom integration guide.
Note: Switching to a different platform clears the meeting created for the previous one, so you won’t leave orphaned meetings behind. The meeting is finalized only when you publish or update the event.
Custom Link
Select Custom Link to enter your own meeting URL. This shows a single Event Link field where you paste the link to your online event.
If your account is out of integration usage tokens, the editor links you to Settings » License & Usage, where you can review your remaining usage. To learn more, see our guide on understanding integration credits and usage limits.
Note: Hybrid events that combine a physical venue and an online location together require the Sugar Calendar Pro plan.
Speakers
Sugar Calendar lets you assign speakers to events on your site. This can be handy for seminars, workshops, or concert events. Users will see who’s performing or speaking at each specific event.
To assign speakers to an event, click the Speakers tab.
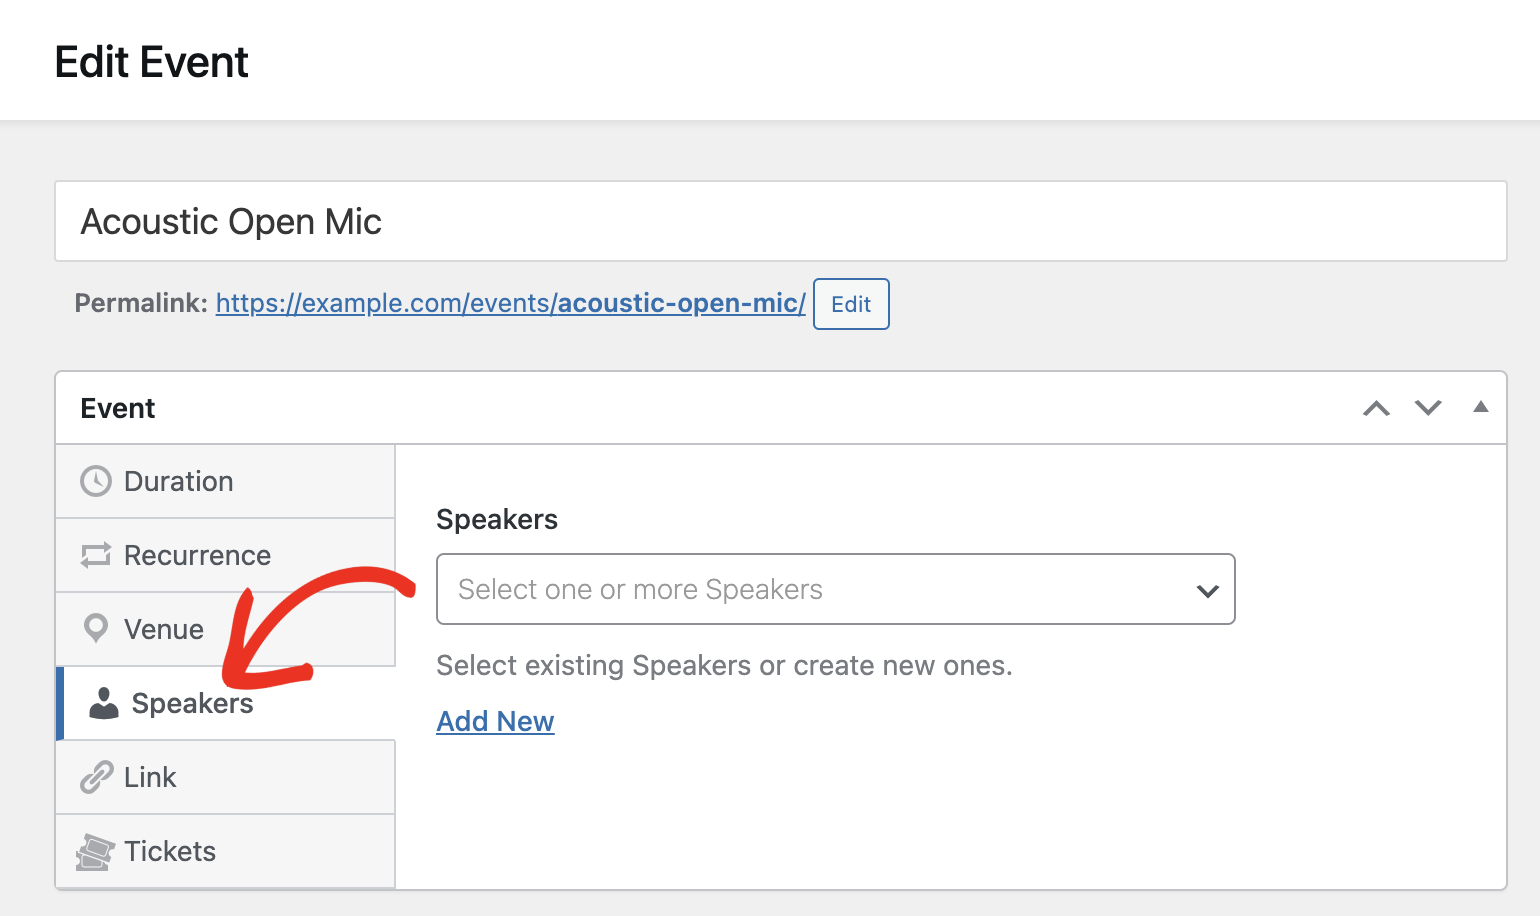
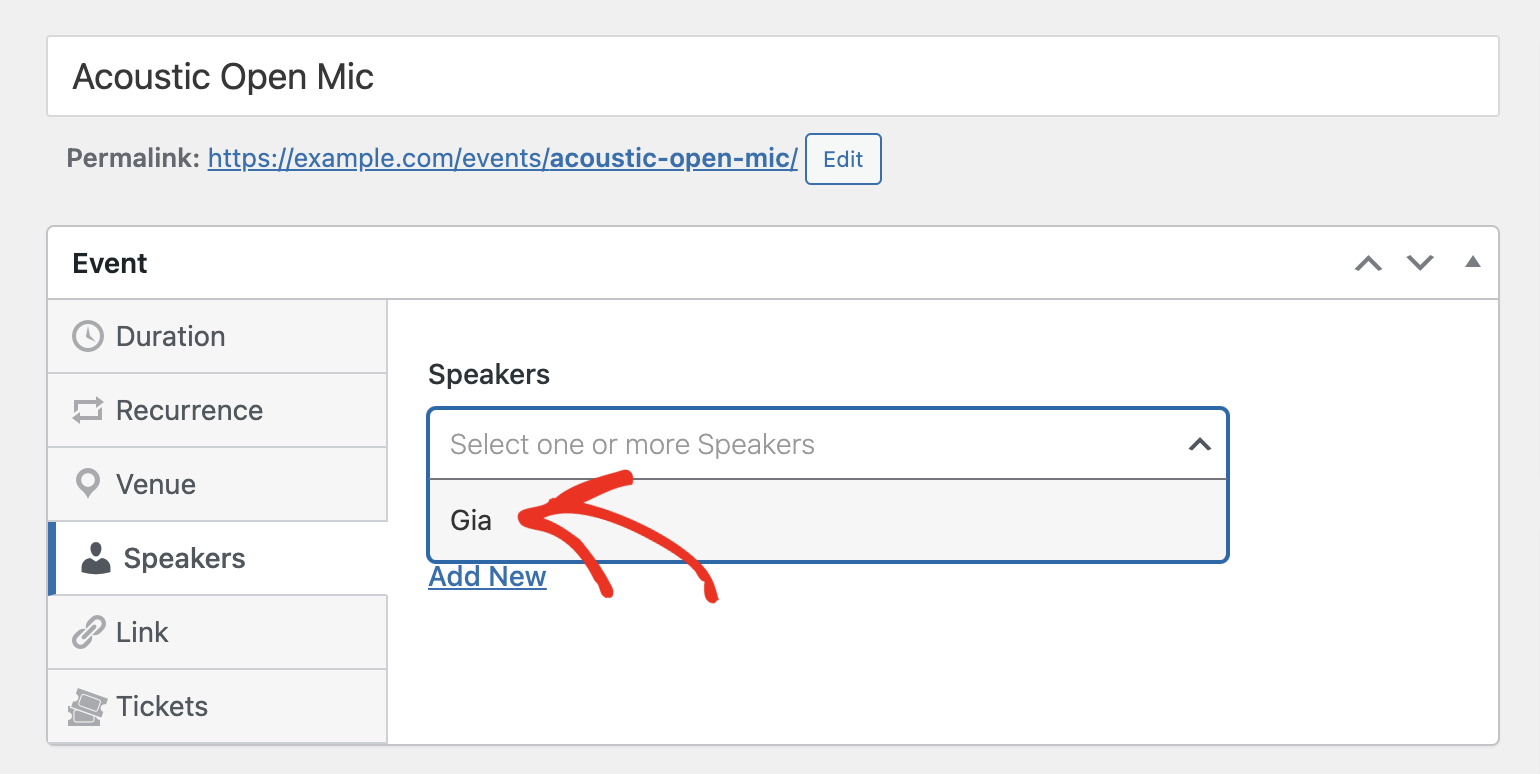
Then, use the dropdown to select one or more existing speakers.
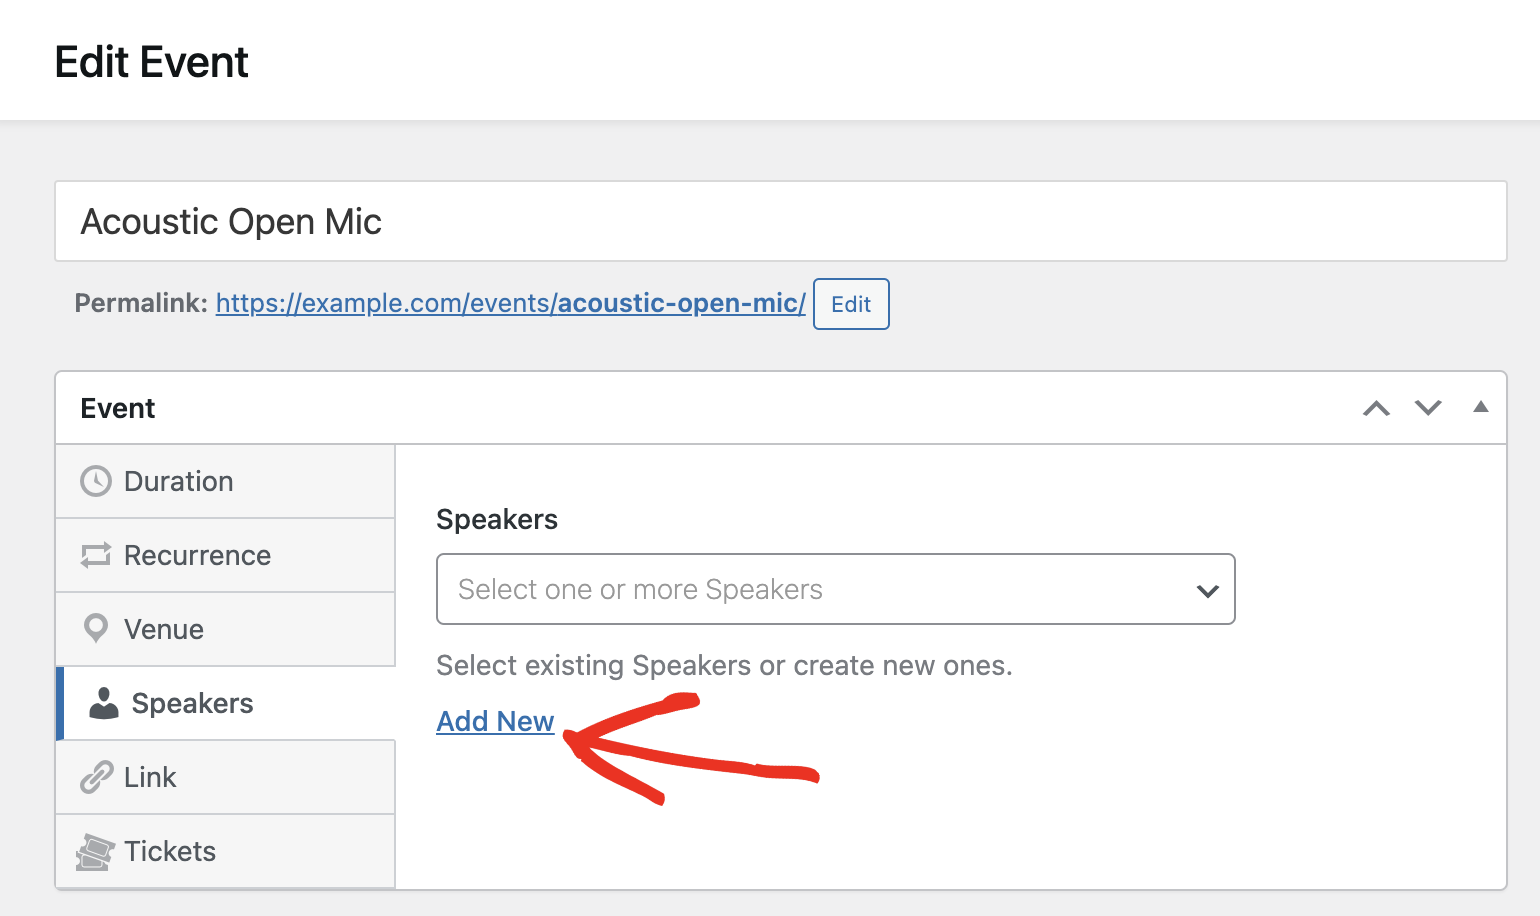
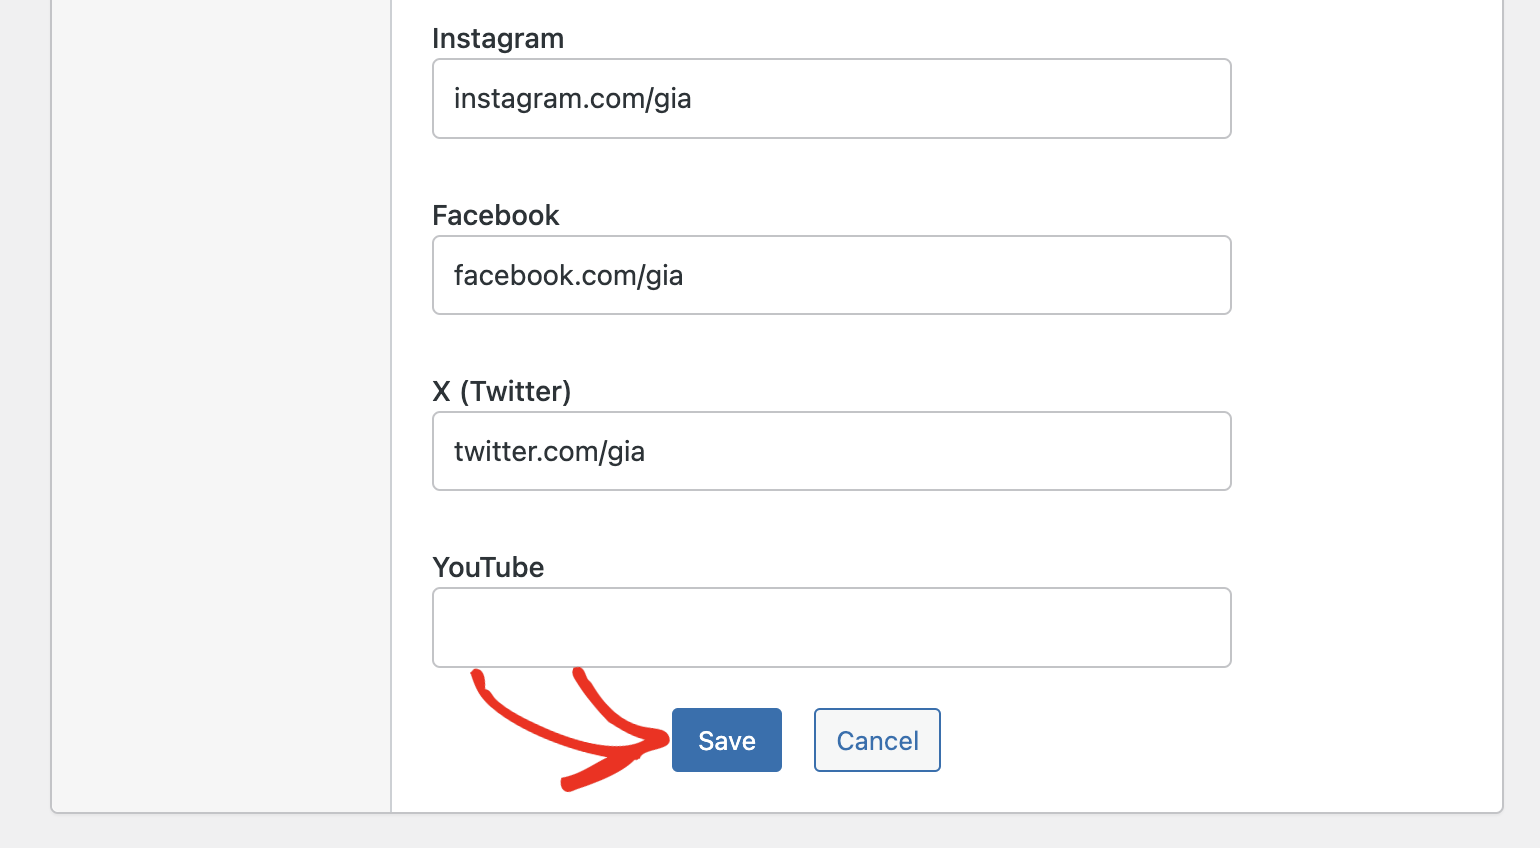
If the speaker doesn’t exist yet, click the Add New link to create a new one directly from the event editor.
Next, fill out the speaker’s details in the form that appears. Once done, click Save to add them to your list.
Note: For more details, see our guide on creating and managing event speakers.
RSVP
With the RSVP option, you can manage and organize RSVP lists for events on your site. This can be helpful if you’d like to easily collect and manage attendee lists.
Note: You’ll need to install and activate the RSVP addon on your site to use this feature.
To enable RSVP for your event, click the RSVP tab and then toggle the RSVP option to the ON position.
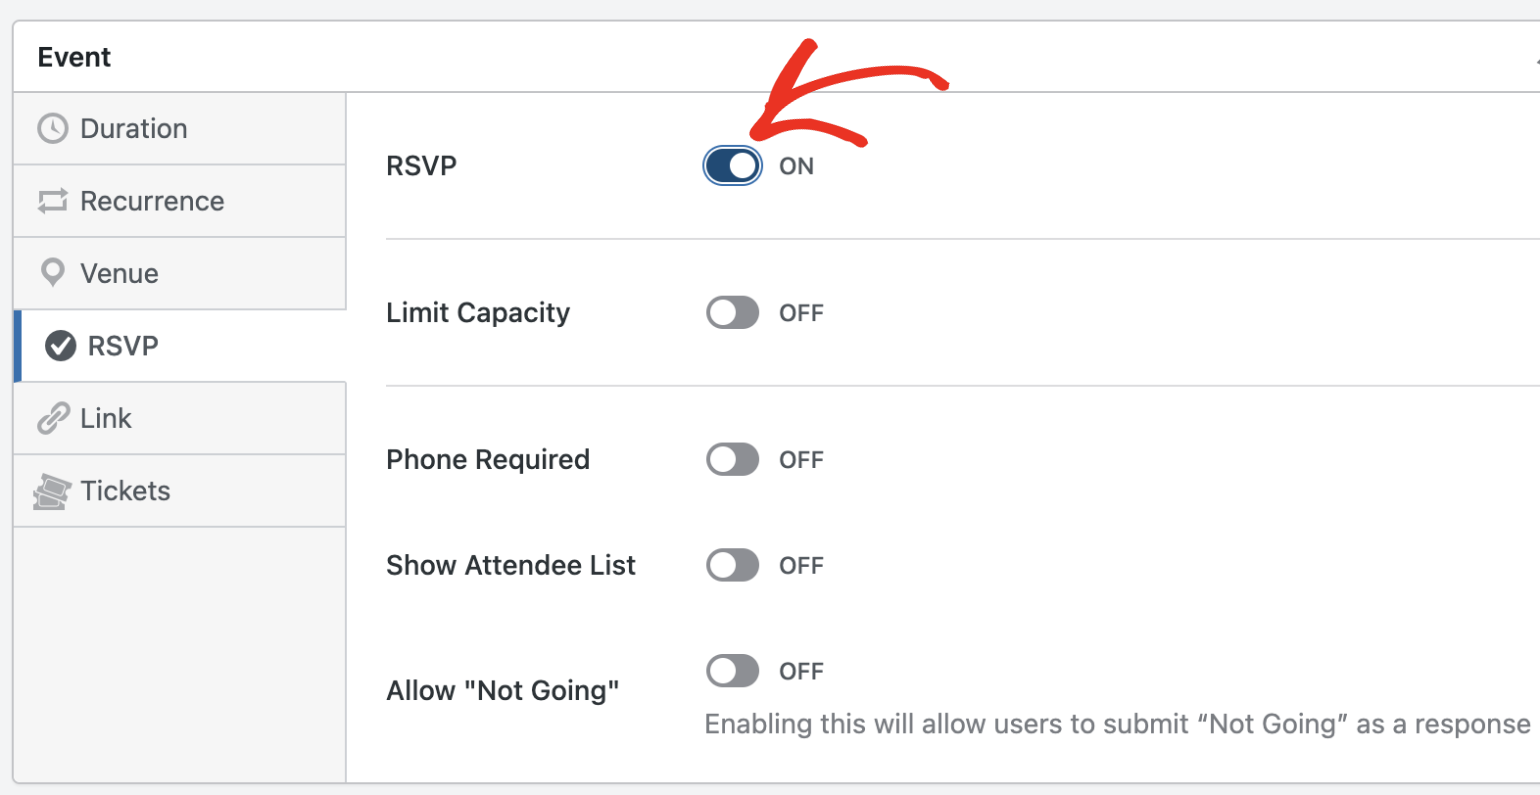
After that, control other settings, such as limiting capacity, showing the attendee list, and more. See our guide on using the RSVP addon for more details.
Registration Form
The Registration Form option collects extra details from attendees when they register for a ticketed or RSVP event, such as dietary requirements or a session choice.
To use it, click the Registration Form tab and toggle the Registration Form option to the ON position, then add the questions you want to ask.
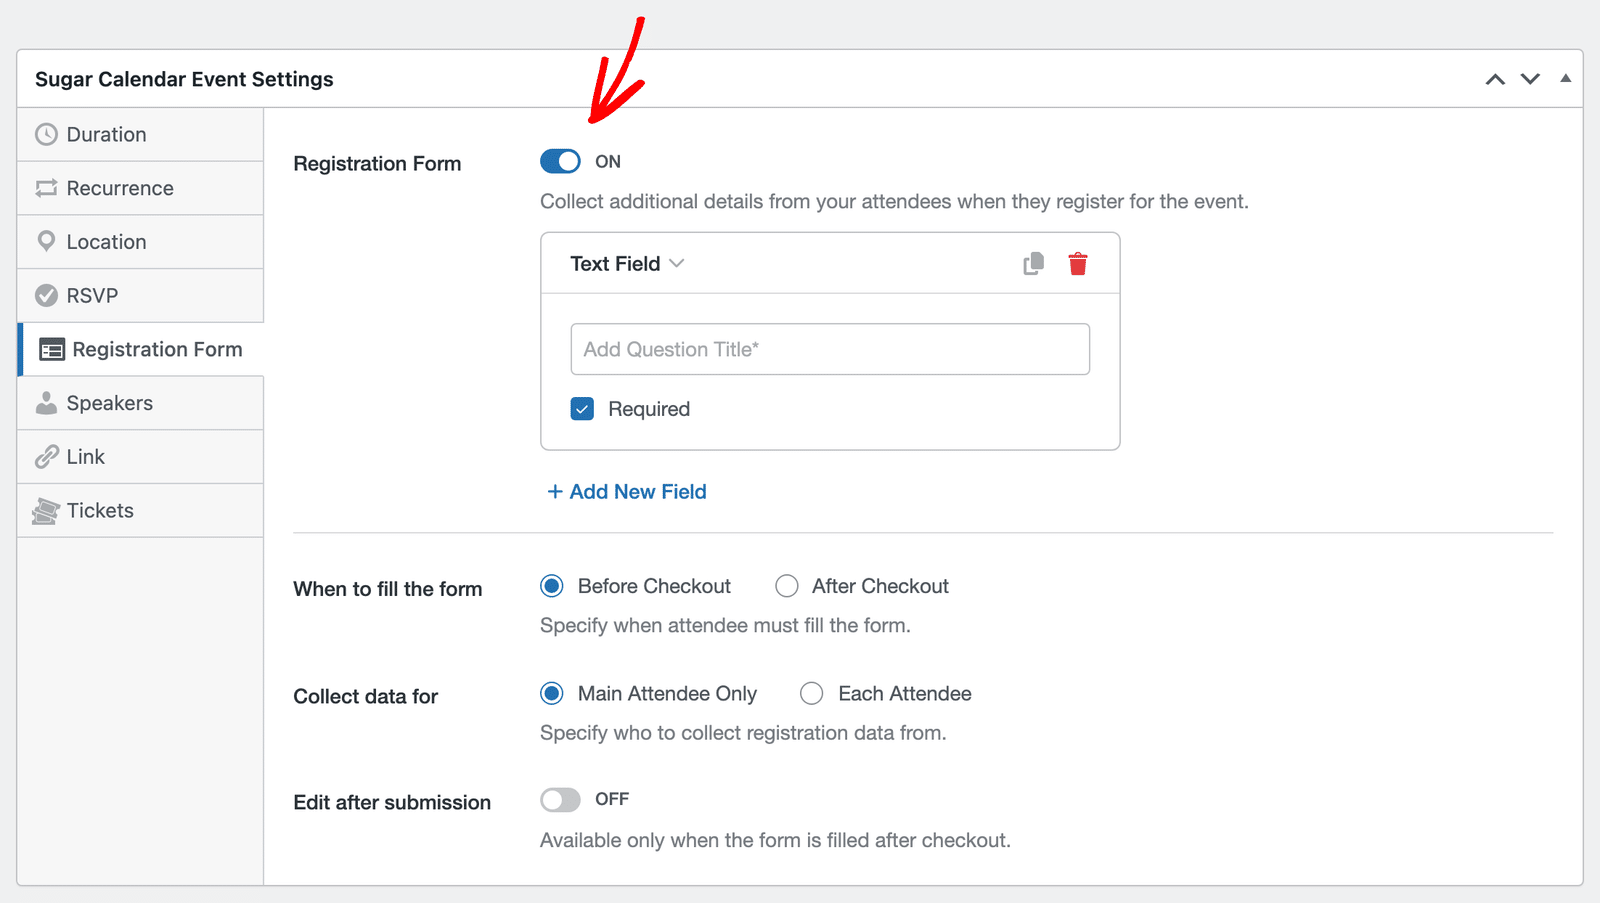
For details about the available field options, see our guide on creating a registration form for your events.
Link
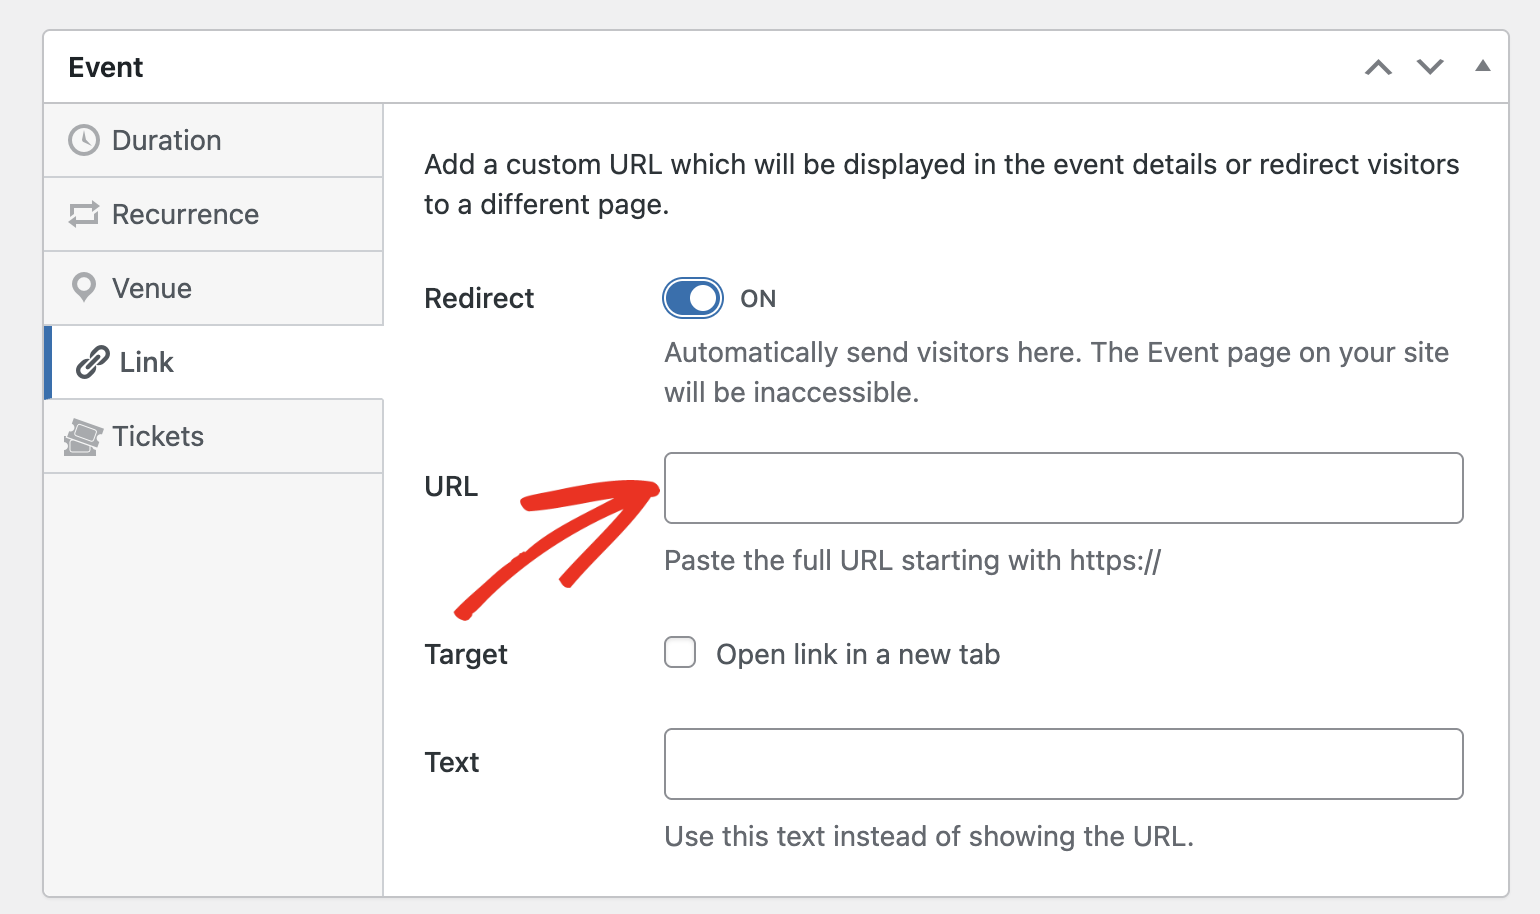
The Link settings let you add a custom URL to show users on the events’ detail page or redirect them to the page. This can be useful if you’d like to redirect users who register for your event to a landing page.
To add a URL, click the Link tab. If you’d like to automatically direct users to the URL, toggle the Redirect option to the ON position. Otherwise, the link will be displayed on the events’ detail page.
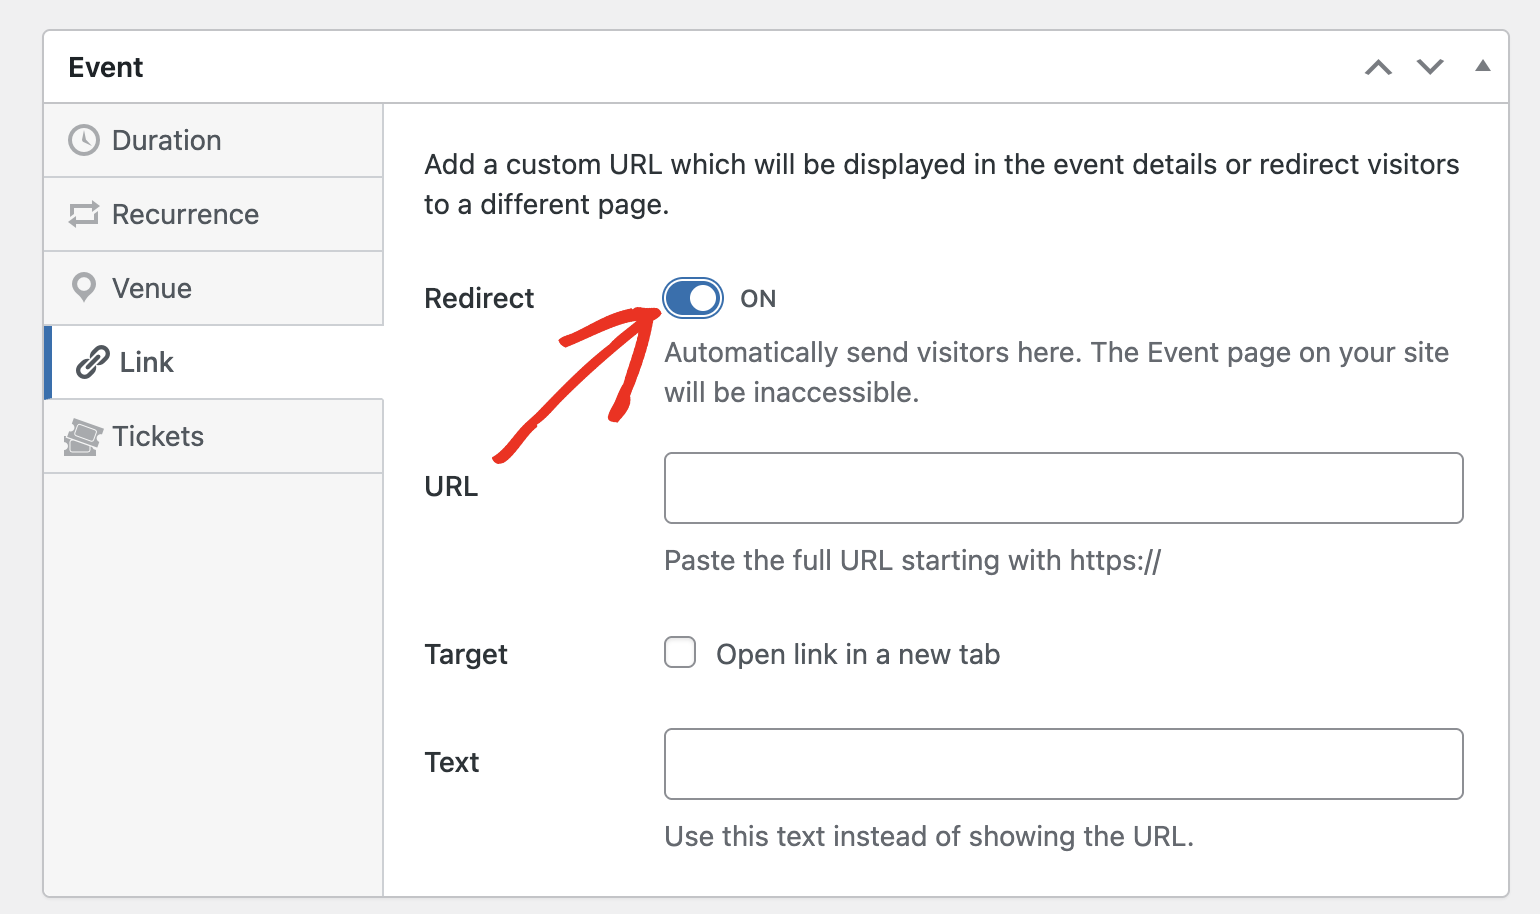
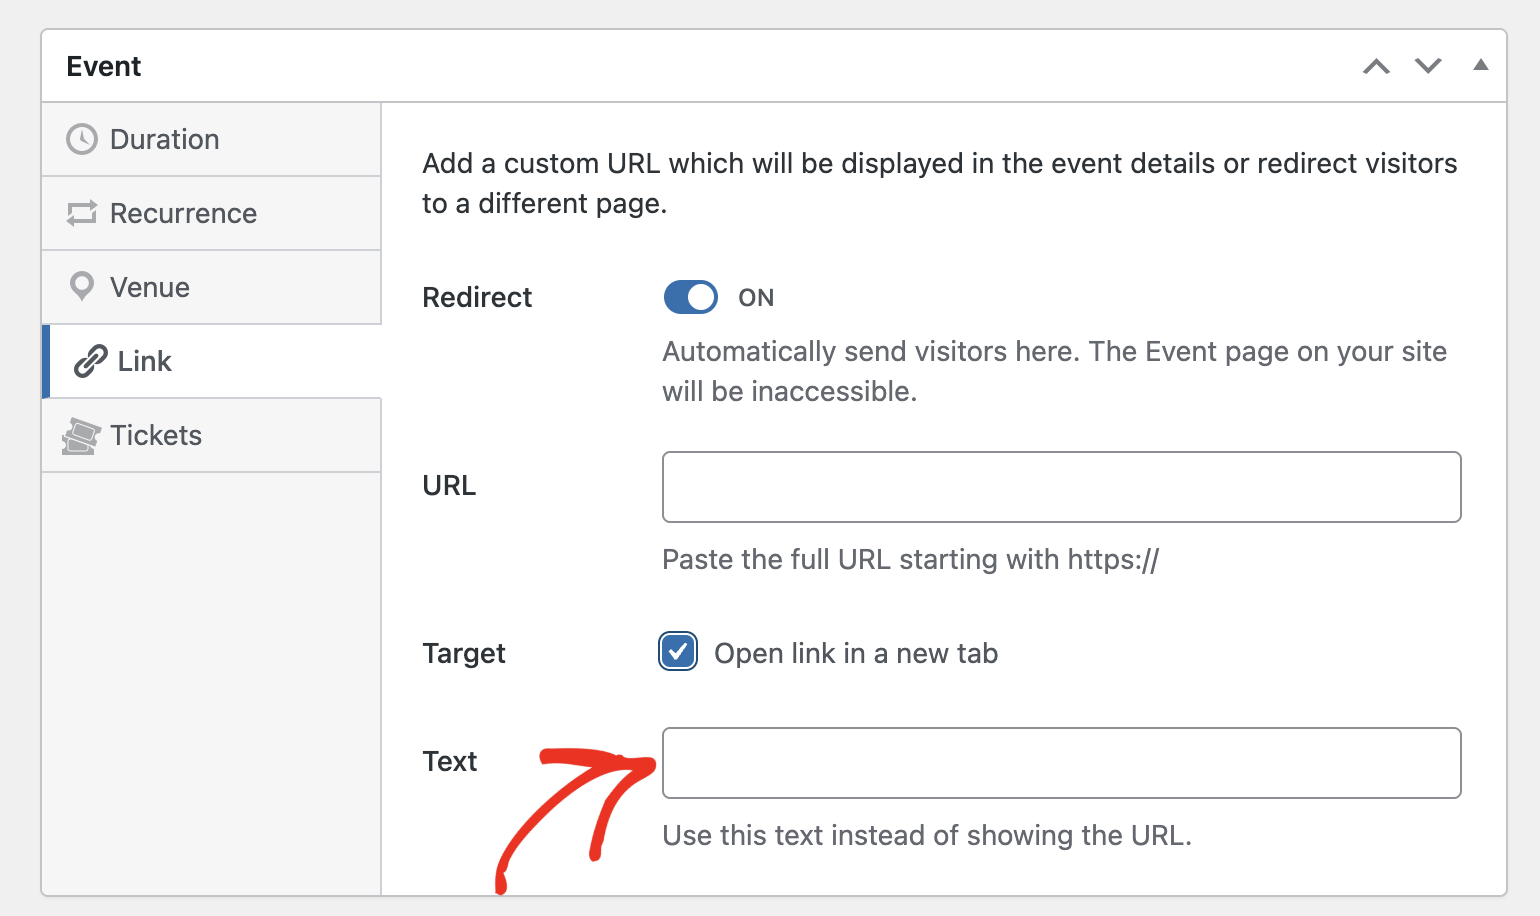
Next, enter the link in the URL field. Check the Target option if you’d like to open the URL in a new browser tab.
Finally, in the Text field, enter the text to show as anchor text for the URL.
Tickets
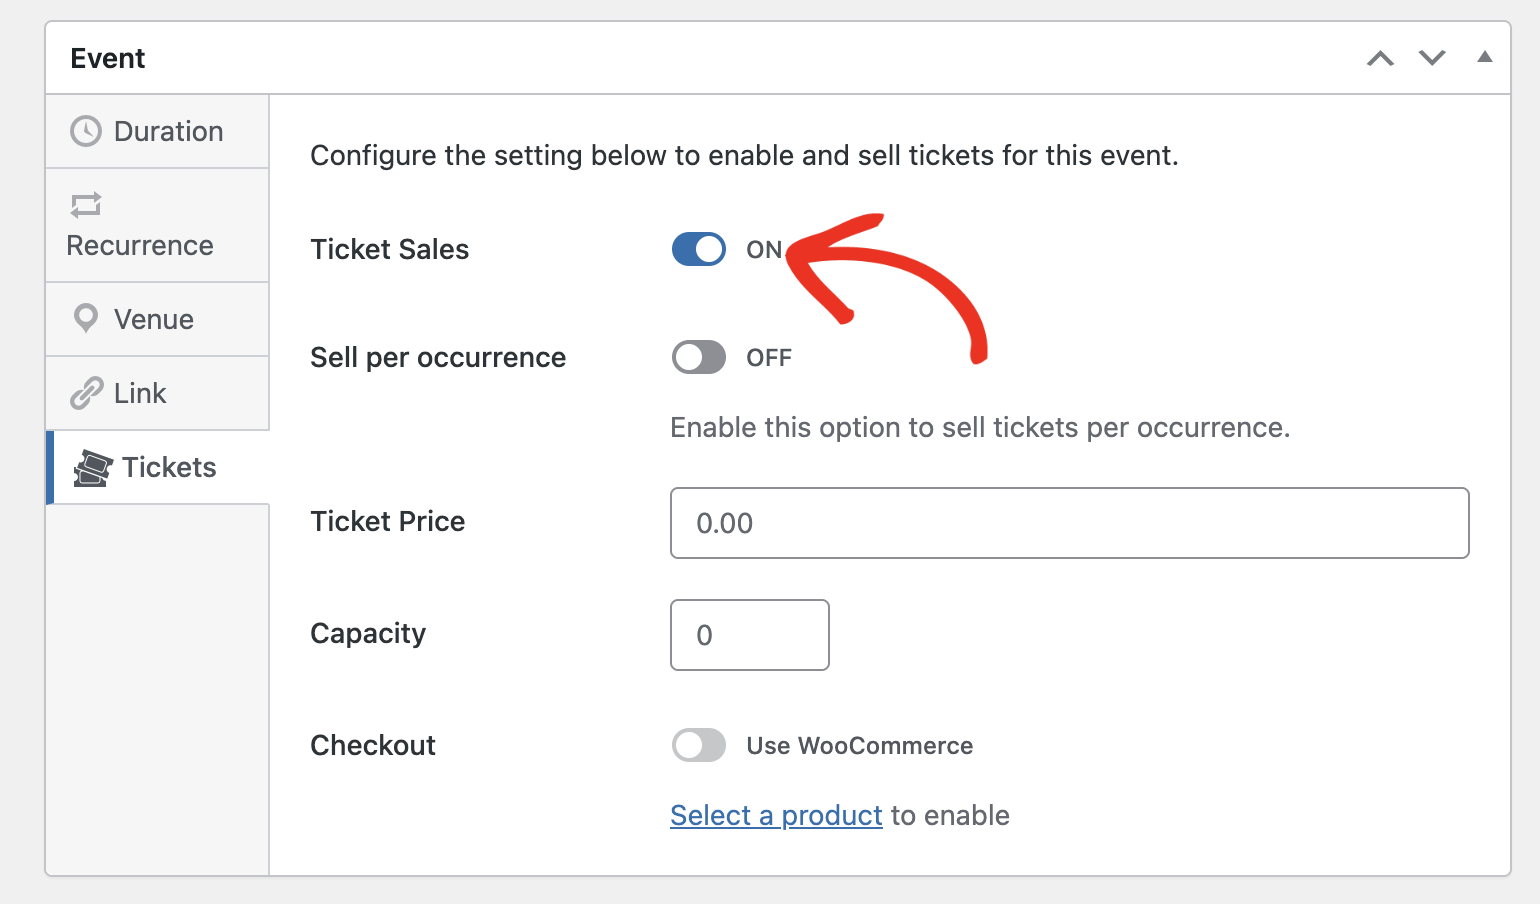
The Tickets setting lets you convert your event to a paid event and sell tickets for it. To use this option, toggle the Ticket Sales option to the ON position. Then set the Ticket Price and Capacity for the event.
To learn more, be sure to check our tutorial on using the Event Ticketing addon with Sugar Calendar Events.
Adding Event Details
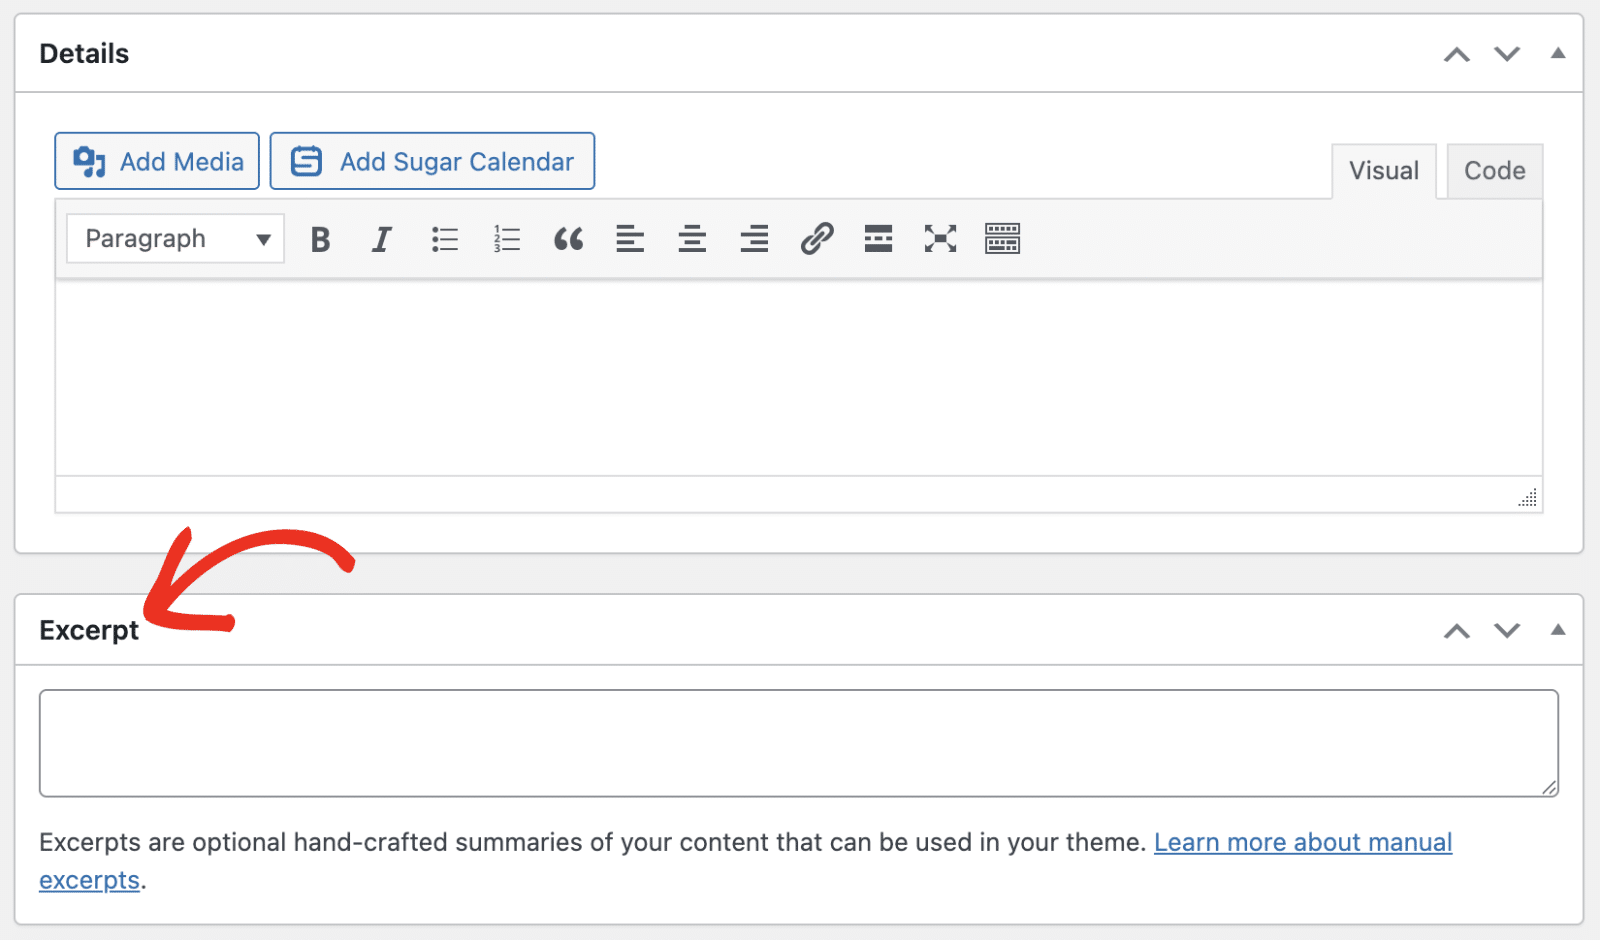
After customizing the event options, proceed to add a description for your event. In the Details field, you’ll be able to add full details about the event.
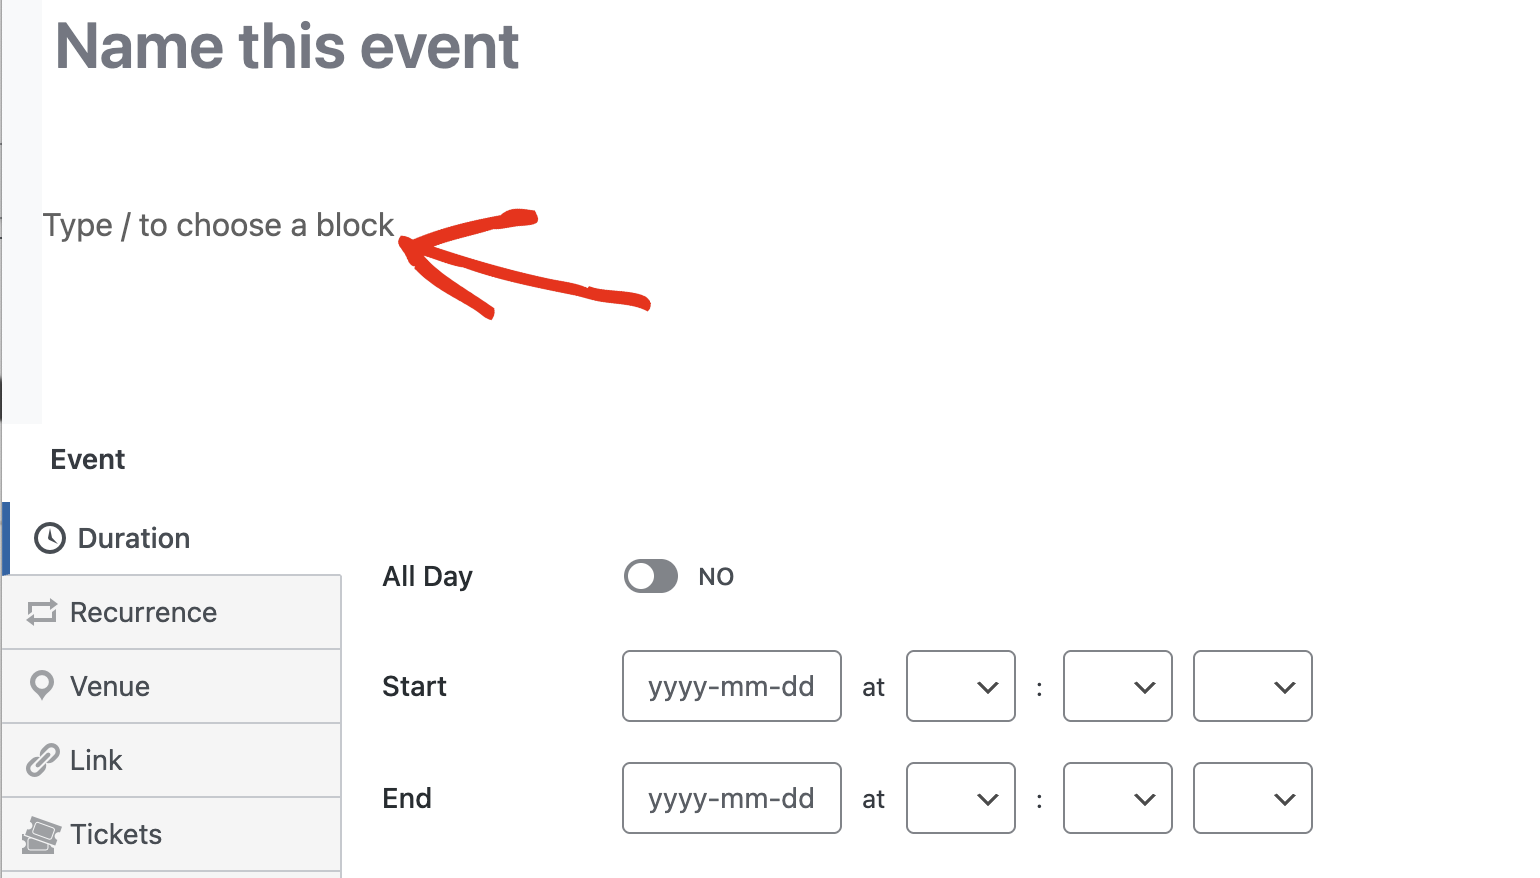
The text editor lets you format text, add images, and apply headings to event descriptions, similar to the WordPress classic editor.
Below the Details section, you’ll be able to add a short description for your event in the Excerpt field.
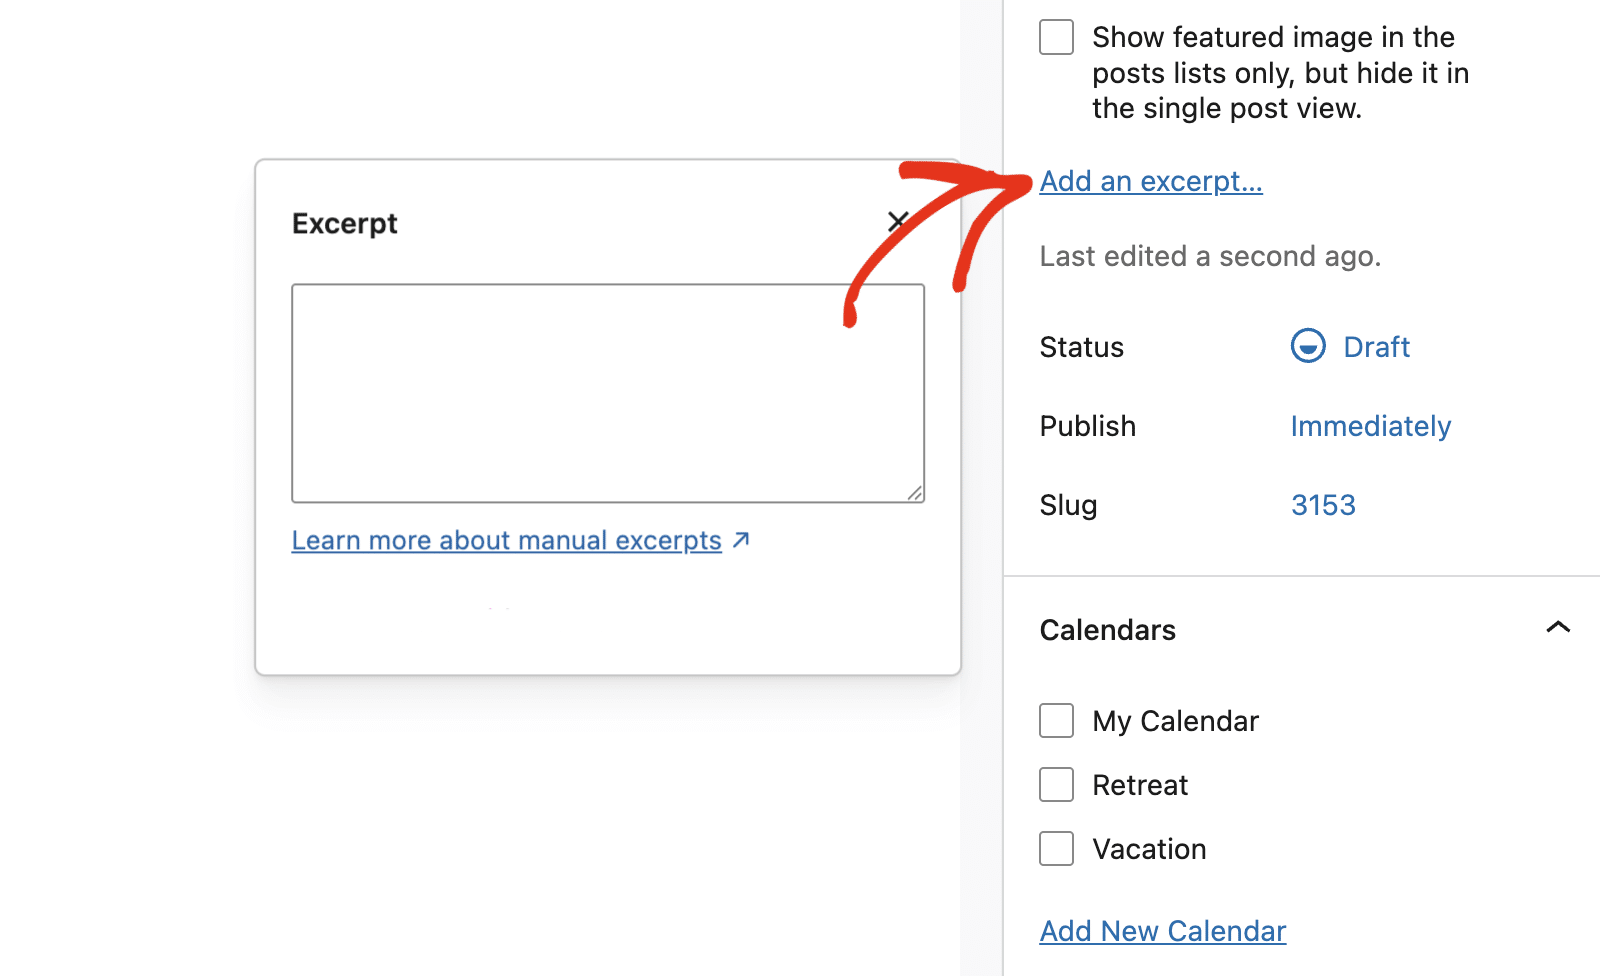
If you’re using the Block Editor, you’ll have access to WordPress blocks when adding details for your event.
To add an excerpt in the block editor, click Add an excerpt… from the right sidebar menu. Then enter the short description in the Excerpt field.
Adding Events to Calendars
Calendars function similarly to how categories work in WordPress. They let you organize your events into calendars. By default, all new events are added to the My Calendar calendar. However, you can add your own calendars and choose the one you want for your event.
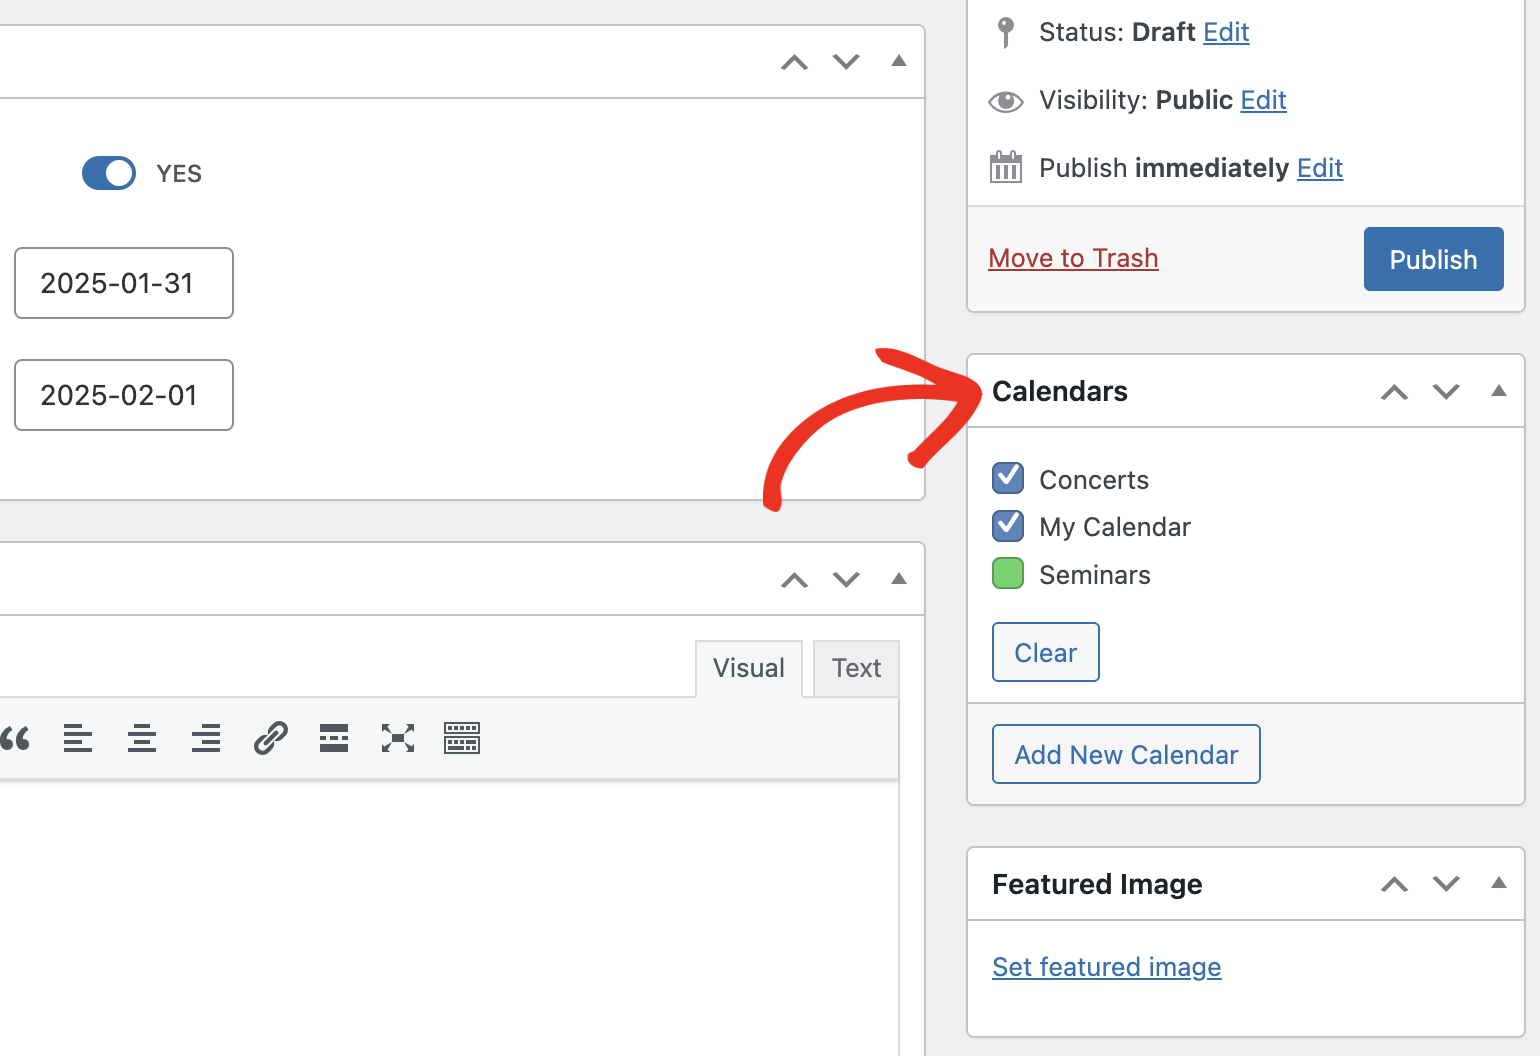
Note: For more details on creating and managing calendars, see our tutorial on organizing events with Calendars.
Adding a Featured Image (Optional)
If you’d like, add a featured image to events you create using Sugar Calendar. To do so, click the Set featured image link under the Featured Image section.
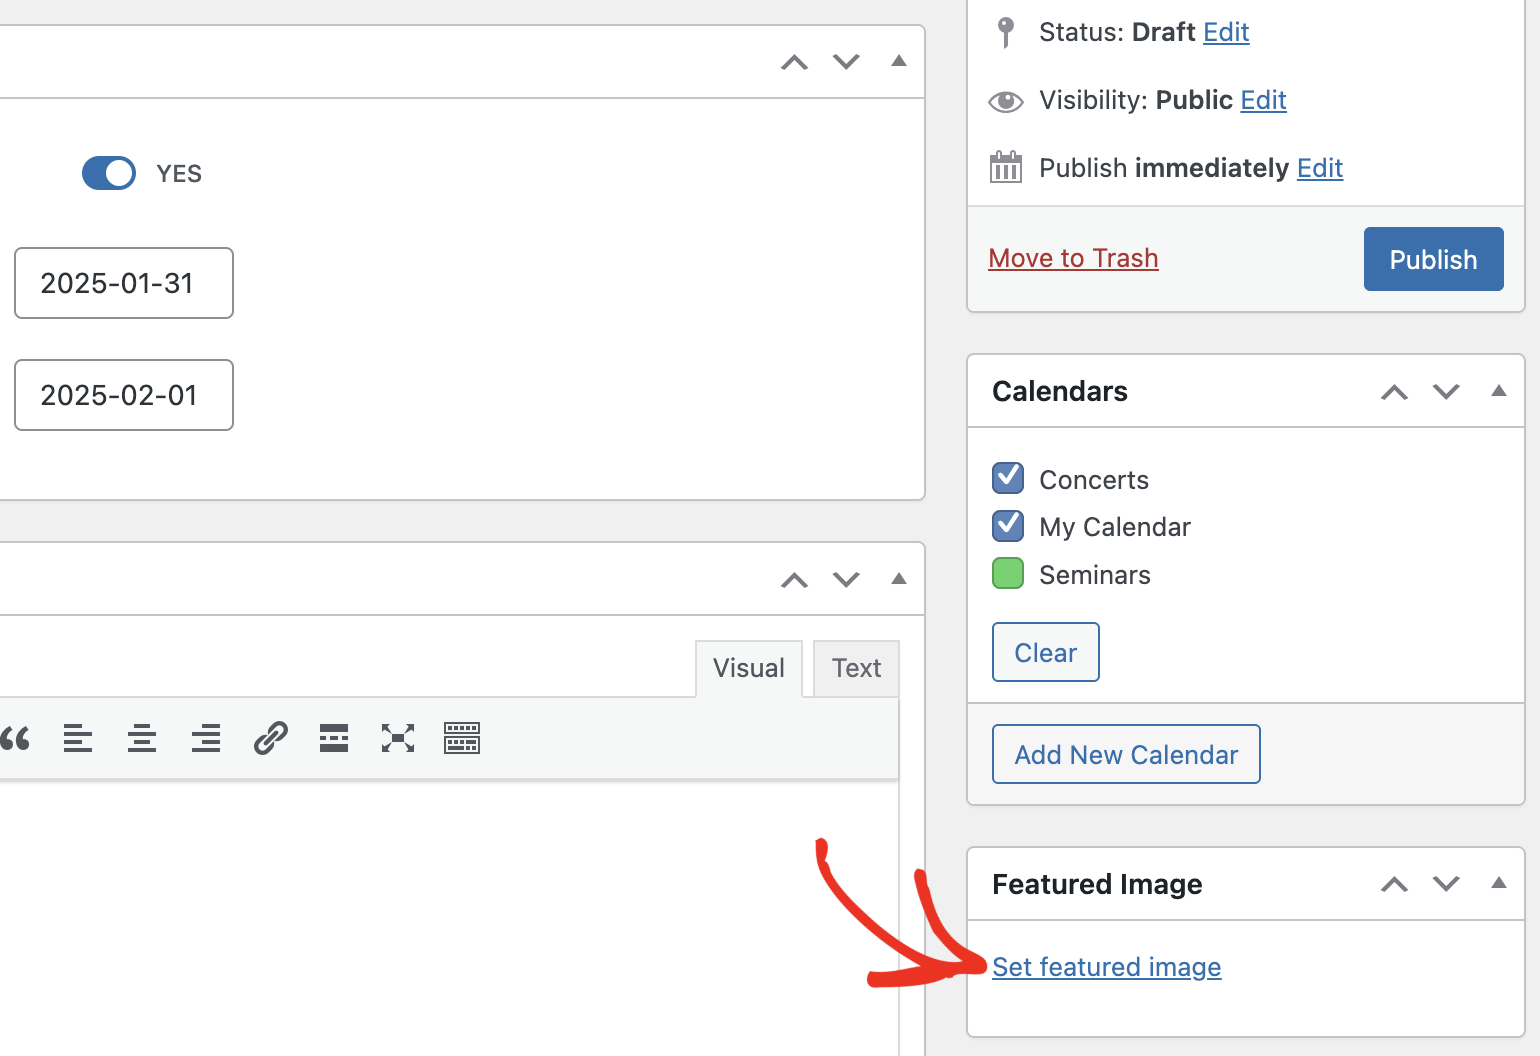
This will direct you to the WordPress media library where you can either upload an image from your computer or select one from the WordPress media library.
Adding Tags
Tags let you categorize events on your site. After creating tags on your site, you can assign one or more tags to your event. To do so, locate the Tags section in the sidebar.
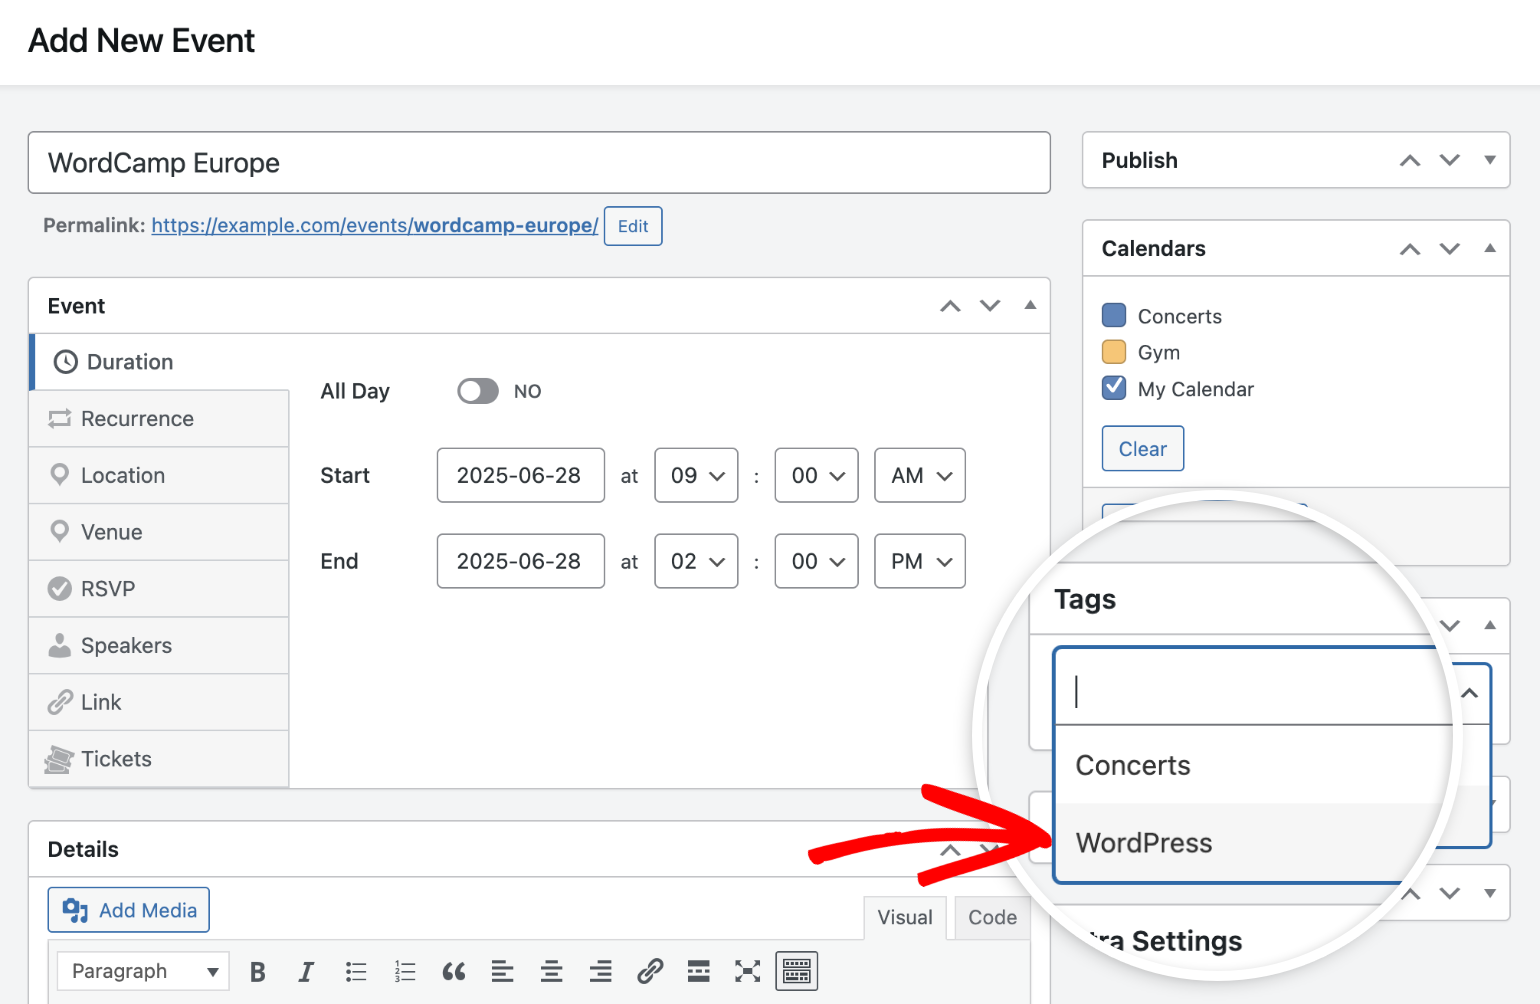
You can select one or more existing tags from the dropdown.
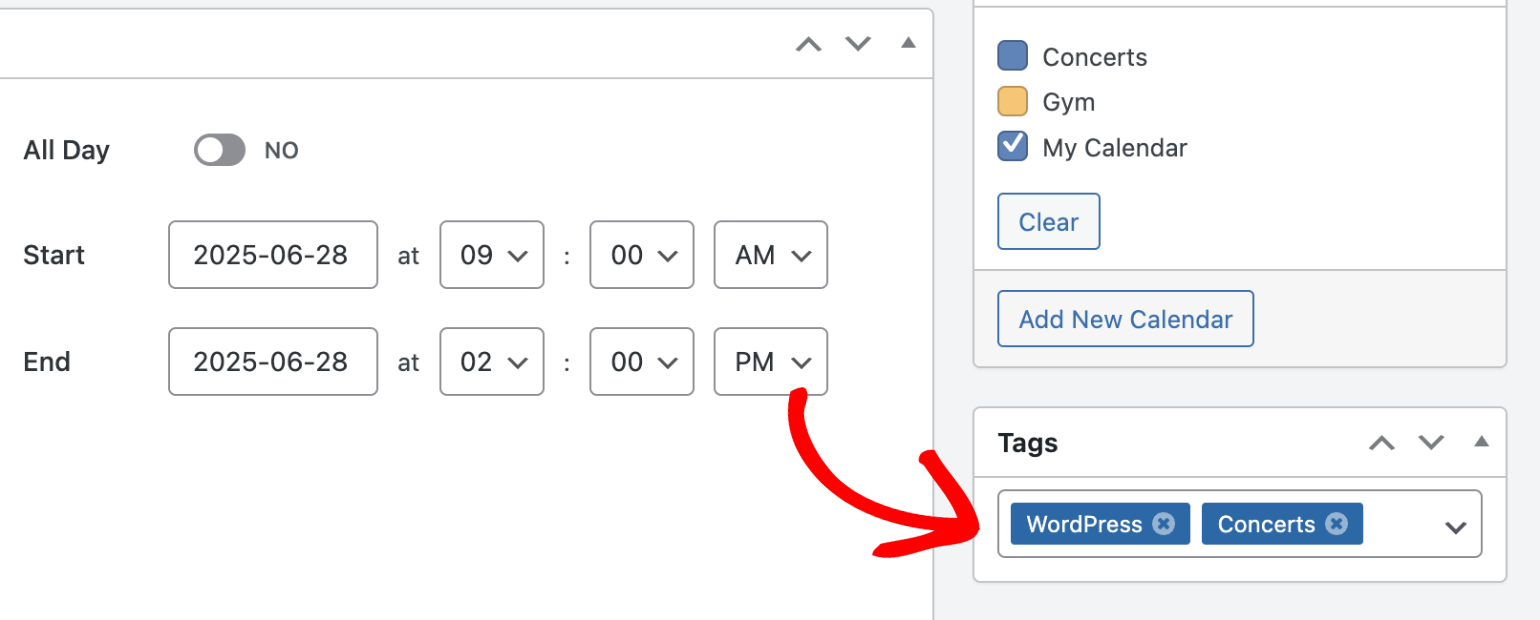
The tags you assign to an event will appear on your event’s archive page and can be used for filtering when displaying event lists or the calendar.
Once you’re done customizing the event options, click the Publish button to create your event.
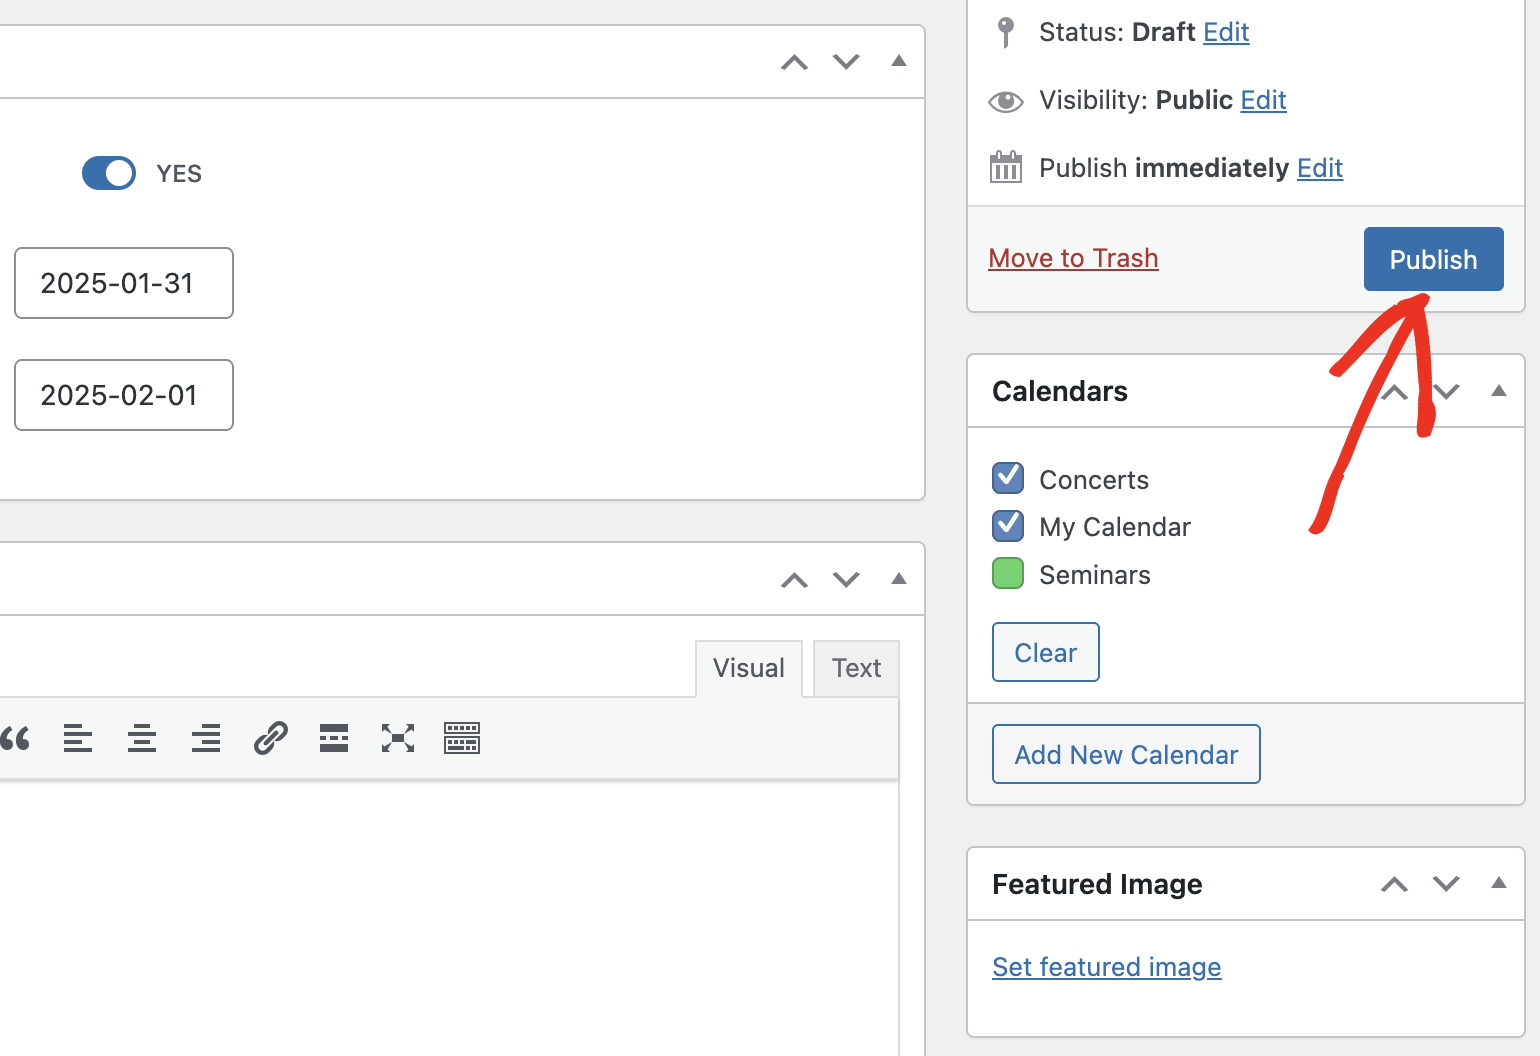
Note: If you’re editing an existing event, the Publish button changes to Update. However, both of them will save your changes.
That’s it! You now know how to create events in Sugar Calendar.
Next, would you like to display events on your site’s frontend? Our tutorial on displaying calendar events explains the various ways to show events on your site.