Would you like to customize event emails for ticket sales and RSVP responses? Sugar Calendar offers customizable email notifications for various attendee actions, including ticket purchases and RSVP responses.
In this guide, we’ll walk you through how to configure, customize, and manage these emails.
In This Article
Before getting started, make sure the Sugar Calendar plugin is installed and activated on your site, and that you’ve verified your license to enable advanced features.
Accessing Email Settings
To configure email notifications, navigate to Sugar Calendar » Settings and select the Emails tab.
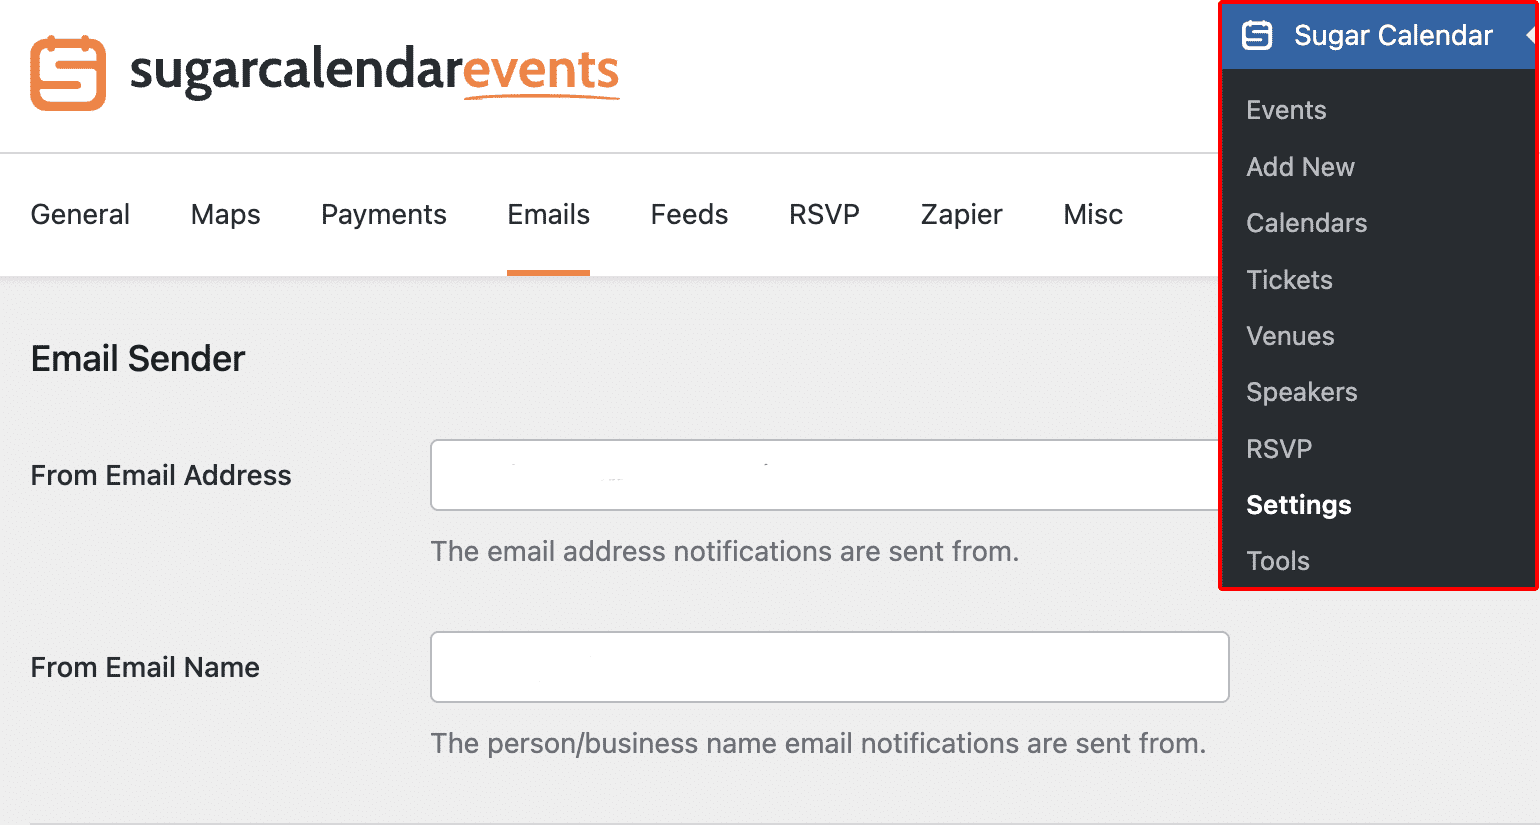
Here, you’ll be able to set the default email sender and name for all event-related emails.
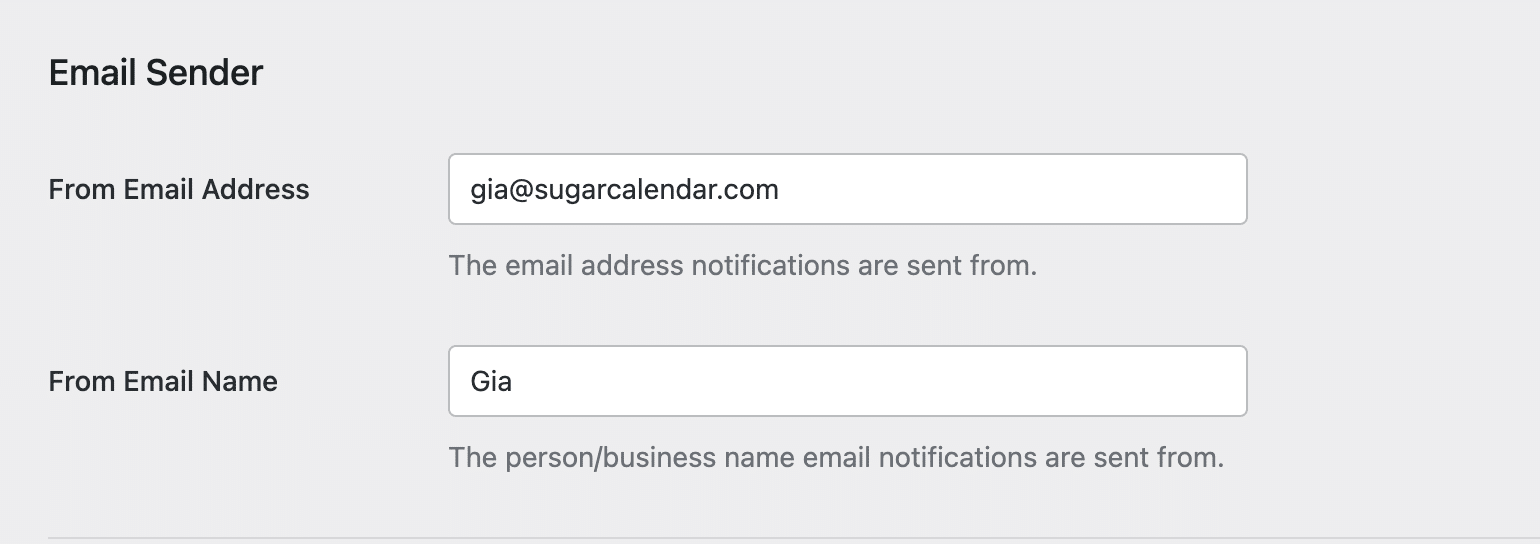
- From Email Address: This is the sender email address for event-related emails.
- From Email Name: The name users will see as the sender.
Note: To improve your WordPress site’s email deliverability, we recommend using an SMTP plugin like WP Mail SMTP.
After updating the sender email details, scroll down and click the Save Settings button to save your changes.
Types of Emails You Can Configure
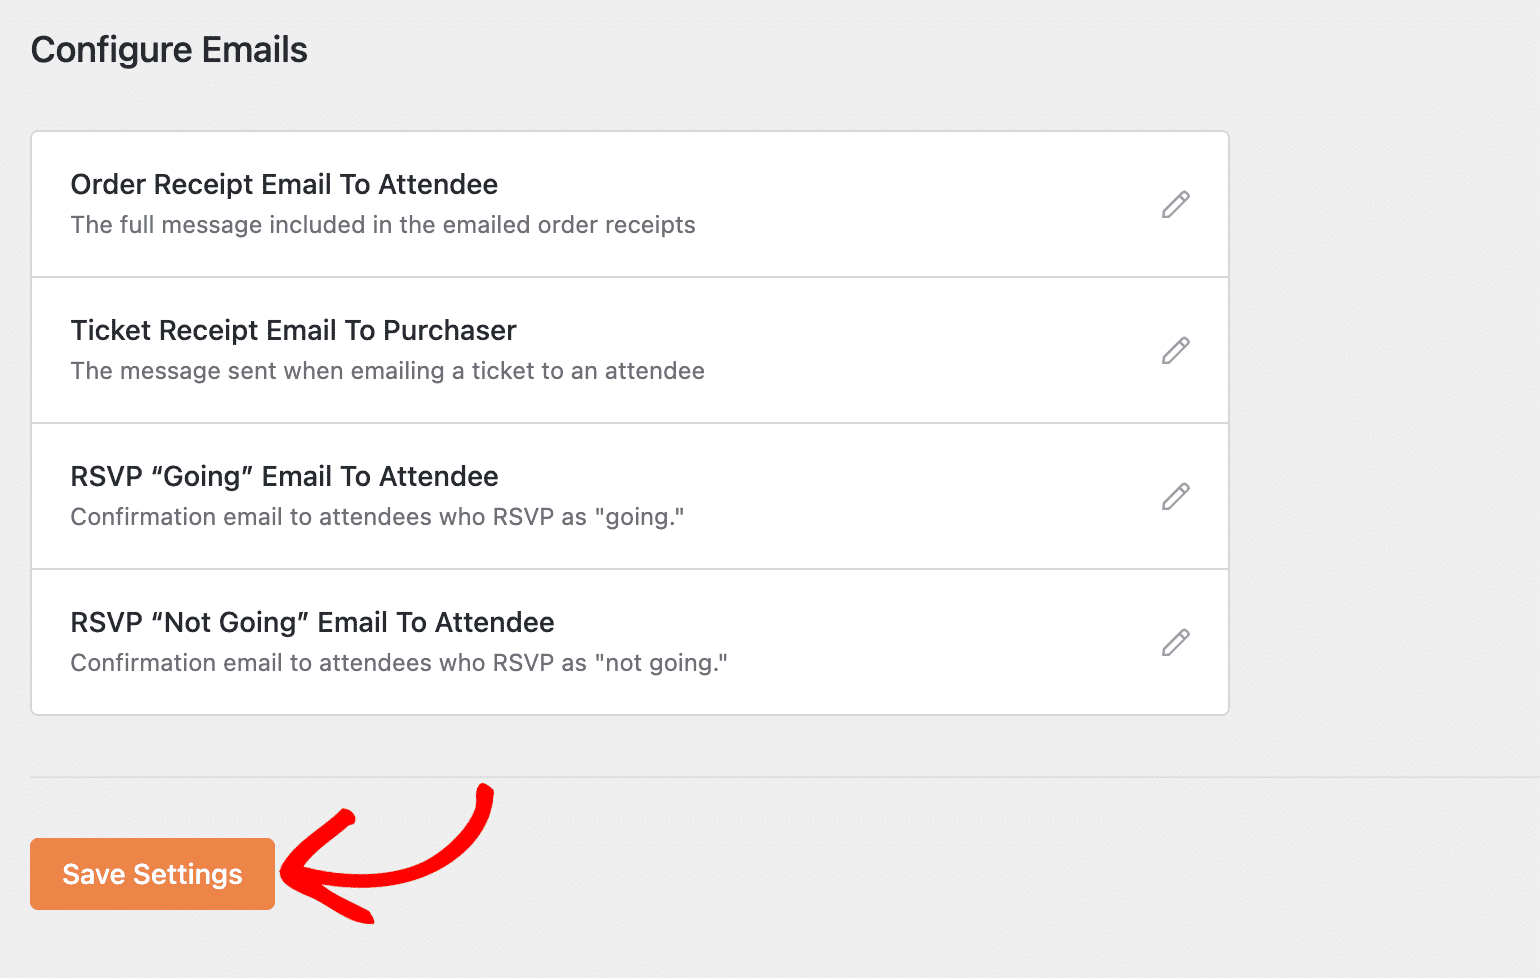
Below the sender settings, you’ll find a list of configurable email templates:
- Order Receipt Email to Attendee
- Ticket Receipt Email to Purchaser
- RSVP “Going” Email to Attendee
- RSVP “Not Going” Email to Attendee
Click the pencil icon next to any template to customize its content.
![]()
Order Receipt Email
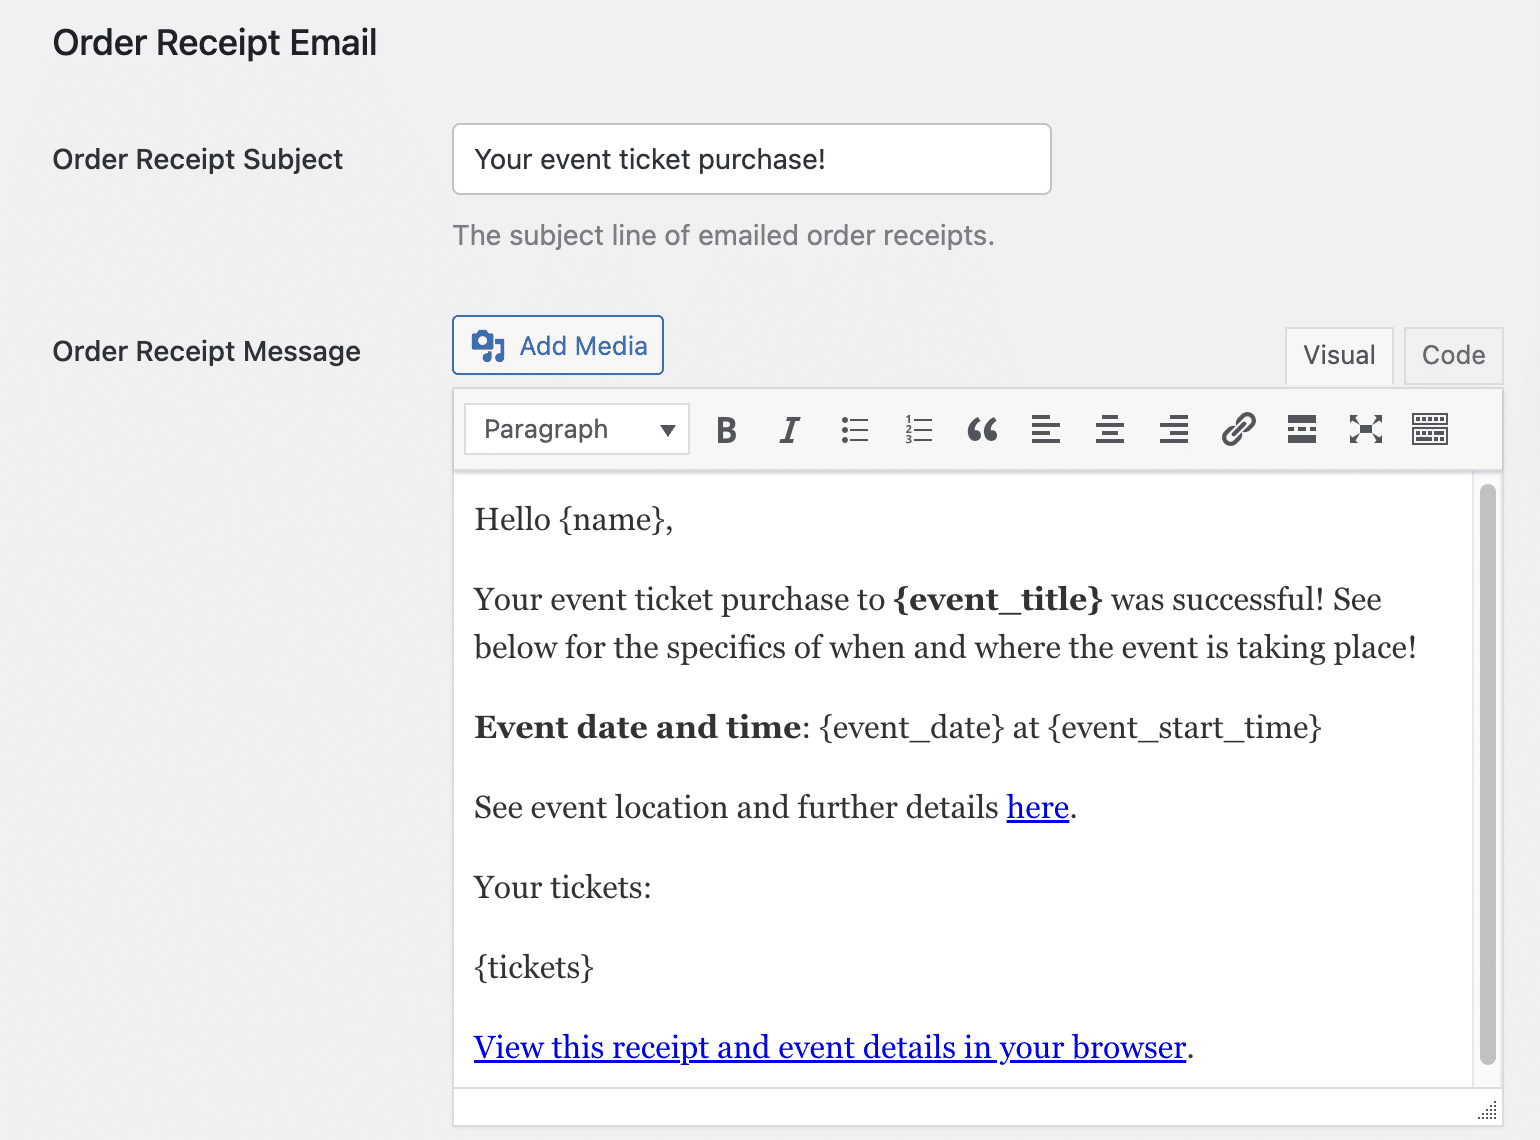
The Order Receipt Email is sent to customers immediately after they complete a ticket purchase.
Here’s what you can modify:
Subject Line: Customize the subject of the email.
Message: Use the visual editor to insert content, formatting, links, and placeholders. Similar to the WordPress post editor.
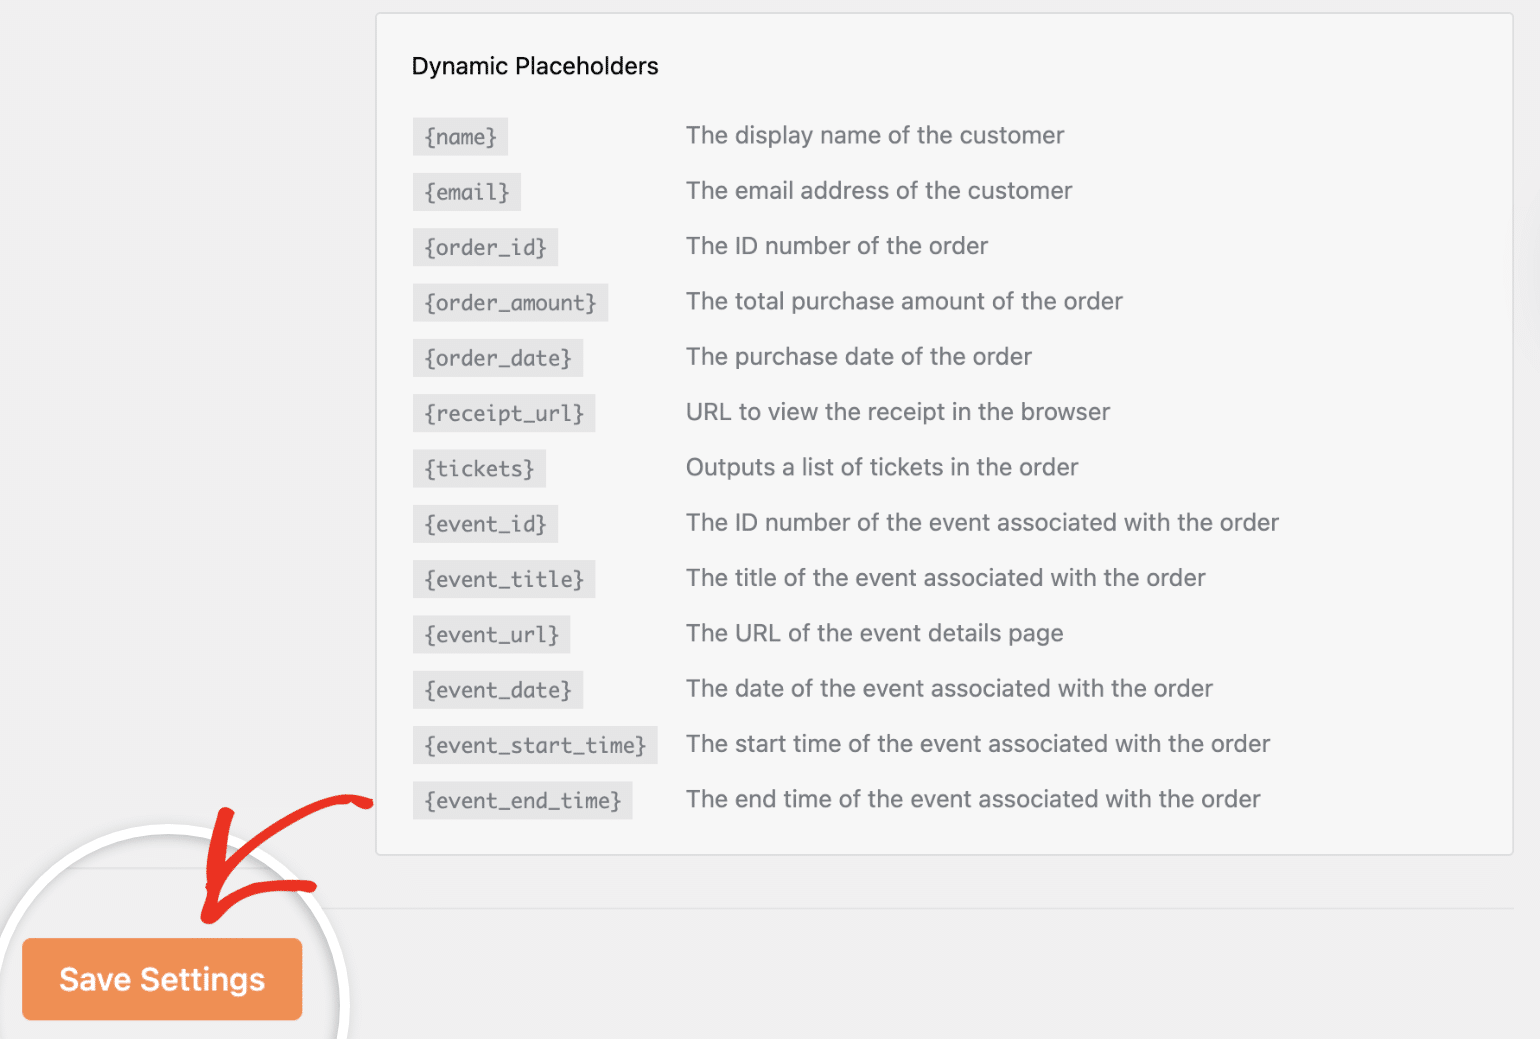
Within the email message, you can use built-in smart tags to reference data from the order. Below, we’ve highlighted the available Dynamic Placeholders:
{name}: The display name of the customer{email}: The email address of the customer{order_id}: The ID number of the order{order_amount}: The total purchase amount of the order{order_date}: The purchase date of the order{receipt_url}: URL to view the receipt in the browser{tickets}: Outputs a list of tickets in the order{event_id}: The ID number of the event associated with the order{event_title}: The title of the event related to the order{event_url}: The URL of the event details page{event_date}: The date of the event related to the order{event_start_time}: The start time of the event related to the order{event_end_time}: The end time of the event related to the order
After updating the email template, scroll down and save your changes before proceeding.
Ticket Receipt Email
The Ticket Receipt Email is sent to each attendee with their individual ticket information.

Similarly, the email message contains dynamic placeholders that retrieve the attendee’s information from the ticket order form. By default, it includes the {ticket_id}, {ticket_code}, and {ticket_url} placeholders in the message.
But you can add other supported placeholders to your message. Below is the list of available placeholders:
-
{ticket_id}: The ticket ID number{ticket_code}: The ticket code{ticket_url}: The URL to the ticket details{event_id}: The ID number of the event associated with the order{event_title}: The title of the event associated with the order{event_url}: The URL of the event details page{event_date}: The date of the event associated with the order{event_start_time}: The start time of the event associated with the order{event_end_time}: The end time of the event associated with the order{attendee_name}: The name of the attendee assigned to a ticket, if provided{attendee_email}: The email of the attendee assigned to a ticket, if provided
After updating the email template, scroll down and save your changes before proceeding.
RSVP “Going” Confirmation Email
If a user RSVPs as “Going” to an event, they’ll receive a confirmation email with all the event details.
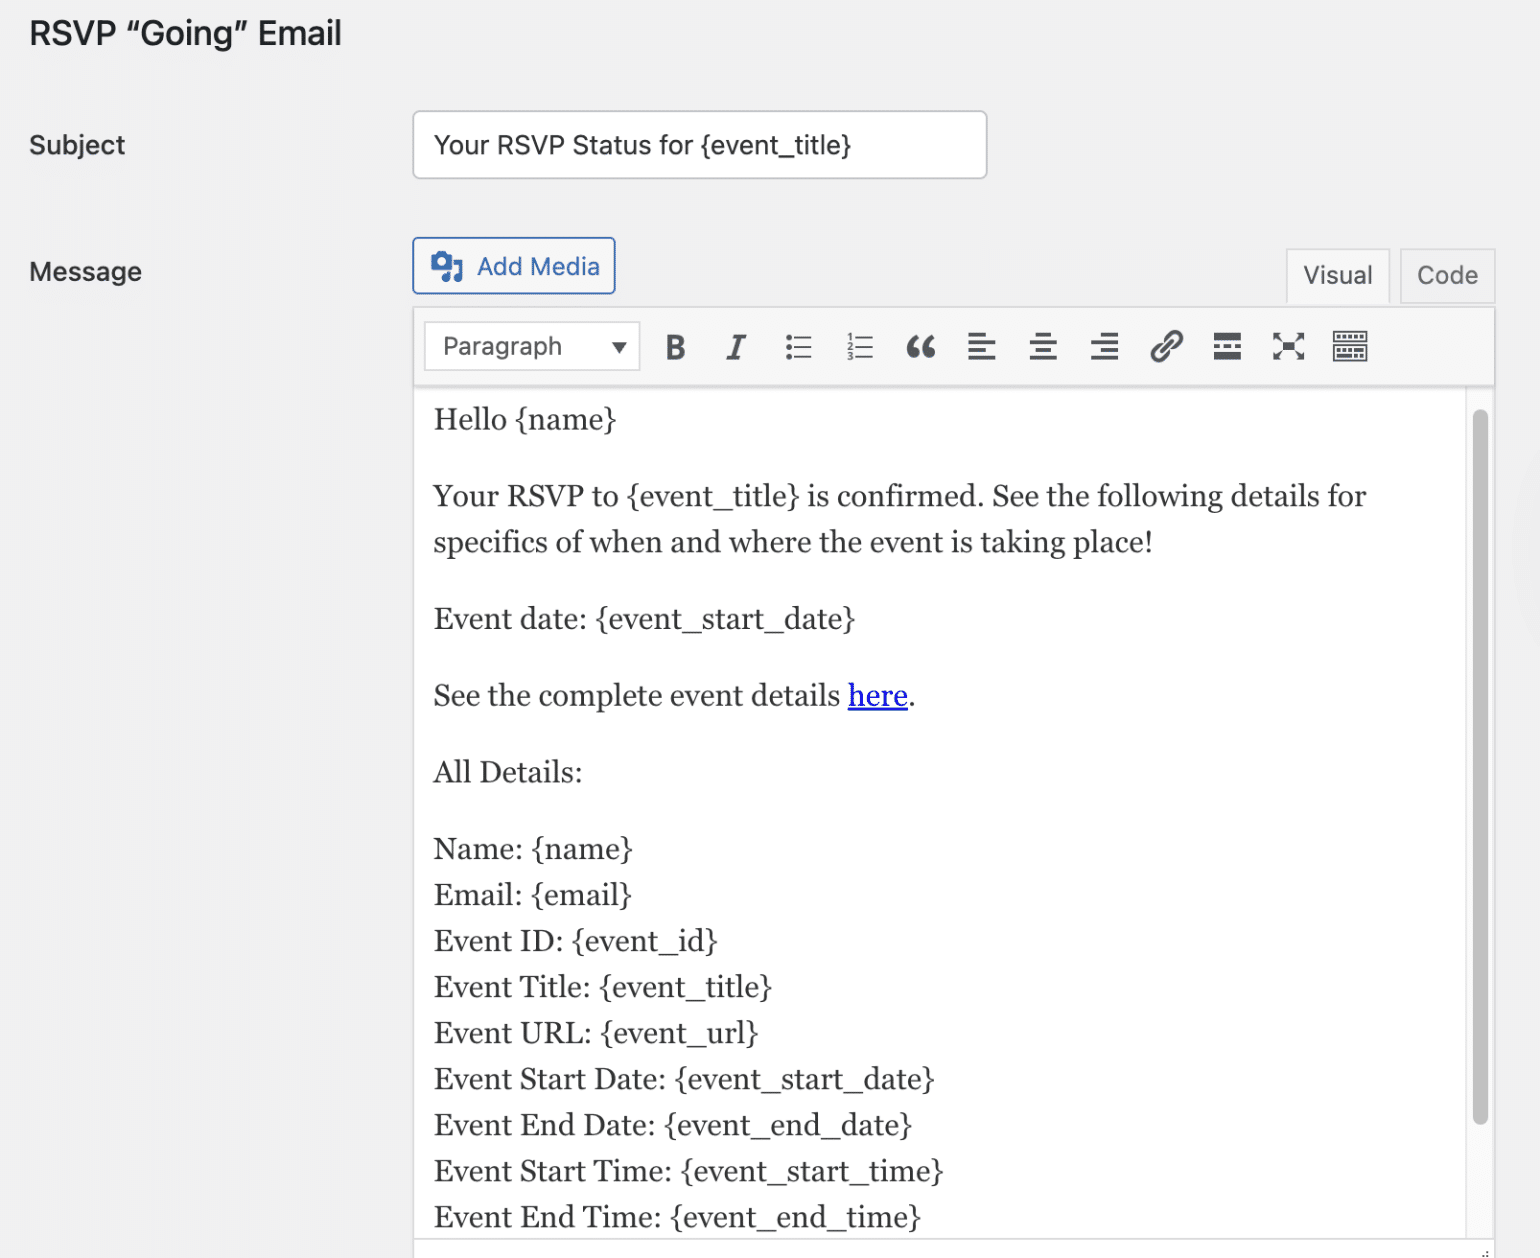
In the message field, you’ll be able to customize the email content for the RSVP confirmation email. It also uses dynamic placeholders to render details about the event to which users RSVP.
Below is a list of available placeholders you can add to the email content:
{name}: The Registree Name{email}: The Registree Email{event_id}: The Event ID{event_title}: The Event Title{event_url}: The Event URL{event_start_date}: The Event Start Date{event_end_date}: The Event End Date{event_start_time}: The Event Start Time{event_end_time}: The Event End Time{additional_attendees_list}: The Additional Attendees List (if applicable)
After updating the email template, scroll down and save your changes before proceeding.
RSVP “Not Going” Email
Attendees who mark themselves as “Not Going” receive a gentle farewell message and can be encouraged to change their RSVP later if needed.
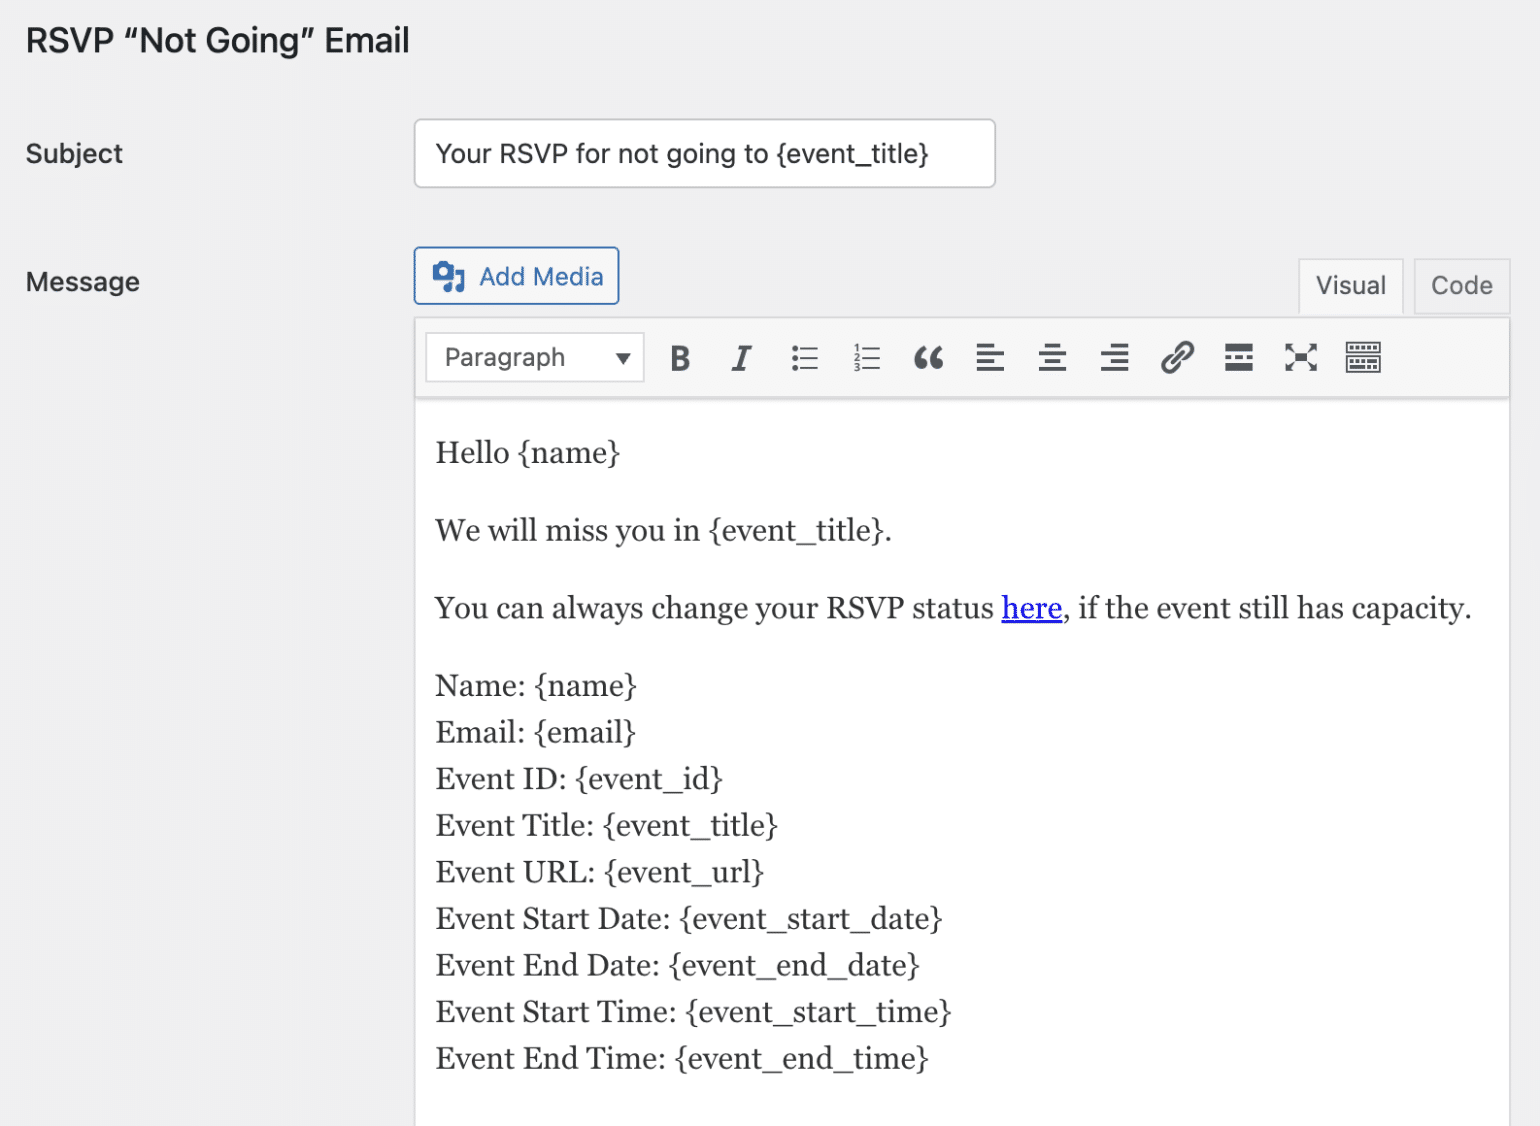
You can customize the farewell message as you see fit. It also supports the same dynamic placeholders as the RSVP “Going” Email template, excluding the {additional_attendees_list} smart tag.
Saving Your Changes
After customizing any email, click the orange Save Settings button to apply your changes.
That’s it! You’ve now set up and customized your event email templates in Sugar Calendar.
Next, would you like to display events on your site’s frontend?v See our guide on displaying event lists to learn how.