Want to efficiently manage all your events from a centralized location? Sugar Calendar Events provides an event management interface that makes it easy to view, organize, and control your events.
This complete guide will walk you through everything you need to know about managing events in Sugar Calendar Events.
In This Article
Before getting started, make sure Sugar Calendar Events is installed and activated on your WordPress site.
Accessing the Events Interface
To access the event management interface, click the Events menu from your WordPress admin sidebar.
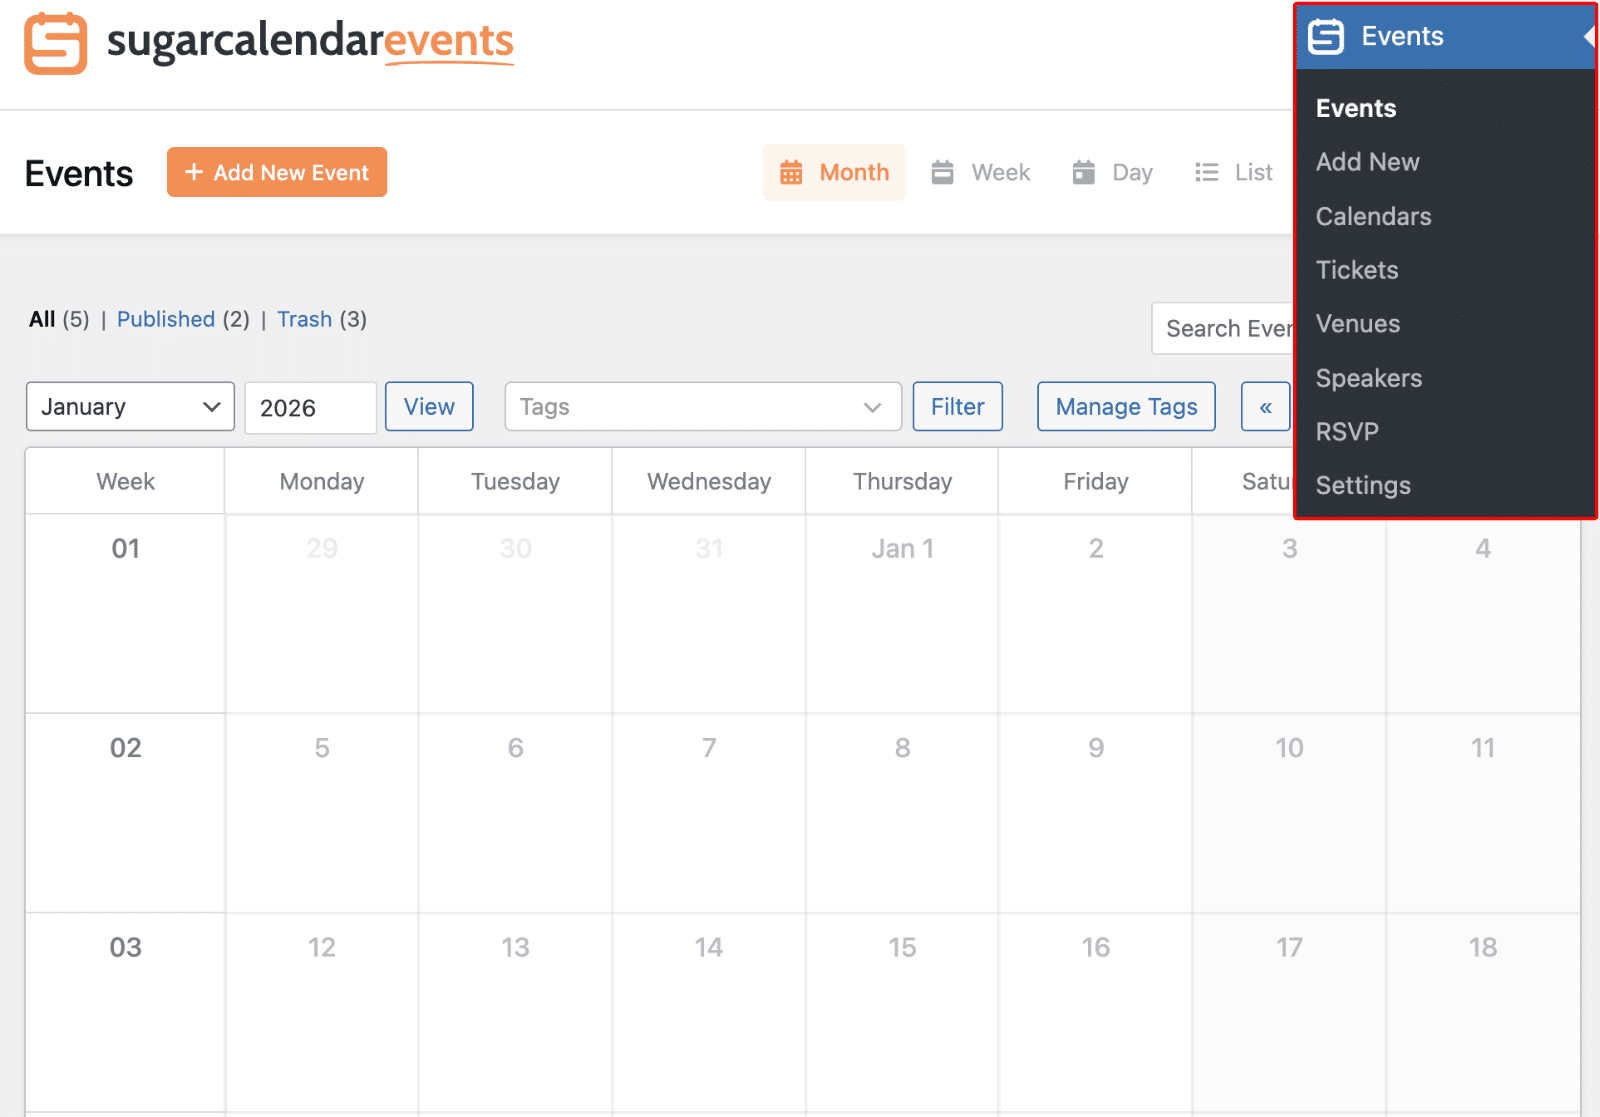
This will open the main Events screen where you can view and manage all your events in various layouts.
Understanding Calendar Views
Sugar Calendar Events offers four different view options to help you visualize and manage your events based on your preferences. The view buttons are located in the top section of the Events screen.
Month View
Click the Month button to display events in a traditional calendar grid format showing an entire month at a glance.

This view is ideal for getting a high-level overview of your event schedule. Each event appears on its scheduled date, making it easy to identify busy periods and available time slots.
Week View
The Week view displays events across a 5-day (or 7-day) week layout with each day shown as a separate column.
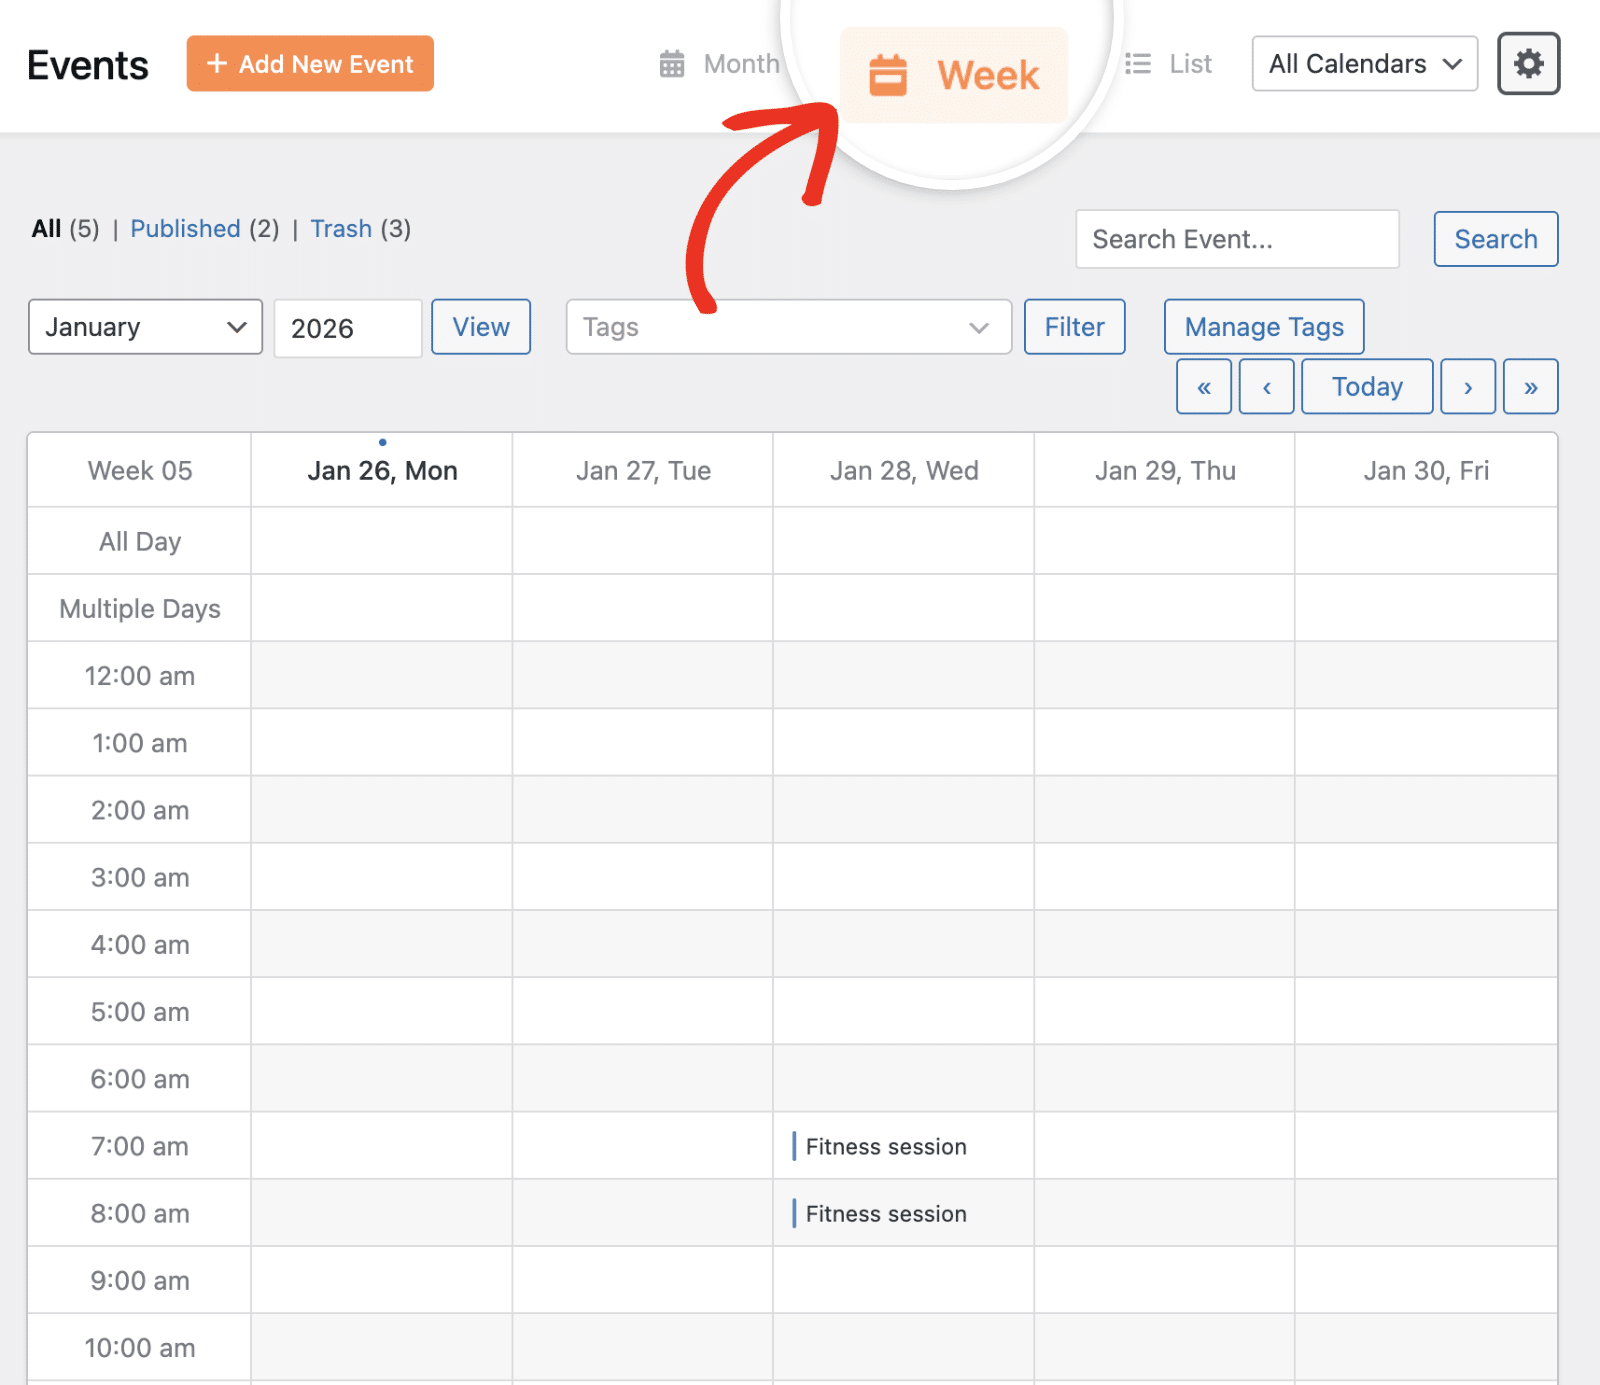
This format provides a detailed hourly breakdown of your events, helping you see event duration and time gaps more clearly throughout the week.
Day View
Click the Day button to focus on a single day with all time slots displayed from morning to evening.
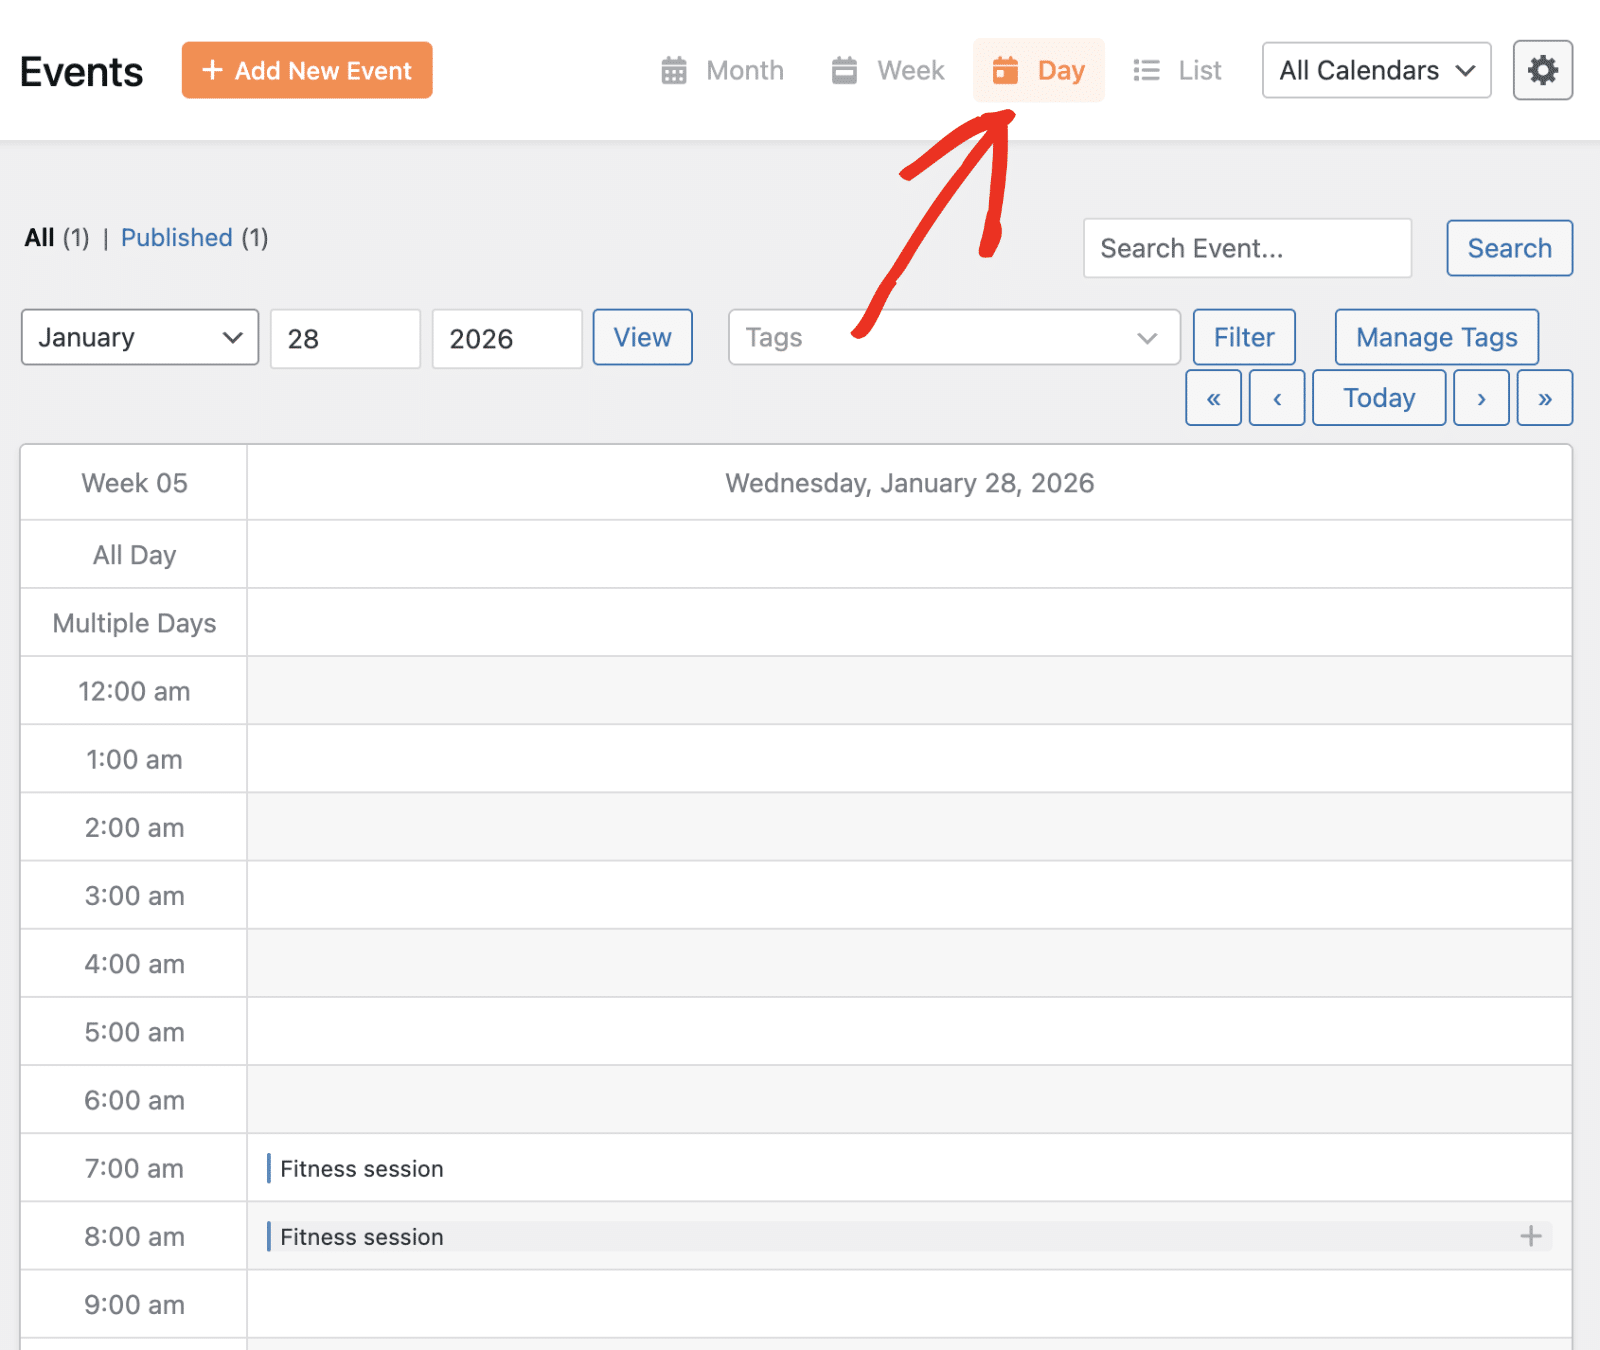
This view is most useful when you need to manage a busy schedule or make precise scheduling decisions for a specific day.
List View
The List view displays your events in a table format with columns showing key information such as Title, Start time, End time, Tags, Duration, Speakers, and Venue.
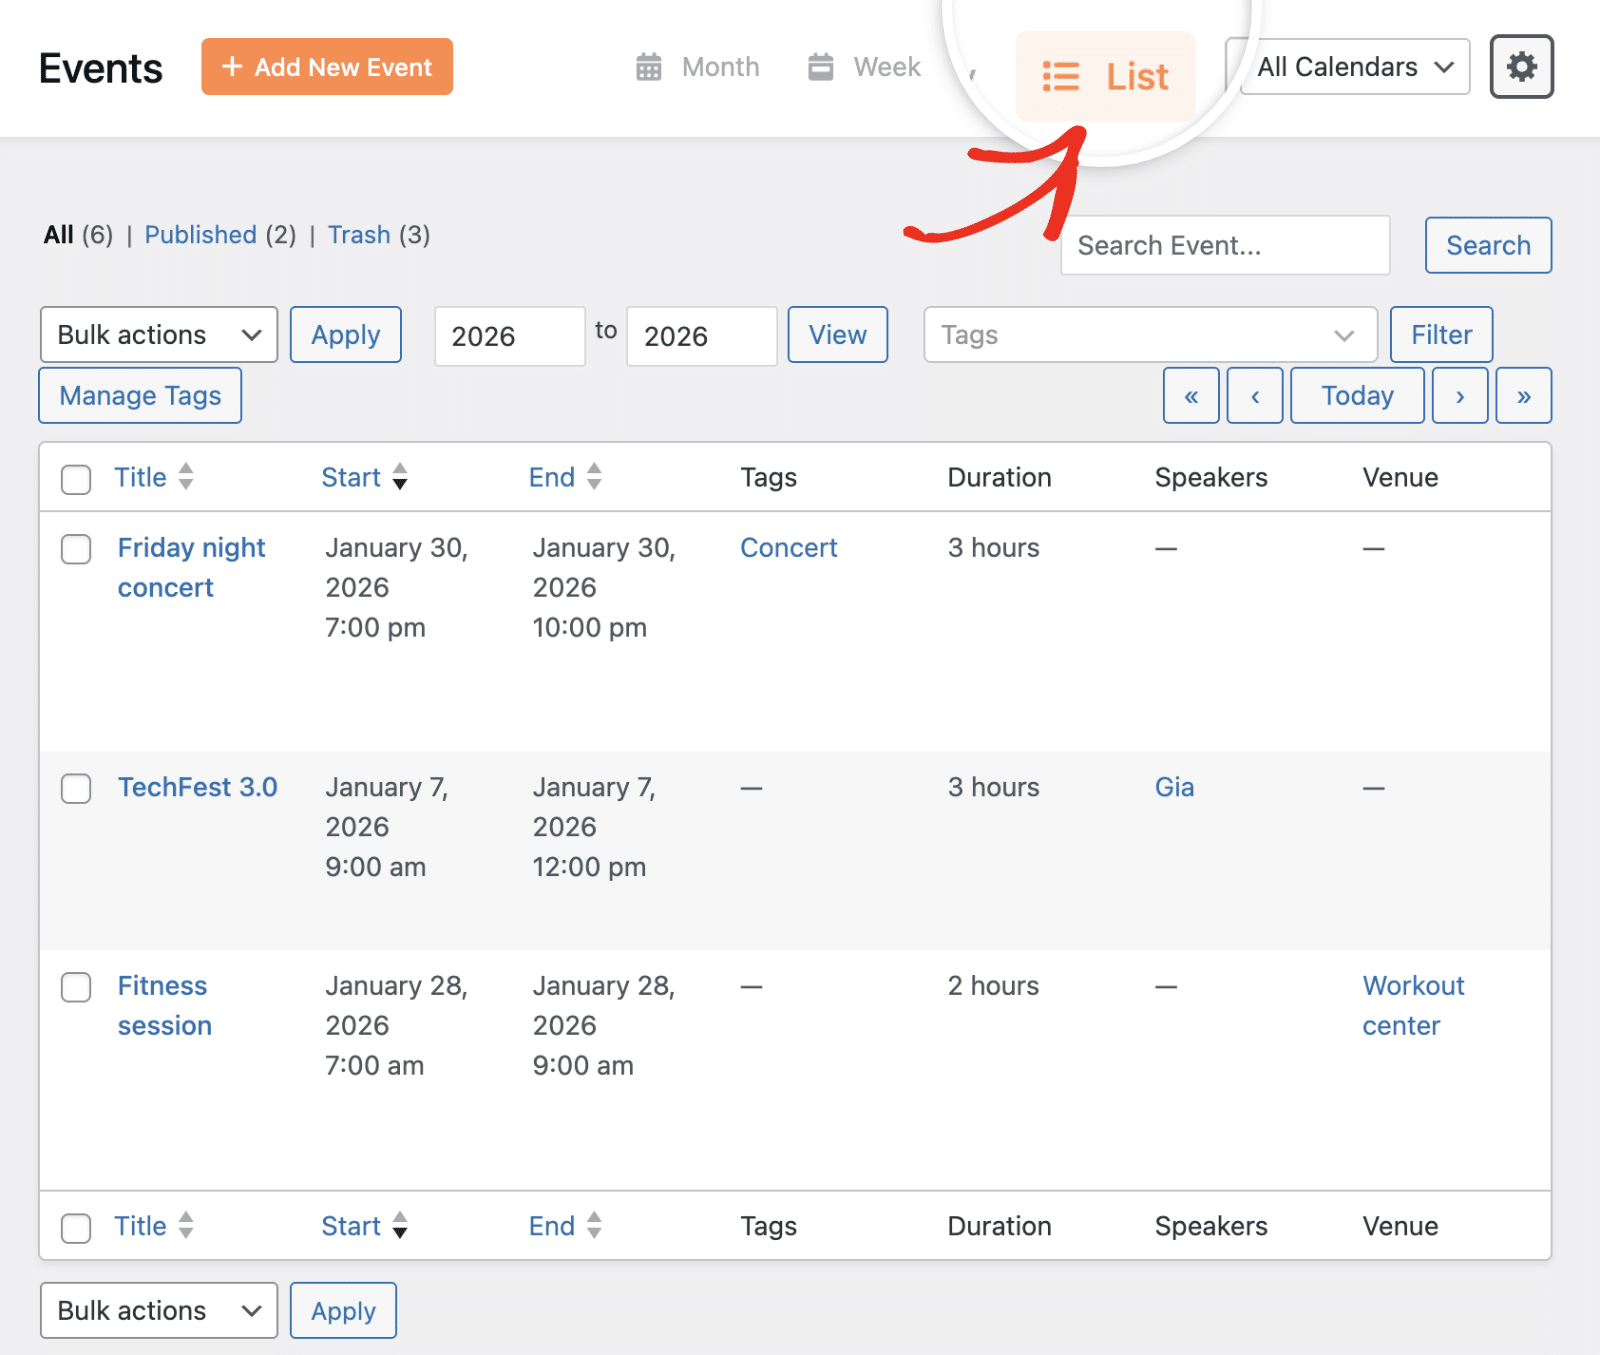
This view is perfect for quickly scanning event details, sorting by different columns, and performing bulk actions on multiple events at once.
Adding New Events
To create a new event, click the + Add New Event button located at the top of the Events screen.
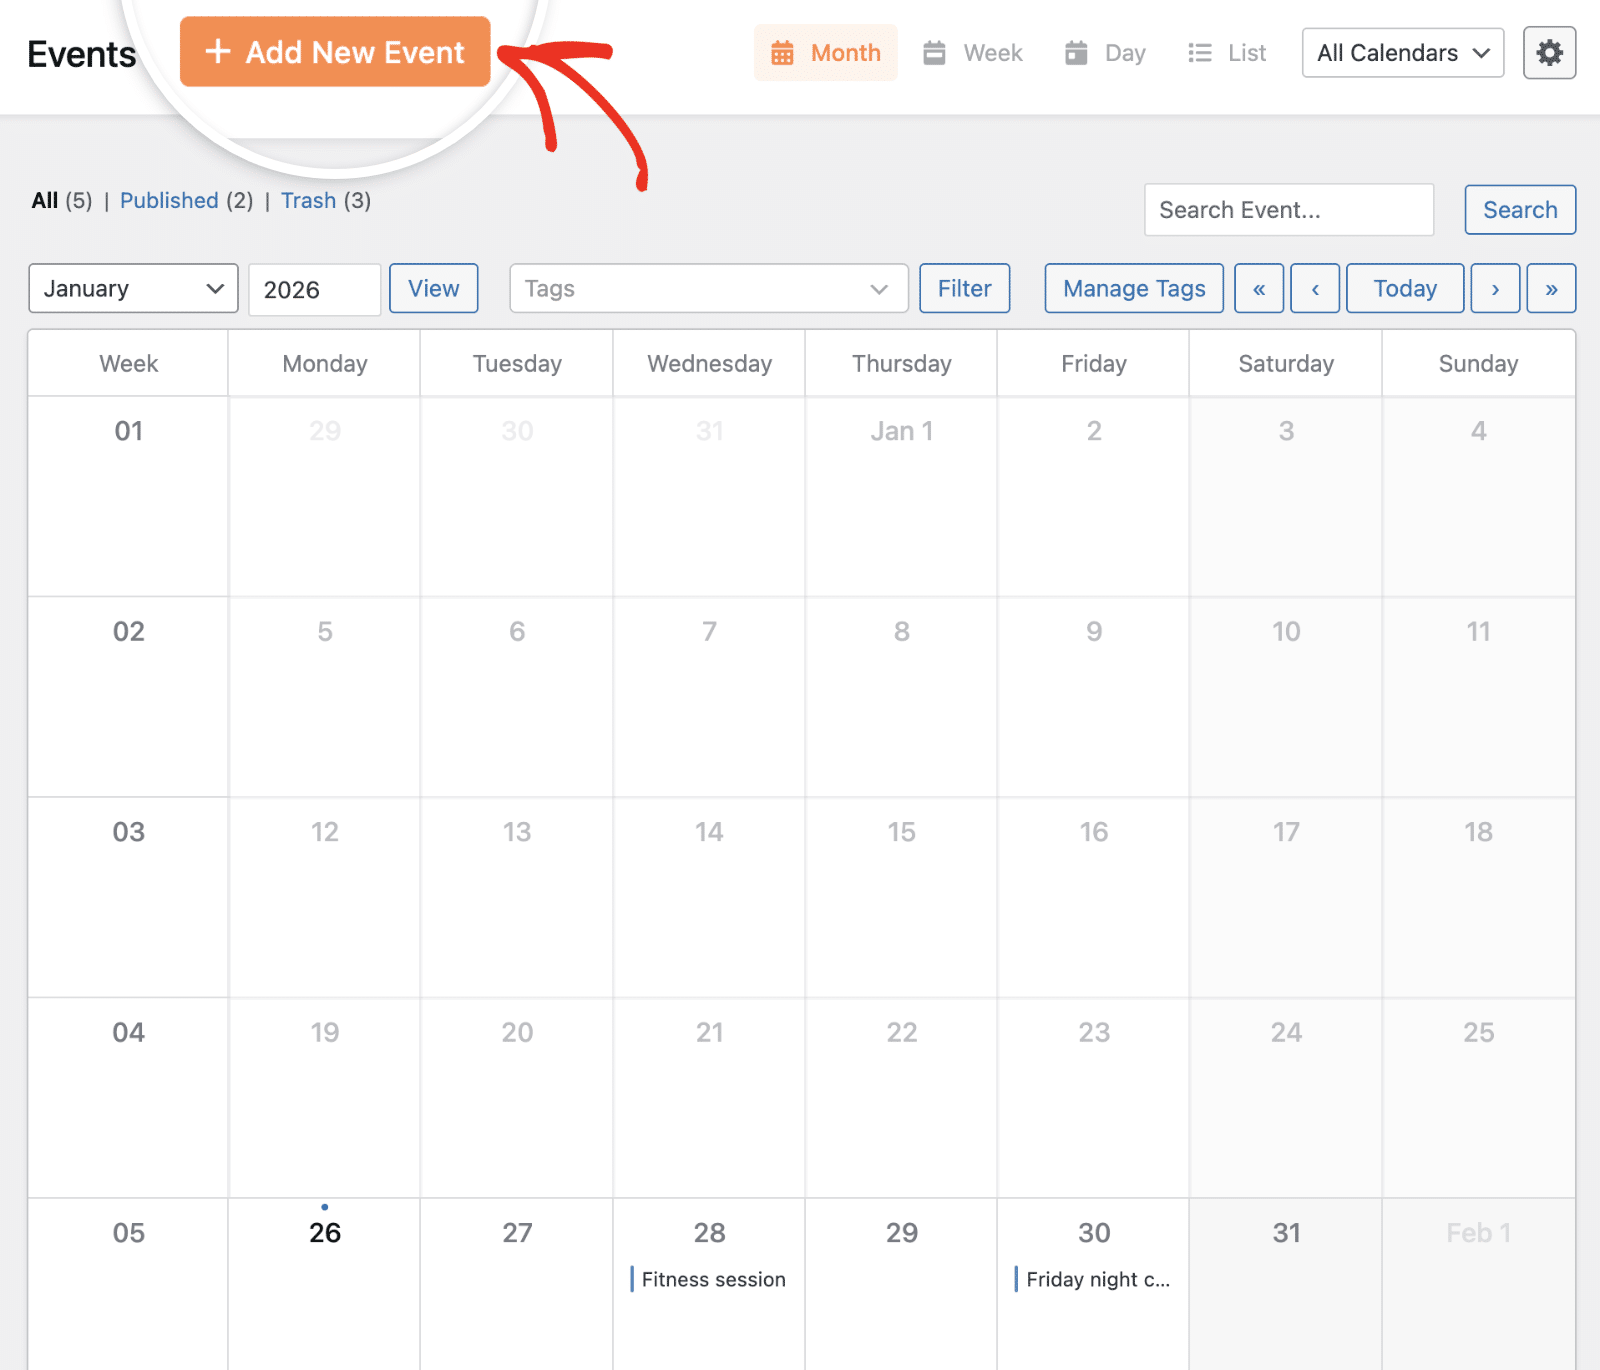
This will redirect you to the event editor, where you can enter all the necessary details for your event.
Viewing Event Details
To view complete information about any event, simply click on it in any calendar view. This will open a popup displaying all relevant details.
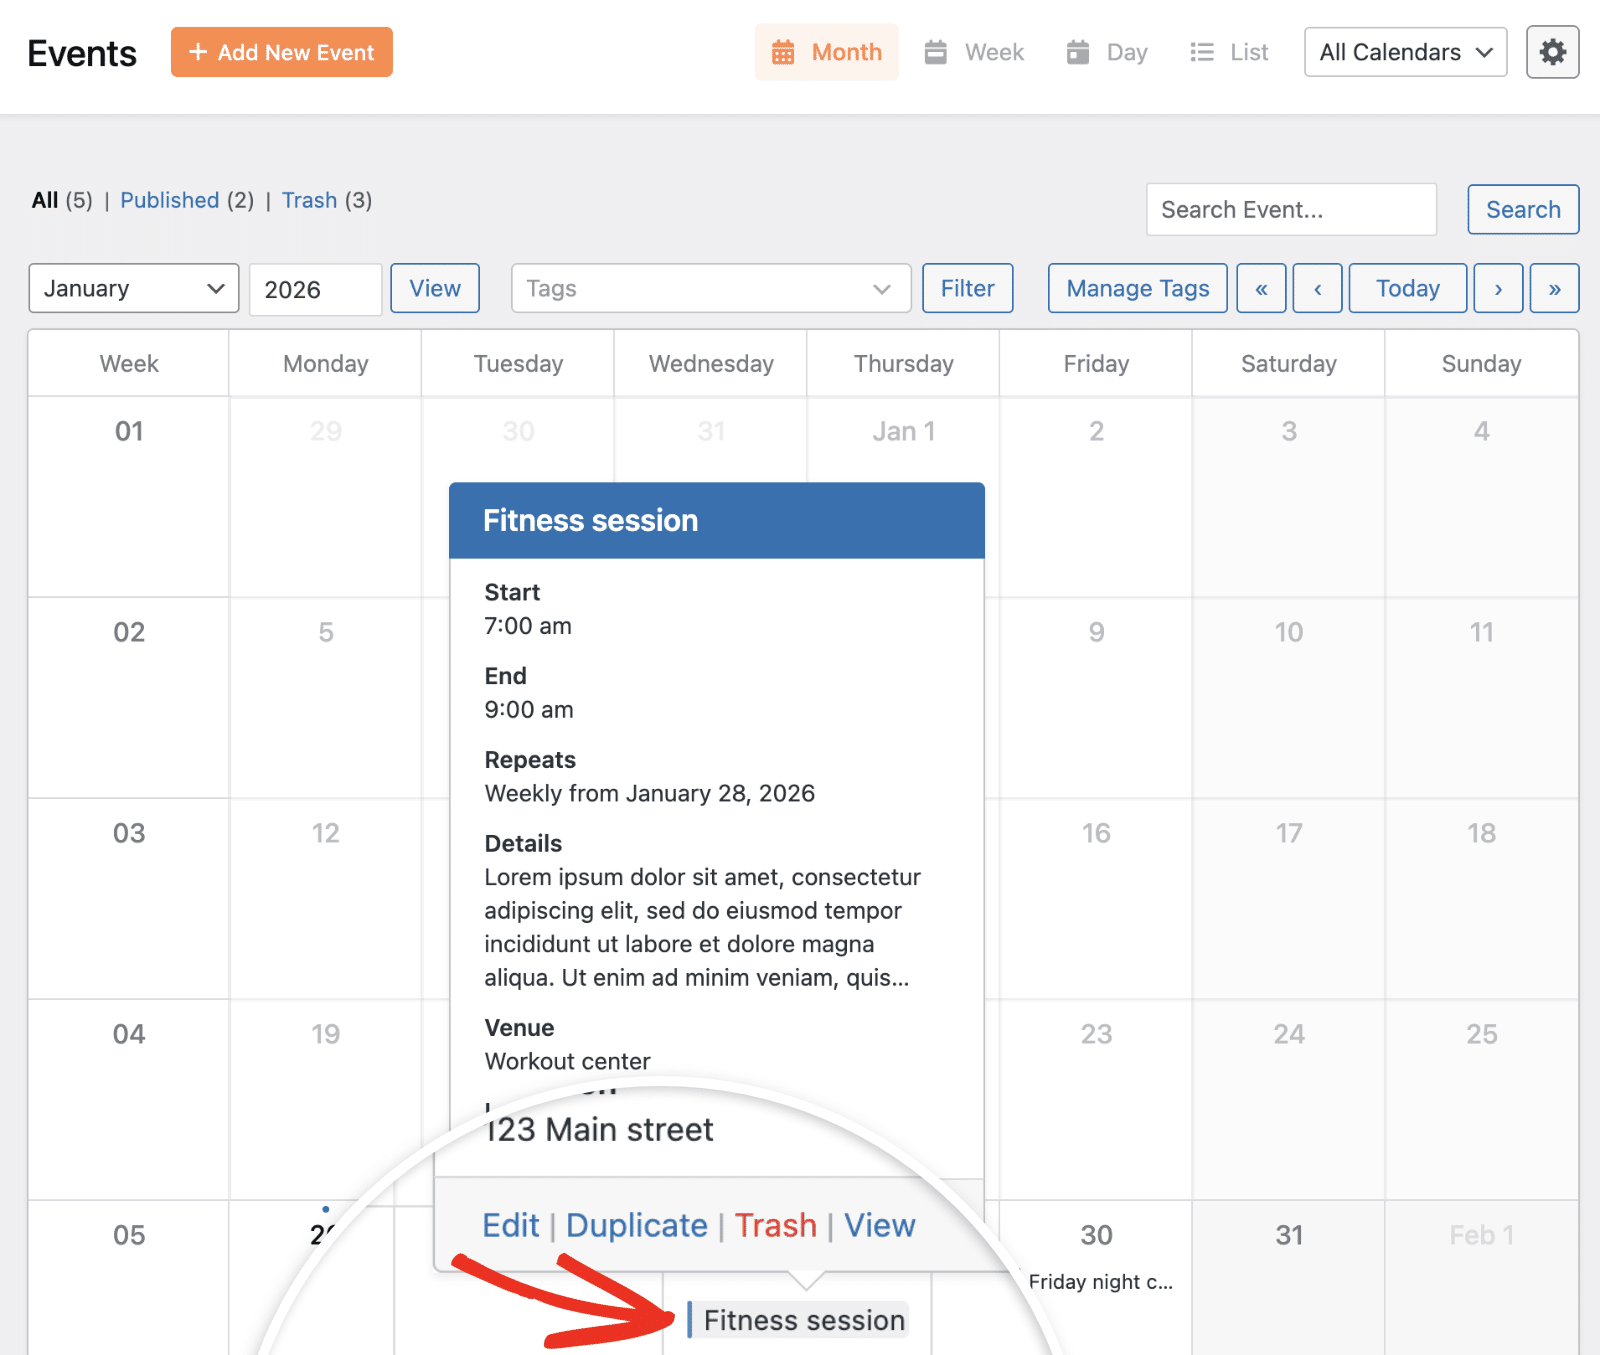
The event popup displays:
- Event title and calendar color indicator
- Start and end date/time
- Recurrence information (if applicable)
- Event details and description
- Venue information and address
- Assigned tags
From this popup, you can quickly access action links to Edit, Duplicate, Trash, or View the full event page.
Editing and Managing Events
Sugar Calendar Events provides multiple ways to edit and manage your events directly from the Events interface.
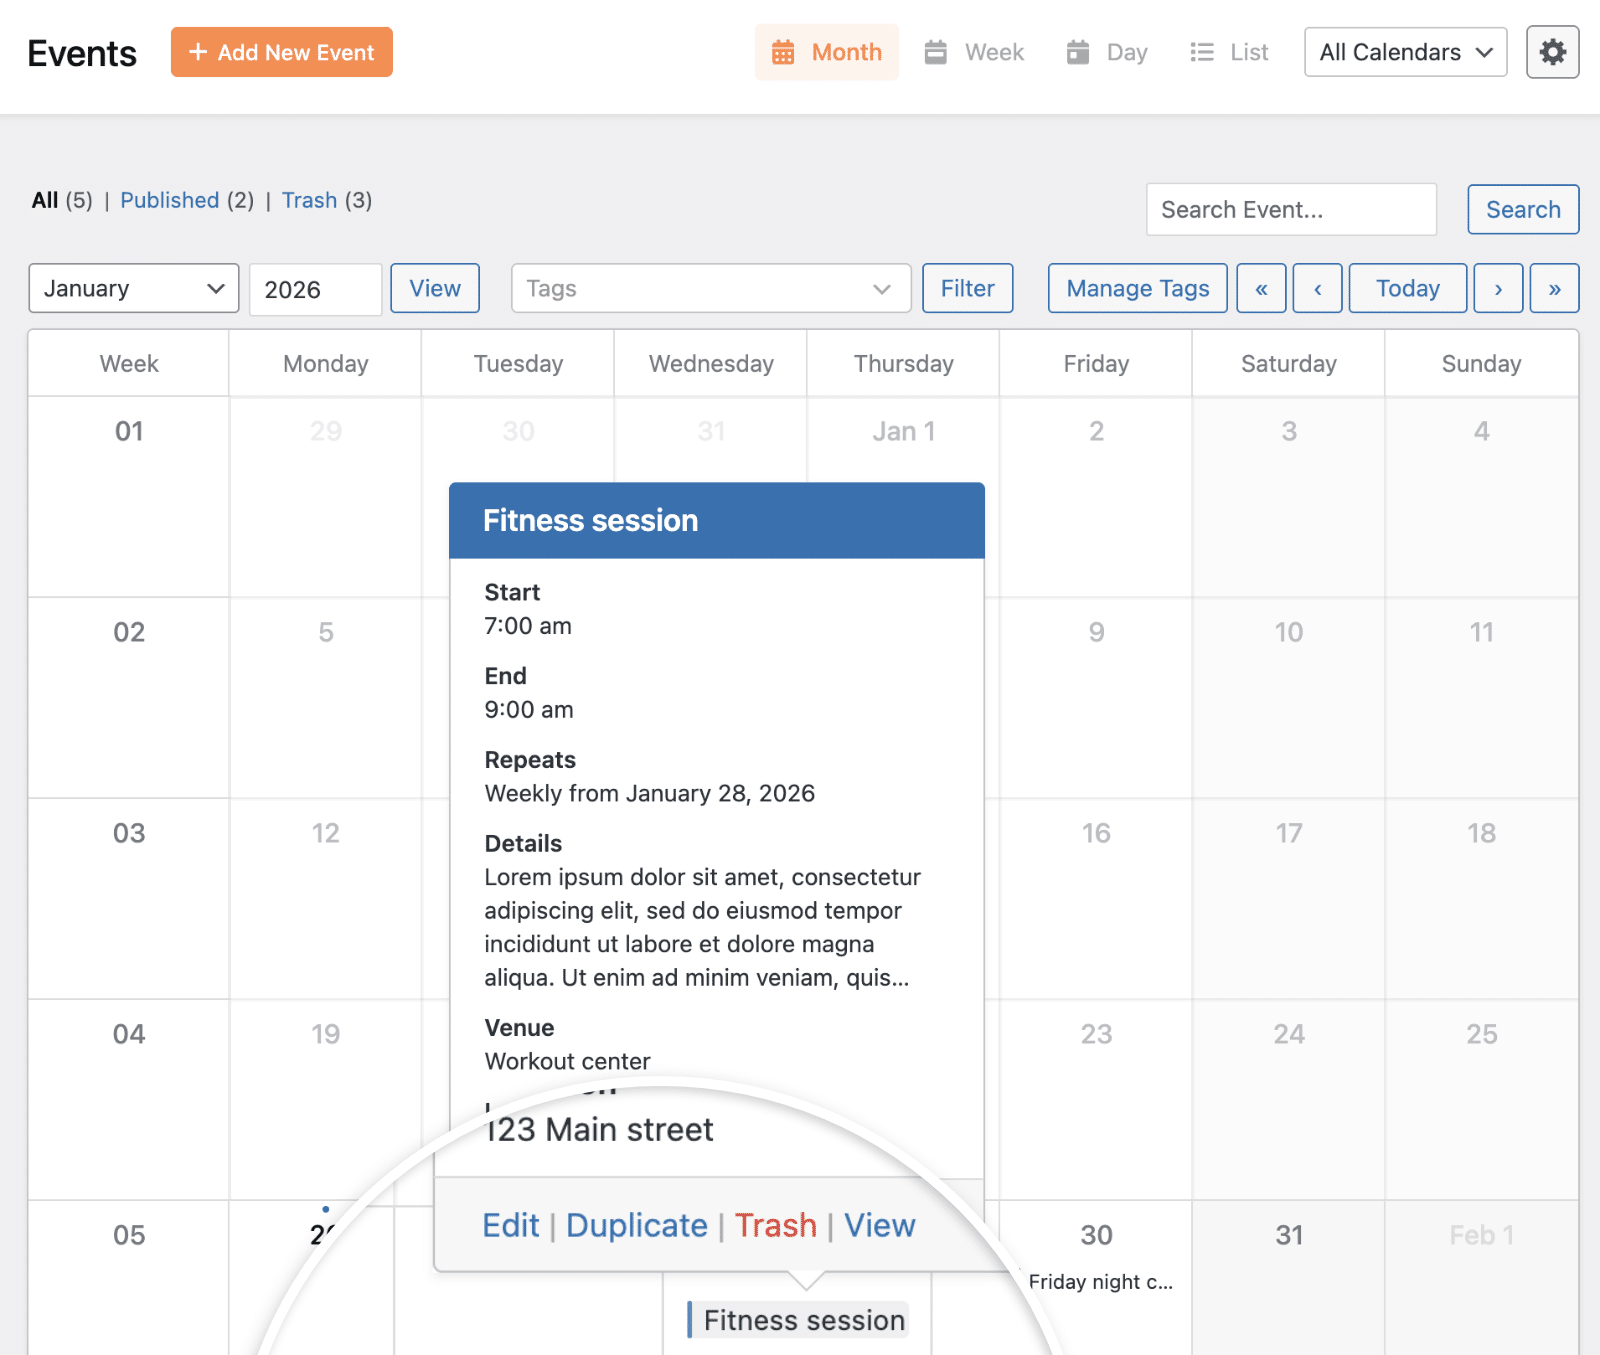
When you click on an event to open its details popup, you’ll see several action links at the bottom:
- Edit – Opens the event editor to modify event details
- Duplicate – Creates a draft copy of the event with all settings
- Trash – Moves the event to trash
- View – Opens the event’s frontend view
In List view, you can also click directly on the event title to open the editor, or hover over an event row to reveal quick action links.
Filtering Events
The Events screen includes powerful filtering options to help you focus on specific event types.
Filtering by Status
At the top of the Events screen, you’ll see status filters showing the count for each status type:
- All – Displays all events regardless of status
- Published – Shows only published events
- Draft – Shows unpublished events
- Trash – Shows events that have been moved to trash

Click any status to filter the calendar to show only events with that status.
Filtering by Tags
Use the Tags dropdown to filter events by specific tags you’ve assigned to your events.
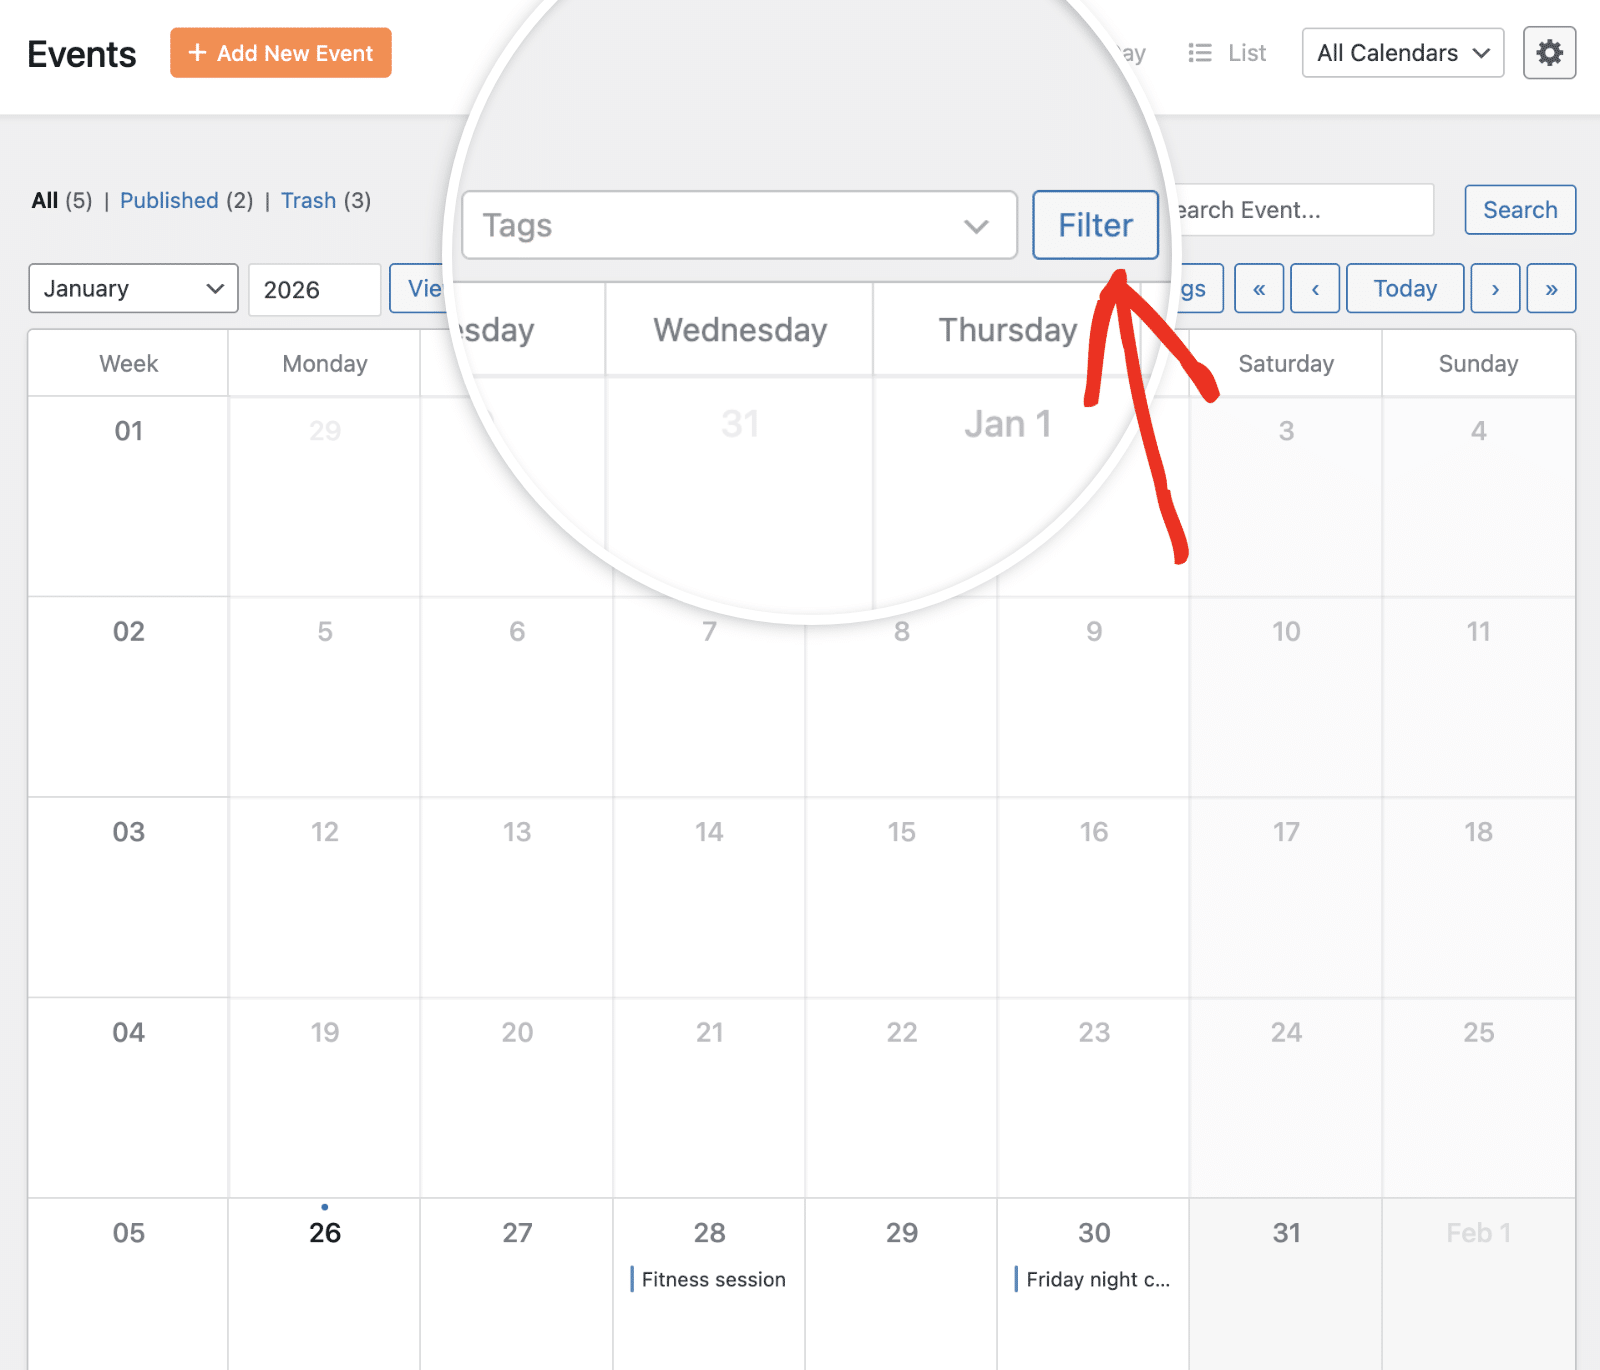
After selecting a tag, click the Filter button to apply it. This is particularly useful if you organize events by tags such as concerts, workshops, or conferences.
Searching for Events
To quickly locate a specific event, use the search field located in the top-right area of the Events screen.
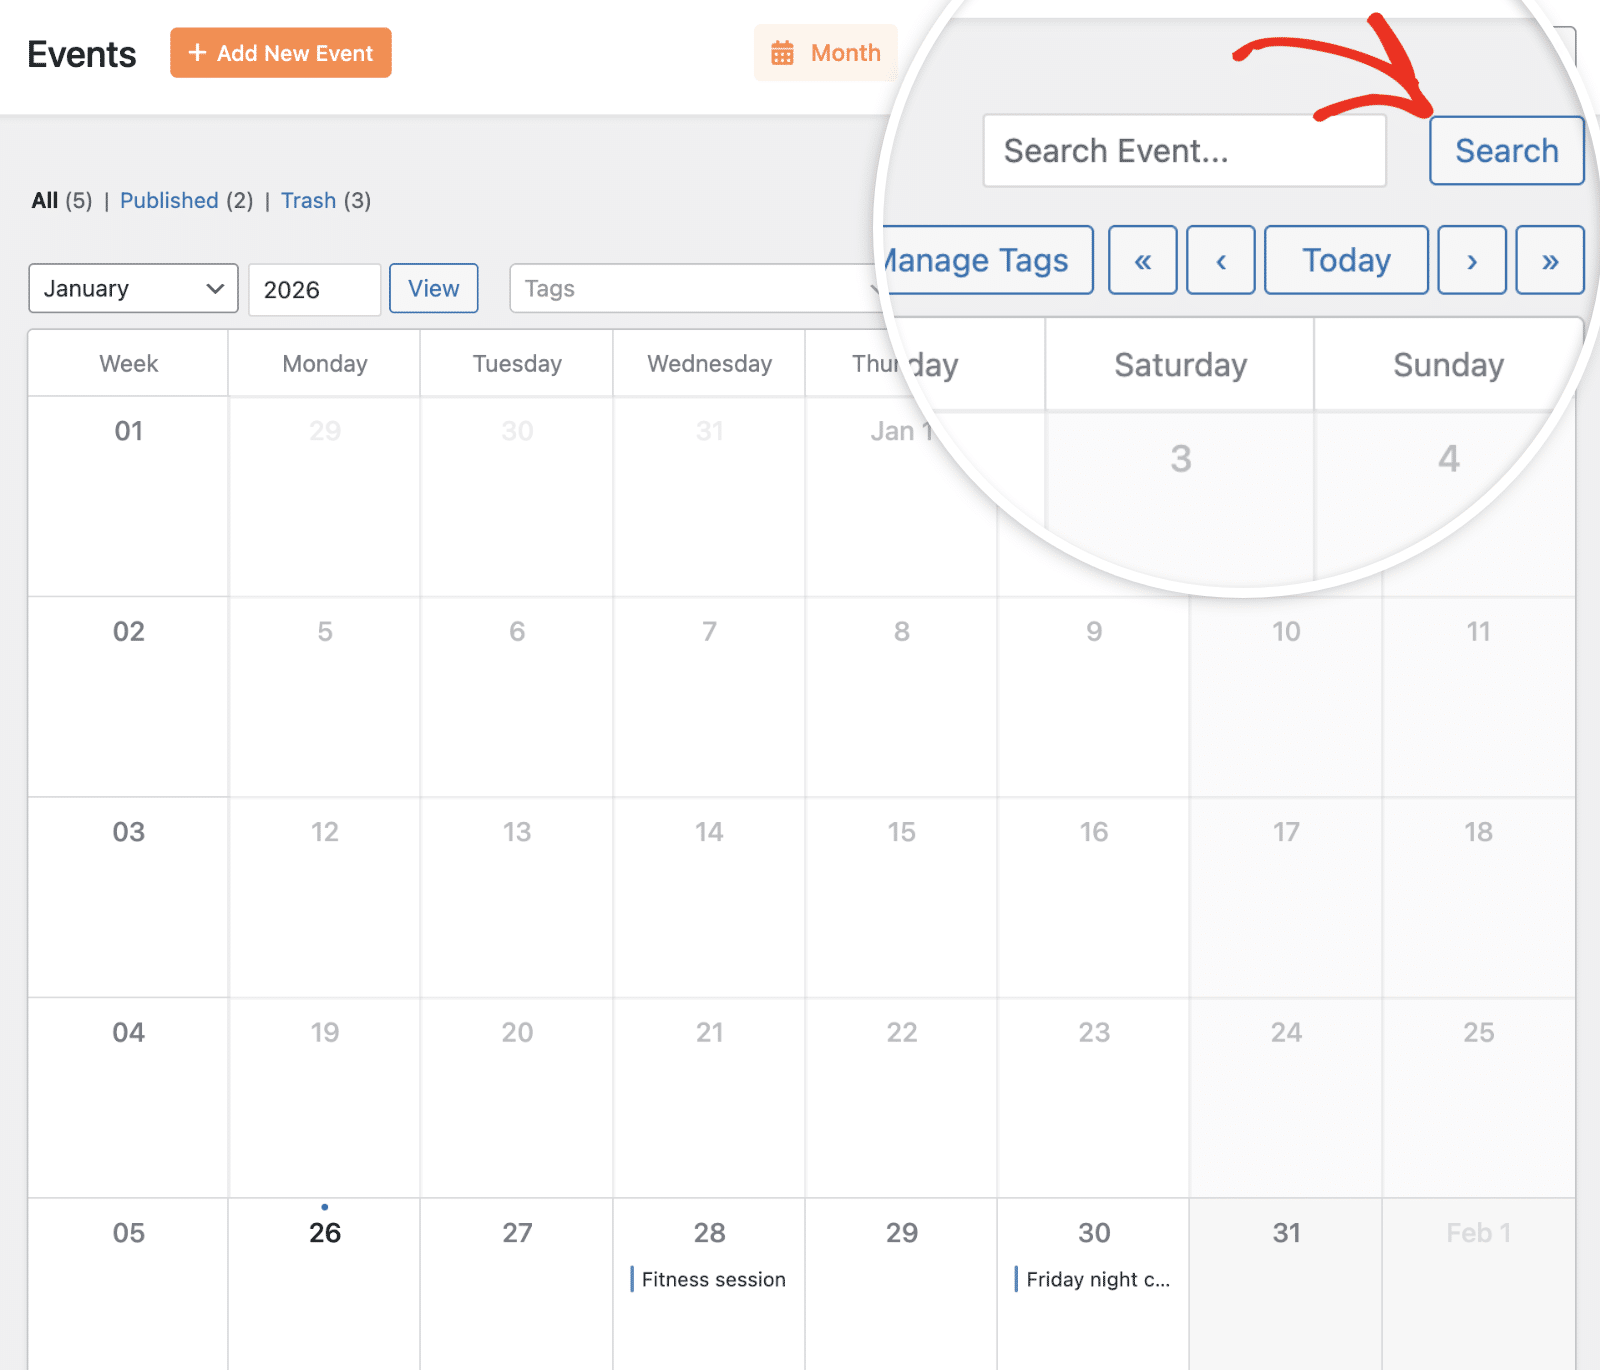
Enter an event title, tag, or other relevant information in the search field, then click Search to filter the results.
This instantly narrows down your events to match your search query.
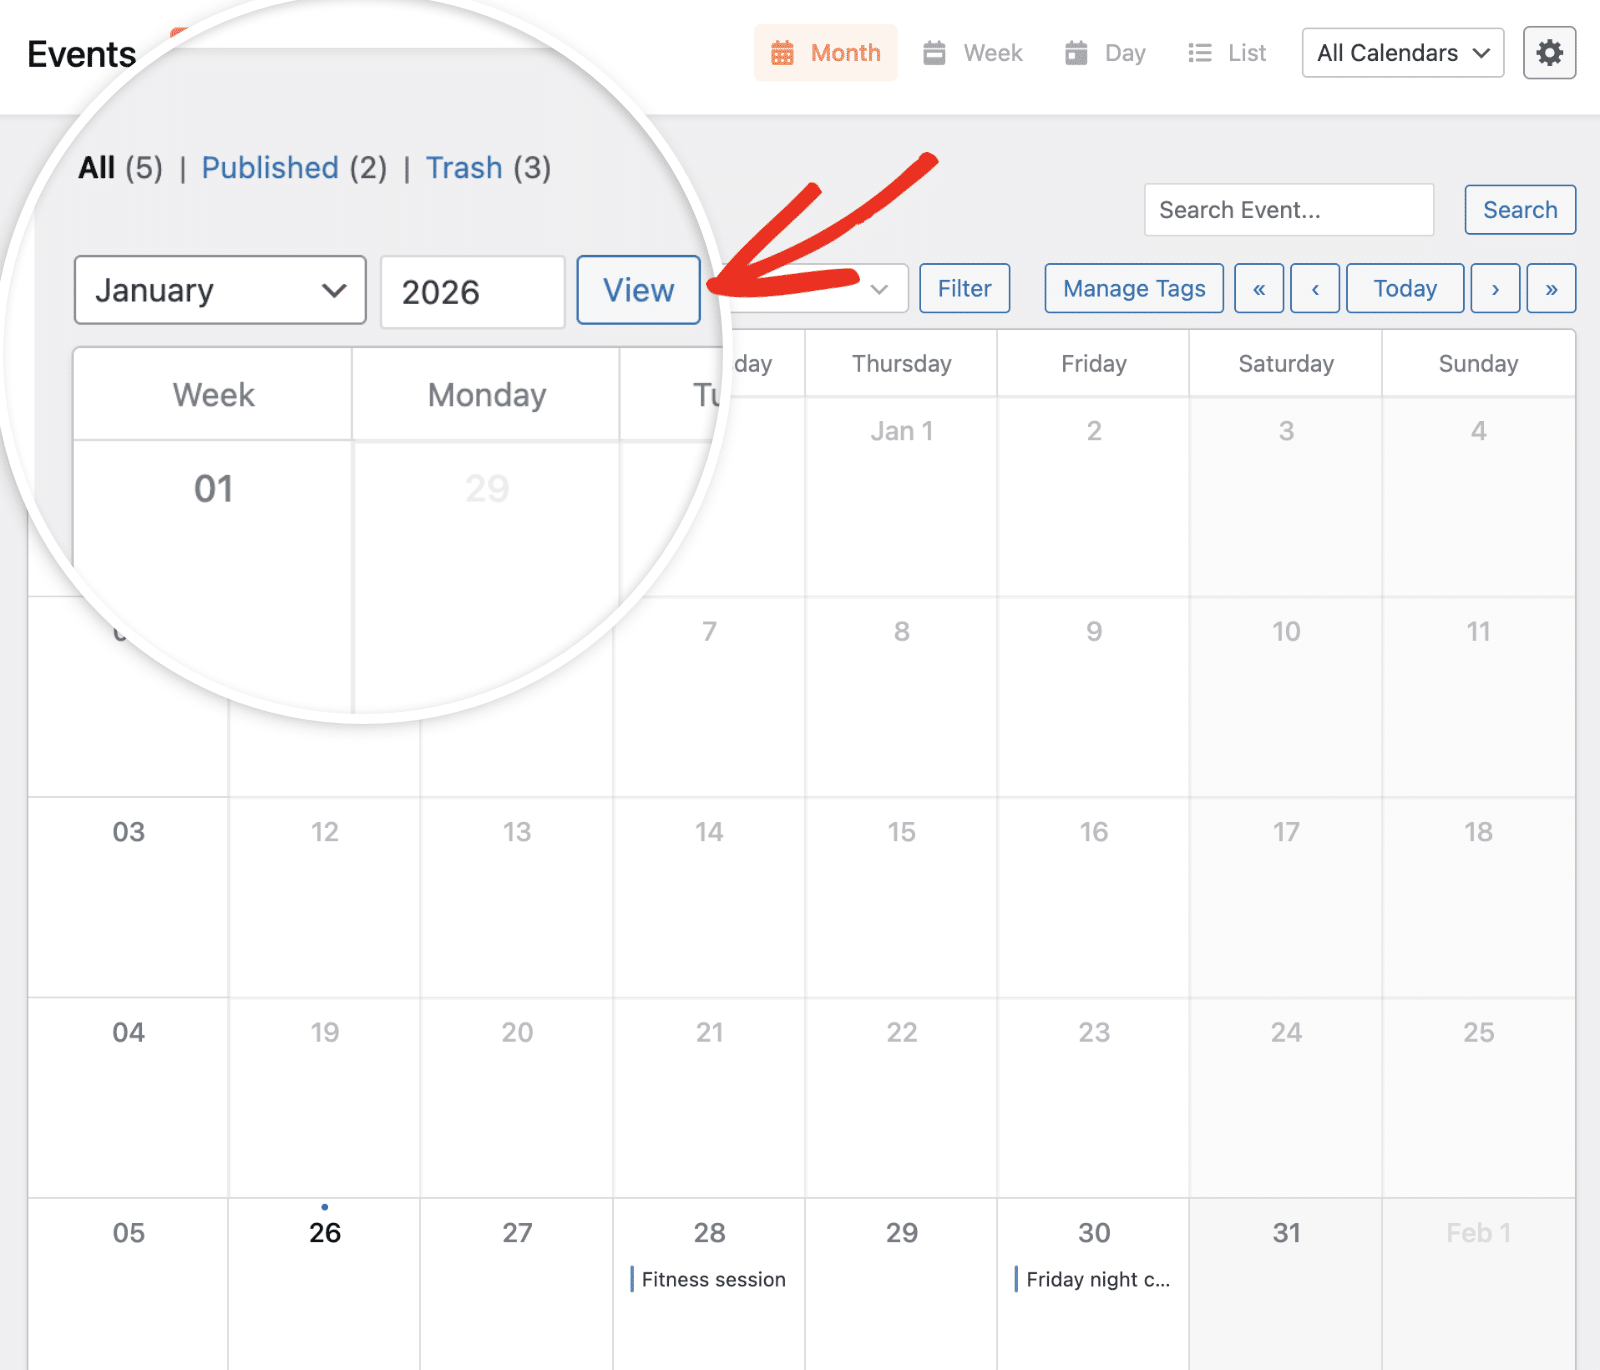
Navigating Between Dates
Sugar Calendar provides multiple ways to navigate to different time periods and dates.
Use the month dropdown and year field to select a specific month and year. After making your selection, click the View button to jump directly to that date.
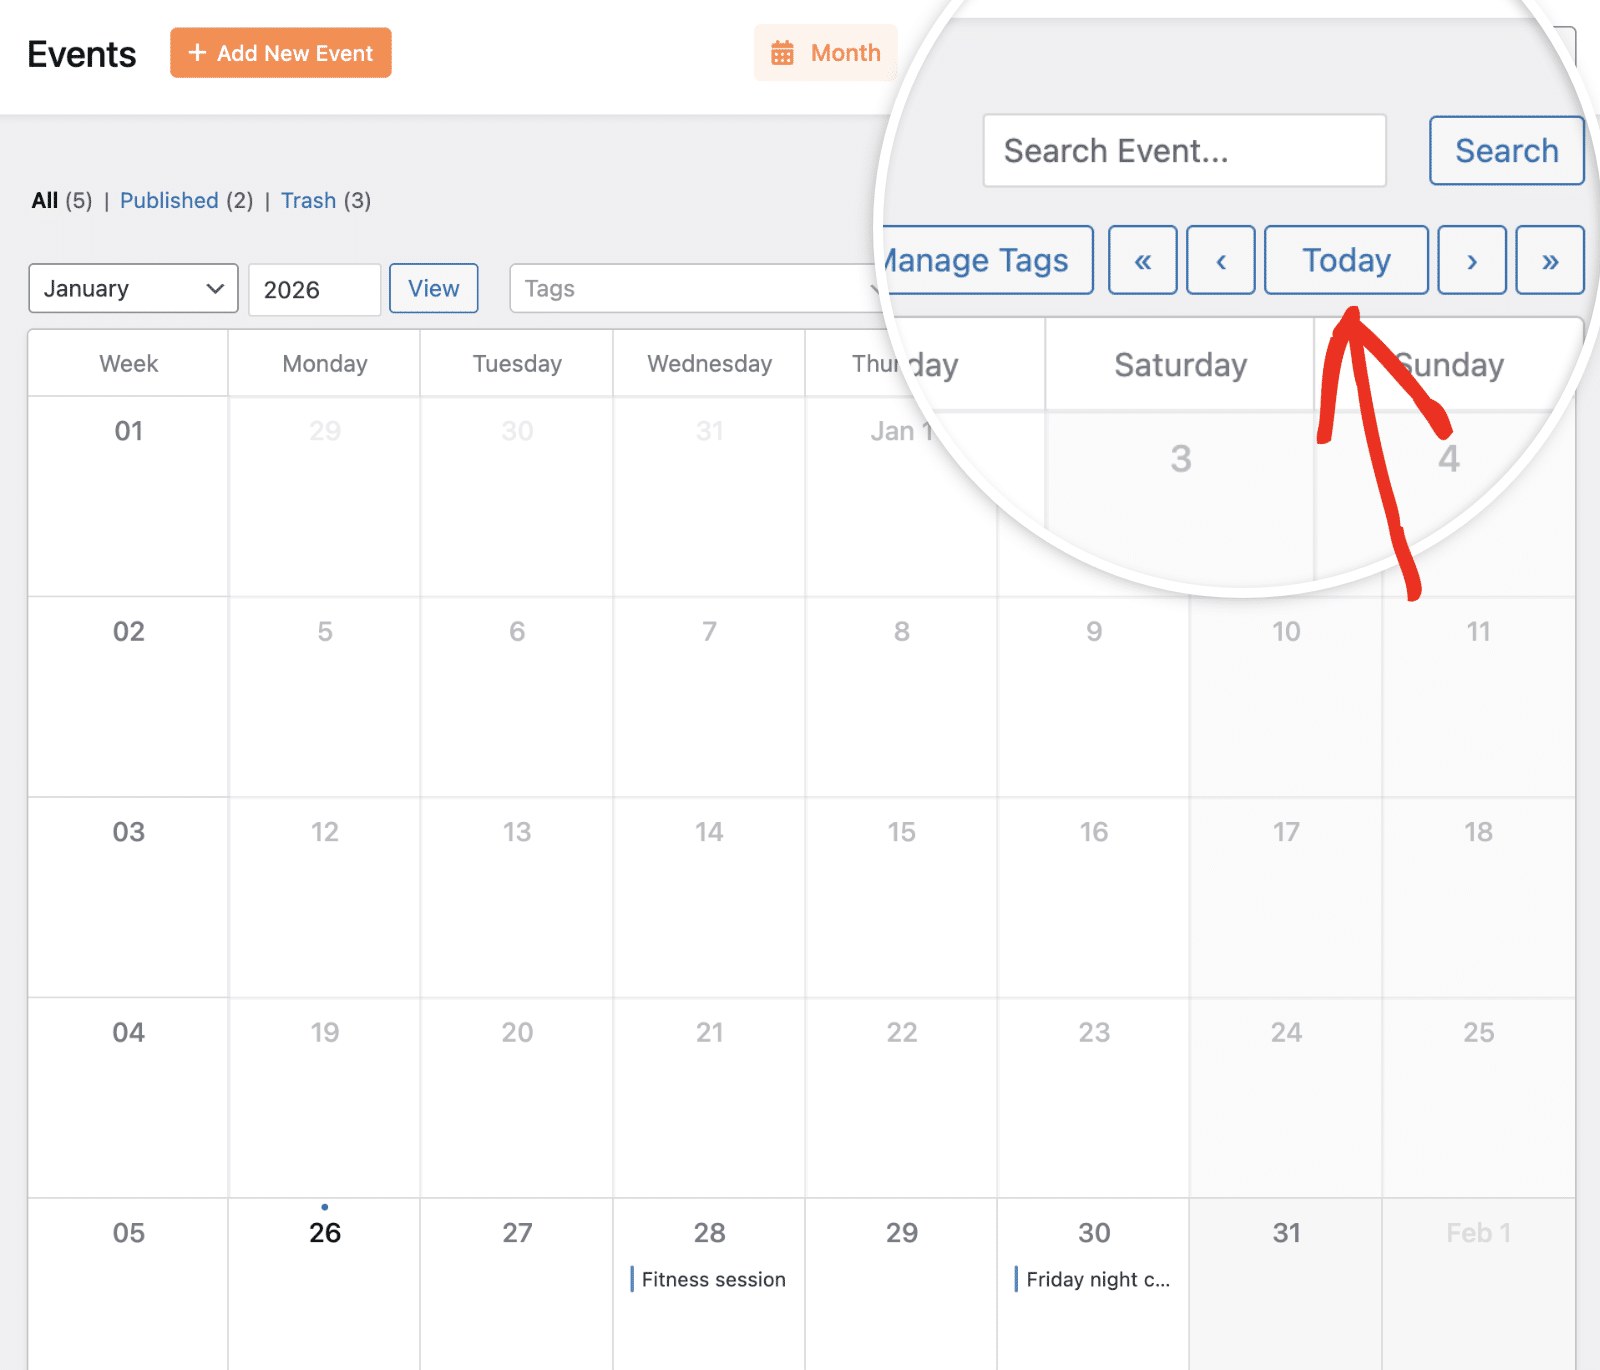
The navigation arrows provide quick access to move through your calendar:
- « – Jump backward to the previous period
- ‹ – Move back one period (month, week, or day depending on your view)
- Today – Return to the current date
- › – Move forward one period
- » – Jump forward to the next period
Managing Multiple Calendars
If you’ve created multiple calendars to organize different types of events, you can filter which calendars are displayed using the All Calendars dropdown in the top-right corner.
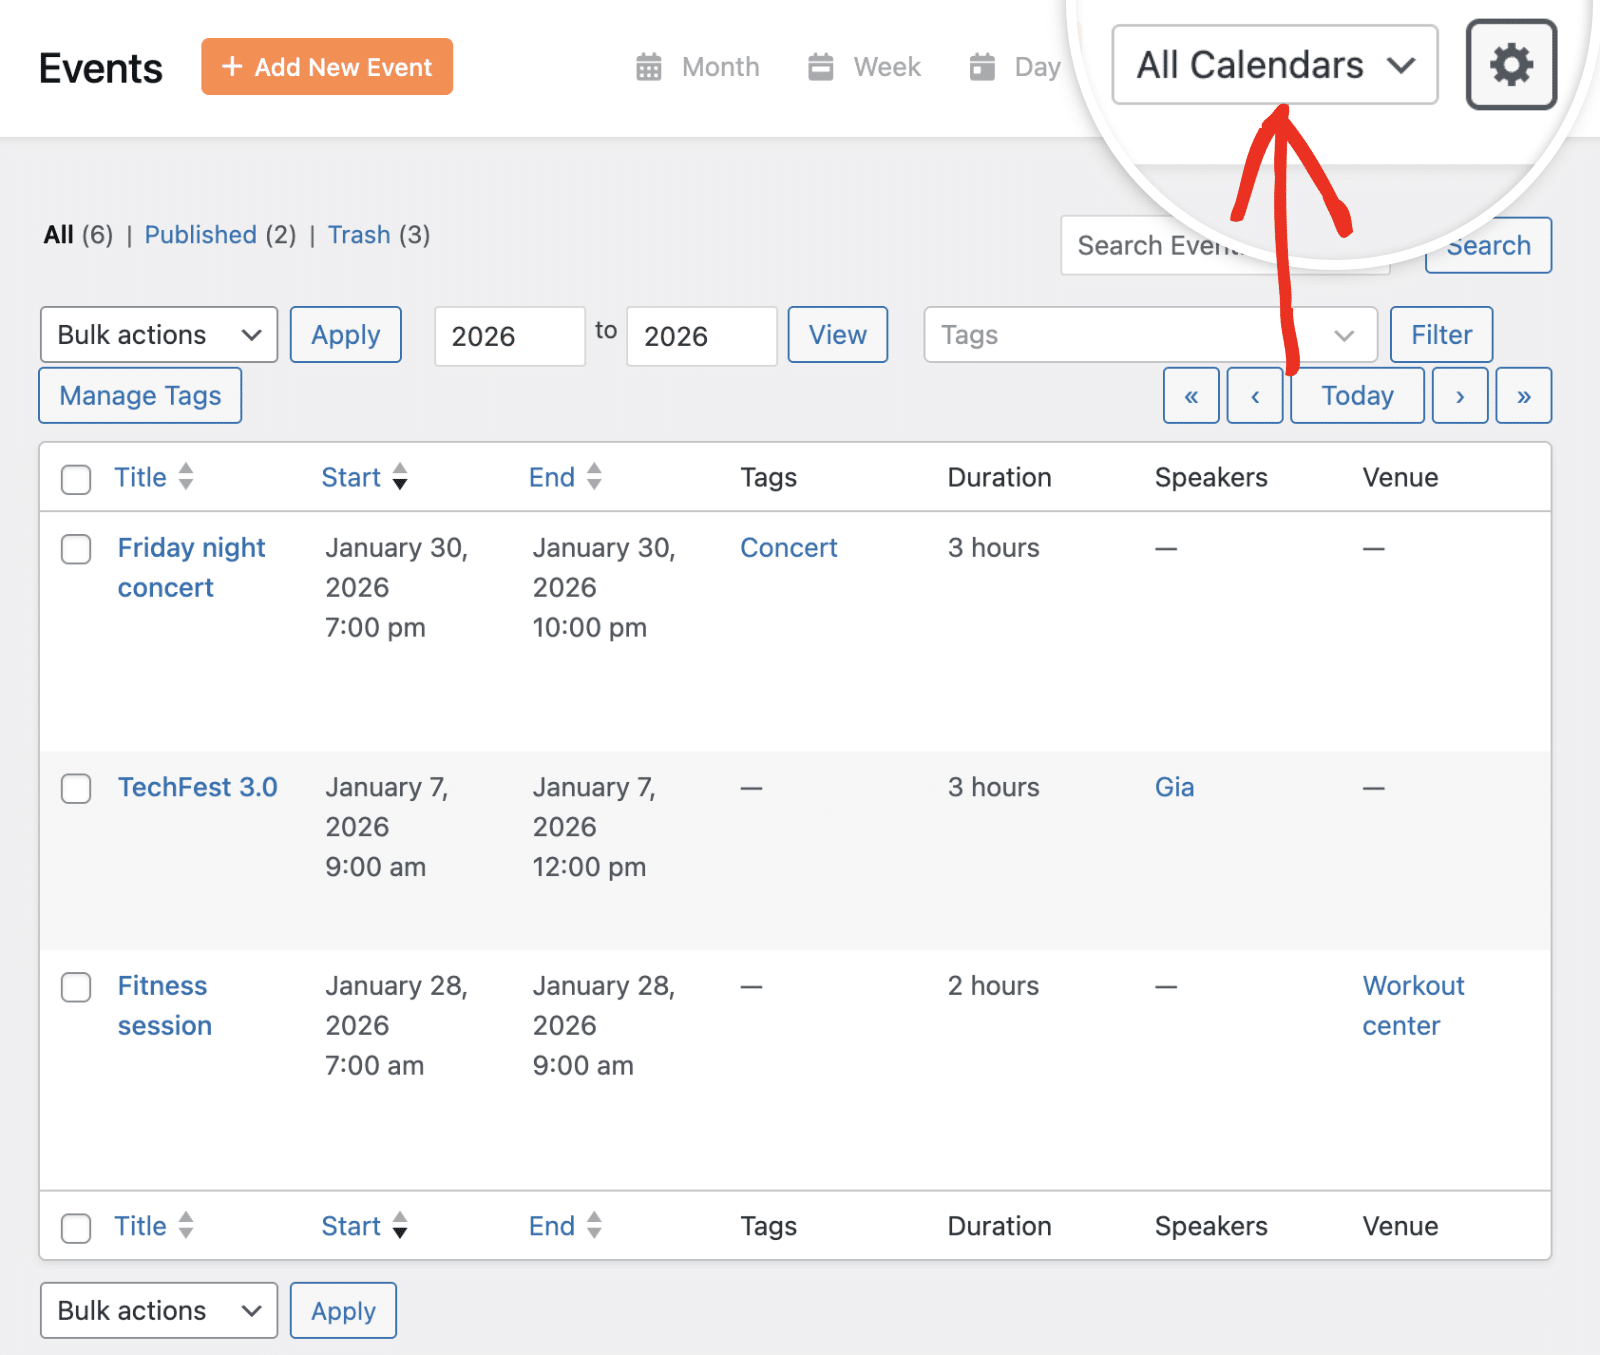
Click the dropdown to see all available calendars and select the one you want to view. This filters the Events screen to show only events from that specific calendar.
Customizing Display Settings
Click the settings (gear) icon in the top-right corner to access display customization options for your Events screen.
Adjusting Column Visibility
In the Columns section, you can toggle which information columns appear in List view. Available columns include:
- Title
- Start
- End
- Tags
- Duration
- Repeats
- Attendees
- Speakers
- Venue
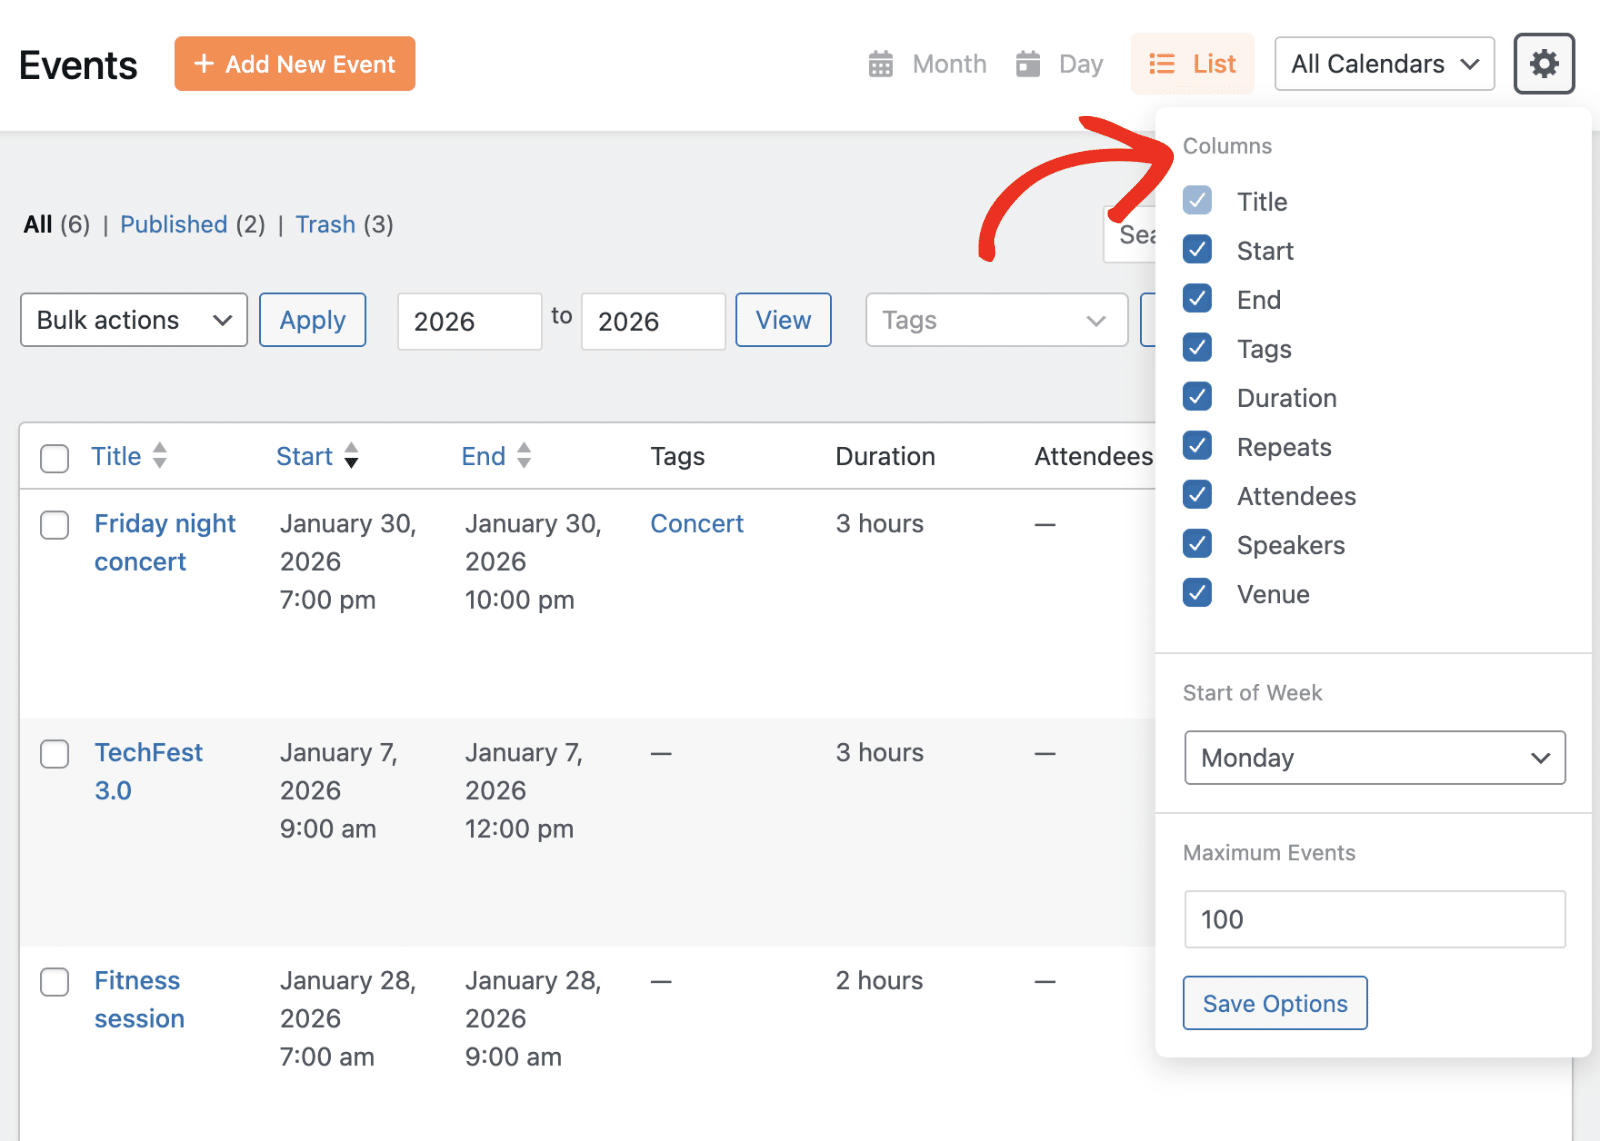
Check or uncheck the boxes to show or hide specific columns based on the information that’s most important to you.
Setting Start of Week
Use the Start of Week dropdown to choose which day your calendar weeks should begin on.
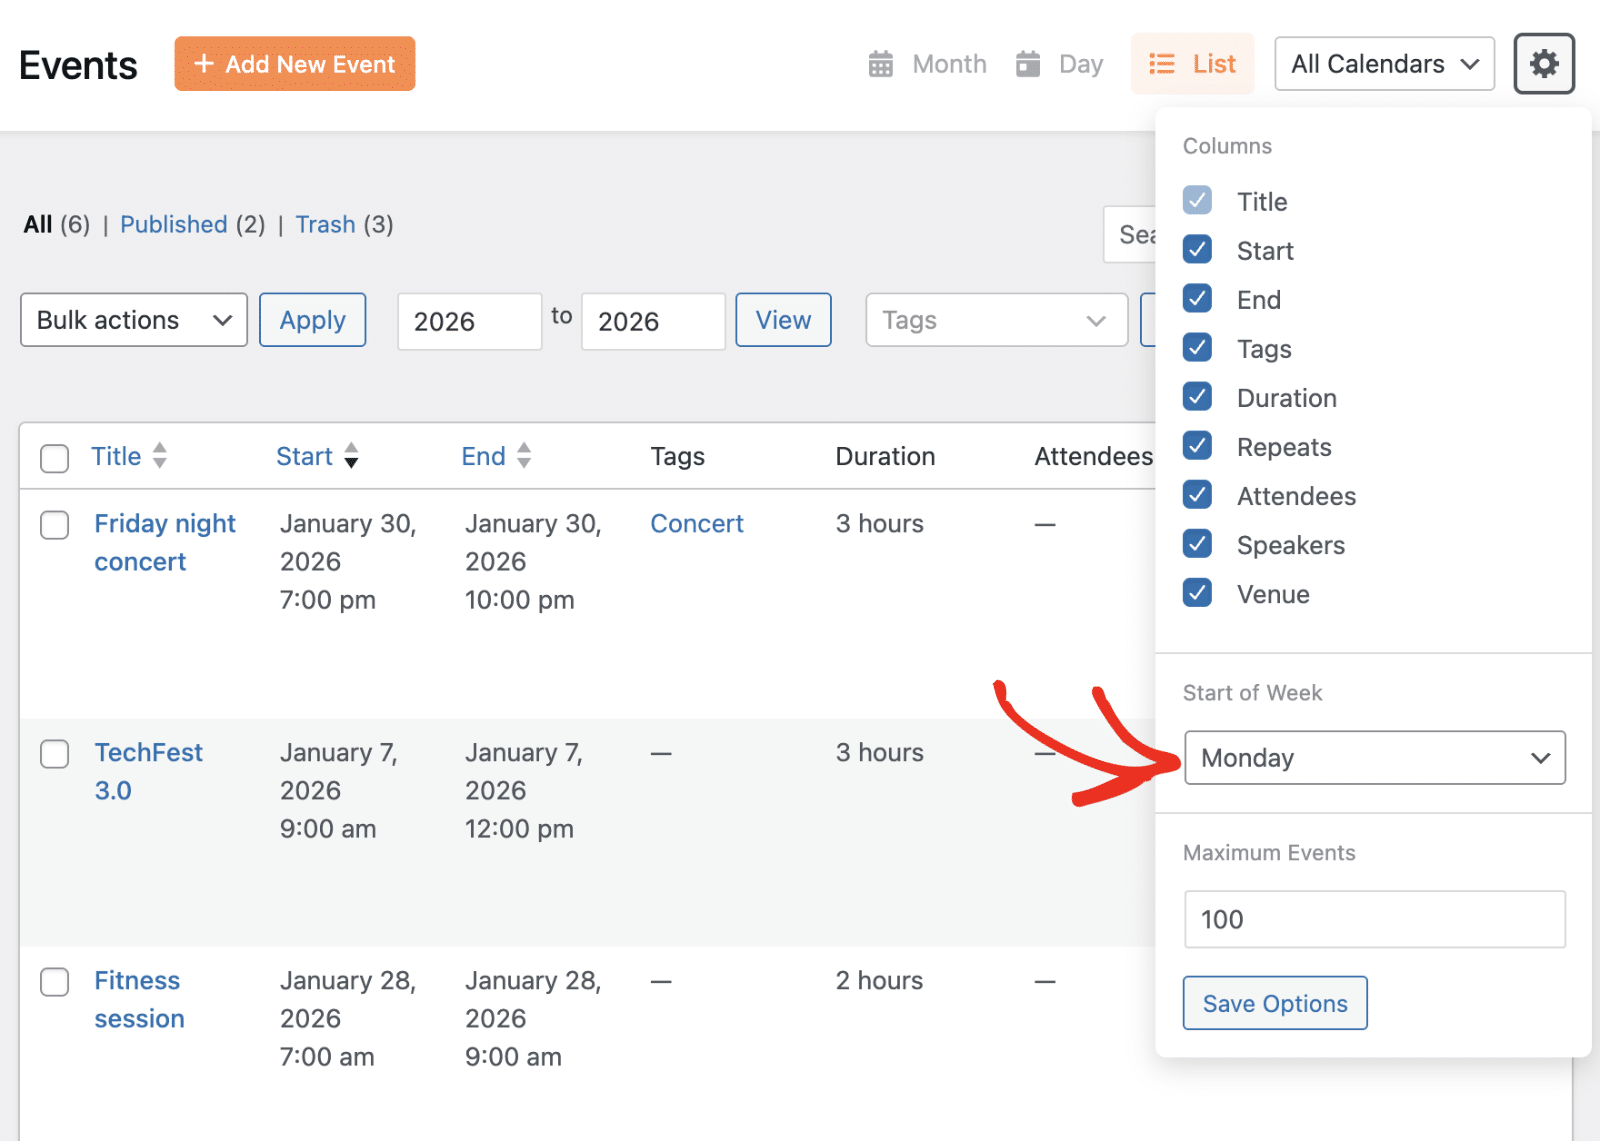
This is particularly useful for matching your calendar to your organization’s schedule or regional preferences.
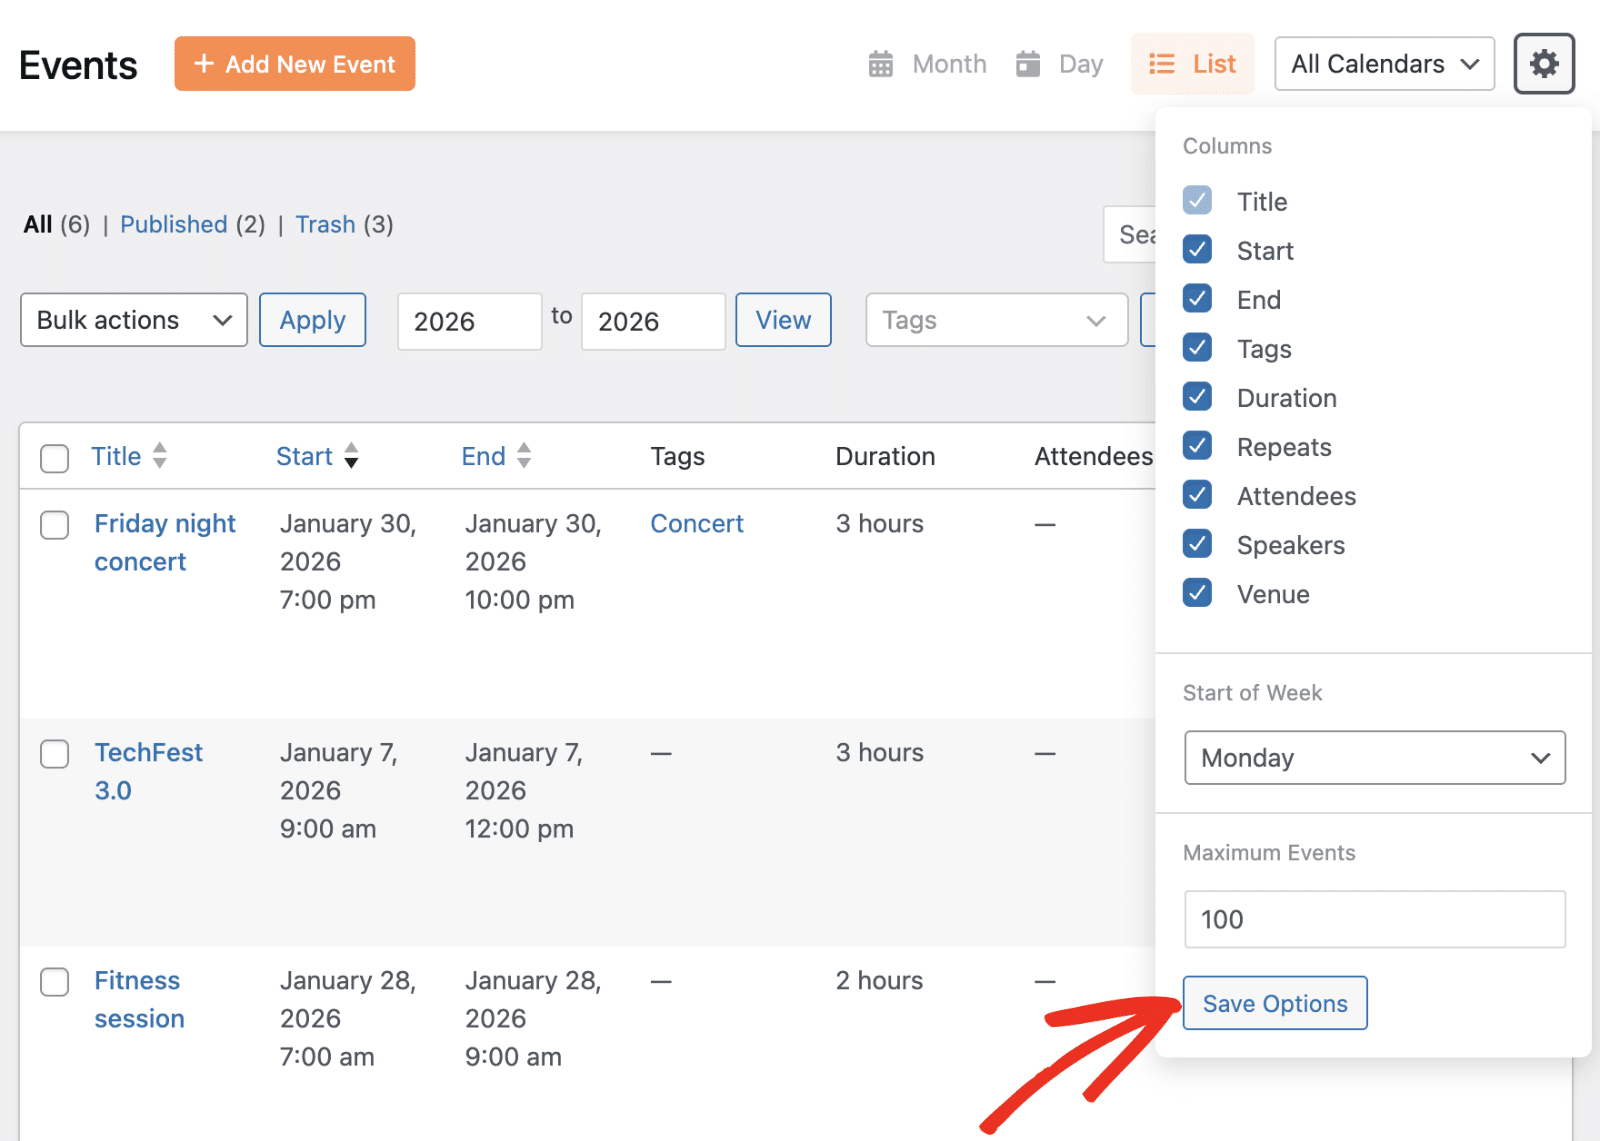
Maximum Events Display
The Maximum Events field lets you control how many events are displayed at once in your calendar views.
Enter a number to set the limit. This helps manage calendar performance when you have a large number of events.
After making any changes to display settings, click the Save Options button to apply your preferences.
Using Bulk Actions
In List view, you can perform actions on multiple events simultaneously using the bulk actions feature.
To use bulk actions:
- Check the boxes next to the events you want to manage
- Select an action from the Bulk actions dropdown
- Click the Apply button

This is an efficient way to trash, edit tags, or perform other actions on multiple events at once.
Managing Trashed Events
When you move events to trash, they’re not permanently deleted immediately. To view trashed events, click the Trash link at the top of the Events screen.
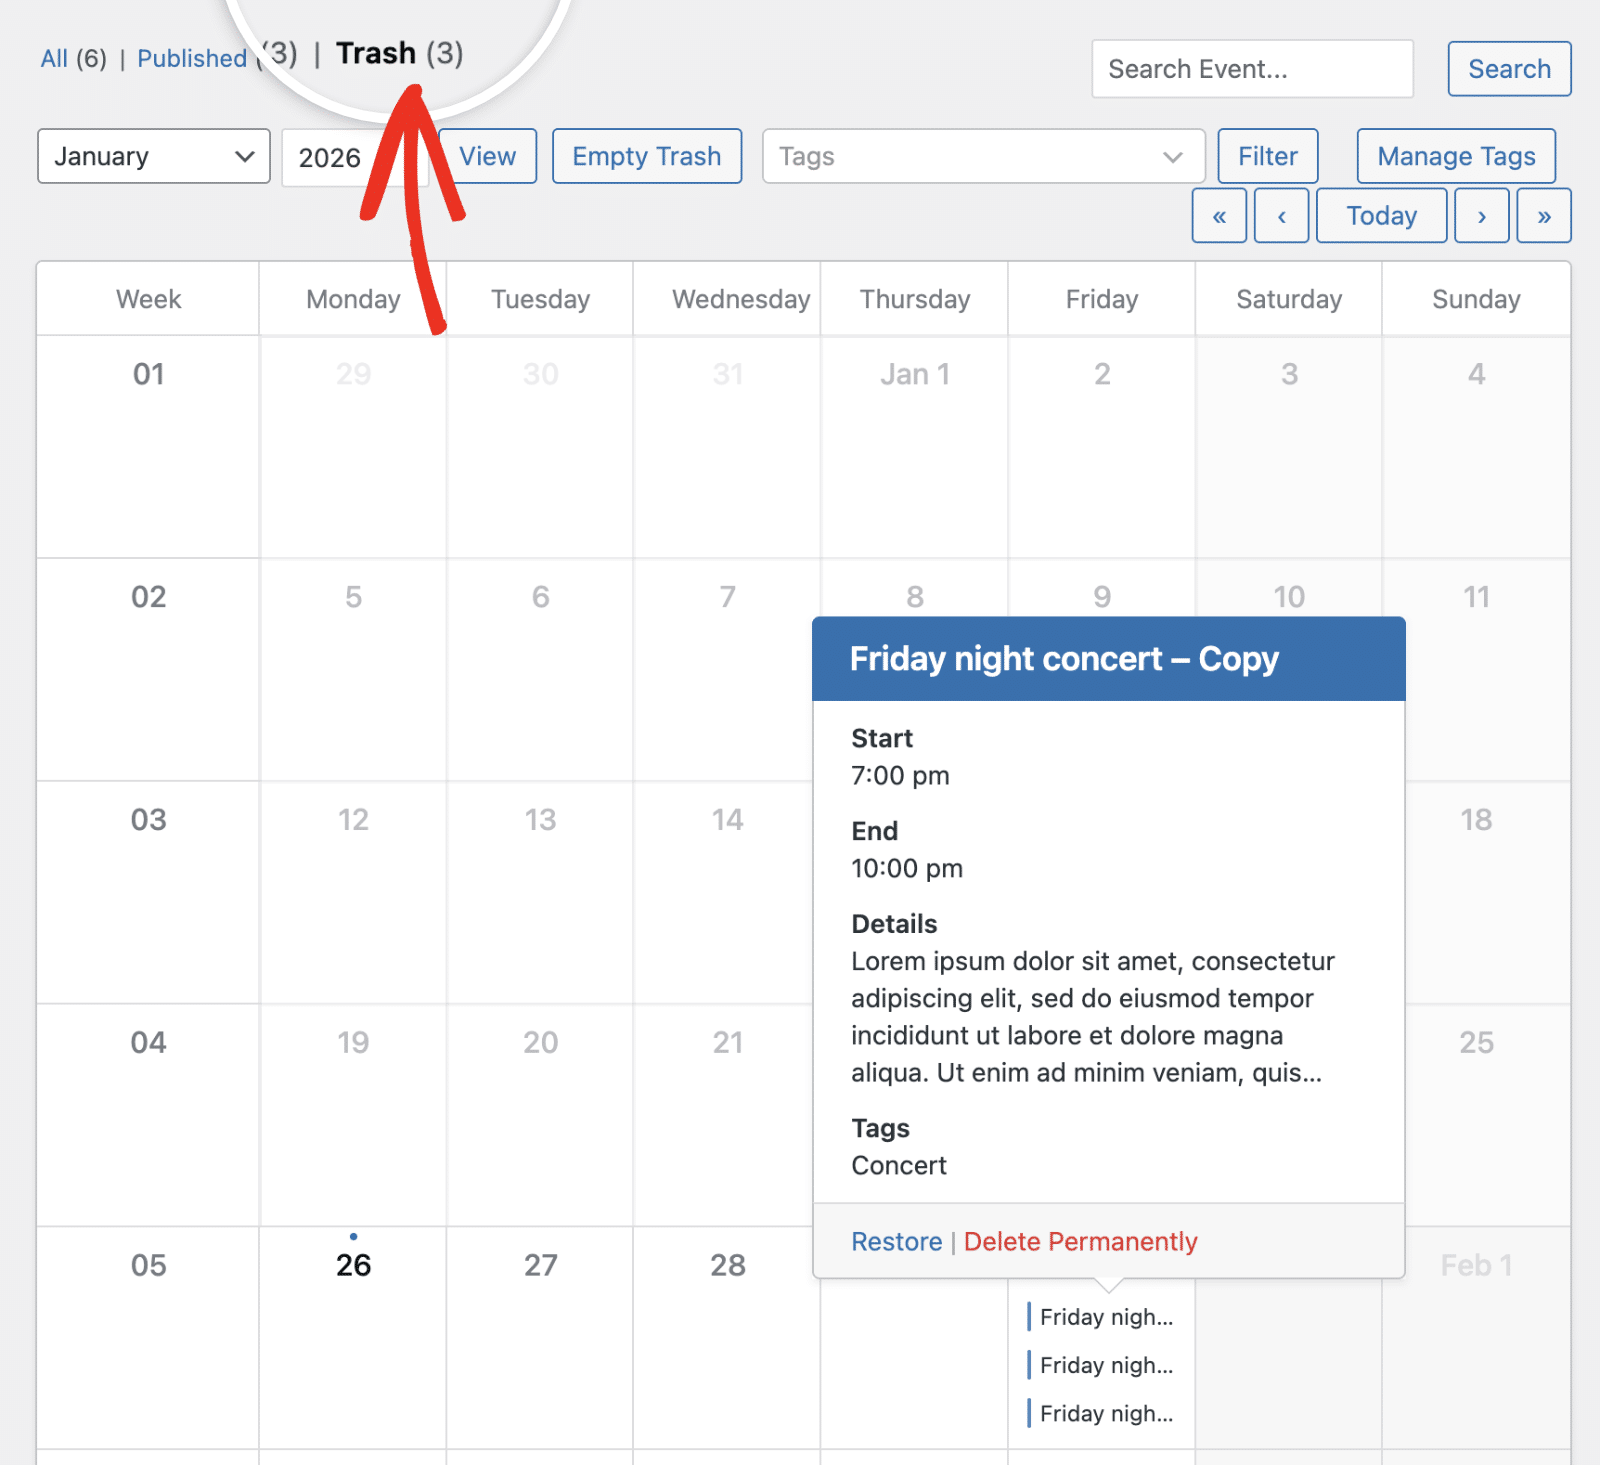
From the trash view, you can:
- Restore events back to their published status
- Delete Permanently to remove events completely from your site
- Empty Trash to permanently delete all trashed events at once
That’s it! You now have a complete understanding of how to manage events in Sugar Calendar Events.
Next, would you like to learn how to display your events on your site’s frontend? Check out our guide on displaying calendar events to showcase your events to visitors.