Would you like to enable spam protection on your RSVP forms in Sugar Calendar? Enabling spam protection for online forms helps to prevent bot submissions and preserves server resources.
This tutorial will show you how to configure Google reCAPTCHA for RSVP forms.
Before getting started, make sure Sugar Calendar Events is installed and activated on your WordPress site and that you’ve verified your license.
Accessing the RSVP Spam Protection Settings
Note: You’ll need to install and activate the RSVP addon on your site to proceed with this guide.
To get started, go to Events » Settings and select the RSVP tab.
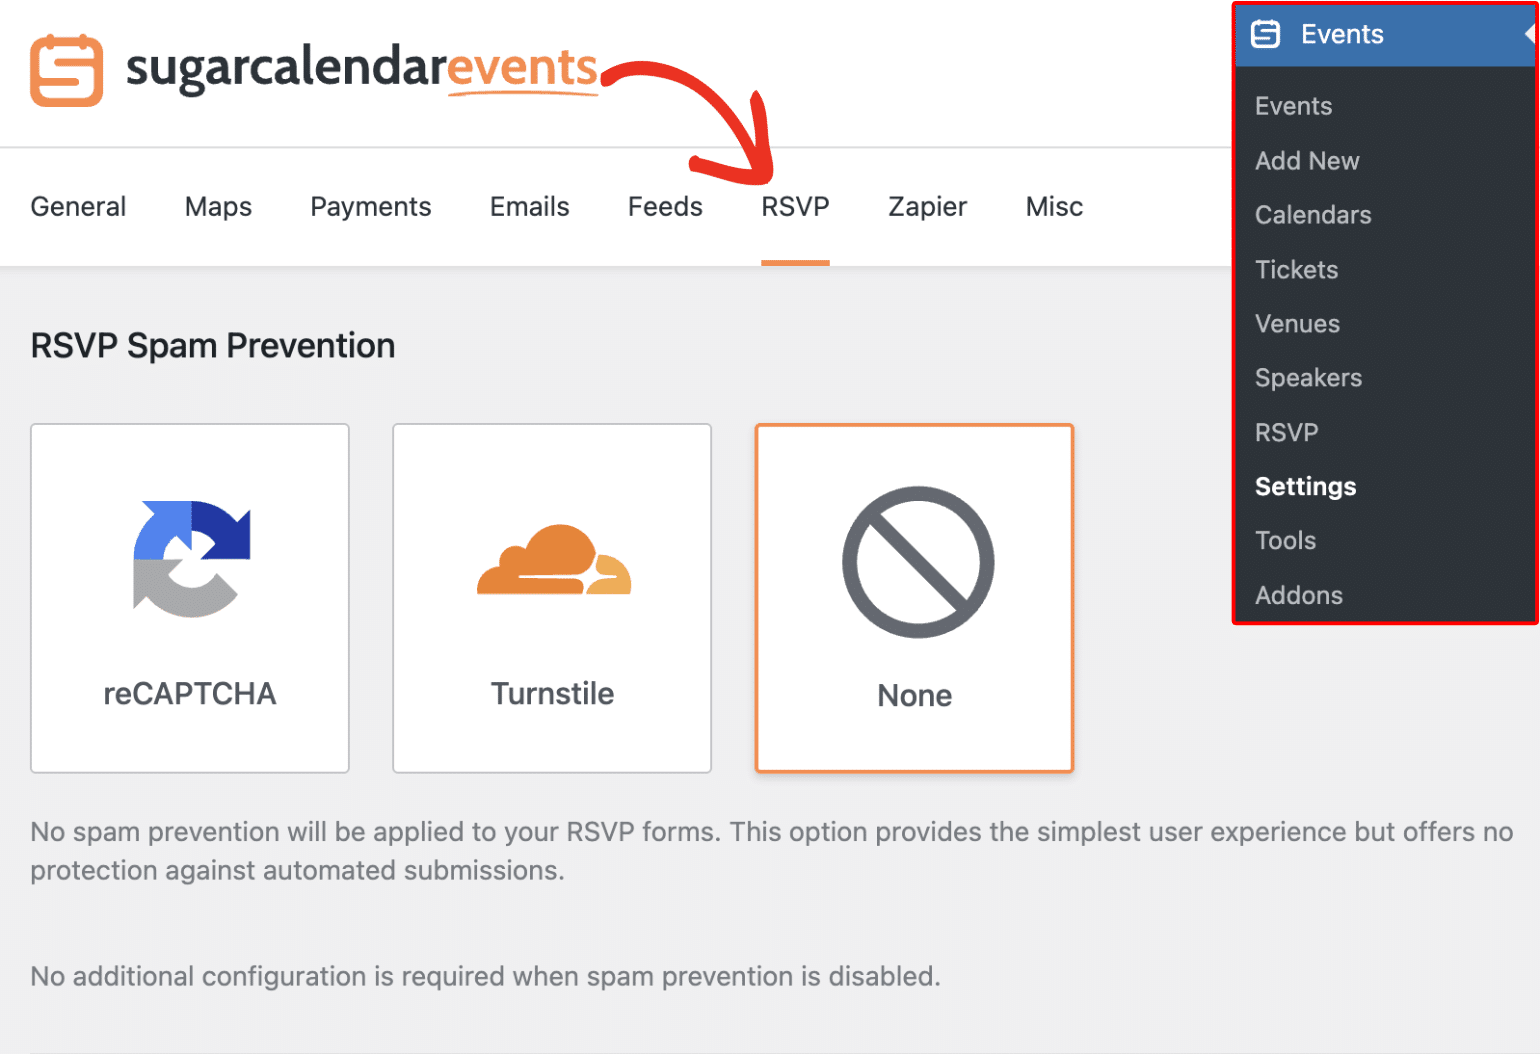
Once here, you’ll see the available spam protection options. Sugar Calendar Events currently support Google reCAPTCHA and Cloudflare Turnstile protection. Below we’ll highlight the available options:
Google reCAPTCHA
reCAPTCHA is a free anti-spam service offered by Google. It adds an extra layer of security to online forms such as contact, newsletter, and RSVP forms. Protecting your form from spam and cyber attacks, while letting real users complete the form.
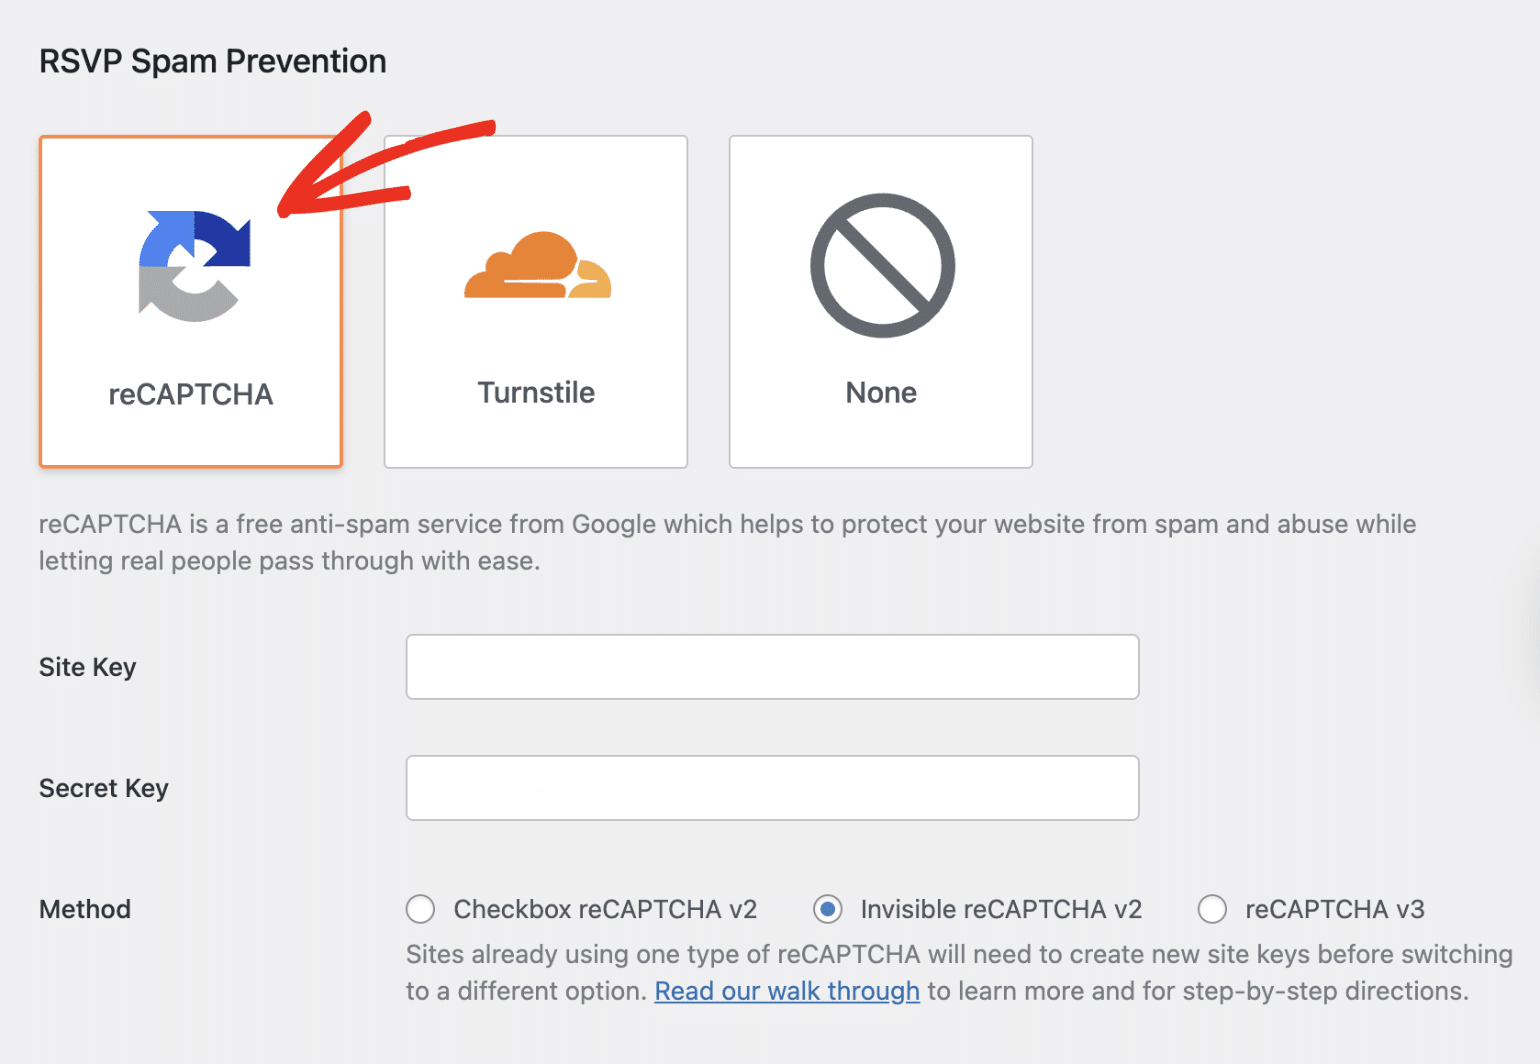
You can choose between the Checkbox reCAPTCHA v2, Invisible reCAPTCHA v2, or reCAPTCHA v3 options.
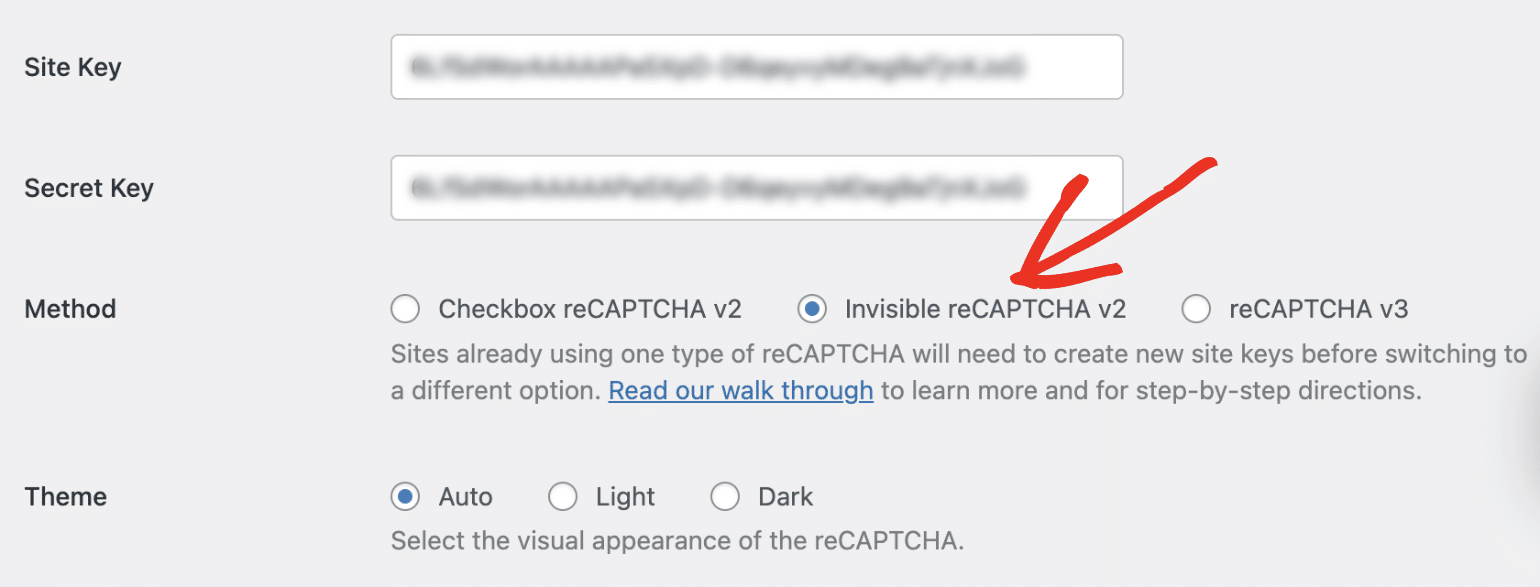
When filling out the RSVP form on your site’s frontend, you’ll see a Google reCAPTCHA badge at the bottom left of the page, indicating that the form is protected.
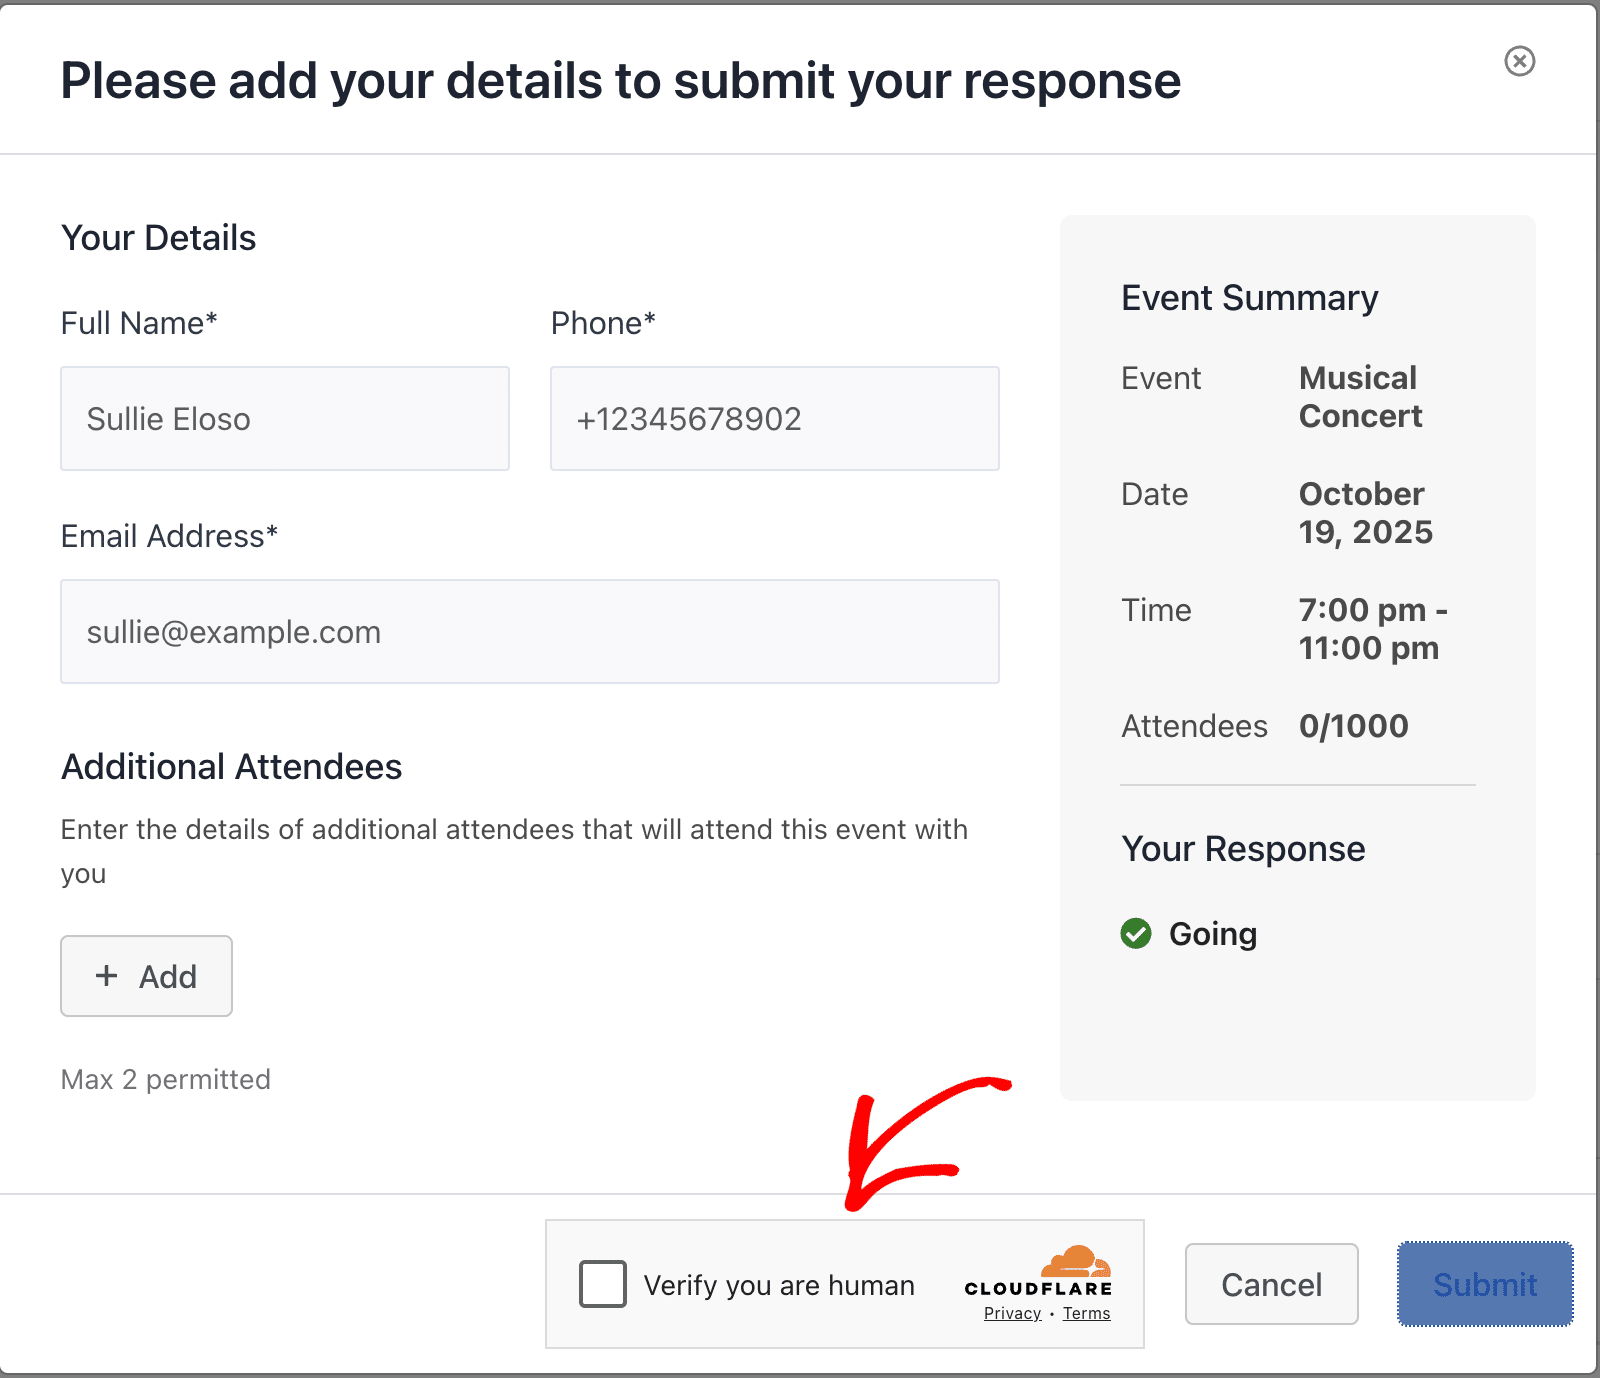
Cloudflare Turnstile
Turnstile is a free, CAPTCHA-like solution for preventing spam on online forms while protecting data privacy.
It is offered by Cloudflare and provides a user-friendly experience by validating visitors without requiring them to solve puzzles or math questions.
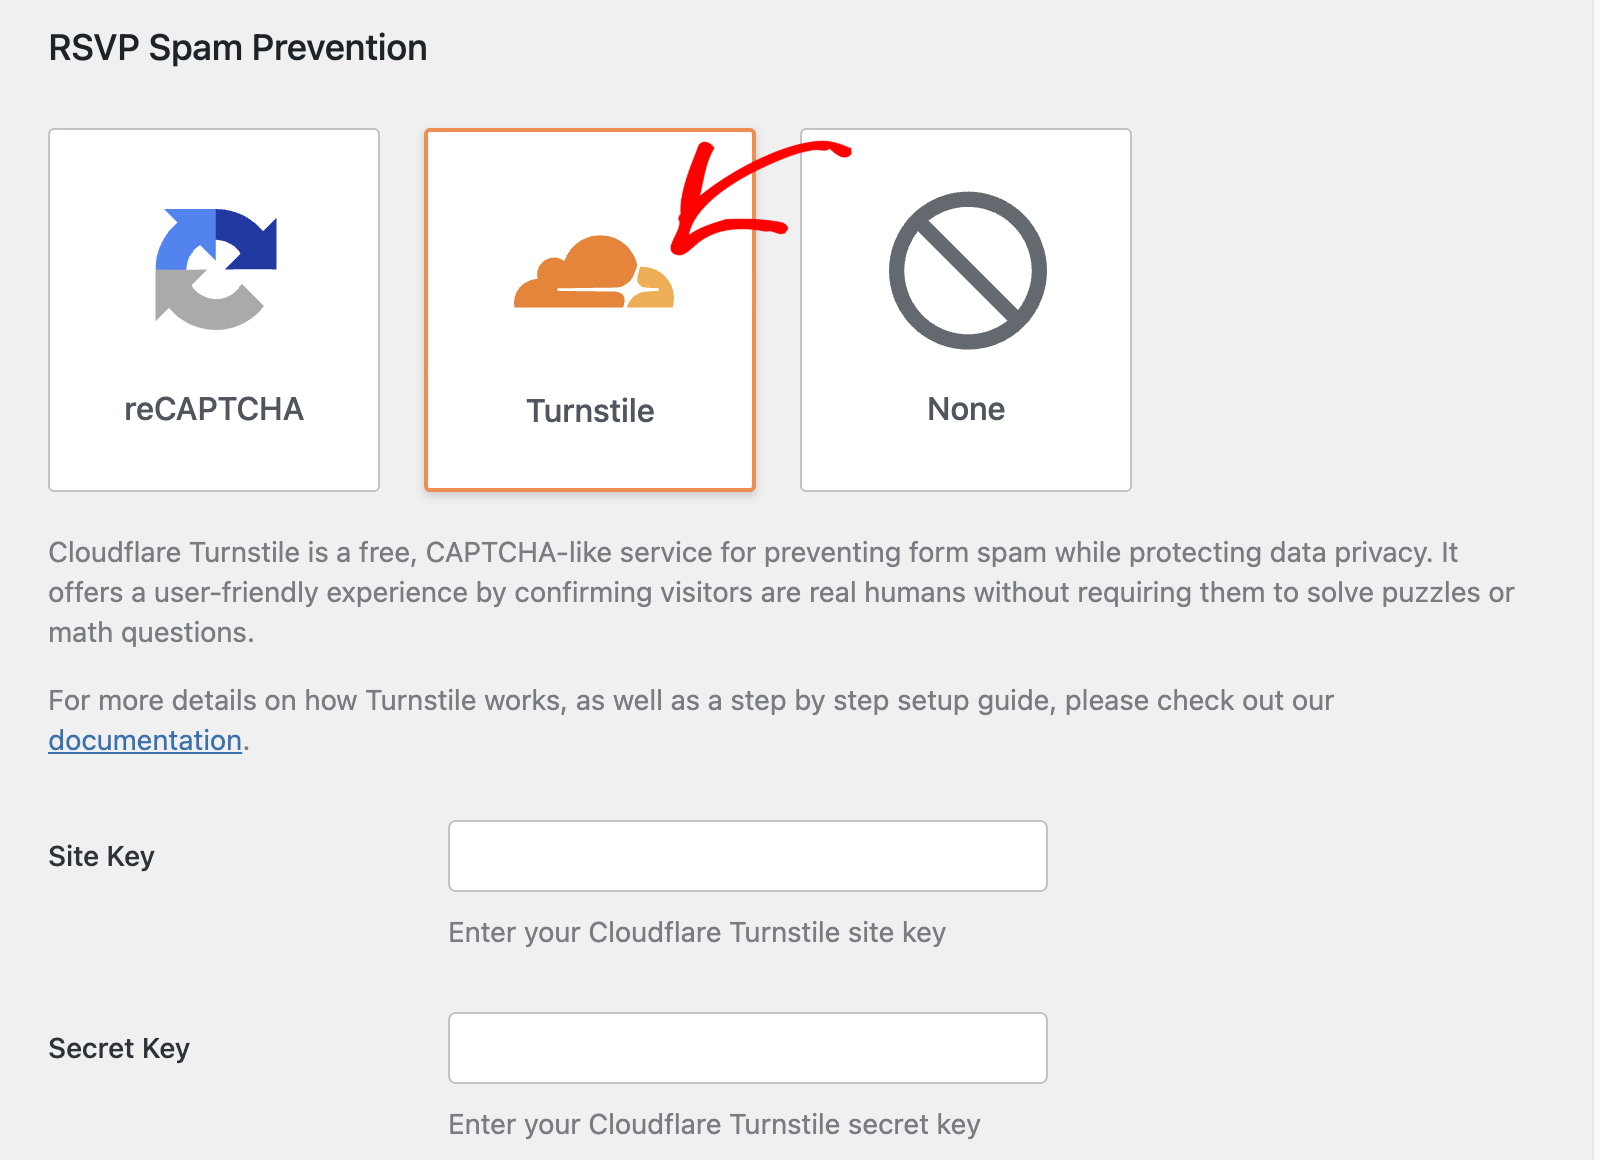
After configuring it, visitors will see a checkbox requiring them to confirm that they’re human before submitting your form.
That’s it! You’ve now learned about the available spam protection options in Sugar Calendar Events and how to configure them.
Next, would you like to display an interactive map on your event details page? Our tutorial on adding Google Maps to events covers all the steps in detail.