Need a centralized view to manage all your appointments in Sugar Calendar Bookings? The Calendar interface provides an easy way to view, organize, and manage your bookings.
In this complete guide, you’ll learn everything about using the Sugar Calendar Bookings Calendar.
In This Article
Before getting started, make sure the Sugar Calendar Bookings plugin is installed and activated on your WordPress site.
Accessing the Calendar
To access the Bookings Calendar, navigate to Bookings » Calendar from your WordPress admin sidebar.
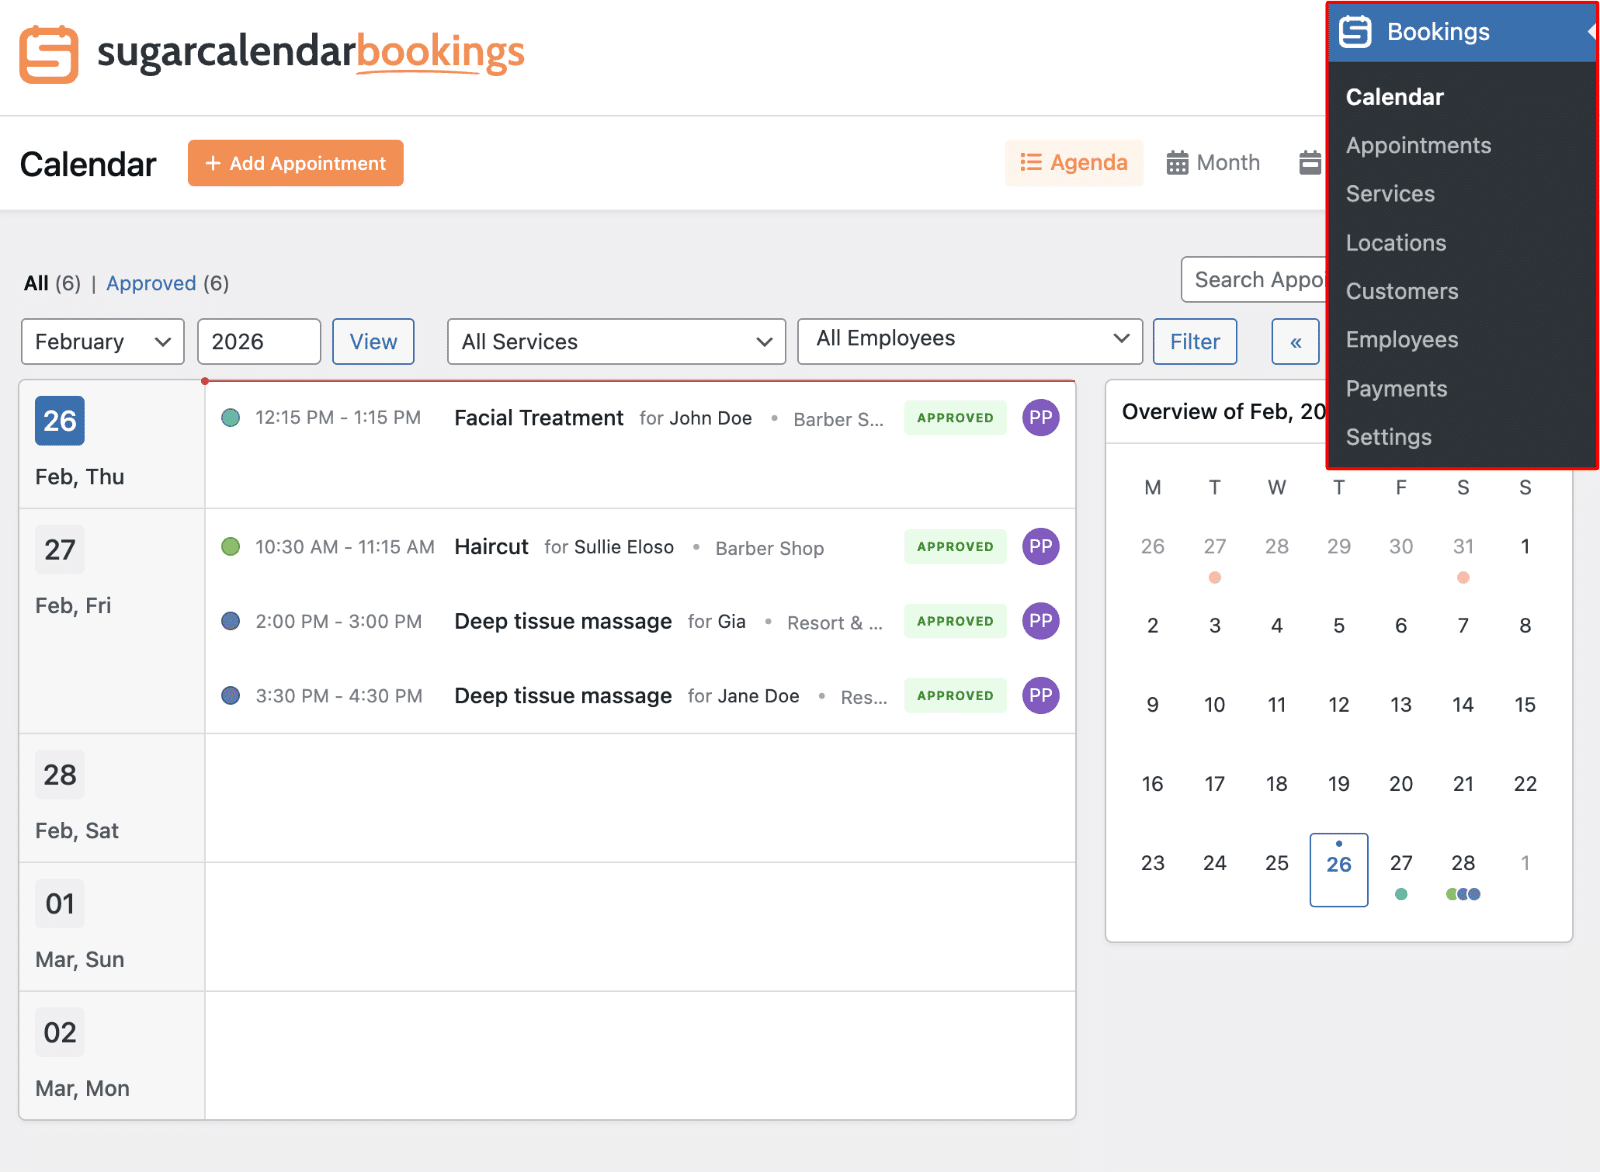
This will open the main calendar interface where all your appointments are displayed in an easy-to-read format.
Understanding Calendar Views
Sugar Calendar Bookings offers three different view options to help you manage appointments based on your preferences and needs. You’ll find the view options in the top-right corner of the calendar screen.
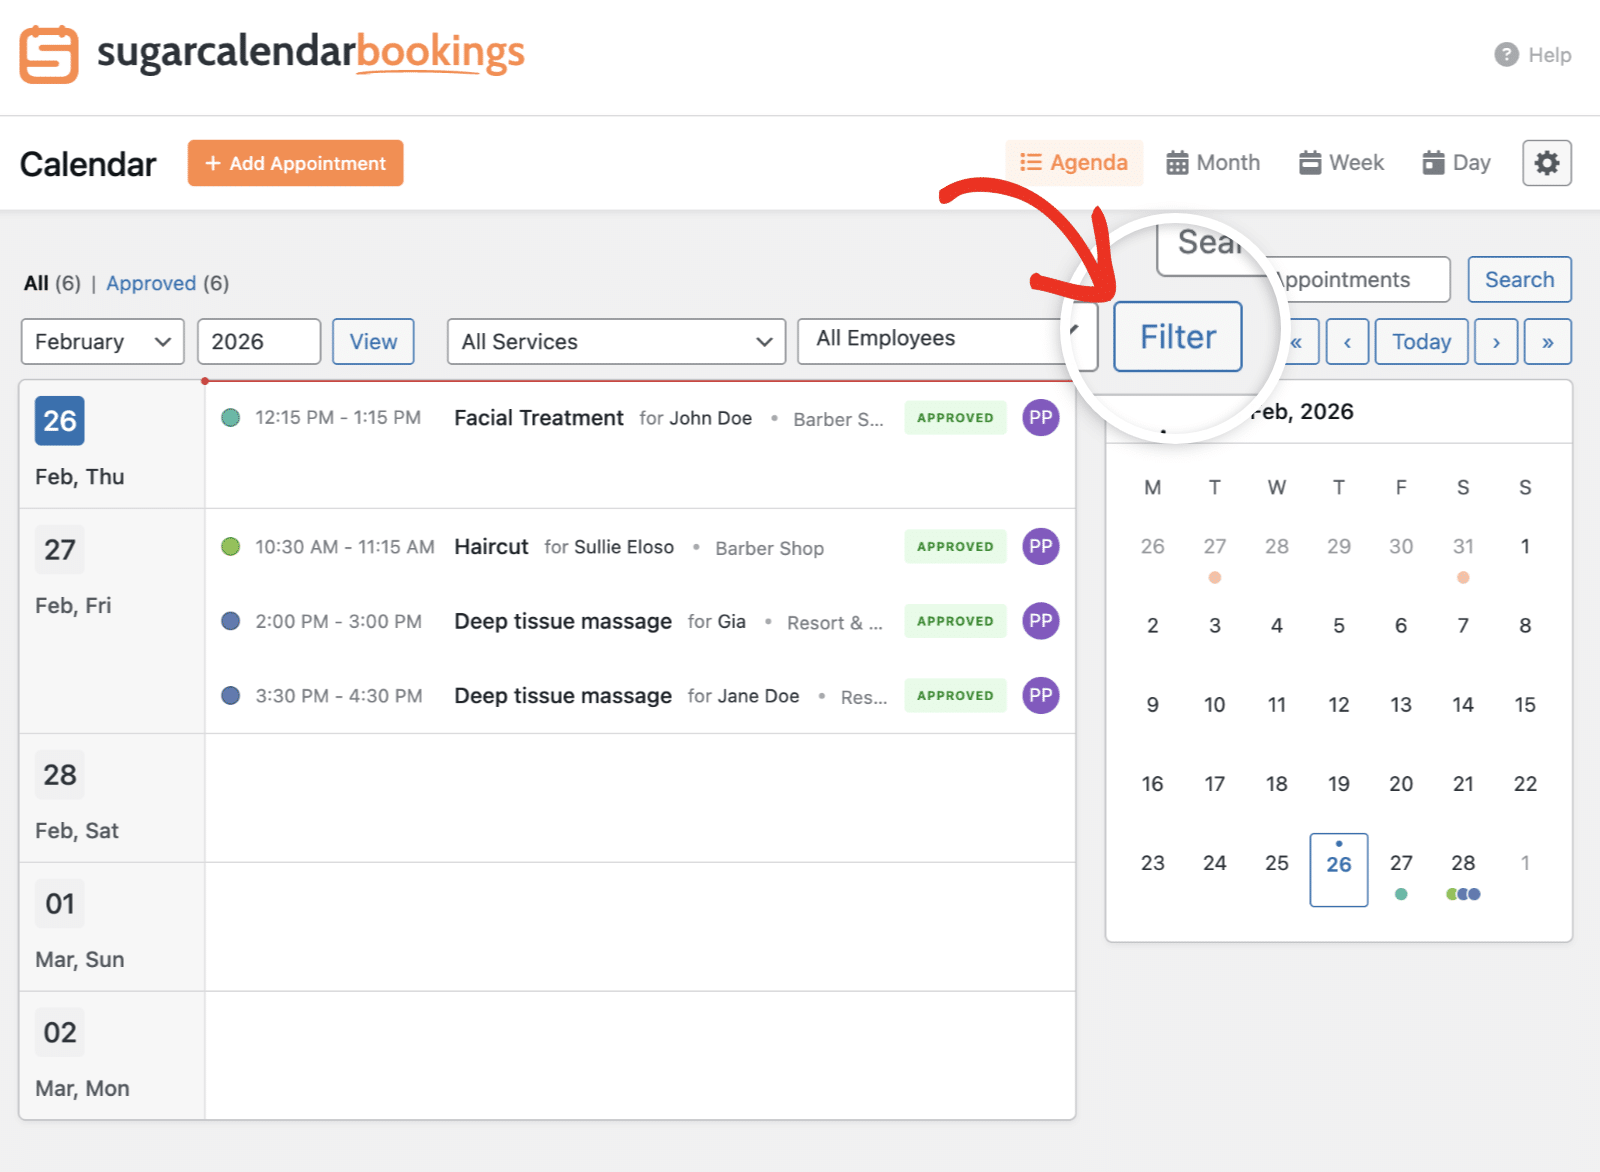
Agenda View
The Agenda view provides a clear view of upcoming appointments. It removes whitespaces and displays only days with an appointment.
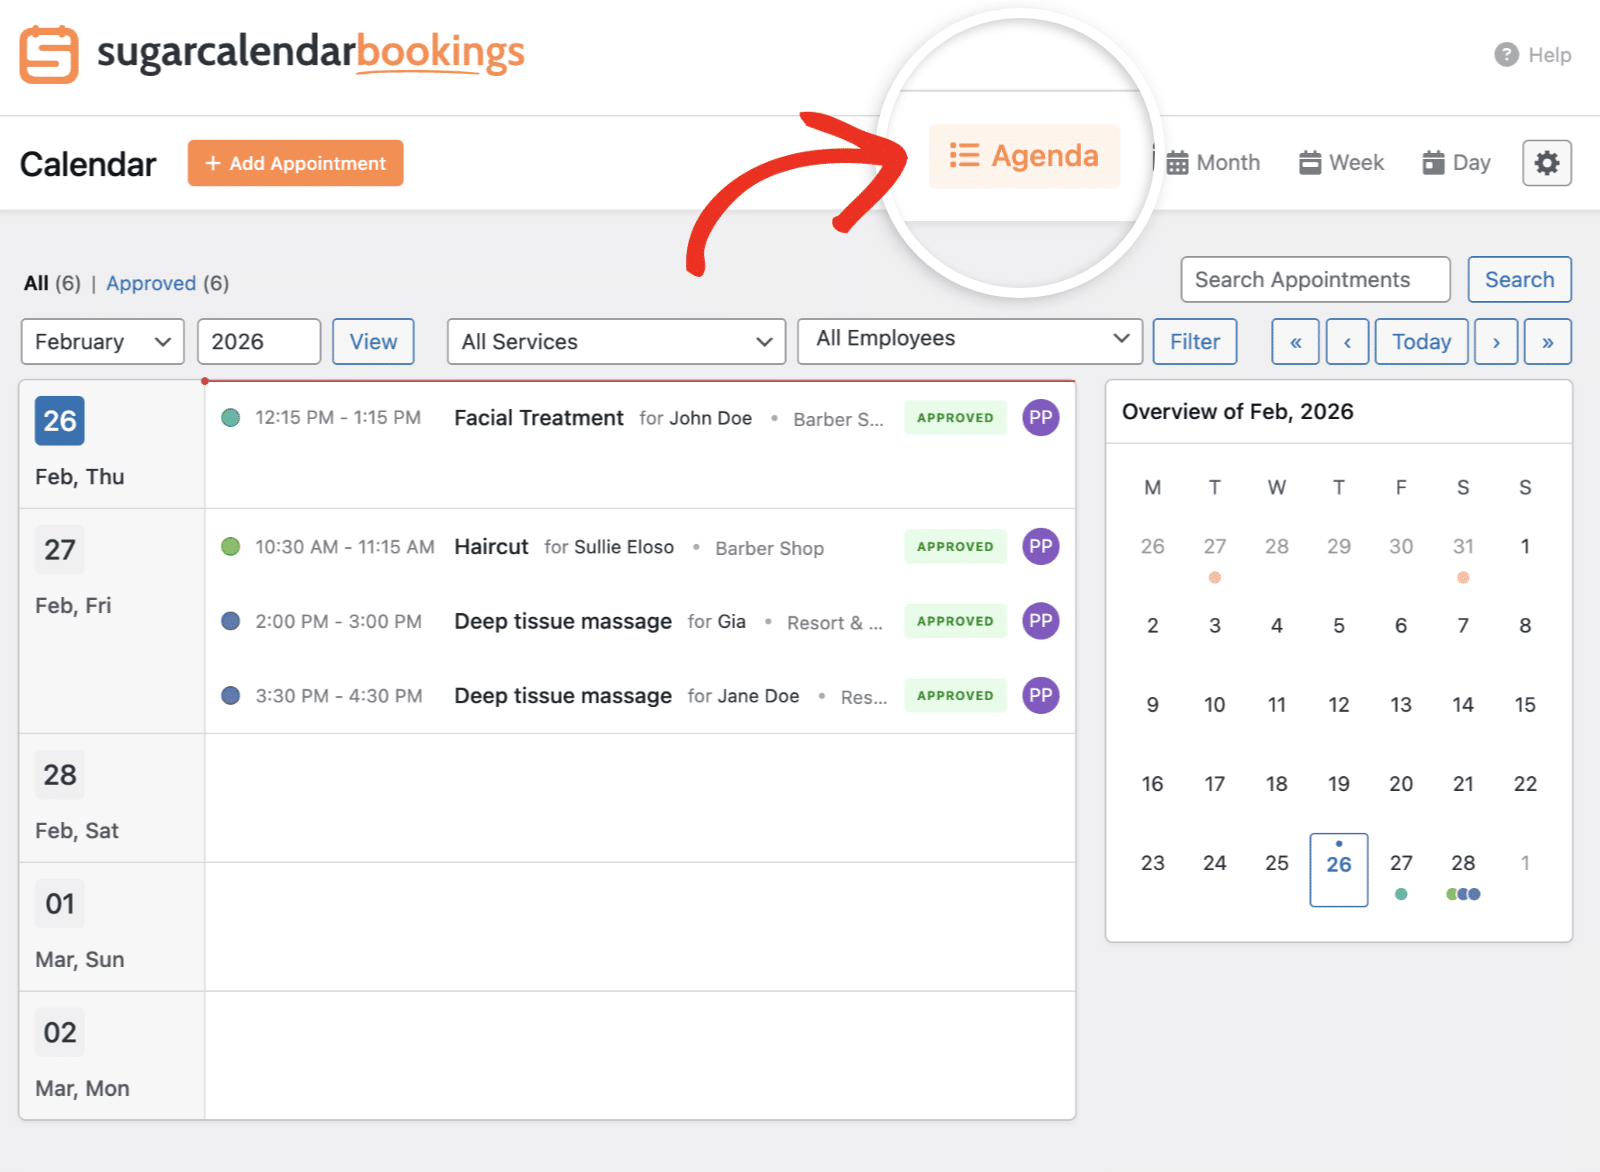
This view is especially helpful when you need a quick overview of what’s coming up on your booking calendar.
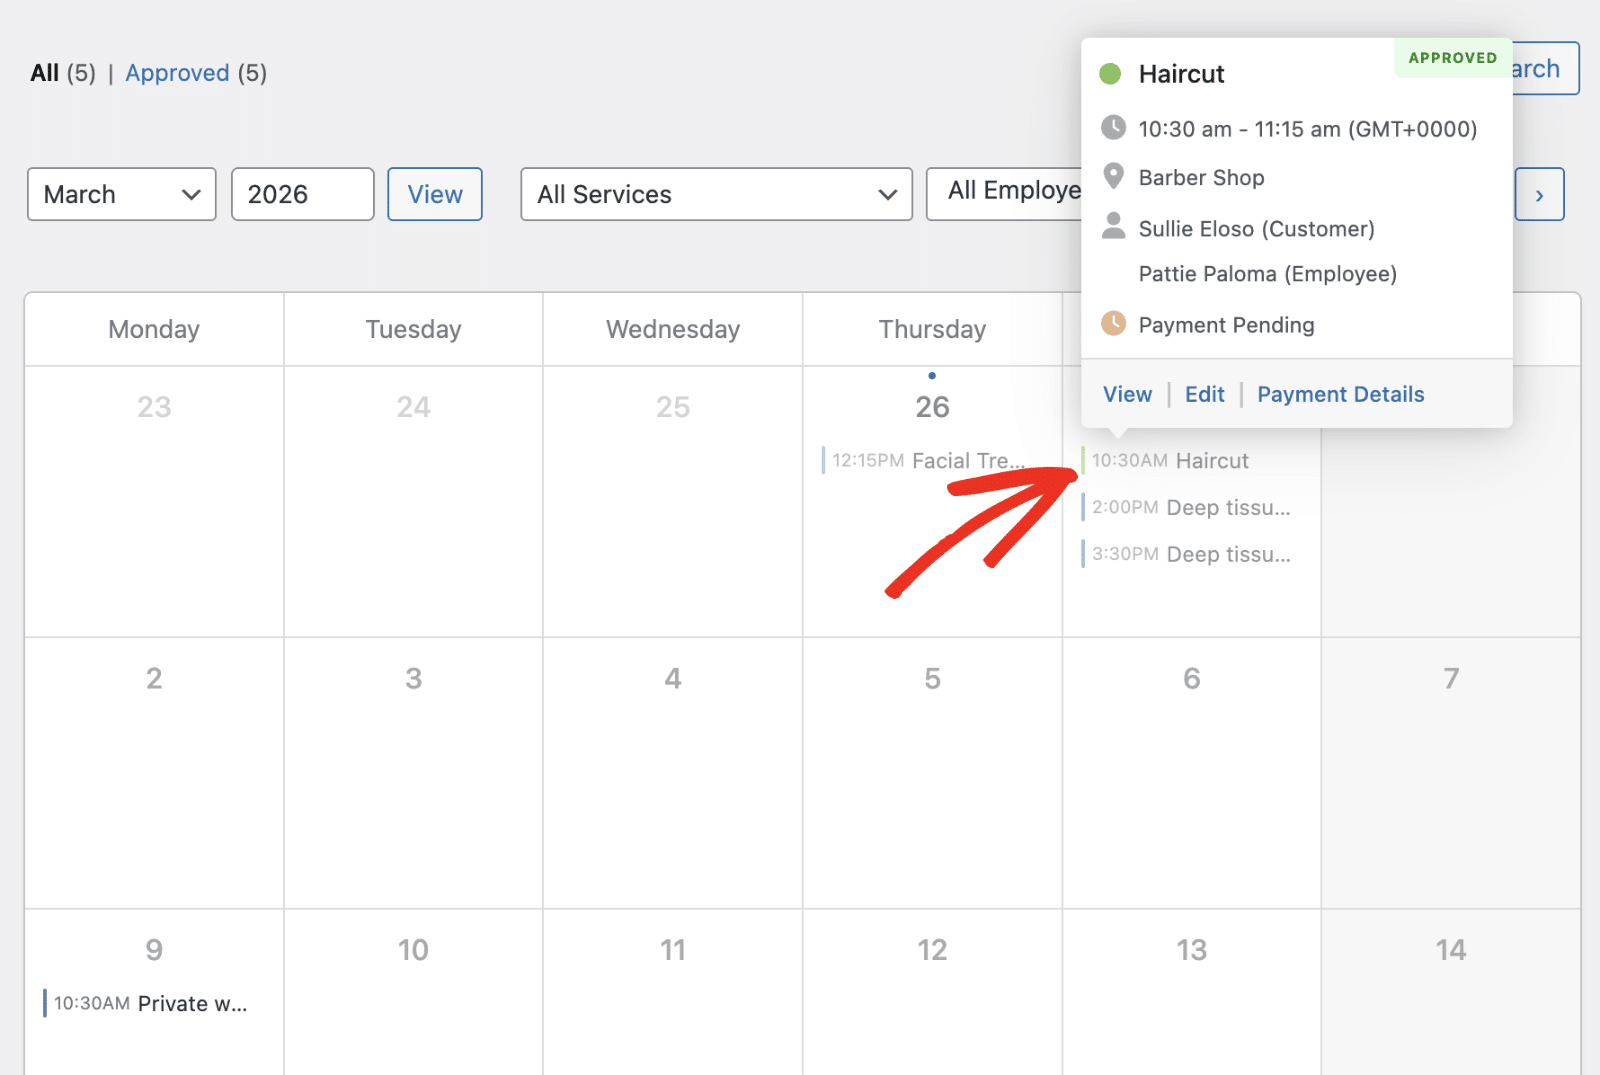
Month View
The Month view displays all appointments for the entire month in a traditional calendar grid format. This view is ideal for getting a high-level overview of your booking schedule.
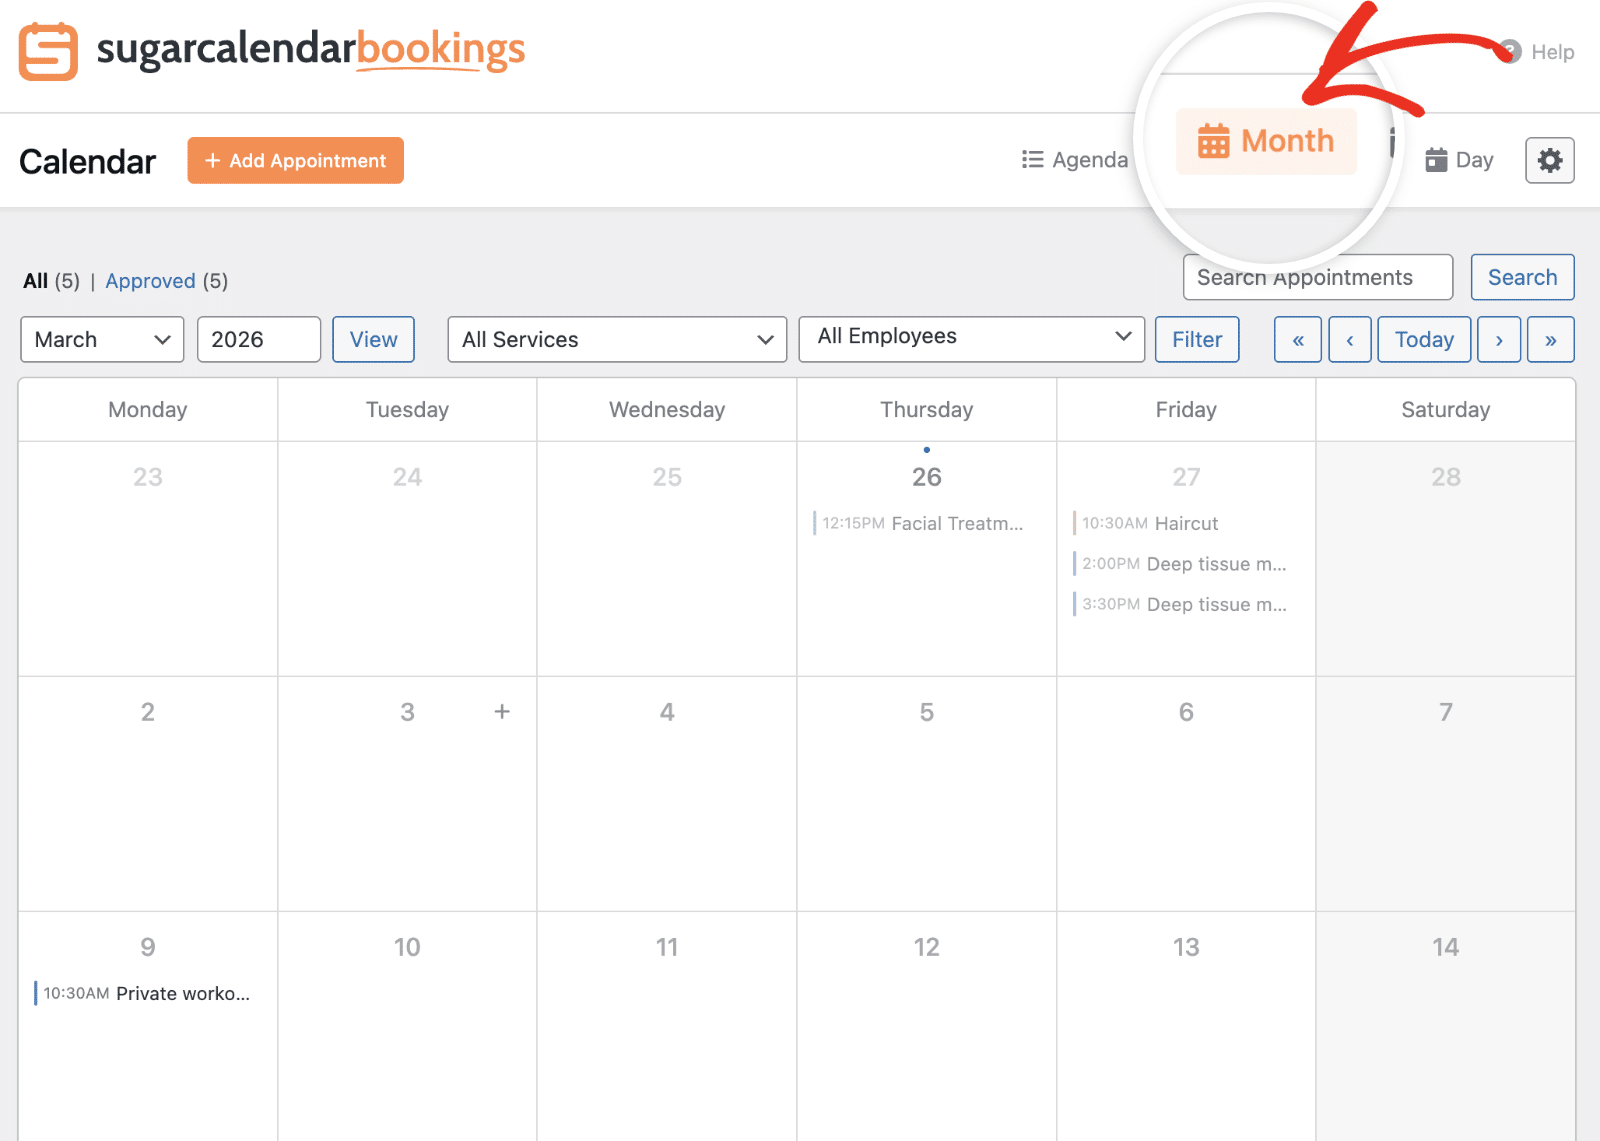
Each appointment appears on its scheduled date, showing the time and service name. This makes it easy to see busy periods and available slots at a glance.
Week View
Click the Week button to switch to a weekly layout that shows a more detailed hourly breakdown of appointments.
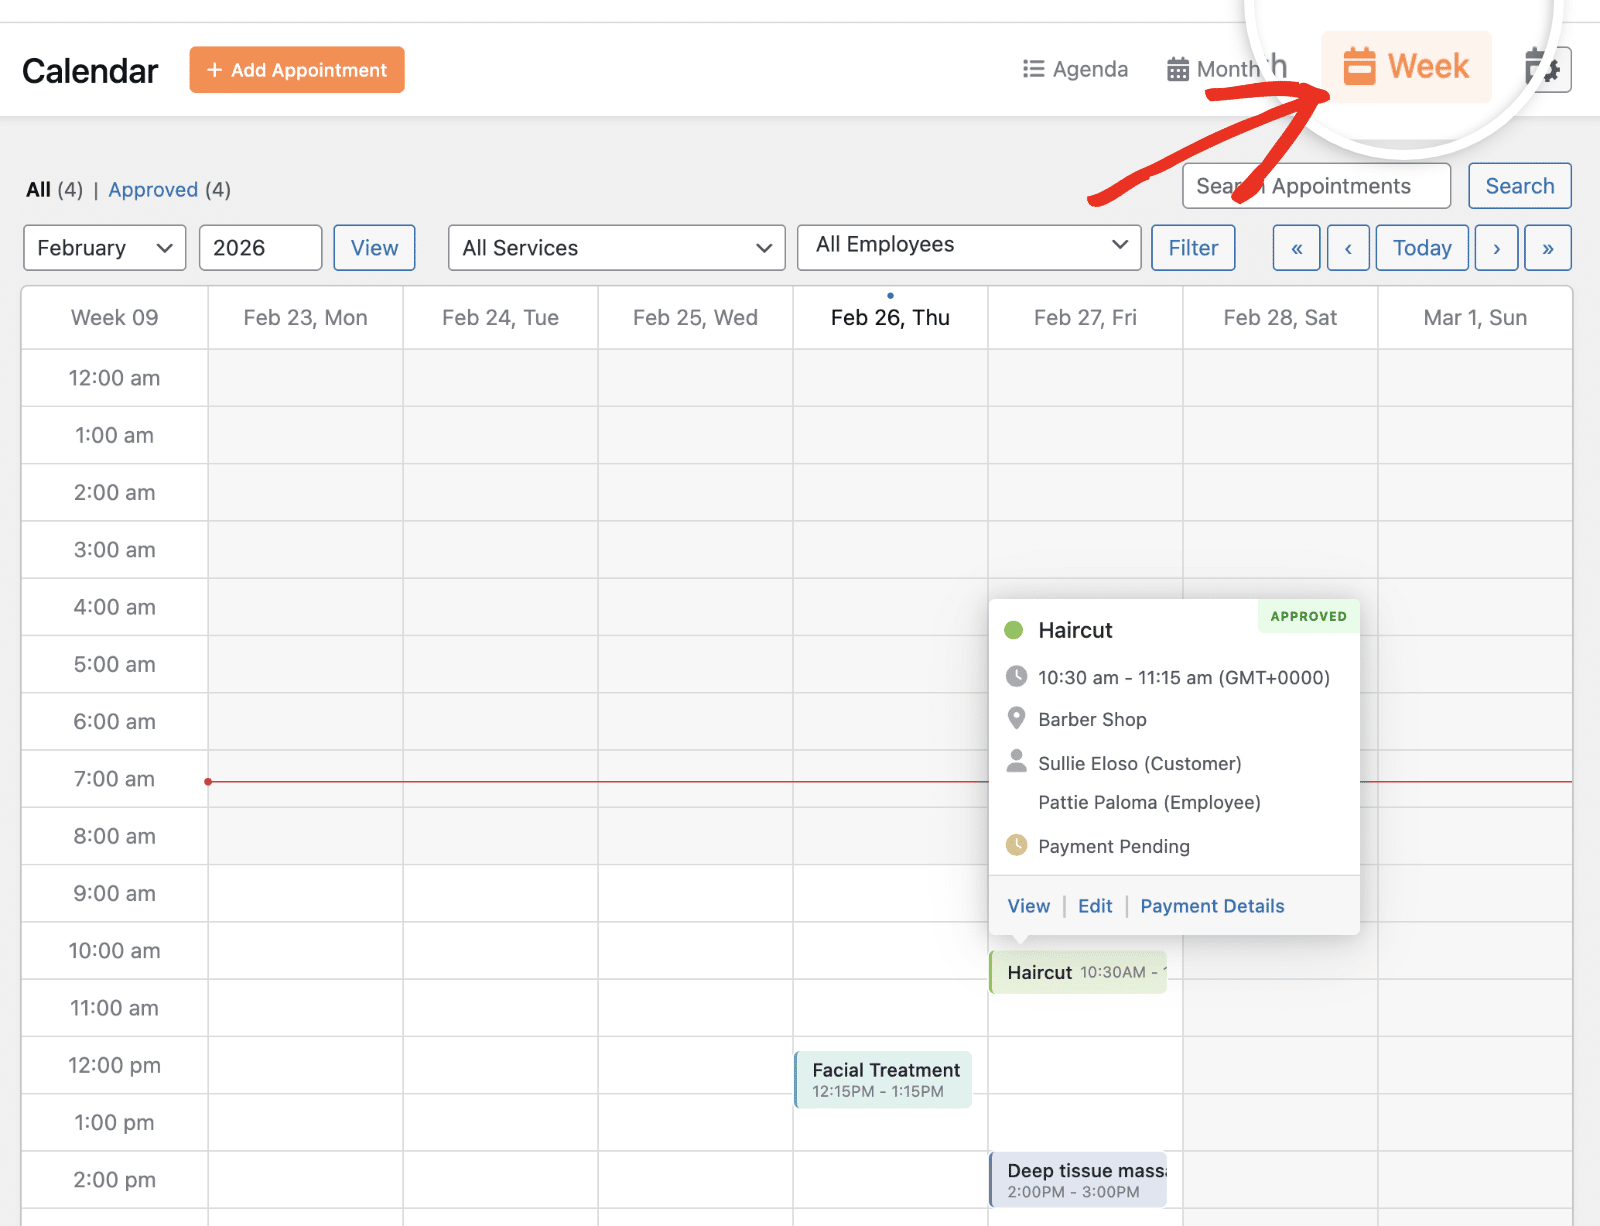
The Week view displays each day as a column with time slots running vertically. This format helps you see appointment duration and time gaps more clearly.
Day View
The Day view focuses on a single day, showing all time slots from morning to evening in detail.
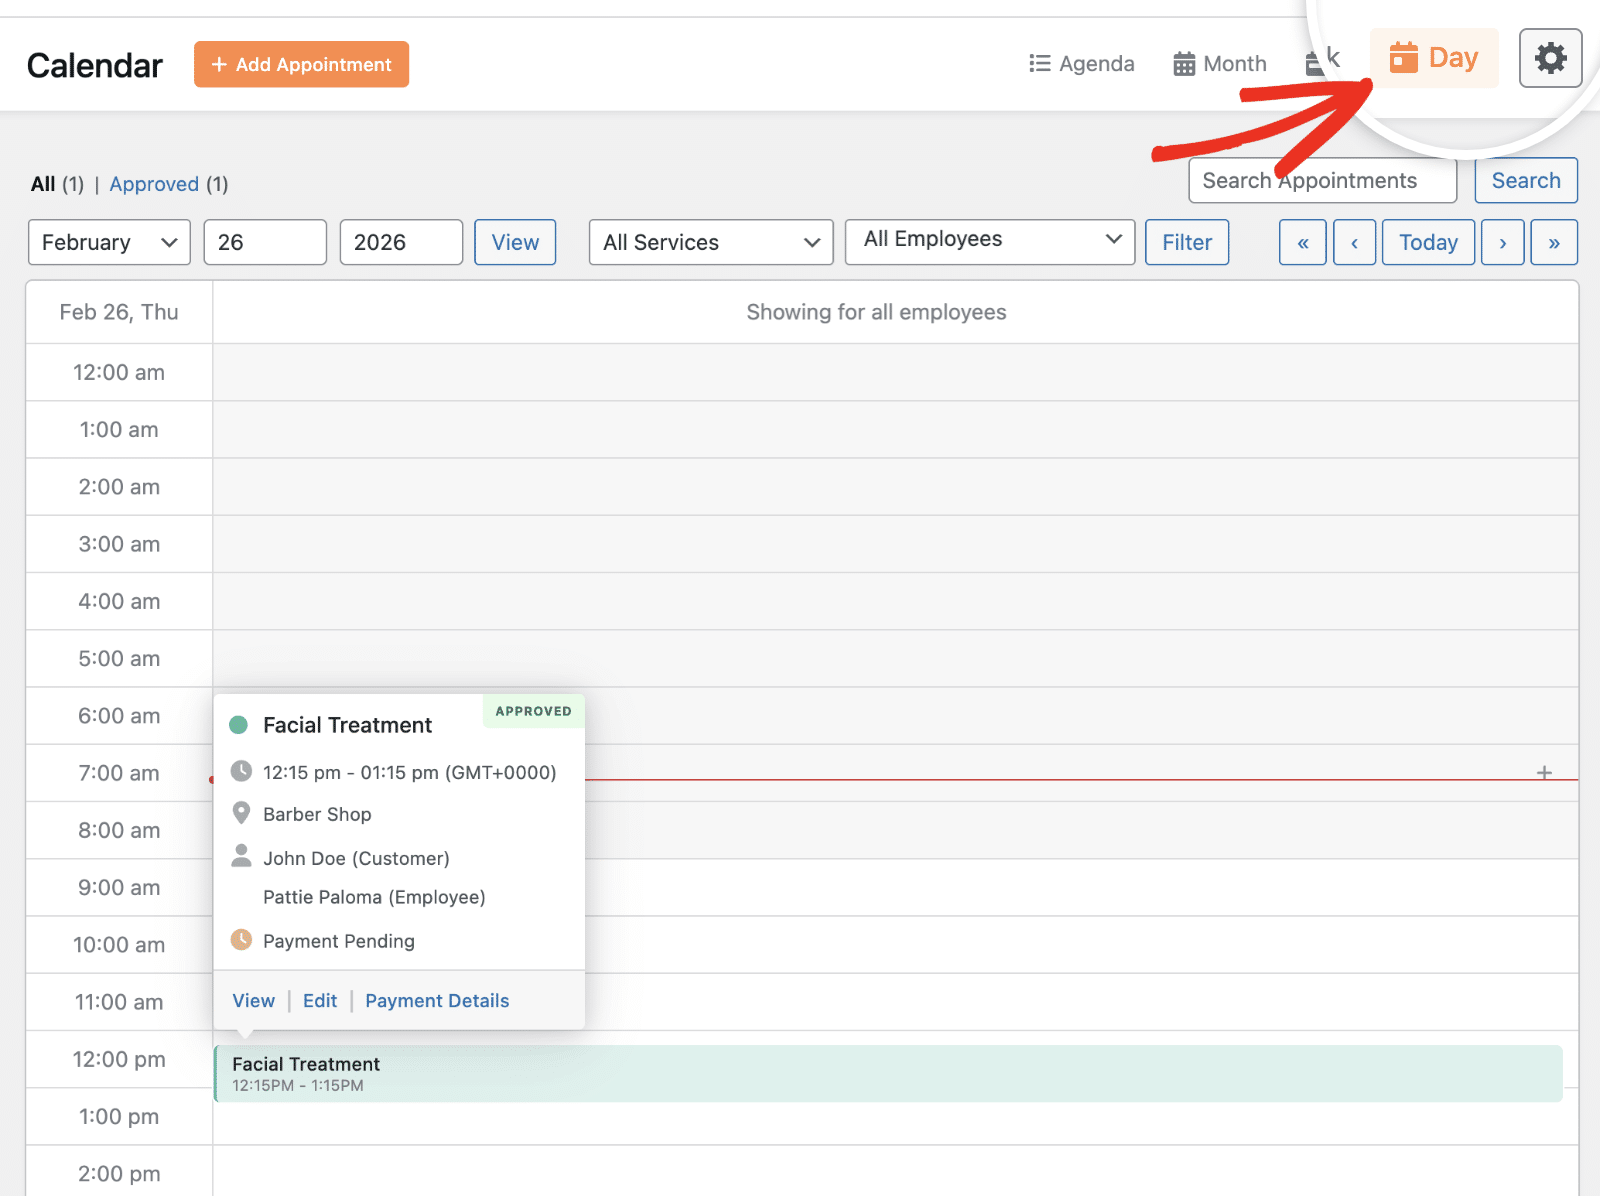
This view is most useful when you need to manage a busy schedule or make precise scheduling decisions for a specific day.
Viewing Appointment Details
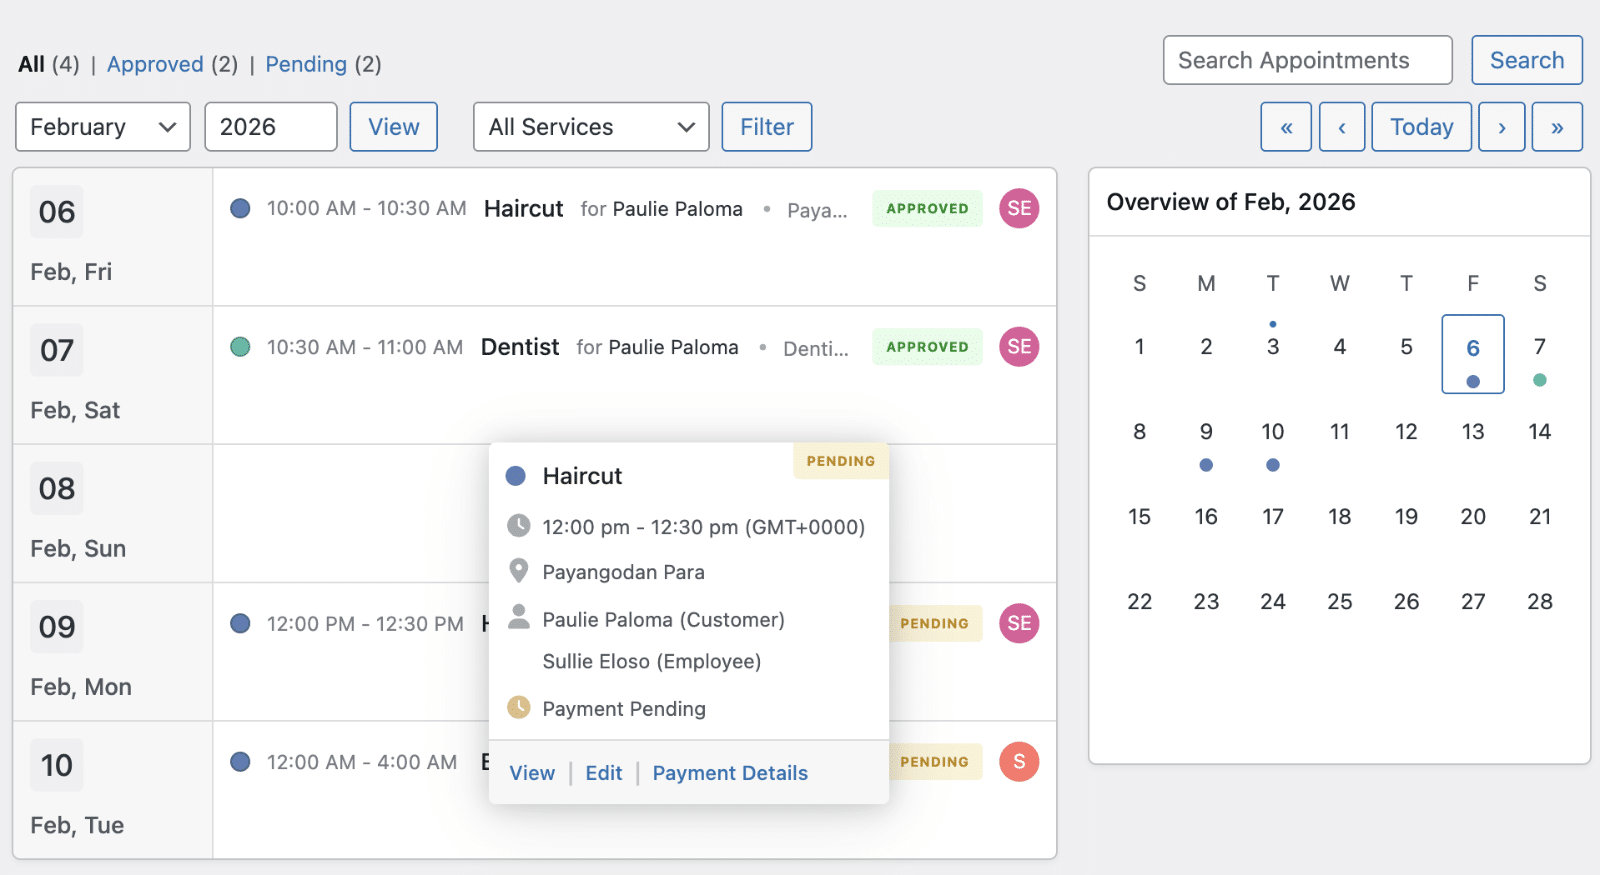
To view complete information about any appointment, simply click on it in the calendar. This will open a popup displaying all the relevant details.
The appointment popup displays:
- Service name and color indicator
- Appointment status (Pending, Approved, etc.)
- Time and duration
- Location details
- Customer information
- Employee assigned to the appointment
- Payment status
From this popup, you can select;
- View to see the full appointment page
- Edit to make changes to the appointment
- Payment Details to manage the payment associated with this appointment.
Adding New Avppointments
To create a new appointment directly from the calendar, click the + Add Appointment button located at the top of the screen.

This will open the appointment creation overlay. You’ll need to enter all necessary details, including customer information, service selection, date, time, and payment options.
Filtering Appointments
The calendar includes several filtering options to help you focus on specific types of appointments.
Filtering by Status
At the top of the calendar, you’ll see status filters showing the count for each status type:
- All – Shows all appointments regardless of status
- Approved – Shows only confirmed appointments
- Pending – Shows appointments awaiting approval
Click any status to filter the calendar to show only appointments with that status.
Filtering by Service
Use the All Services dropdown to filter appointments by specific service types. After selecting the service, click the Filter button to apply it.
This is particularly useful if you offer multiple services and want to focus on managing bookings for a specific service.
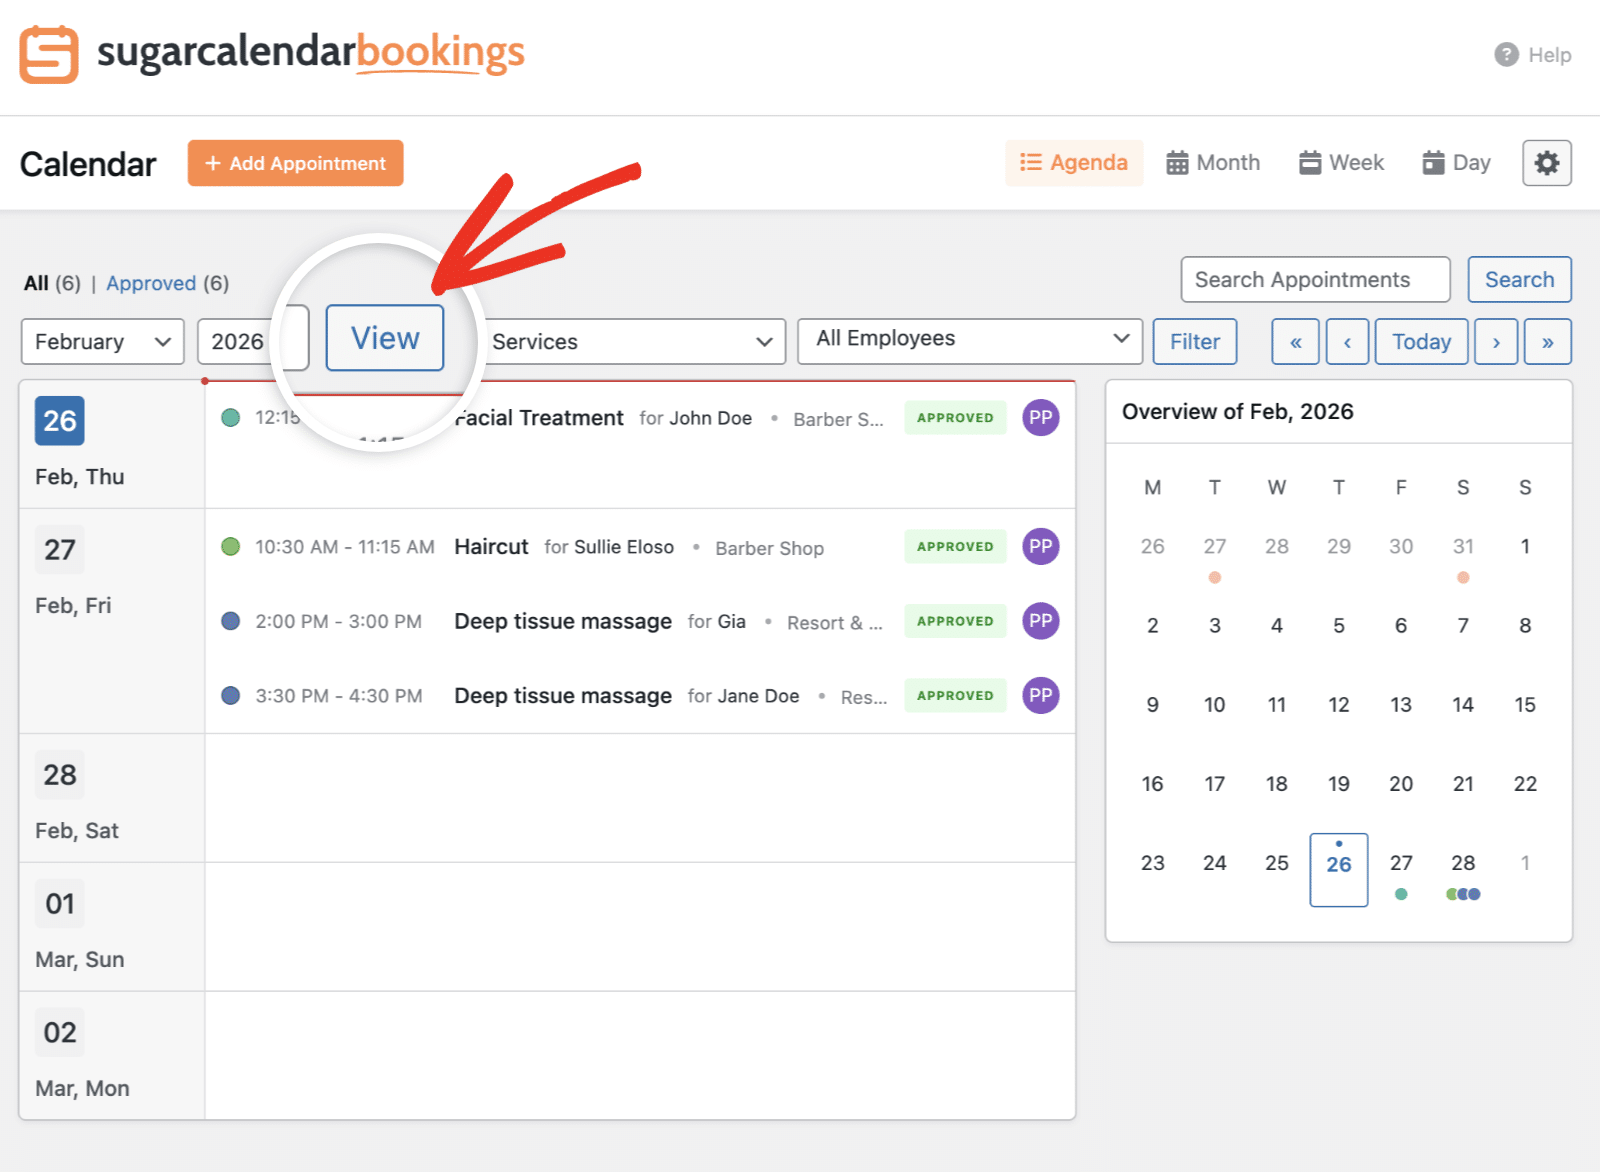
Navigating Between Dates
The calendar provides multiple ways to navigate to different time periods.
Use the month and year selectors to choose a specific month. After that, click the View button to jump directly to that date.
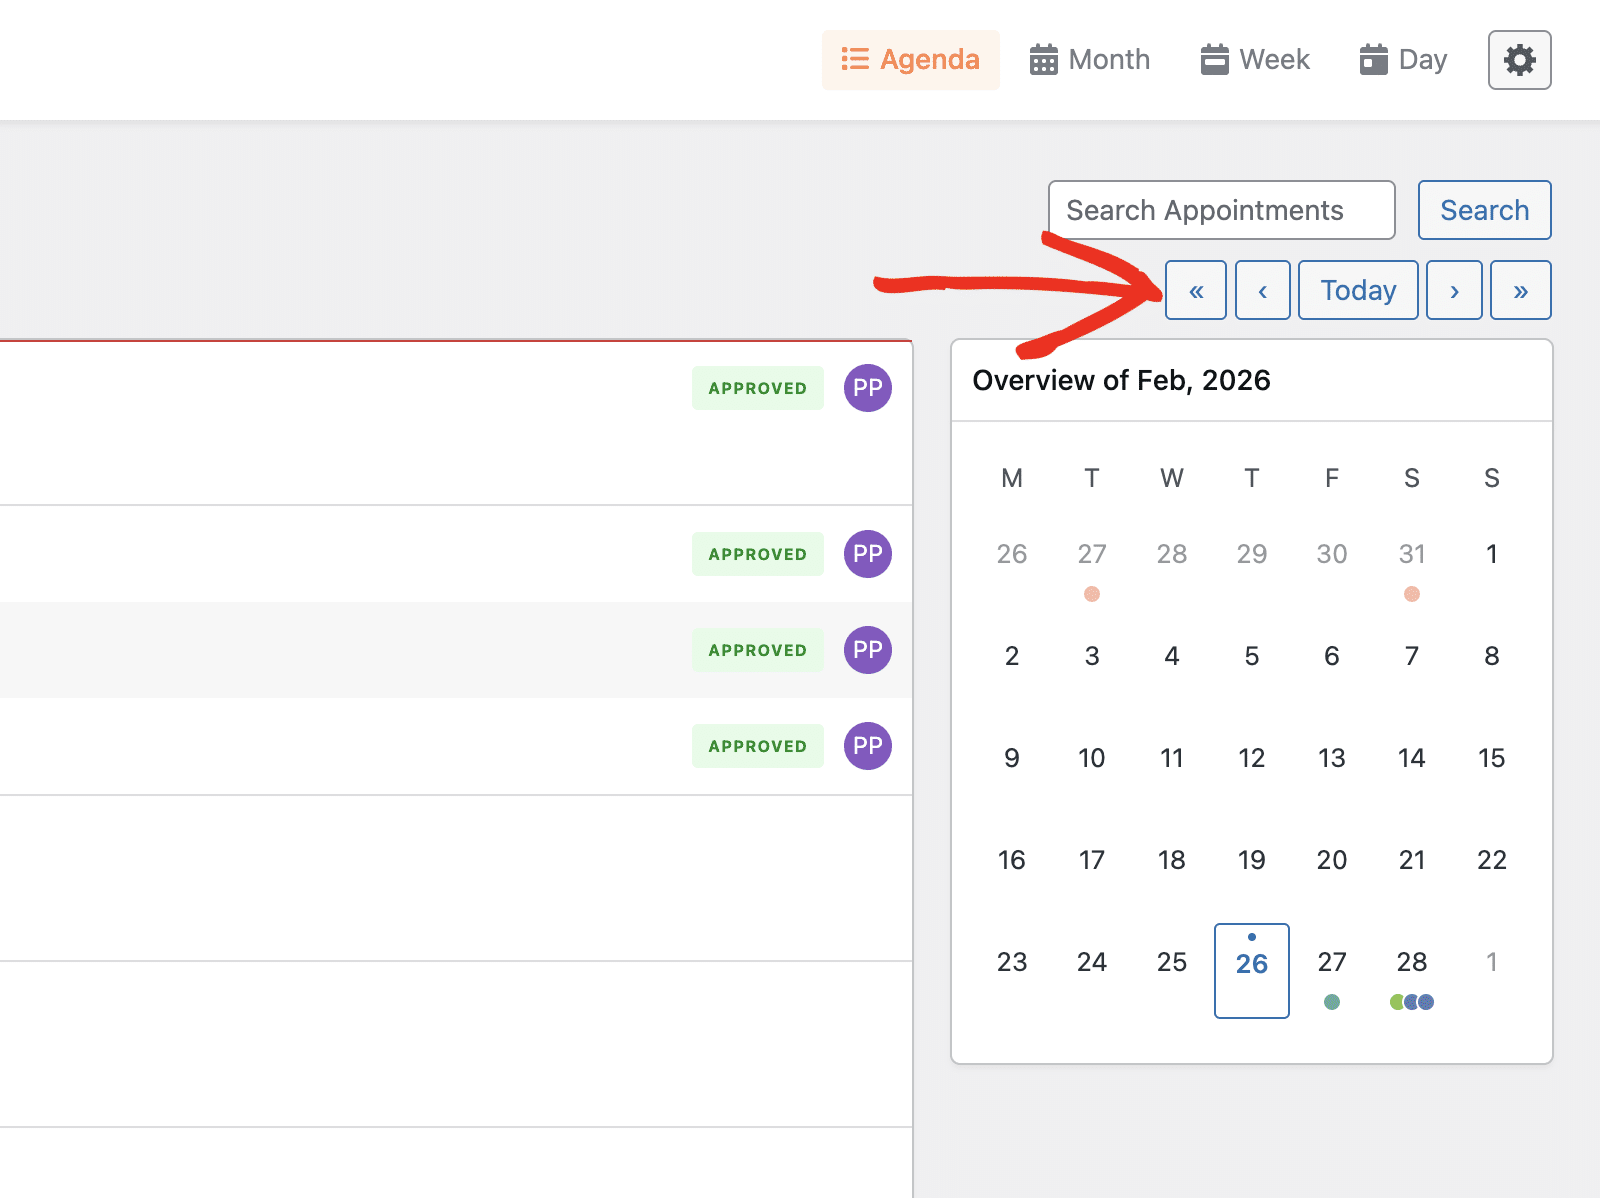
The navigation arrows let you move forward and backward through your calendar:
- « – Jump to the previous period (month, week, or day depending on your view)
- ‹ – Move back one period
- Today – Return to the current date
- › – Move forward one period
- » – Jump to the next period
Searching for Appointments
To quickly find a specific appointment, use the search field located in the top-right area of the calendar.
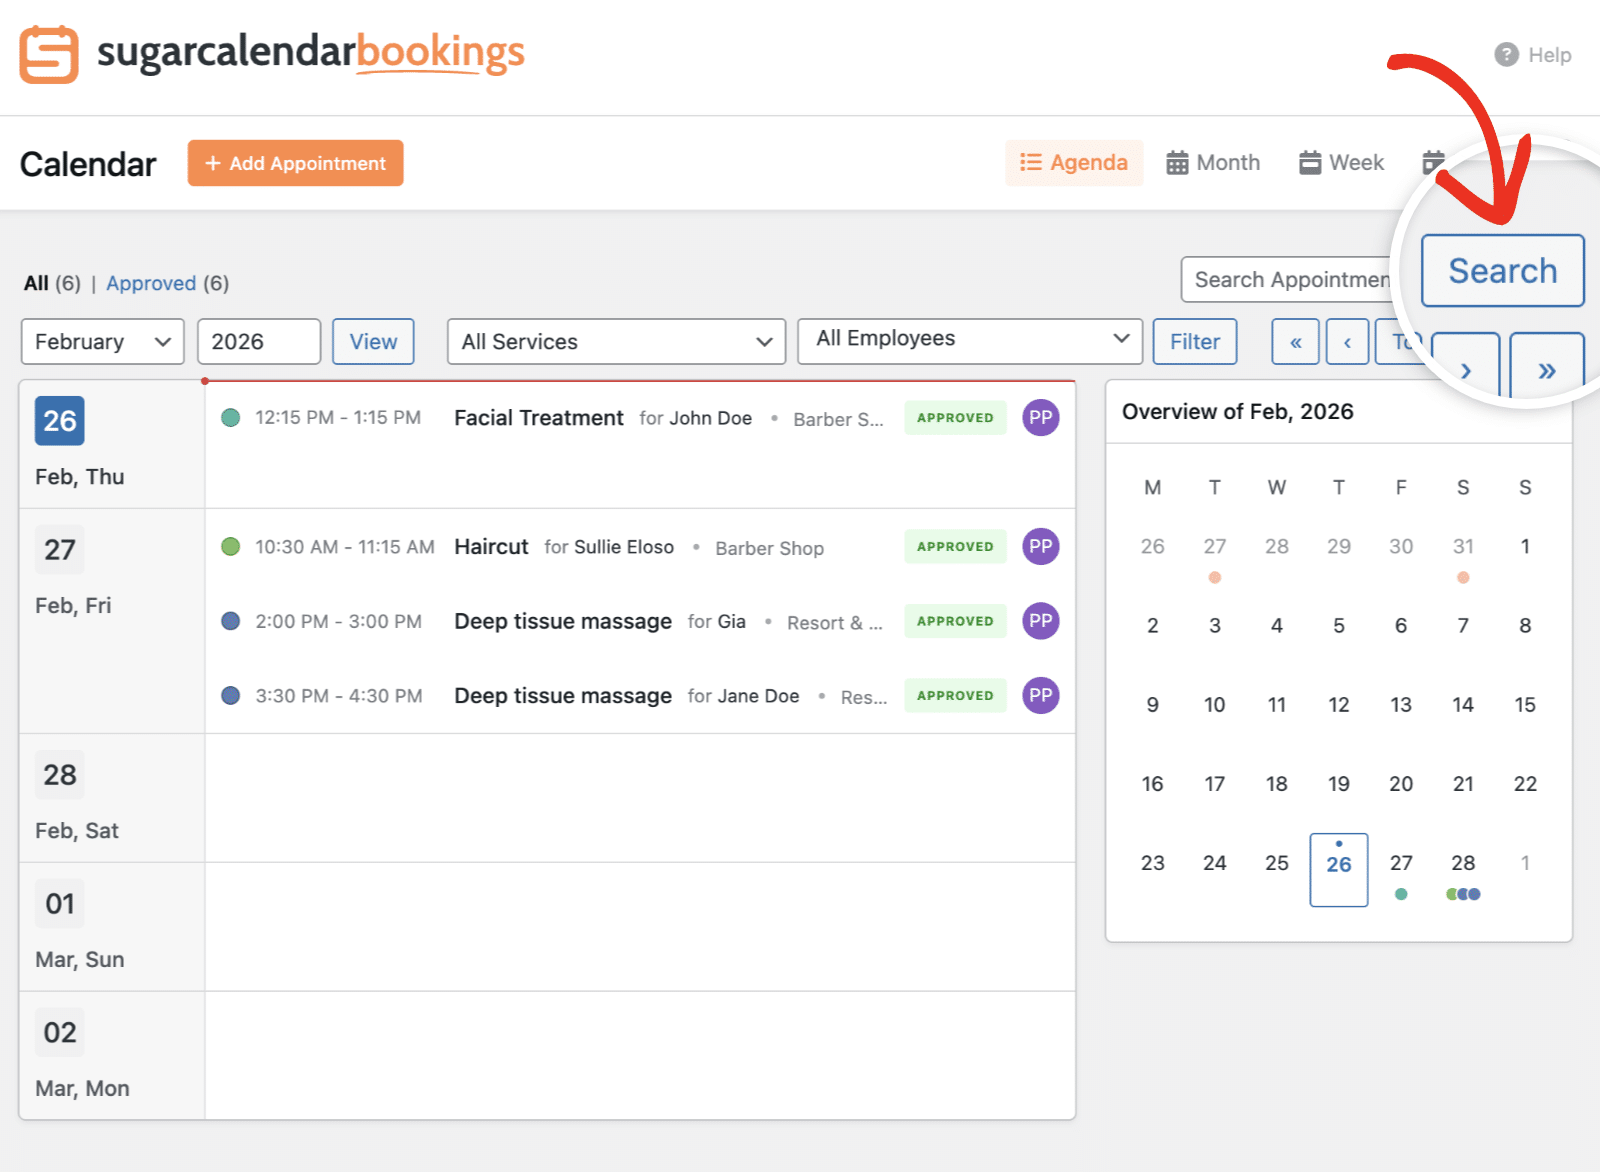
Enter a customer name, service name, or other relevant information, then click Search to filter the results.
Customizing Calendar Display
Click the settings (gear) icon in the top-right corner to access calendar display options. In the Columns section, you can toggle which days of the week appear in your calendar view.
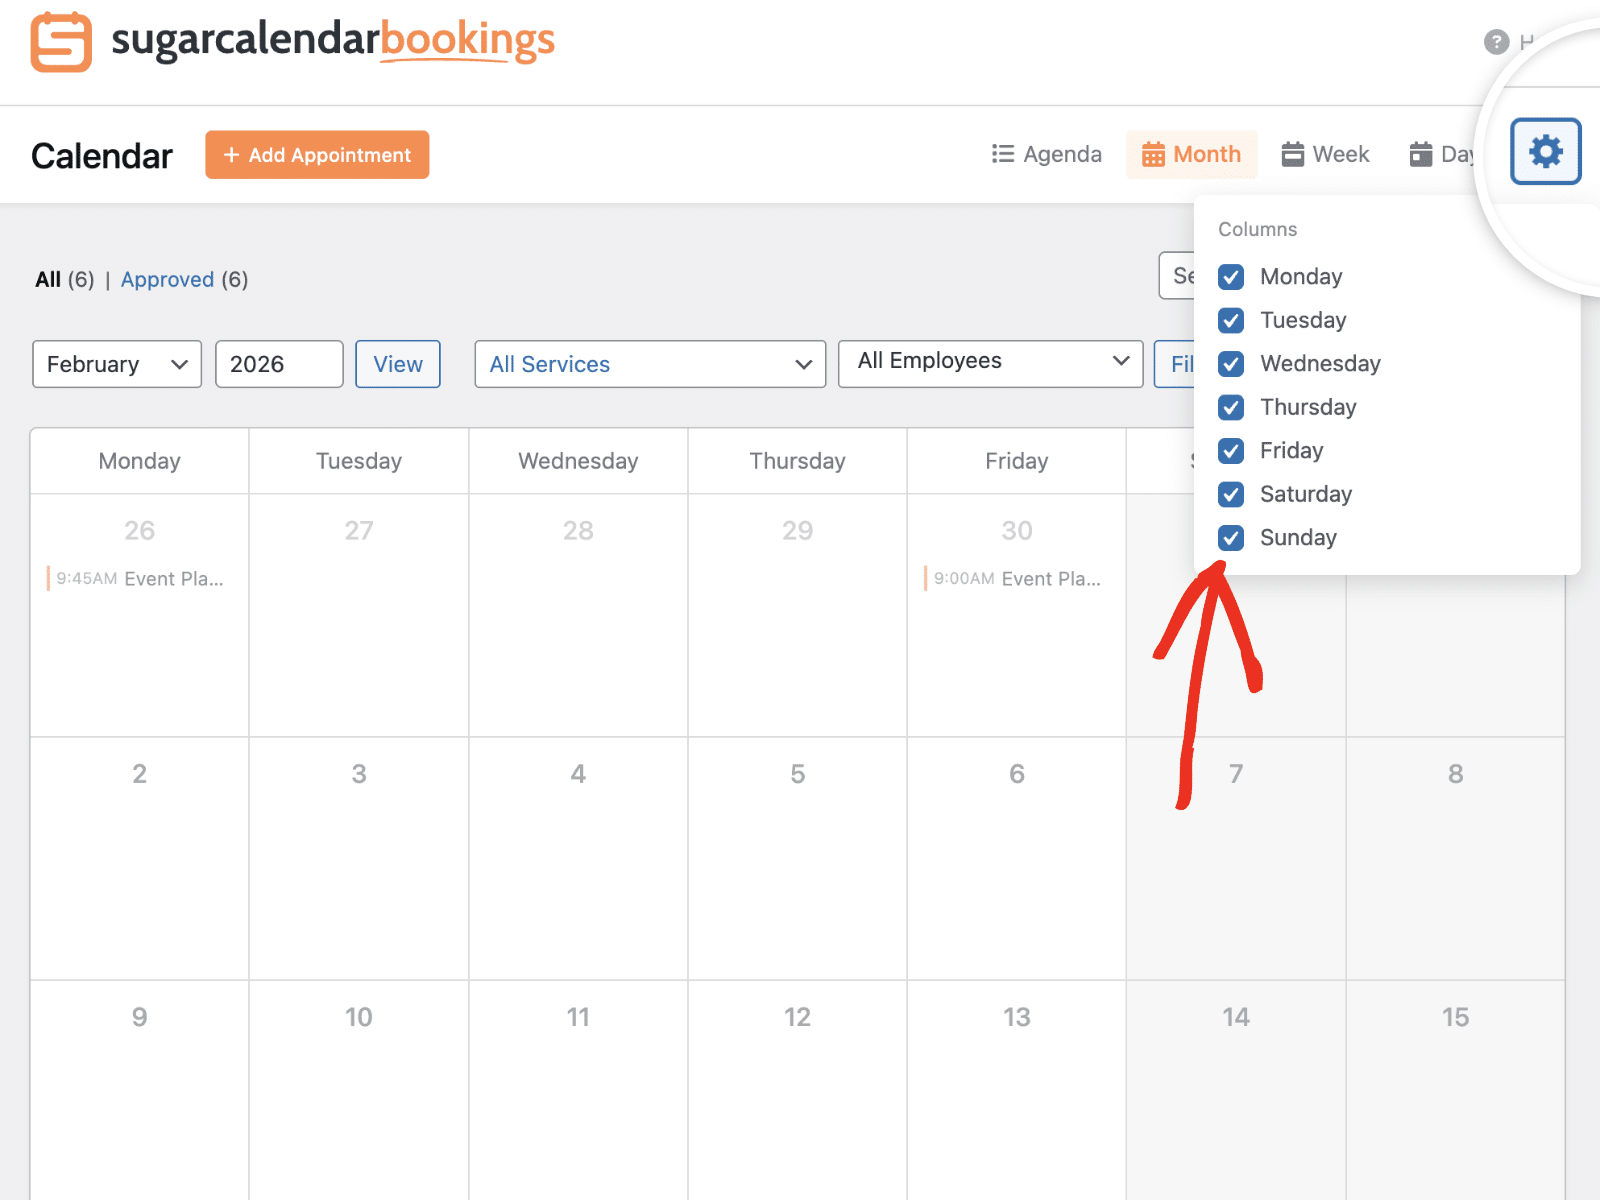
This is useful if your business operates only on certain days. For example, if you don’t take weekend appointments, you can uncheck Saturday and Sunday to hide those columns and create a cleaner view.
Clicking this icon on the Agenda view will show a different set of options.
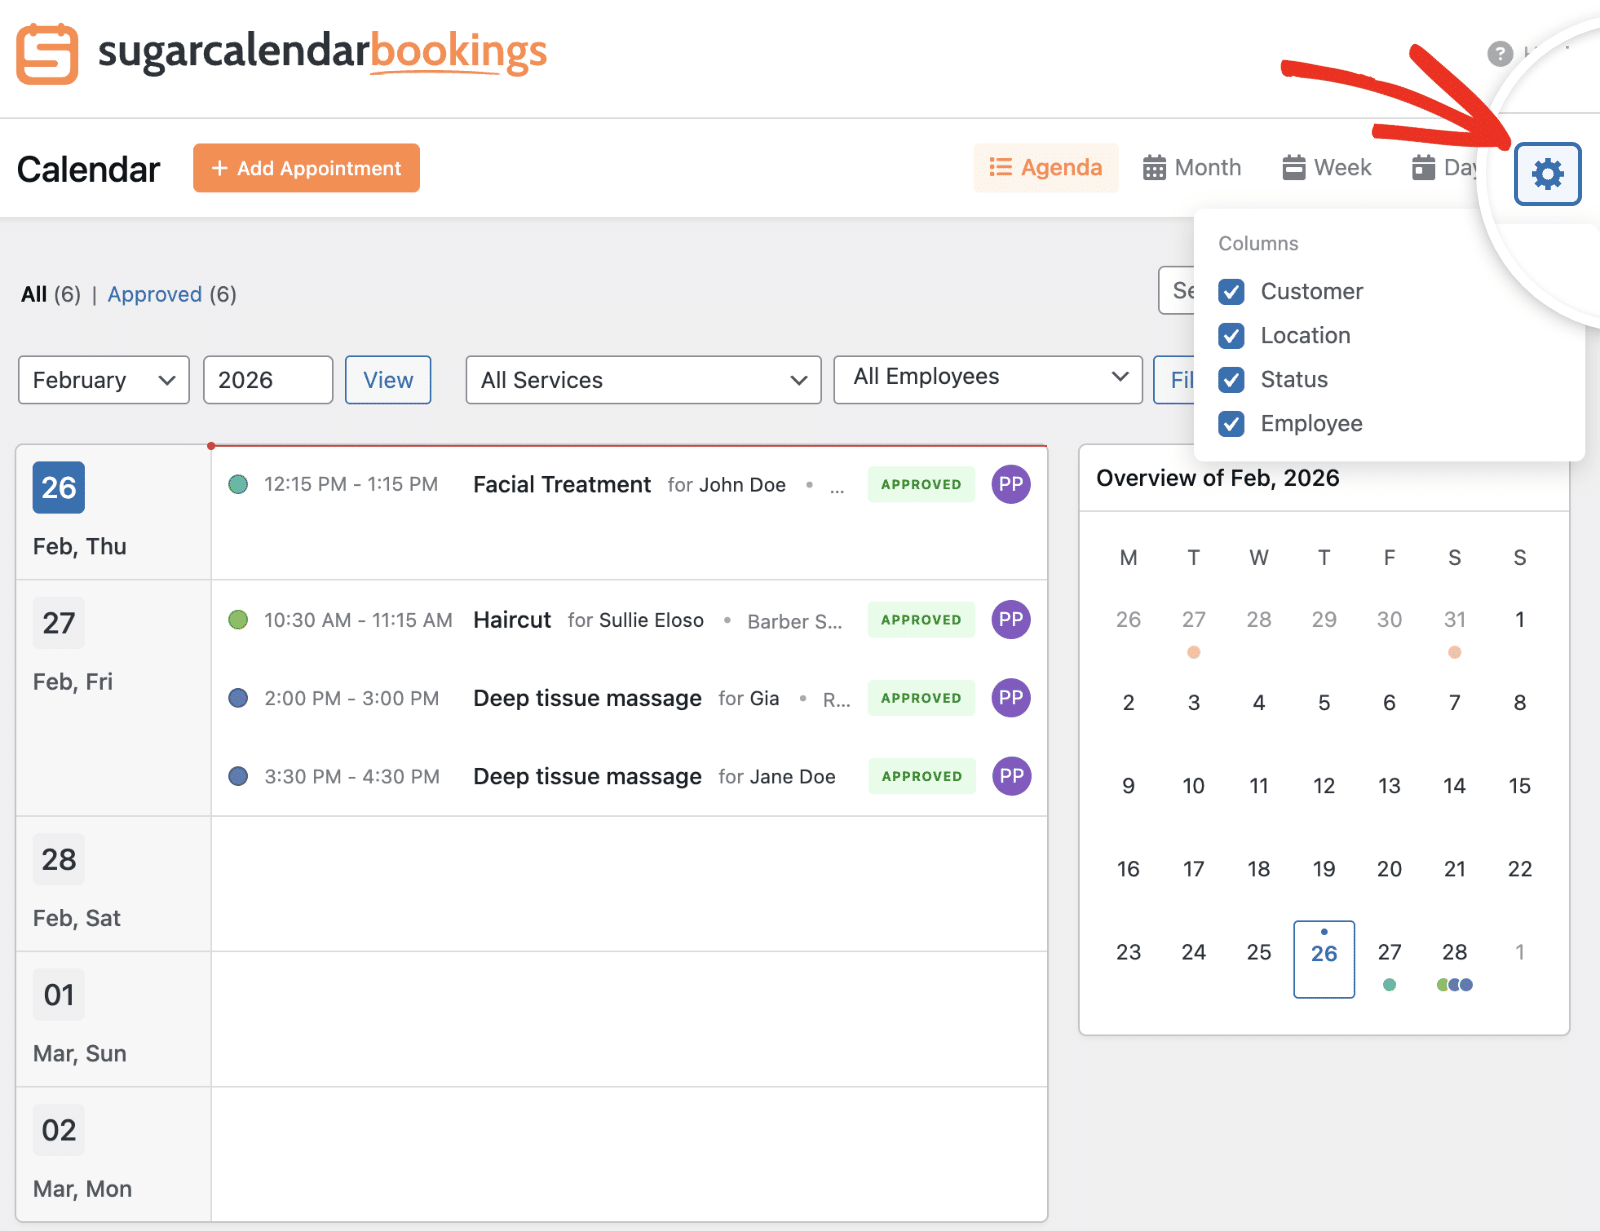
You can hide/show the customer’s name, service location, status, or employee name from the Agenda view.
That’s it! You now have a complete understanding of how to use the Sugar Calendar Bookings Calendar.
Next, would you like to view and manage bookings on your site? Check out our guide on managing appointment bookings for more details.