Would you like to offer virtual appointments with automatic Zoom meeting links? Sugar Calendar Bookings integrates with Zoom, so every booking automatically generates a meeting link.
In this tutorial, we’ll show you how to set up and use the Zoom integration in Sugar Calendar Bookings.
In This Article
Requirements: To use the Zoom integration, you’ll need:
- A Zoom account (free or paid)
- A valid SSL certificate on your WordPress site
- Sugar Calendar Bookings installed and activated
Connecting Your Zoom Account
Both admins and employees connect their Zoom accounts from the Integrations settings page. Each person connects their own account independently, so meeting links reflect the host who owns the appointment.
Connecting as an Admin
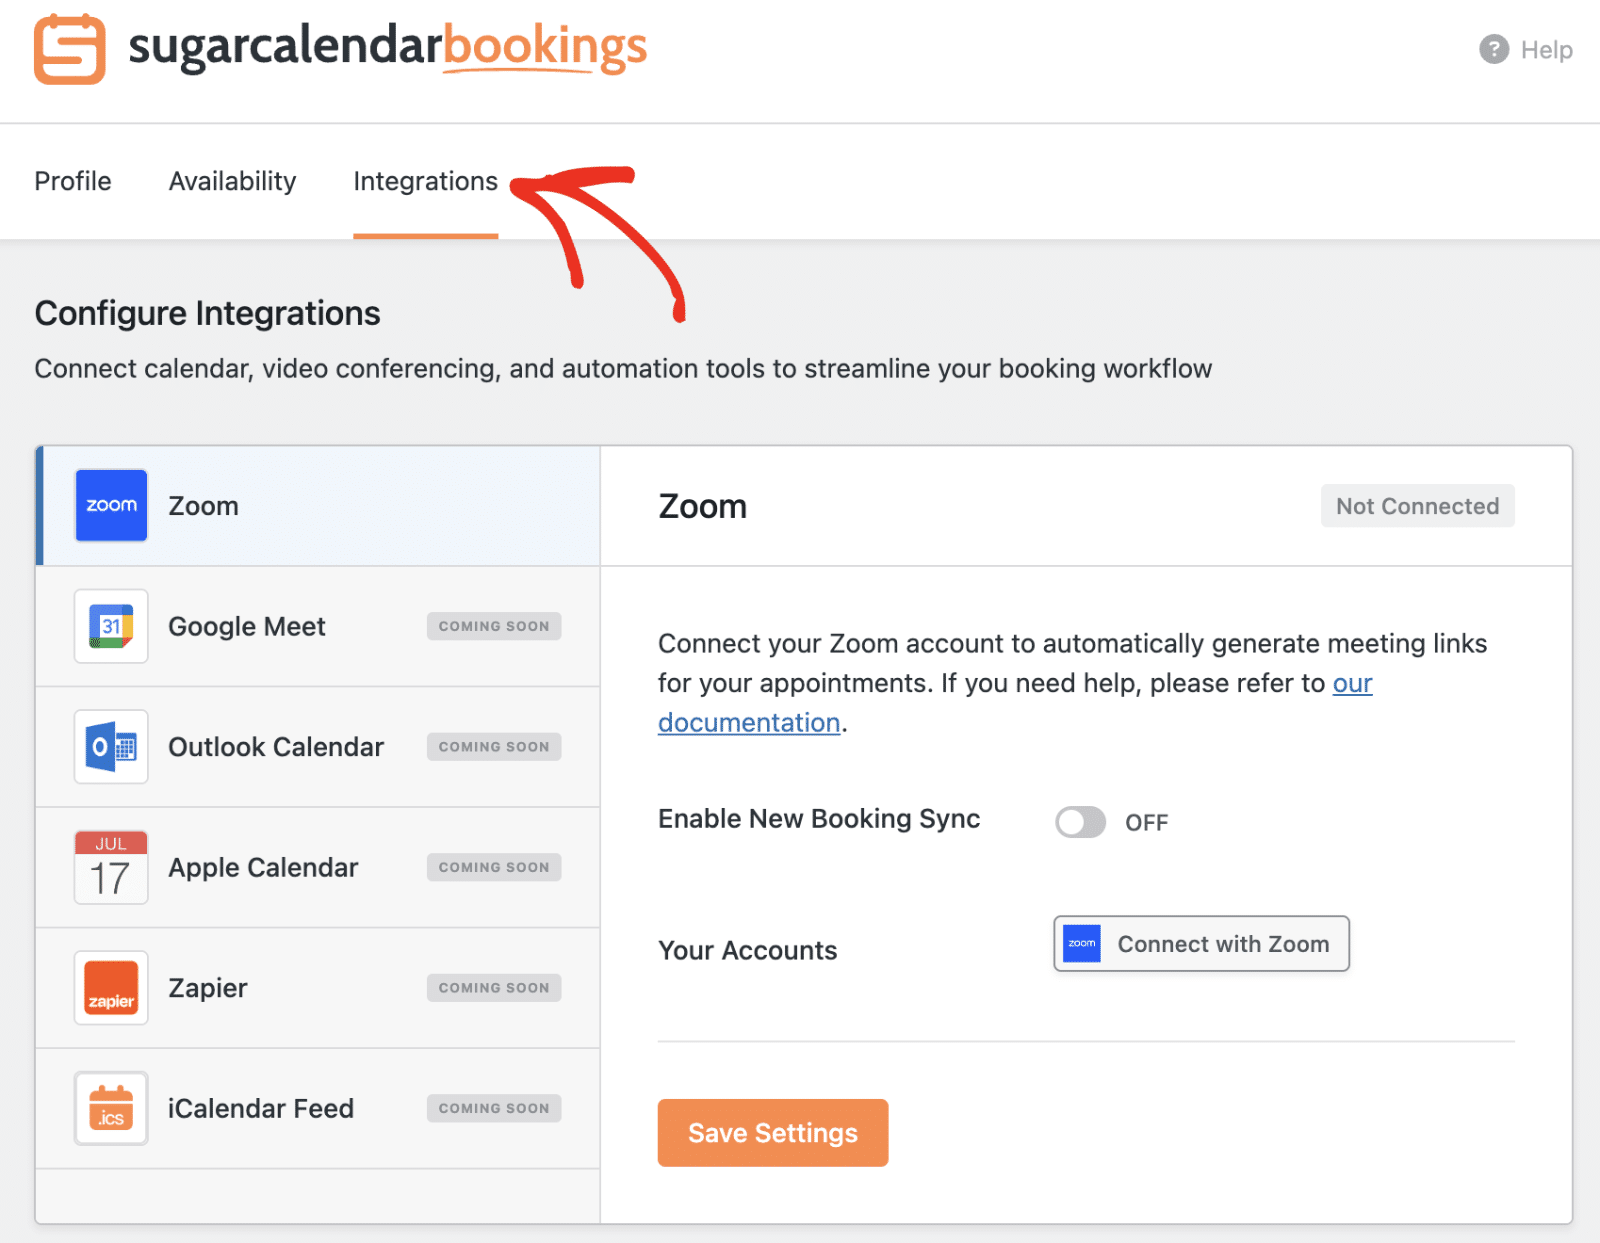
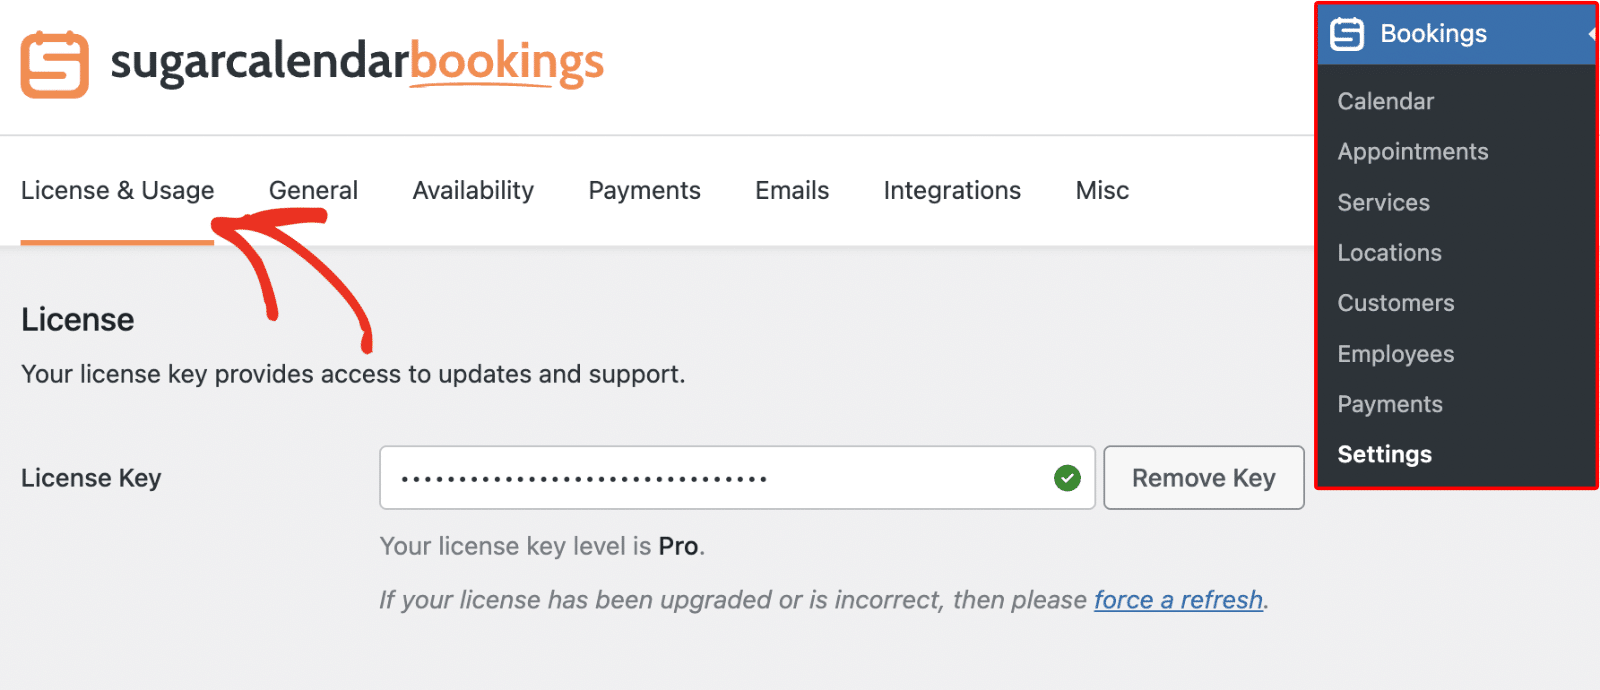
To connect your Zoom account as an admin, go to Bookings » Settings in your WordPress dashboard and click the Integrations tab.
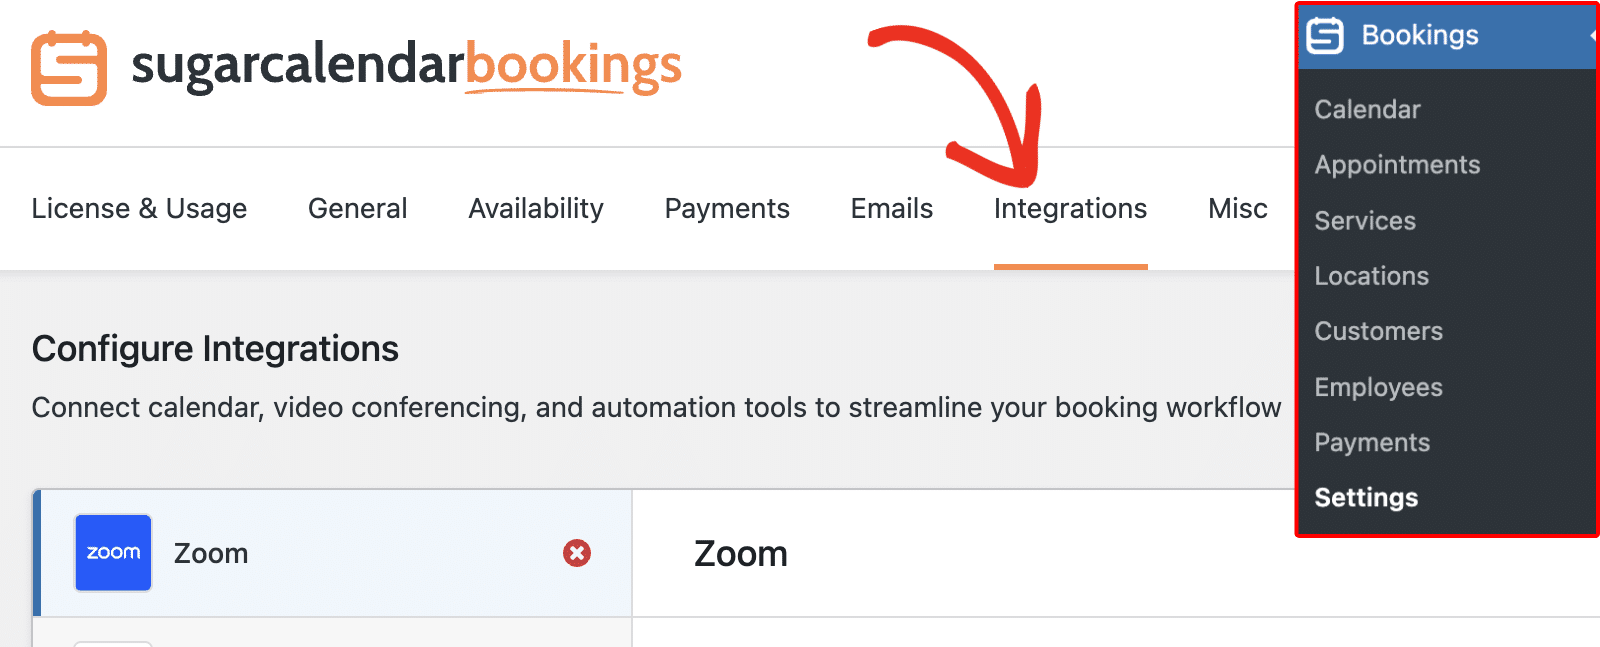
Once here, you’ll see all the available integrations Sugar Calendar Bookings supports.
Make sure to select the Zoom sidebar menu. Then click the Connect with Zoom button. Zoom’s authorization page opens in your browser. If you are not already signed in to Zoom, enter your credentials now.
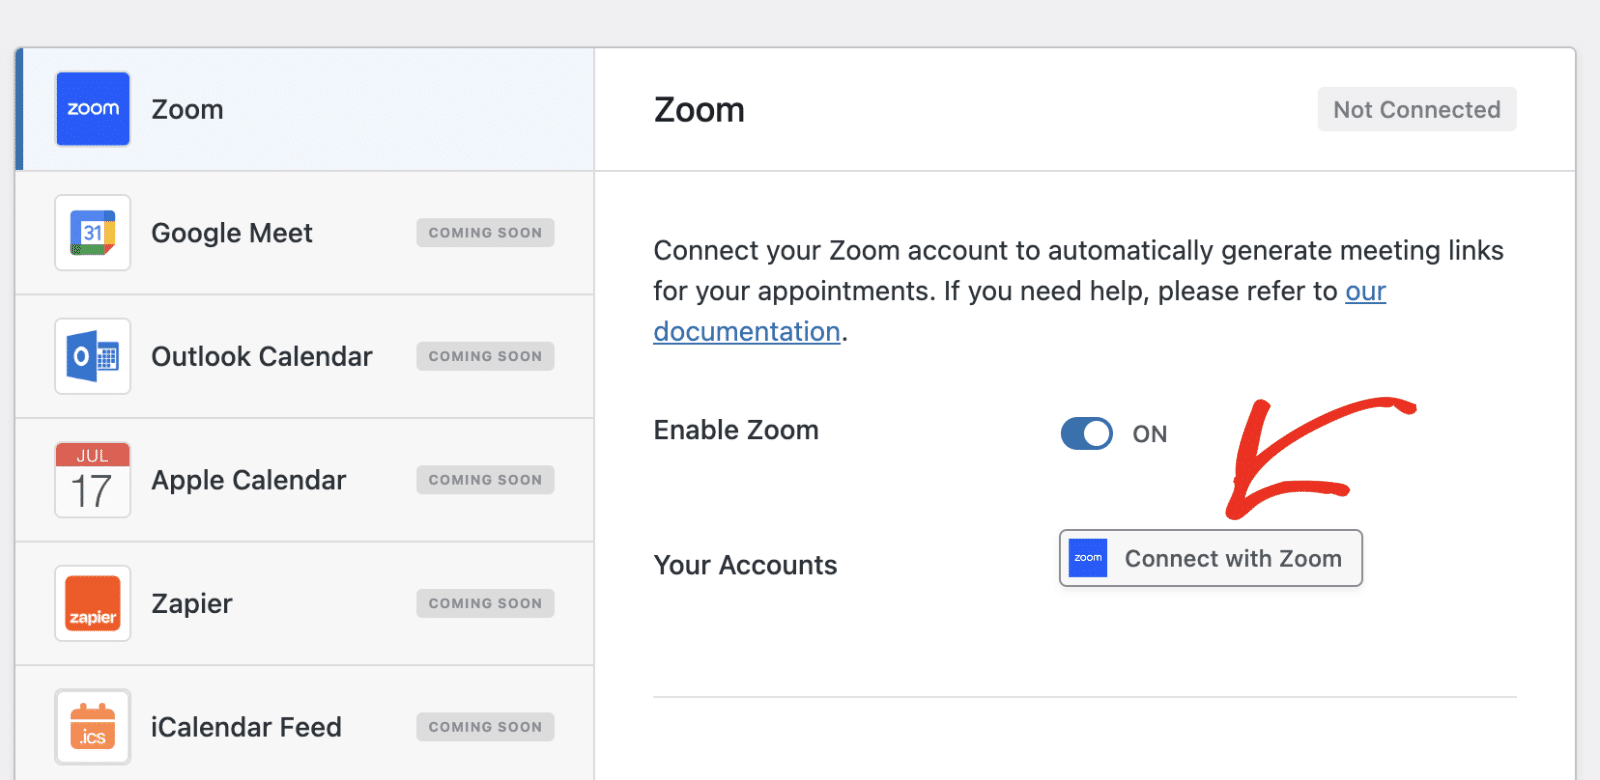
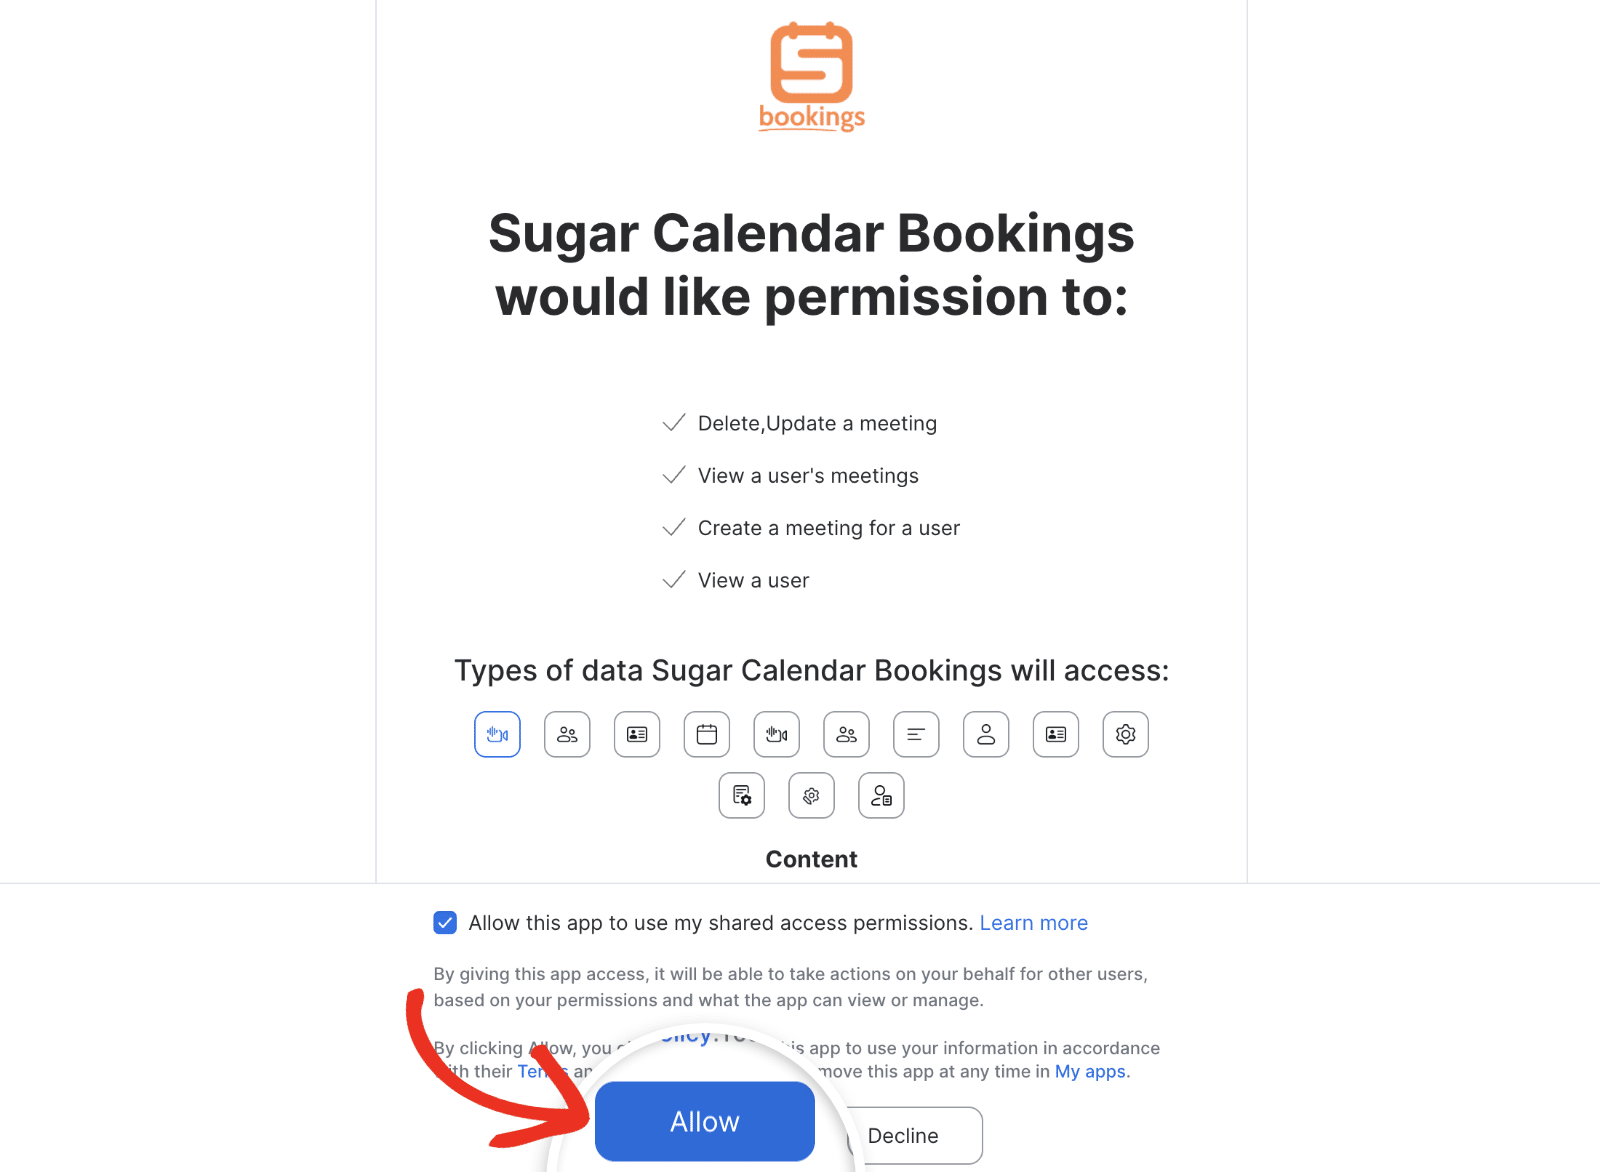
After signing in, click Allow to grant Sugar Calendar Bookings access to your Zoom account.
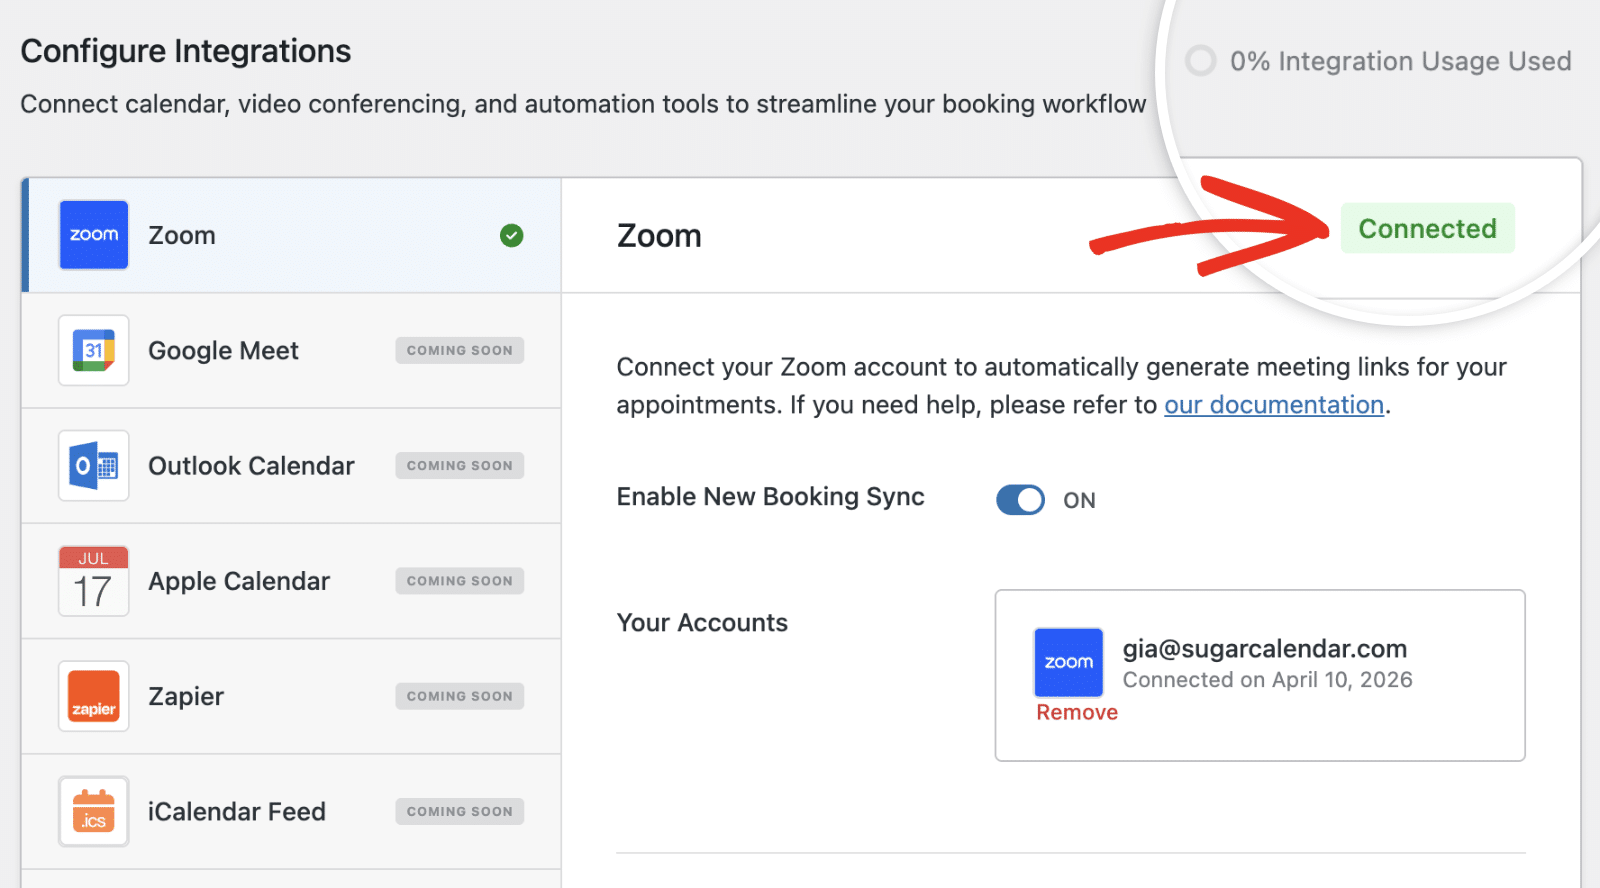
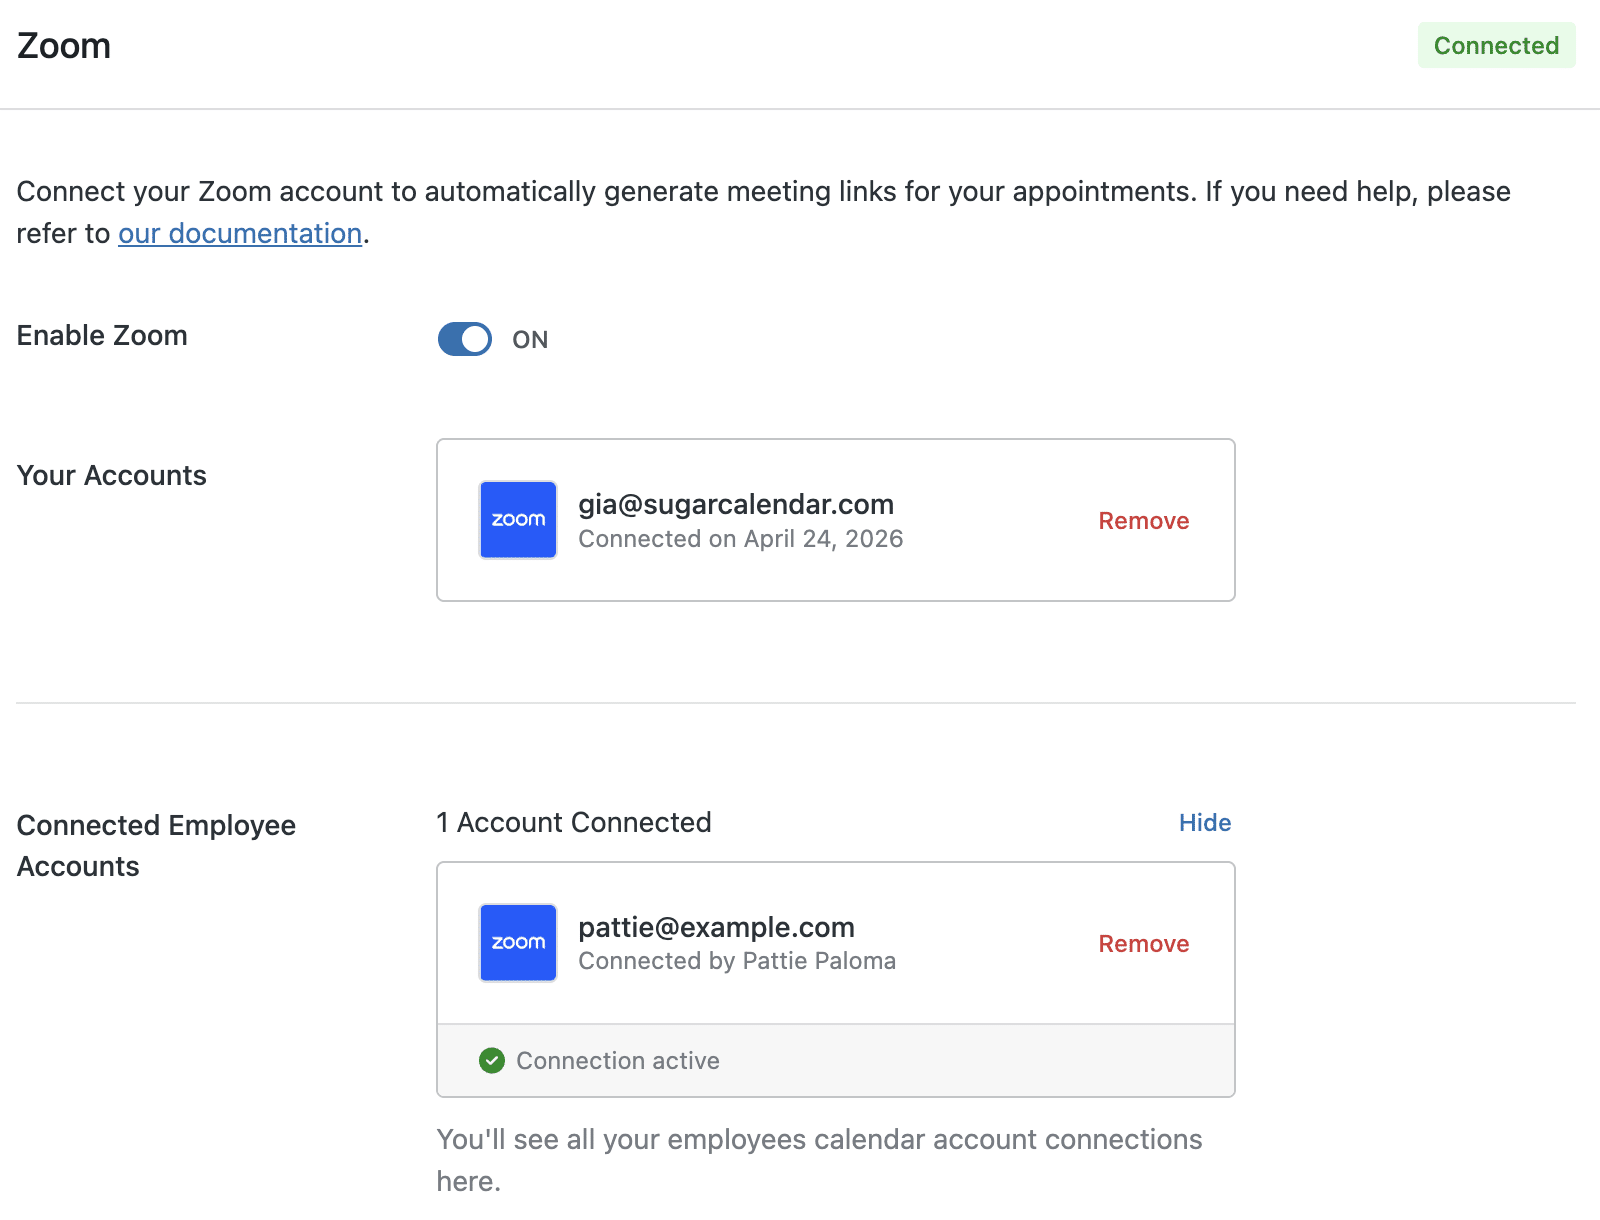
You should be redirected back to the Integrations settings page after completing the integration.

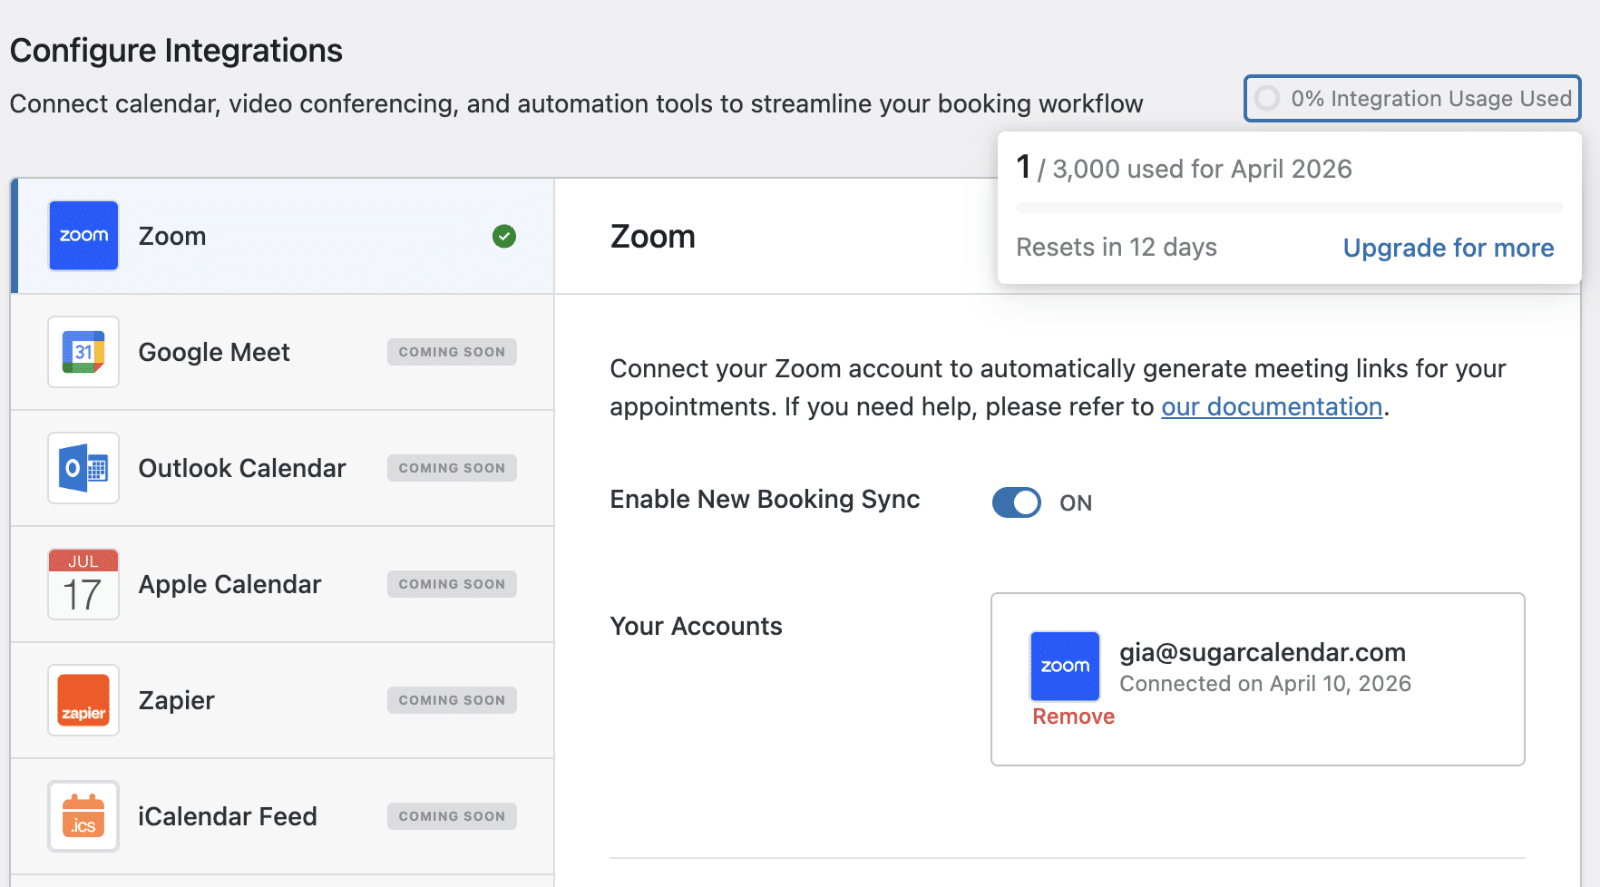
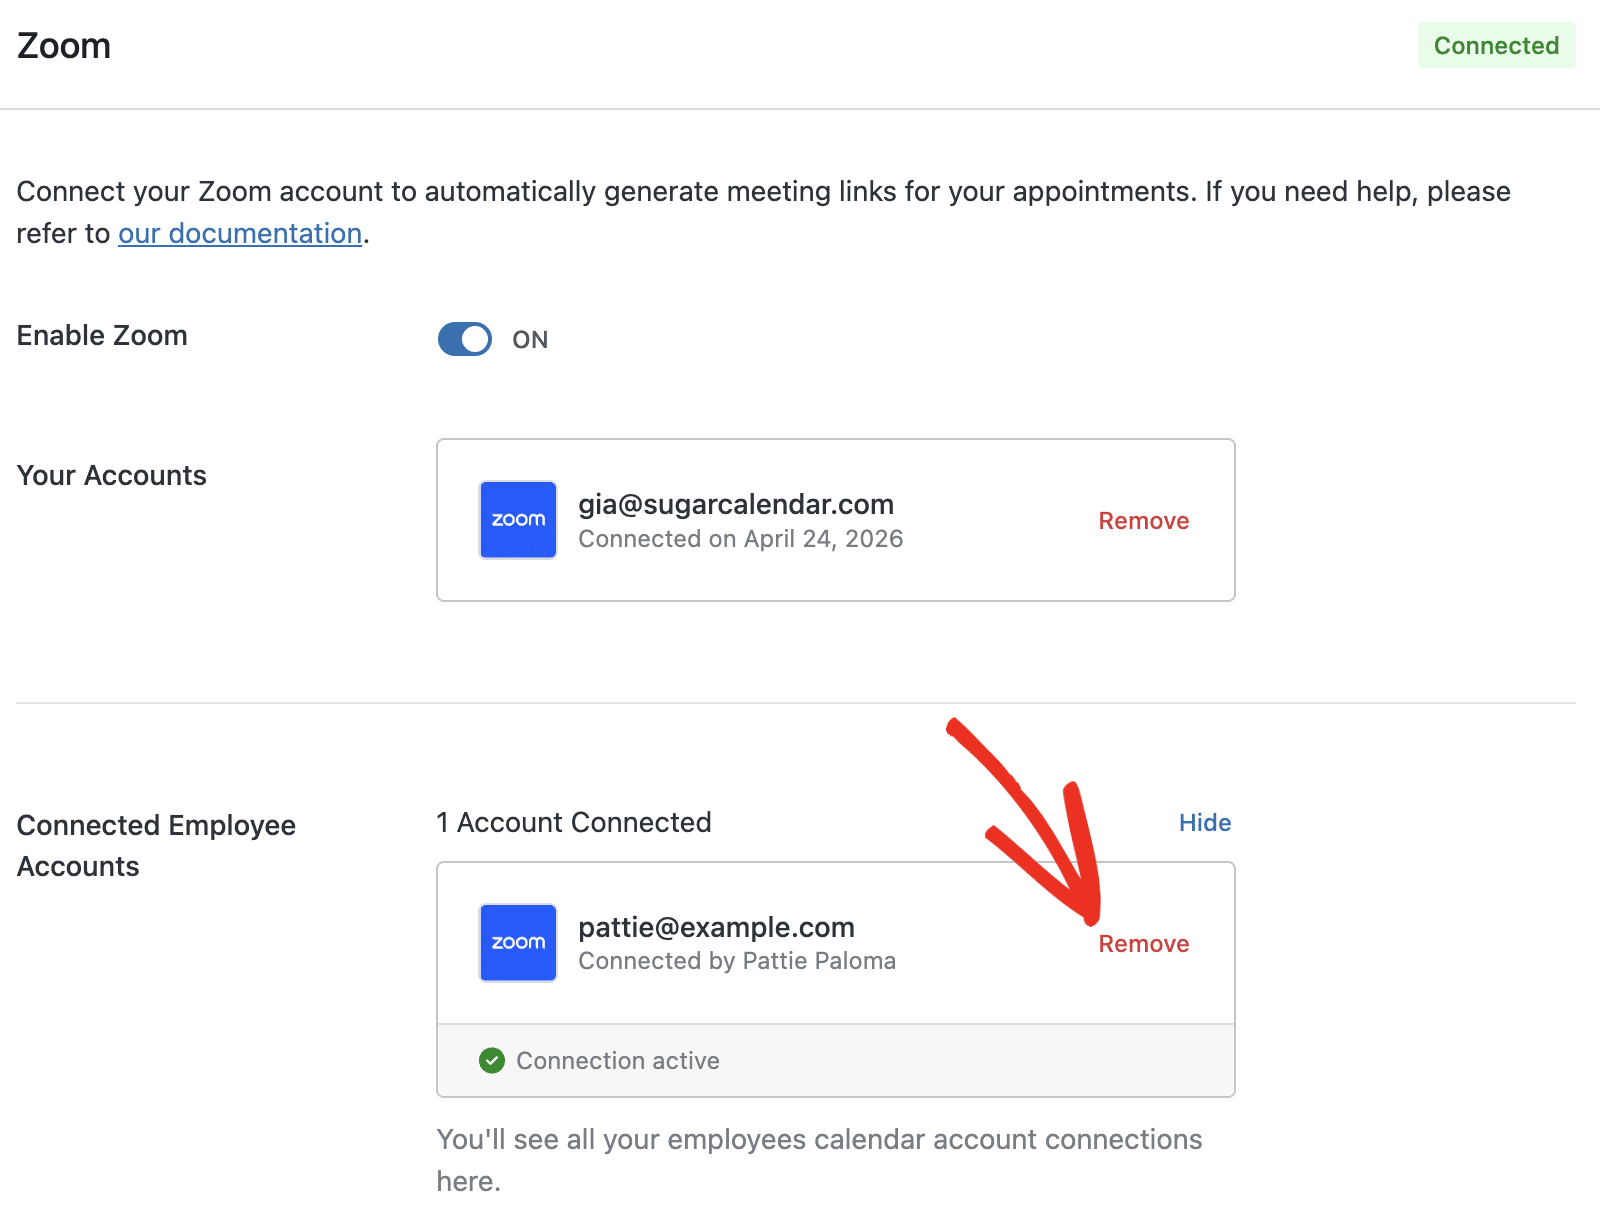
Your connected Zoom account name and email address appear under the Zoom panel, confirming the connection was successful.
Connecting as an Employee
Employees connect their own Zoom accounts from the Integrations tab in their employee settings page. The steps are the same: click Connect with Zoom, authorize access in Zoom, and the account links to the employee’s profile.
After an employee connects their account, the site admin will see their connection under the Connected Employee Accounts section.
Additional Settings
Below the Employee connections, you’ll additional settings for the Zoom connection.
The Meeting Title field is what shows up in Zoom as the meeting title.
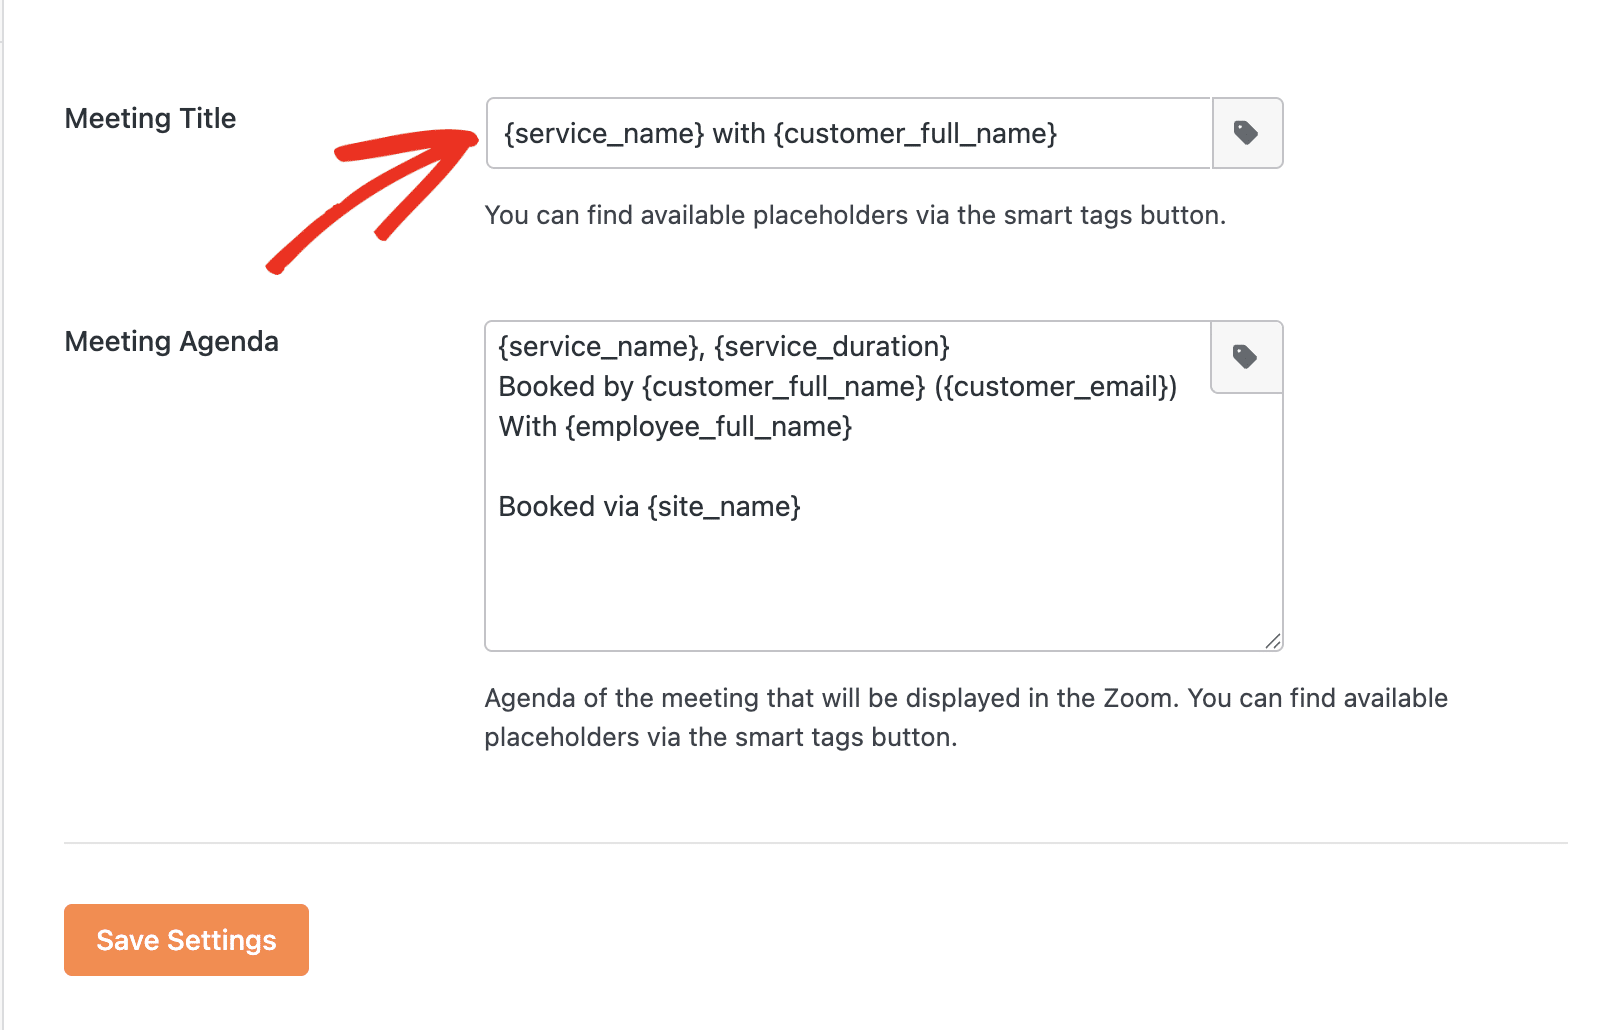
It supports smart tags that let you pull dynamic values from the appointment. To see the available smart tags, click the Tags icon.
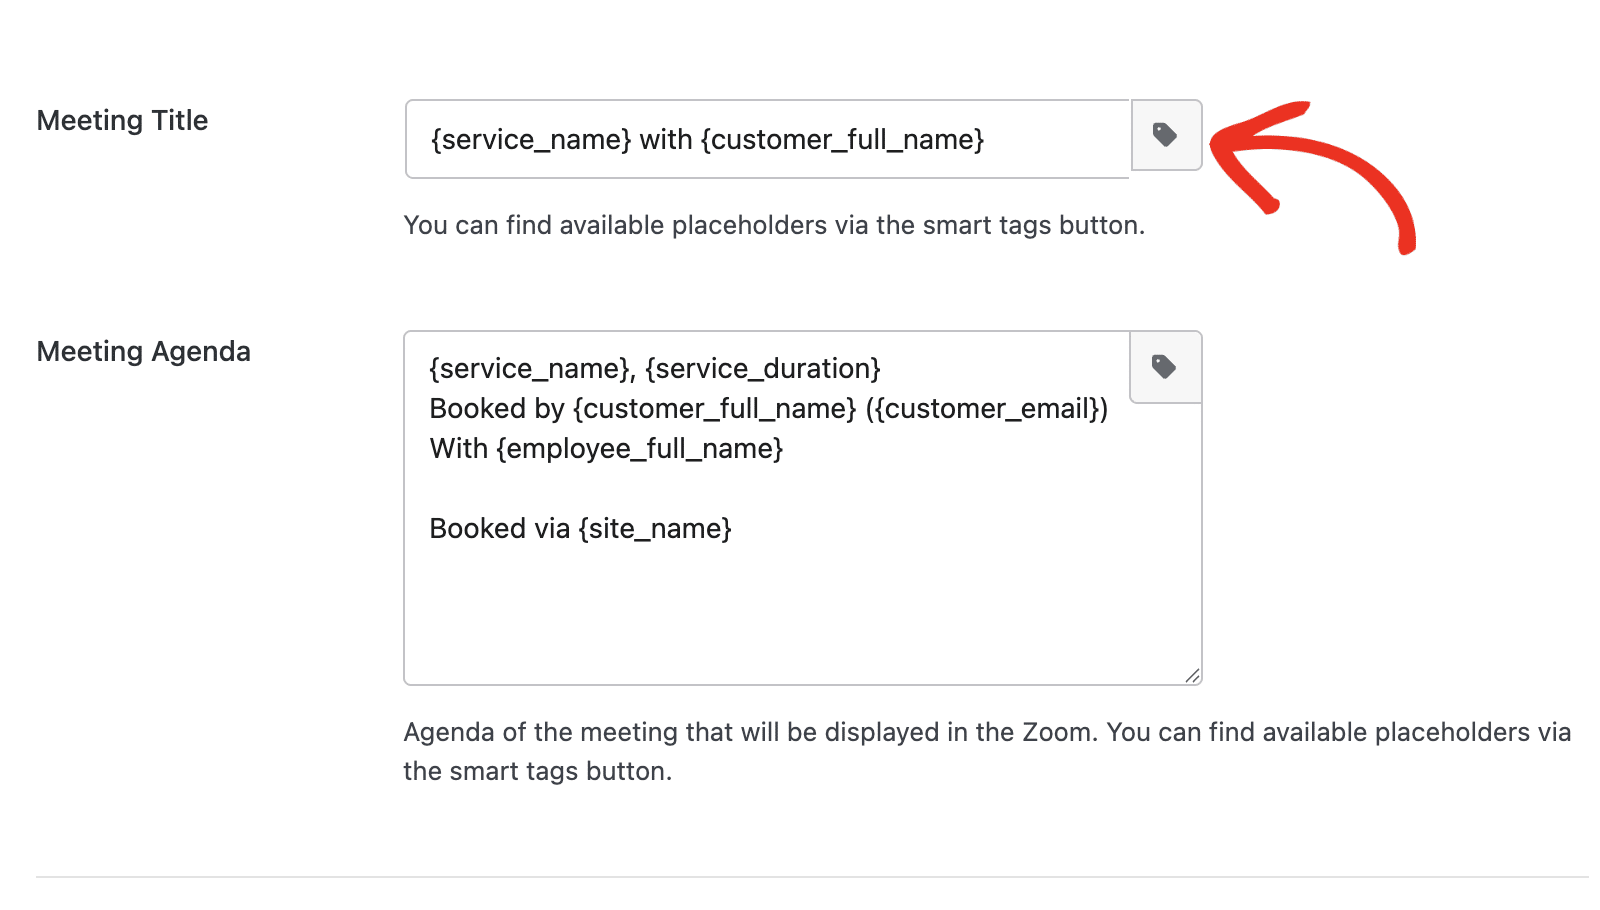
The Meeting Agenda field is the booking description that’s displayed in Zoom.
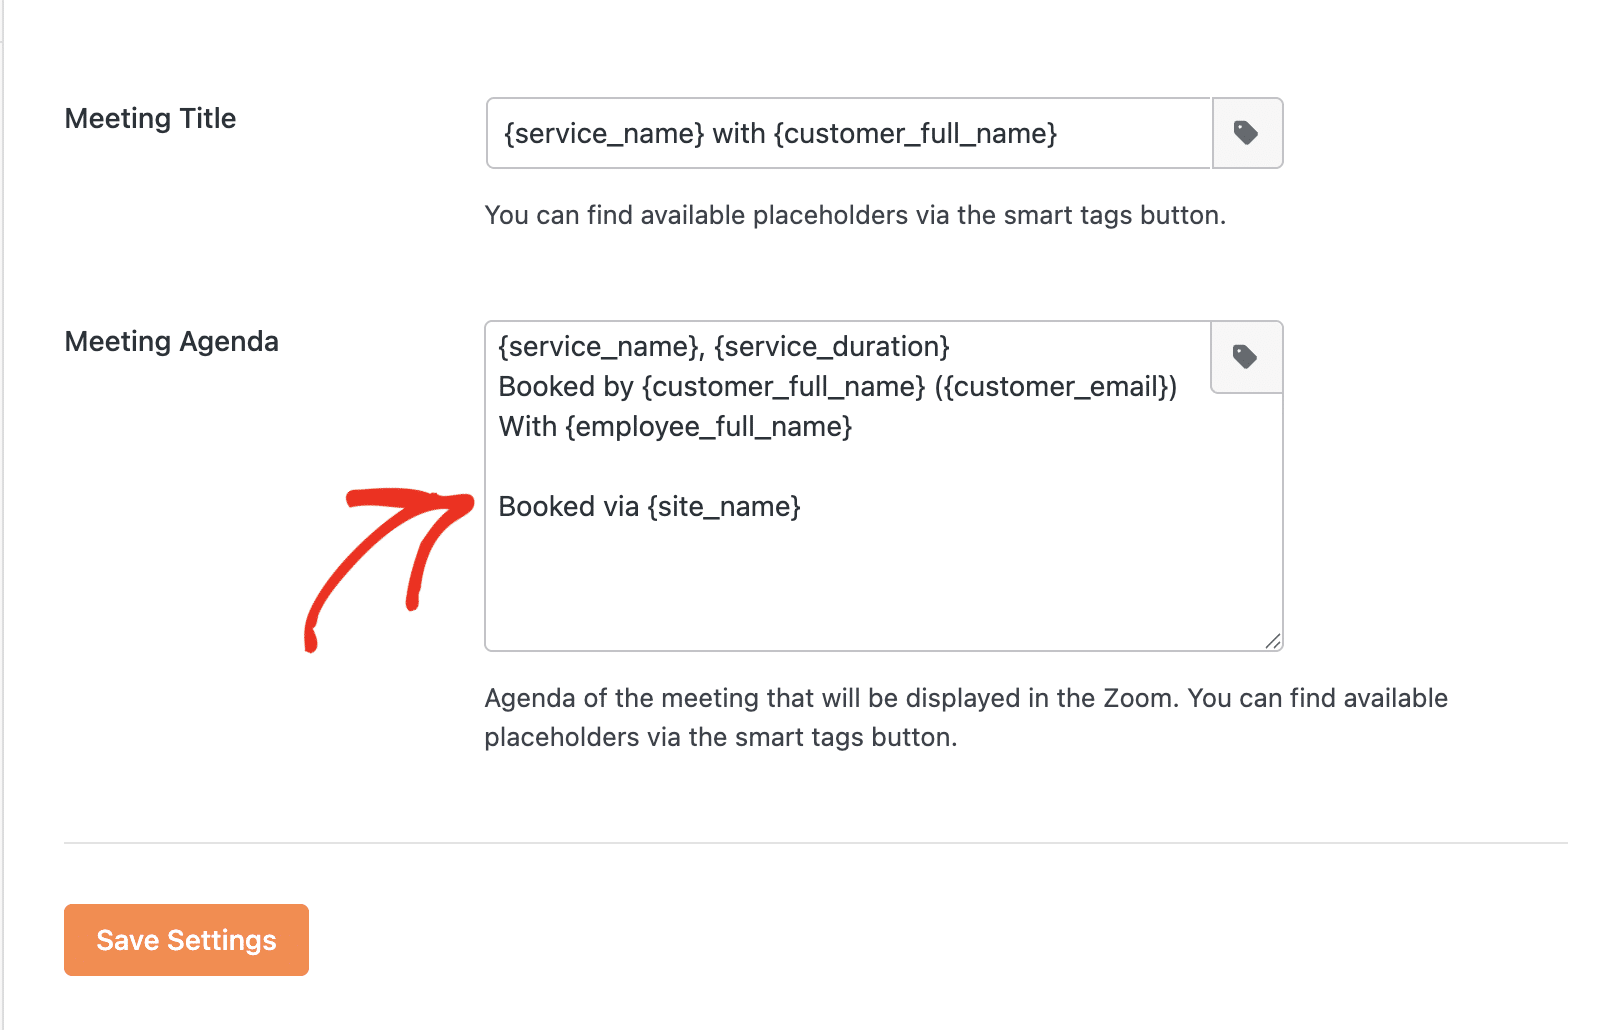
Similarly, use the tags icon to choose from the available smart tags.
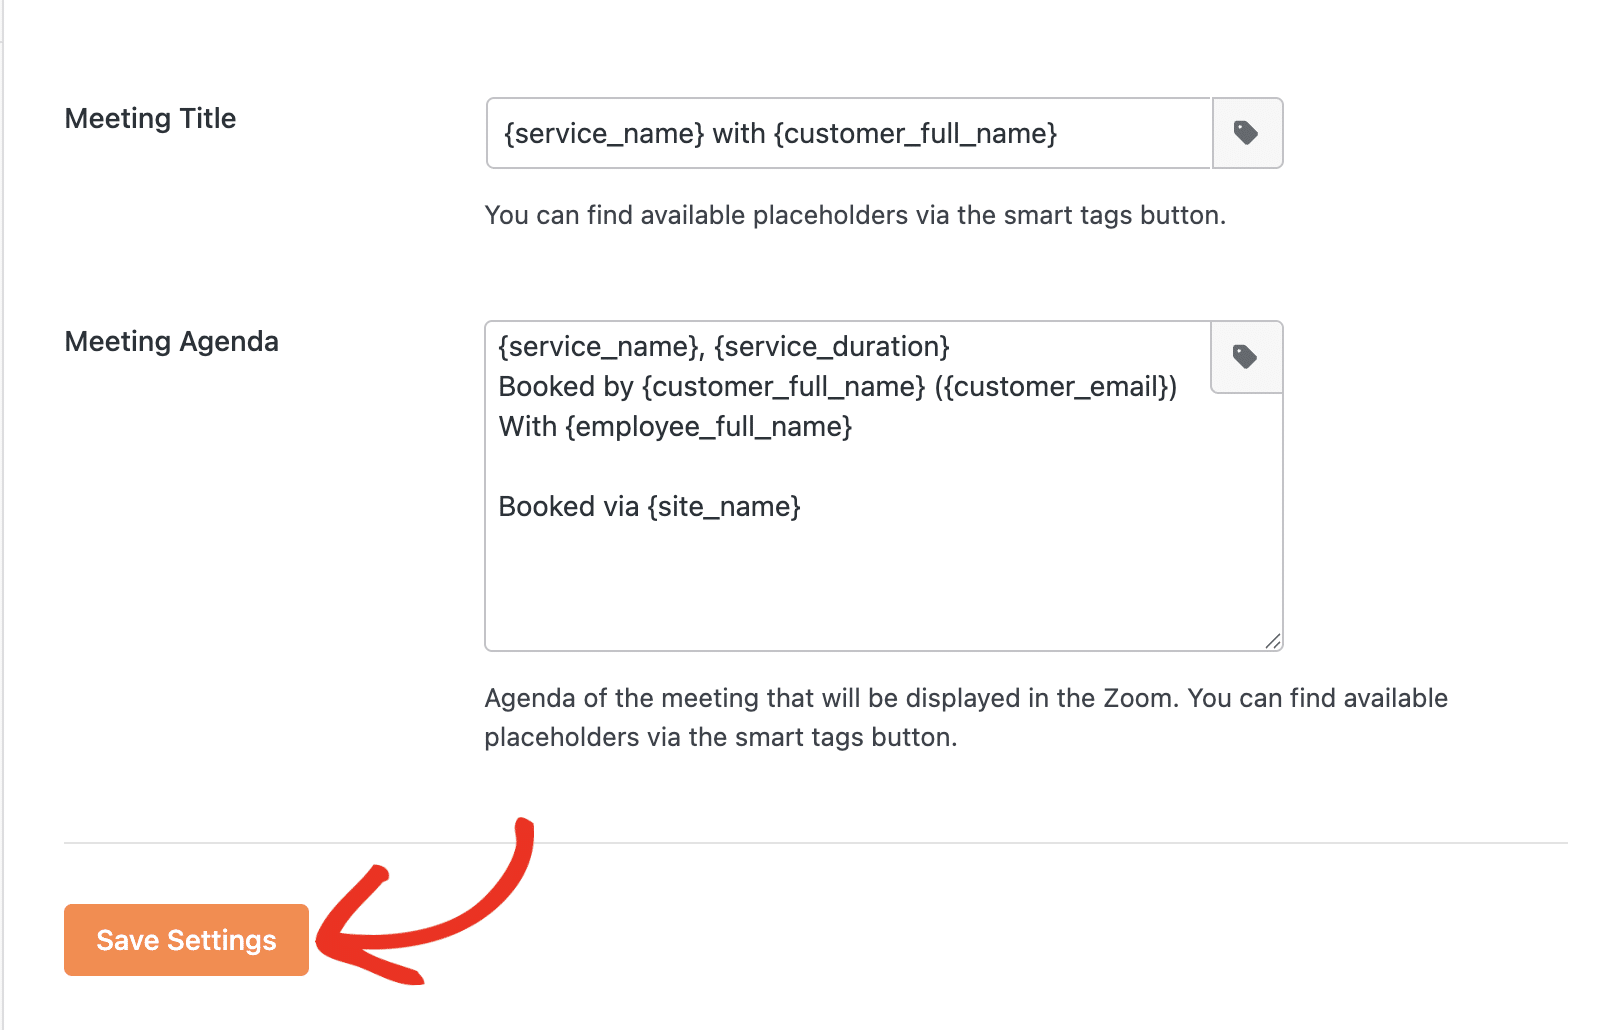
Once you’re done customizing the Zoom integration, click Save Settings to save your changes.
Setting Up a Zoom Service Location
Once a Zoom account is connected, Zoom becomes available as an online location option when creating or editing a service.
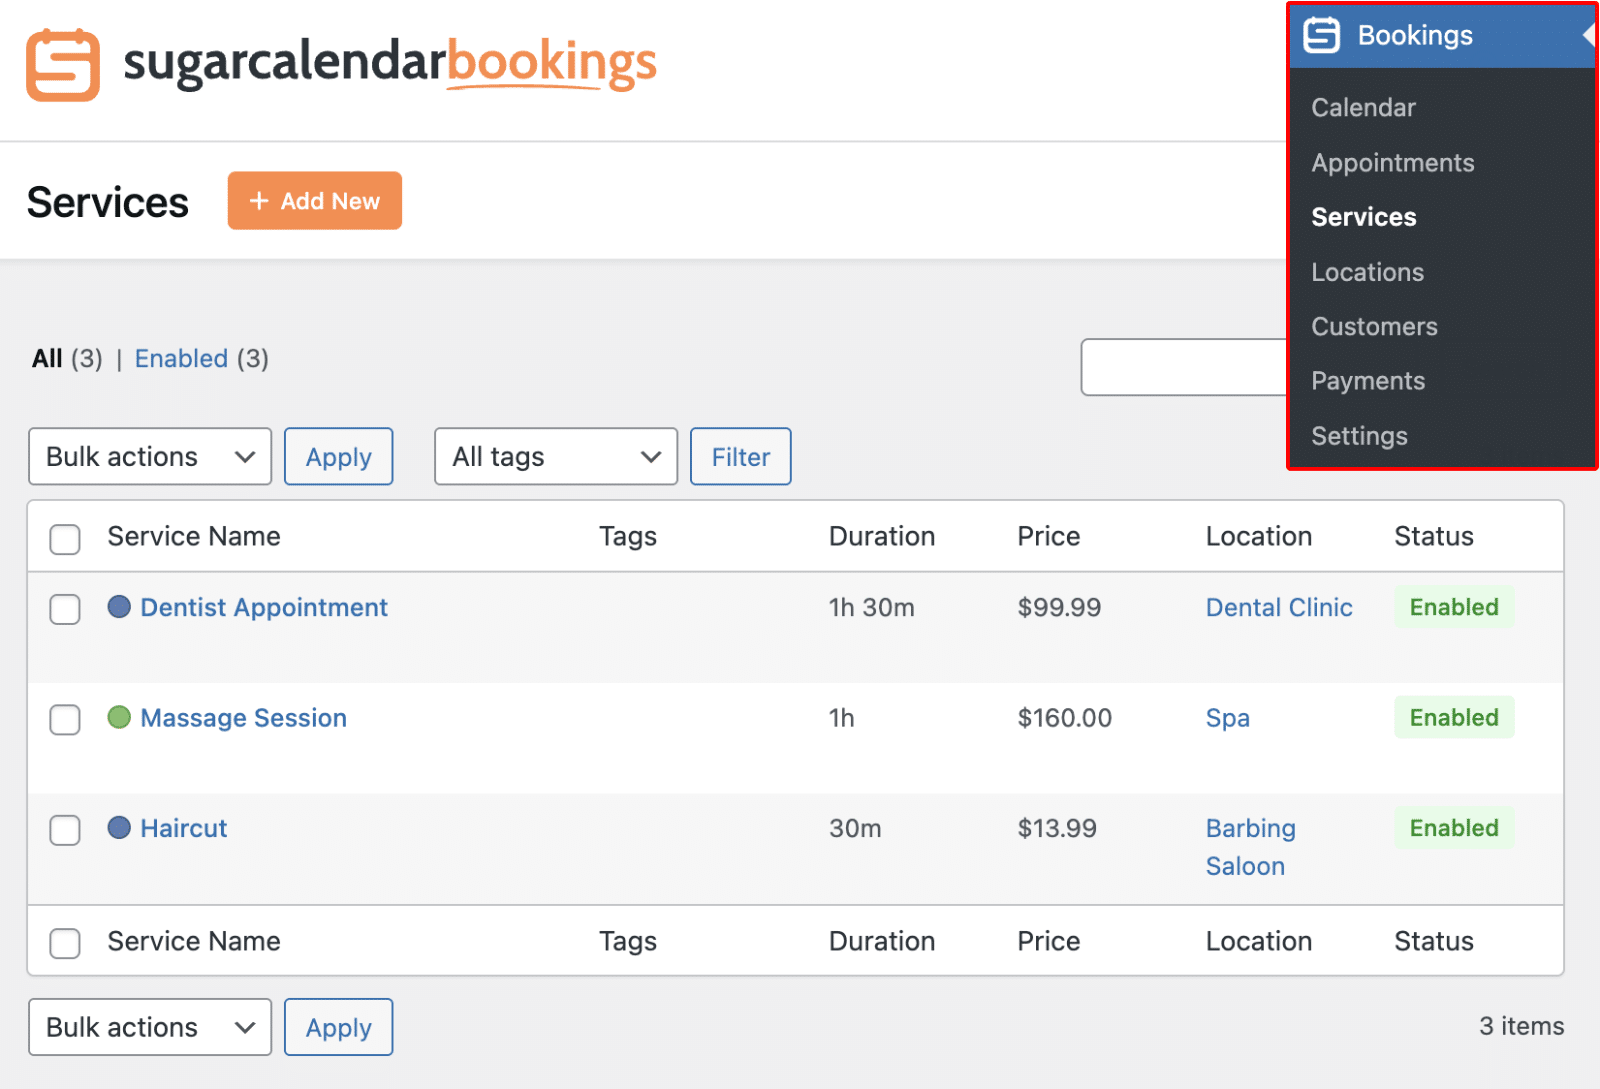
To set Zoom as the location for a service, go to Bookings » Services and open the service you want to edit (or create a new one).
In the service editor, select the employee for the service first. The available online location options depend on which employee is assigned and whether they have connected their Zoom account.
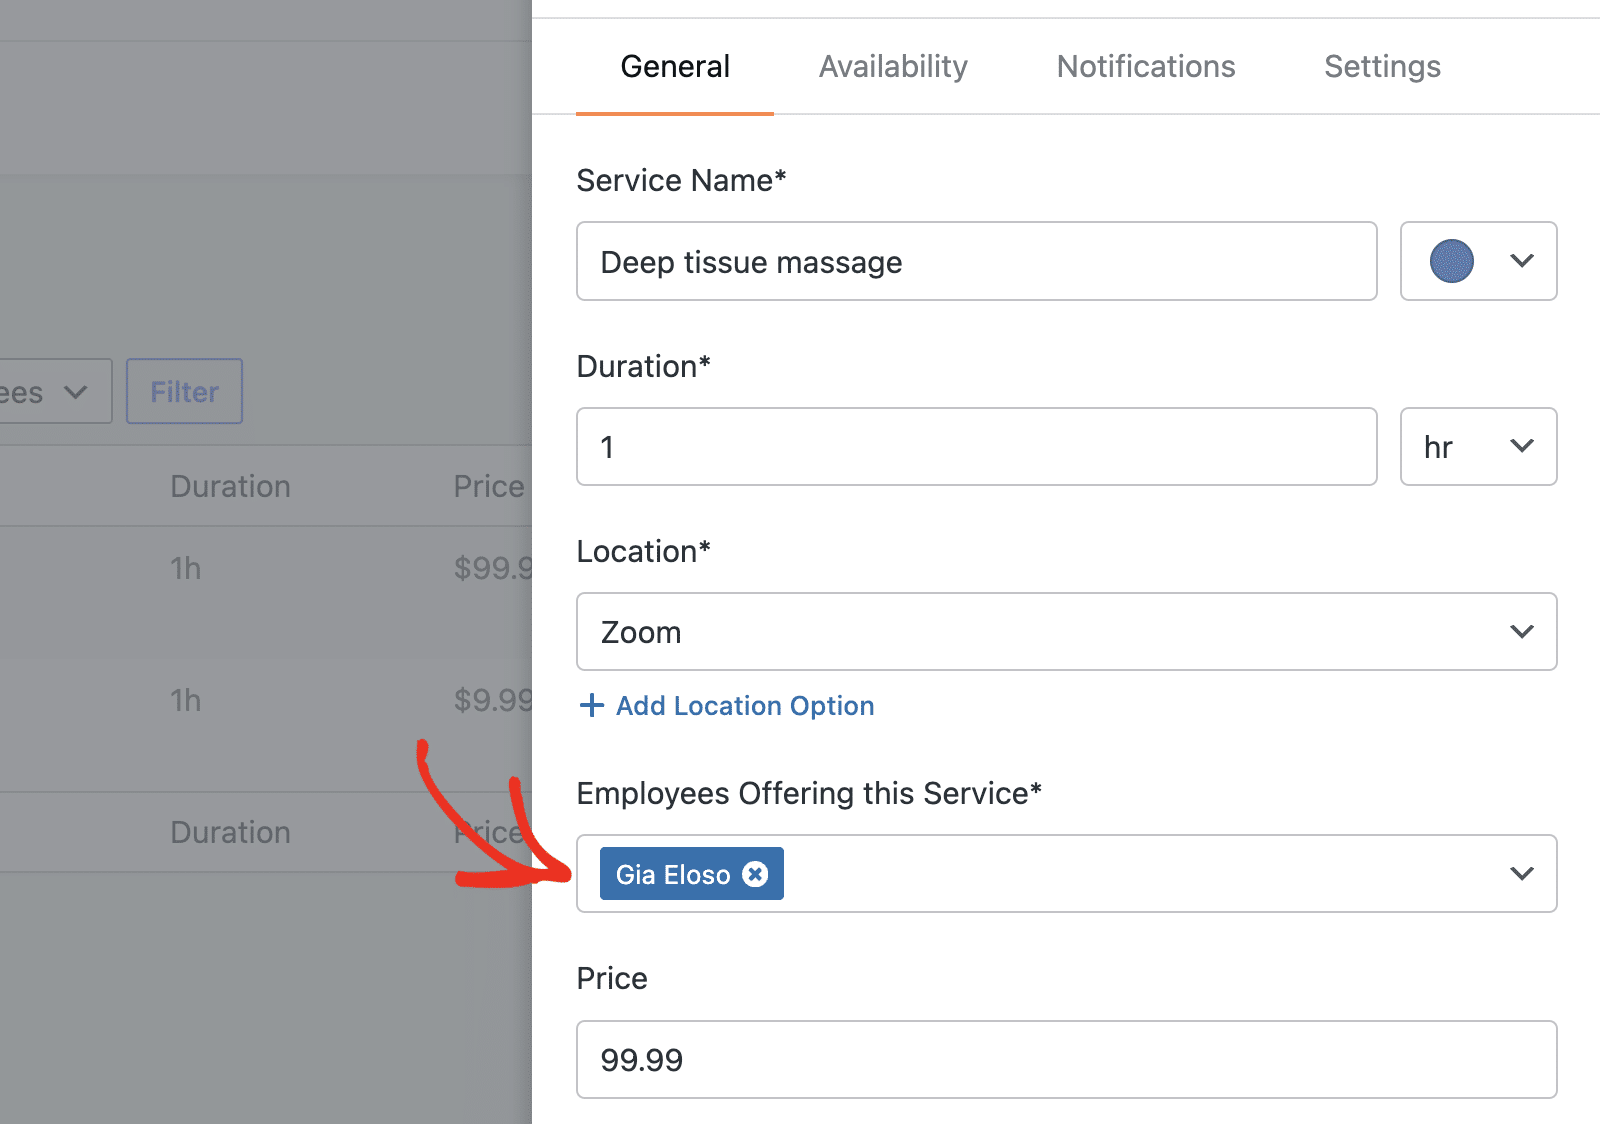
After selecting an employee with a connected Zoom account, open the Location field and select Zoom.
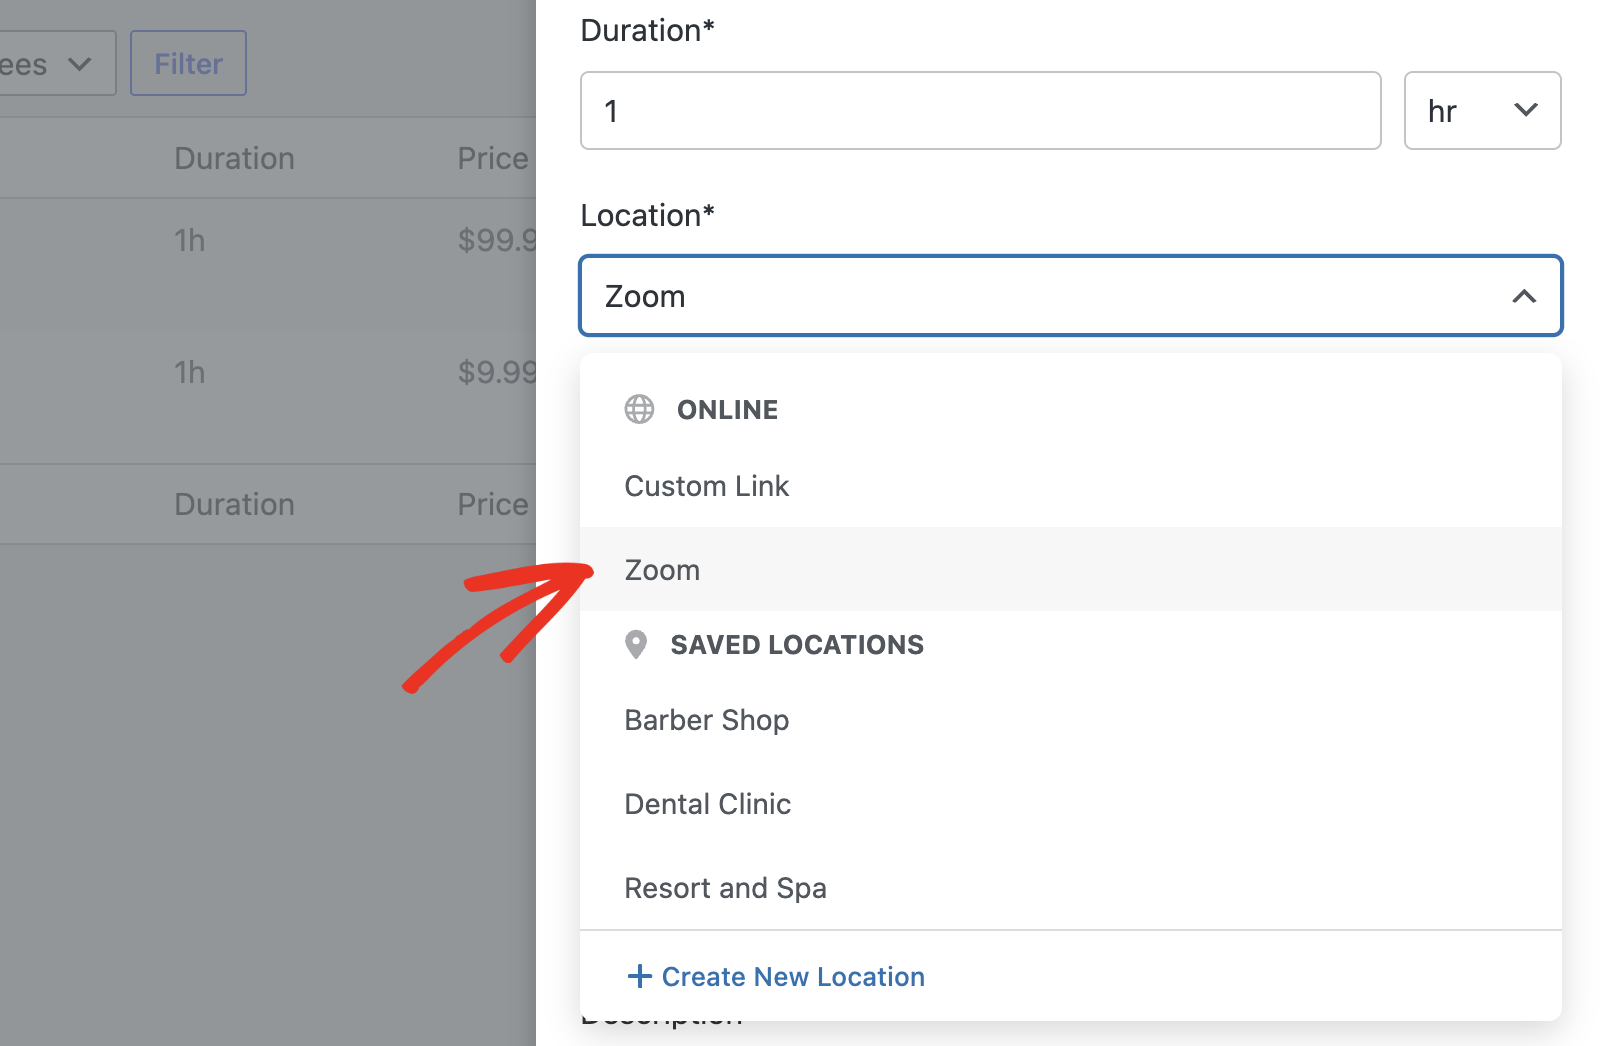
Save the service. When a client books this service, Sugar Calendar Bookings automatically generates a Zoom meeting link and includes it in the booking confirmation email.
Important: Select the employee before choosing a location. The Zoom location option only appears if the assigned employee has connected their Zoom account. If you select Zoom as the location for an employee who has not connected Zoom, an error occurs at booking time.
Understanding the Integration Workflow
Once the Zoom account is connected and assigned to a service, Sugar Calendar Bookings manages Zoom meetings automatically throughout the booking lifecycle.
New bookings: When a client books an appointment, a dedicated Zoom meeting is created with the correct date, time, and duration. The meeting join link is included in the confirmation email.
Rescheduled bookings: When a booking is rescheduled, the associated Zoom meeting updates automatically to match the new date and time. The join link stays the same.
Cancelled bookings: When a booking is cancelled, the associated Zoom meeting is deleted from the Zoom account.
Usage Limits
Zoom integration usage counts toward your account’s monthly integration usage limit. When your limit is reached, you are prompted to upgrade your plan.
To check your current usage, go to Settings » License and Usage.
You’ll see your usage for the current month.
Alternatively, you can find the usage tracker at the top of the Integrations page.
Disconnecting Your Zoom Account
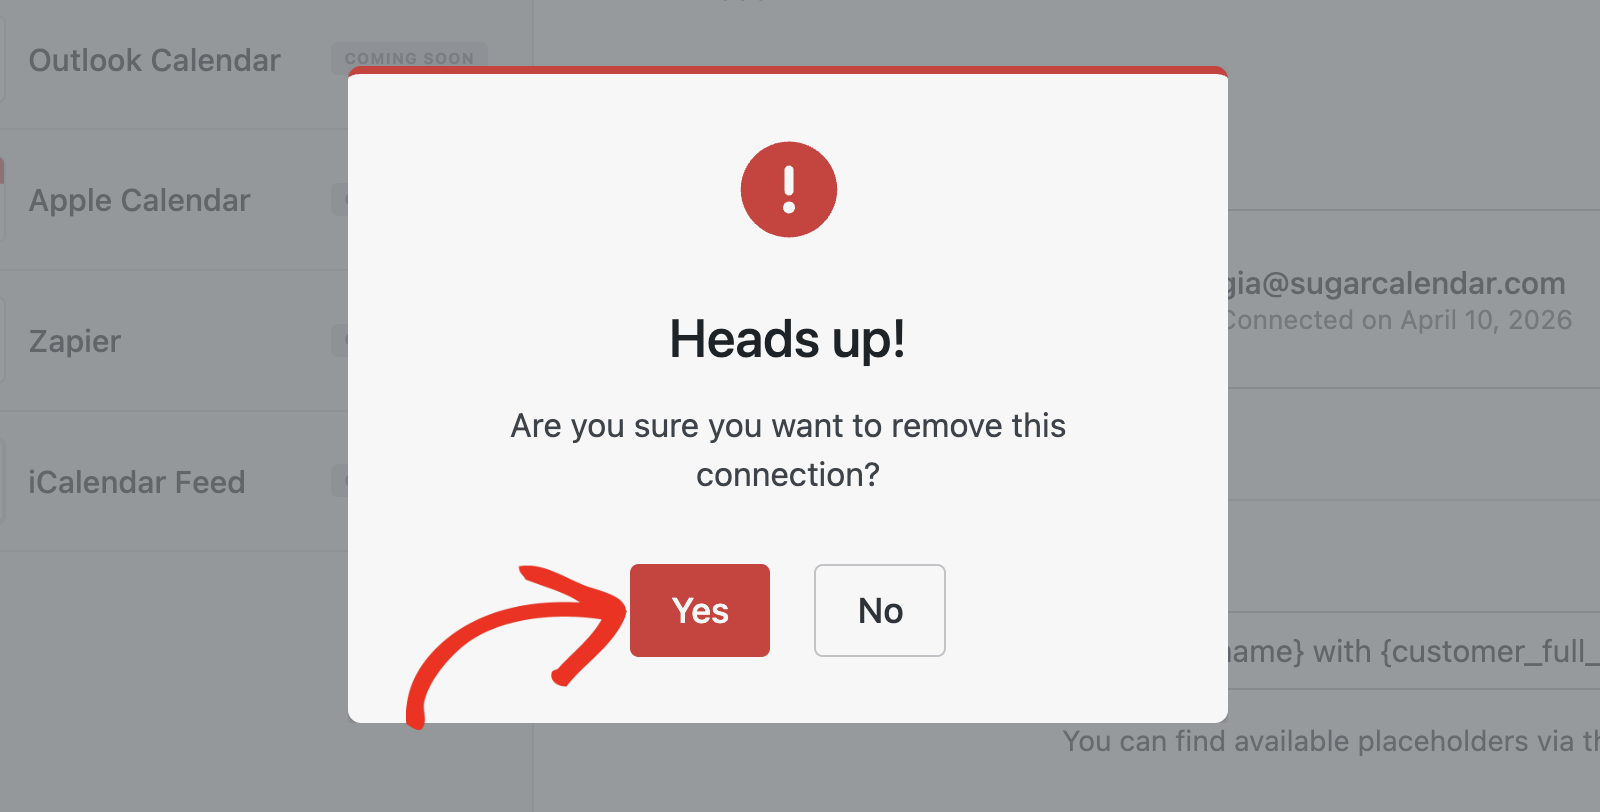
To disconnect a Zoom account, go to Bookings » Settings and click the Integrations tab.
Click the Remove button next to the connected Zoom account.
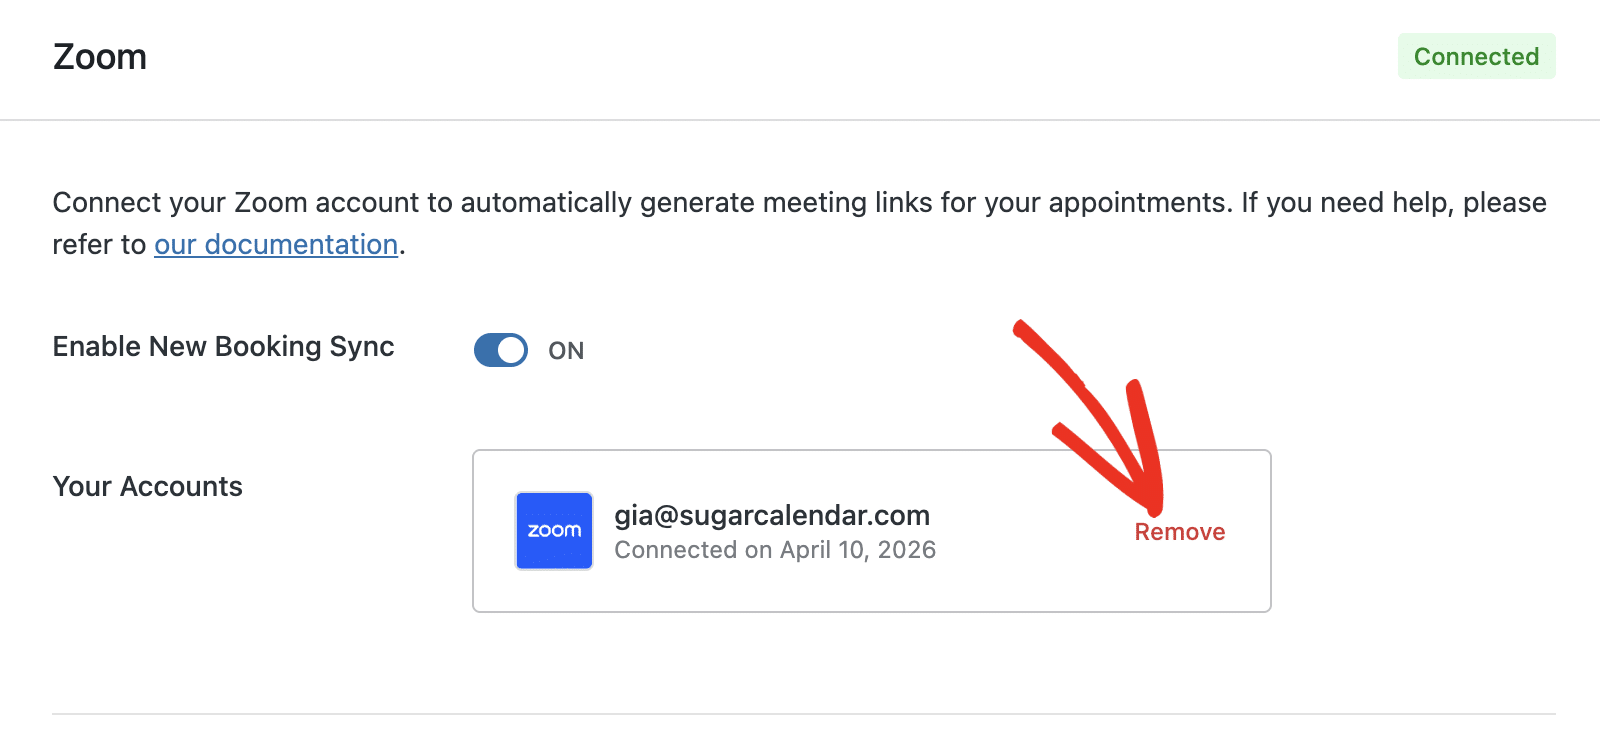
In the overlay that appears, click Yes to confirm the removal.
If you’re the site administrator, you can also remove an employee’s Zoom connection by clicking Remove next to their email.
Note: Disconnecting immediately removes your stored Zoom credentials from your WordPress site. Existing Zoom meeting links in past or upcoming bookings remain in your Zoom account but will no longer be managed by Sugar Calendar Bookings.
Frequently Asked Questions
Below, we’ve addressed some of the most common questions regarding the Zoom integration with Sugar Calendar Bookings.
The Connect to Zoom button doesn’t work. What should I do?
Make sure your WordPress site has a valid SSL certificate (HTTPS). Zoom requires secure connections for API communication. Additionally, check that your site can make outbound HTTP requests, as some hosting providers or security plugins may block external API calls.
Why isn’t a Zoom meeting being created for my booking?
First, verify your Zoom account is still connected by navigating to Bookings » Settings » Integrations. If the connection was lost (for example, if you changed your Zoom password), reconnect by clicking the Connect to Zoom button again. Also, check that the booking service has Zoom enabled as a location option.
The Zoom meeting link isn’t appearing in the confirmation email. How can I fix this?
Confirm that your email notification template includes the Zoom meeting link field. If emails aren’t sending at all, this is a general email configuration issue rather than a Zoom-specific problem. See our tutorial on customizing booking emails for more details.
My Zoom connection expired or stopped working. What should I do?
Zoom access tokens expire periodically and are refreshed automatically. In rare cases, the refresh may fail, especially if you revoked access from your Zoom account settings. To fix this, navigate to Bookings » Settings » Integrations, click Remove, and then click Connect with Zoom to reauthorize the connection.
That’s It! You now know how to set up and use the Zoom integration in Sugar Calendar Bookings.
Next, would you like to allow users to book an appointment from your site’s frontend? See our guide on displaying the booking form to learn how.