Would you like to keep track of customers for your bookings? Sugar Calendar’s customer management system helps you organize customer information, track their booking history, and maintain detailed records for future reservations.
This guide covers how to create and manage customers in the Bookings plugin.
In This Article
Before getting started, make sure Sugar Calendar Bookings is installed and activated on your site.
Accessing the Customer Management Area
To start, navigate to Bookings » Customers from the WordPress admin area.
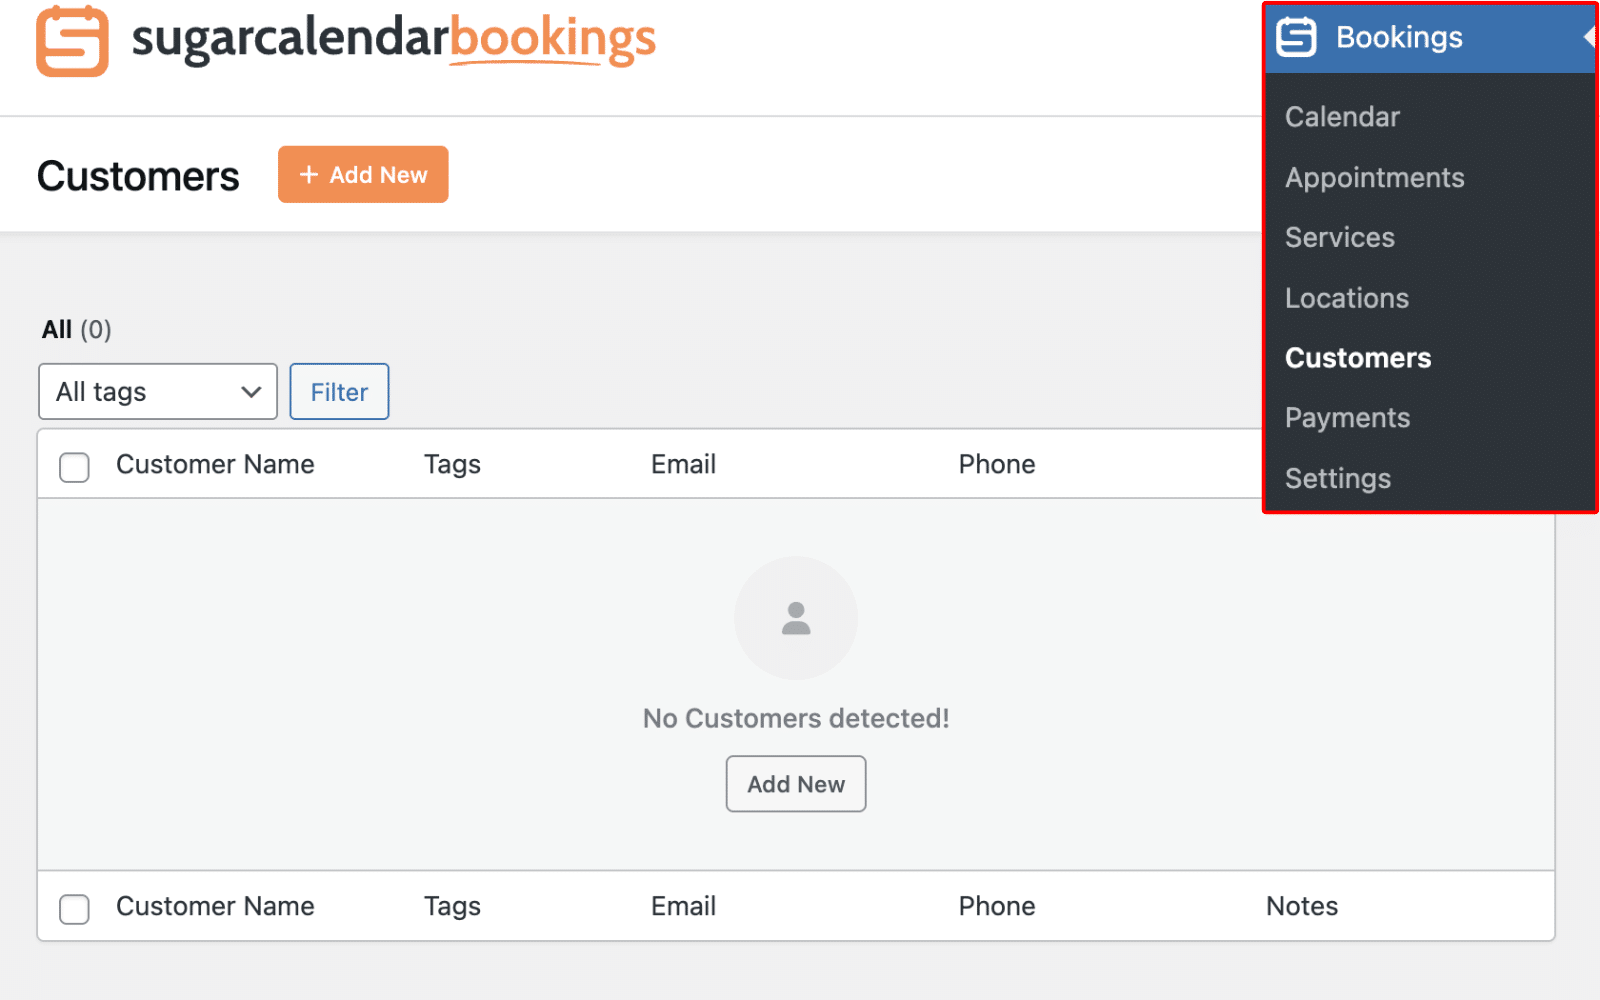
This page displays all your customers in a table format. It shows details like names, assigned tags, email addresses, phone numbers, and any notes you’ve added about them.
When users book an appointment on your site, their details will be added to the customer list as well. However, you can manually create customers from the admin dashboard.
Creating a New Customer
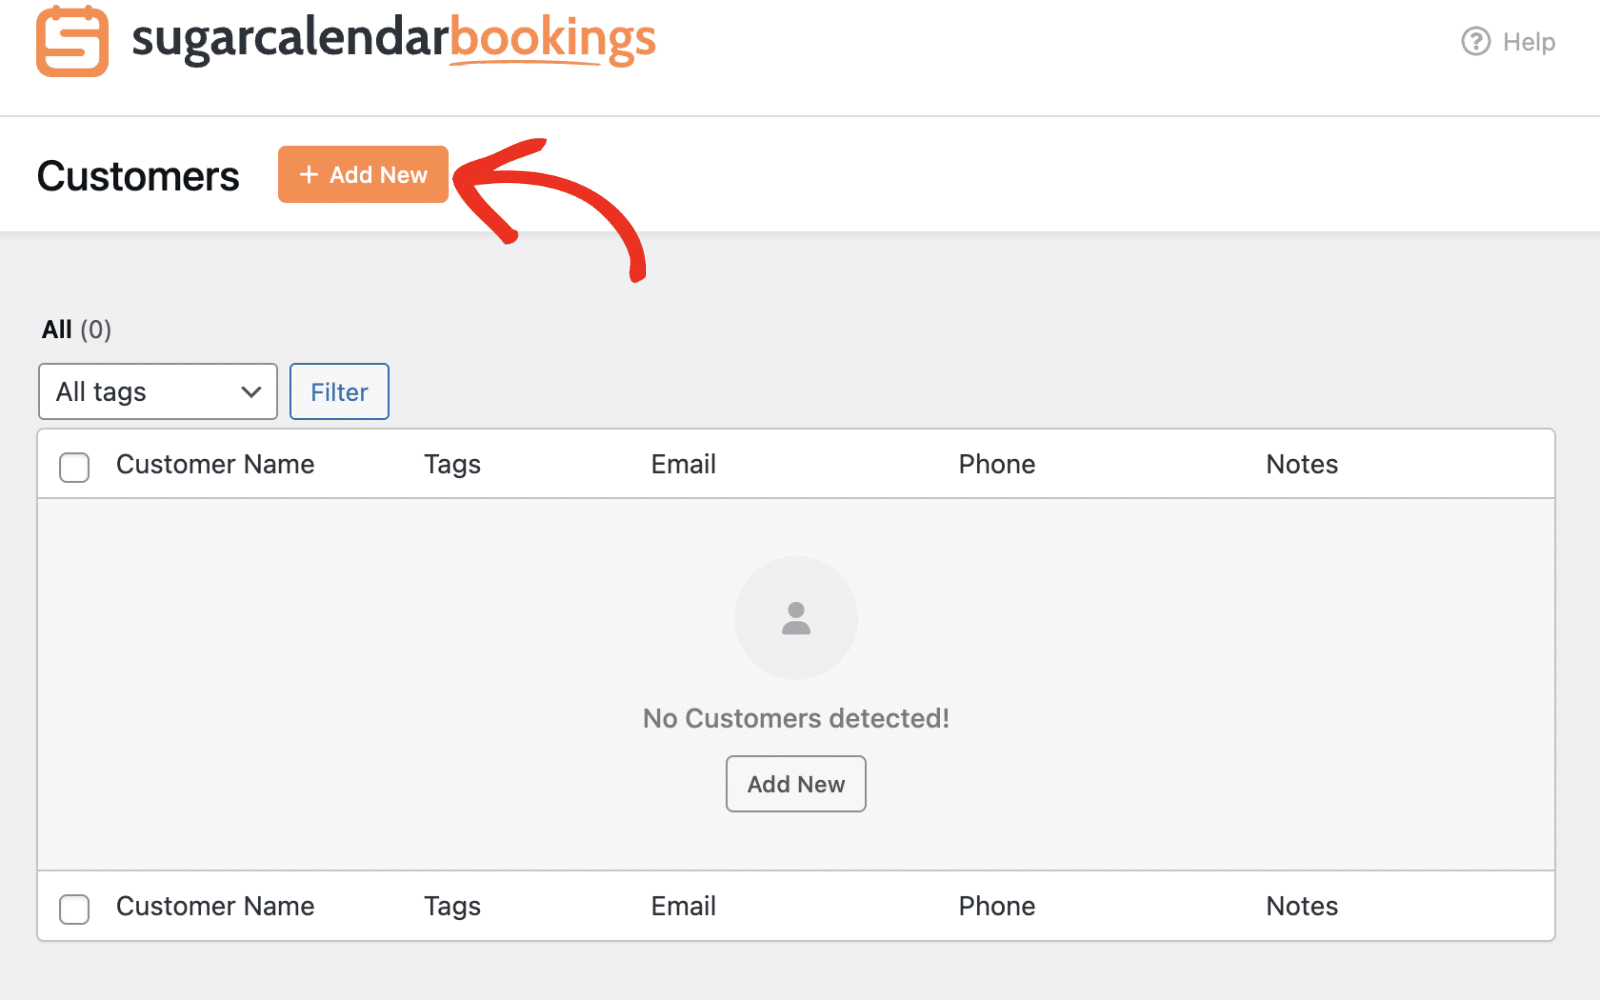
To add a new customer to your system, click the Add New button at the top of the Customers page.
This will open the Add New Customer dialog box where you can enter the customer’s information.
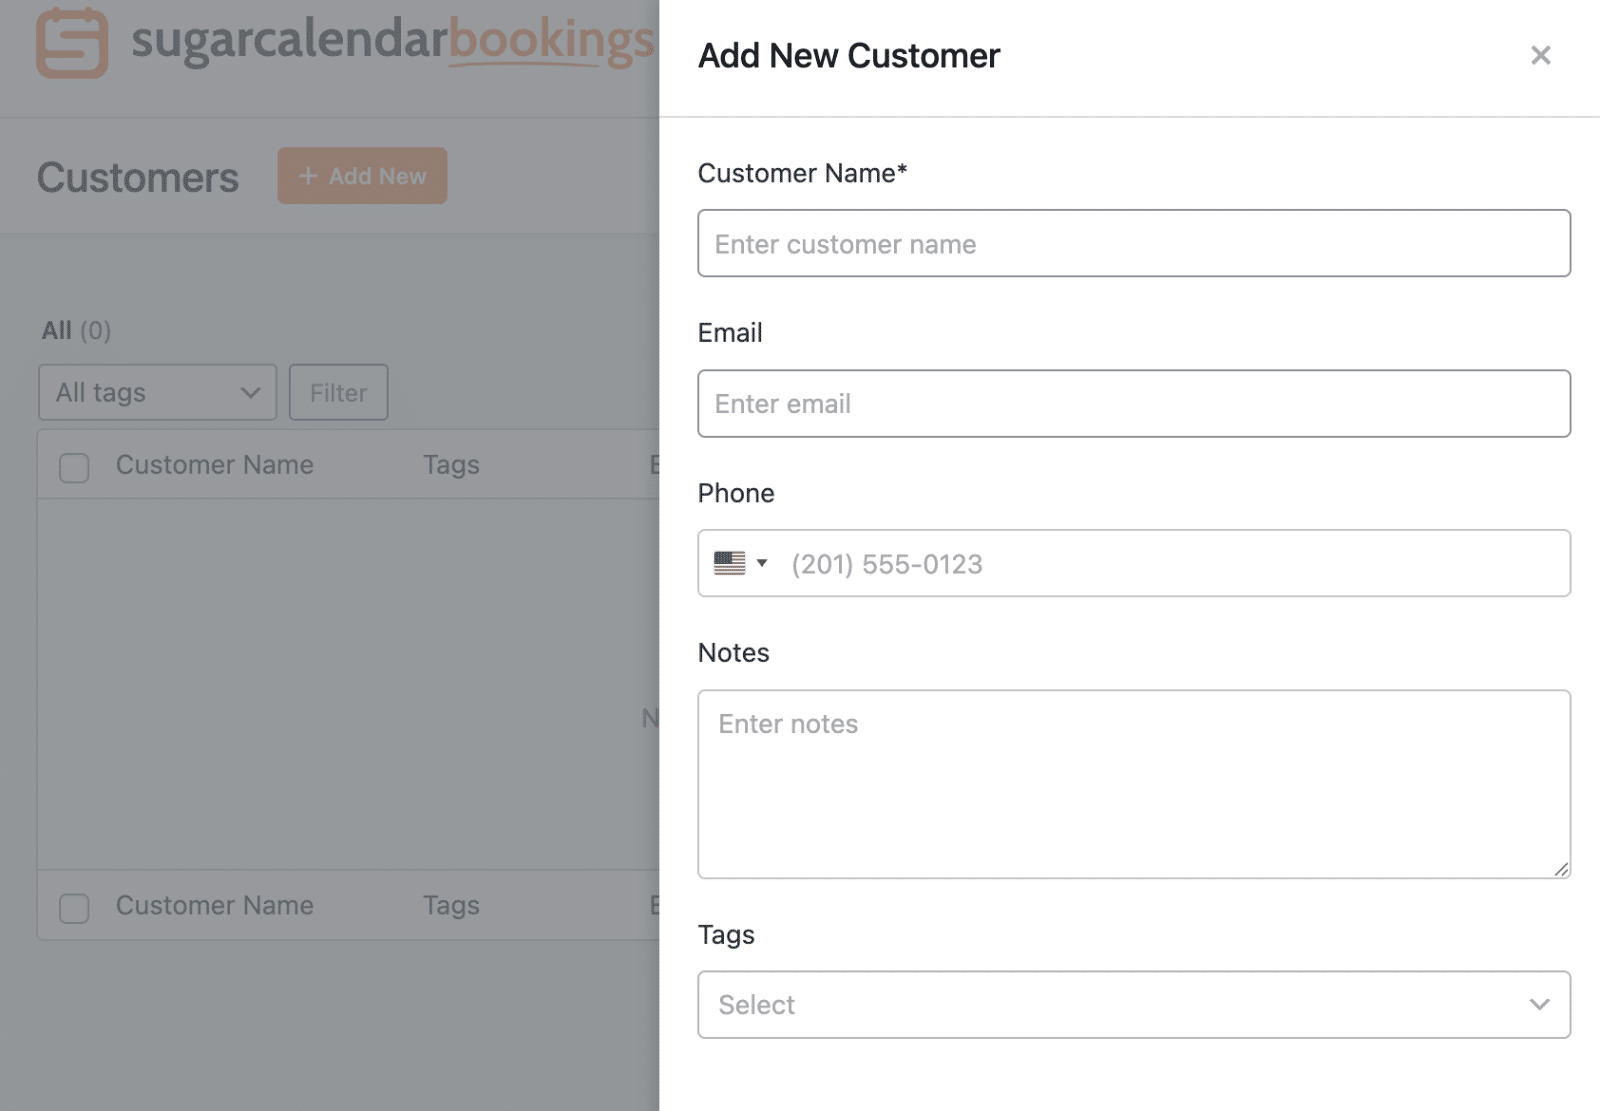
You’ll need to fill in the customer information fields. Below, we’ve highlighted the available fields:
- Customer Name: Enter the customer’s full name (required)
- Email: Add the customer’s email address for communication and booking confirmation emails
- Phone: Include the customer’s phone number with country code selection
- Notes: Add any additional information about the customer that might be helpful for future reference
- Tags: Assign tags to categorize and organize your customers
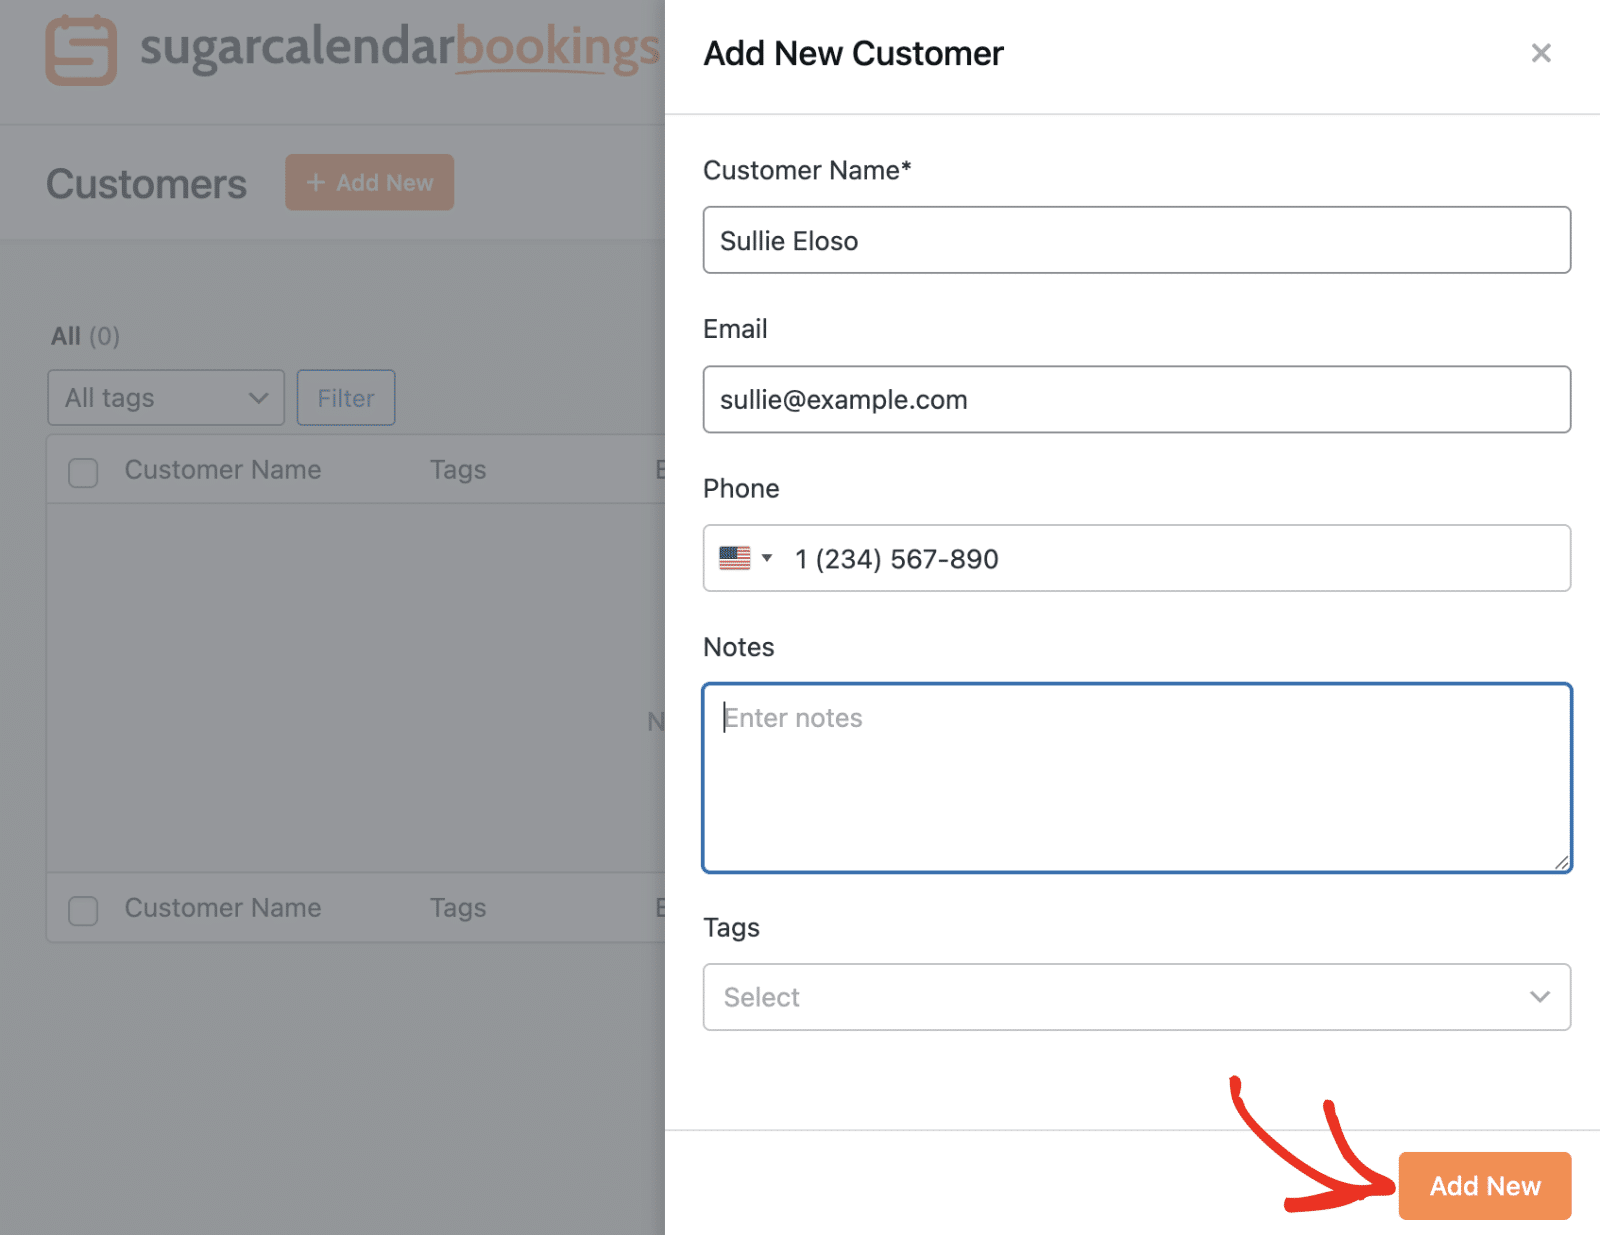
After entering the necessary information, click the Add New button to save the customer to your system.
Managing Existing Customers
Your customers list provides several tools to help you manage your customer database effectively.
Filtering Customers
You can filter your customer list using the tag dropdown and search functionality:
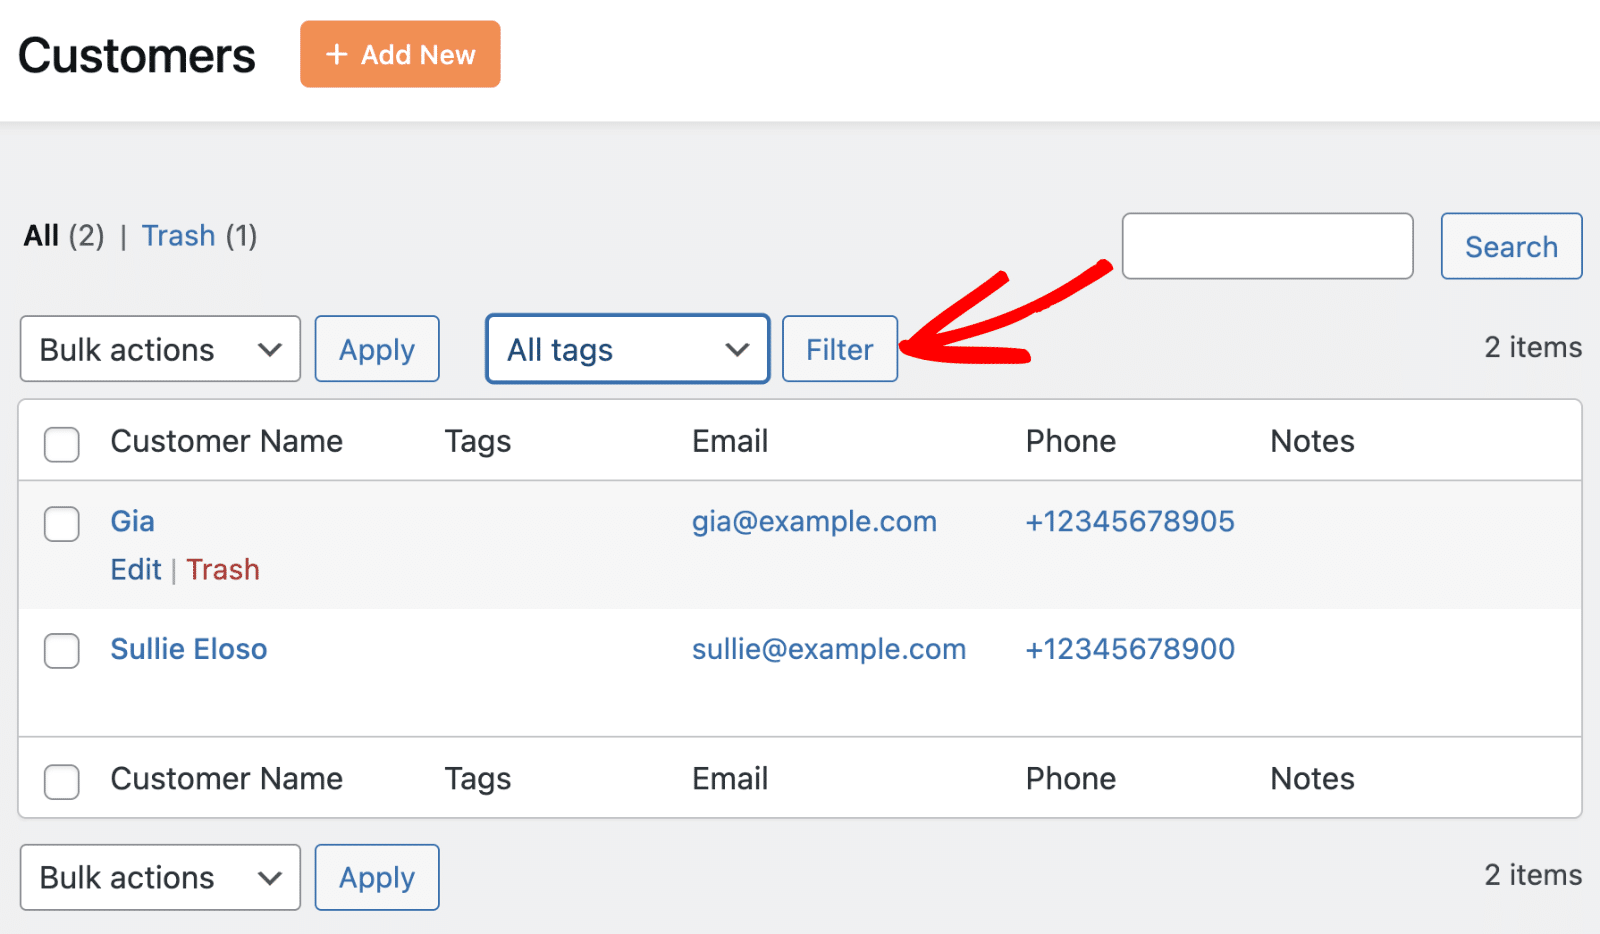
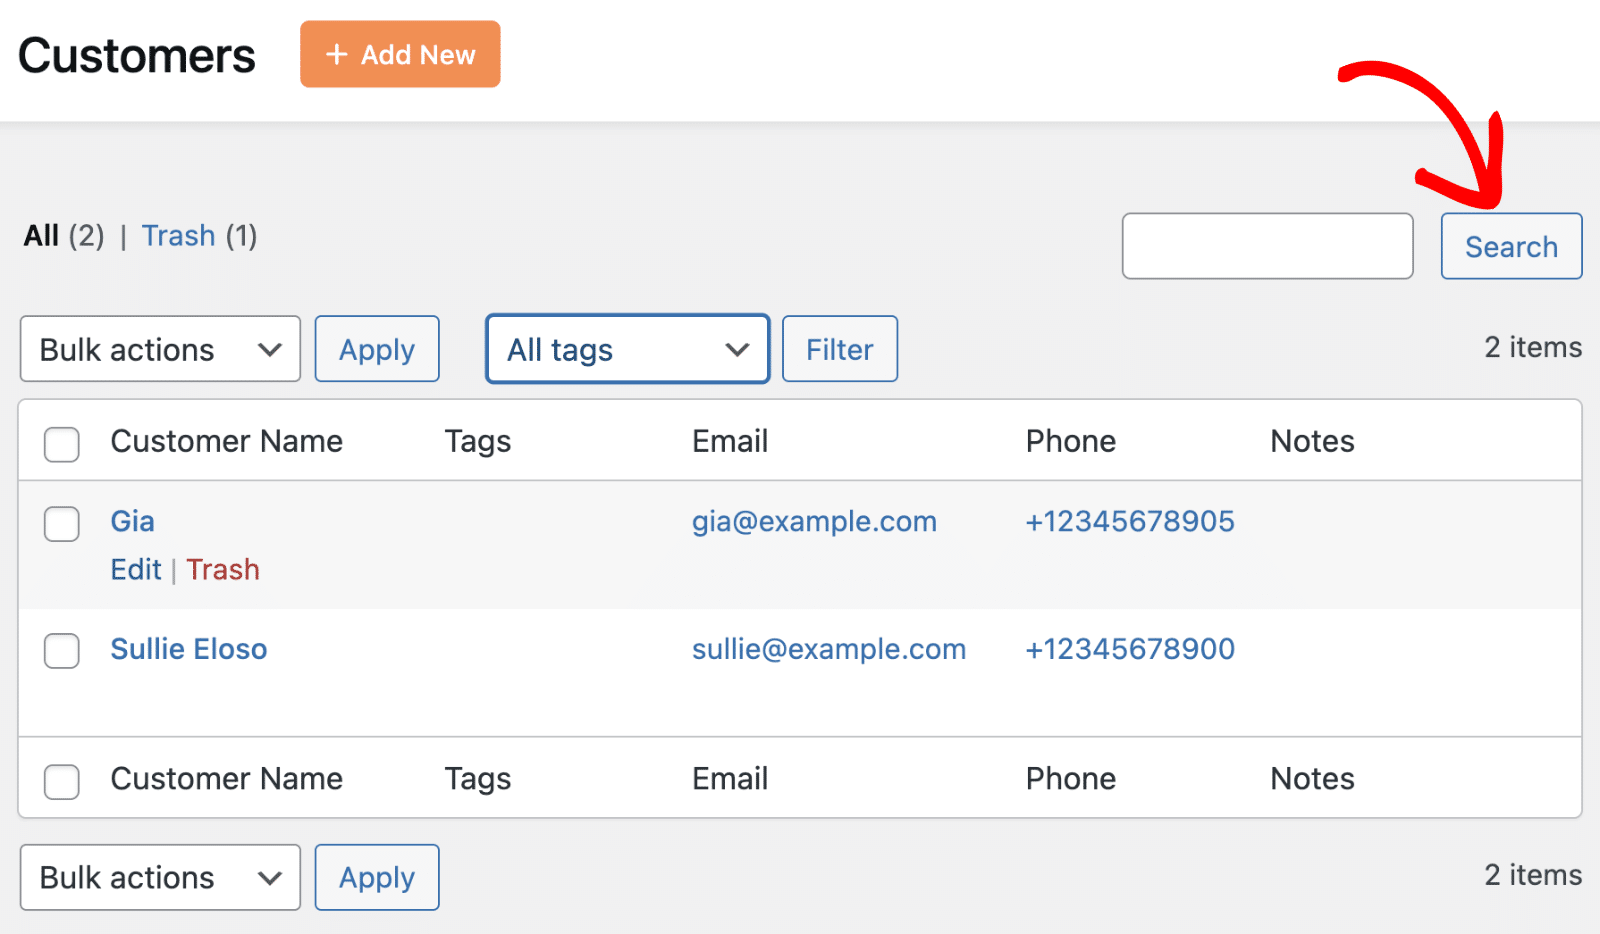
You can use the search box to find specific customers by name, email, or phone number.
Bulk Actions
For managing multiple customers at once, use the bulk actions feature:
For this, select the customers you want to manage by checking the boxes next to their names.

Then, choose an action from the Bulk actions dropdown. Finally, click Apply to perform the selected action.
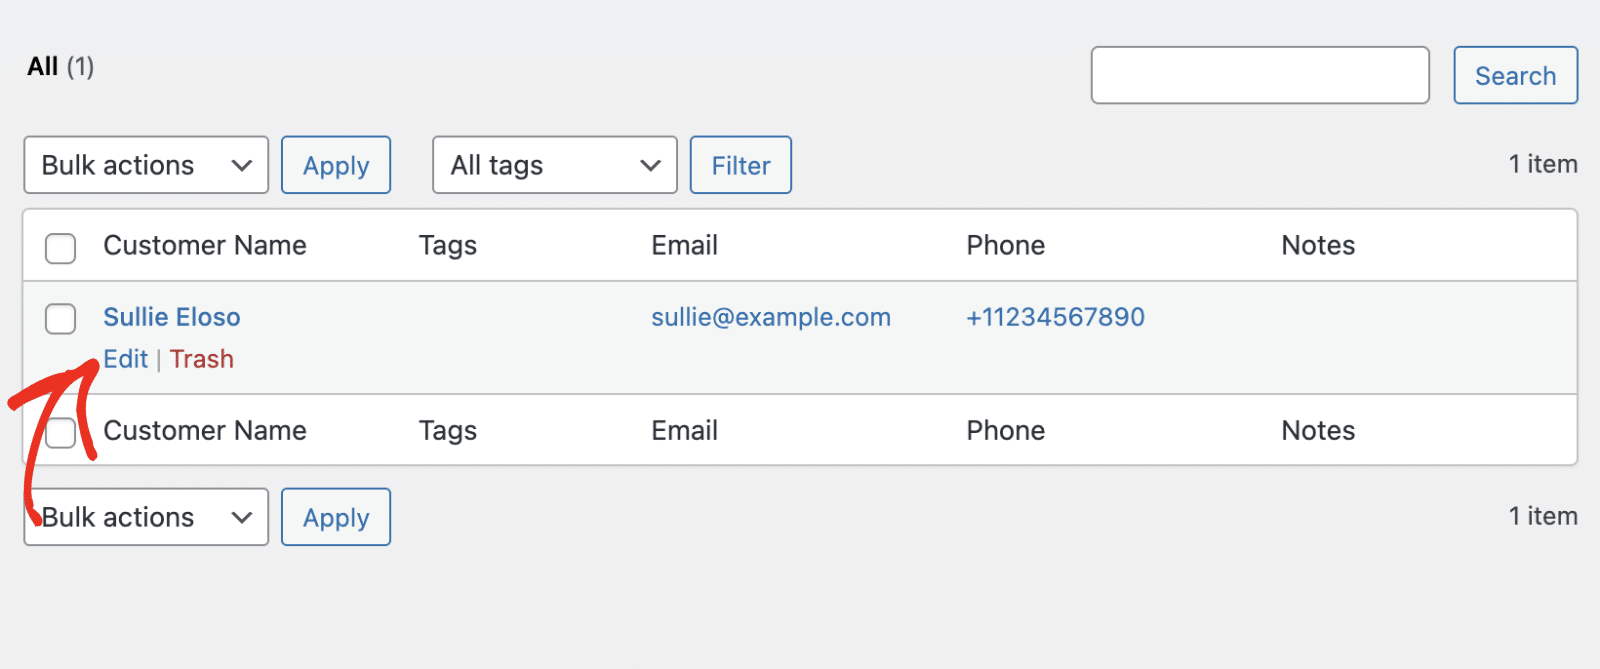
Editing Customer Information
To modify an existing customer’s details, click the Edit link next to the customer’s name in the list.
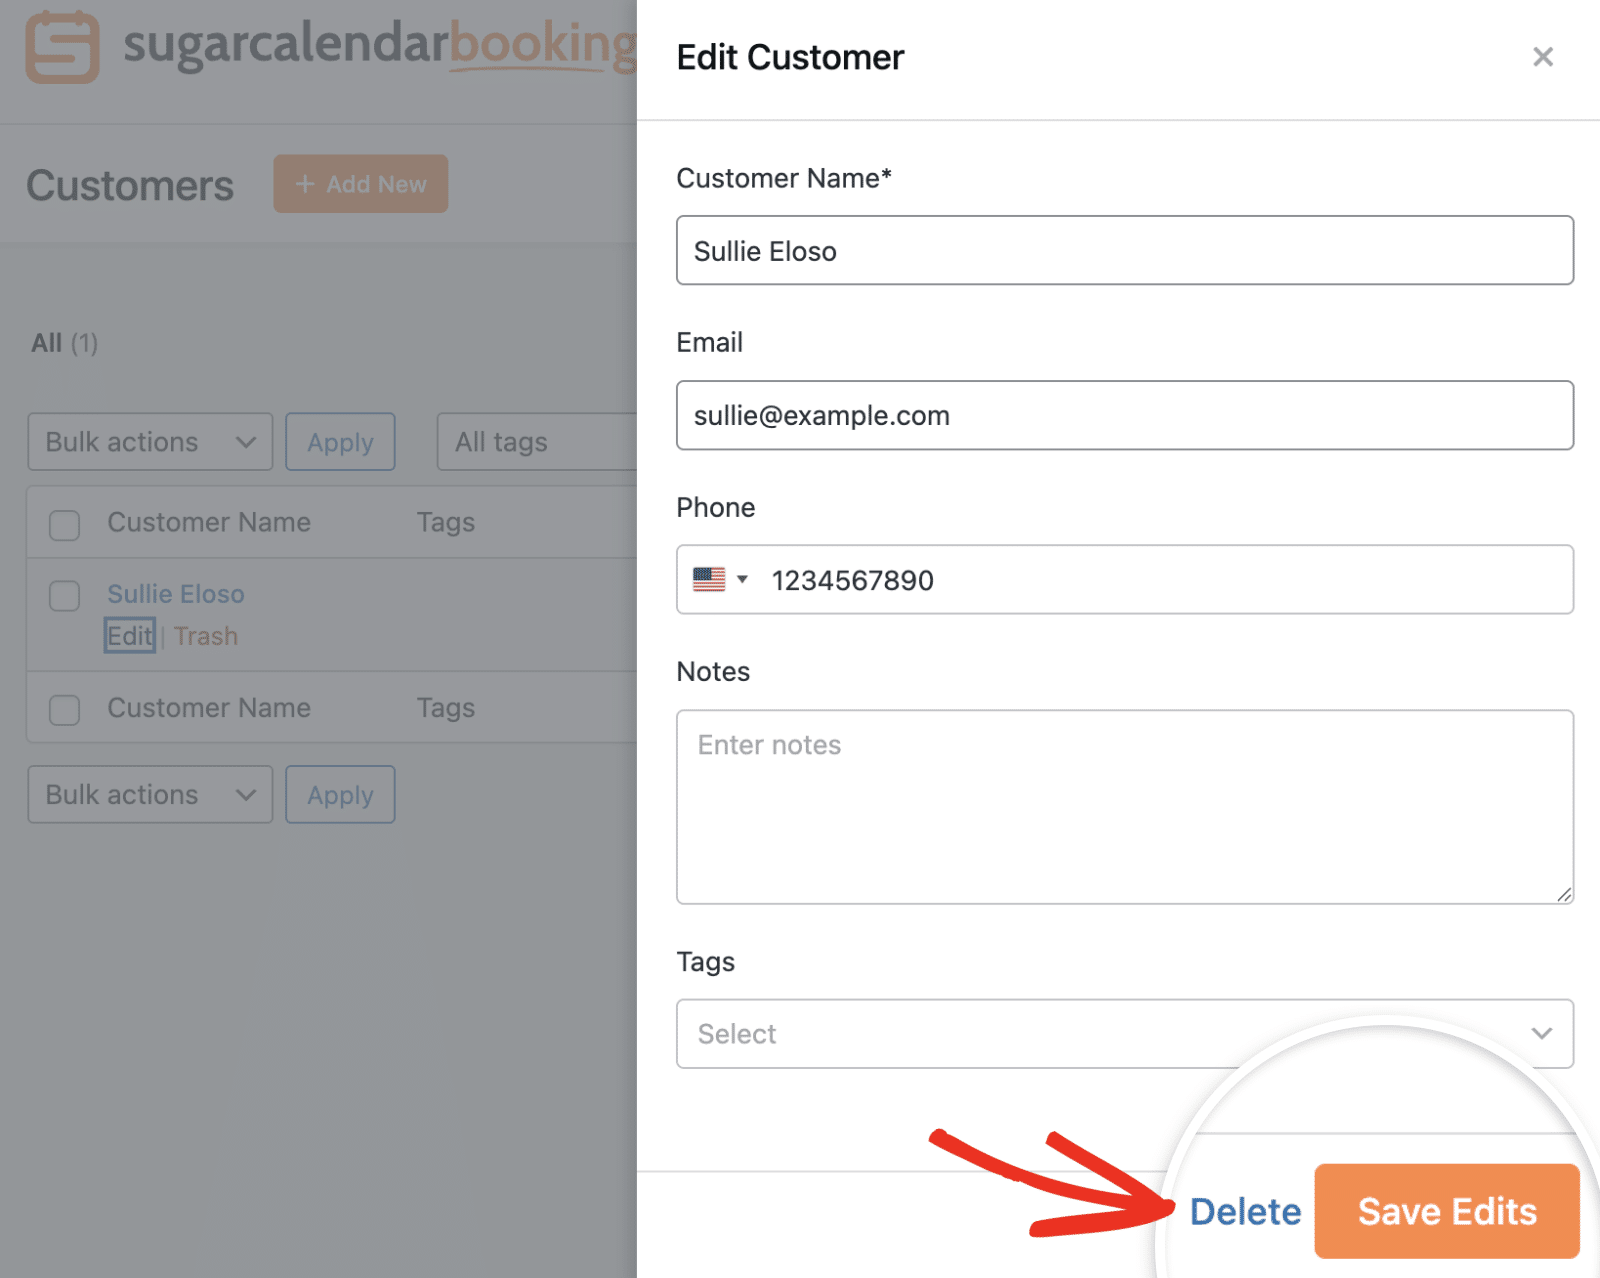
This opens the Edit Customer dialog, where you can update any of the customer’s information.
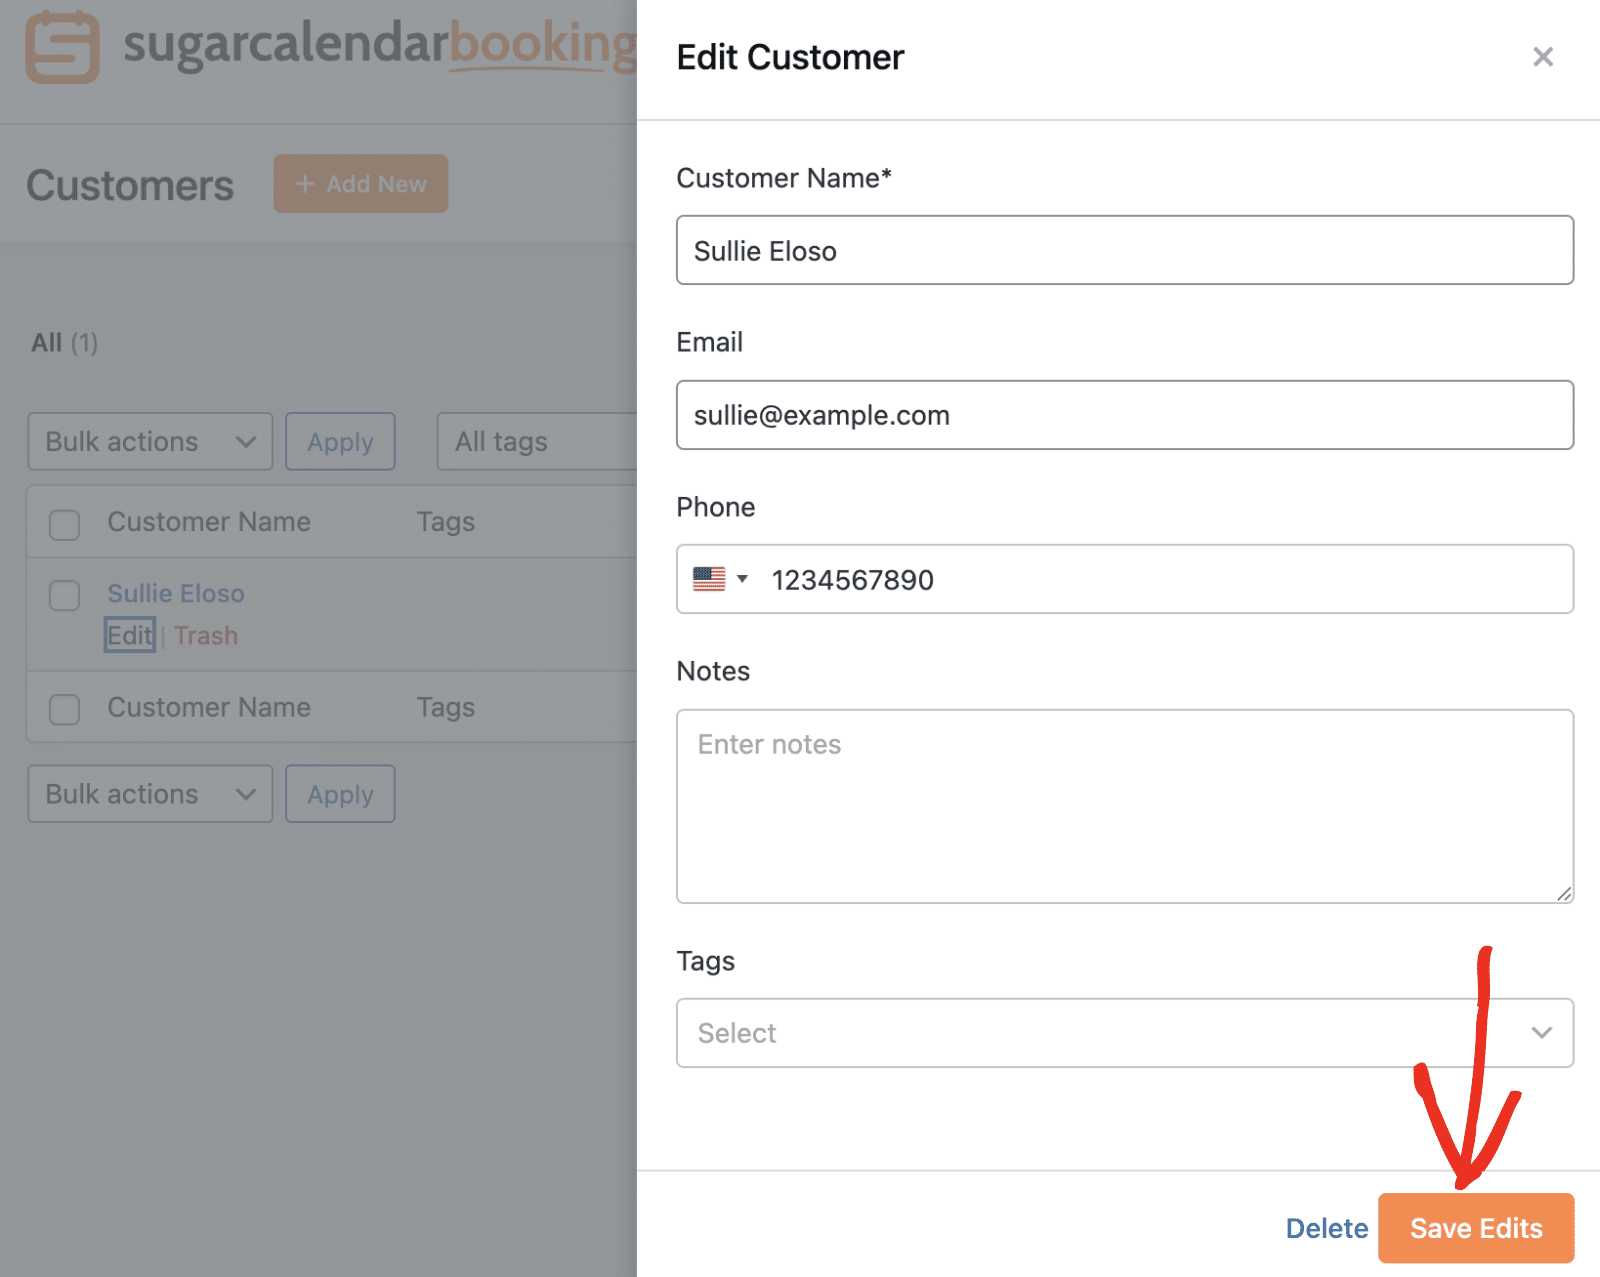
After making your changes, click Save Edits to update the customer’s information in your system.
Deleting Customers
To remove a customer from your system, you have two options:
Individual Deletion
Click the Trash link next to the customer you want to remove.
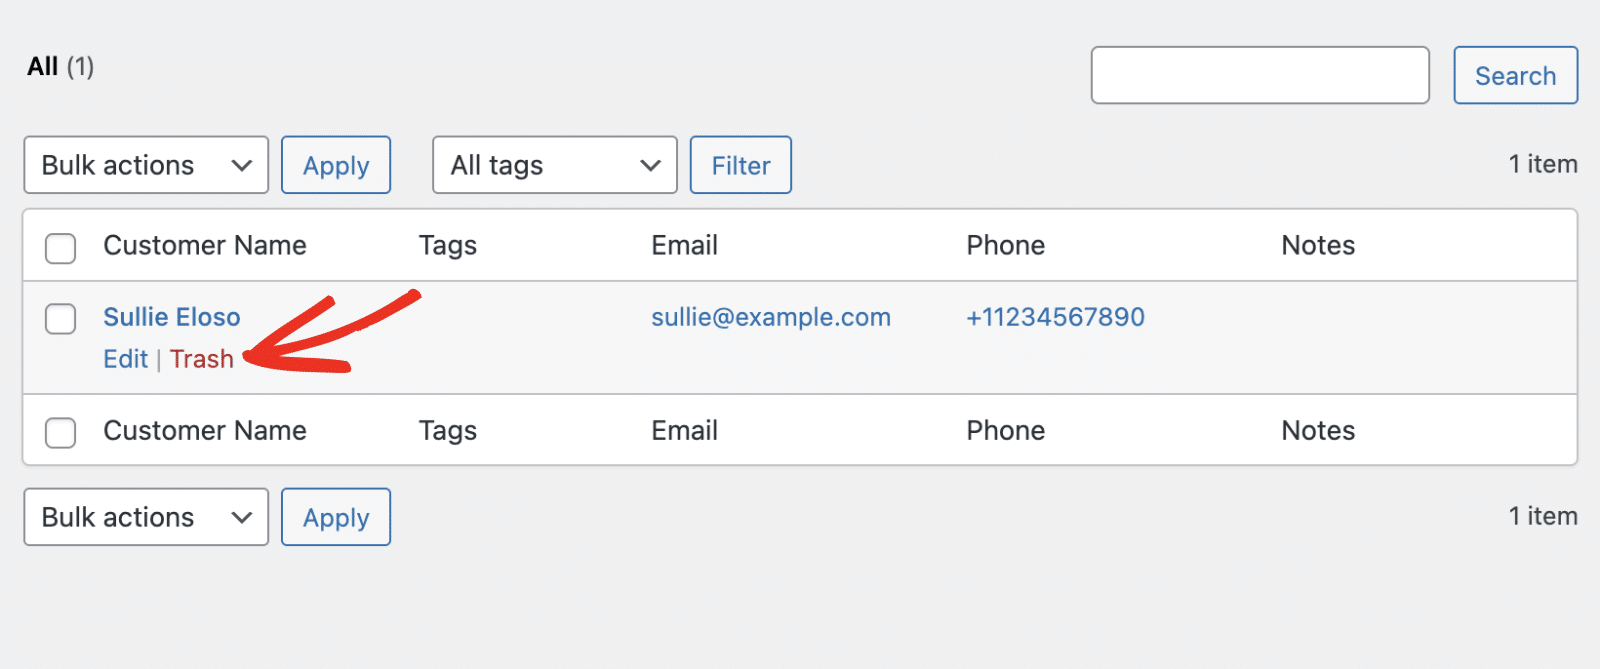
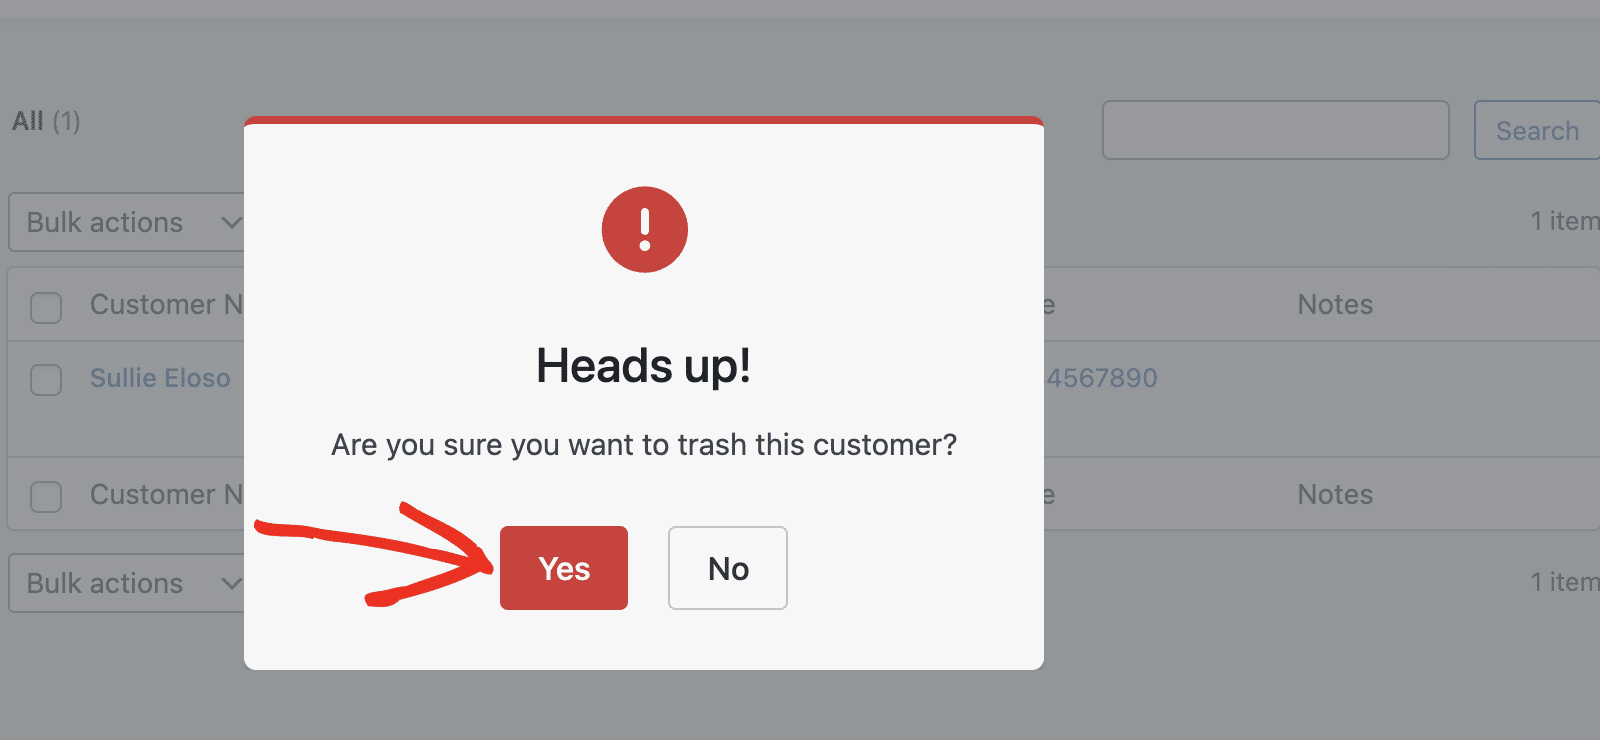
A confirmation dialog will appear asking if you’re sure you want to delete the customer. Click Yes to confirm the deletion.
Bulk Deletion
To delete multiple customers at once, first select the customers you want to delete by checking their boxes

Then, choose “Delete” from the Bulk actions dropdown. Finally, click Apply to delete all selected customers.
To access the customers you just deleted, click the Trash folder.
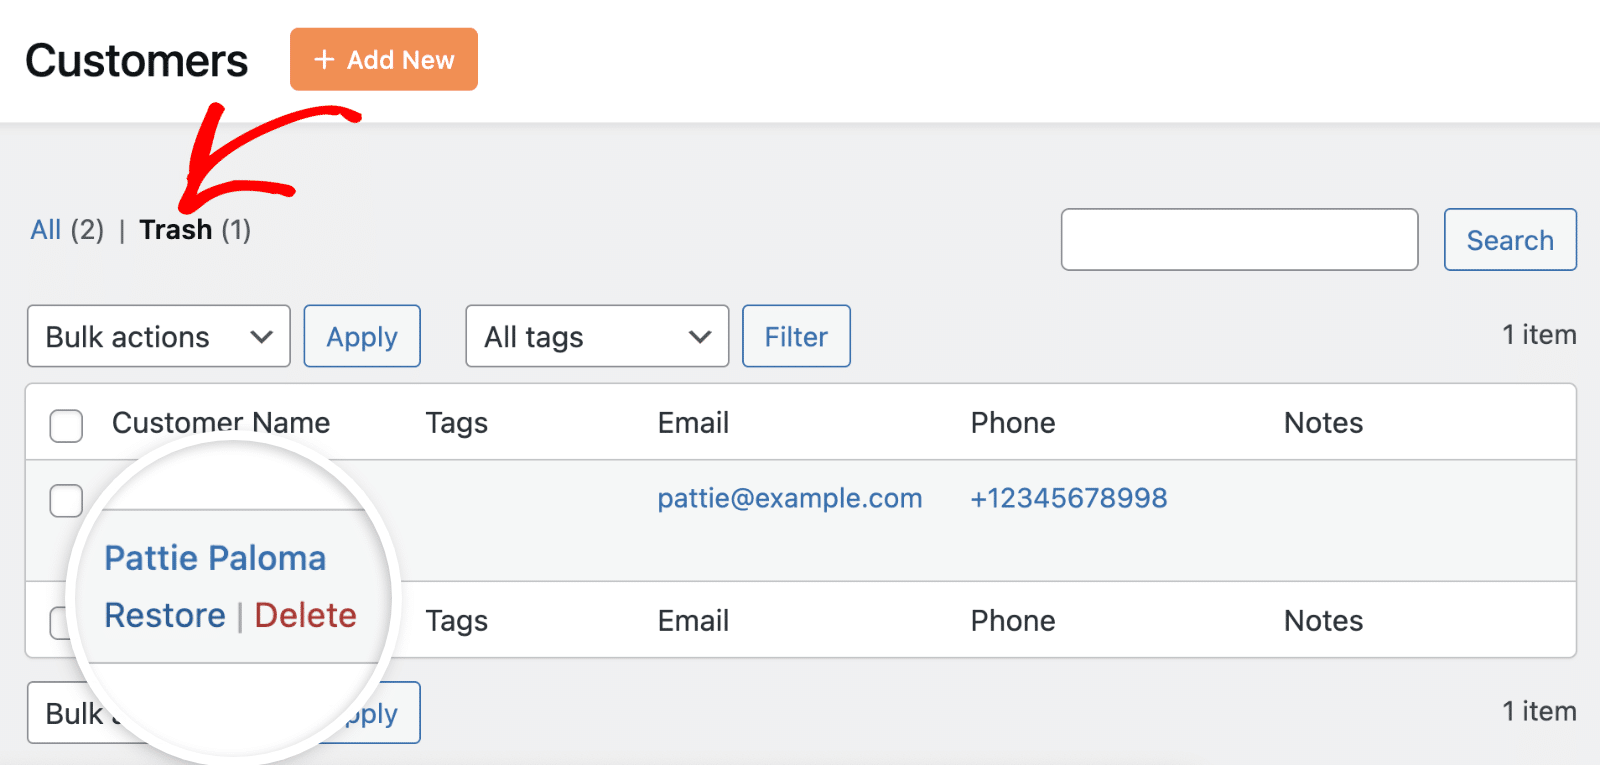
Once here, you’ll be able to Restore or Permanently Delete the customer from your site.
Note: You won’t be able to access the customer’s information after permanently deleting them from your site.
In the Edit Customer dialog, you can also delete the customer by clicking on Delete. This would also permanently remove the customer from your site.
That’s it! You now know how to create and manage customers in Sugar Calendar Bookings.
Next, would you like to learn how to accept online payments for bookings on your site? Check out our guide on setting up payment methods for more details.