Would you like to manage services in Sugar Calendar Bookings? Services are the bookable offerings you provide to customers, such as appointments, consultations, or any time-based service your business offers.
In this tutorial, we’ll show you how to create, edit, and manage services in Sugar Calendar Bookings.
In This Article
Before you get started, make sure Sugar Calendar Bookings is installed and activated on your WordPress site.
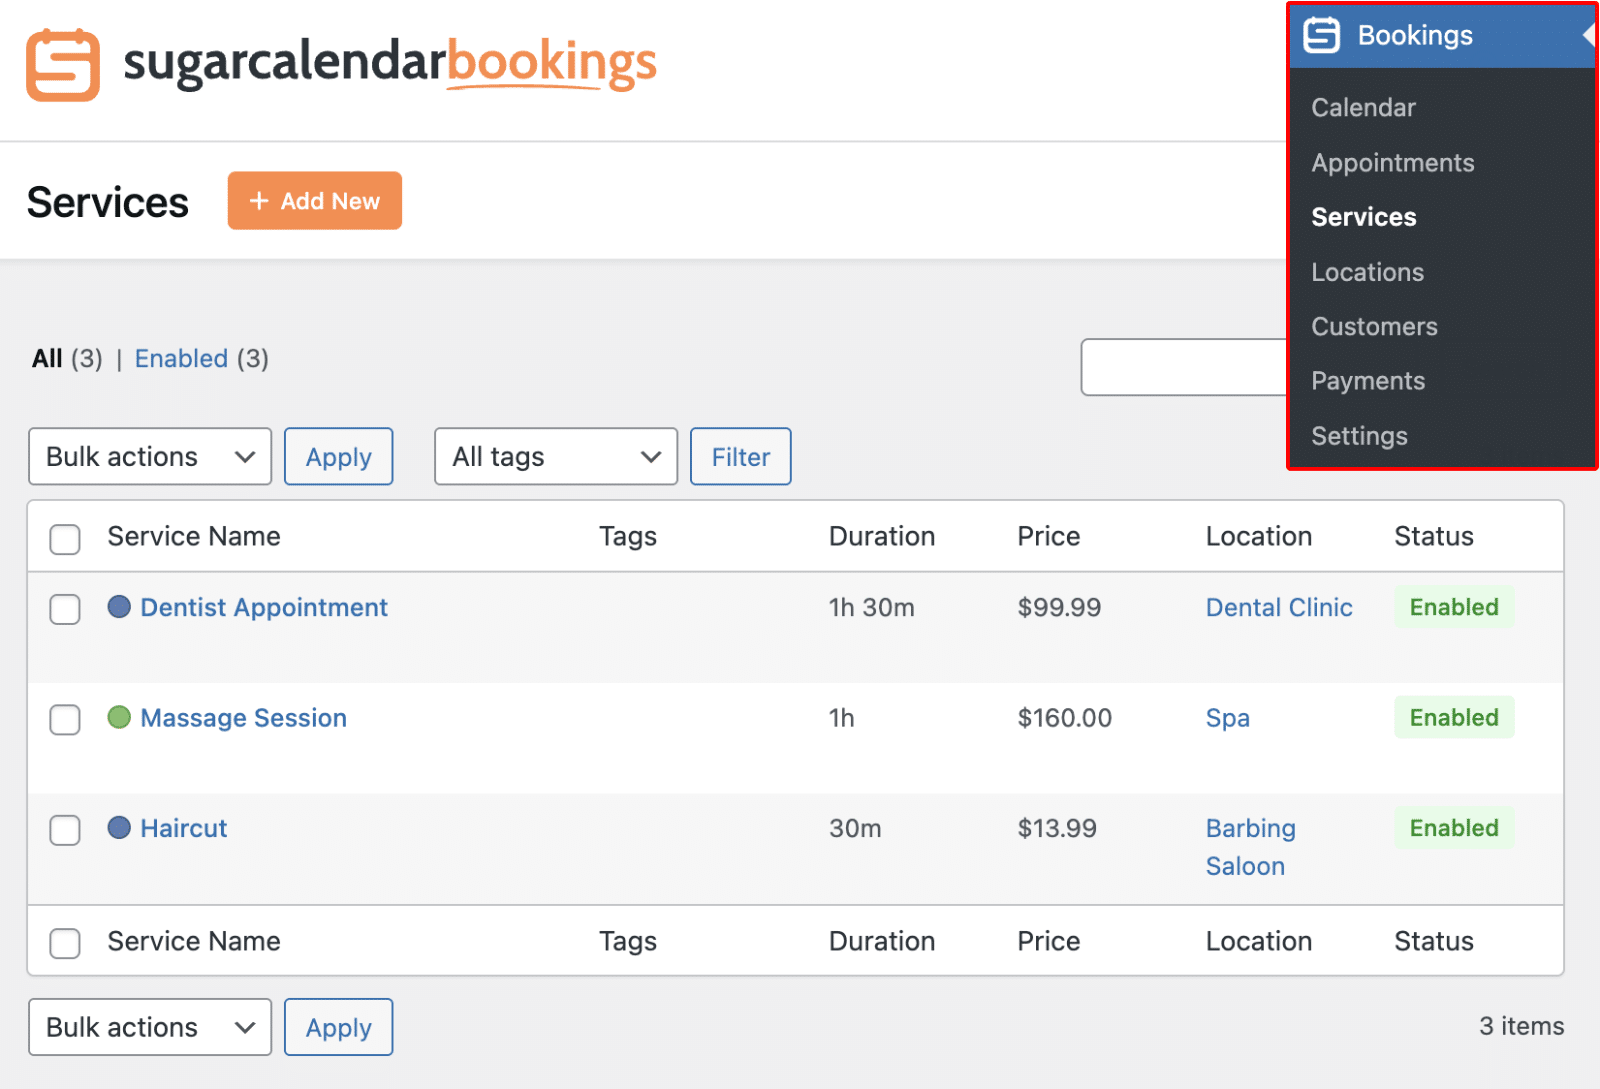
Accessing the Services Page
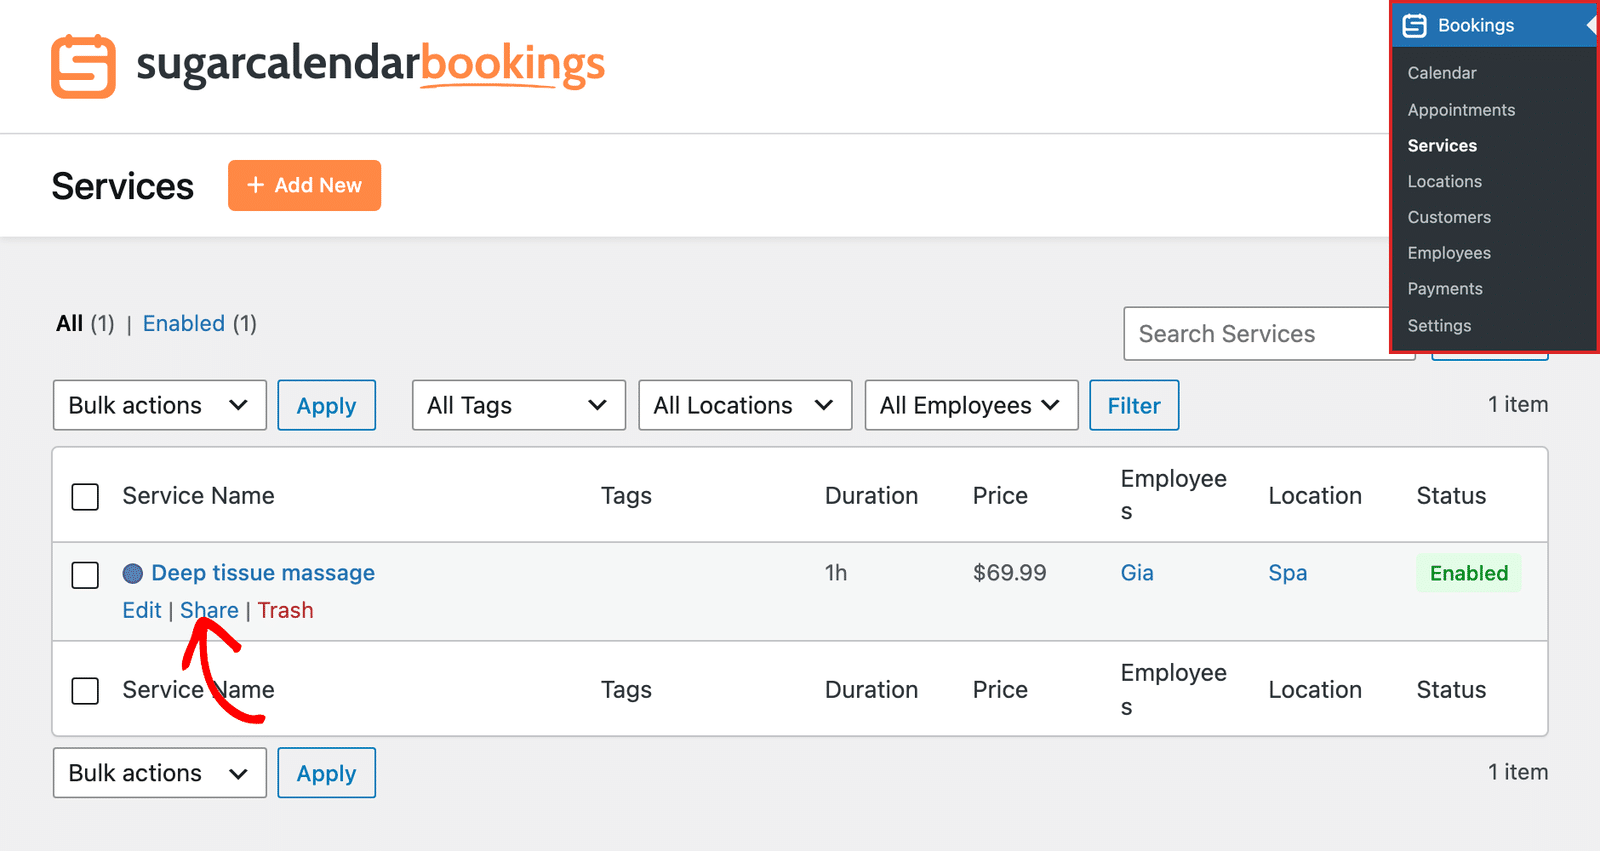
To start managing your services, navigate to Bookings » Services from your WordPress admin sidebar.
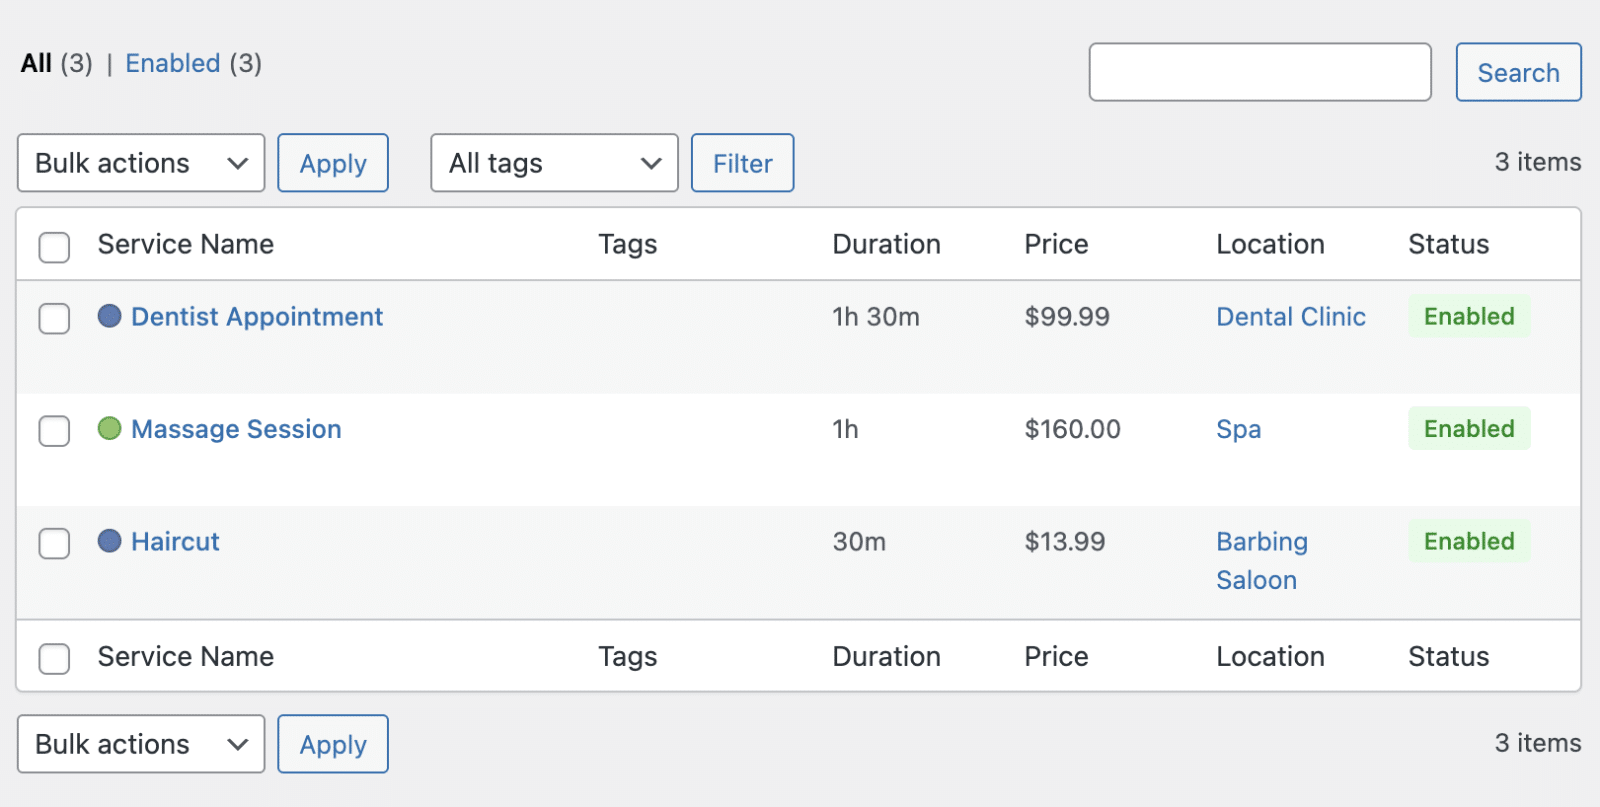
This will display the Services page. Here, you can view all your existing services along with their details, including duration, price, location, and status.
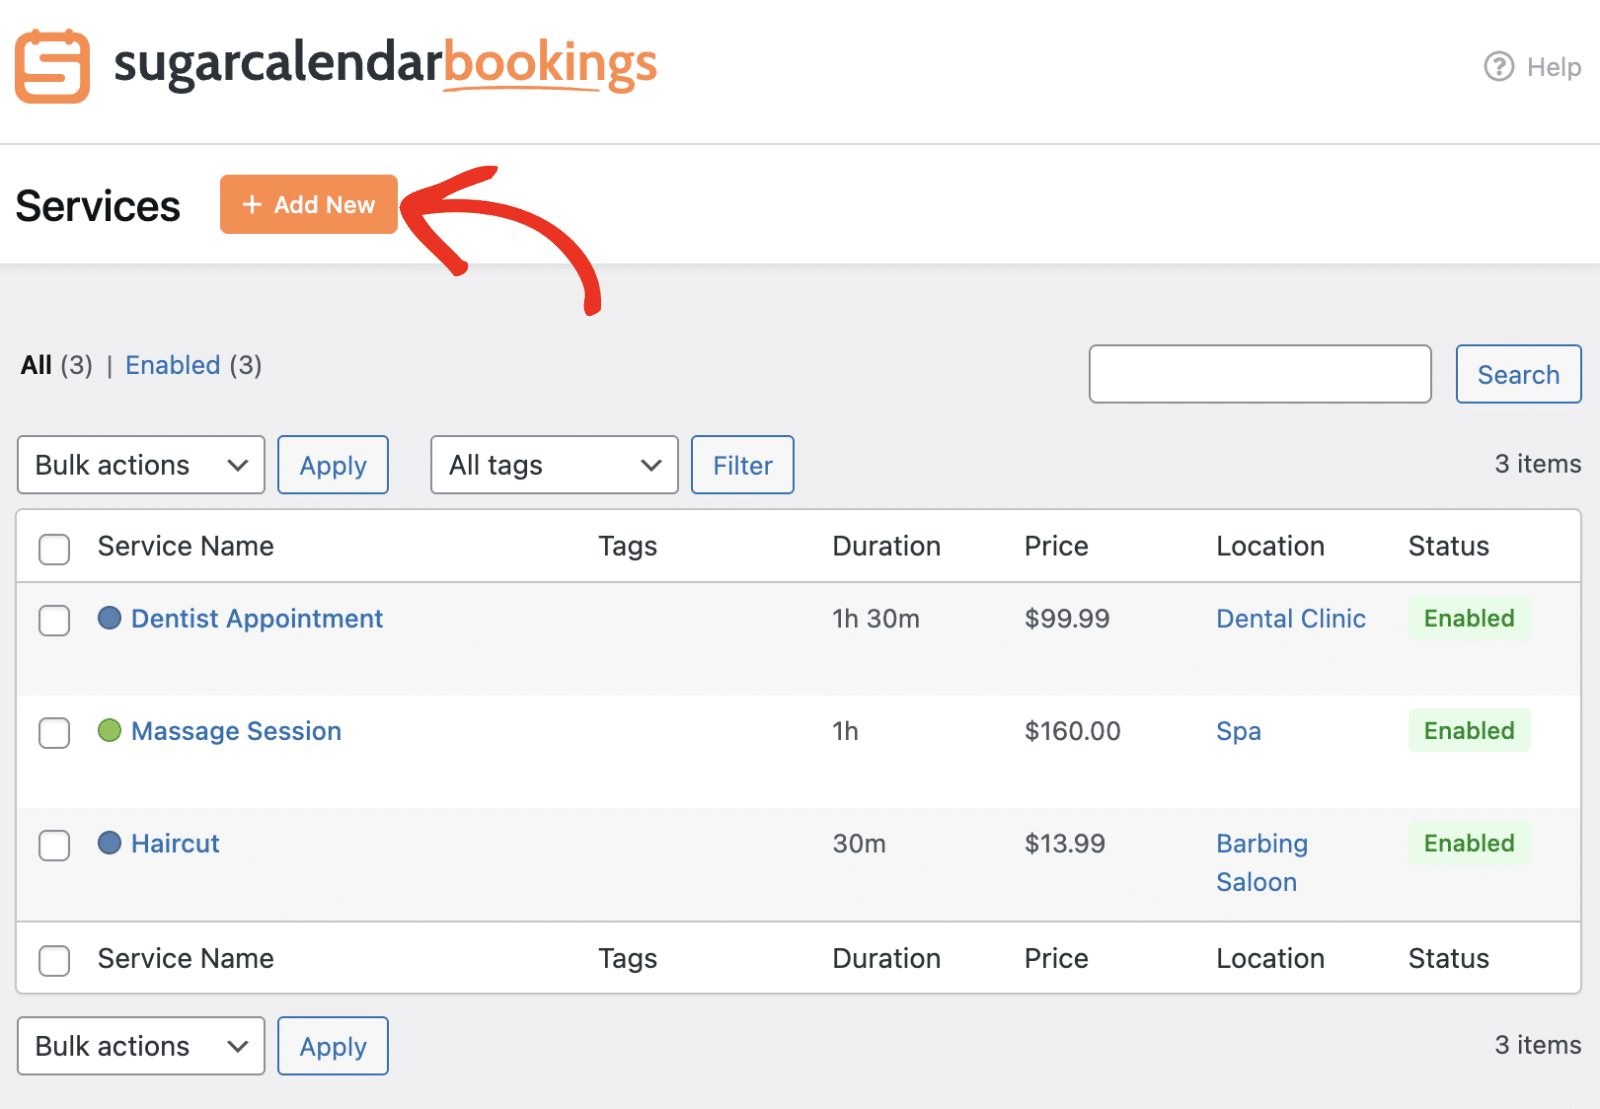
Adding a New Service
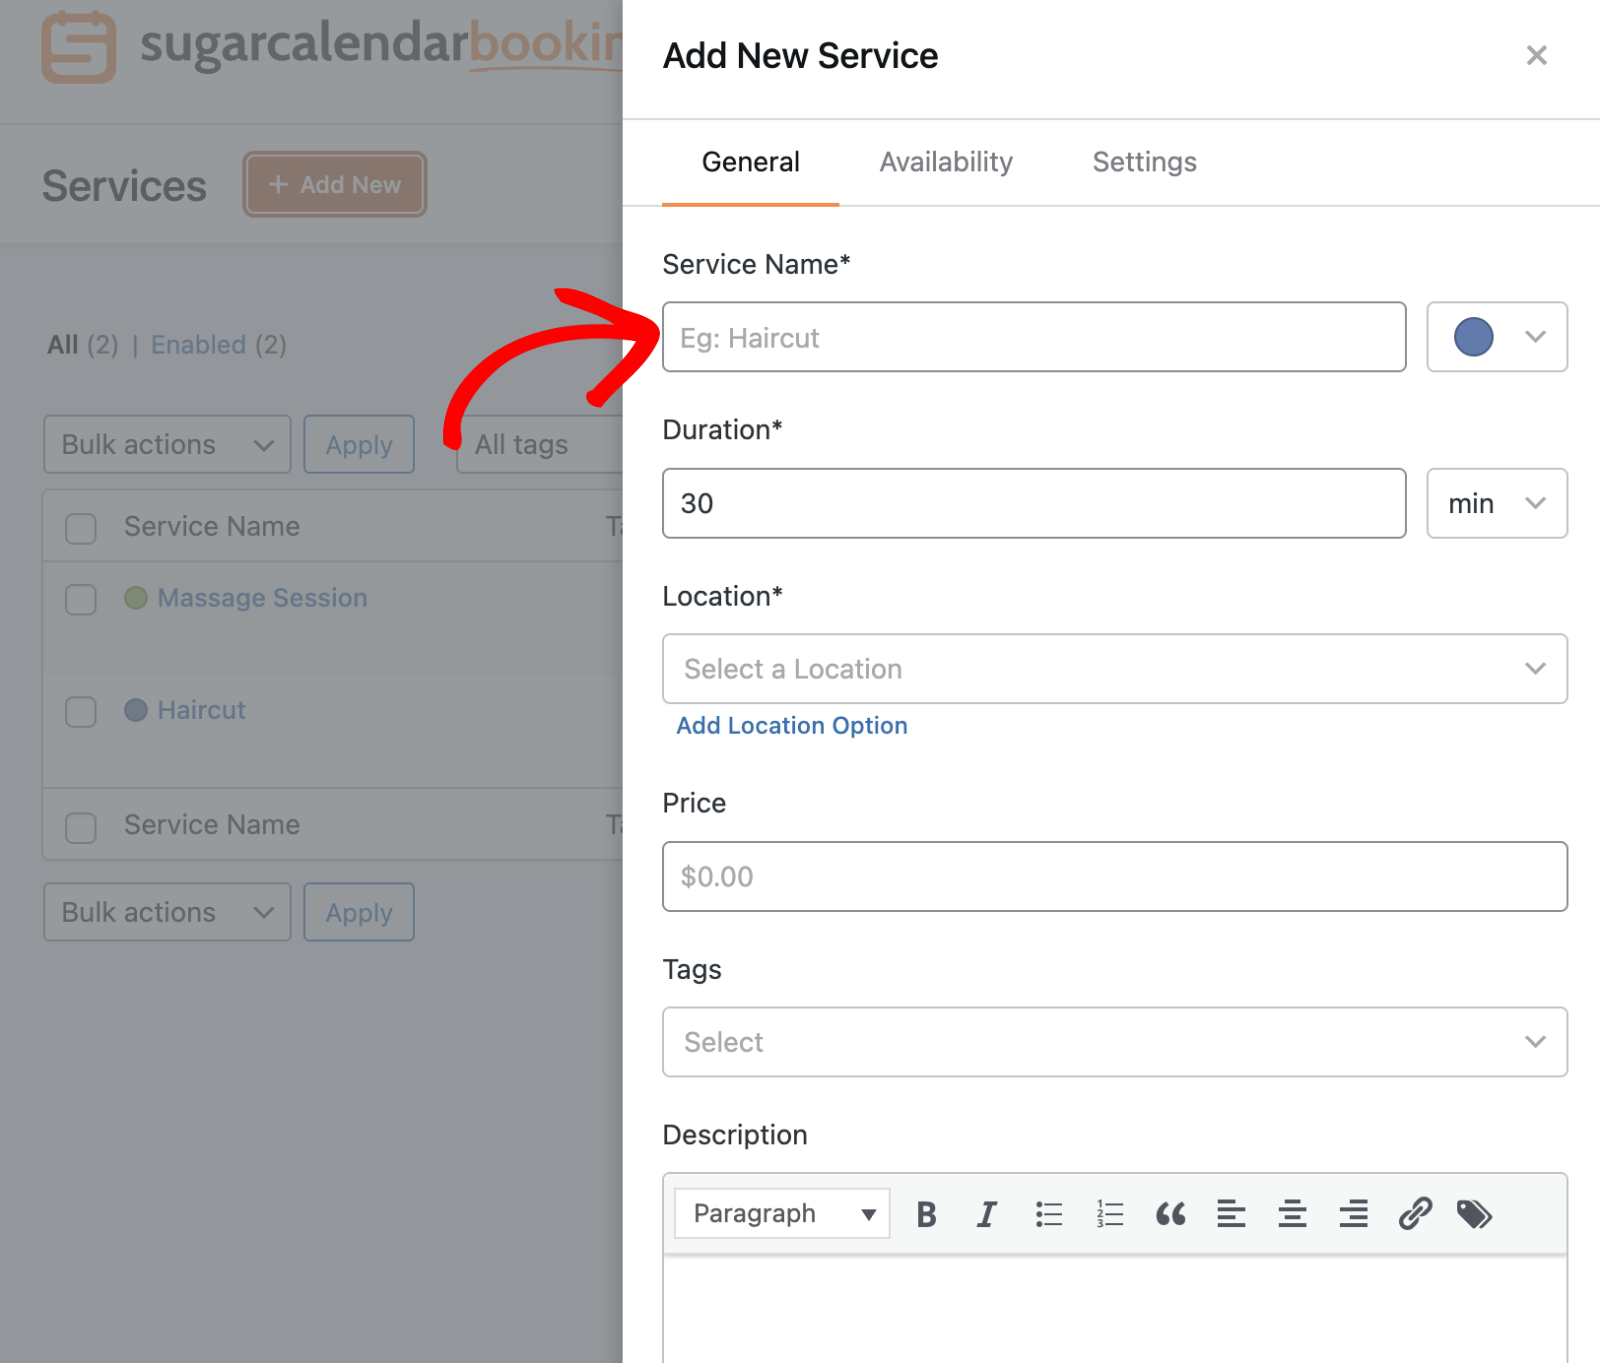
To create a new service, click the Add New button at the top of the Services page.
This will open the Add New Service modal, where you can configure all the details for your new service.
Editing an Existing Service
To modify a service, hover over the service name in the list and click Edit.
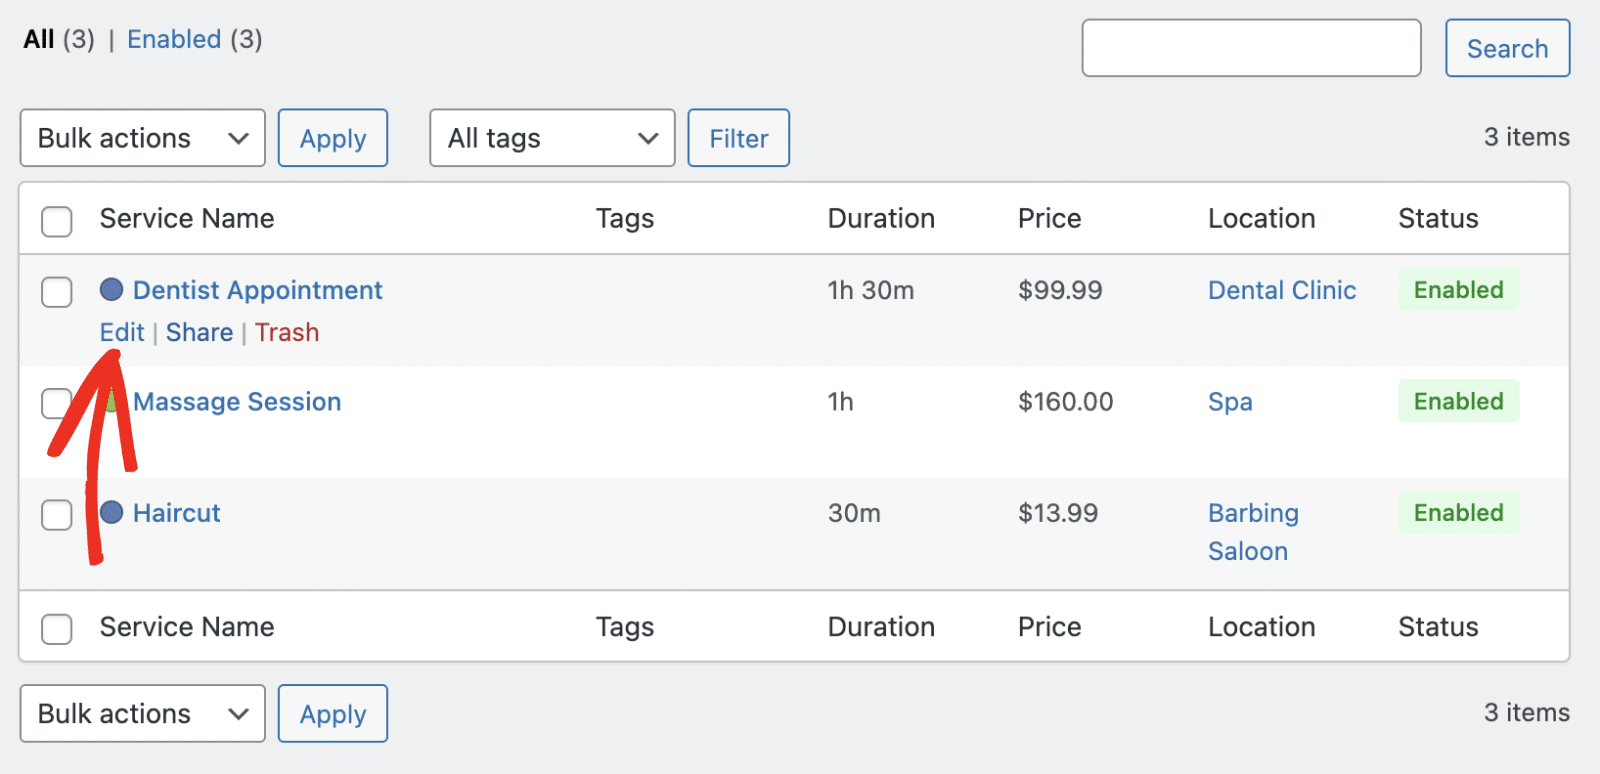
This will open the same Edit Service modal where you can update any of the service details across the General, Availability, and Settings tabs.
Make your changes and click Save Edits to update the service.
Displaying Services
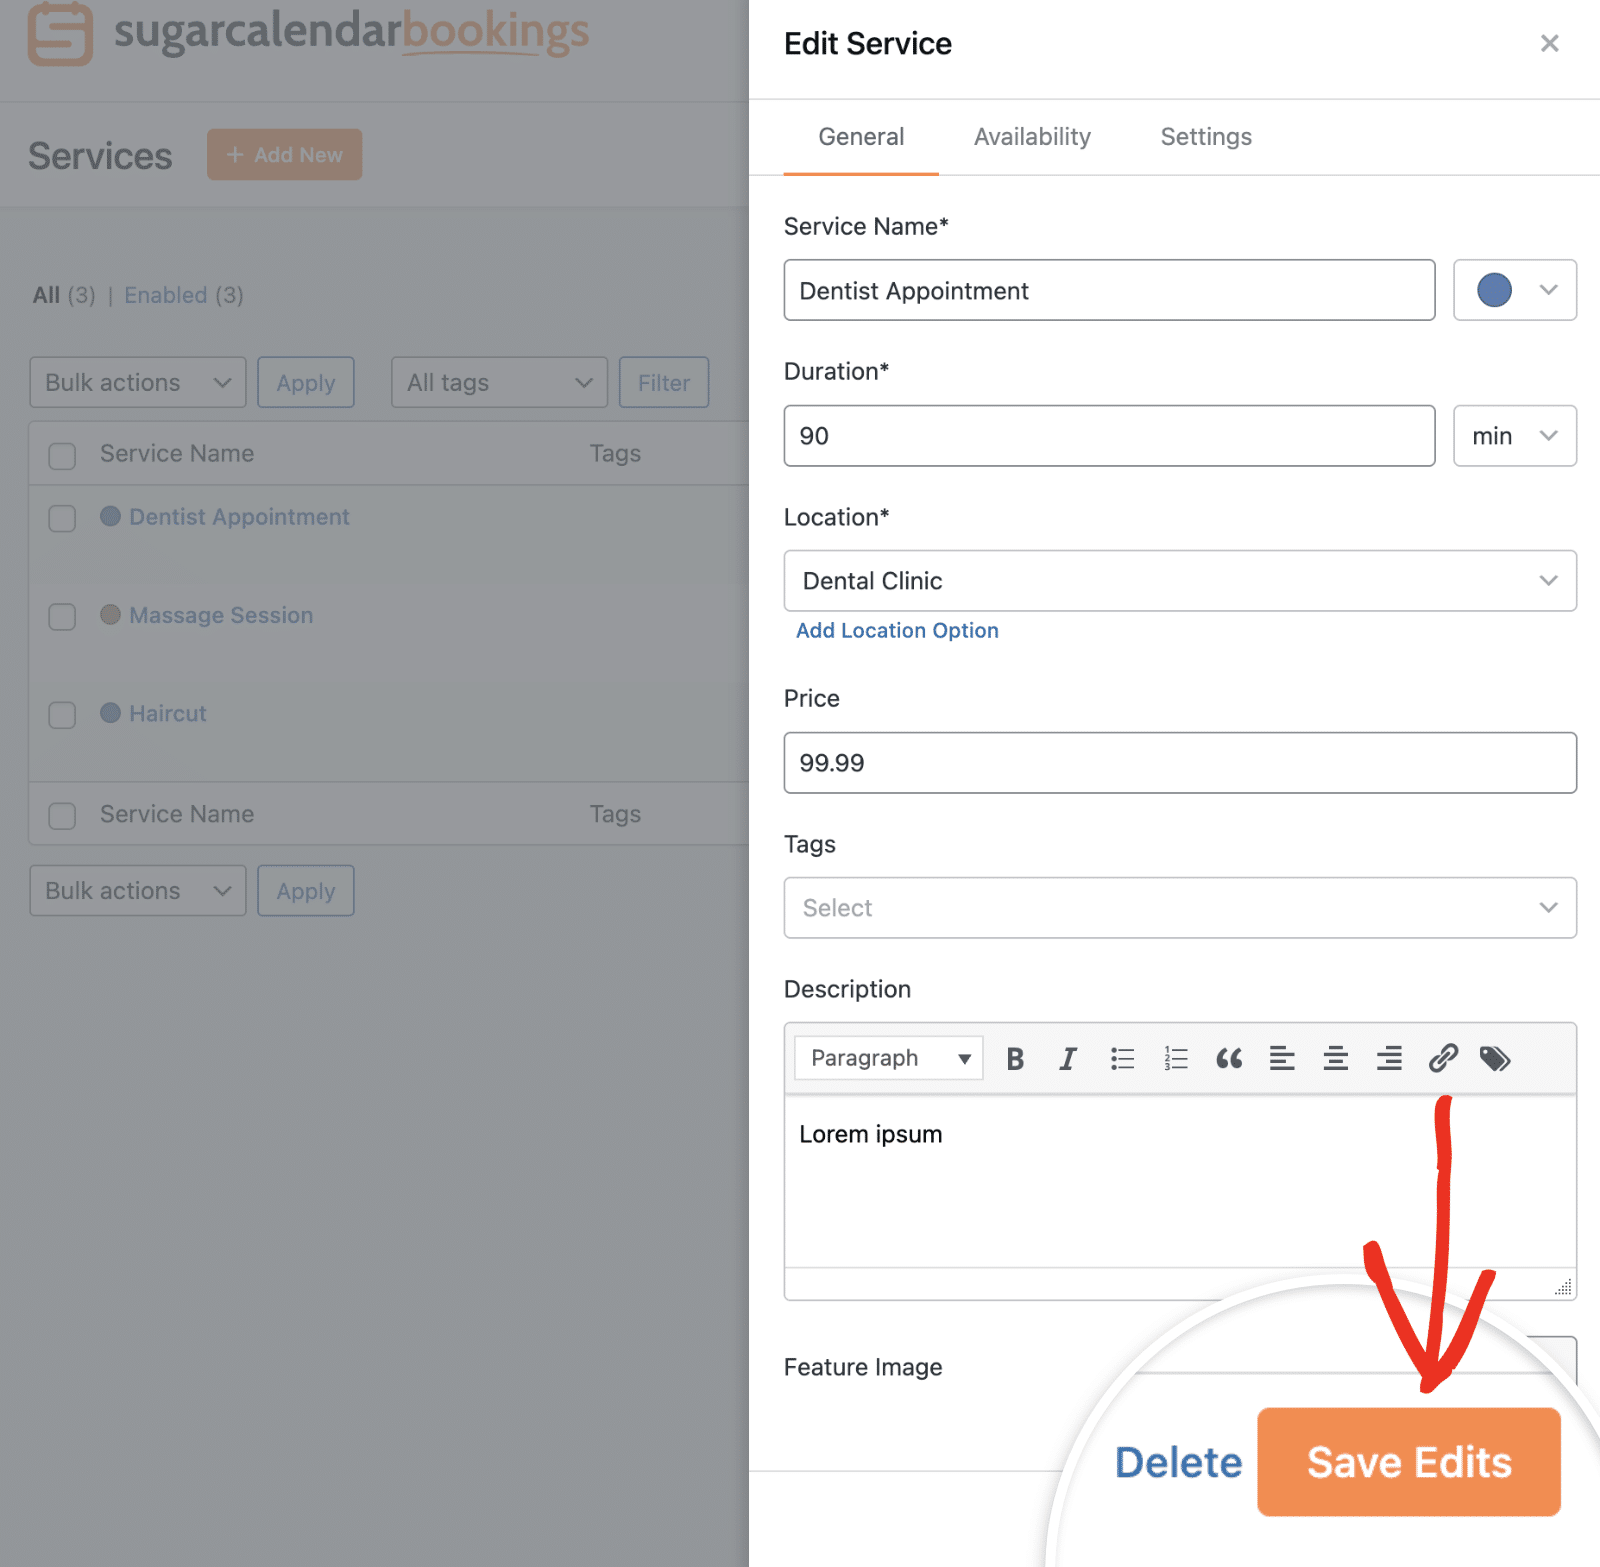
Sugar Calendar Bookings provides a shortcode for each service that you can use to display a booking form on any page or post.
To get the shortcode, hover over the service name and click Share.

This will display a modal with the service shortcode. Click Copy to copy it to your clipboard.
You can then paste this shortcode into any WordPress page or post to display a booking form for that specific service.
Sharing a Service Booking Page
Every service you create has its own booking page to share directly with customers, so they book that specific service without browsing the rest of your site. Share a service in three ways: link to its dedicated booking page, embed it in an existing page, or drop a shortcode wherever you need it.
To get started, go to Bookings » Services, find the service you want to share, and select Share from its row actions.
The Share panel opens with everything you need to publish the service.
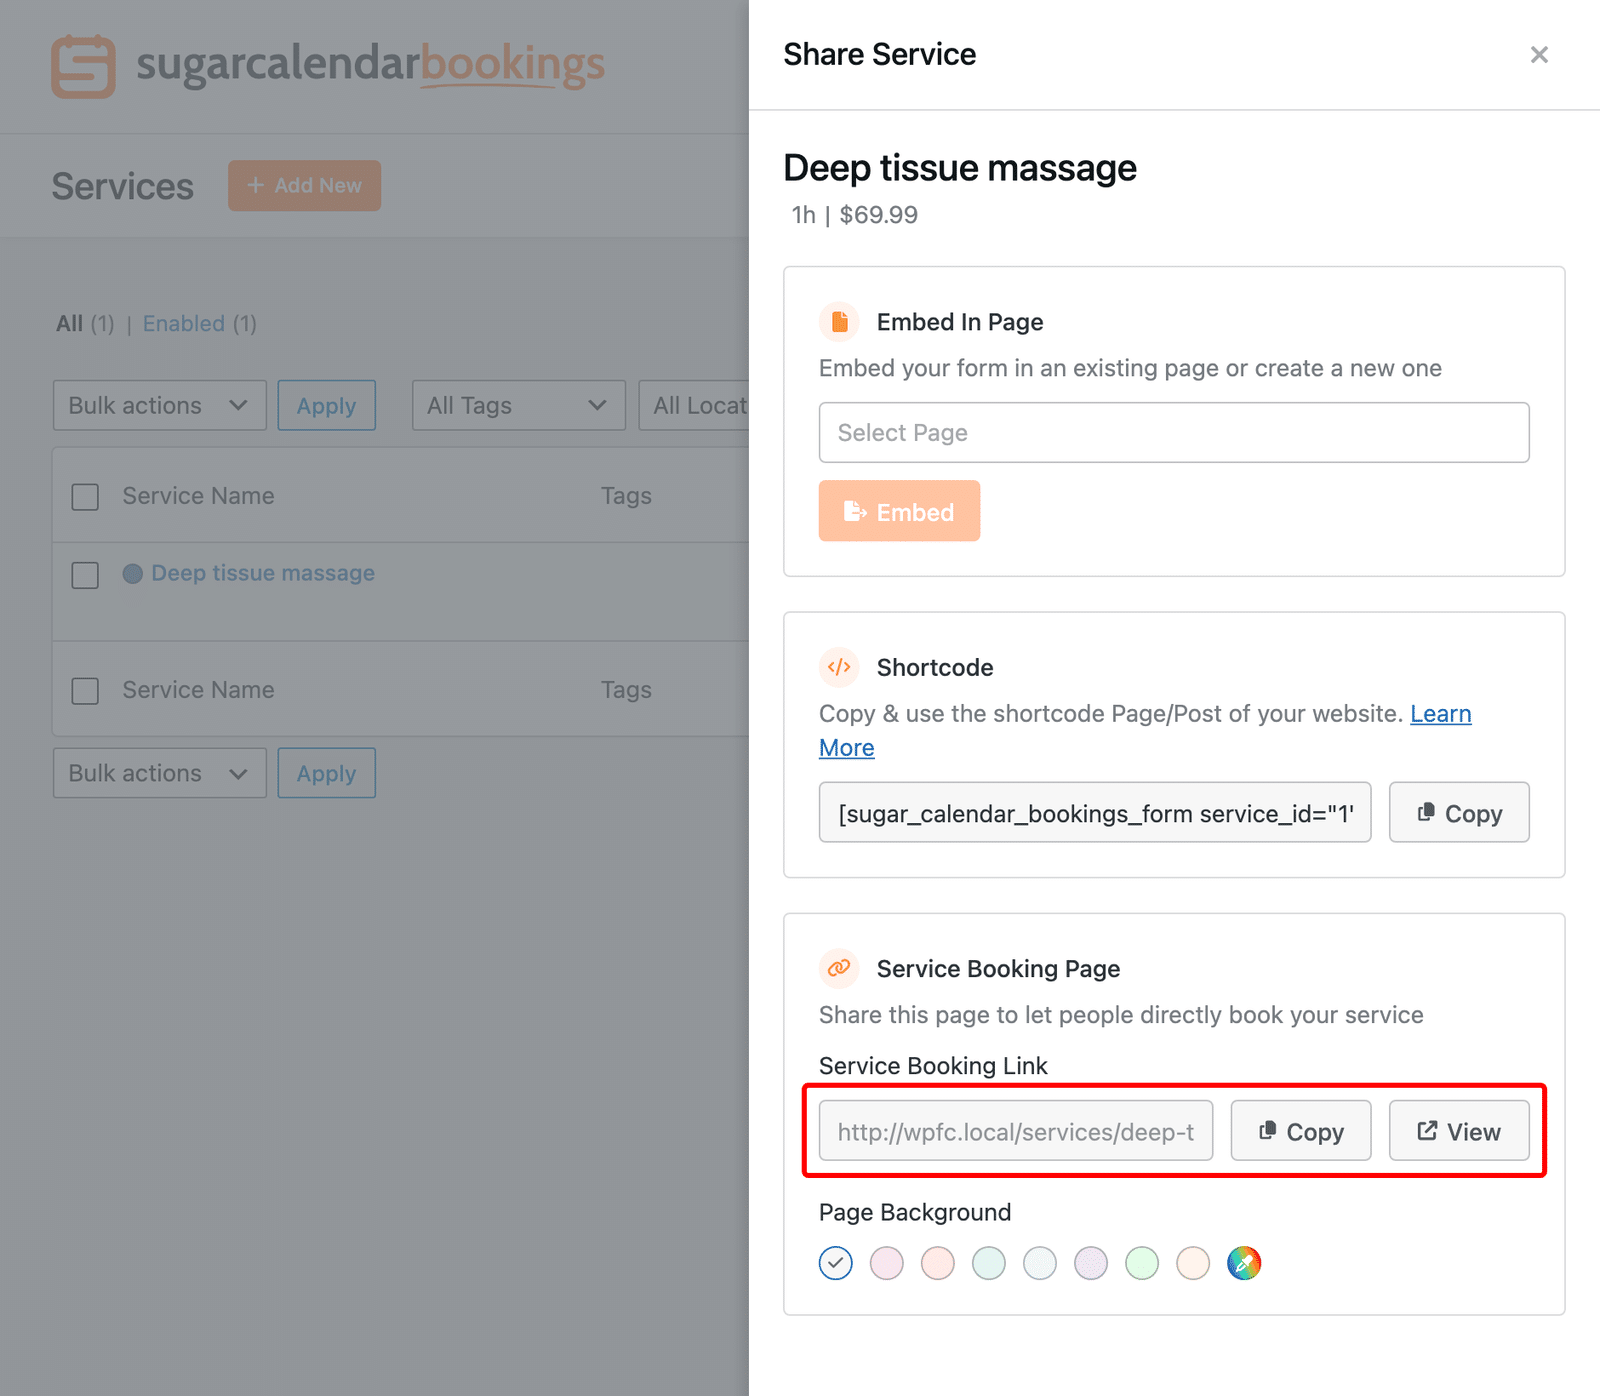
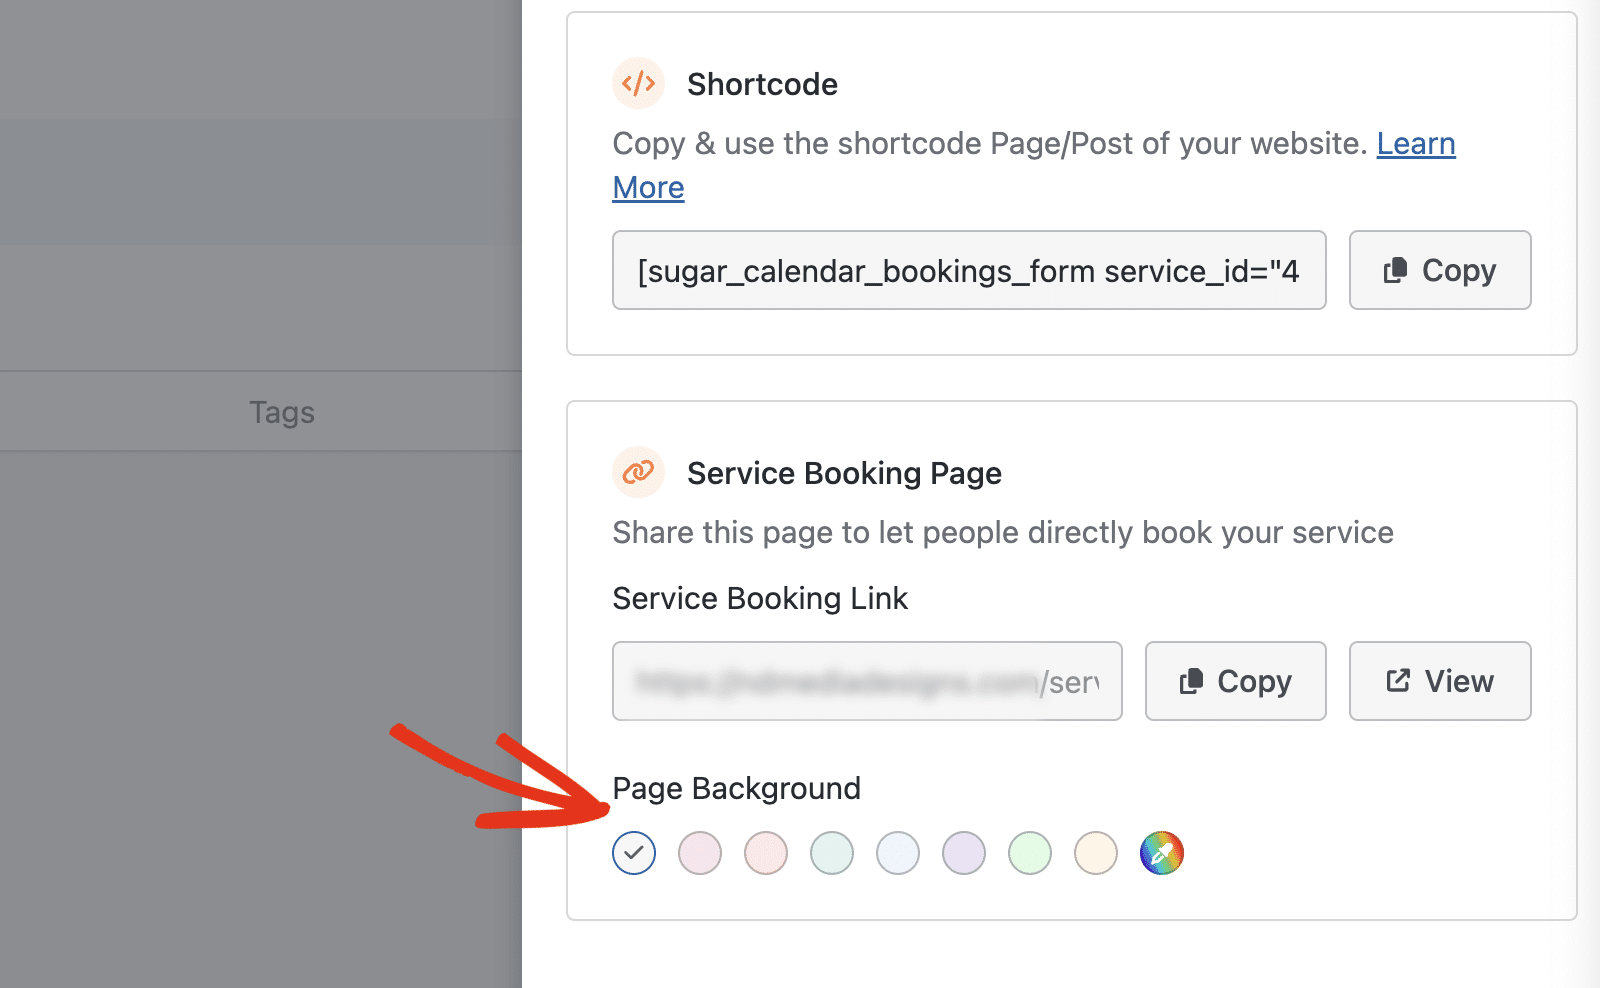
Sharing the service booking page
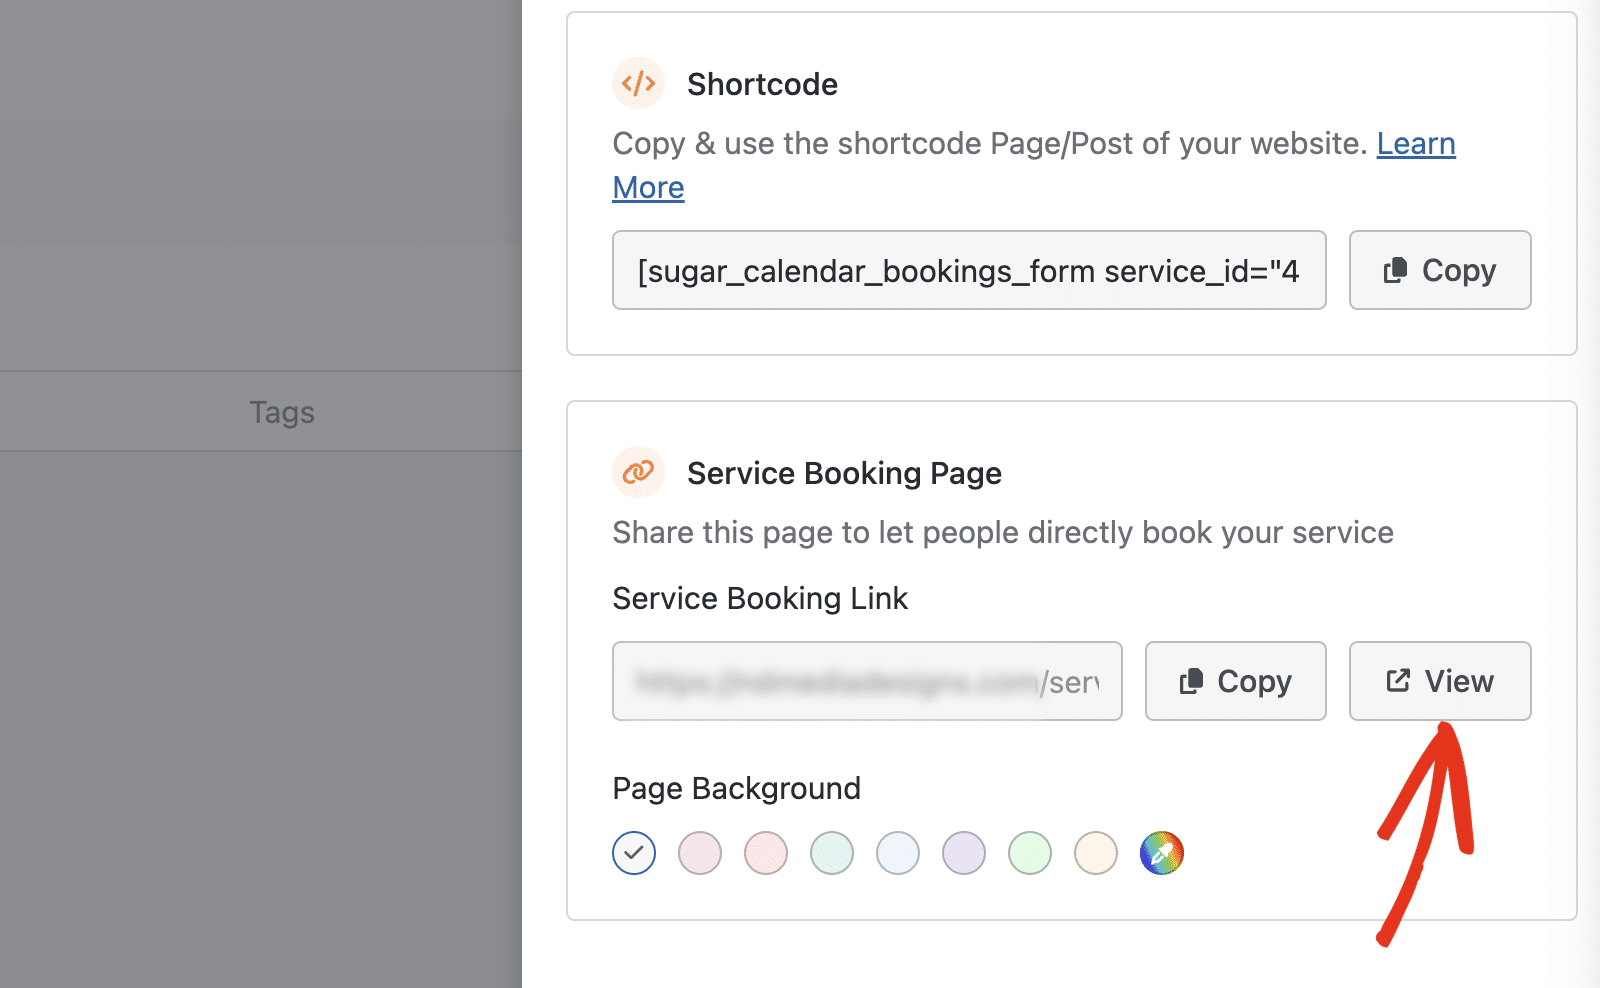
Under the Service Booking Page, copy the Service Booking Link and share it wherever you like, such as in an email, a social post, or a button on your site.
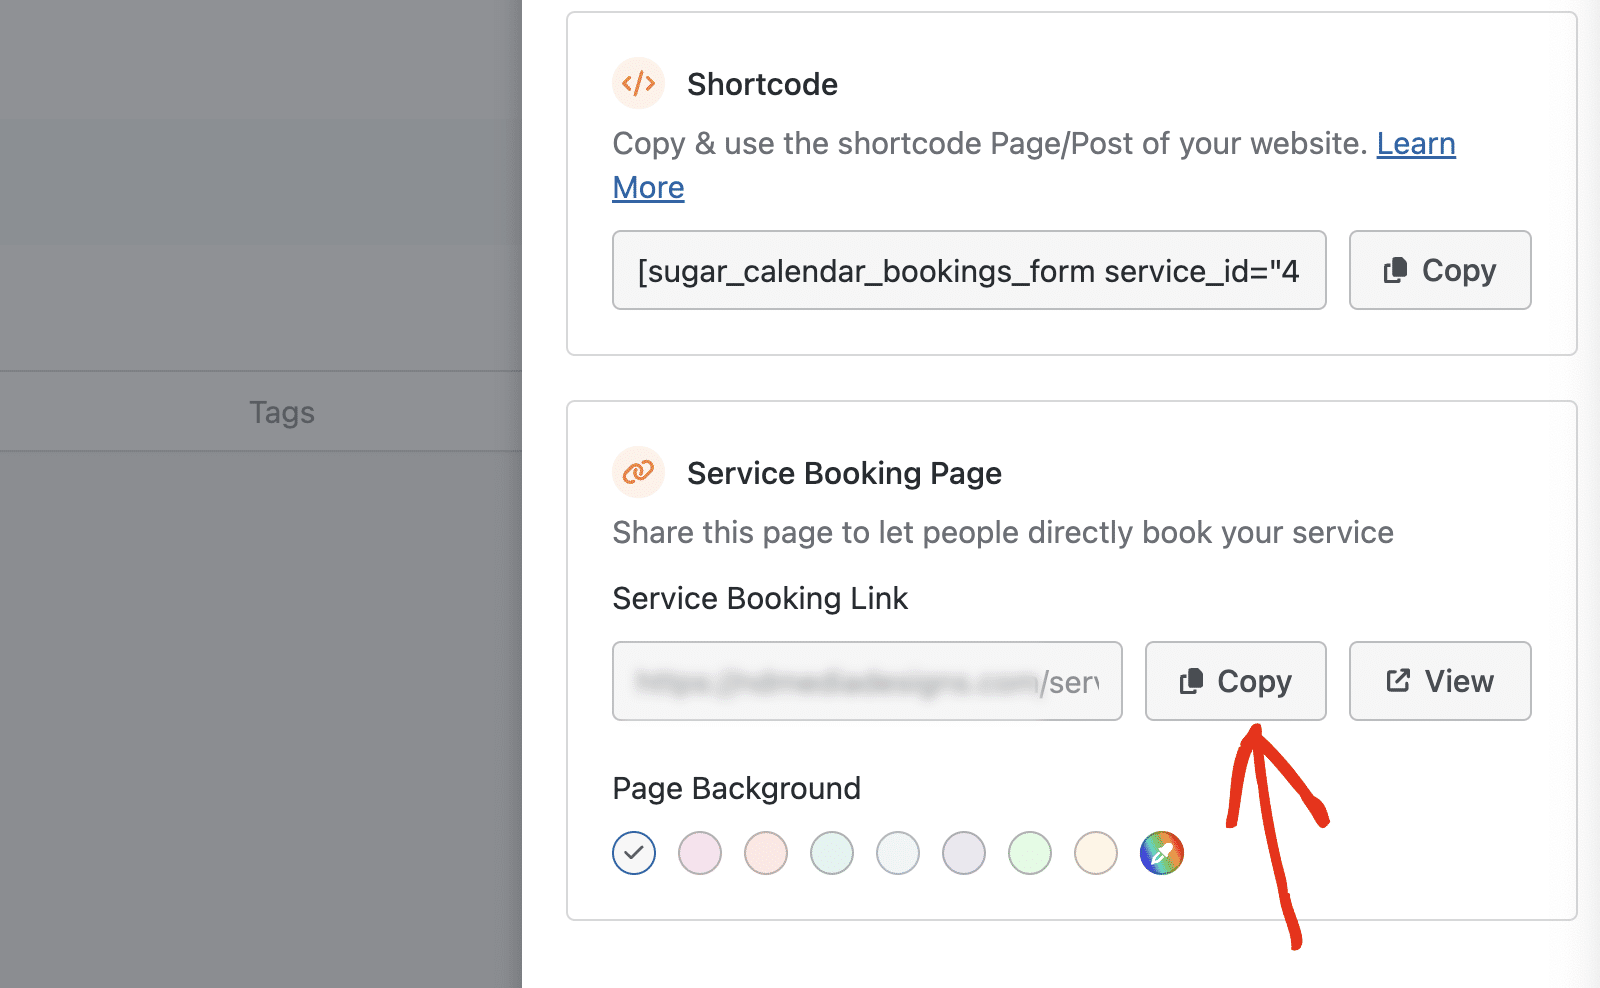
Select View to preview the page first.
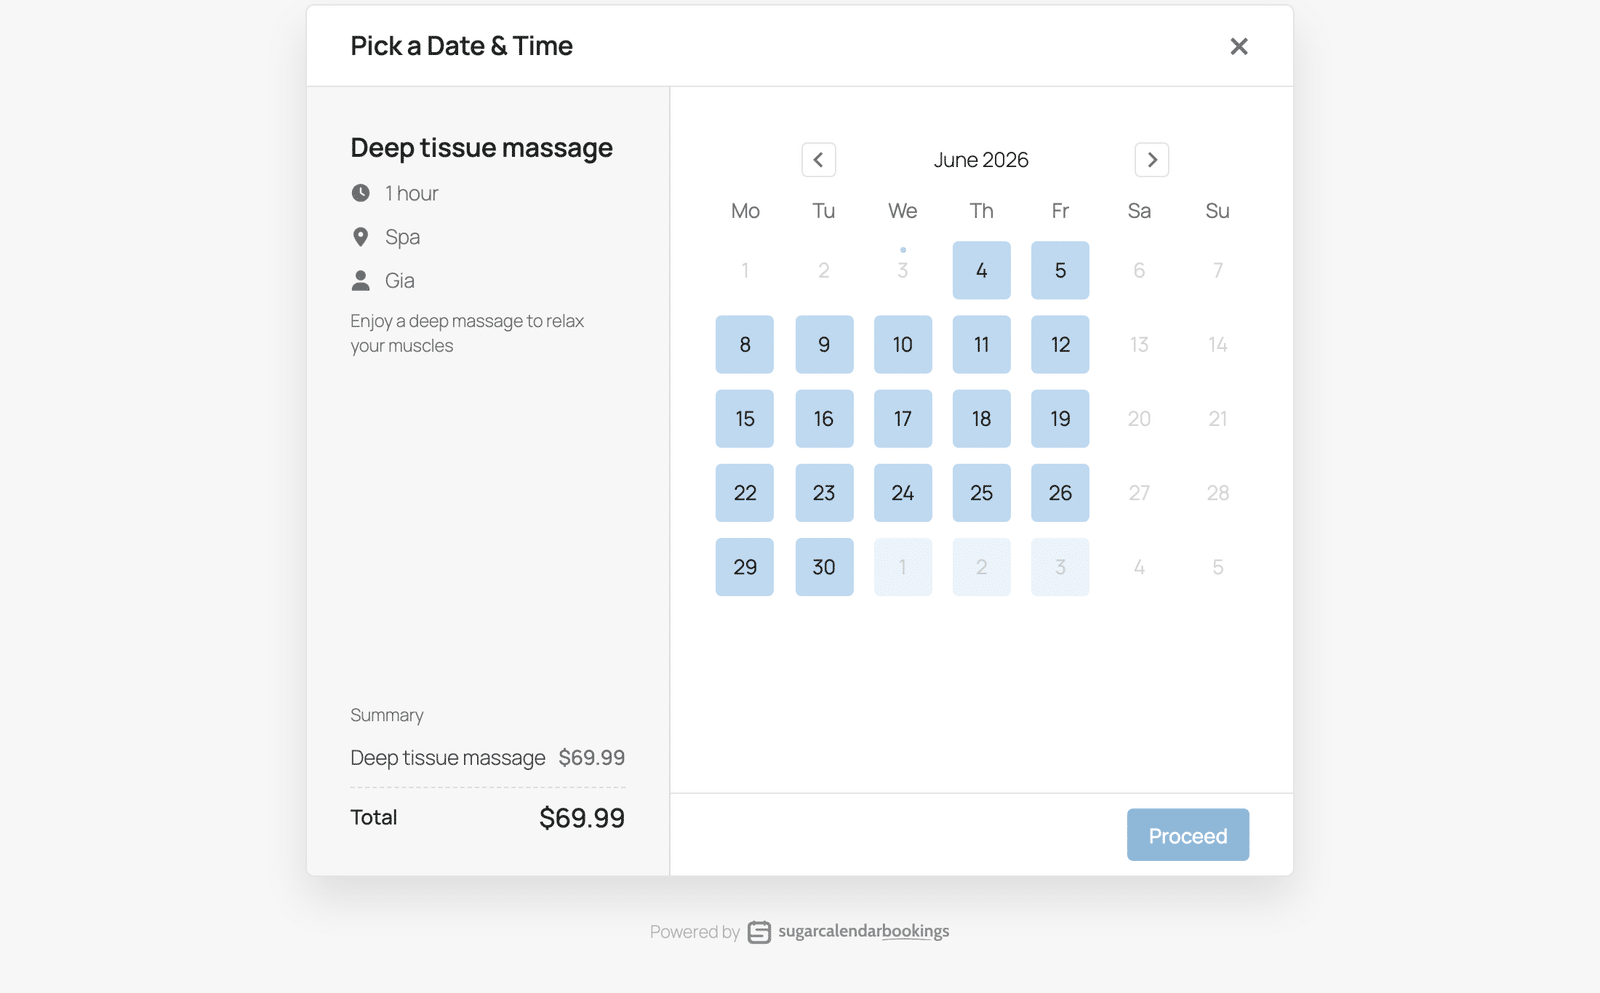
When a customer opens the link, they see a dedicated booking page for that service, where they pick a date and time and complete their booking.
In the Page Background section, you can customize the page color.
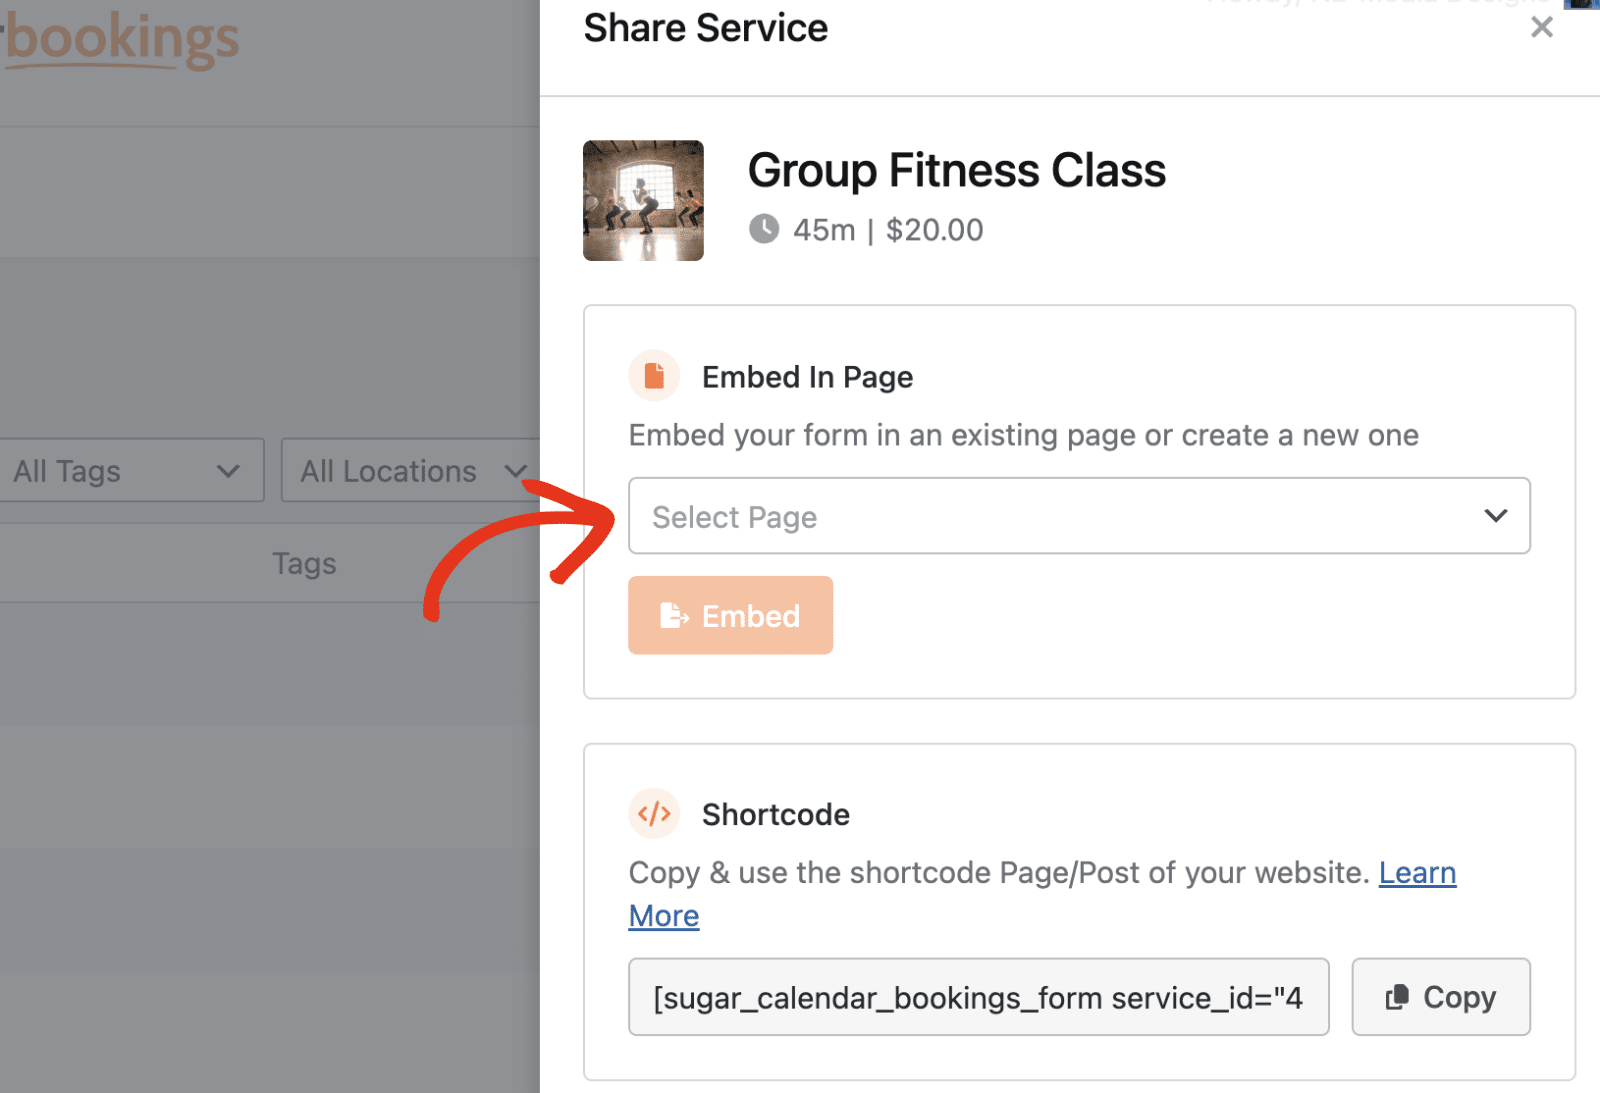
Embedding the form in a page
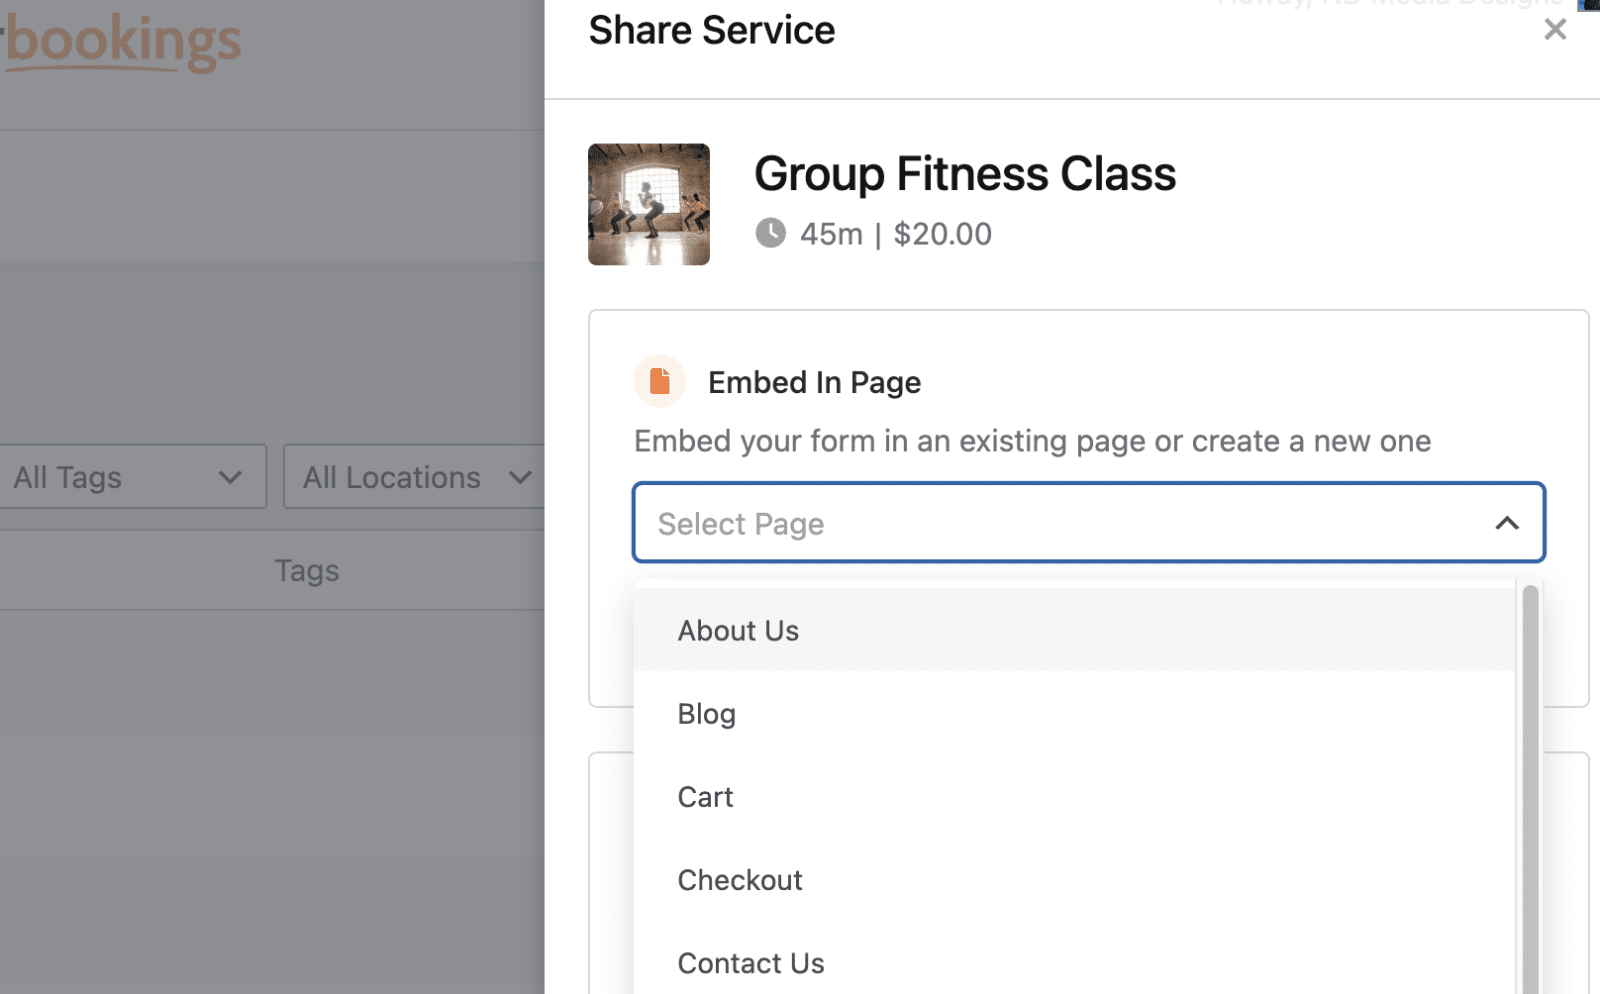
To place the service’s booking form inside an existing page, use the Embed In Page option.
Select the page you want, then choose Embed.
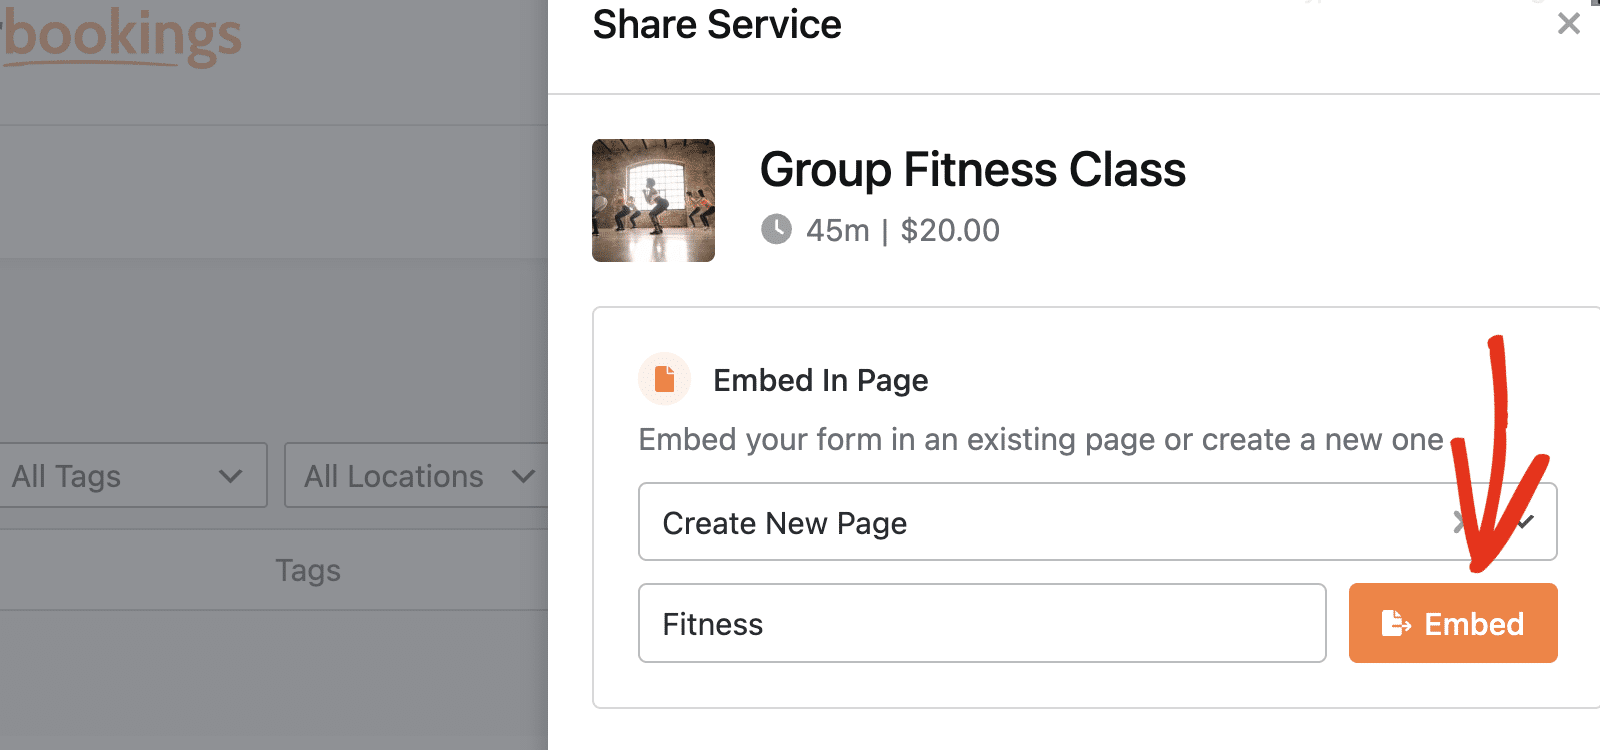
To create a fresh page instead, select that option from the same menu. Then enter the page name and click Embed.
Using the shortcode
Prefer to add the form manually? Copy the Shortcode and paste it into any page or post.
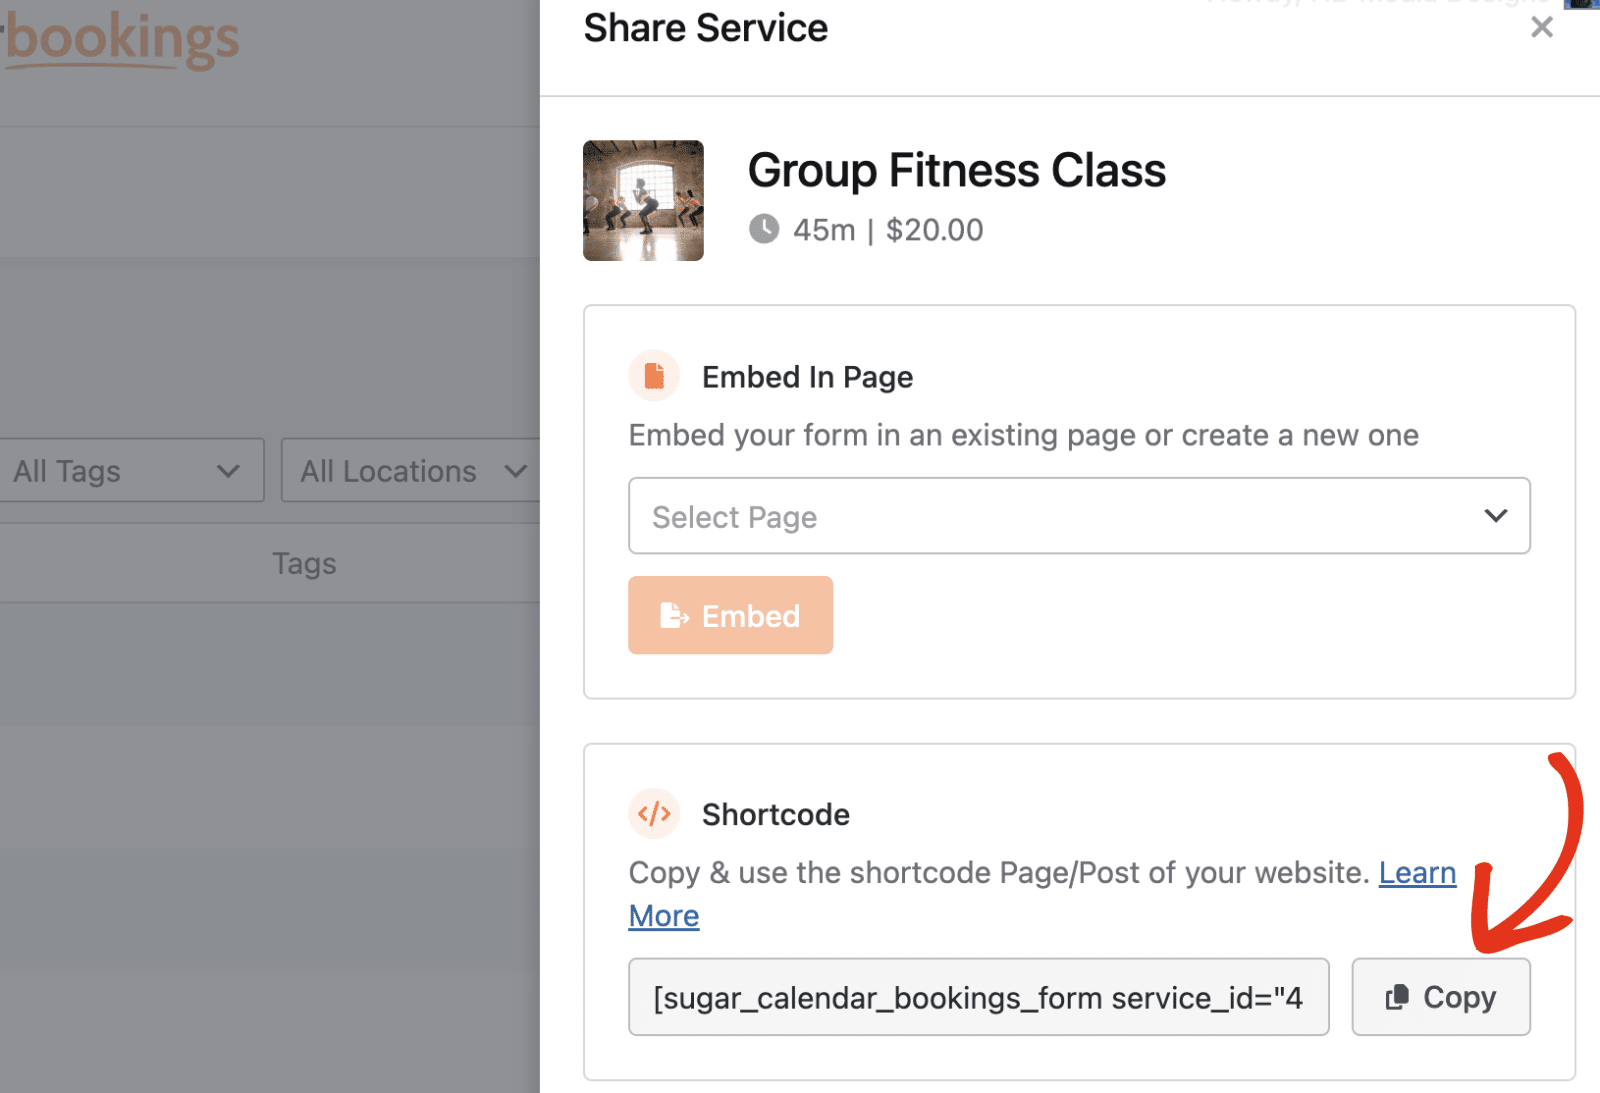
Each service has its own shortcode, so the form automatically loads the correct service.
With these sharing options, you can point customers straight to the service they need and reduce the steps between interest and a confirmed booking.
Managing Multiple Services
The Services page provides several tools to help you manage your services efficiently.
Filtering Services
At the top of the services list, you’ll see filter options:
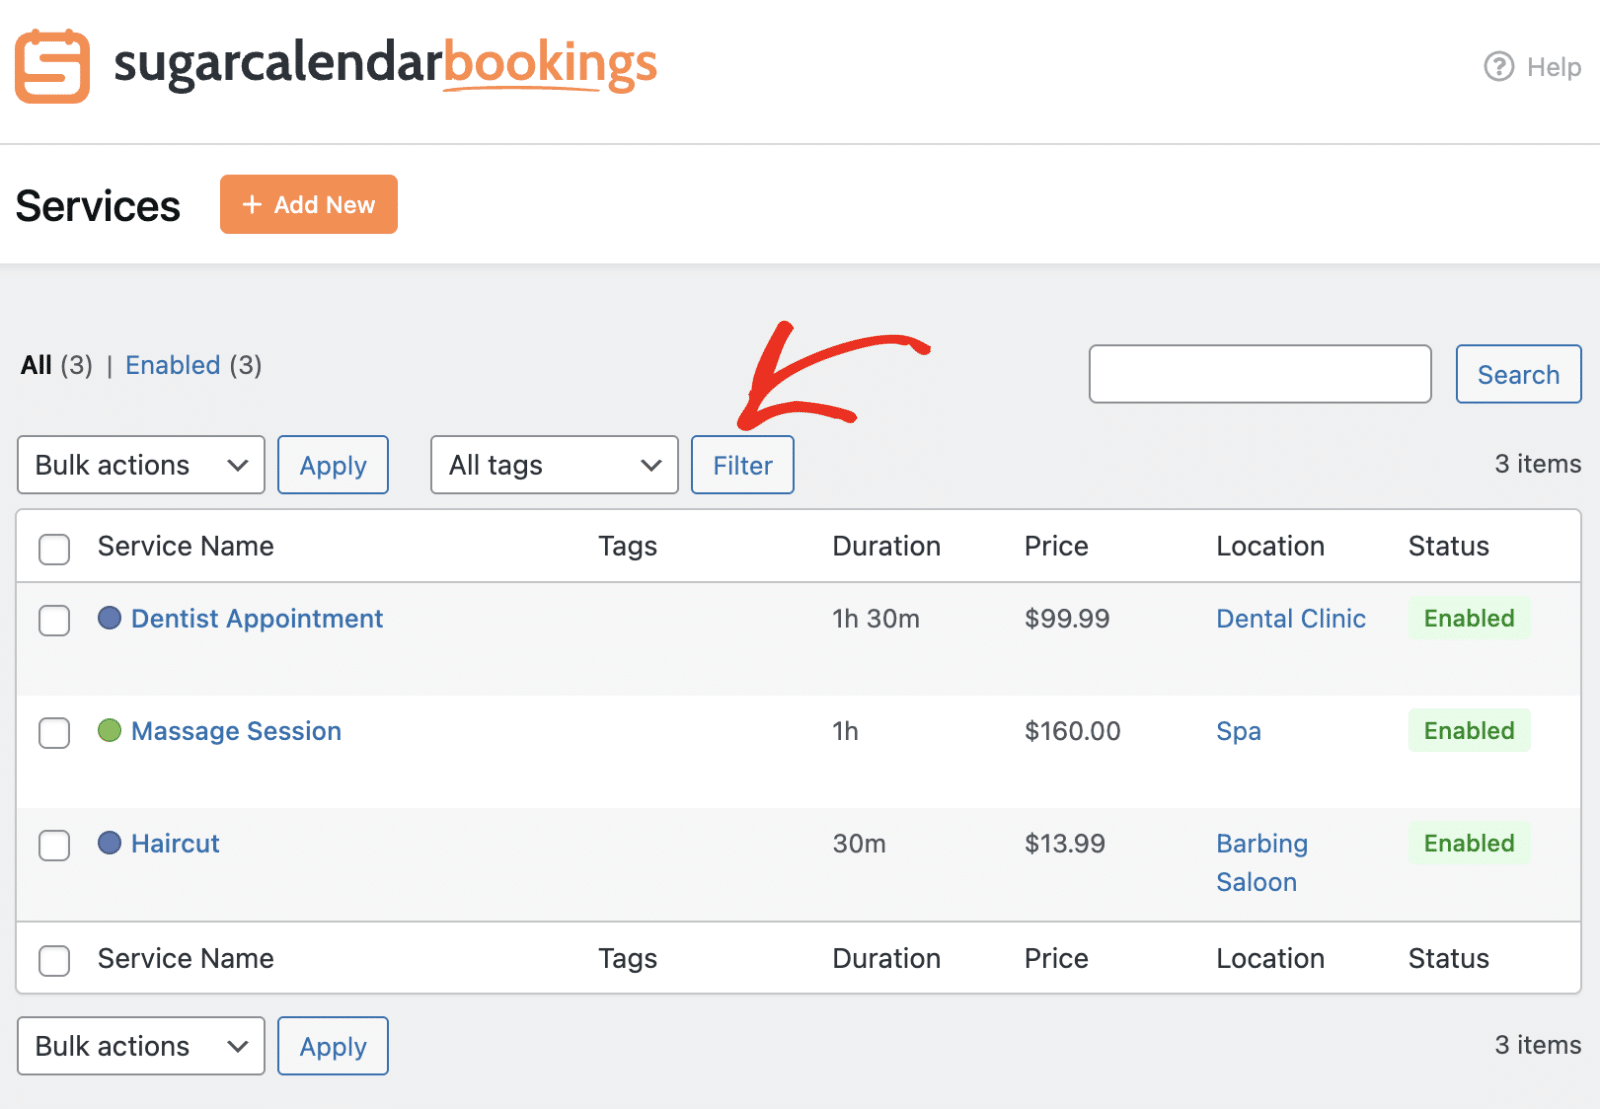
You can filter services by tags using the All tags dropdown and clicking Filter.
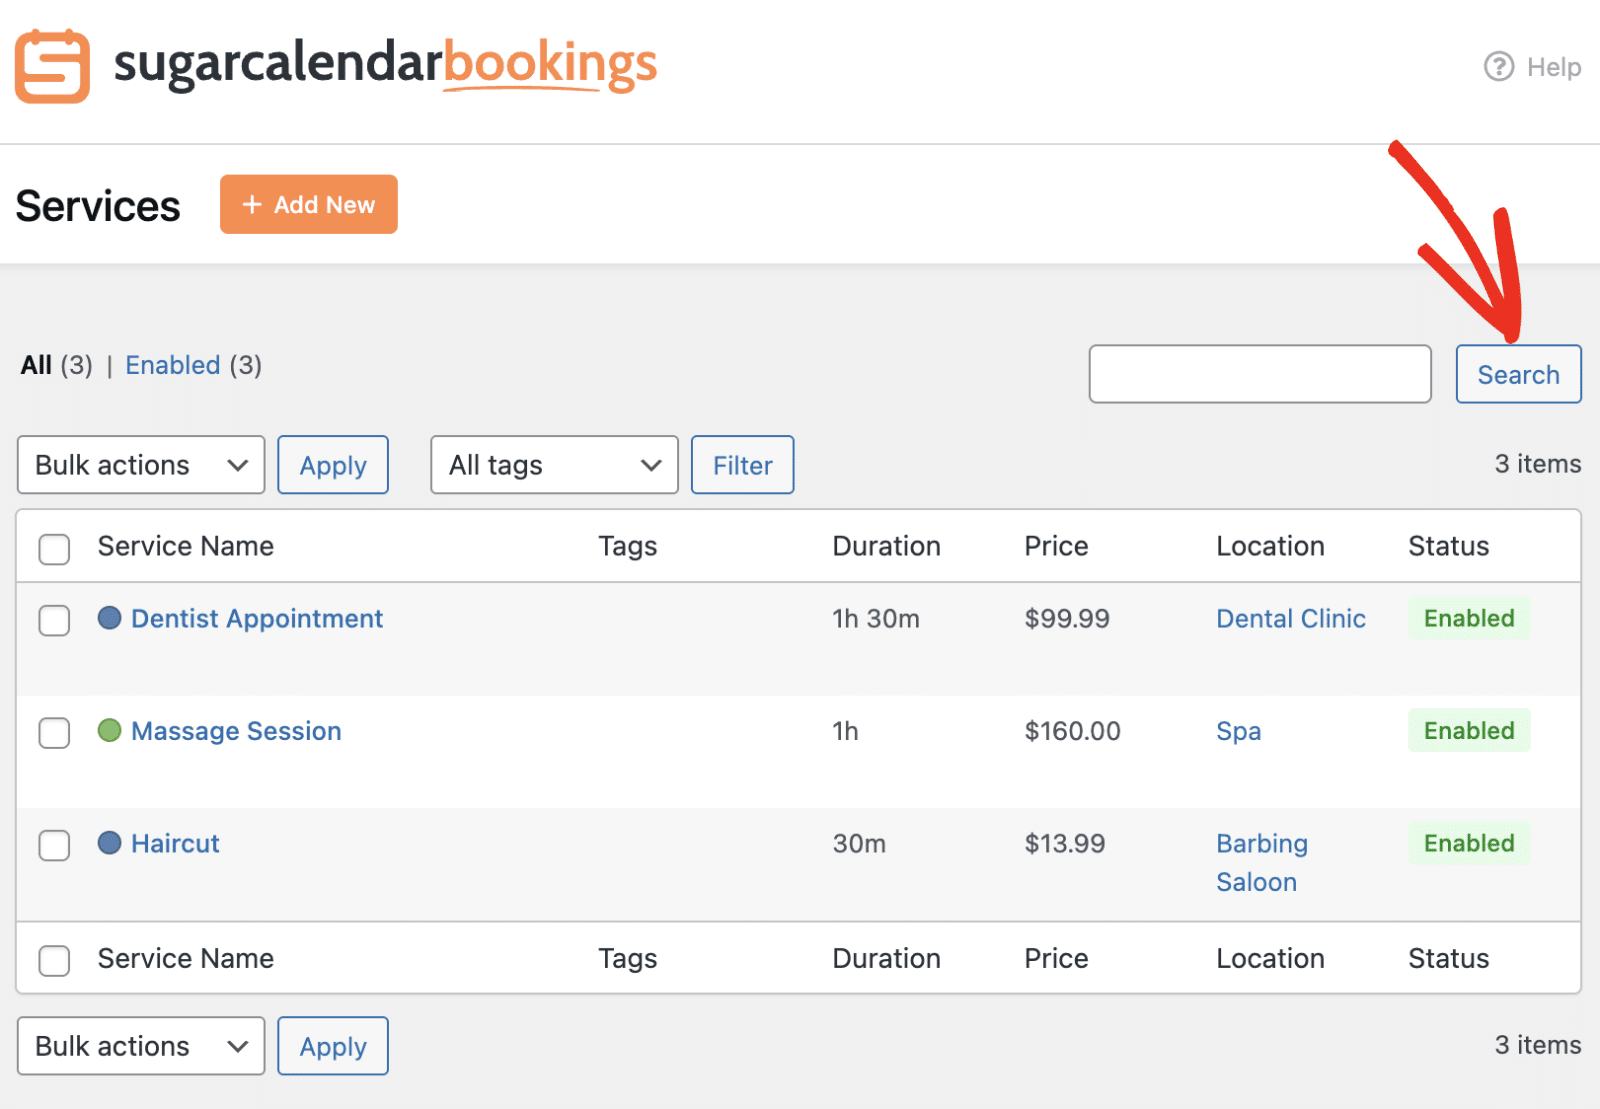
Searching Services
Use the search box to quickly find specific services by name. Enter your search term and click Search.
Bulk Actions
To perform actions on multiple services at once, check the boxes next to the services you want to modify.
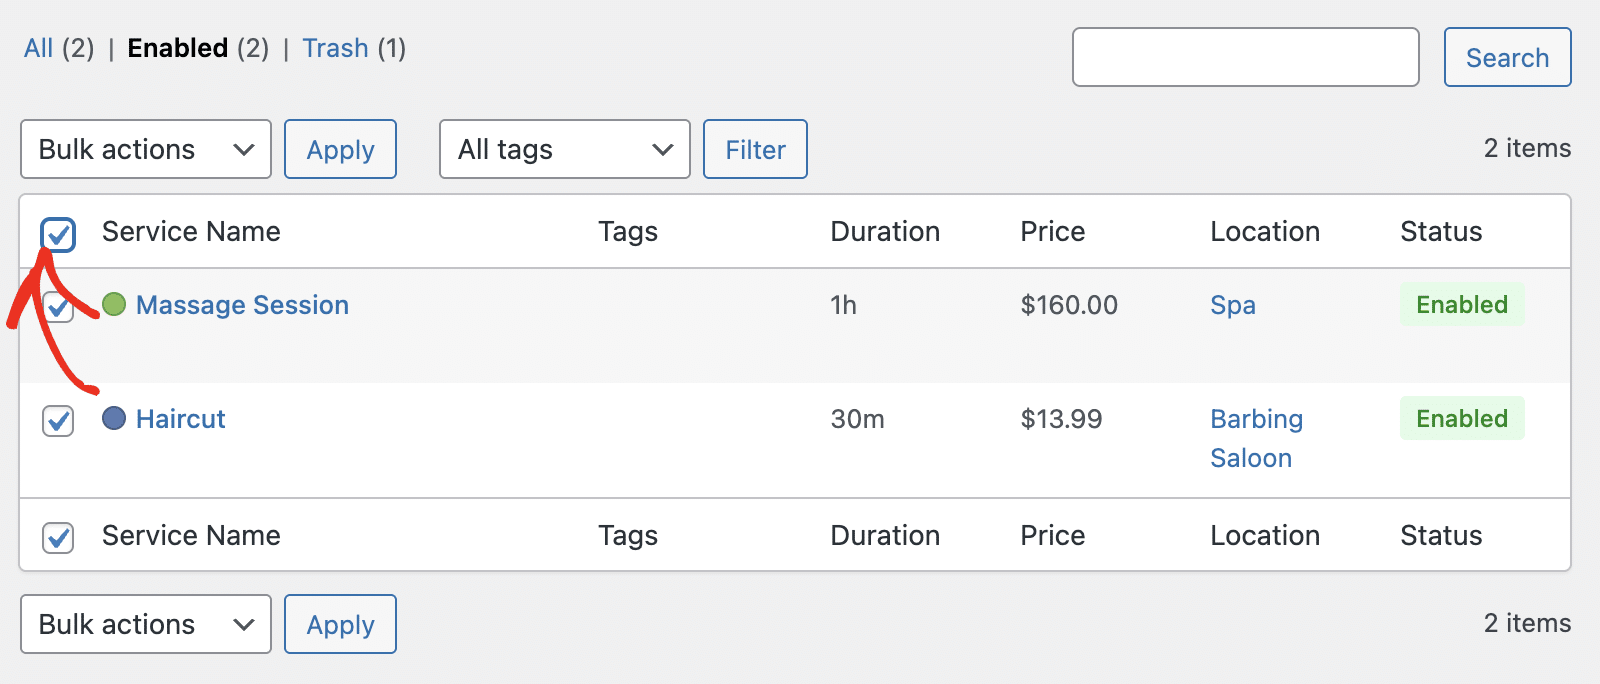
Then select an action from the Bulk actions dropdown and click Apply.
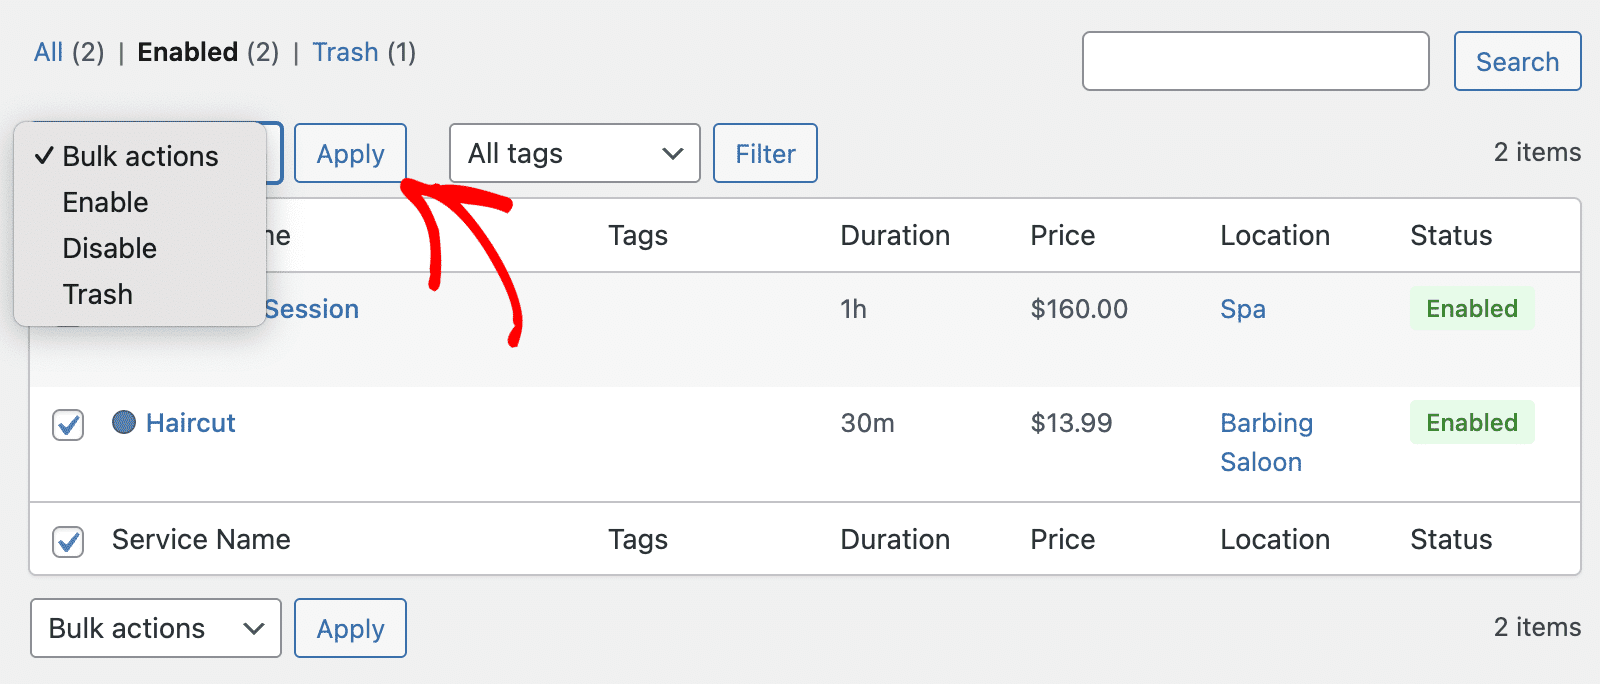
Available bulk actions include enabling, disabling, or moving services to trash.
Disabling a Service
If you want to temporarily hide a service without deleting it, you can disable it. Click Edit on the service, then go to the Settings tab.
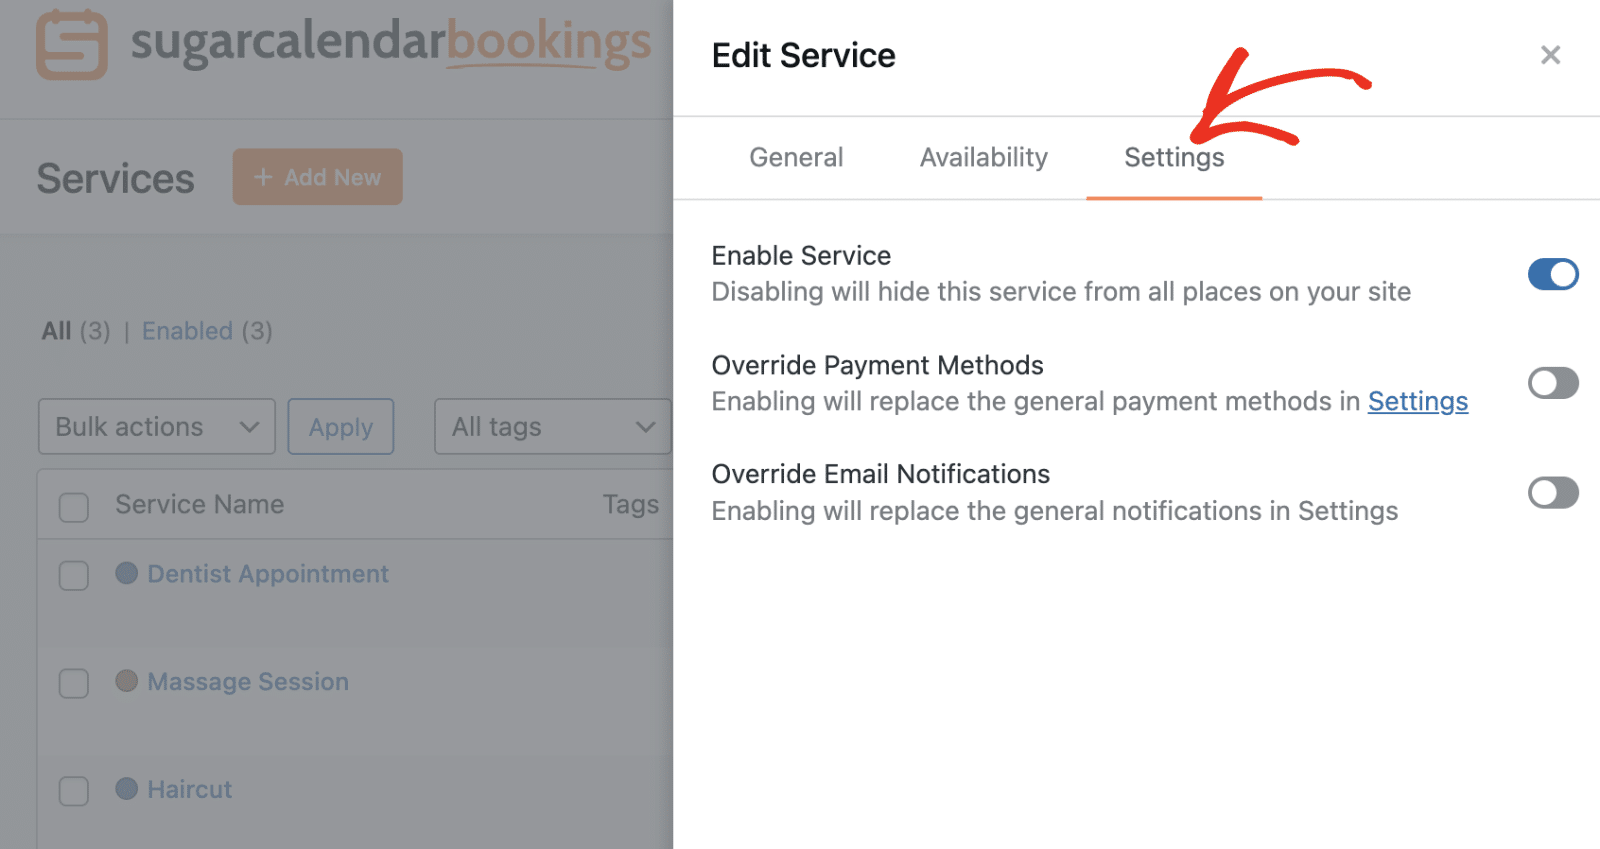
Once here, toggle the Enable Service option to the OFF position. This will hide the service from all booking pages on your site while preserving all its settings.

The service status will change to Disabled in the services list.
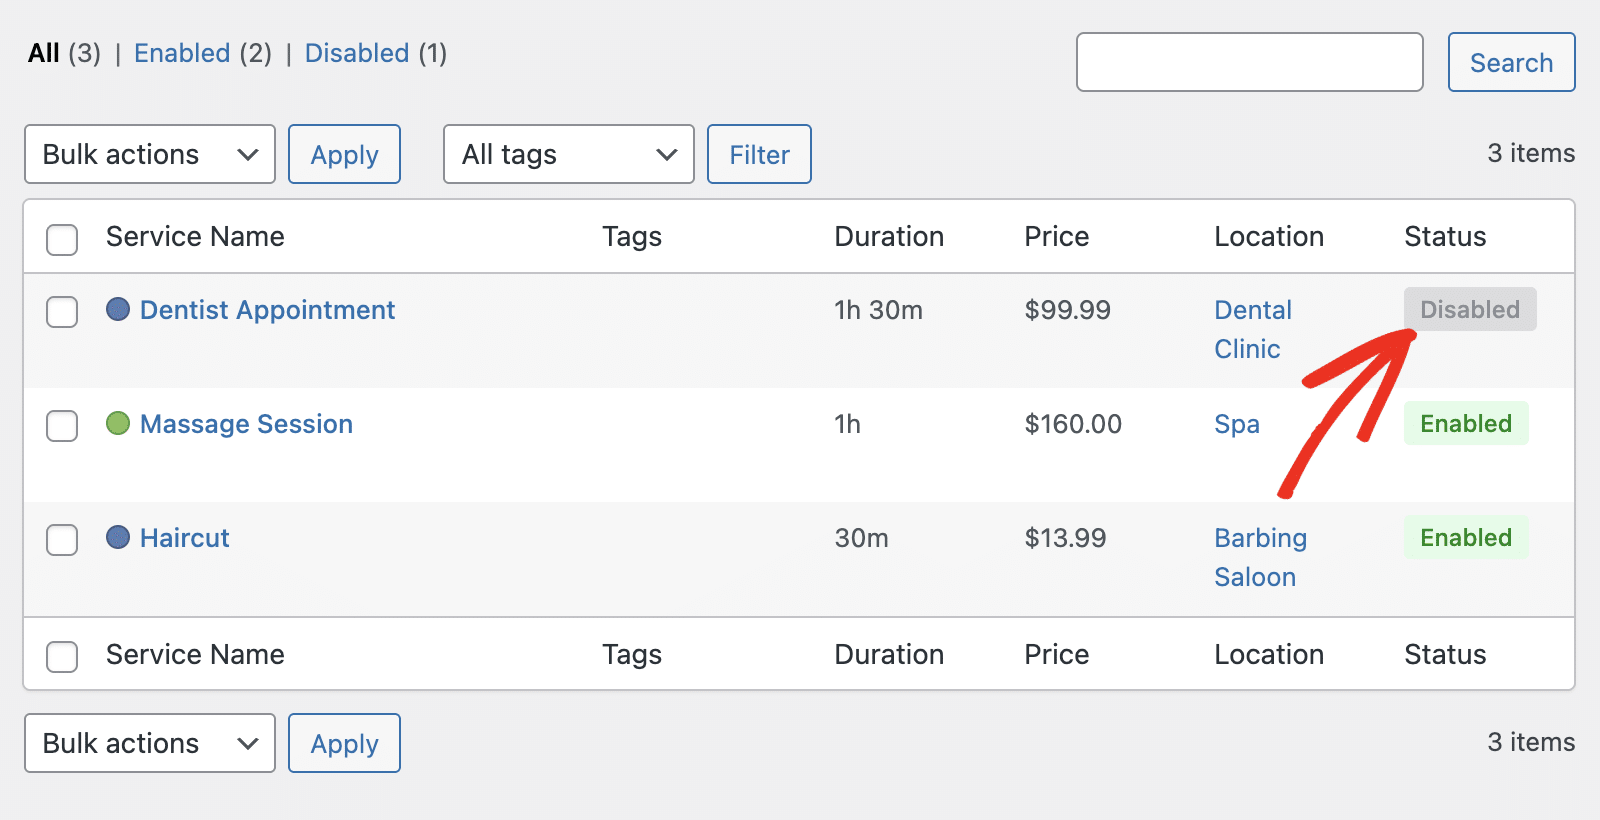
To re-enable the service later, simply toggle the option back to ON.
Deleting a Service
If you no longer need a service, you can move it to trash. Hover over the service name and click Trash.
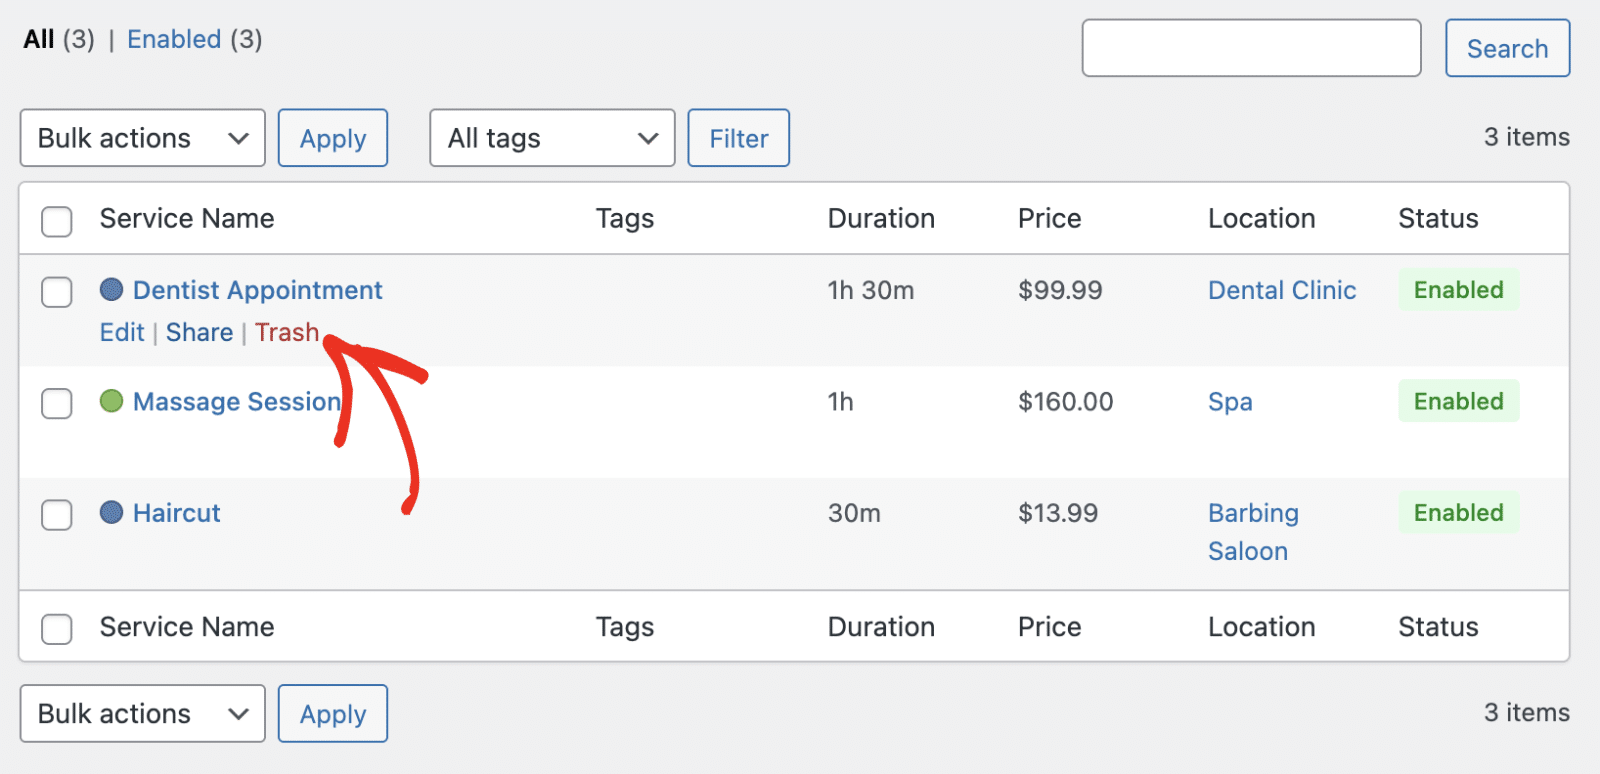
A confirmation dialog will appear warning you that all appointments related to this service will also be trashed. Click Yes to confirm.
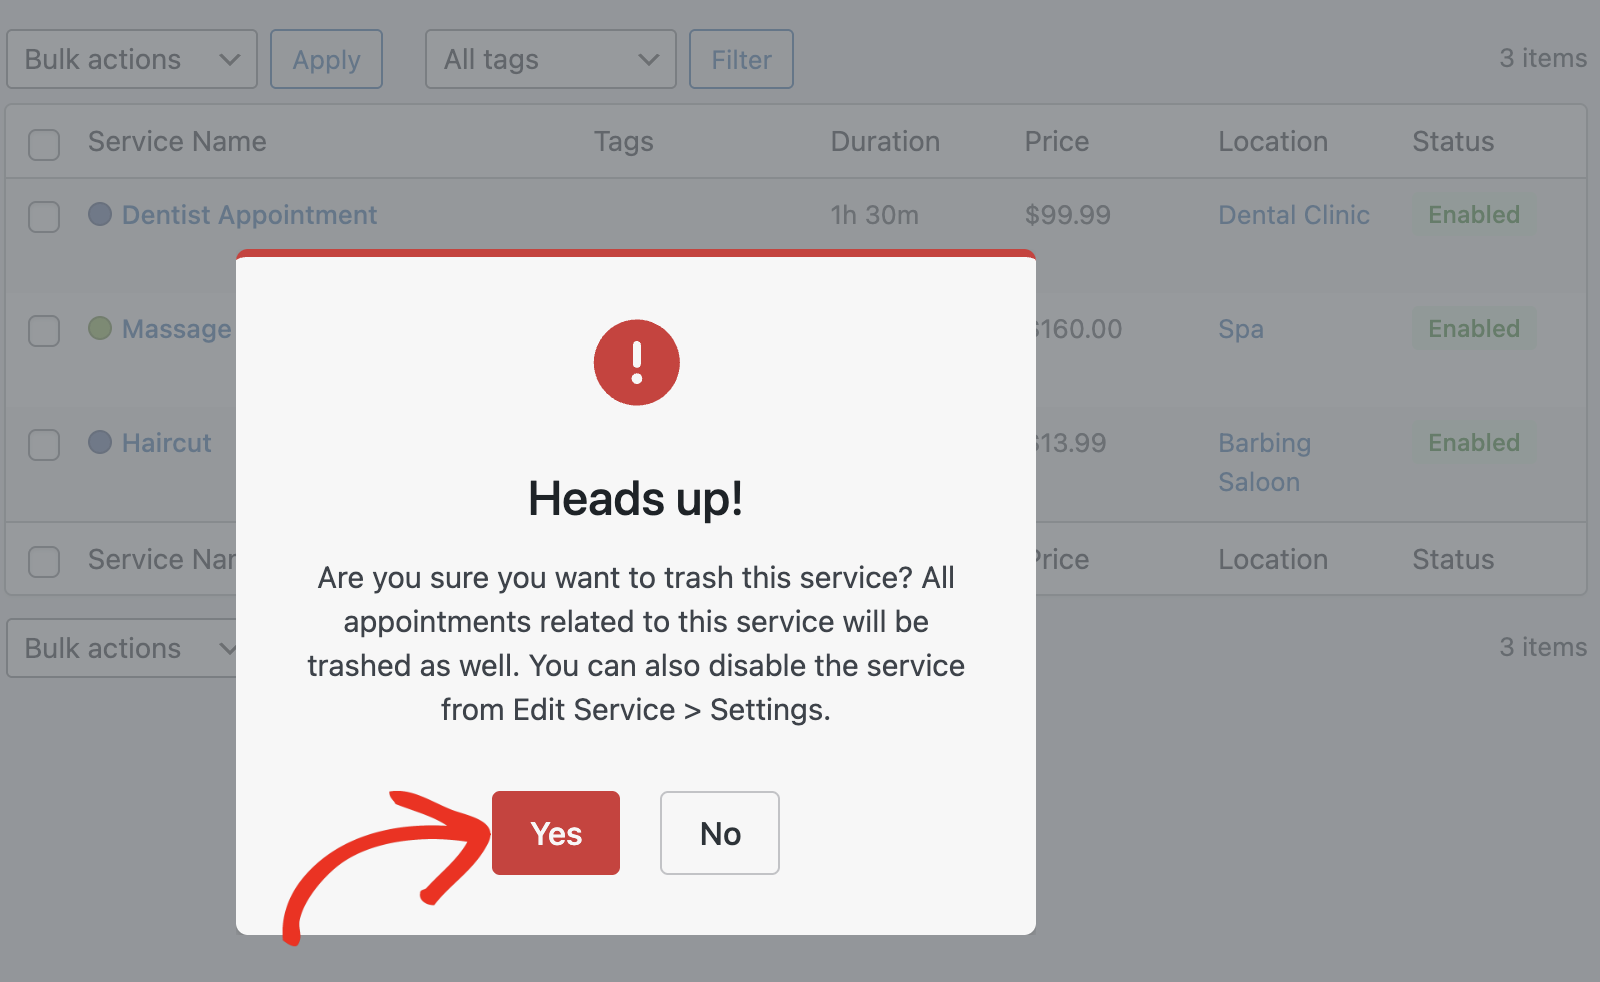
Note: When you trash a service, all appointments associated with it will also be moved to trash. If you want to keep the service but hide it from customers, consider disabling it instead.
The trashed service can be found by clicking the Trash filter at the top of the Services page.
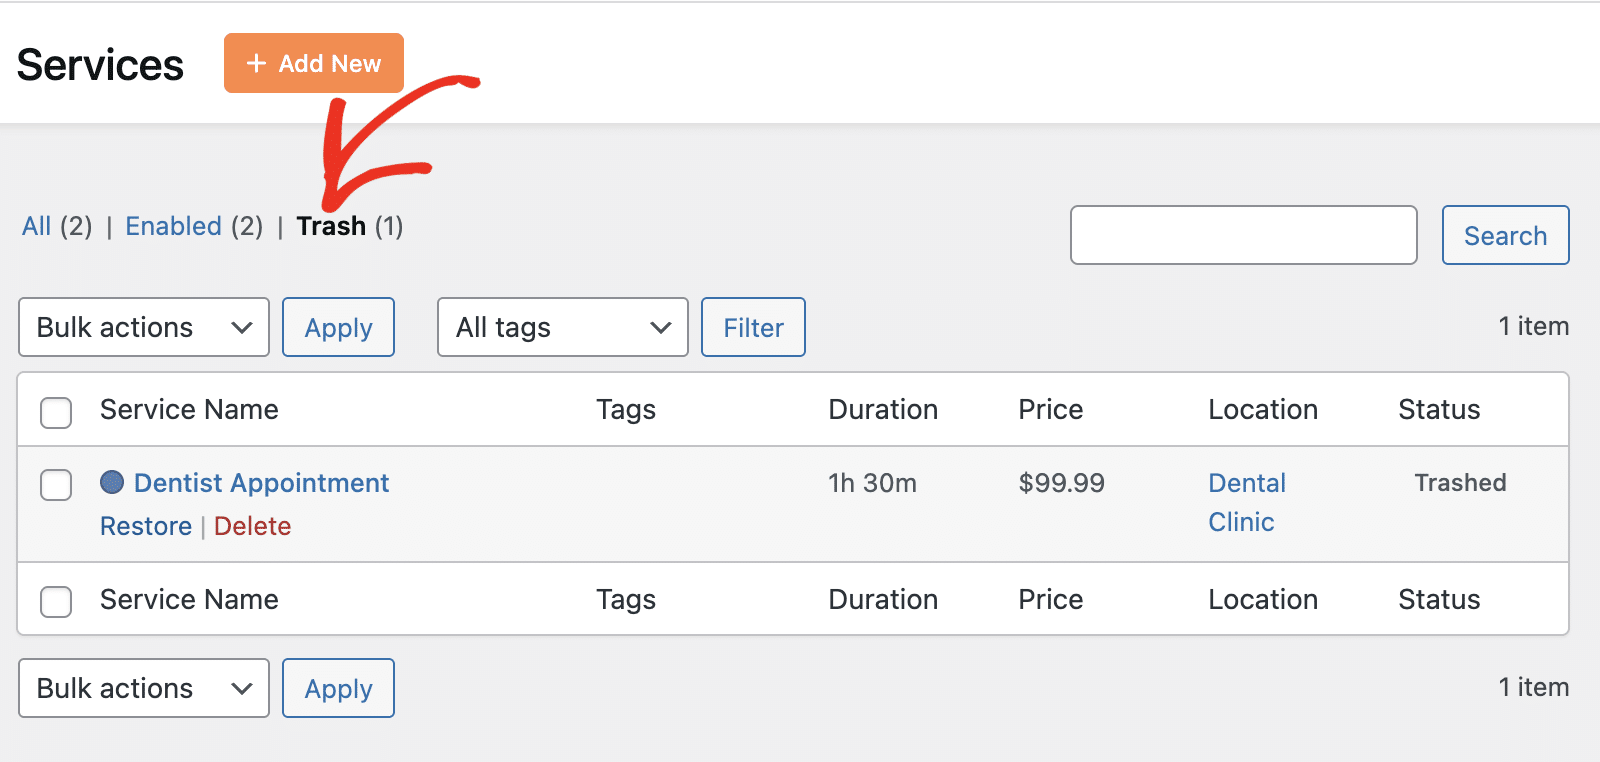
From here, you can either Restore the service or permanently Delete it.
Frequently Asked Questions
Below, we’ve addressed some of the most common questions regarding managing services in Sugar Calendar Bookings.
Can I create services with different prices?
Yes, each service can have its own price. When adding or editing a service, simply enter the desired price in the Price field under the General tab.
What happens to existing appointments when I delete a service?
When you move a service to trash, all appointments associated with that service are also moved to trash. If you want to preserve existing appointments, consider disabling the service instead of deleting it.
Can I offer free services?
Yes, you can set the price to 0 to offer free services. Customers will still be able to book these services, but no payment will be required.
That’s it! You now know how to manage services in Sugar Calendar Bookings.
Next, would you like to learn how to accept payments for your services? Check out our guide on setting up payment options to start collecting payments for your bookings.