Would you like to add team members who will provide services to customers on your site? Sugar Calendar Bookings allows you to create and manage employees who can be assigned to specific services and appointment times.
In this guide, we’ll show you how to create and manage employees in Sugar Calendar Bookings.
In This Article
Before getting started, make sure Sugar Calendar Bookings is installed and activated on your WordPress site. You’ll also want to create at least one service to assign to your employees.
Accessing the Employees Page
To get started, navigate to Bookings » Employees from the WordPress admin sidebar menu.
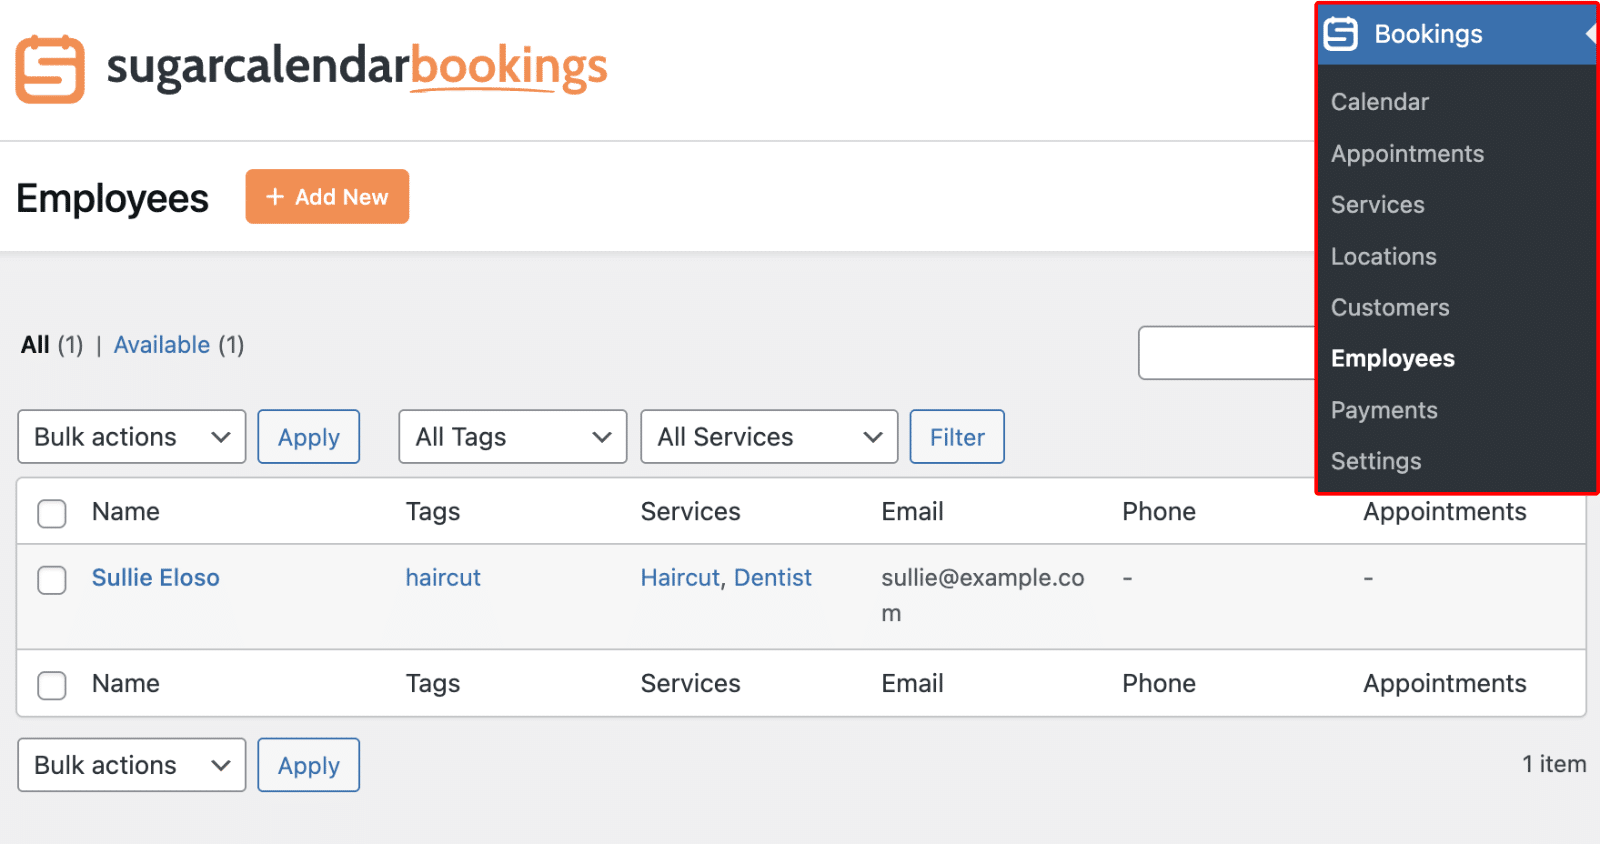
This will take you to the Employees management page where you can view all existing employees, add new ones, and manage employee details.
Adding a New Employee
To add a new employee, click the Add New button at the top of the Employees page.

This will open the Add New Employee modal where you can configure employee information and settings.
Configuring General Settings
The General tab contains all the basic information about your employee.
Employee Name
Start by entering the employee’s name in the Employee Name field. This is a required field and will be displayed to customers when they book appointments.
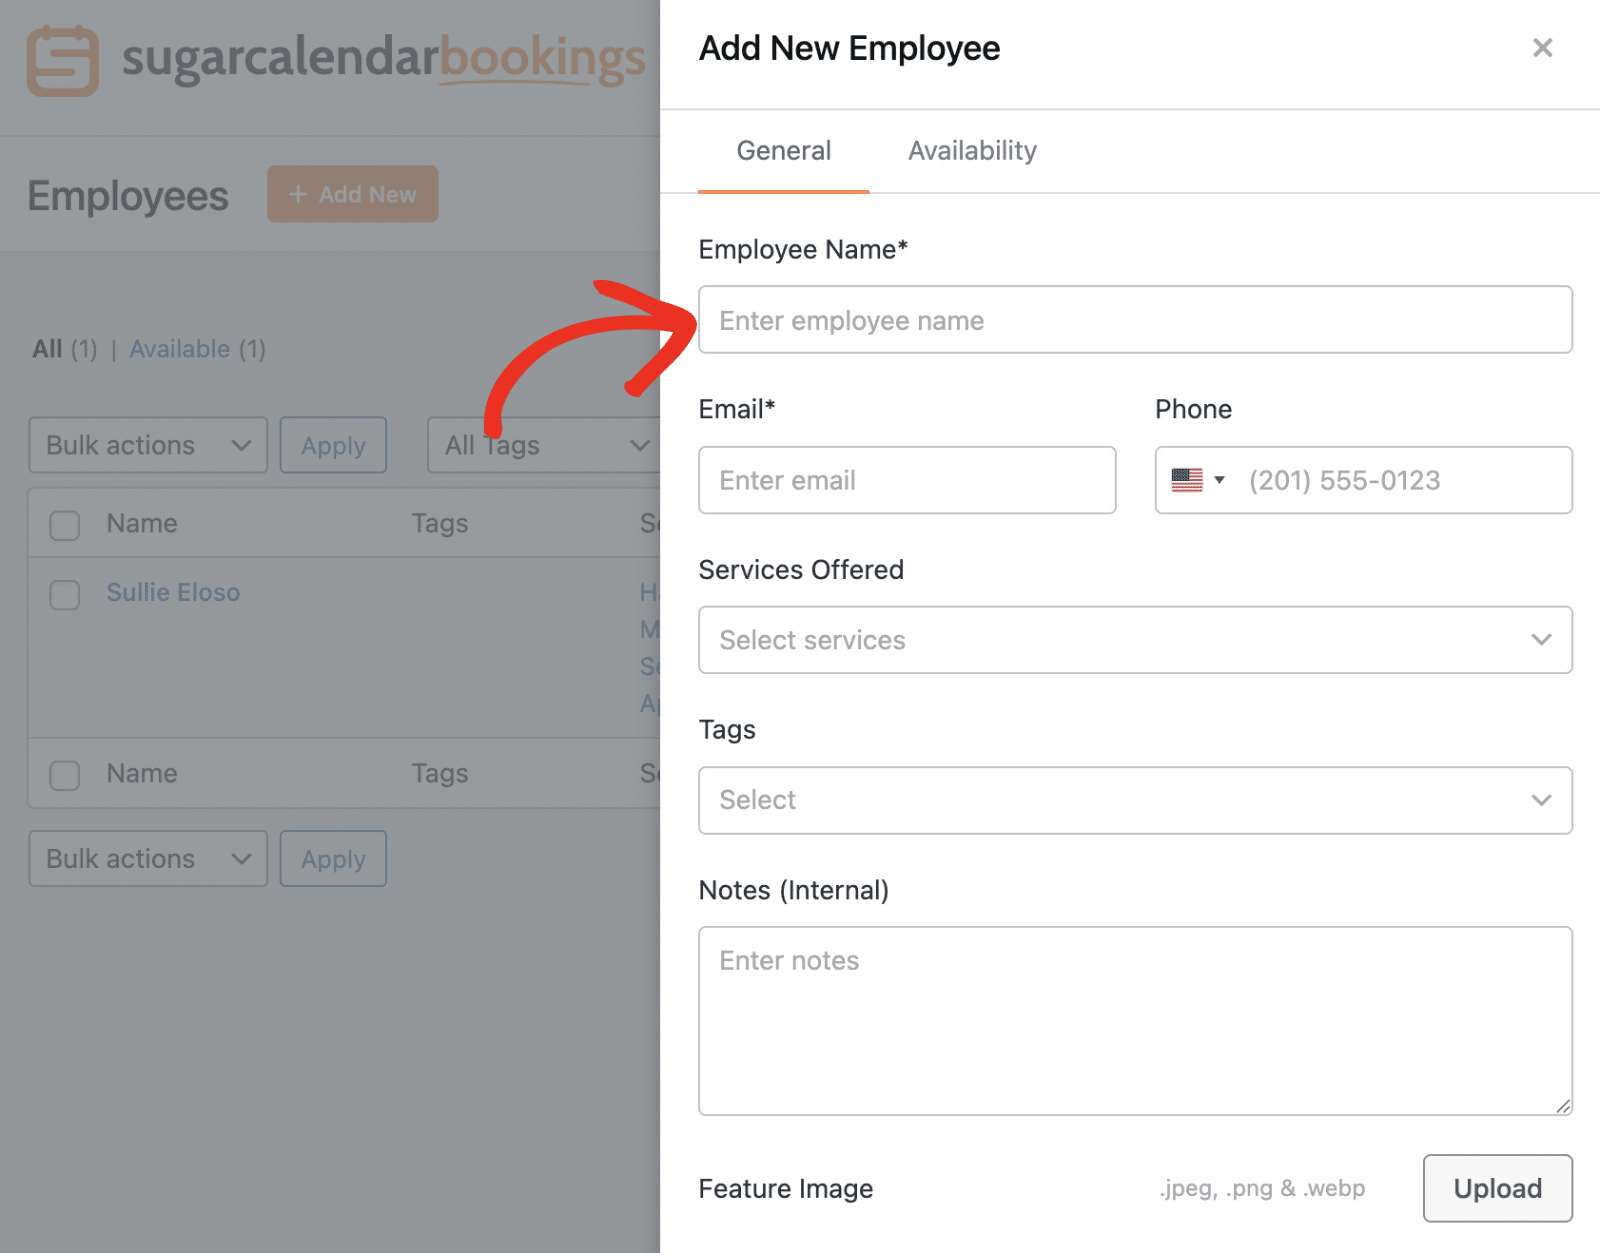
Next, enter the employee’s email address in the Email field. This is a required field and will be used to send appointment notification emails to the employee.
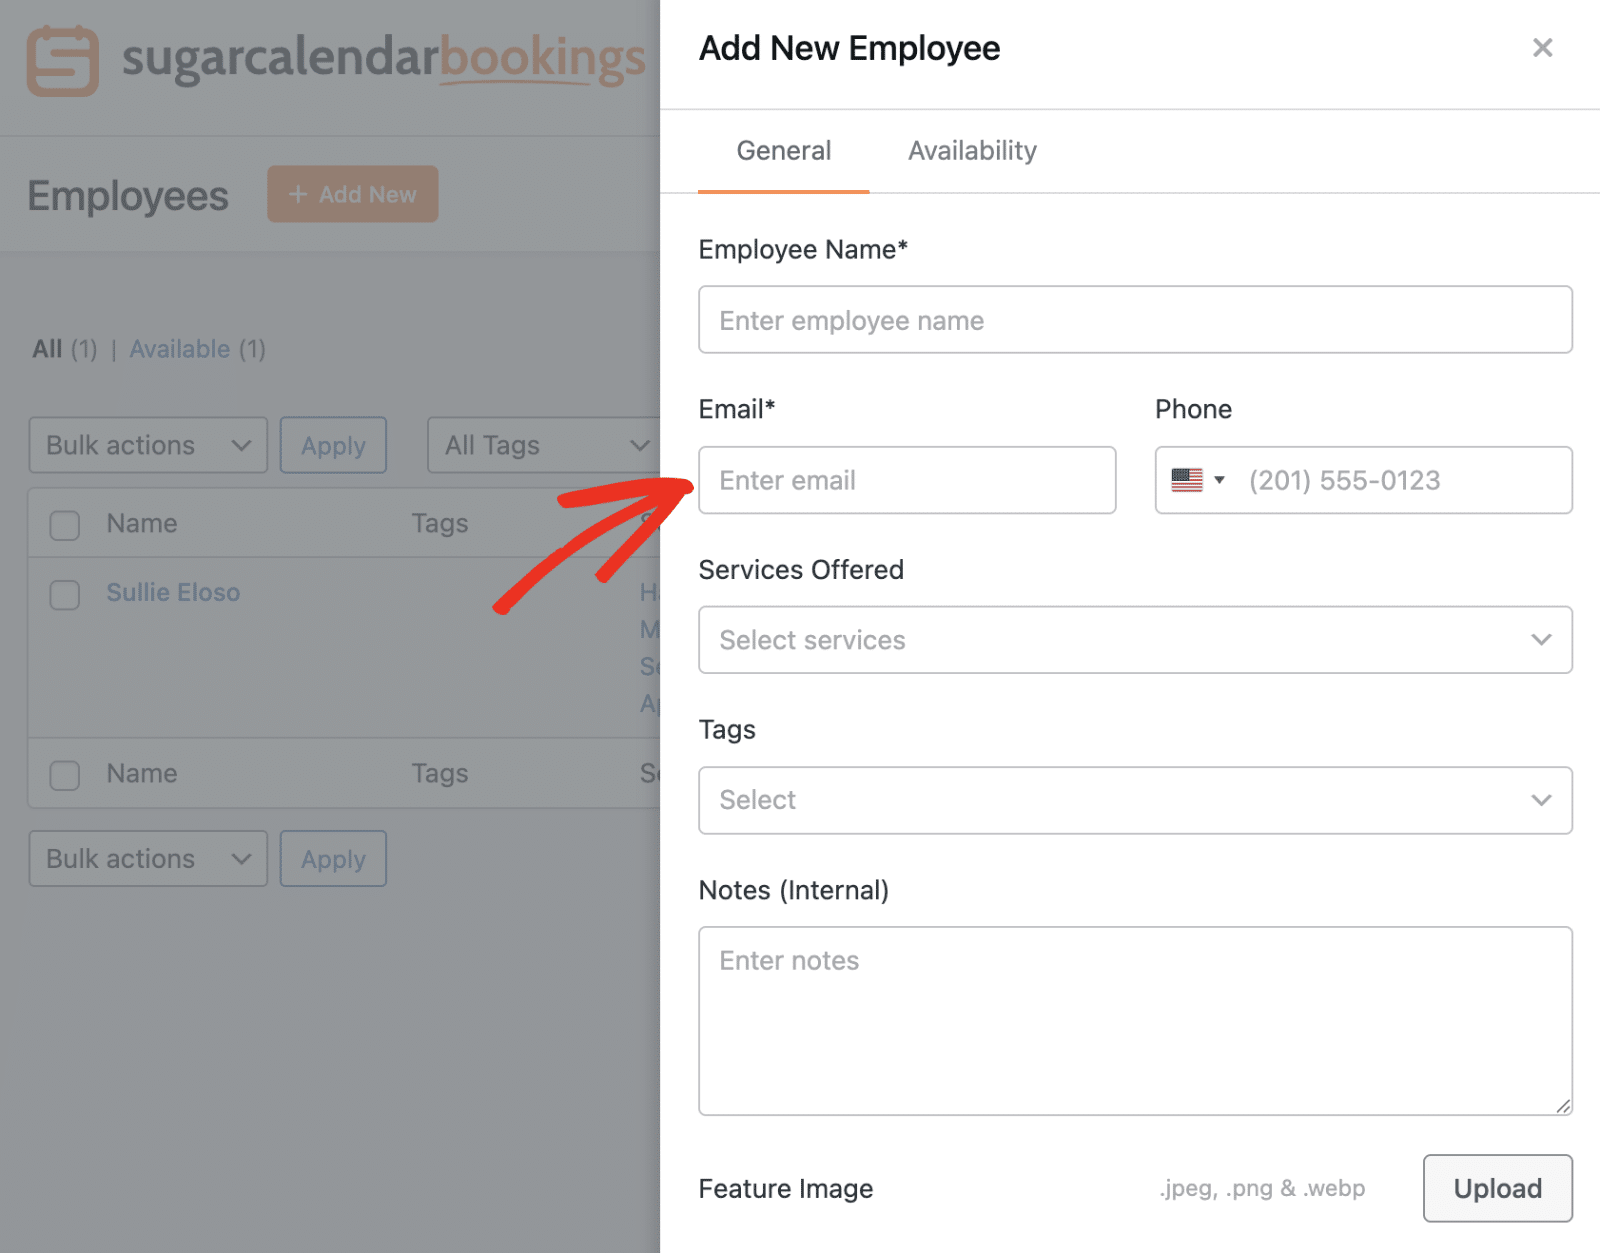
Optionally, you can add the employee’s phone number in the Phone field.
Services Offered
The Services Offered dropdown lets you select which services this employee can provide. You can assign multiple services to a single employee.
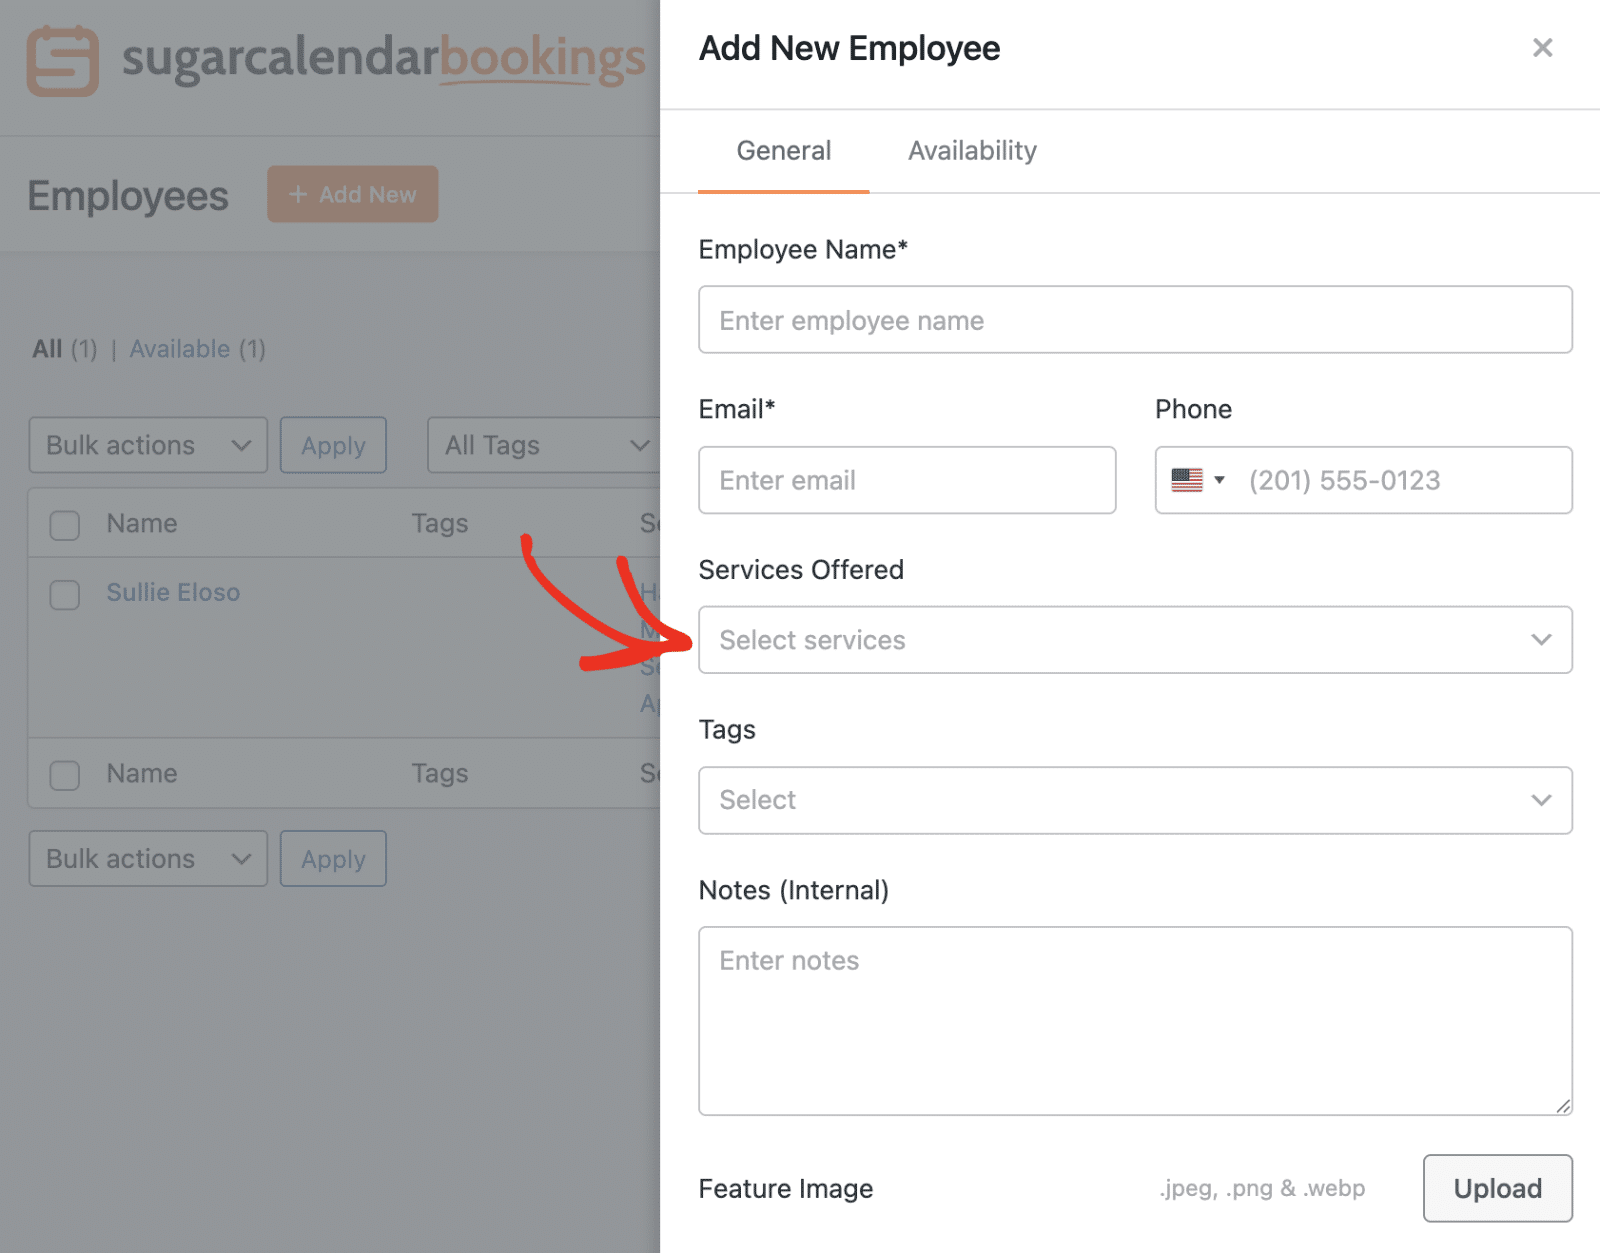
To assign a service to the employee, click the dropdown to view all available services. Then, select each service the employee will offer.
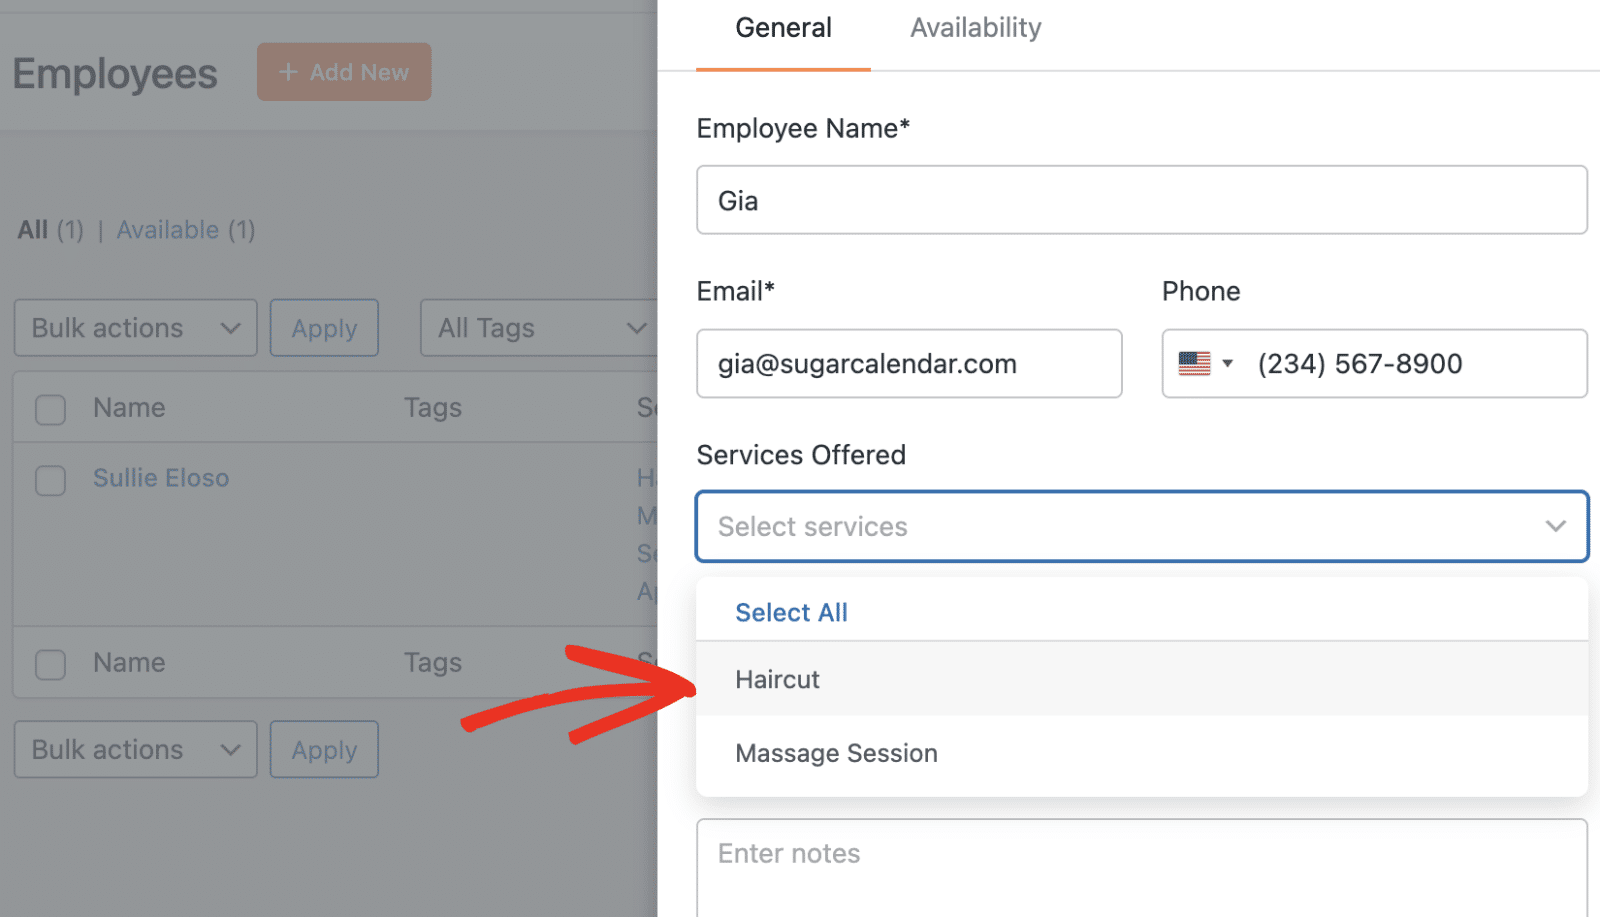
You can also click Select All to assign all services quickly.
Tags
The Tags field allows you to organize employees by adding custom tags. Tags can be useful for filtering and categorizing employees by department, specialty, or location.
Notes (Internal)
You can use the Notes field to add any private notes about the employee. These notes are visible only to administrators and will not be displayed to customers.
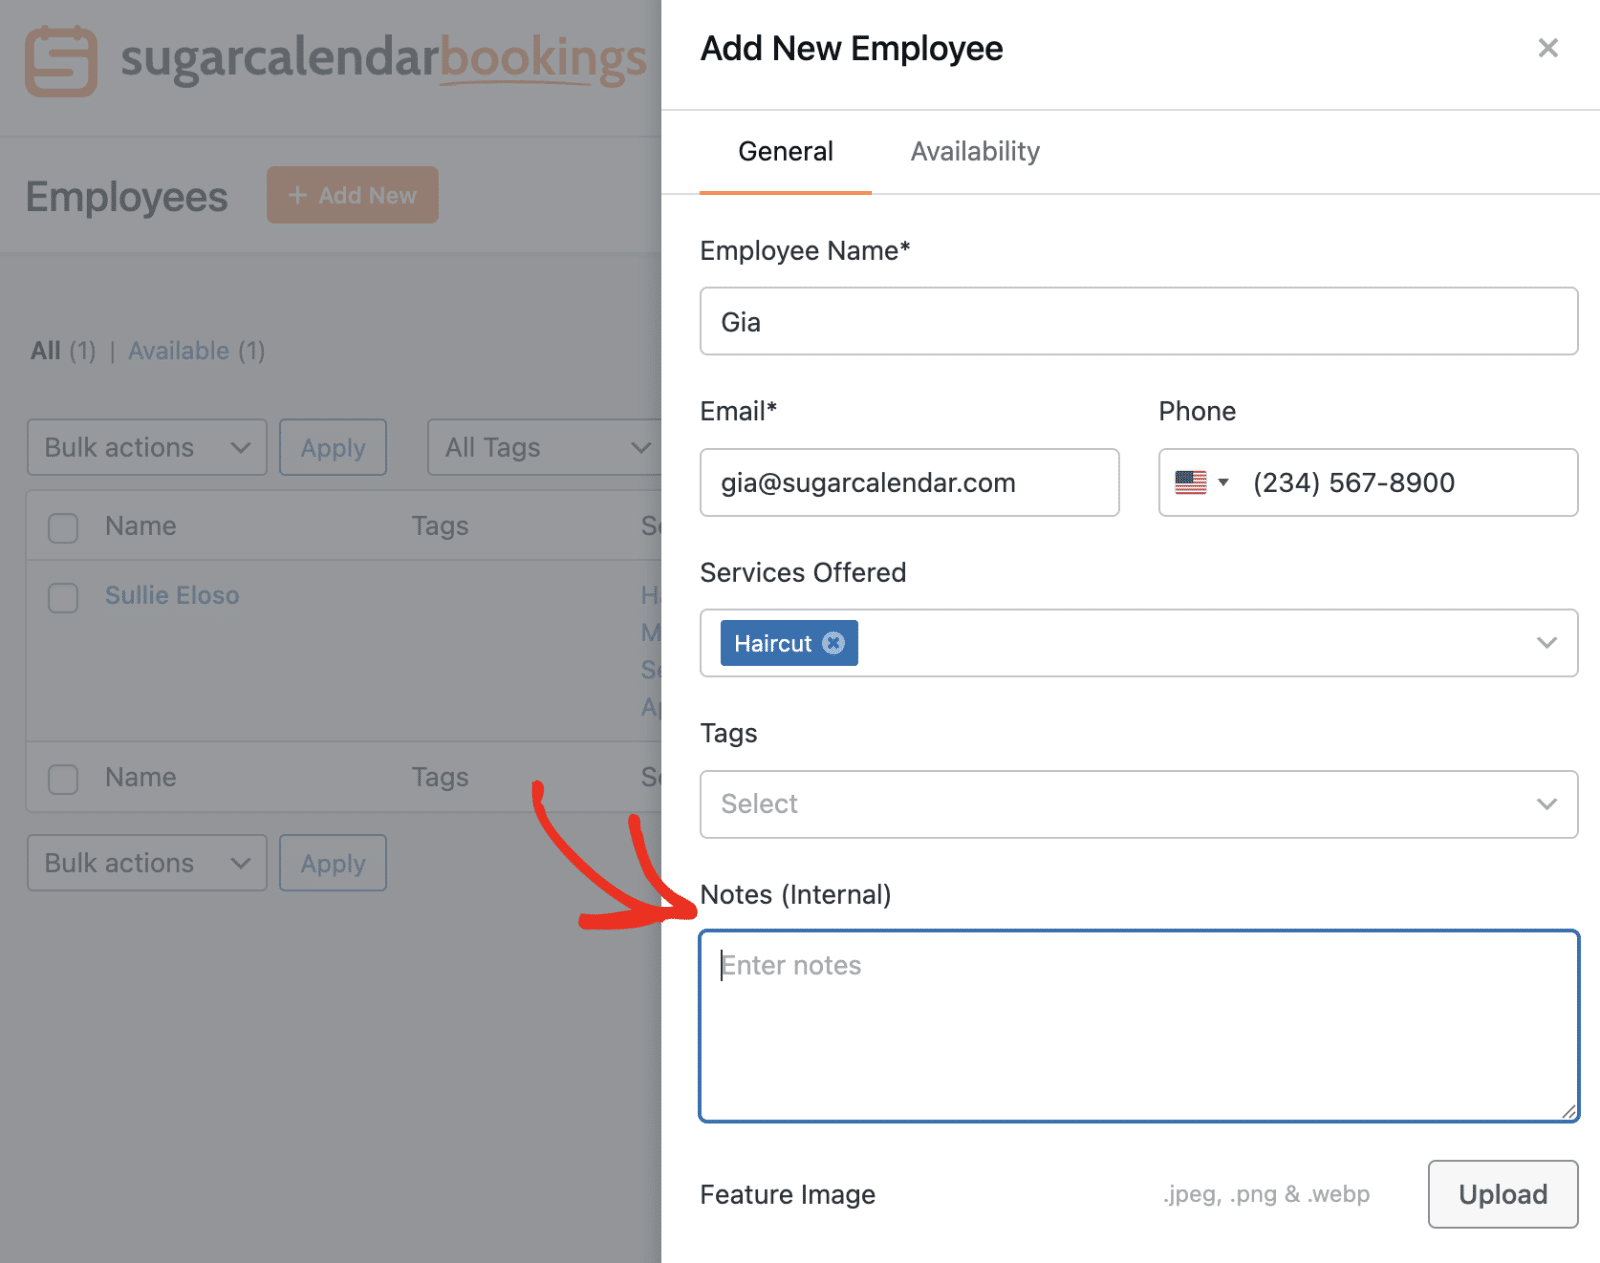
Feature Image
You can optionally upload a profile photo or image for the employee by clicking the Upload button in the Feature Image section.

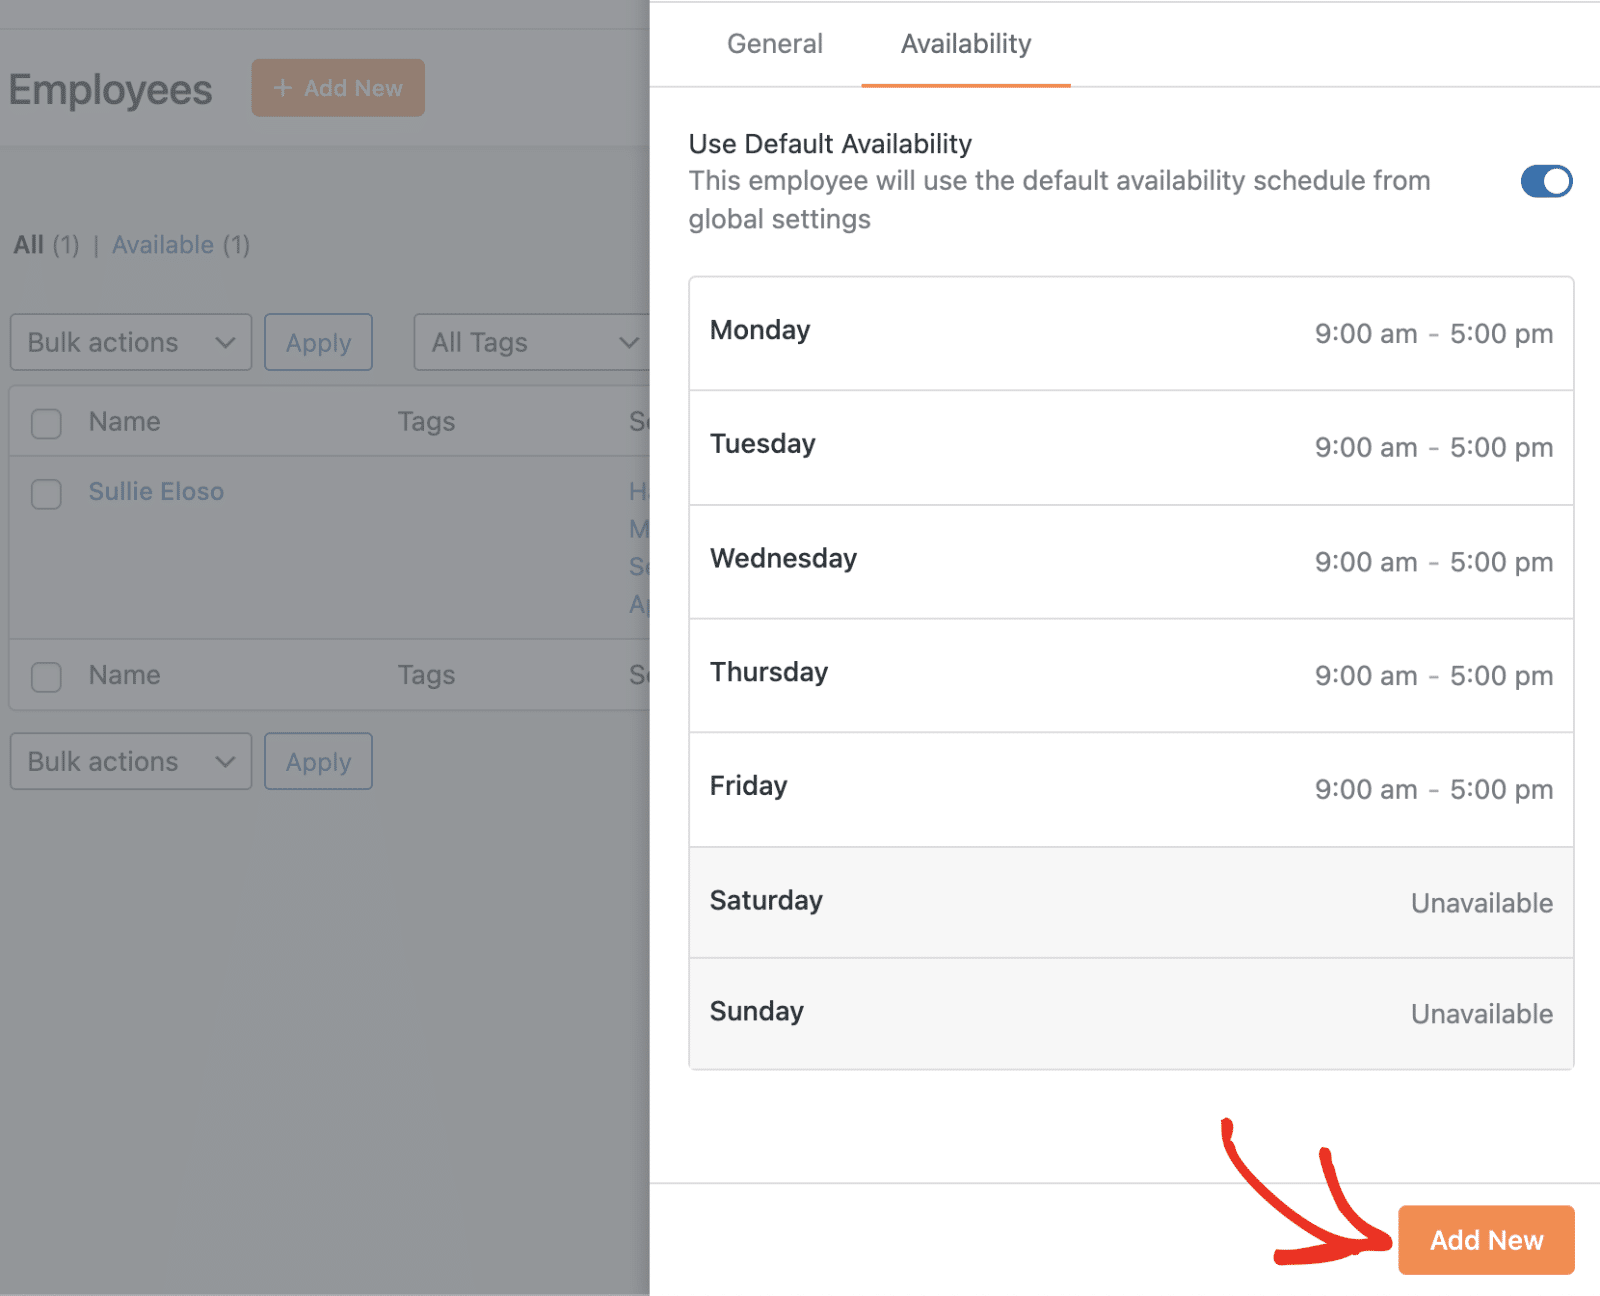
Setting Employee Availability
After configuring the general settings, click the Availability tab to set when this employee is available for appointments.
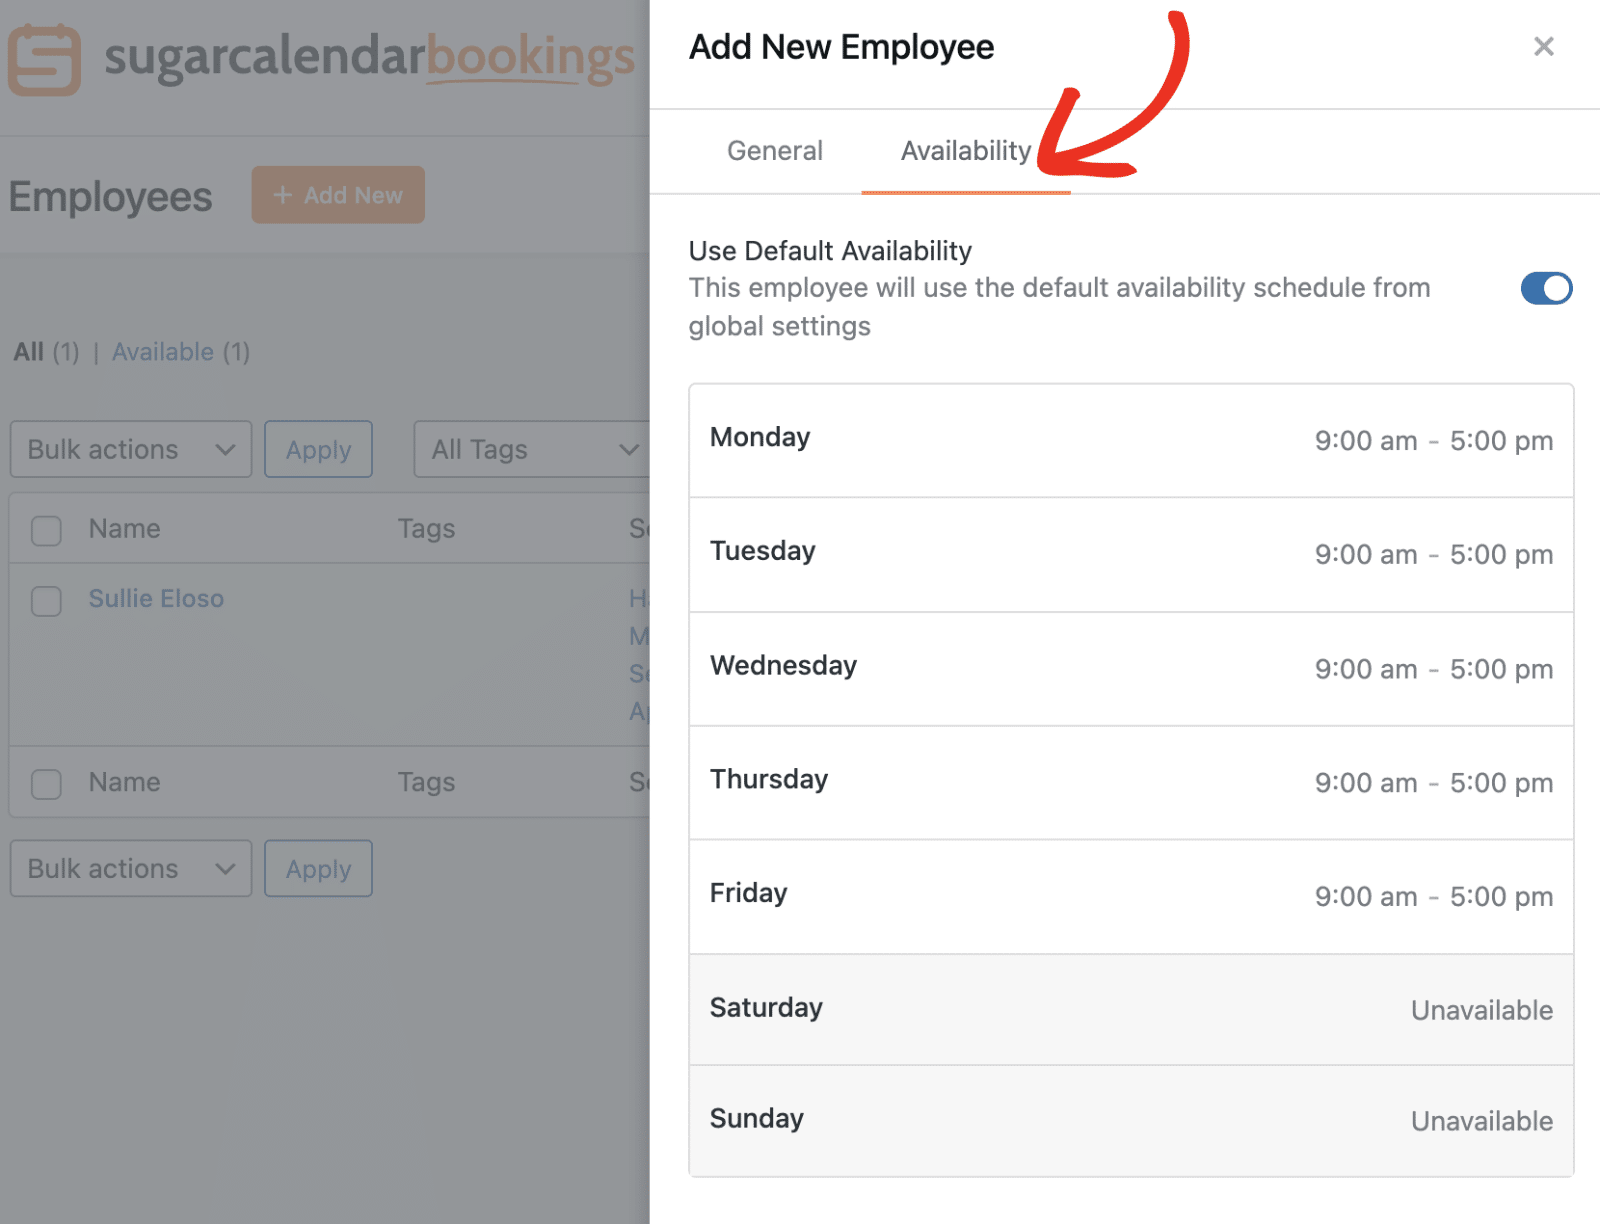
By default, the Use Default Availability toggle is set to the ON position. When enabled, the employee will use the default availability schedule configured in your global Bookings settings.
Custom Availability Schedule
To create a custom availability schedule for this employee, toggle the Use Default Availability option to the OFF position.
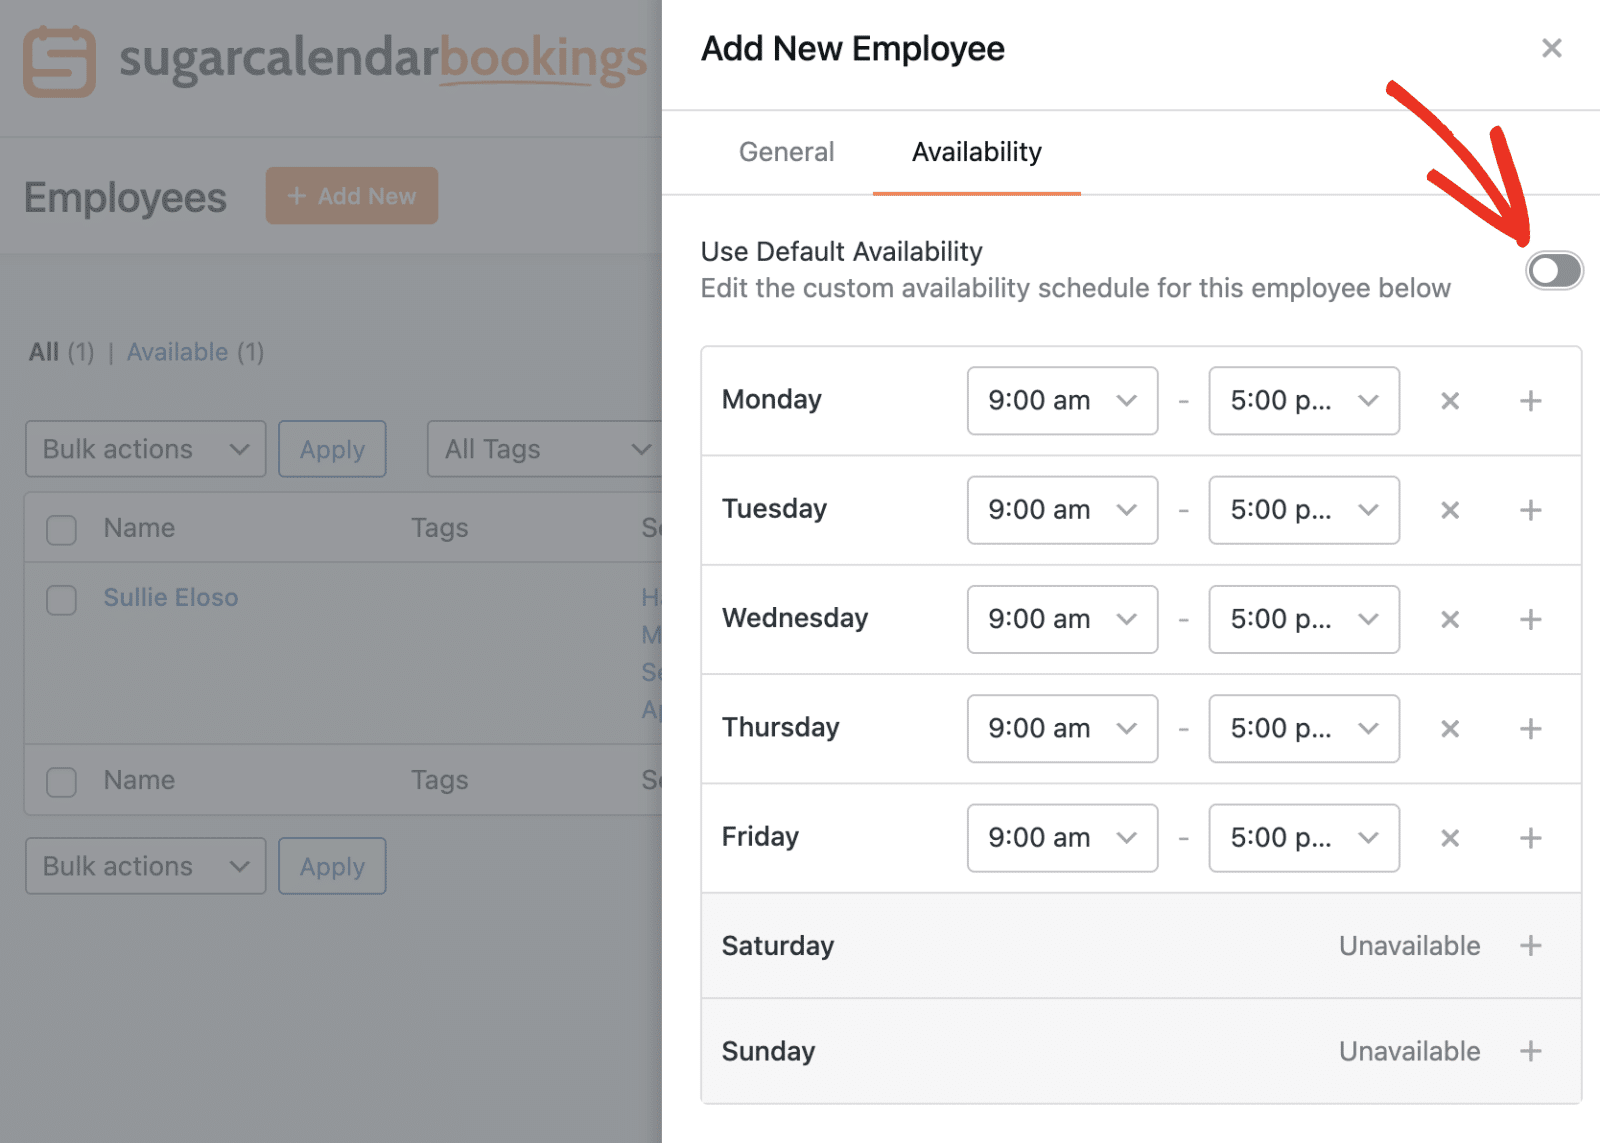
Once disabled, you can customize the employee’s availability for each day of the week. For each day, you can:
- Set start and end times using the time dropdowns
- Add multiple time slots for a single day using the + button
- Remove time slots using the × button
- Click the + button next to days marked as Unavailable to add availability
Once you’ve configured all the employee settings, click the Add New button at the bottom of the modal to save the employee.
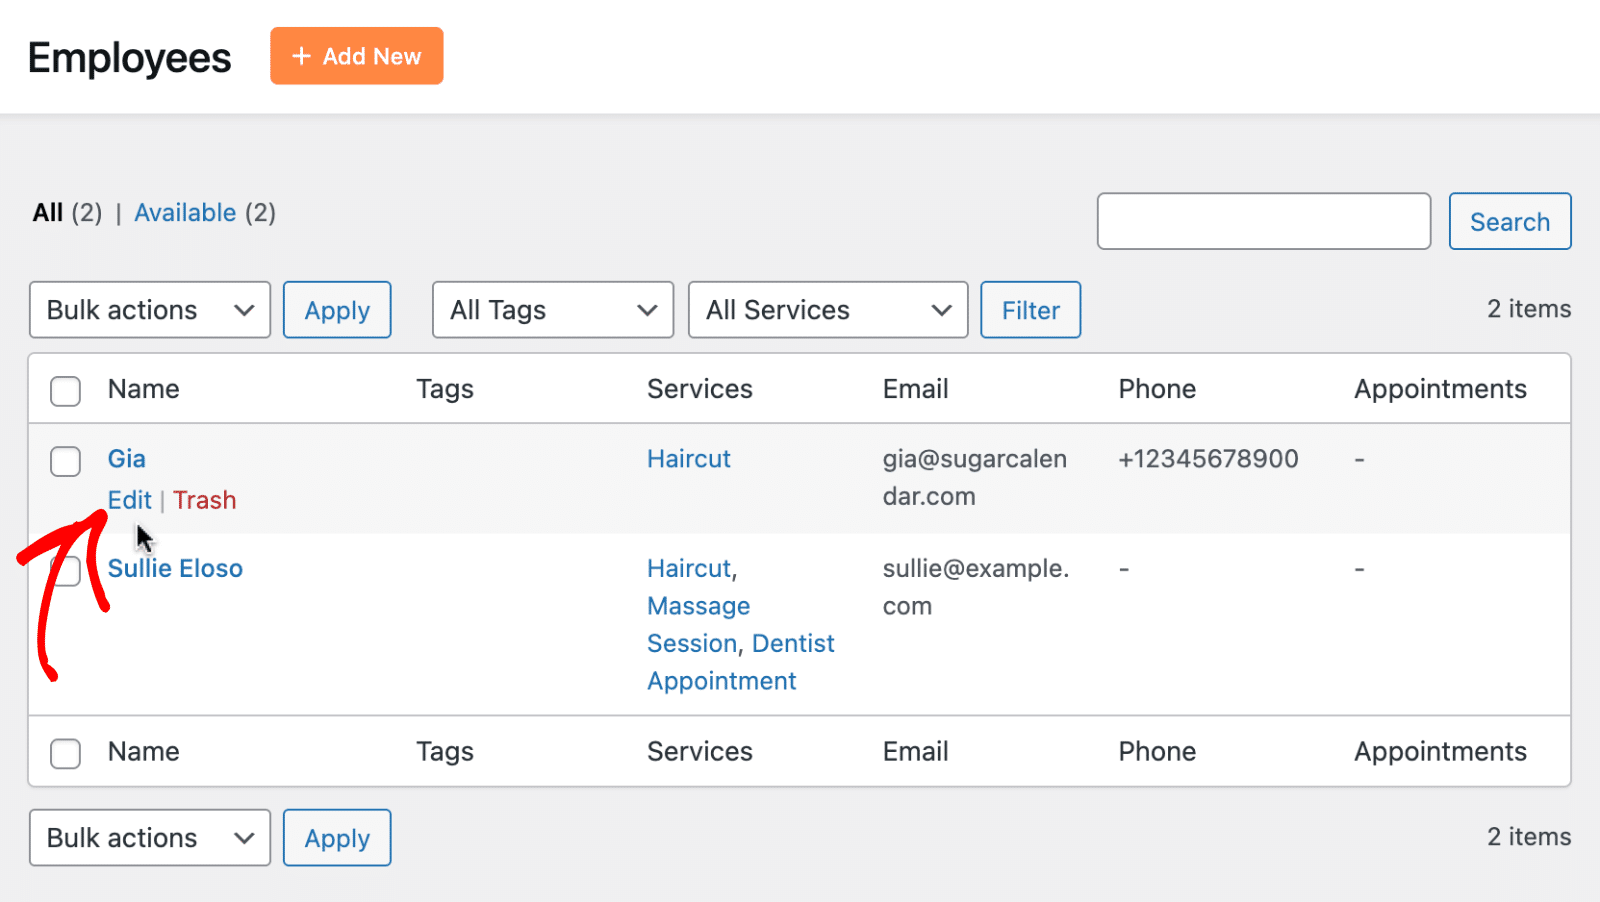
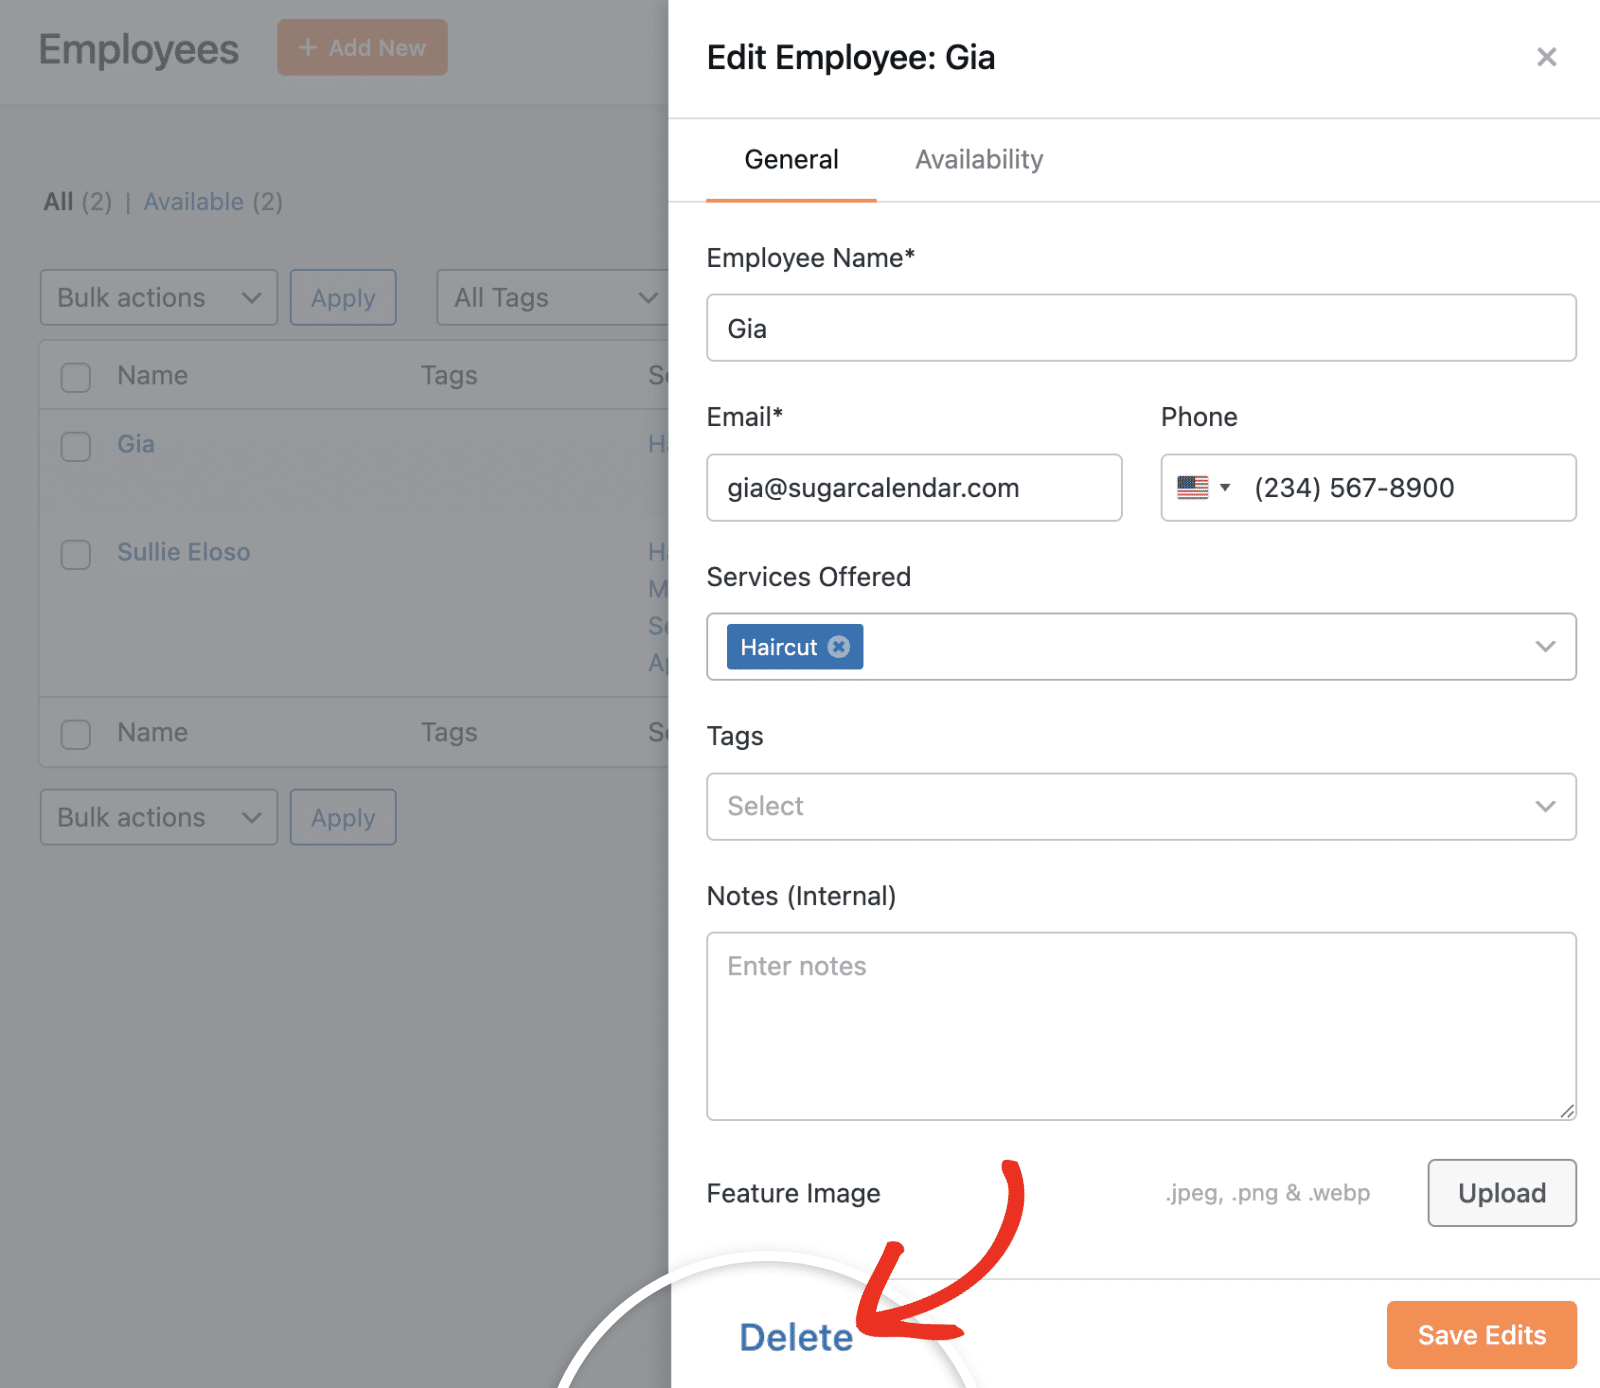
Editing an Existing Employee
To edit an existing employee, locate the employee in the list and click the Edit link that appears below their name.
This will open the Edit Employee modal with all the same fields available when adding a new employee. Make your desired changes to any of the employee information or settings.
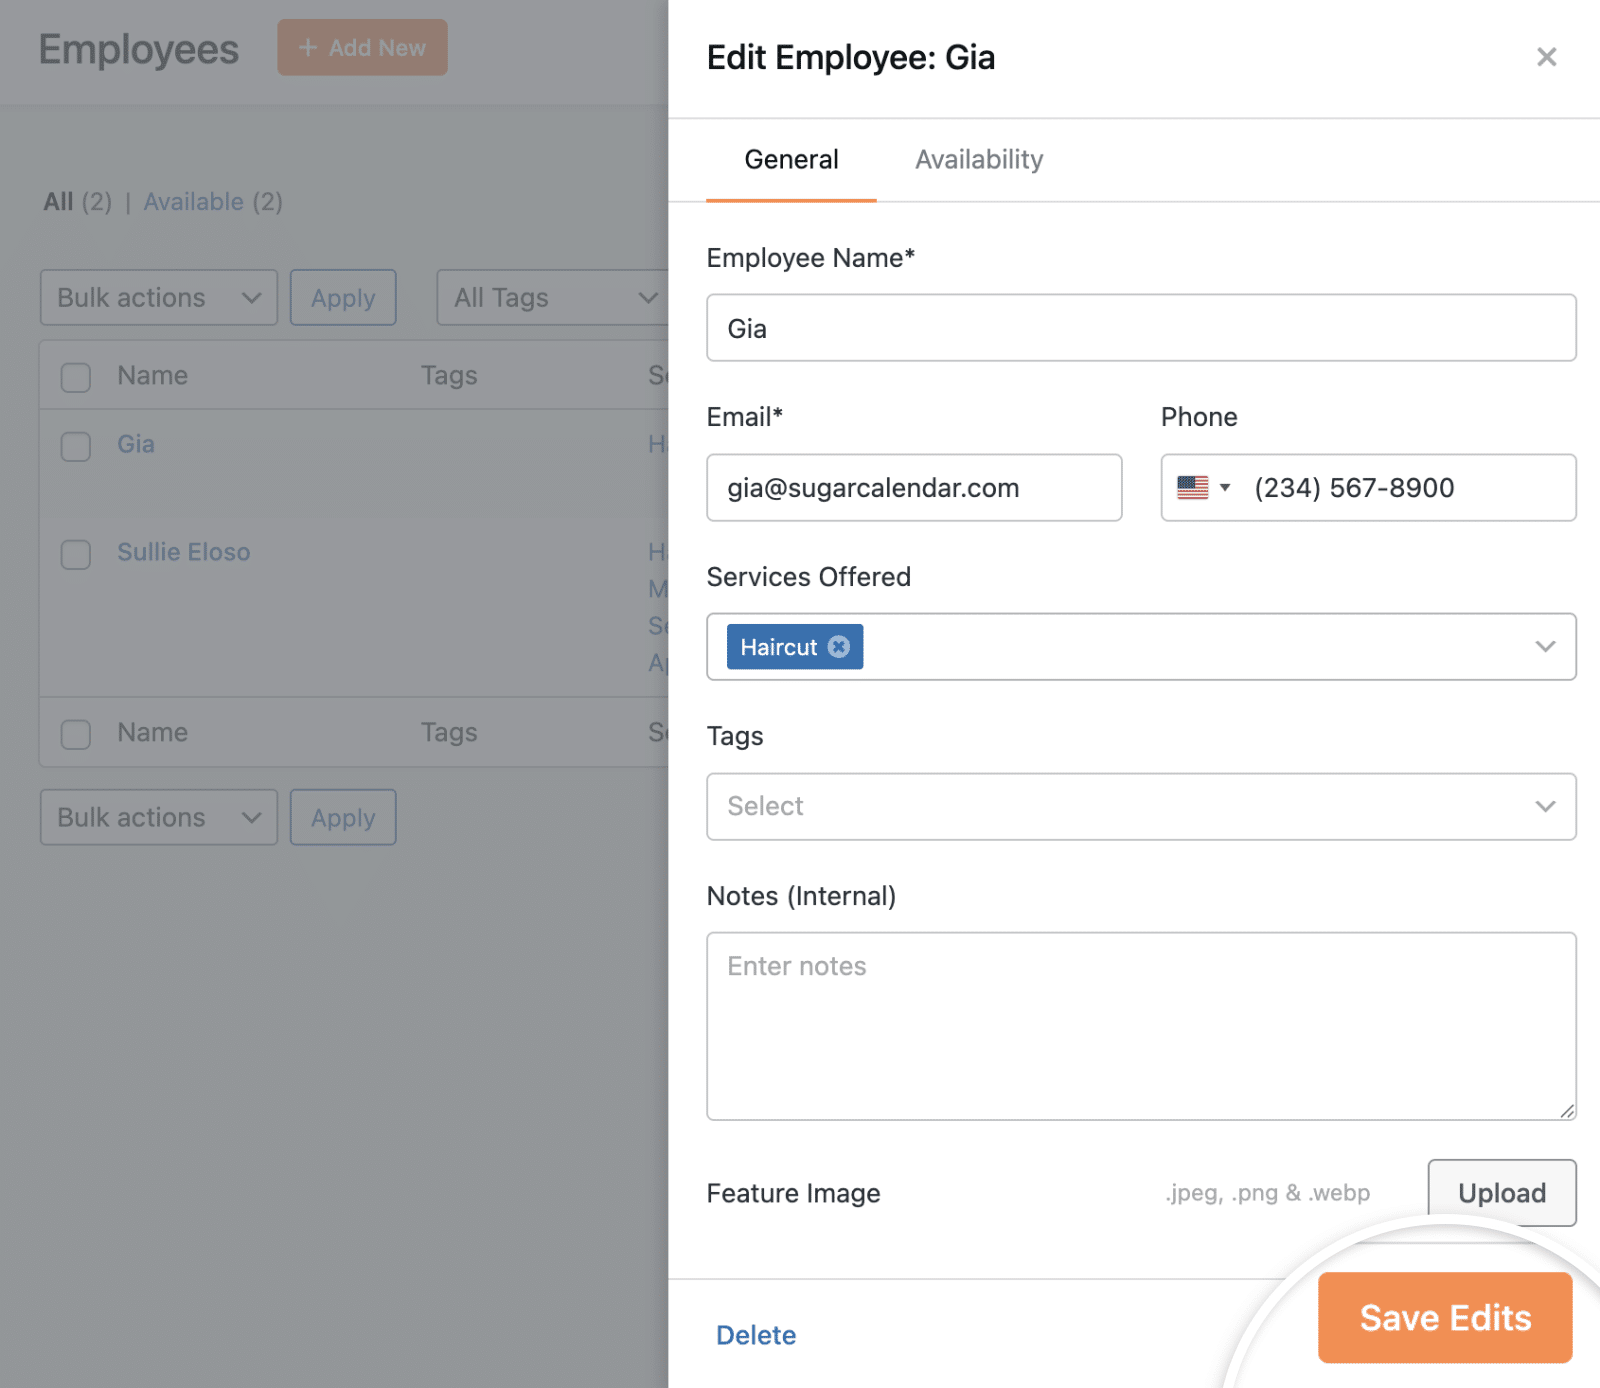
After making your changes, click the Save Edits button at the bottom of the modal to update the employee information.
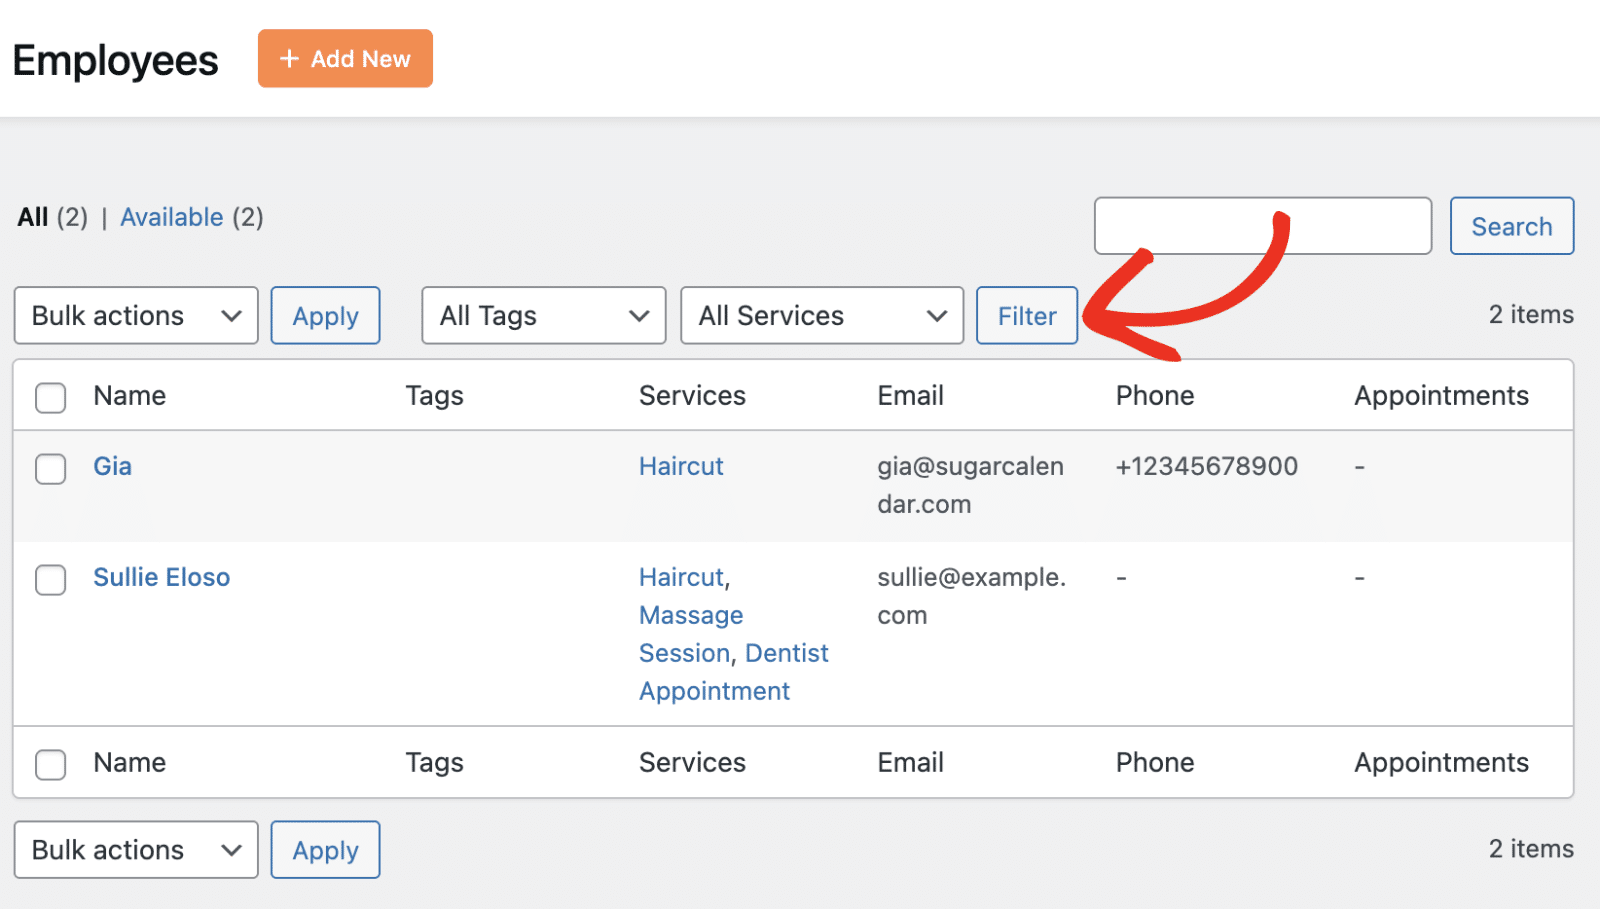
Searching and Filtering Employees
As your team grows, you may need to quickly find specific employees. Sugar Calendar Bookings provides several options for searching and filtering your employee list.
Search by Name
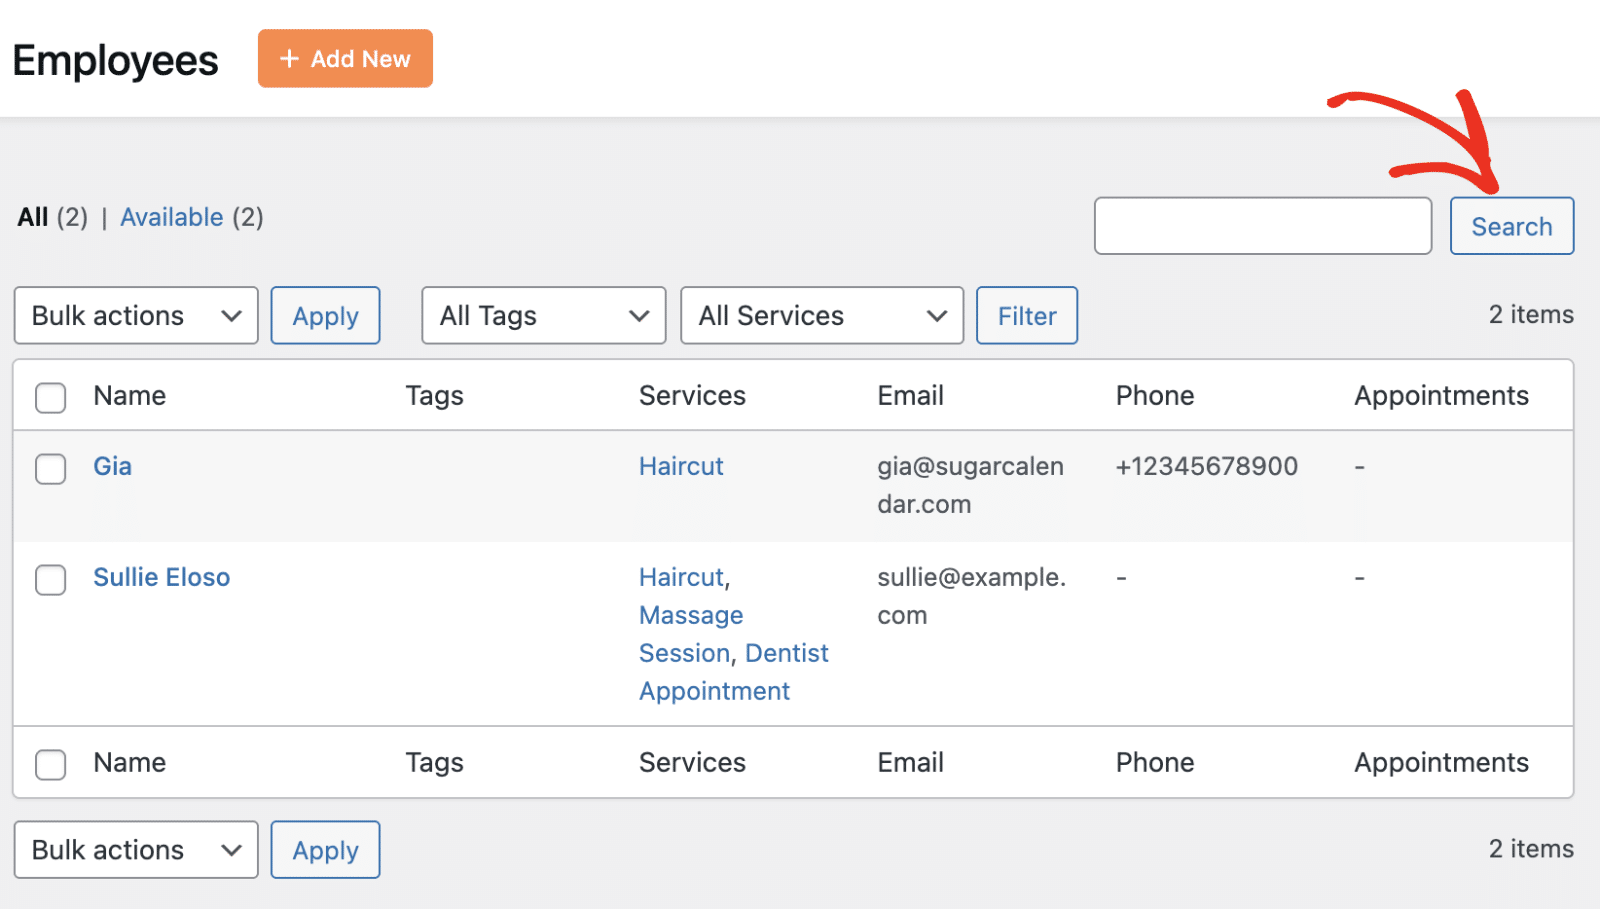
Use the search box in the top-right corner of the Employees page to search for employees by name. Enter the employee’s name and click the Search button.
Filter by Tags or Services
Use the All Tags and All Services dropdown filters to narrow down your employee list. Select a specific tag or service from the dropdown, then click the Filter button to apply your selection.
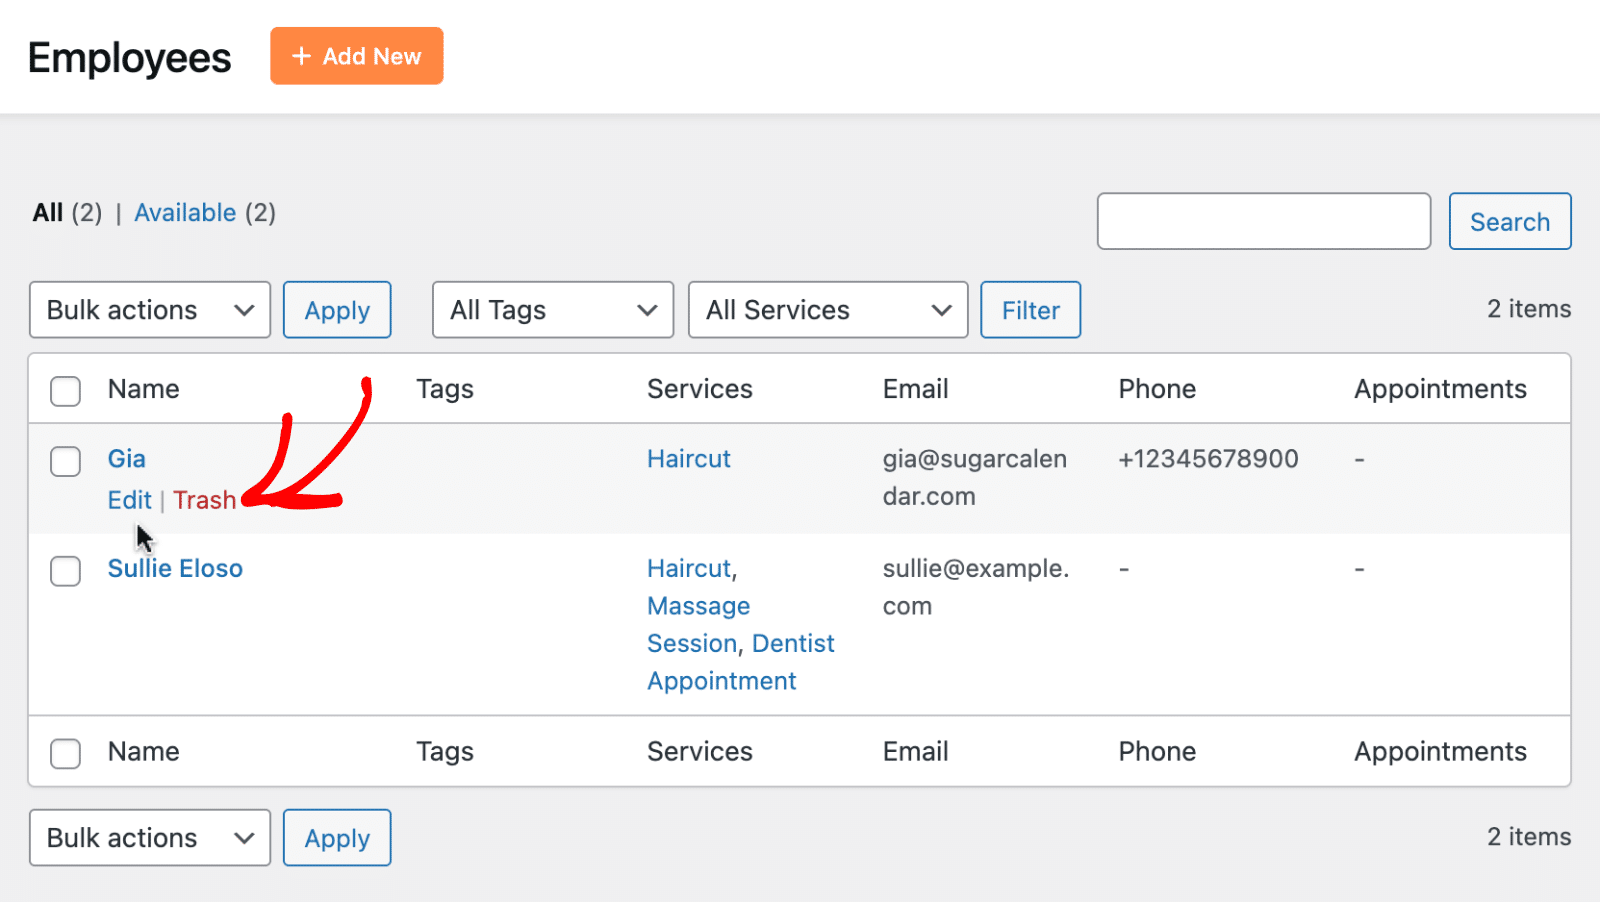
Deleting an Employee
If you need to remove an employee from your system, you can move them to the trash. This doesn’t permanently delete the employee immediately, allowing you to restore them if needed.
To delete an employee, locate them in the employee list and click the Trash link below their name.
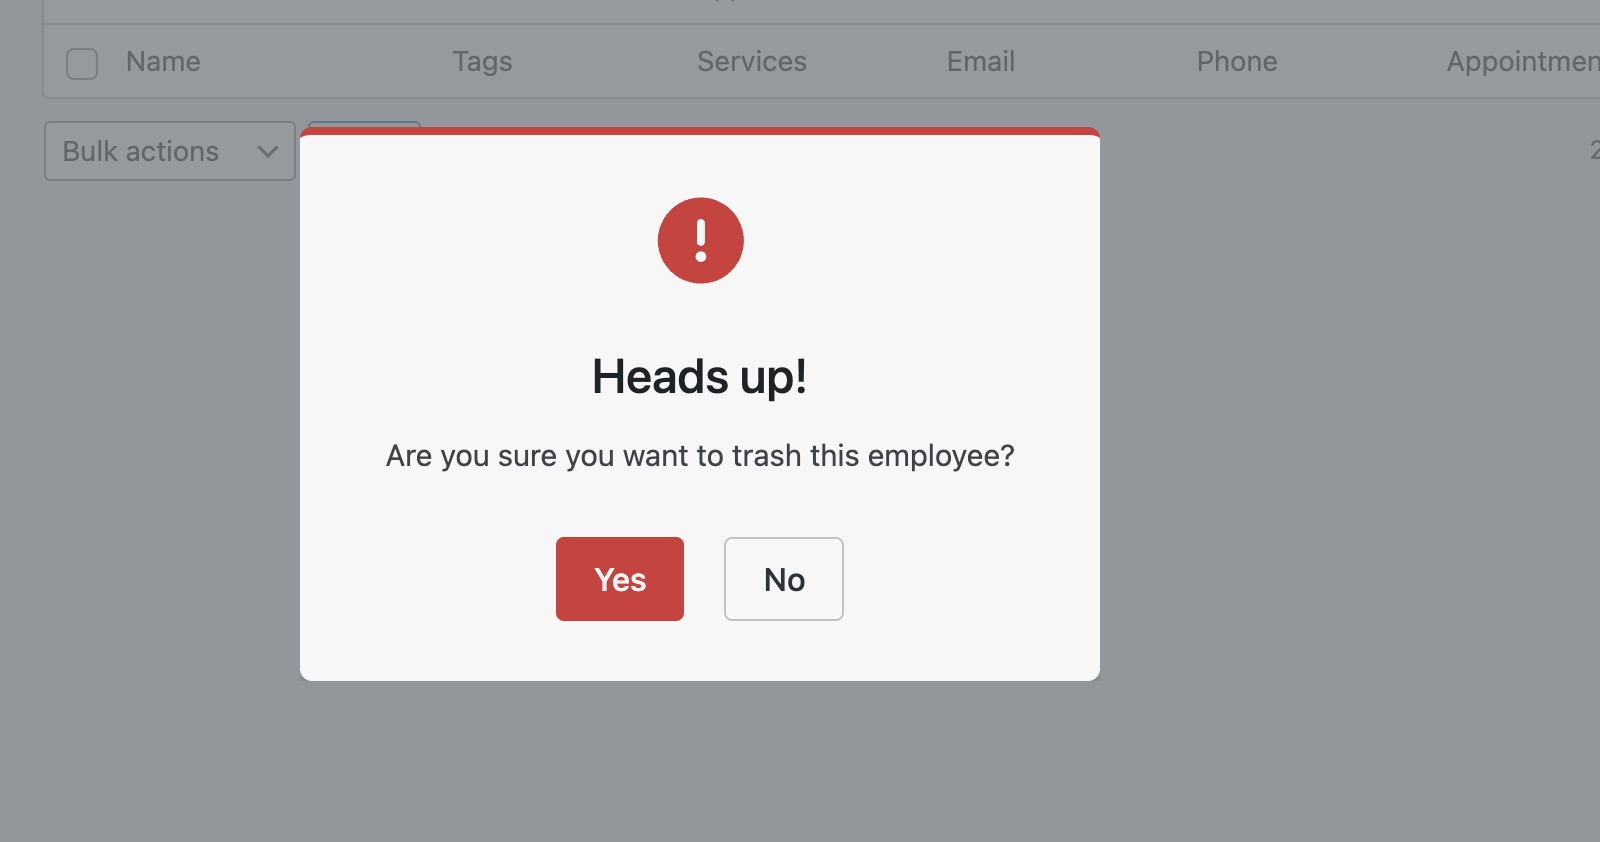
A confirmation dialog will appear asking you to confirm the deletion. Click Yes to move the employee to the trash, or No to cancel.
Restoring or Permanently Deleting Employees
Trashed employees can be restored or permanently deleted. To view trashed employees, click the Trash link at the top of the employee list.
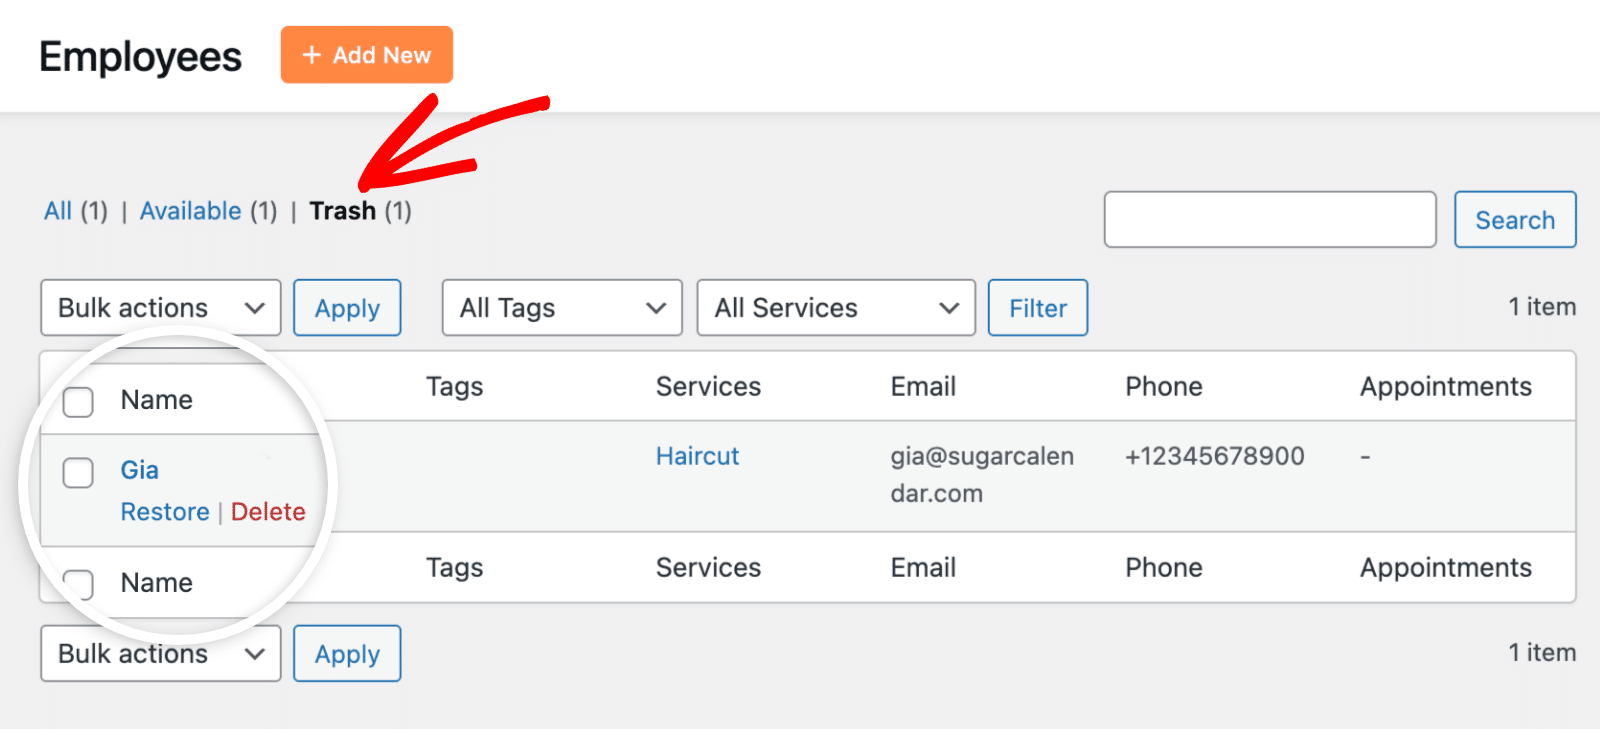
For each trashed employee, you’ll see two options:
- Restore – Returns the employee to your active employee list
- Delete – Permanently removes the employee from your system
Alternatively, you can permanently delete an employee from the Edit Employee modal by clicking the Delete button at the bottom of the form.
That’s it! You now know how to create and manage employees in Sugar Calendar Bookings.
Next, would you like to learn how customers can book appointments with your employees? Check out our guide on booking an appointment for more details.