Are you ready to start offering bookable services on your website? Services in Sugar Calendar Bookings allow you to create appointment-able offerings that customers can book directly through your site.
This tutorial will walk you through creating your first service in Sugar Calendar Bookings.
In This Article
Before you get started, make sure the Sugar Calendar Bookings plugin is installed and activated on your WordPress site.
Accessing the Services Management Area
To get started, log in to your WordPress admin area and navigate to Bookings » Services. Then click the Add New button to create your first service..

This will open the Add New Service dialog, where you can configure your service details.
Configuring Service Details
In the General tab, you’ll need to fill out the basic information about your service:
Service Name
Enter a descriptive name for your service in the Service Name field. This is what customers will see when booking appointments.

Duration
Set the duration for your service using the Duration field. You can choose the time unit (minutes or hours) from the dropdown menu next to the duration field.

Price
If your service requires payment, enter the price in the Price field. Leave this field empty or set it to $0.00 if the service is free.

Tags and Description
Use the Tags dropdown to categorize your service. You can select existing tags or create new ones to help organize your services.
In the Description field, provide detailed information about your service. This helps customers understand what they’re booking and sets proper expectations.

Feature Image
Optionally, you can upload a feature image for your service by clicking the Upload button in the Feature Image section.

This image will help customers identify and differentiate between your services.
Setting Up Service Location
From the Location dropdown, you can select where the service will be provided. You have several options:

- SAVED LOCATIONS: Choose from existing locations you’ve created
- ONLINE: For virtual services or online consultations.
To use this option, select Custom Link and then provide a custom URL for the service location.

After choosing the Custom Link option, additional field will appear. Go ahead and paste the link in the Custom Link field.

If you need to create a new location, click the + Create New Location link.

This will open the location creation form, where you’ll need to enter the following details:
- Location Name: A descriptive name for the location
- Address: The physical address (required)
- Address 2: Additional address information (optional)
- City: The city where the service is located
- State/Province: The state or province
- Country: Select the appropriate country
- Postal Code: The postal/zip code
- Phone: Contact phone number (optional)
- Website: Location website URL (optional)

After entering the location details, click Add New to save the location and return to the service creation form.

You can add multiple locations to a specific service. To add a new location, click the Add Location Option.

Assigning Employees to Your Service
Below the service location, you’ll find the Employees section. Here, you can assign an employee from your team to the service.
To assign an employee, click the Select employees dropdown. You’ll be able to choose from your employee list.
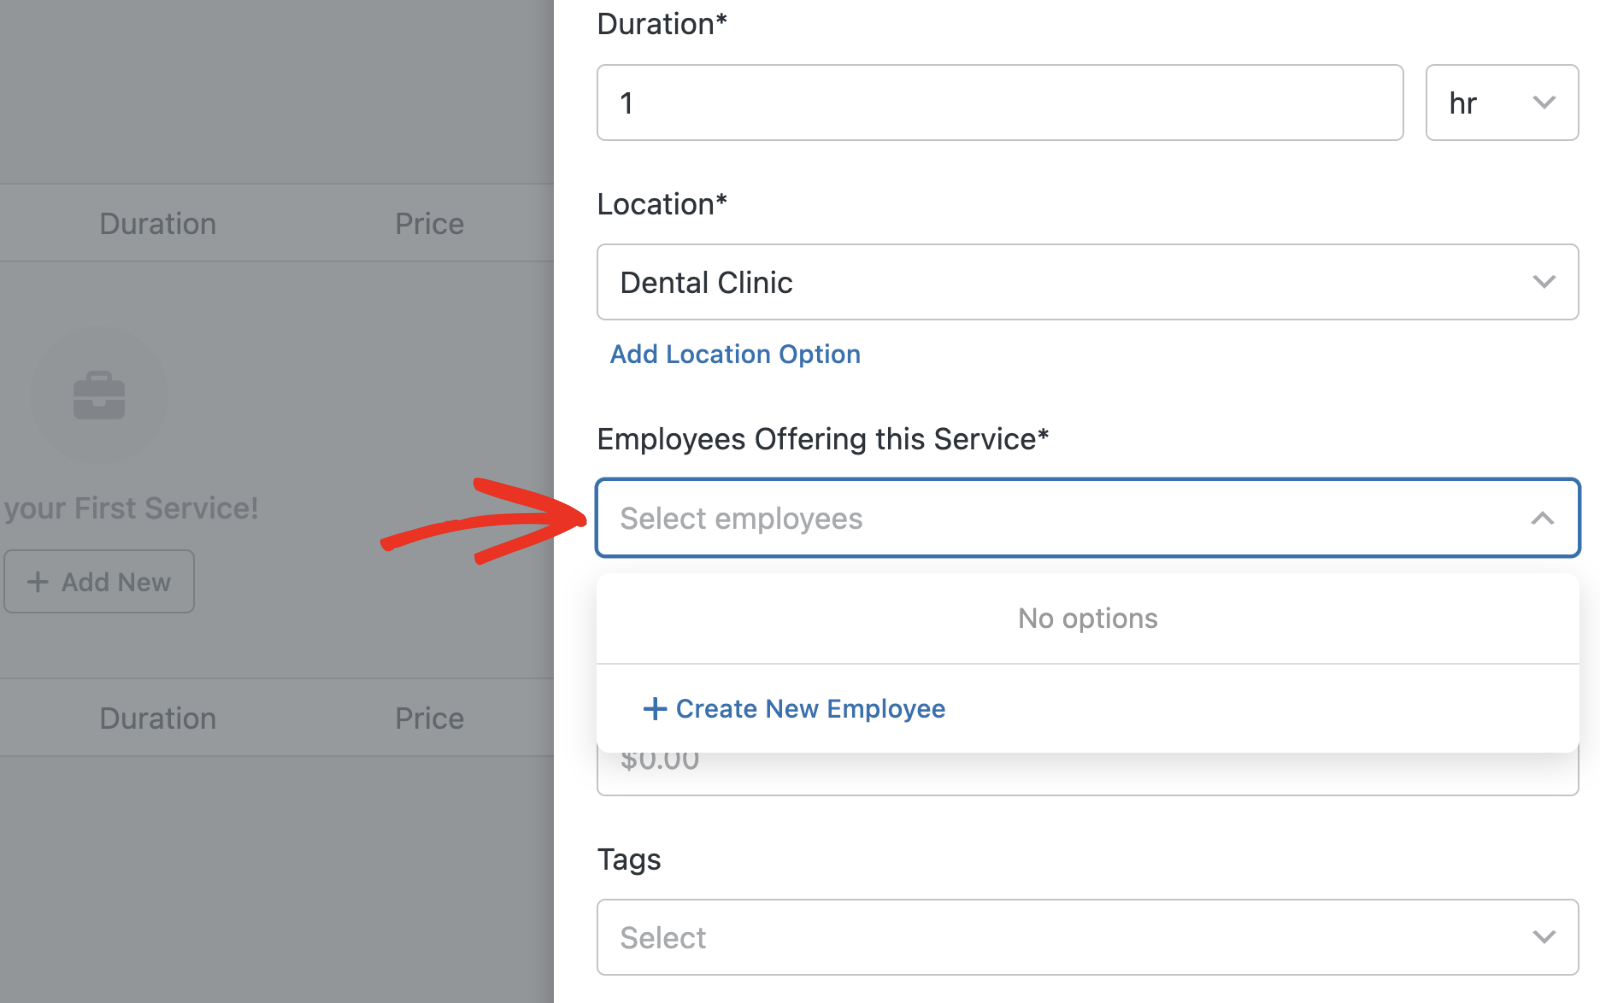
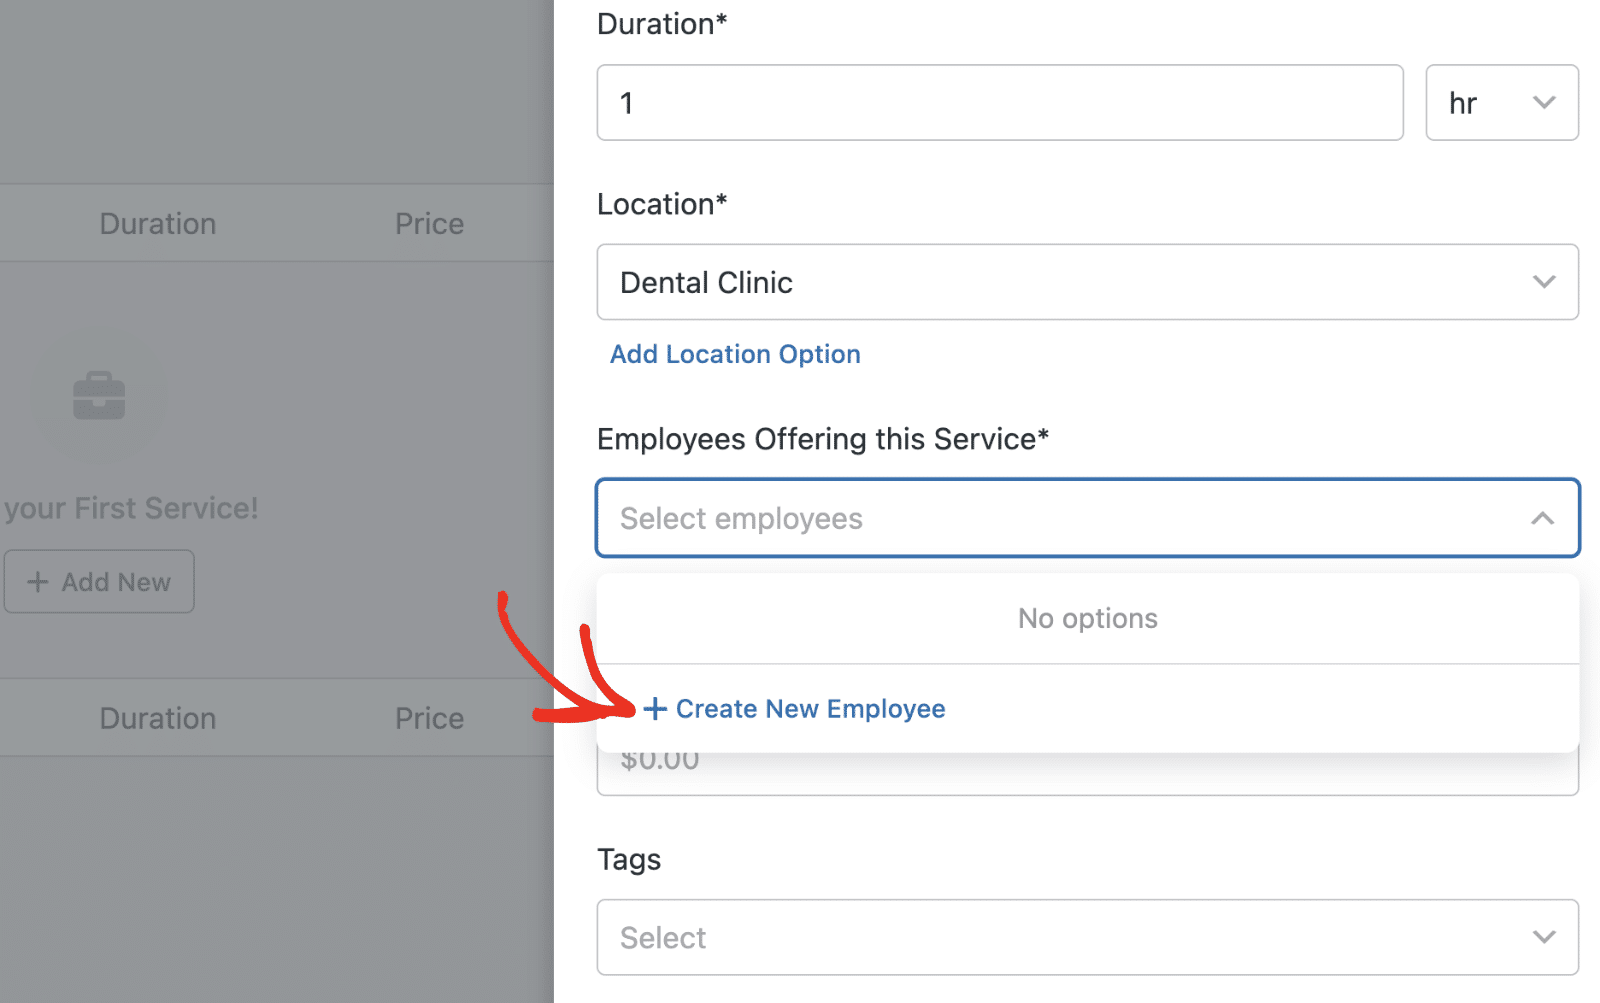
If you don’t have any employee items, click Create New Employee to add an employee.
This will open the employee creation form. You’ll need to fill out the form with the employee’s details.
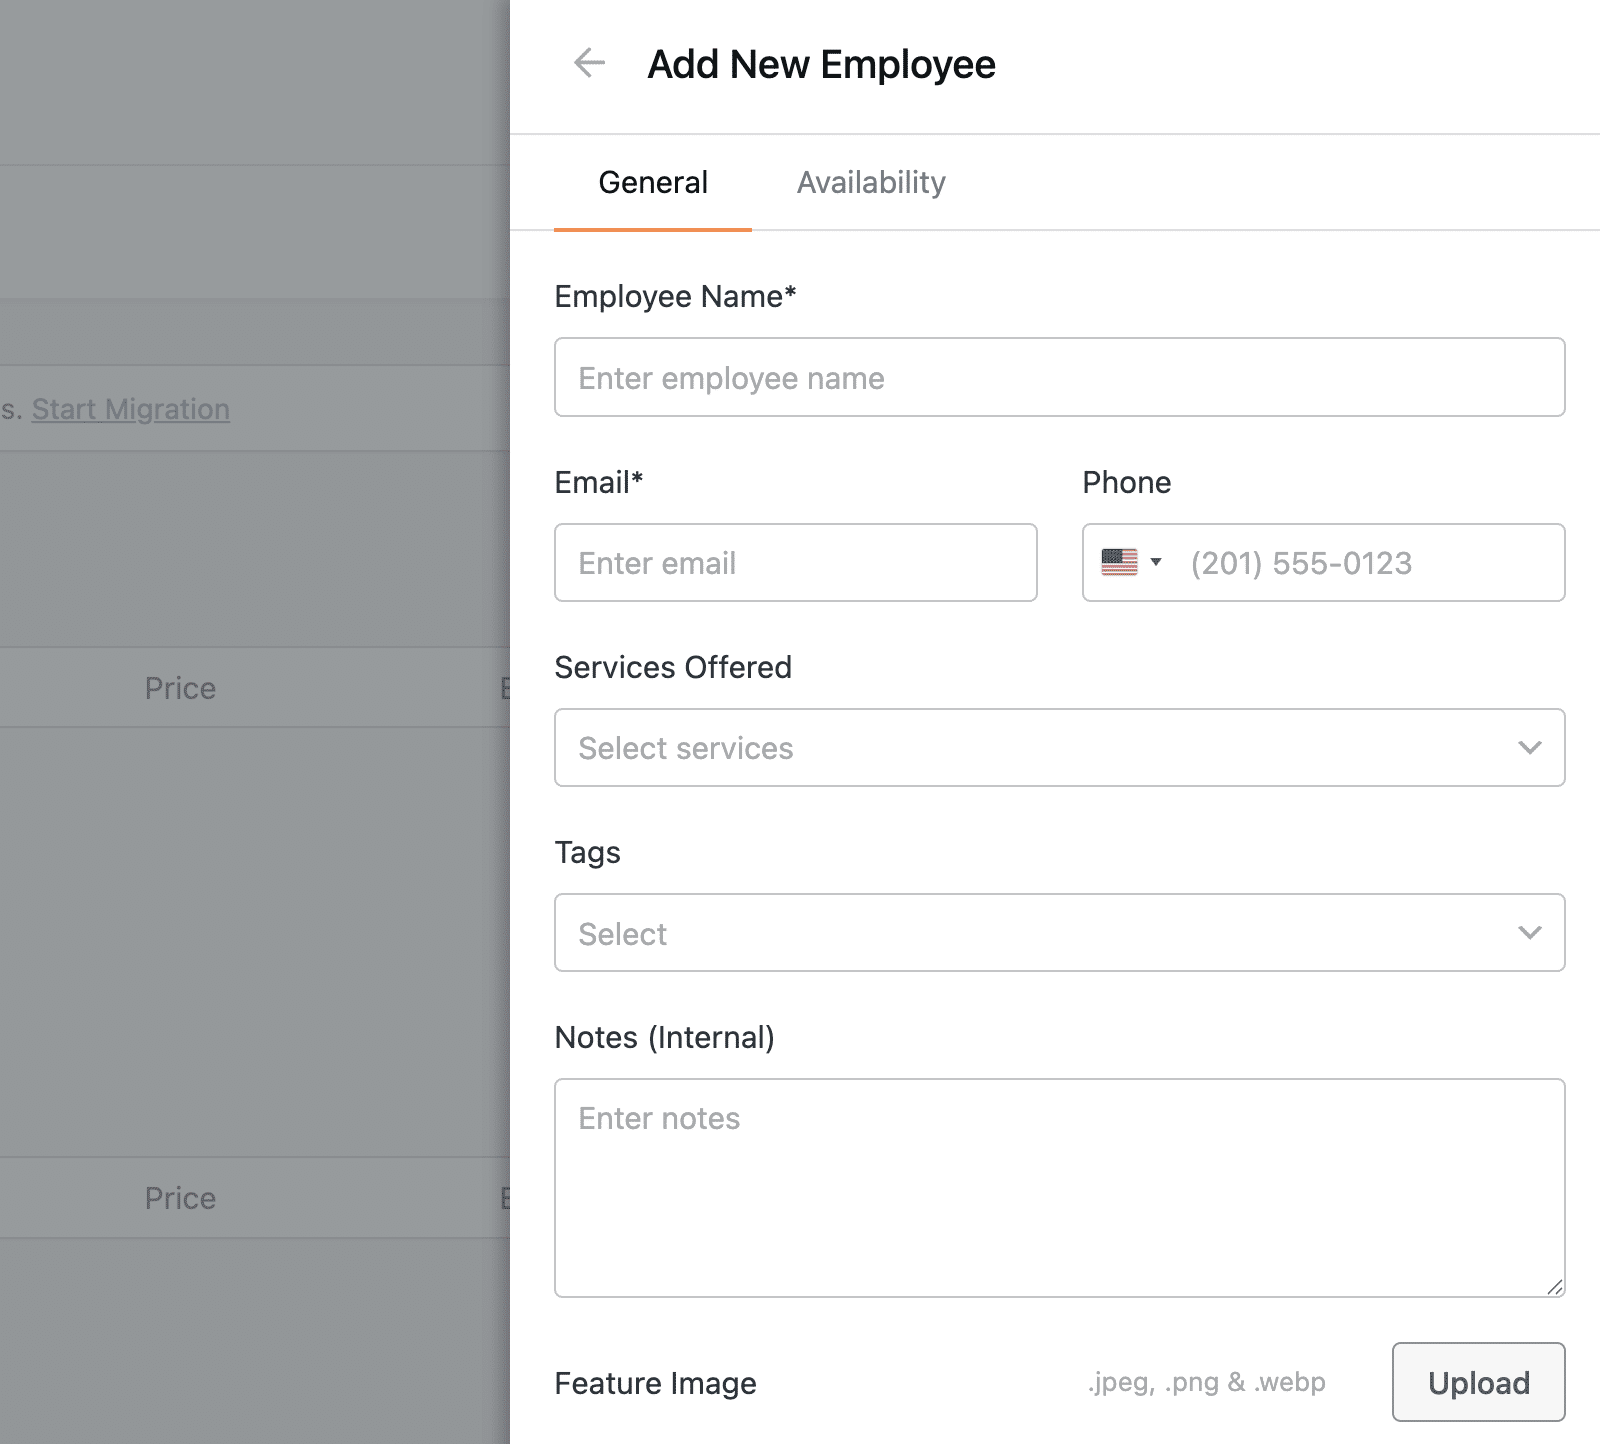
Below, we’ve highlighted the available field options:
- Employee Name (required): The name of the employee.
- Email (required): The employee’s email address. This will be used to send appointment reminder emails to the employee.
- Phone: Employee’s phone number.
- Services Offered: Use this option if you’d like to assign specific services to an employee.
- Tags: Taxonomy for filtering employees on your site.
- Notes (Internal): Any additional notes you want to include about the employee.
- Feature Image: This option allows you to specify a display image for the employee.
After entering the employee details, click the Availability tab to set a custom schedule for this employee.
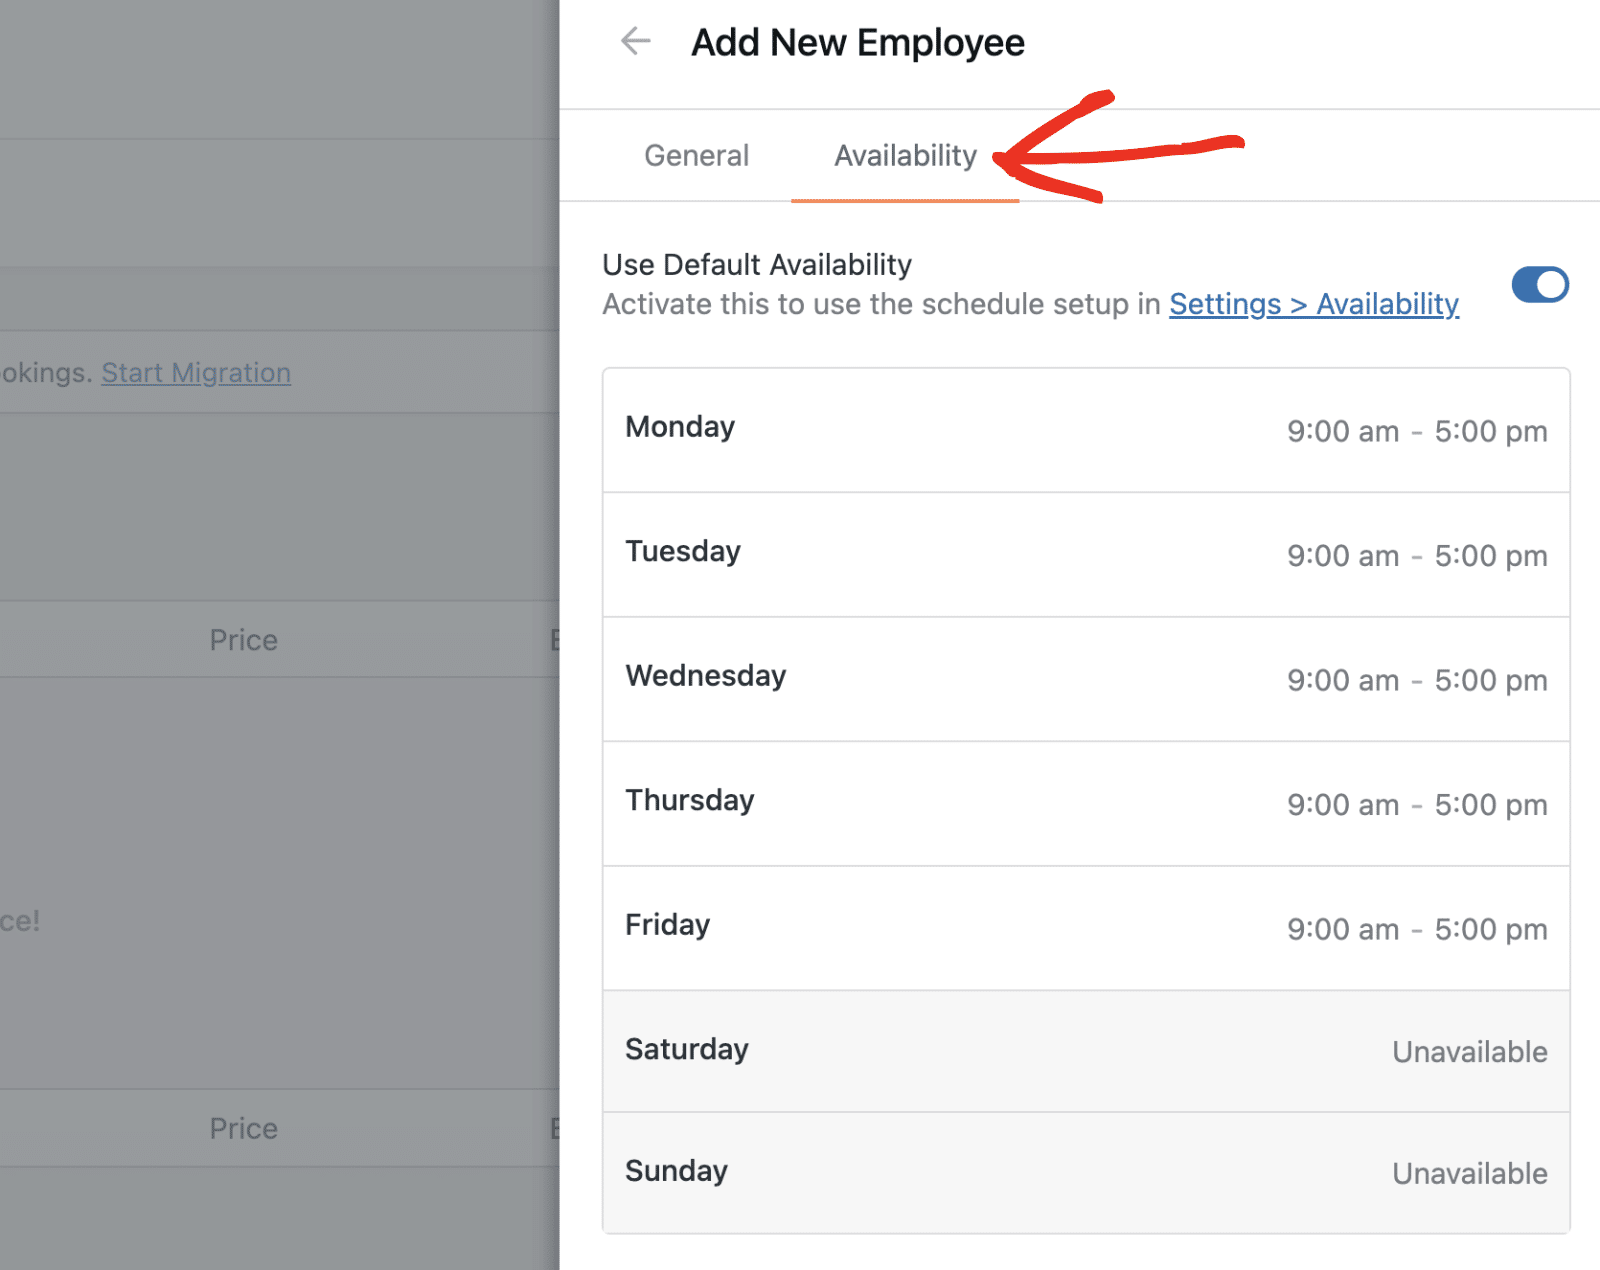
By default, it is set to the site-wide schedule you set when configuring Sugar Calendar Bookings settings. But you can modify it by toggling the Use Default Availability option to the OFF position.
Once you’re done adding the employee details, click Add New to save your changes.

Configuring Service Availability
After configuring the general settings, switch to the Availability tab. Here, you’ll be able to customize the service availability.

By default, the service will use the availability configured for the entire site. However, you can update the availability for this service by disabling the Use Default Availability option.

Once disabled, you’ll be able to set the time slots you want to enable for the service.

Configuring Service Settings
Switch to the Settings tab to configure additional options for your service.

In the Settings tab, you can control the Enable Service option. This toggle allows you to enable or disable the service.

When disabled, the service will be hidden from all places on your site where customers can make bookings.
The service will use the default payment options you configured when setting up the plugin. You can customize it for this service by enabling the Override Payment Methods toggle.

Once enabled, you’ll be able to set the payment methods you want to enable for this service.

Below the payment methods settings, you’ll find the email notification option. This setting controls all booking-related emails.
It defaults to the site-wide email settings you set for the plugin. However, you can customize it by enabling the Override Email Notifications option.

After enabling it, you’ll see all the booking-related emails. Toggle off the switch for any email option to disable them.

To customize a particular email notification, click on Edit.

In the overlay that appears, you’ll be able to update the email content and subject line.
Note: See our tutorial to learn more about customizing booking emails.
Once you’ve configured all the service details, click the Add New button to create your service.

Congratulations! You’ve successfully created your first service in Sugar Calendar Bookings.
Next, would you like to allow users to book services you’ve created on your site? Check out our guide on displaying services and booking appointments for more details.