Want to customize booking-related emails that Sugar Calendar Bookings sends to customers and staff? The email customization feature allows you to personalize all booking-related notification emails to match your brand.
In this guide, we’ll show you how to customize booking emails in Sugar Calendar.
In This Article
Before getting started, make sure Sugar Calendar Bookings is installed and activated on your site.
Accessing Email Settings
To customize your booking emails, navigate to Bookings » Settings in the sidebar menu. Once there, click on the Emails tab to access all email options.
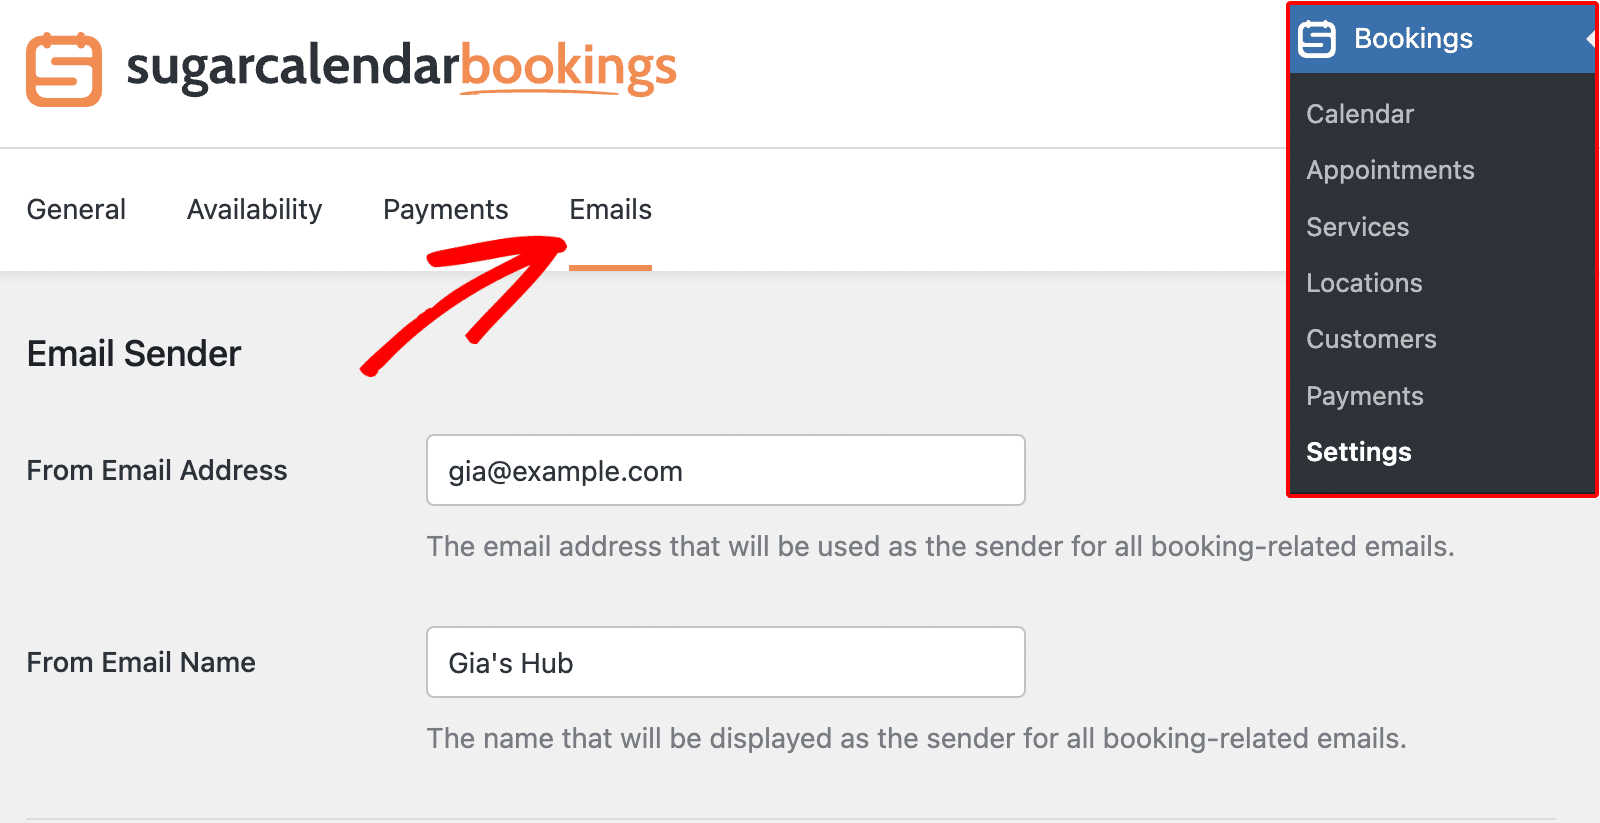
Configuring Email Sender Information
Before customizing your email templates, you’ll want to configure who appears as the sender of all booking-related emails.
From Email Address
Enter the email address that will appear as the sender for all booking-related emails. This should typically be your business email address.
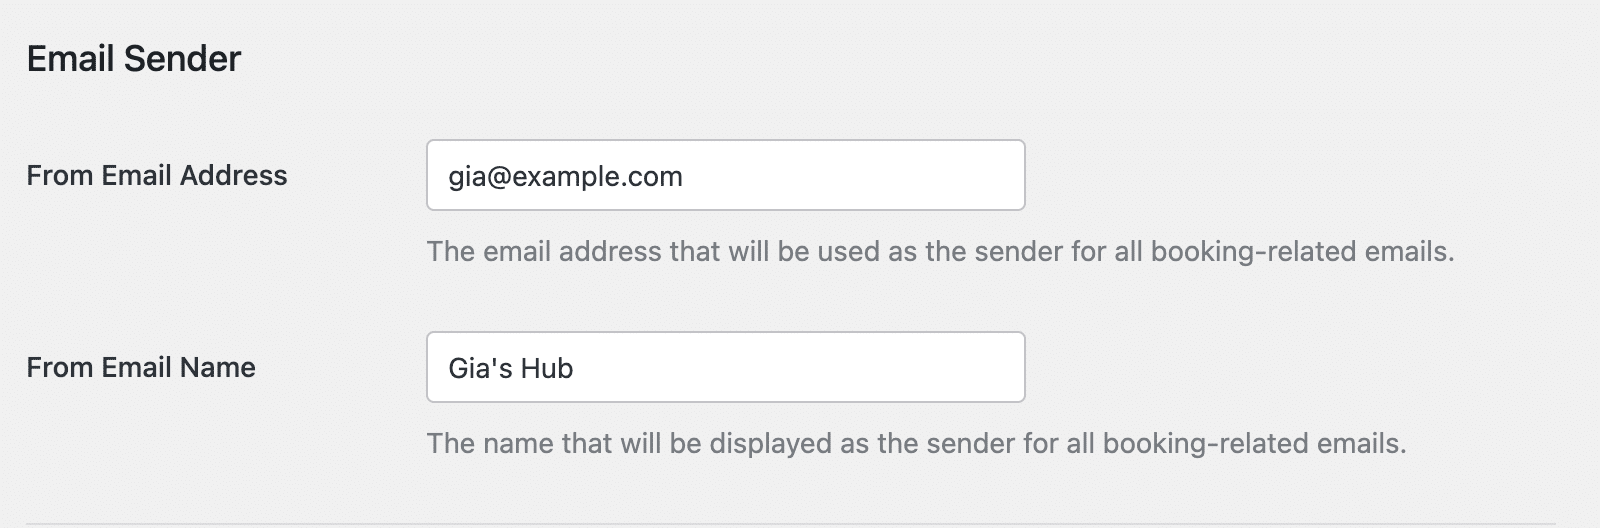
From Email Name
Below the From Email, you’ll need to specify the sender name for all booking-related emails. This could be your business name or your personal name, depending on your preference.
Available Email Types
Sugar Calendar provides several email templates that you can customize for different booking scenarios:

- Pending Booking Email to Attendee: The message sent to customers when their booking is pending approval
- Pending Booking Email to Employee: Email notification sent to staff members about the pending status of a user’s booking
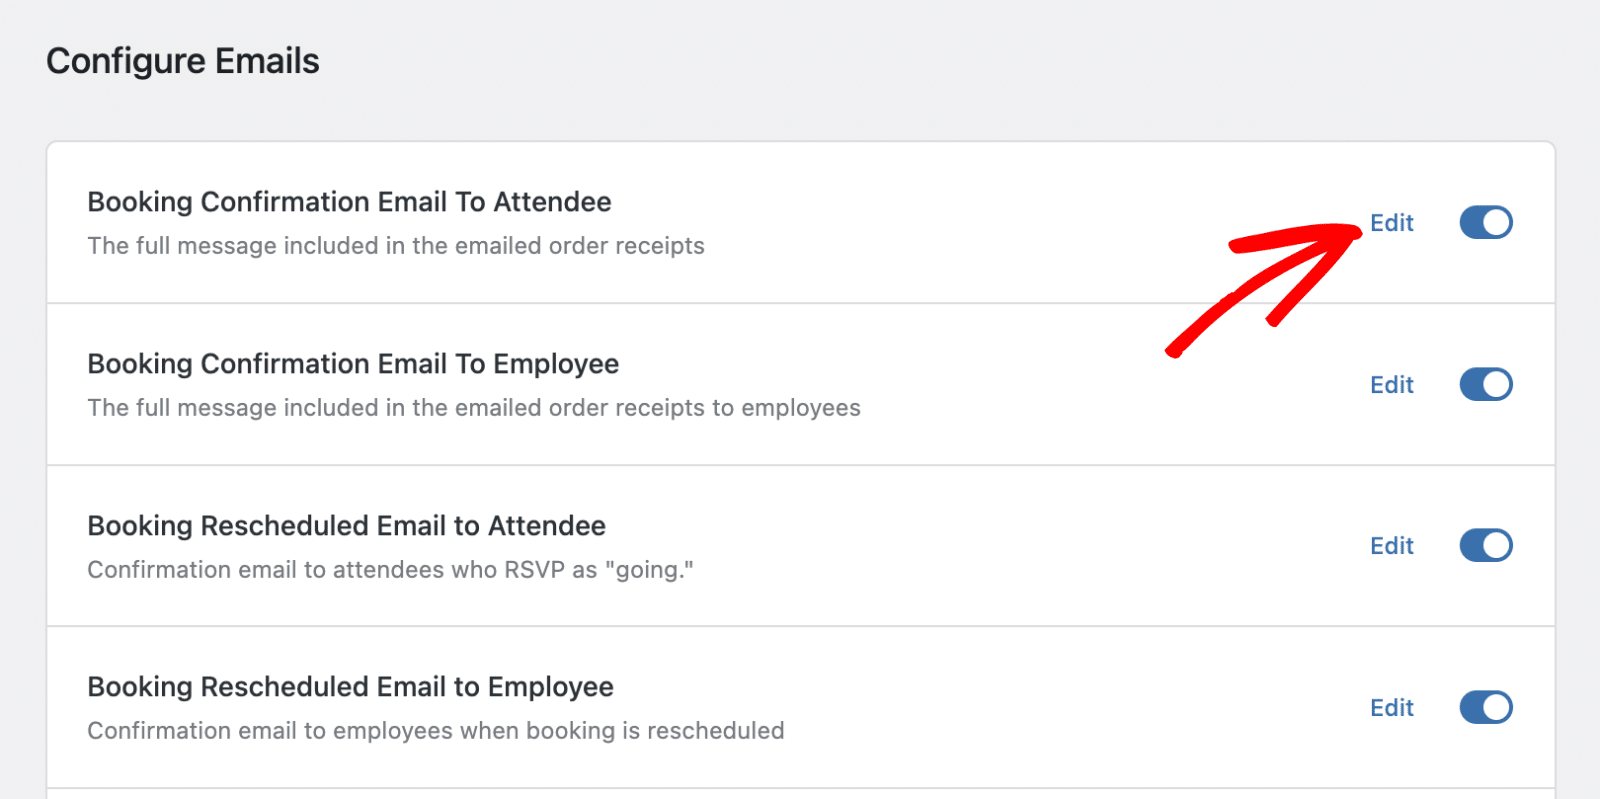
- Booking Confirmation Email To Attendee: The message sent to customers when they successfully book a service
- Booking Confirmation Email To Employee: The notification sent to staff members when a new booking is made
- Booking Rescheduled Email to Attendee: Sent to customers when their booking is moved to a different time
- Booking Rescheduled Email to Employee: Notifies staff when a booking has been rescheduled
- Booking Cancellation Email to Attendee: Sent to customers when their booking is cancelled
- Booking Cancellation Email to Employee: Notifies staff when a booking has been cancelled
- Appointment Reminders to Attendee: Reminder emails sent to customers before their appointment
- Appointment Reminders to Employee: Reminder emails sent to staff about upcoming appointments
- Payment Refund Email to Customer: Email notification sent to the customer for refunded booking payments

Editing Email Templates
To customize any email template, click the Edit button next to the email type you want to modify.
This will open the email editor where you can customize various aspects of the email:
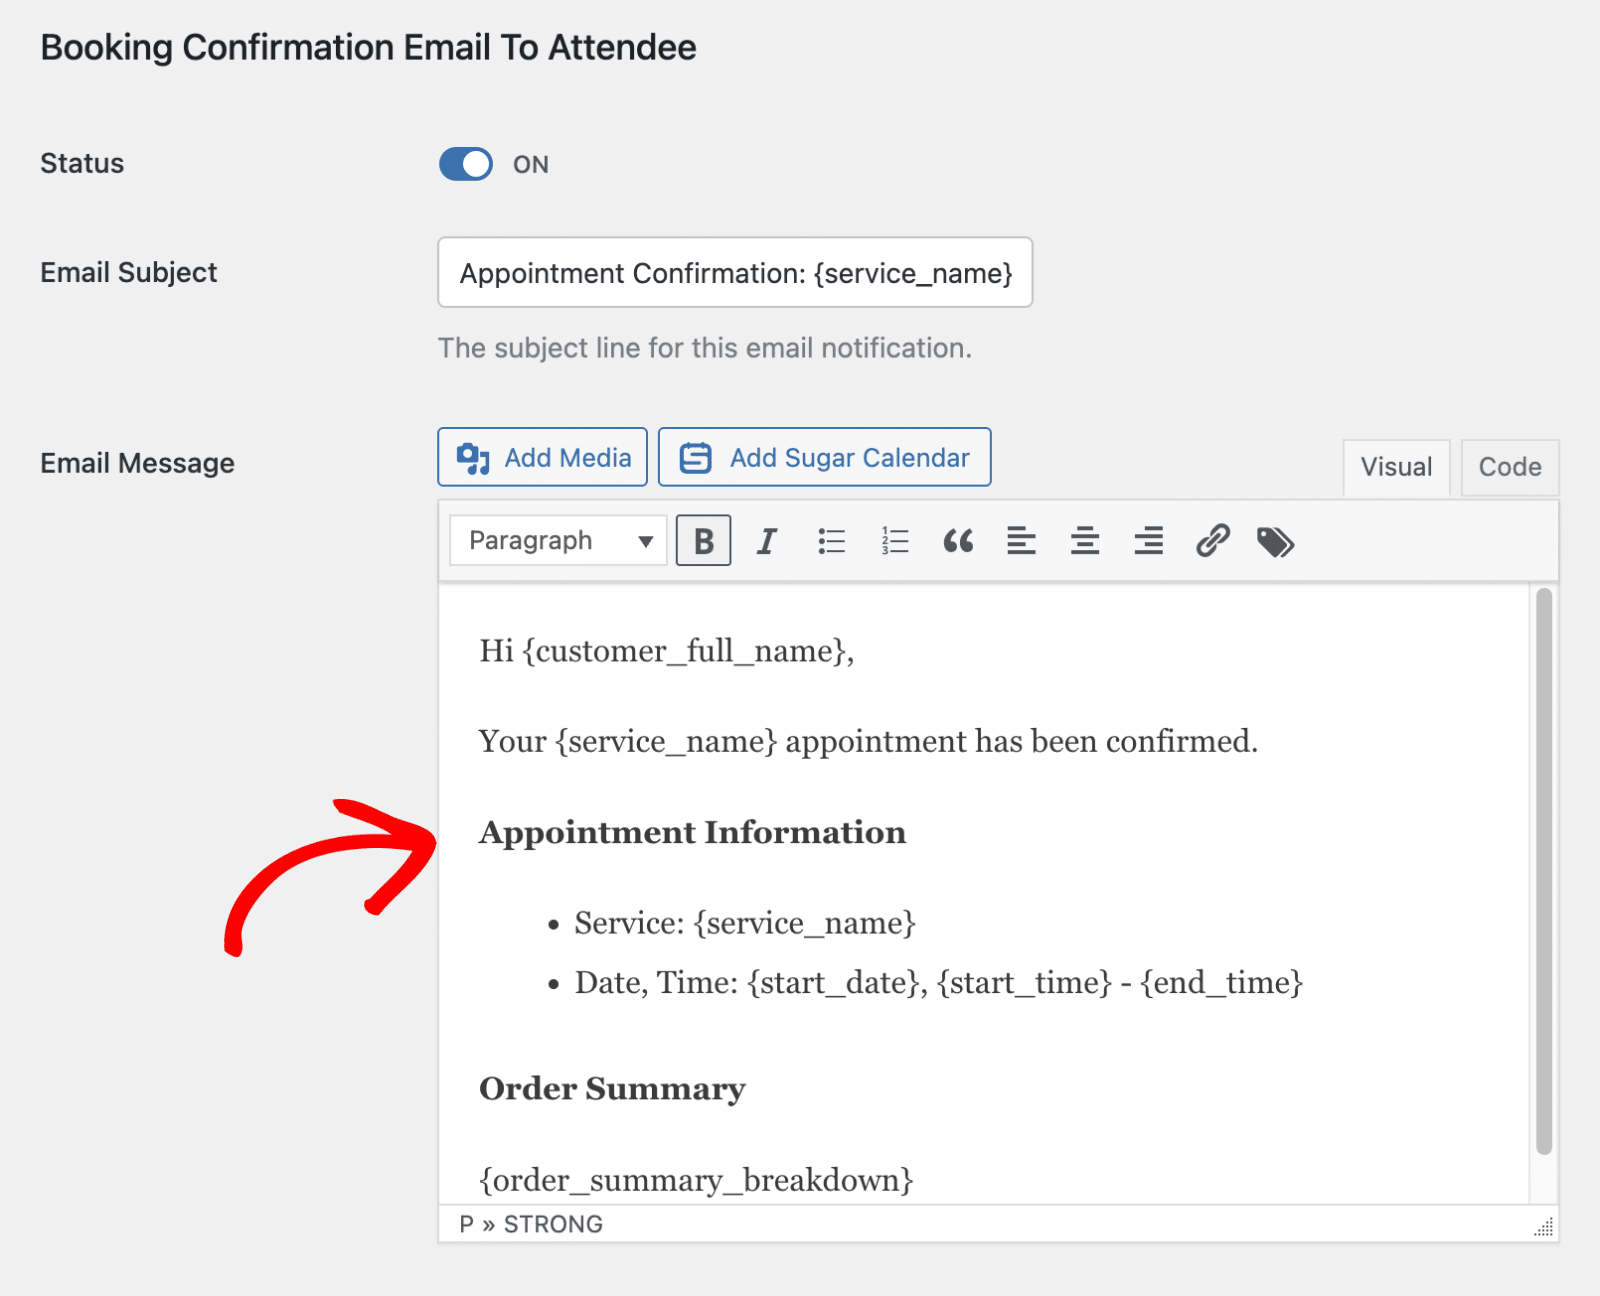
Email Subject
This contains the subject line for the email. You can use smart tags to automatically include relevant information like the service name.
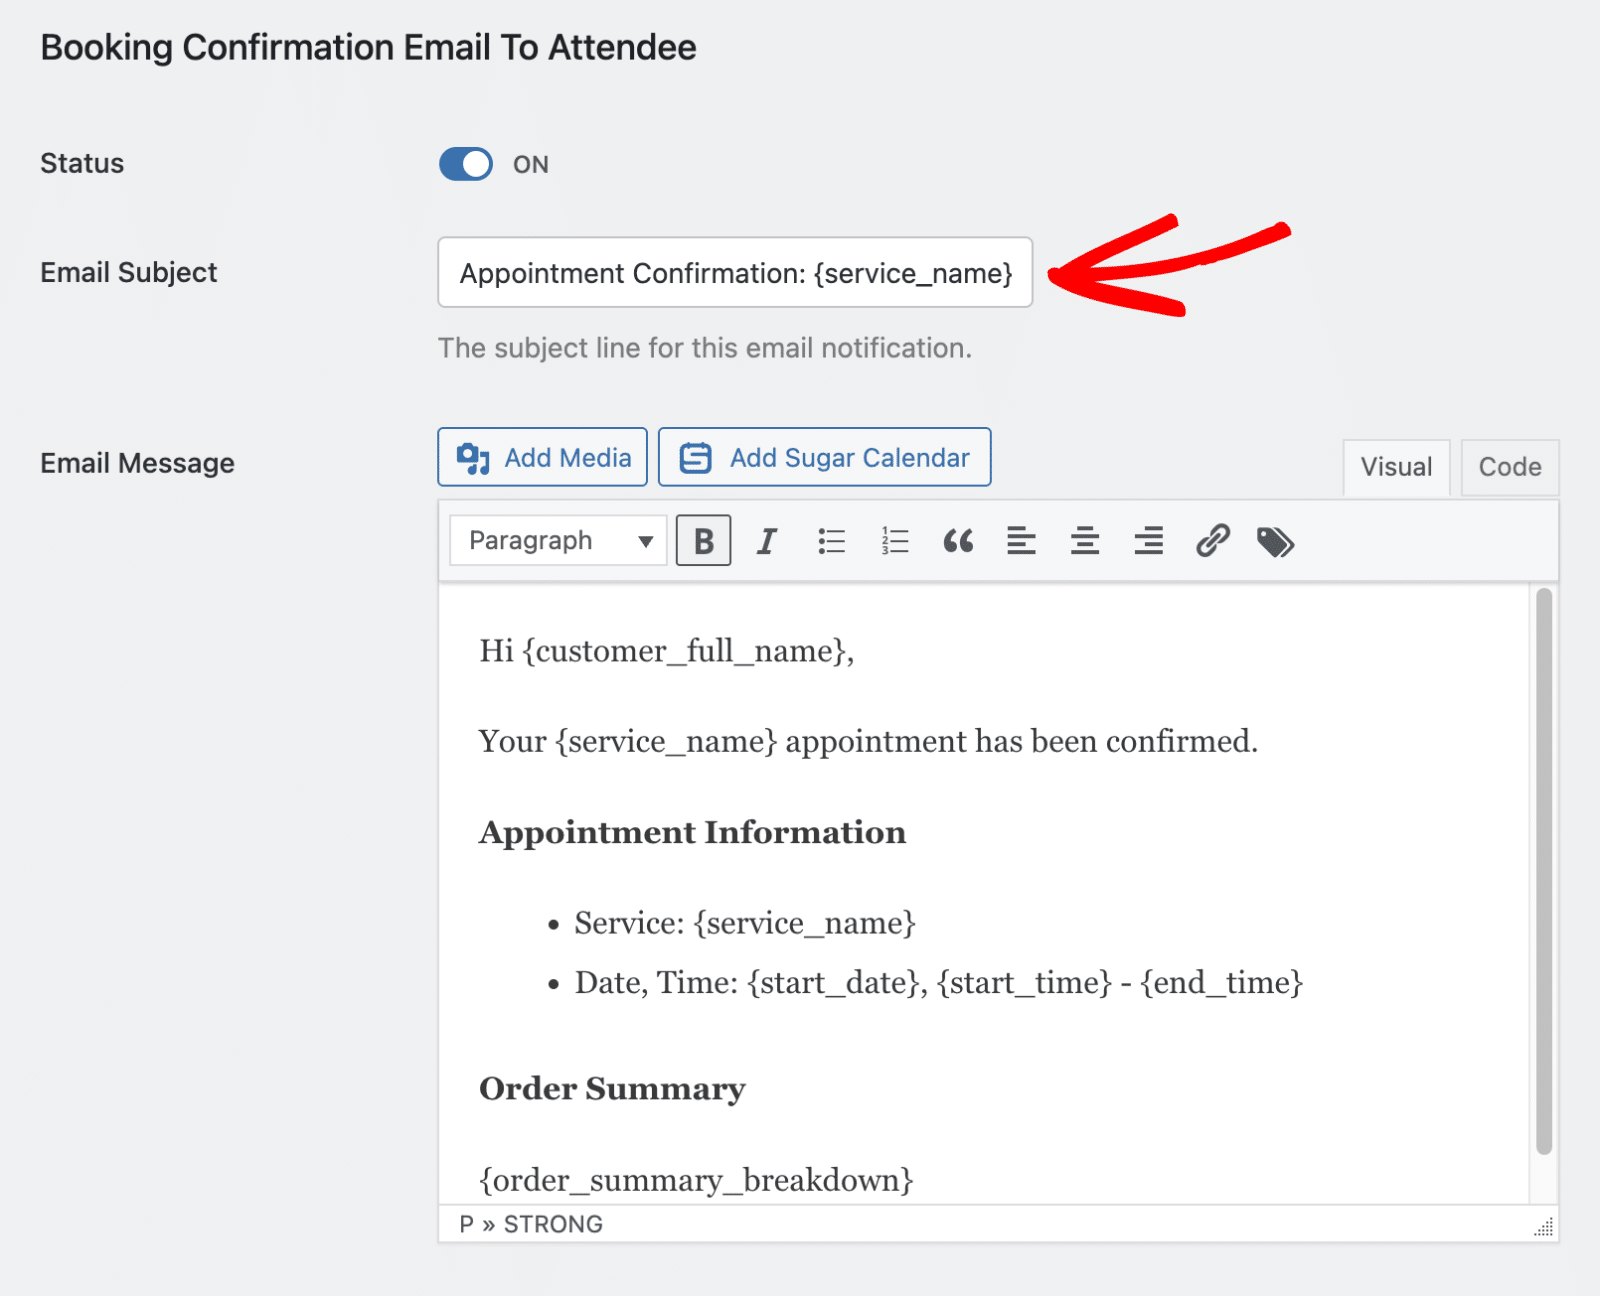
Email Message
Use the rich text editor to customize the email content. The editor provides formatting options similar to WordPress, allowing you to:
- Format text with bold, italic, and other styling options
- Add lists and bullet points
- Insert links
- Add images using the Add Media button
- Include dynamic content using smart tags
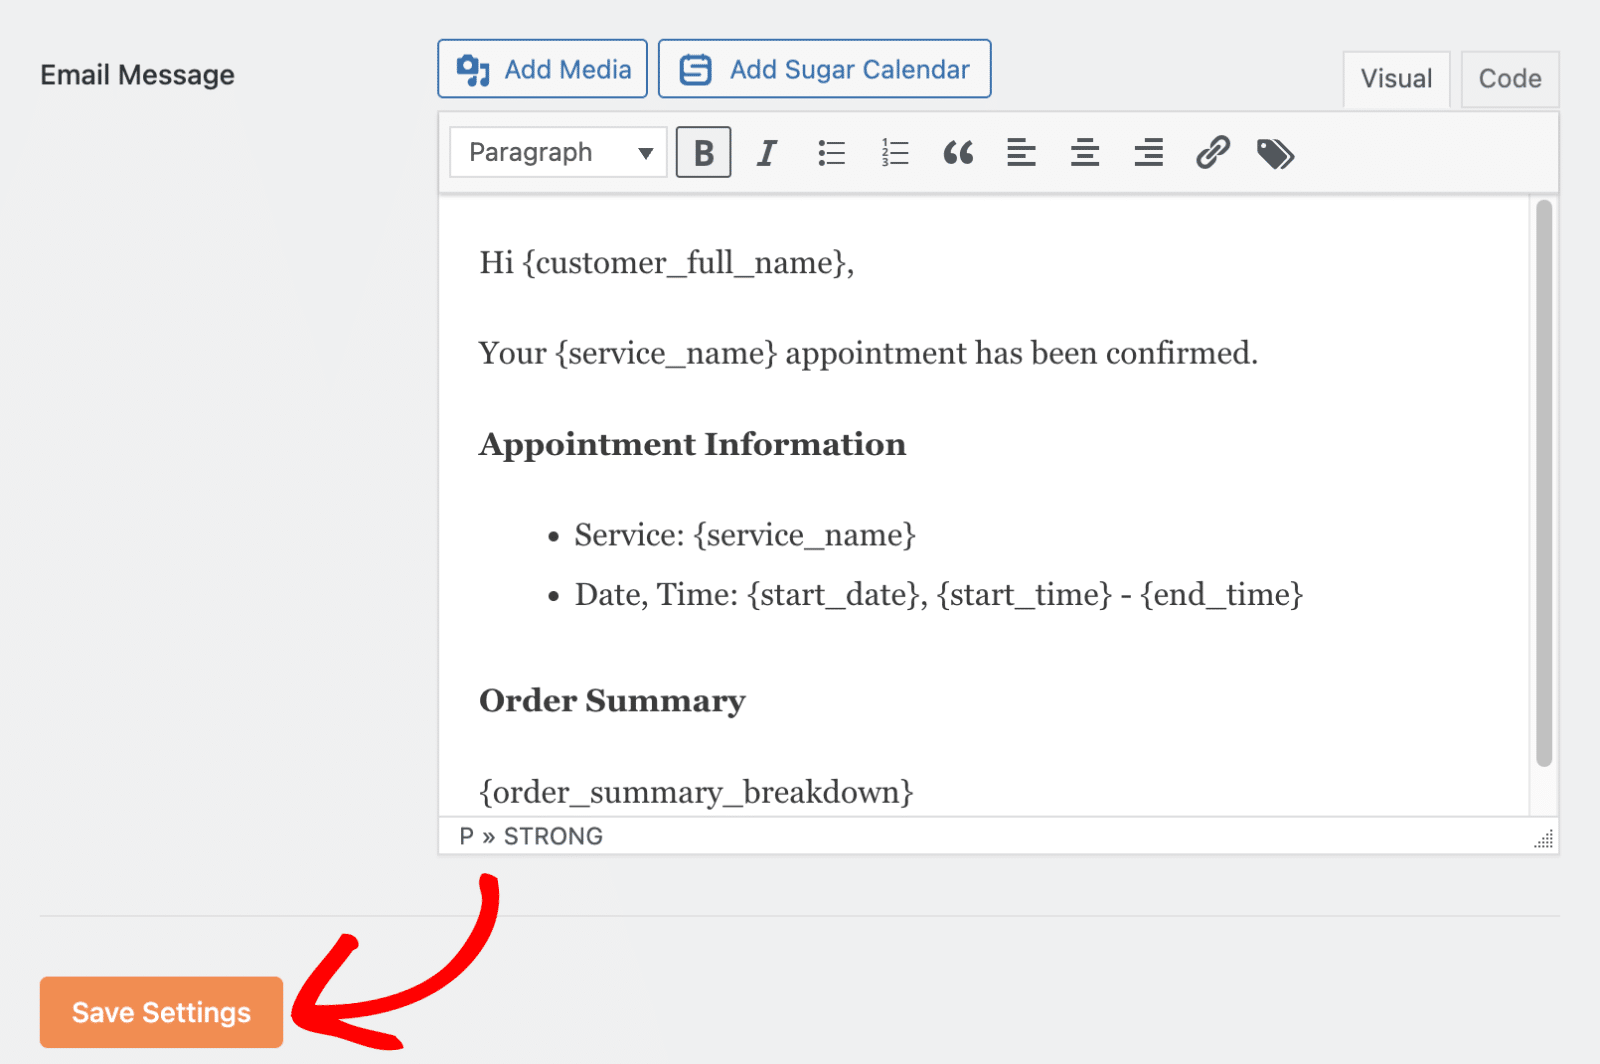
After making your changes, scroll down and click Save Settings to apply your email customizations.
Using Smart Tags
Smart tags are dynamic placeholders that automatically populate with relevant booking information when emails are sent. Common smart tags include:
{customer_full_name}: The customer’s complete name{service_name}: The name of the booked service{start_date}: The appointment start date{start_time}: The appointment start time{end_time}: The appointment end time{order_summary_breakdown}: Complete order details, including pricing{refund_amount}: Booking amount refunded to the customer{payment_gateway}: Payment processor used to complete the appointment booking
These smart tags ensure that each email contains accurate, personalized information about the specific booking.
Enabling and Disabling Emails
You can enable or disable each email type using the toggle switch next to it. This gives you complete control over which emails are sent and which are not.
To disable an email type, switch the toggle to the OFF position.
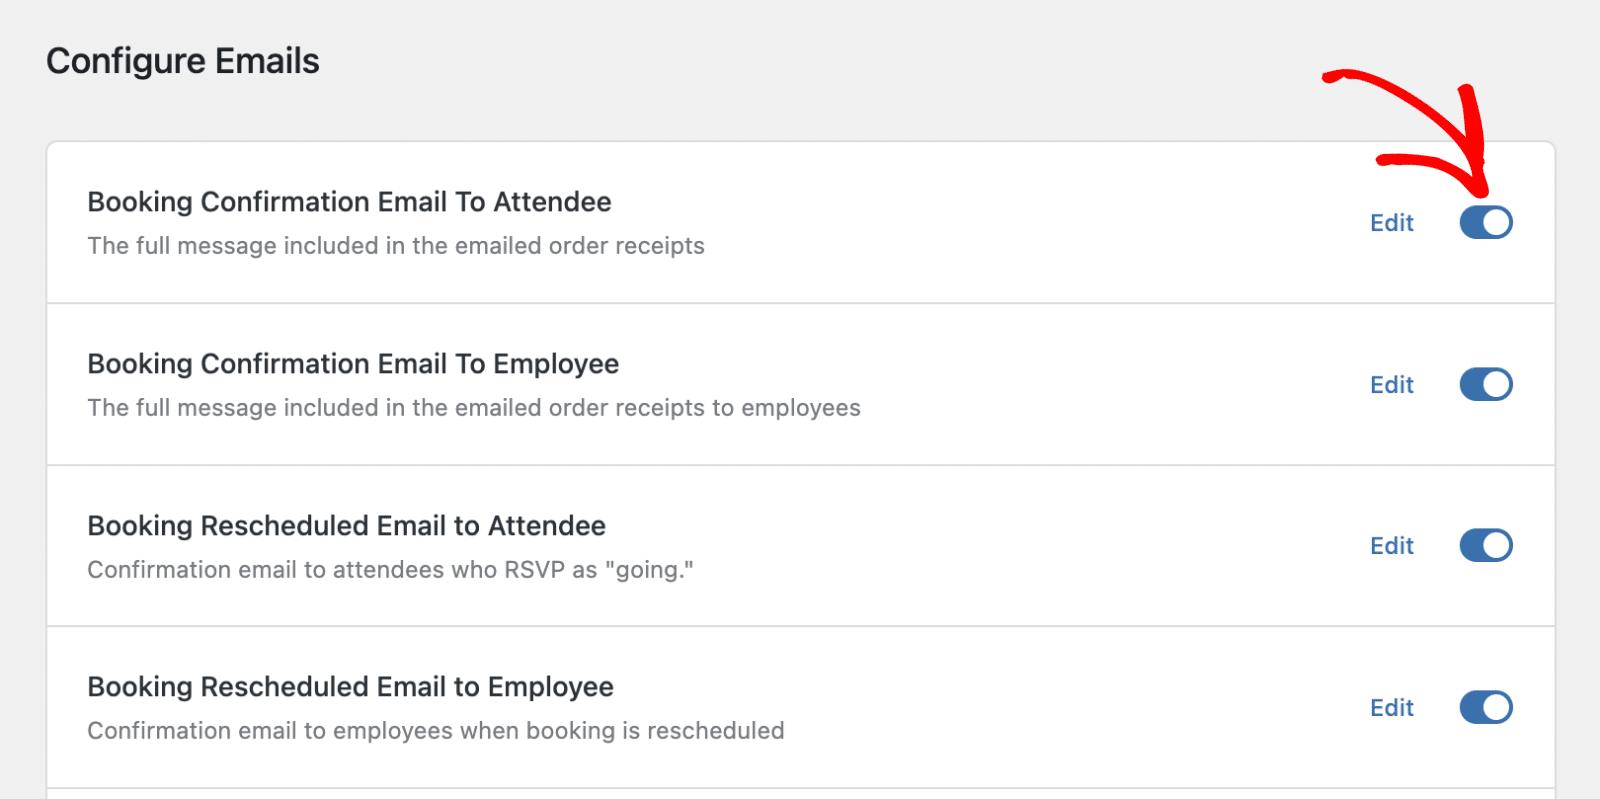
This flexibility enables you to tailor your communication workflow to meet your specific business needs.
For example, you might want to send confirmation emails to customers but not to employees. Or you might prefer to handle reminder emails through a different system.
After customizing your emails, be sure to click the Save Settings button to save your changes.

Example Email Output
Here’s an example of how a customized appointment reminder email appears to recipients:

The email includes personalized information such as the customer’s name, service details, appointment time, and order summary, all populated automatically using smart tags.
That’s it! You’ve successfully learned how to customize booking emails in Sugar Calendar.
Next, would you like to learn how to display an appointment booking form on your site’s frontend? See our guide on displaying the booking form to learn how.