Would you like to learn how to manage appointment bookings on your site? Sugar Calendar Bookings includes a dashboard that helps you track appointment dates, manage customer data, and payment details.
This guide will show you how to manage appointment details directly from your WordPress dashboard.
In This Article
Before getting started, make sure the Sugar Calendar Bookings plugin is installed and activated on your site. You’ll also need to make sure that you’ve already created at least one appointment booking.
Viewing Appointments
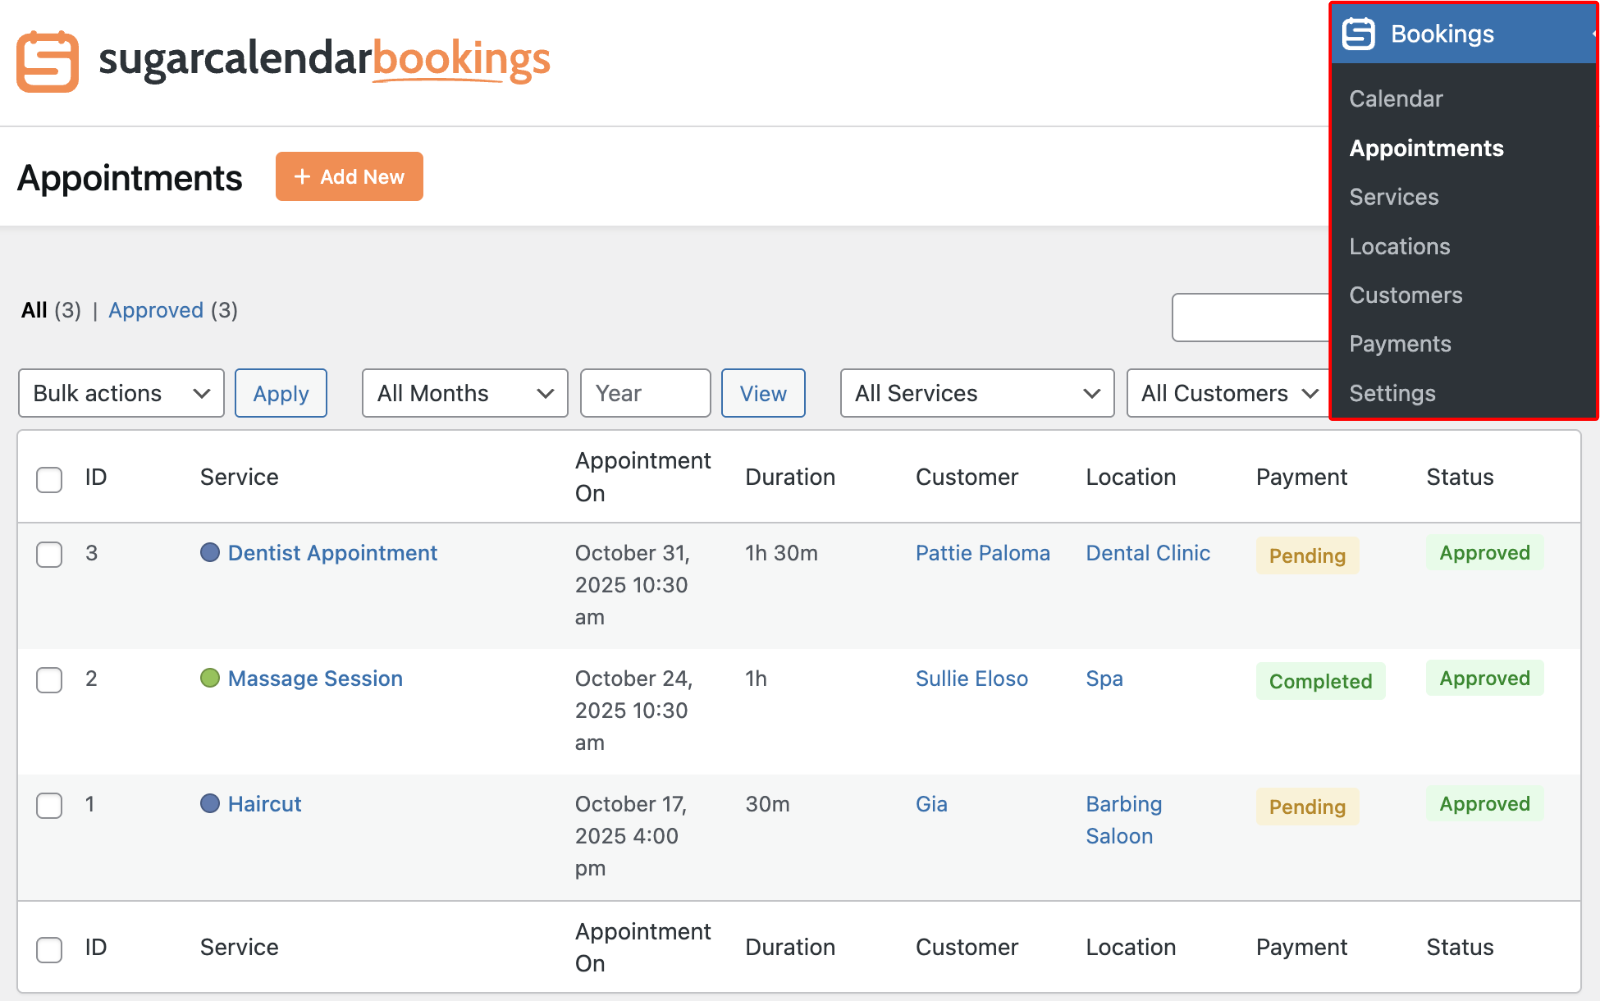
To view all appointments, go to Bookings » Appointments from your WordPress dashboard. Here you’ll see a list of all scheduled appointments, including details such as the customer’s name, service, location, payment status, and approval status.
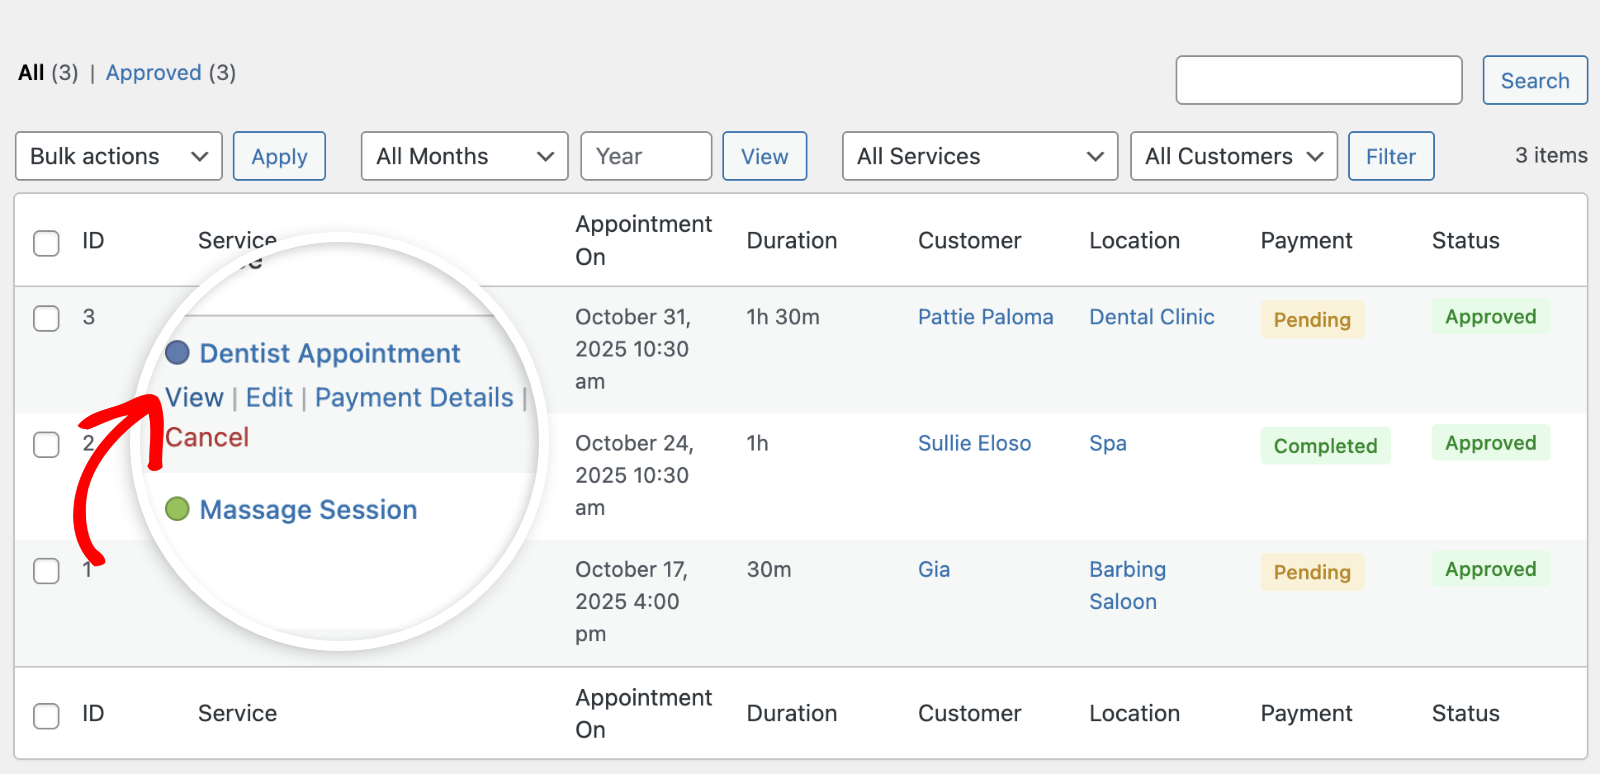
Clicking on the View link under an appointment opens the detailed view for that booking.
Searching and Filtering Appointments
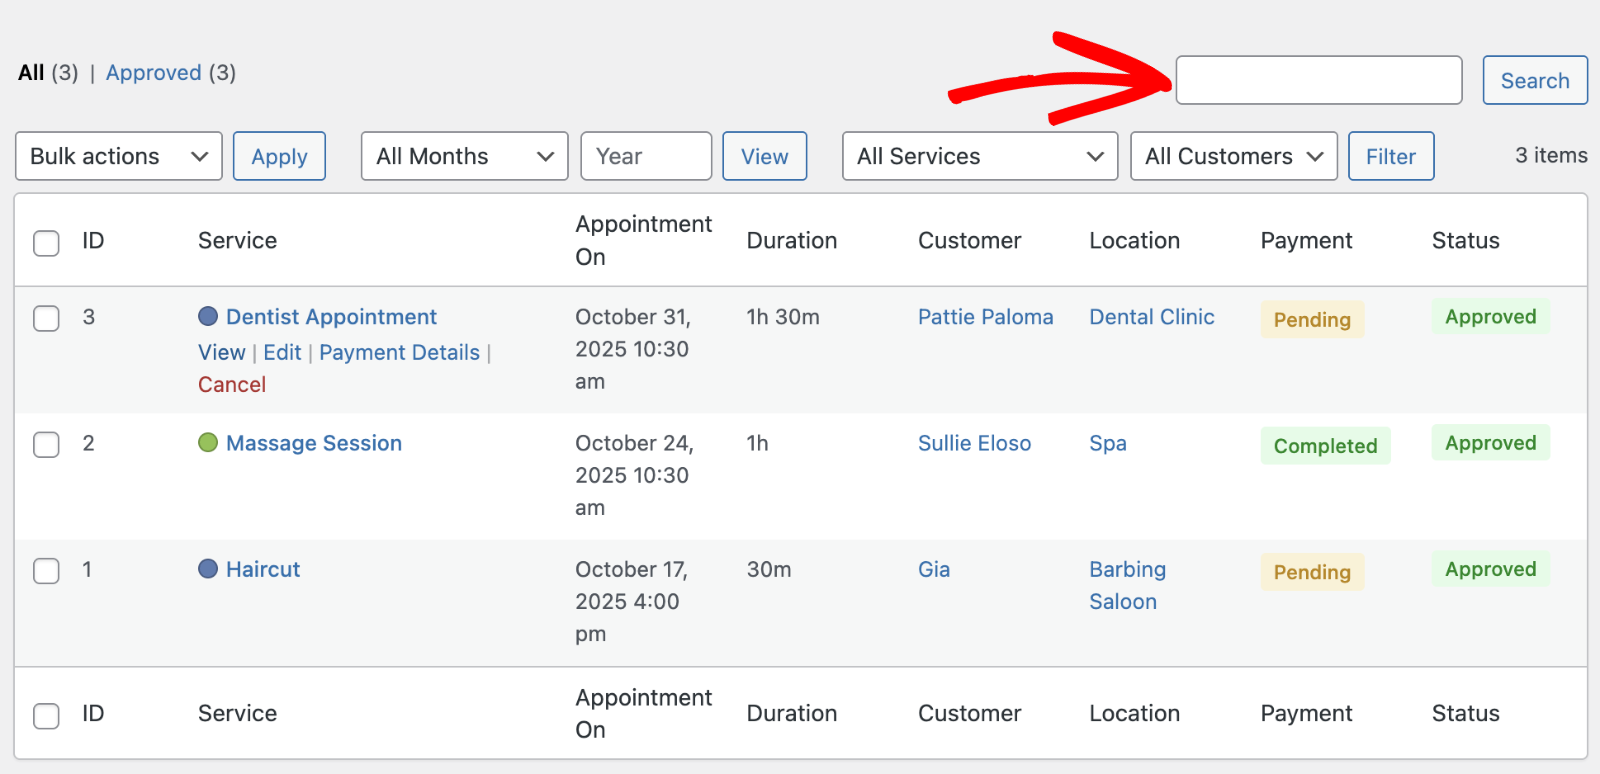
You can quickly locate appointments using the search bar or available filters. Use the dropdown menus to filter by month, service, or customer, or type keywords (like a customer’s name) in the search box.
Editing Appointments
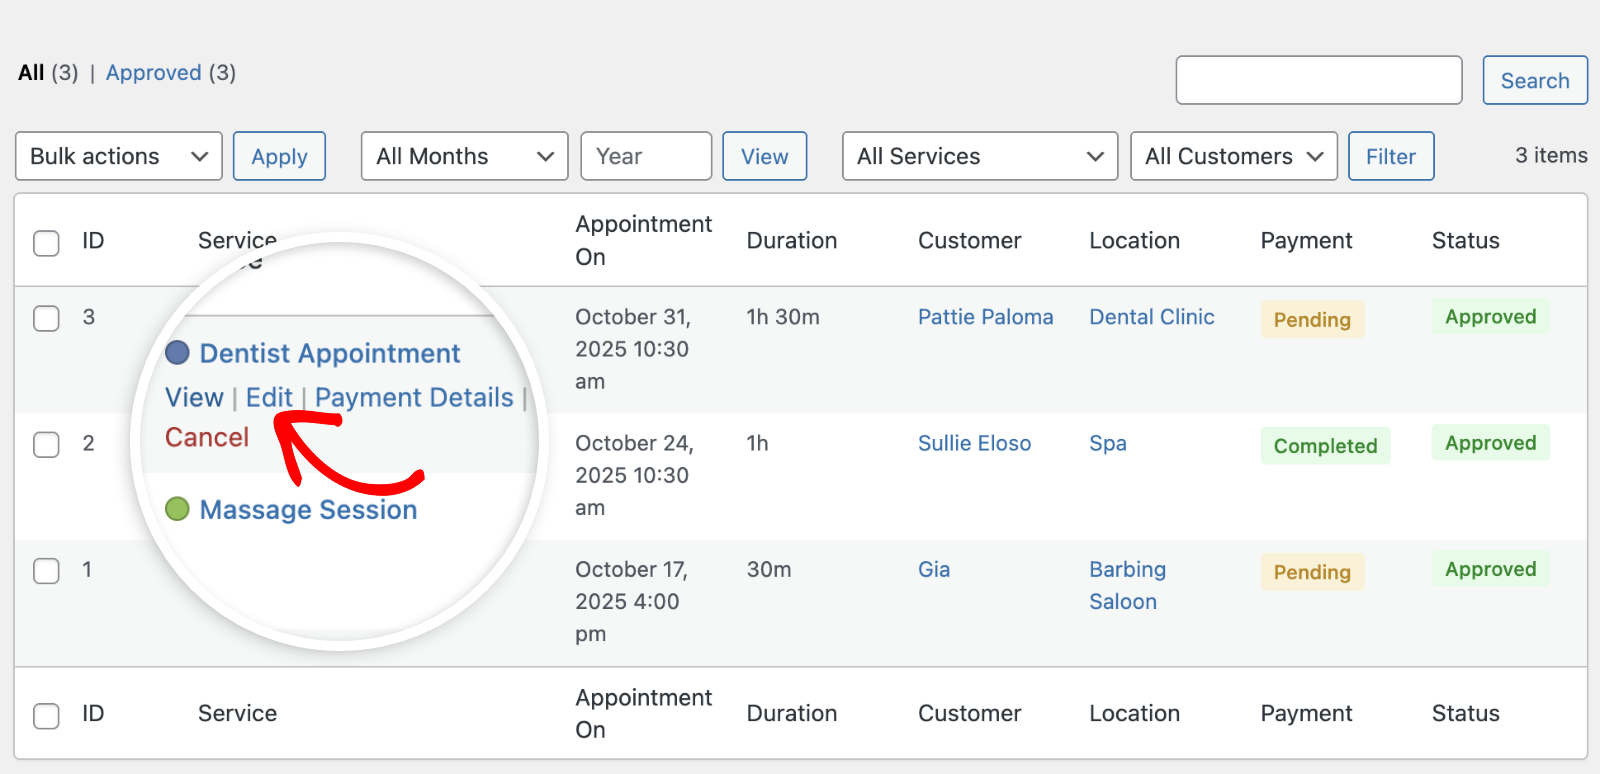
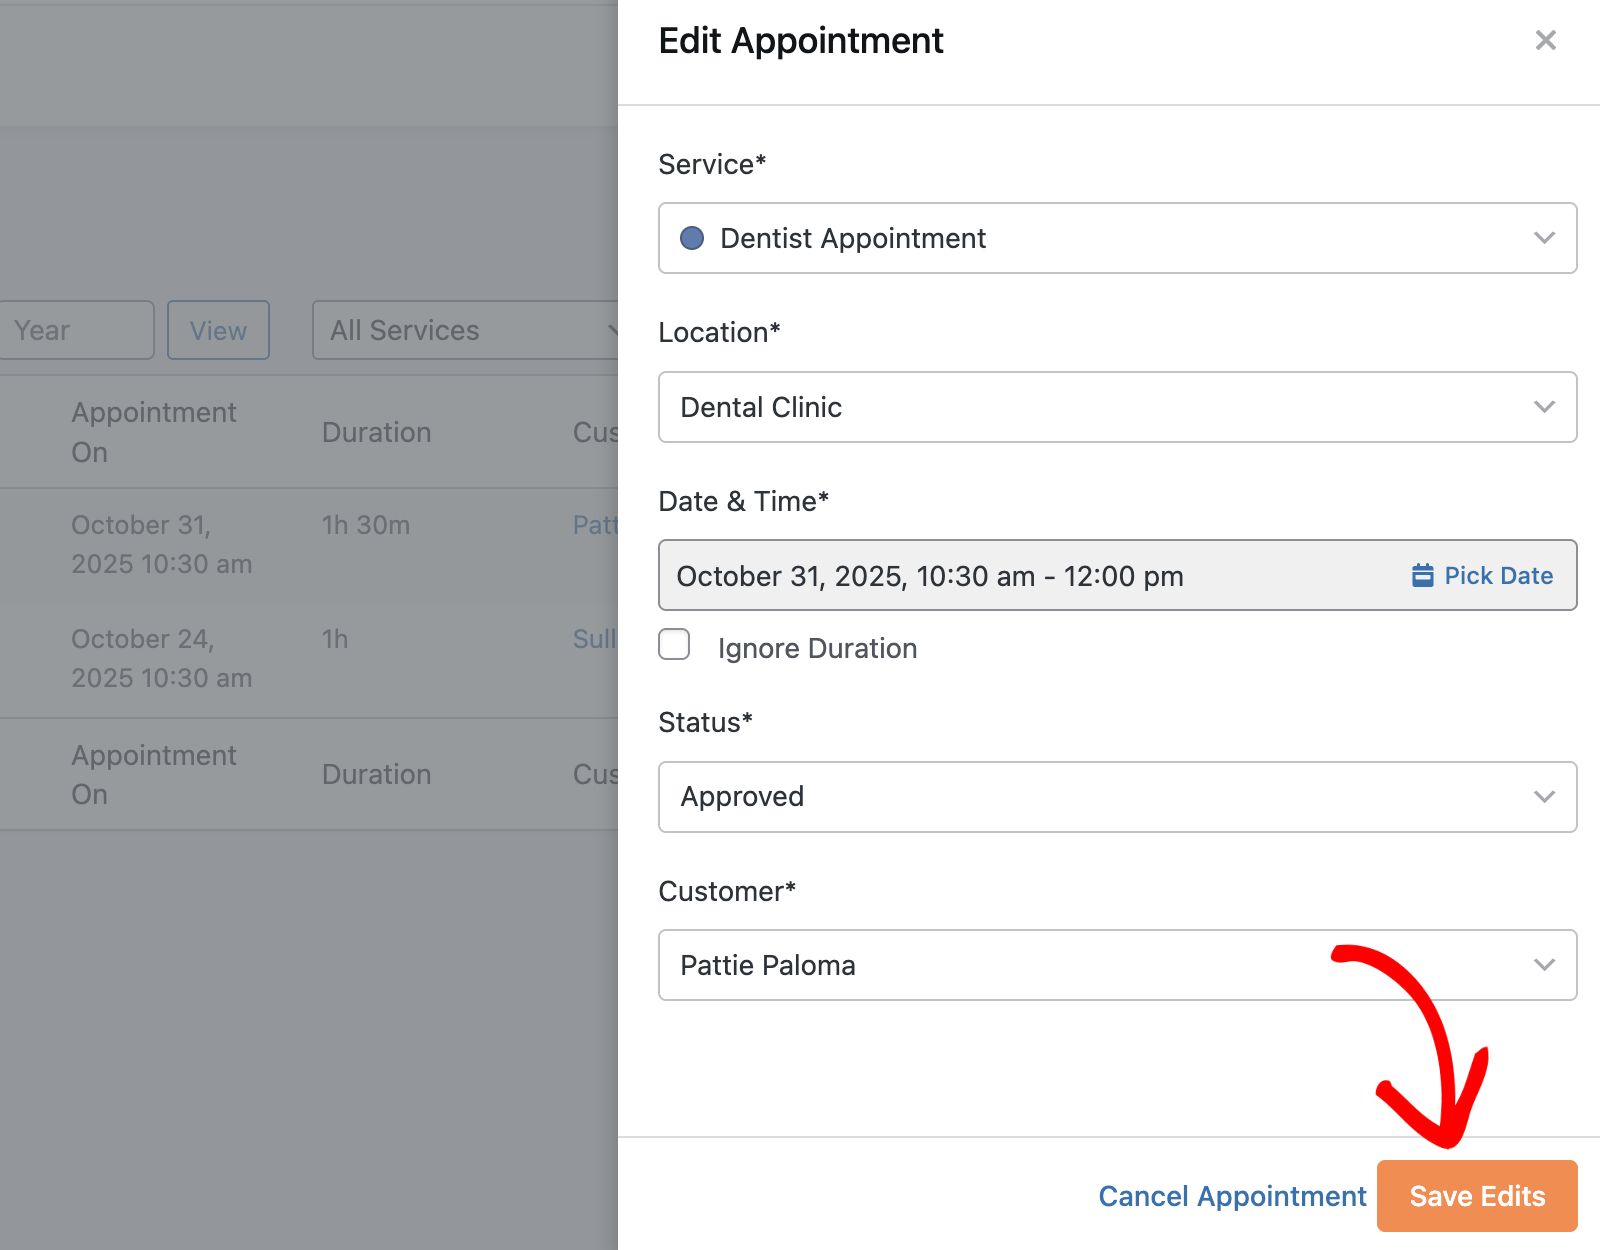
To edit an appointment, click the Edit link below the service name or from the appointment details page.
After that, go ahead and update any necessary information, such as date, time, service, or status. Once done, click Save Edits to apply your changes.
Canceling Appointments
If a customer needs to cancel, you can do so directly from the Appointments list or the appointment details page. To cancel from the list, click the Cancel link below the service name.

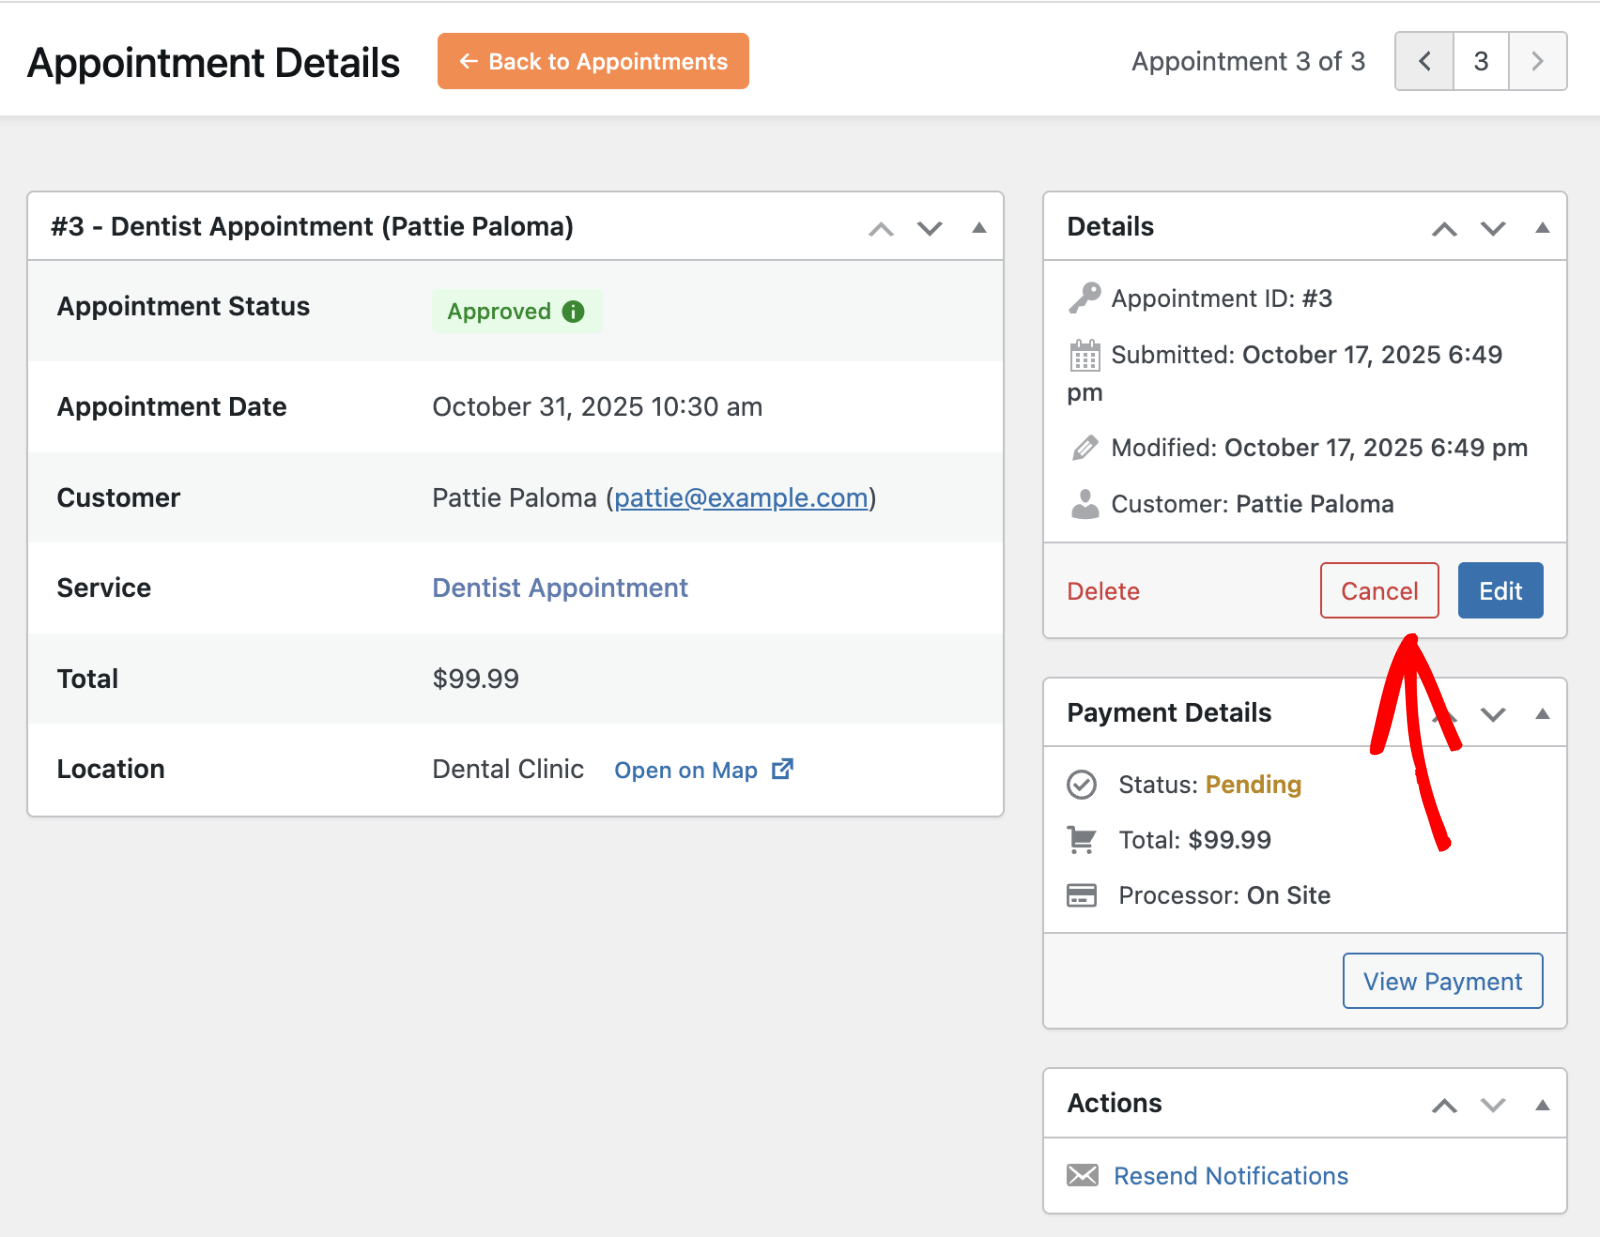
Alternatively, open the appointment details and click Cancel from the right-hand panel.
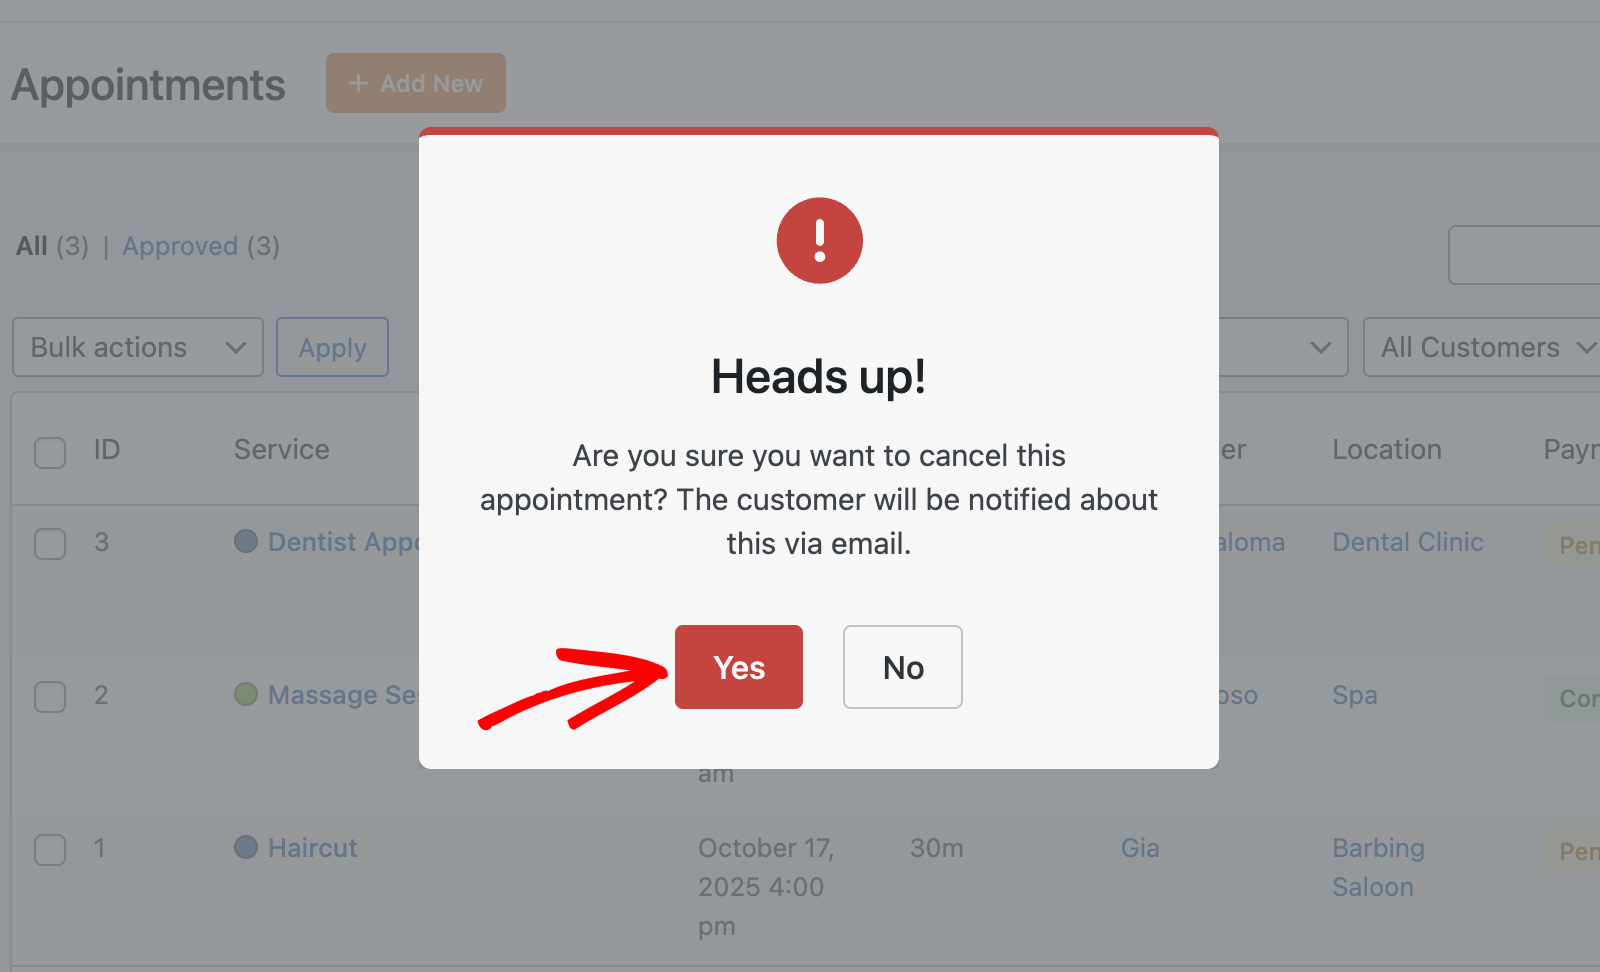
A confirmation dialog will appear. Click Yes to proceed with cancellation. The customer will automatically receive a cancellation email.
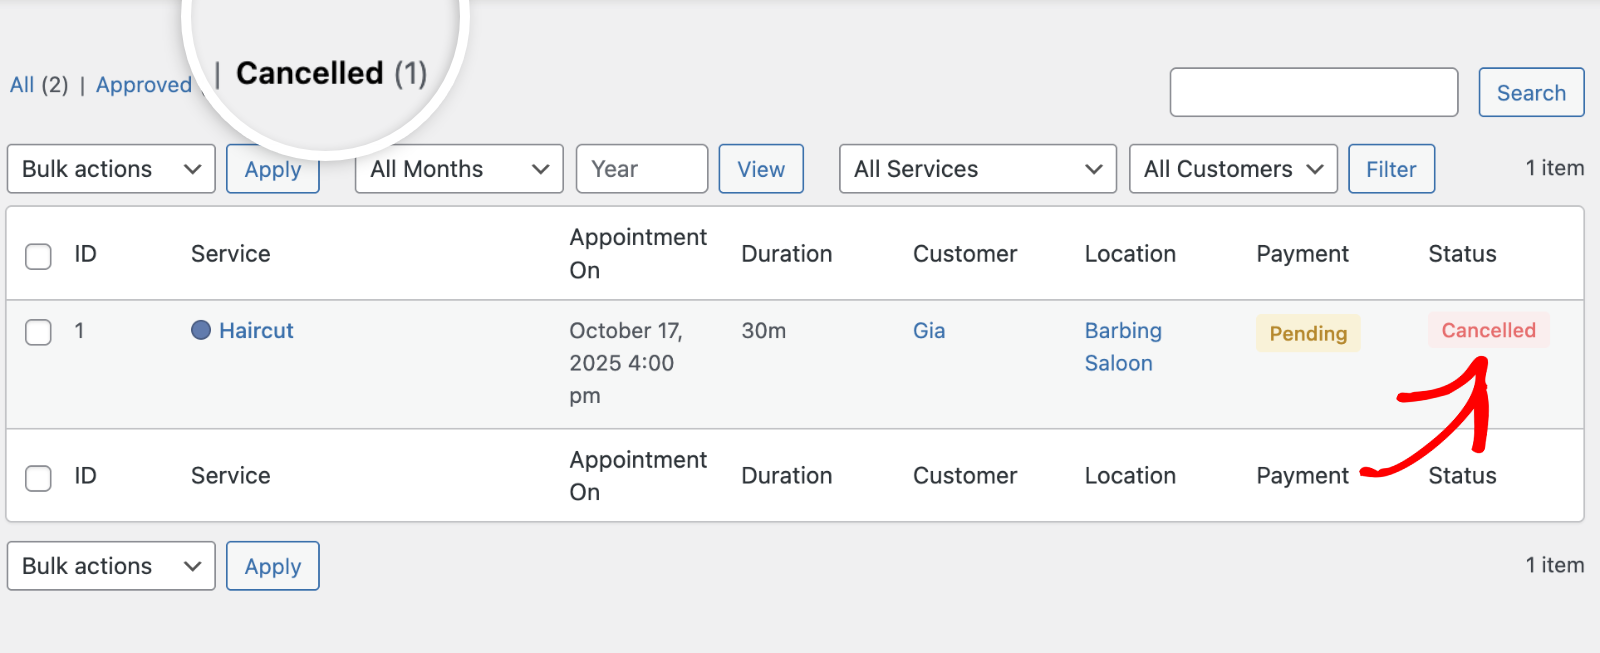
Once canceled, the appointment will appear under the Cancelled tab in your Appointments list.
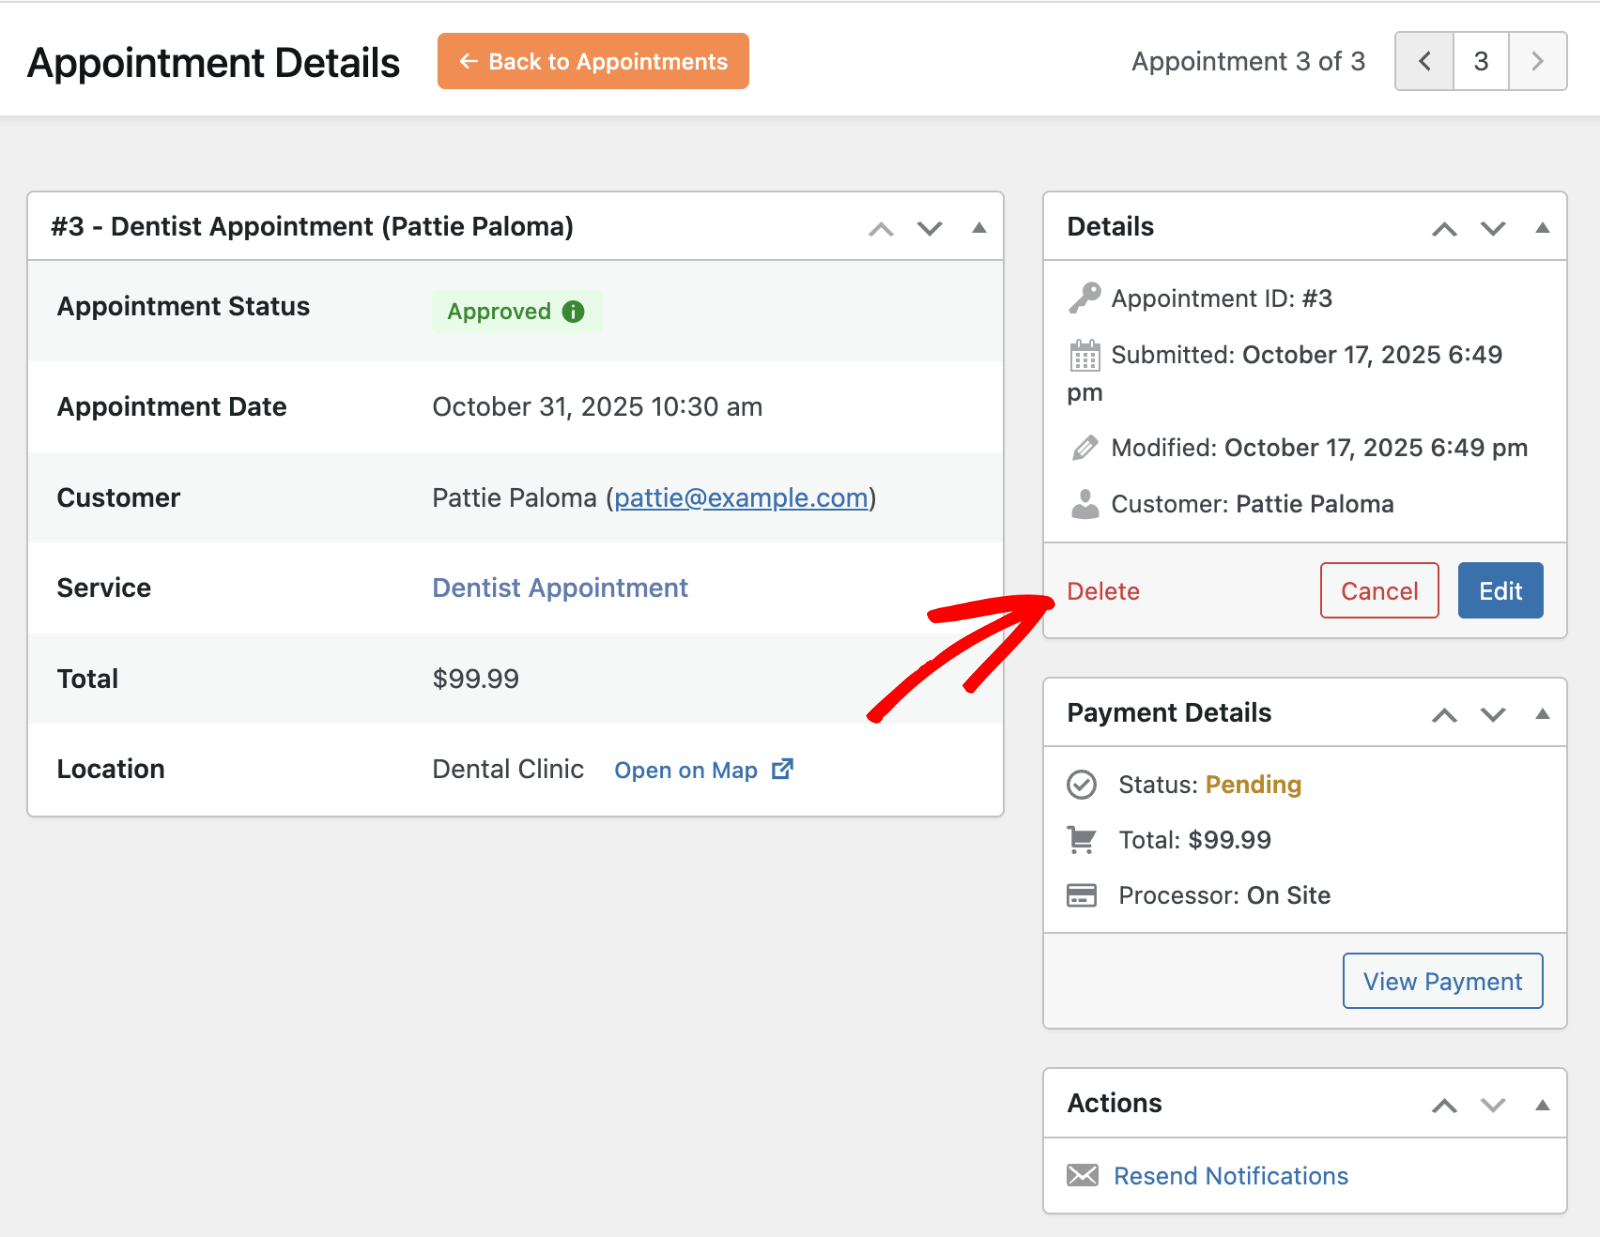
Deleting Appointments
To permanently remove an appointment, open its detail view and click the Delete button. This action cannot be undone, so proceed carefully.
In the overlay that appears, click Yes to confirm your action. Once deleted, the record will be permanently removed from your site.

Note: You won’t be able to recover the booking after permanently deleting it from your site.
Resending Notifications
In the Actions section, you’ll be able to manually resend notification emails to customers. From the appointment detail page, click the option for the email notification you’d like to resend.

Below we’ve highlighted the available options:
- Resend Confirmation Notification
- Resend Reminder Notification
- Resend Update Notification
When you click on any of the email notification options, an overlay will appear. Go ahead and click Yes to resend the notification.

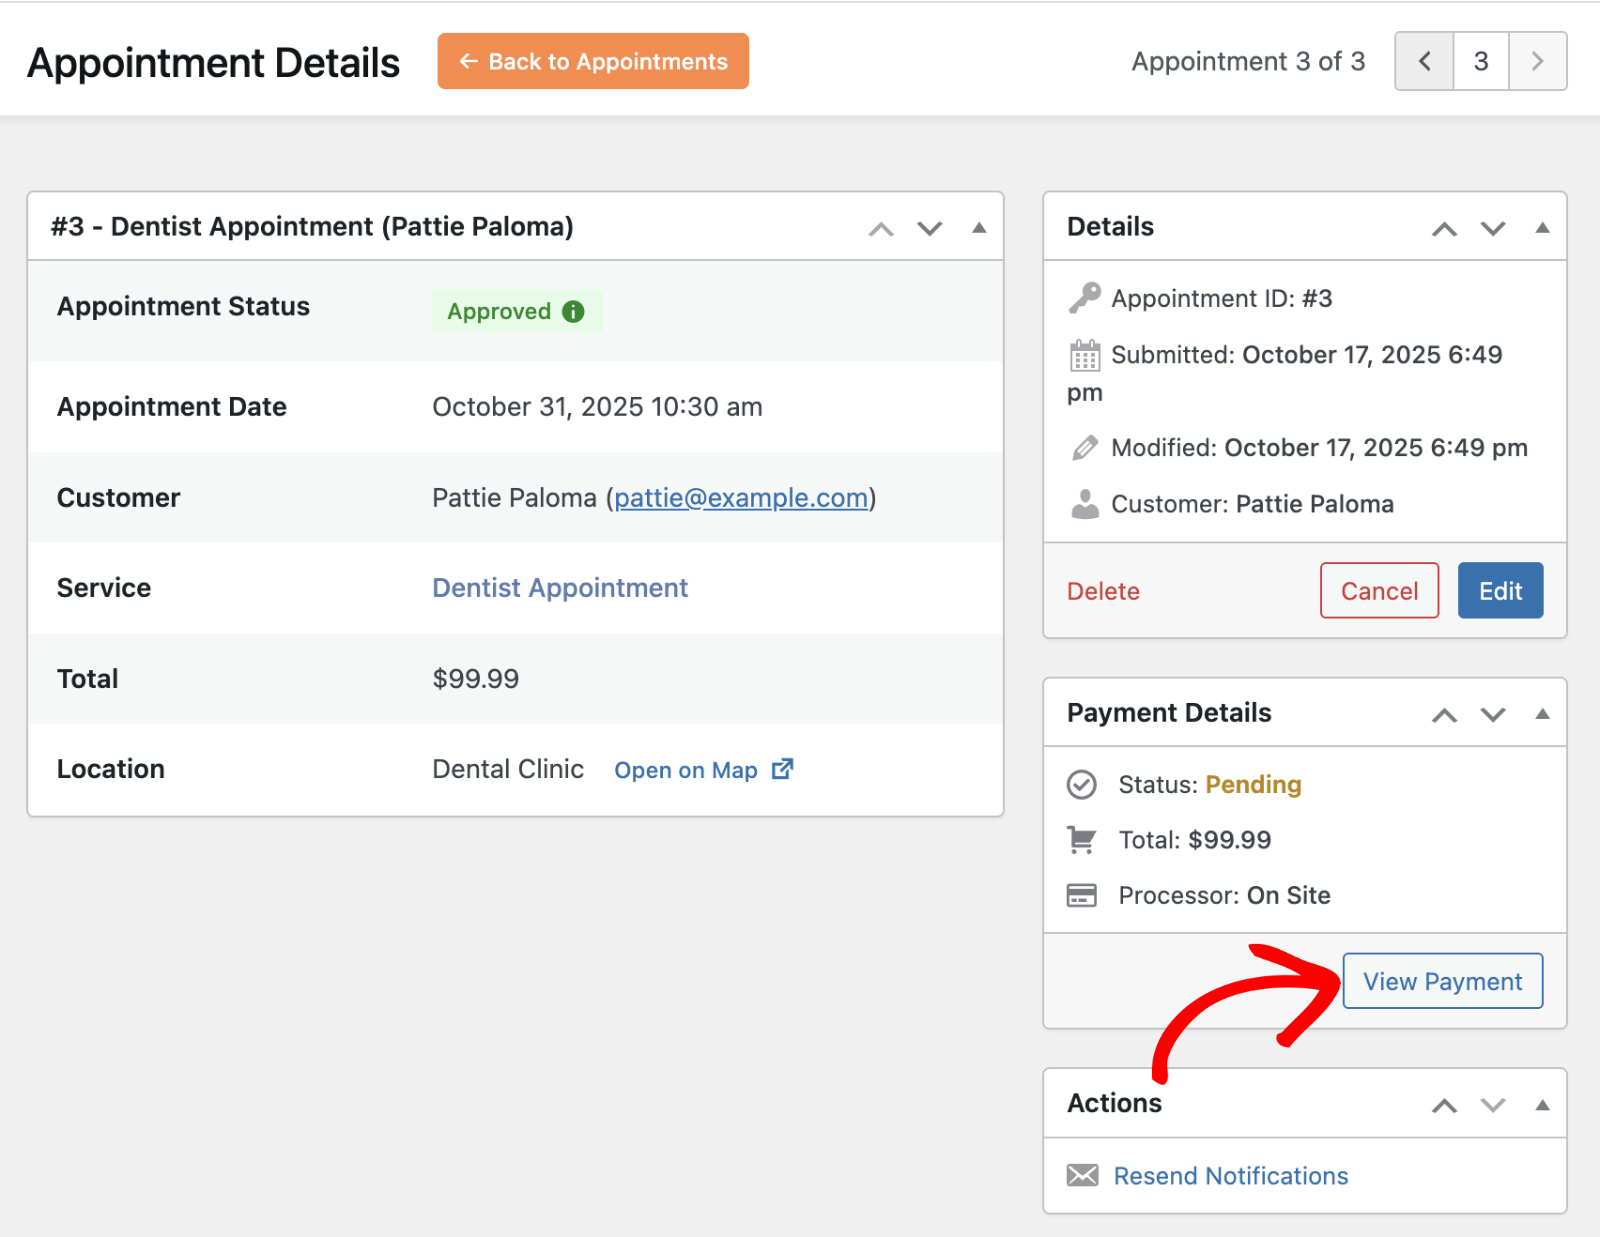
Viewing and Updating Payment Details
For appointments that include payments, you can view or update the payment details from the appointment screen. Click the View Payment button to open the associated payment record.
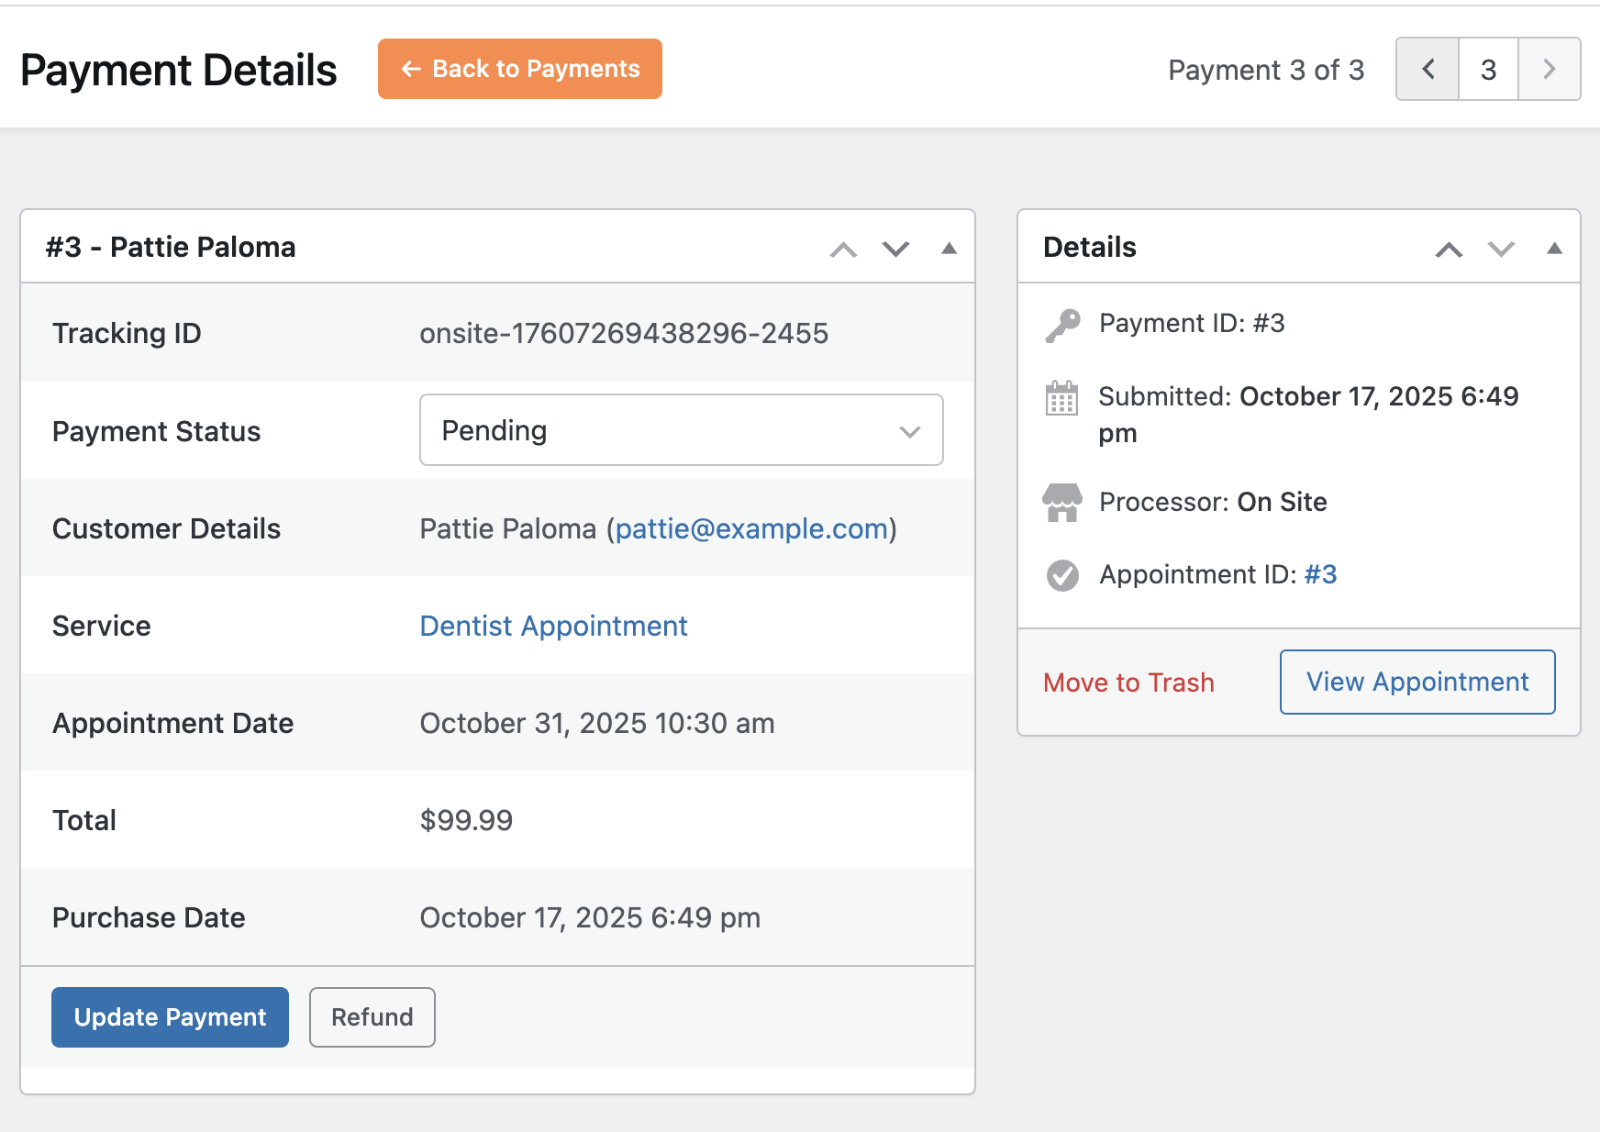
In the Payment Details view, you can check the customer, service, appointment date, and total payment amount. You can also update the payment status or issue a refund if needed.
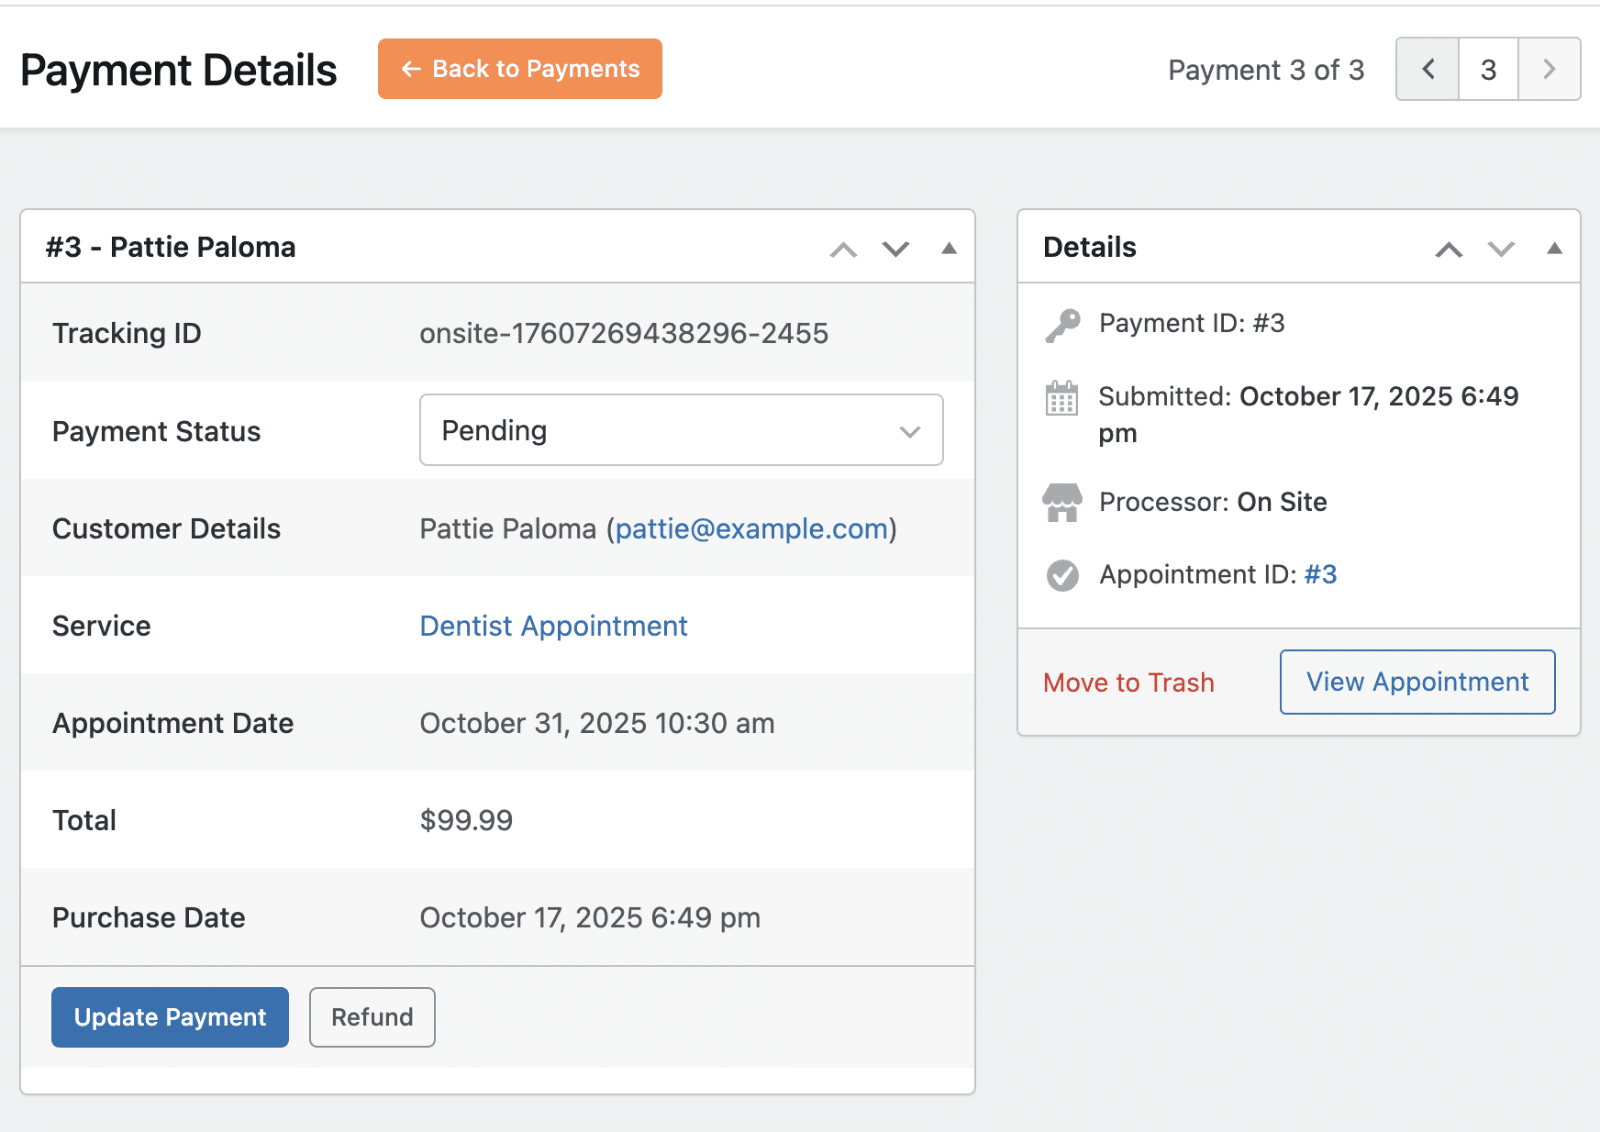
To change the payment status, select a new option from the Payment Status dropdown.

After that, click Update Payment to save your changes.
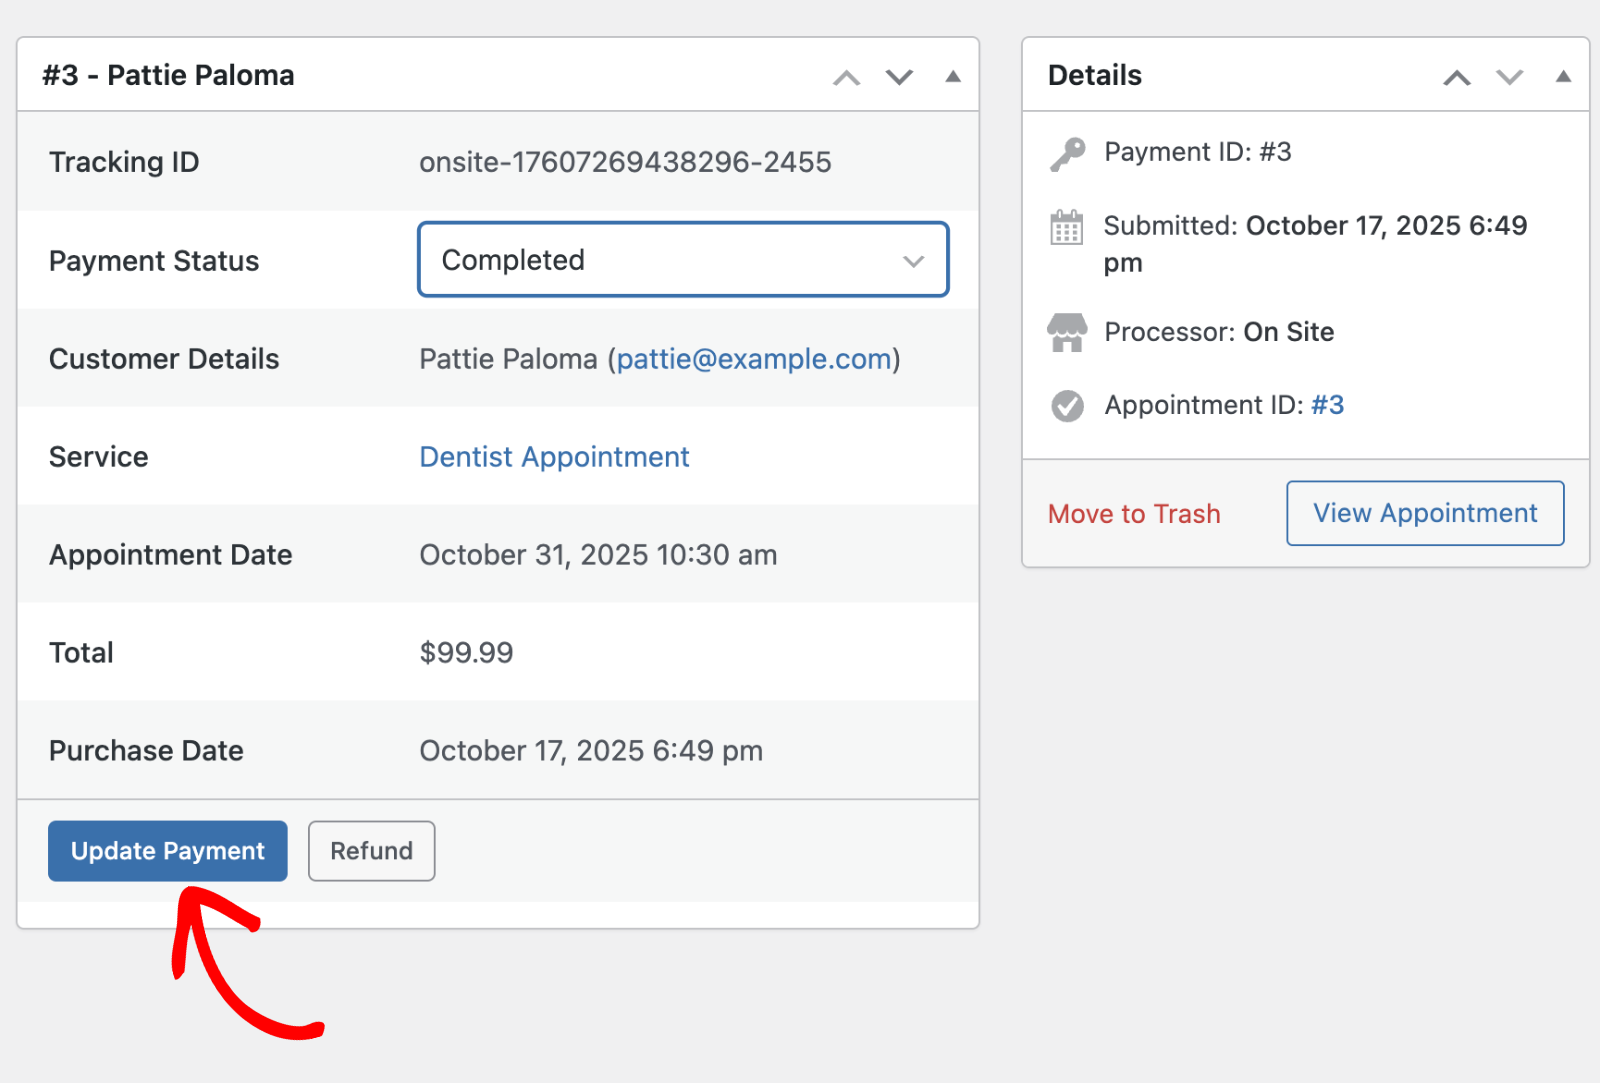
Once updated, the payment status will reflect in both the Payments and Appointments sections of the dashboard.
That’s it! Now you know how to manage appointments in Sugar Calendar Bookings.
Next, would you like to customize booking availability on your site? See our guide to learn how.