Are you ready to switch from Amelia to Sugar Calendar Bookings? Our migration tool makes it easy to transfer all your booking data, including services, locations, customers, and appointments, in just a few clicks.
In this guide, we’ll walk you through migrating your data from Amelia to Sugar Calendar Bookings.
In This Article
Before getting started, make sure Sugar Calendar Bookings is installed and activated on your site. You’ll also need Amelia installed with active booking data.
Accessing the Migration Tool
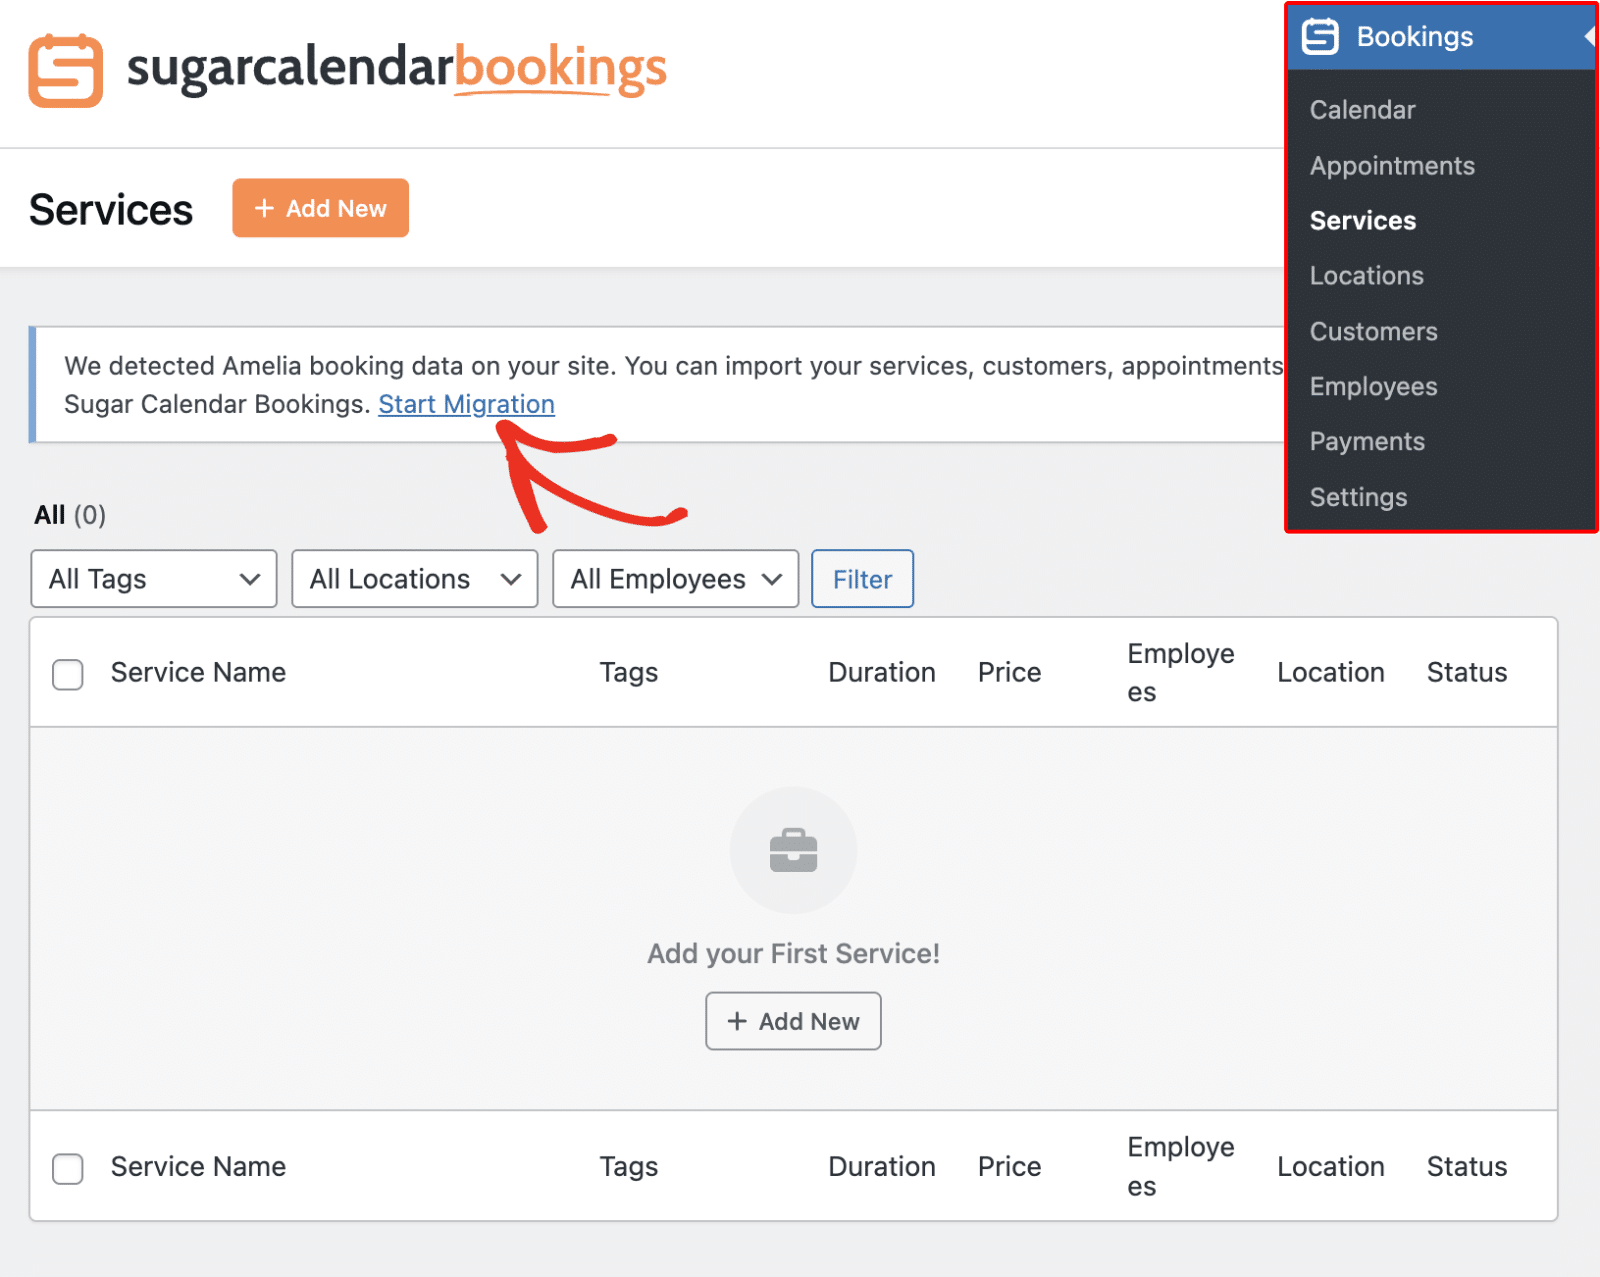
Sugar Calendar Bookings automatically detects if you have Amelia installed on your site.
When that happens, you’ll see a notification banner prompting you to migrate your data. Click Start Migration to start importing your data from Amelia.
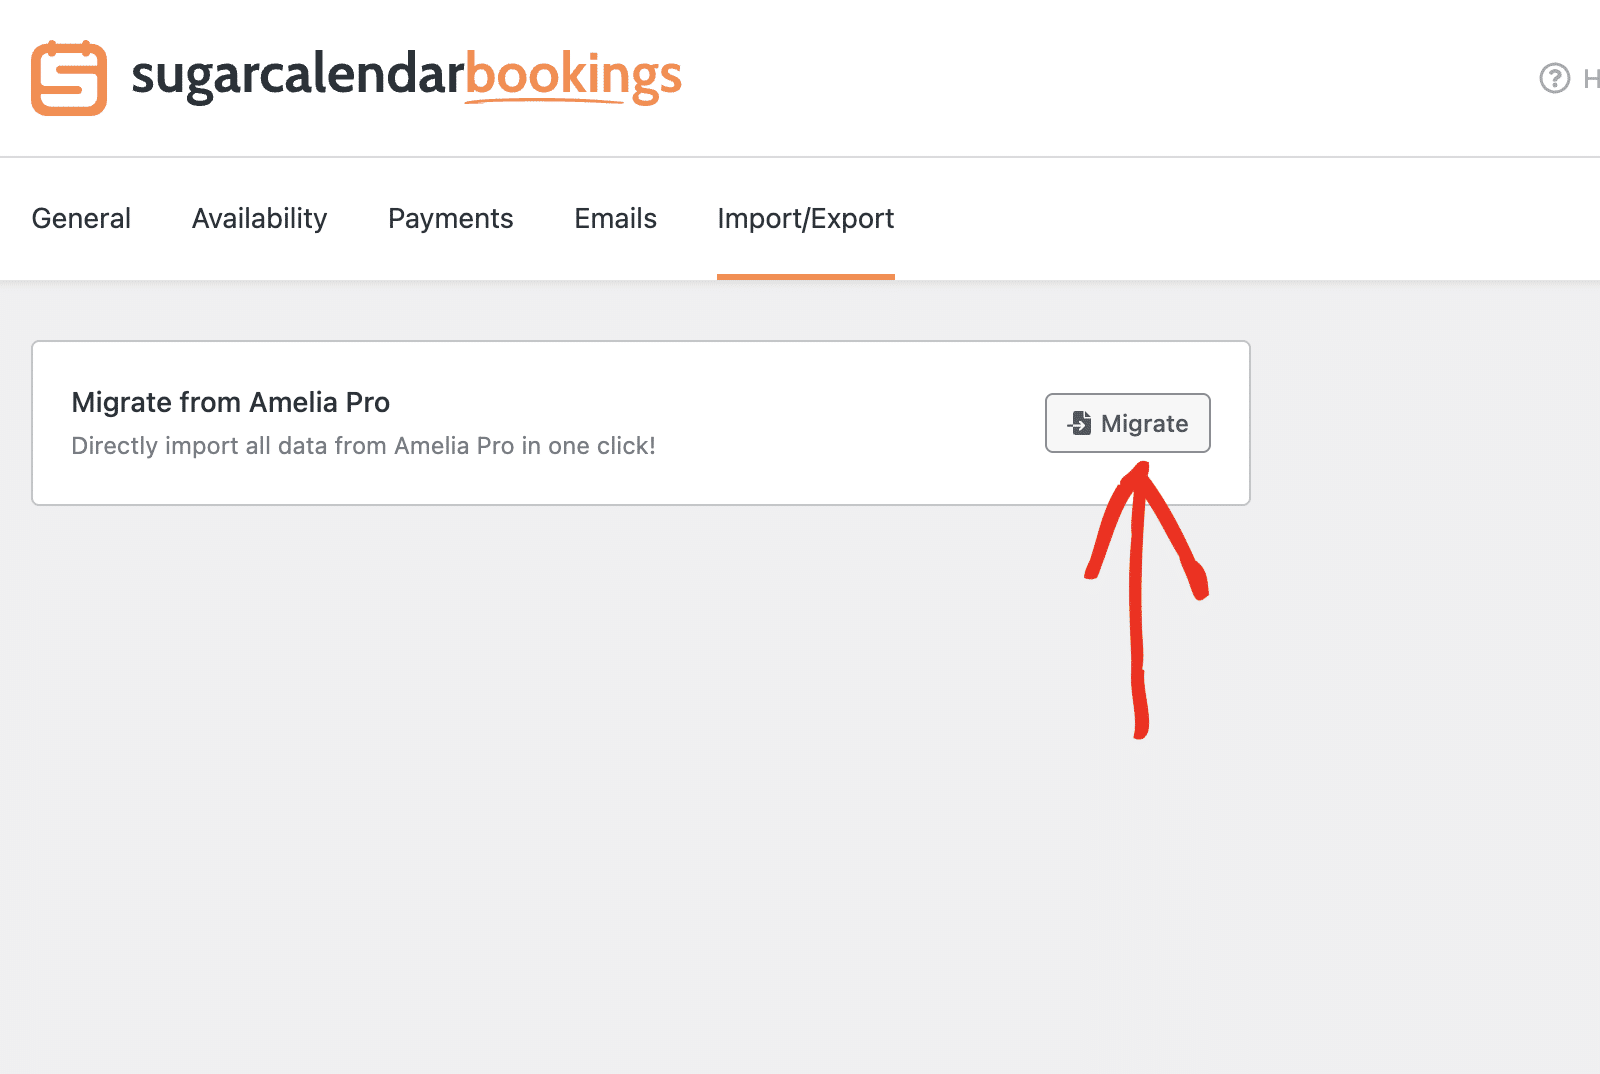
Alternatively, you can access the migration tool from the plugin’s settings page. To do so, navigate to Bookings » Settings in your WordPress admin area. Click on the Import/Export tab to view the migration options.

Here, you’ll see the option to directly import all data from Amelia Pro. Click the Migrate button to begin the process.
Starting the Migration Process
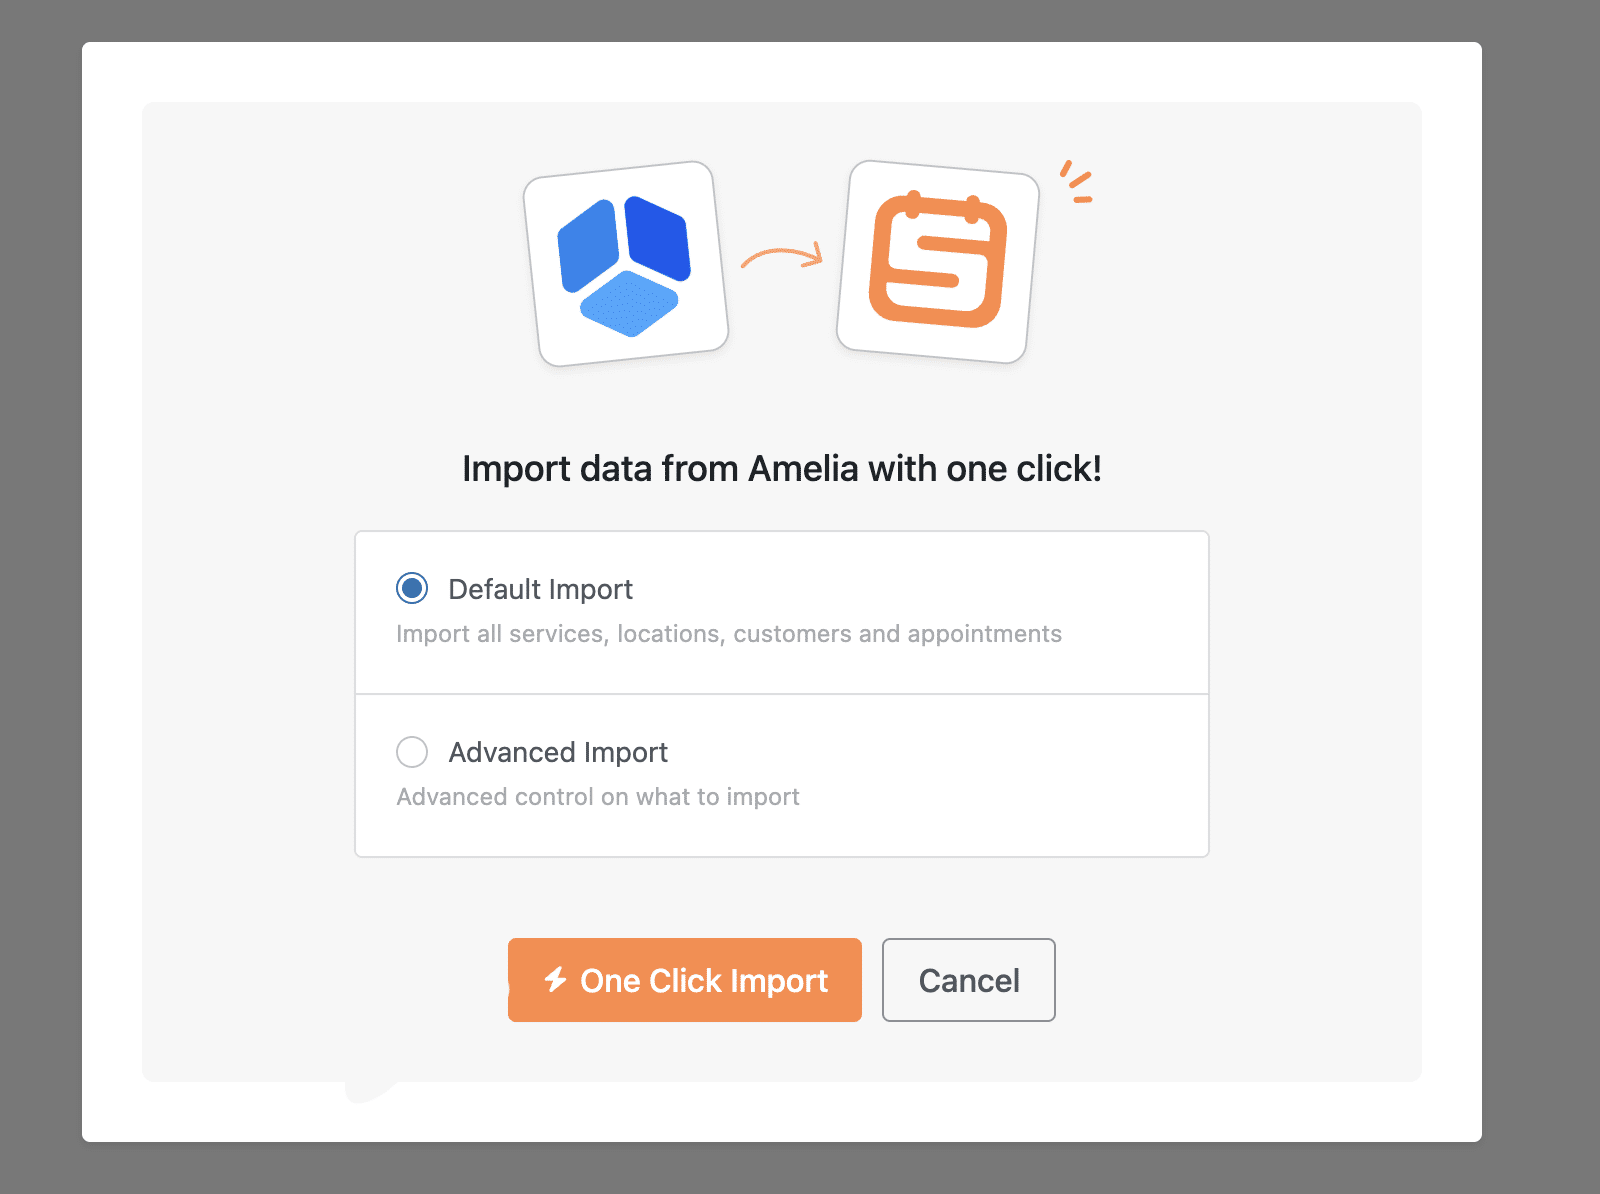
After clicking the Migrate button, a modal window will appear with two import options: Default Import and Advanced Import.
Note: If you’re migrating from Amelia Pro to Sugar Calendar Bookings Lite, some features that require a paid license won’t be migrated. You’ll need to upgrade to a paid license to access them.
Default Import
The Default Import option imports all services, locations, customers, and appointments from Amelia in one click. This is the quickest way to migrate your data, and we recommend it for most users.
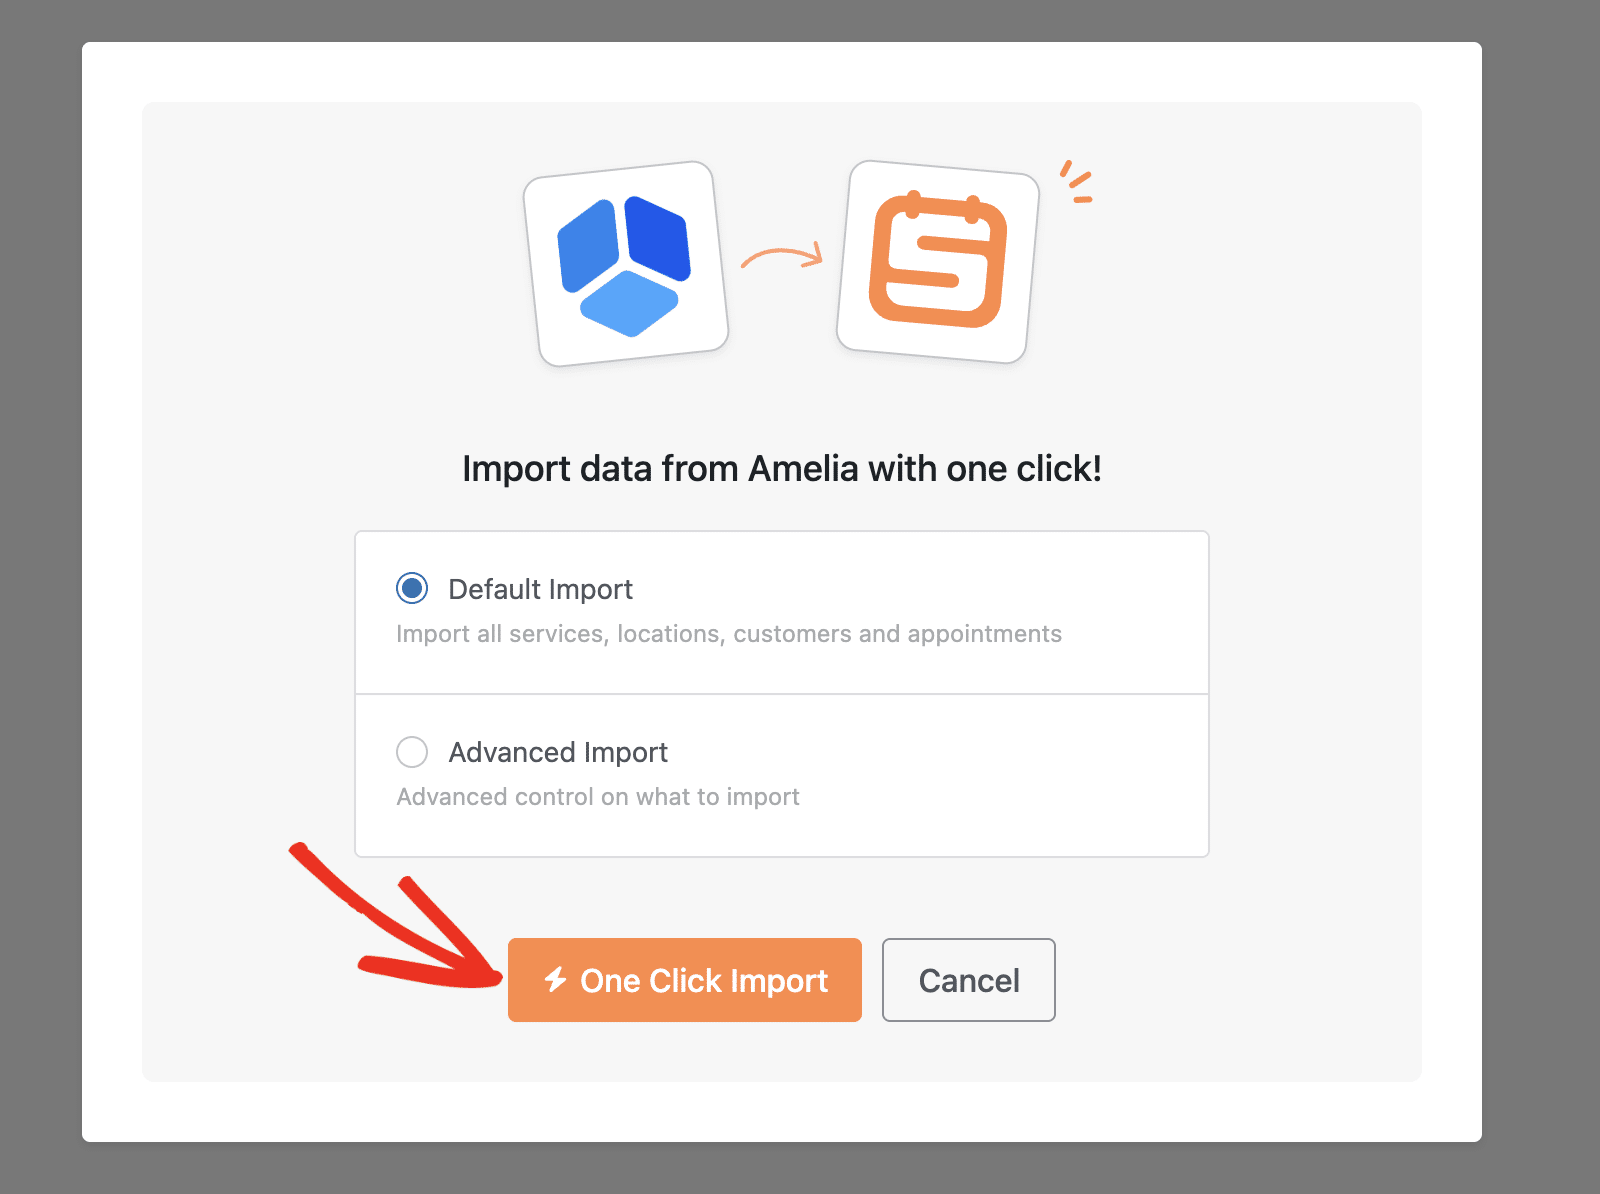
To use Default Import, select the Default Import radio button and click One Click Import.
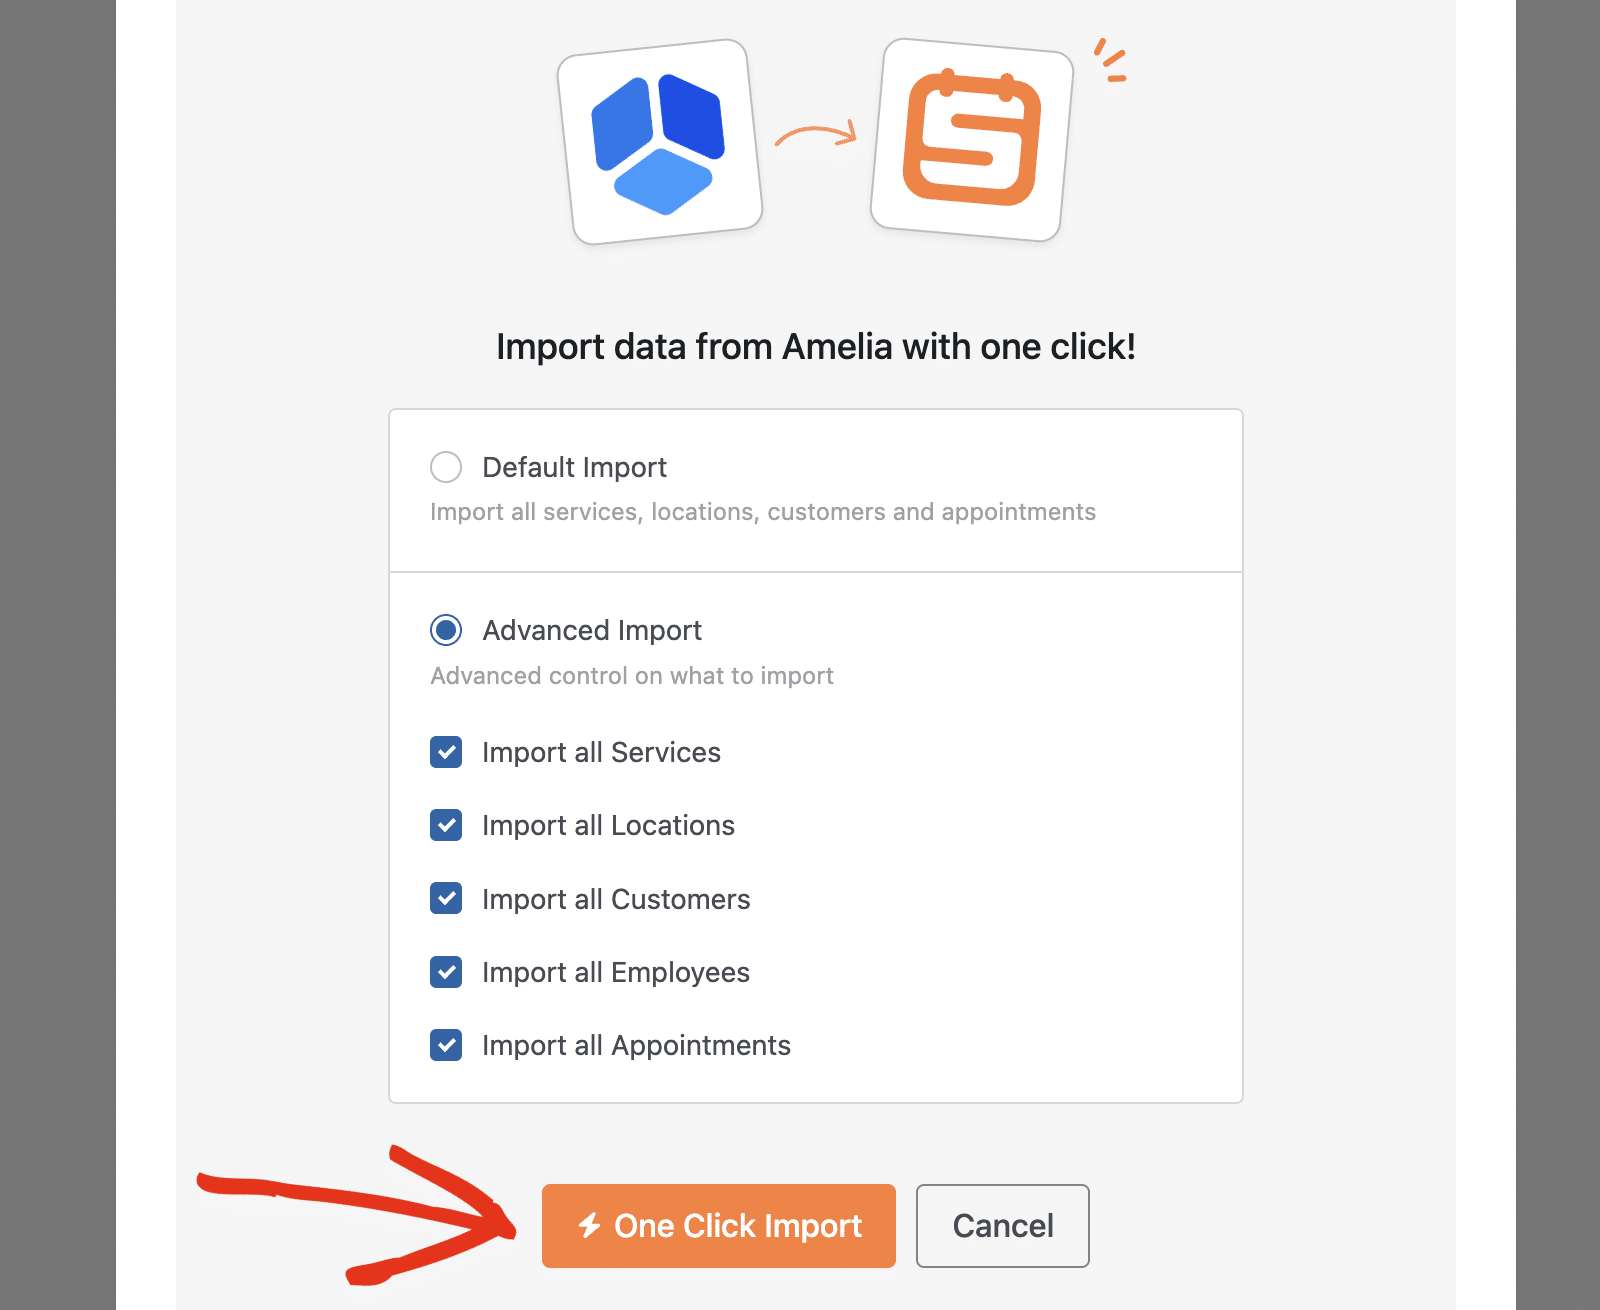
Advanced Import
The Advanced Import option gives you more control over what data to migrate. You can selectively choose which types of data to import by checking or unchecking the available options.
To use Advanced Import, select the Advanced Import radio button. You’ll see checkboxes for the following data types:
- Import all Services
- Import all Locations
- Import all Customers
- Import all Employees
- Import all Appointments
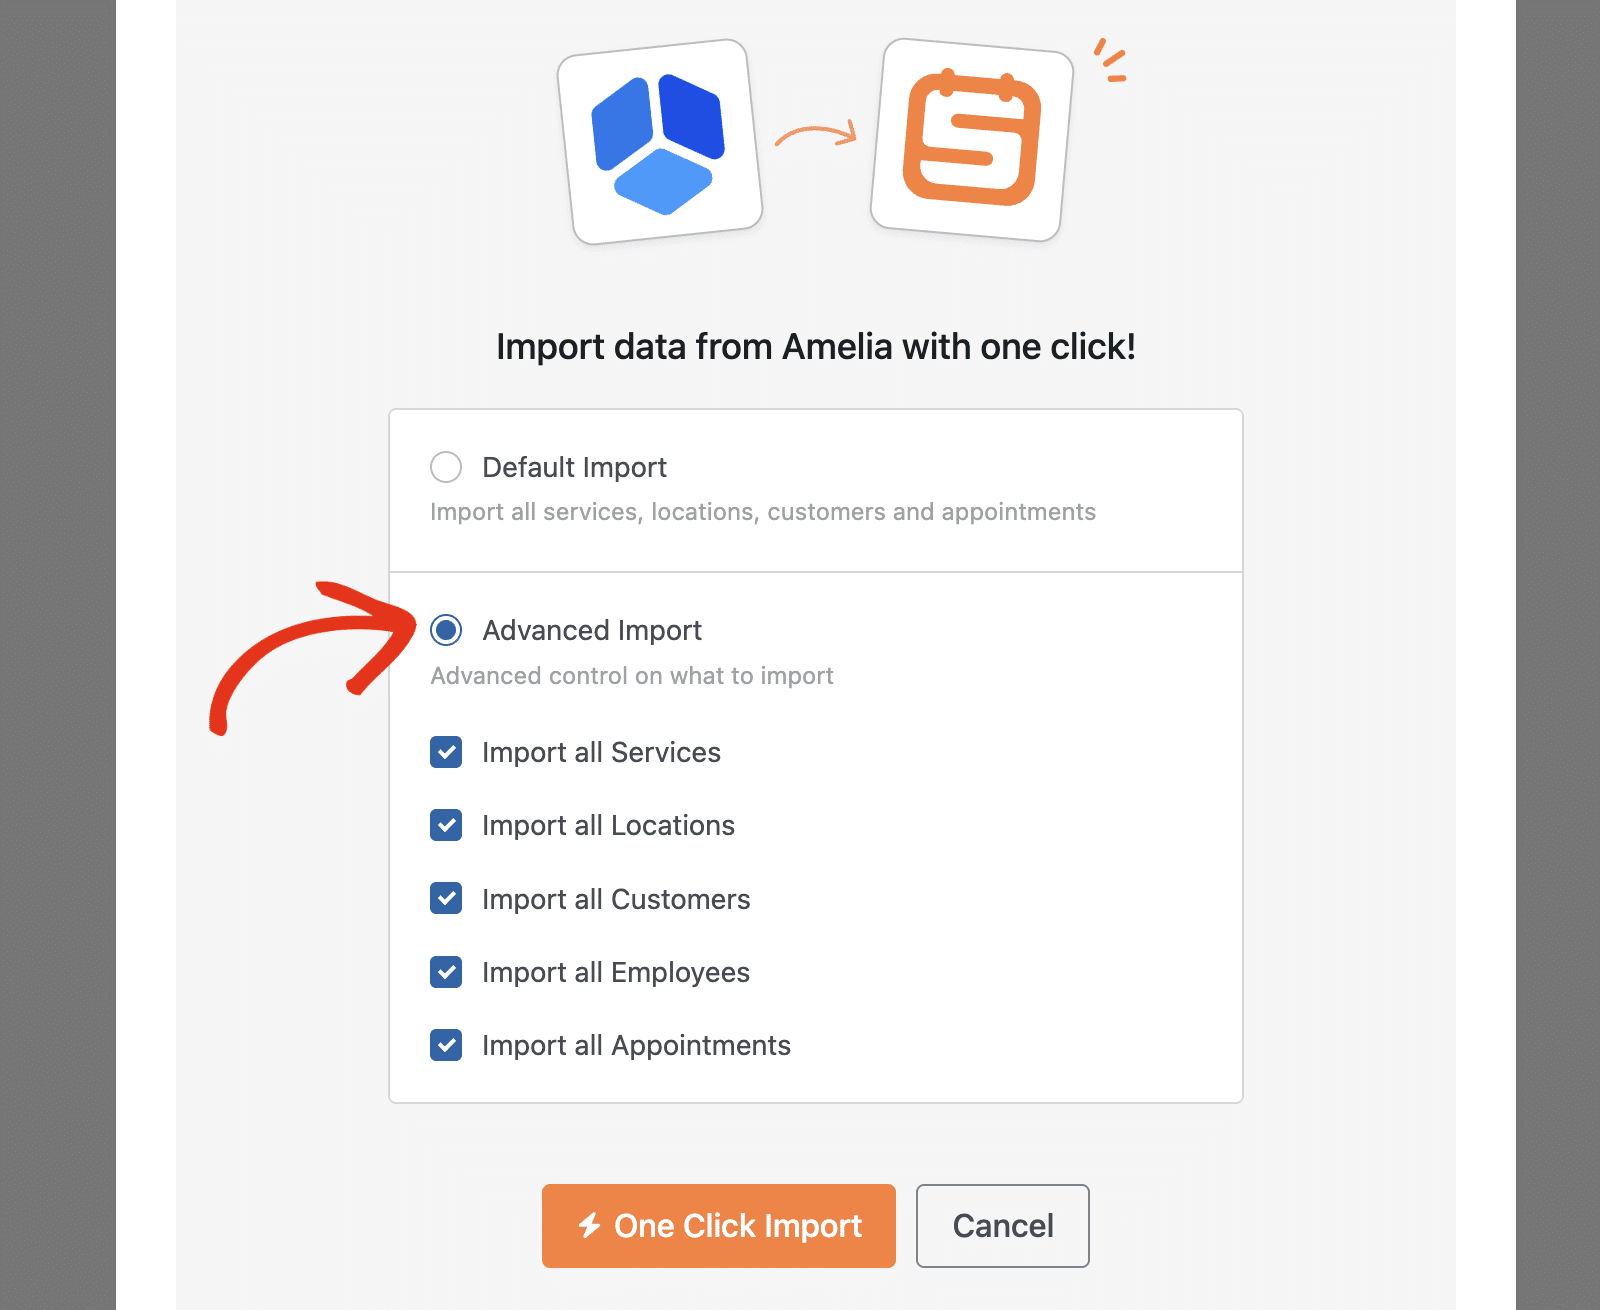
Check the boxes for the data types you want to import. Once you’ve made your selections, click the One Click Import button to begin the migration.
Note: If you choose to import appointments, the migration tool will automatically import related data such as services, locations, and customers that are associated with those appointments.
Understanding the Migration Report
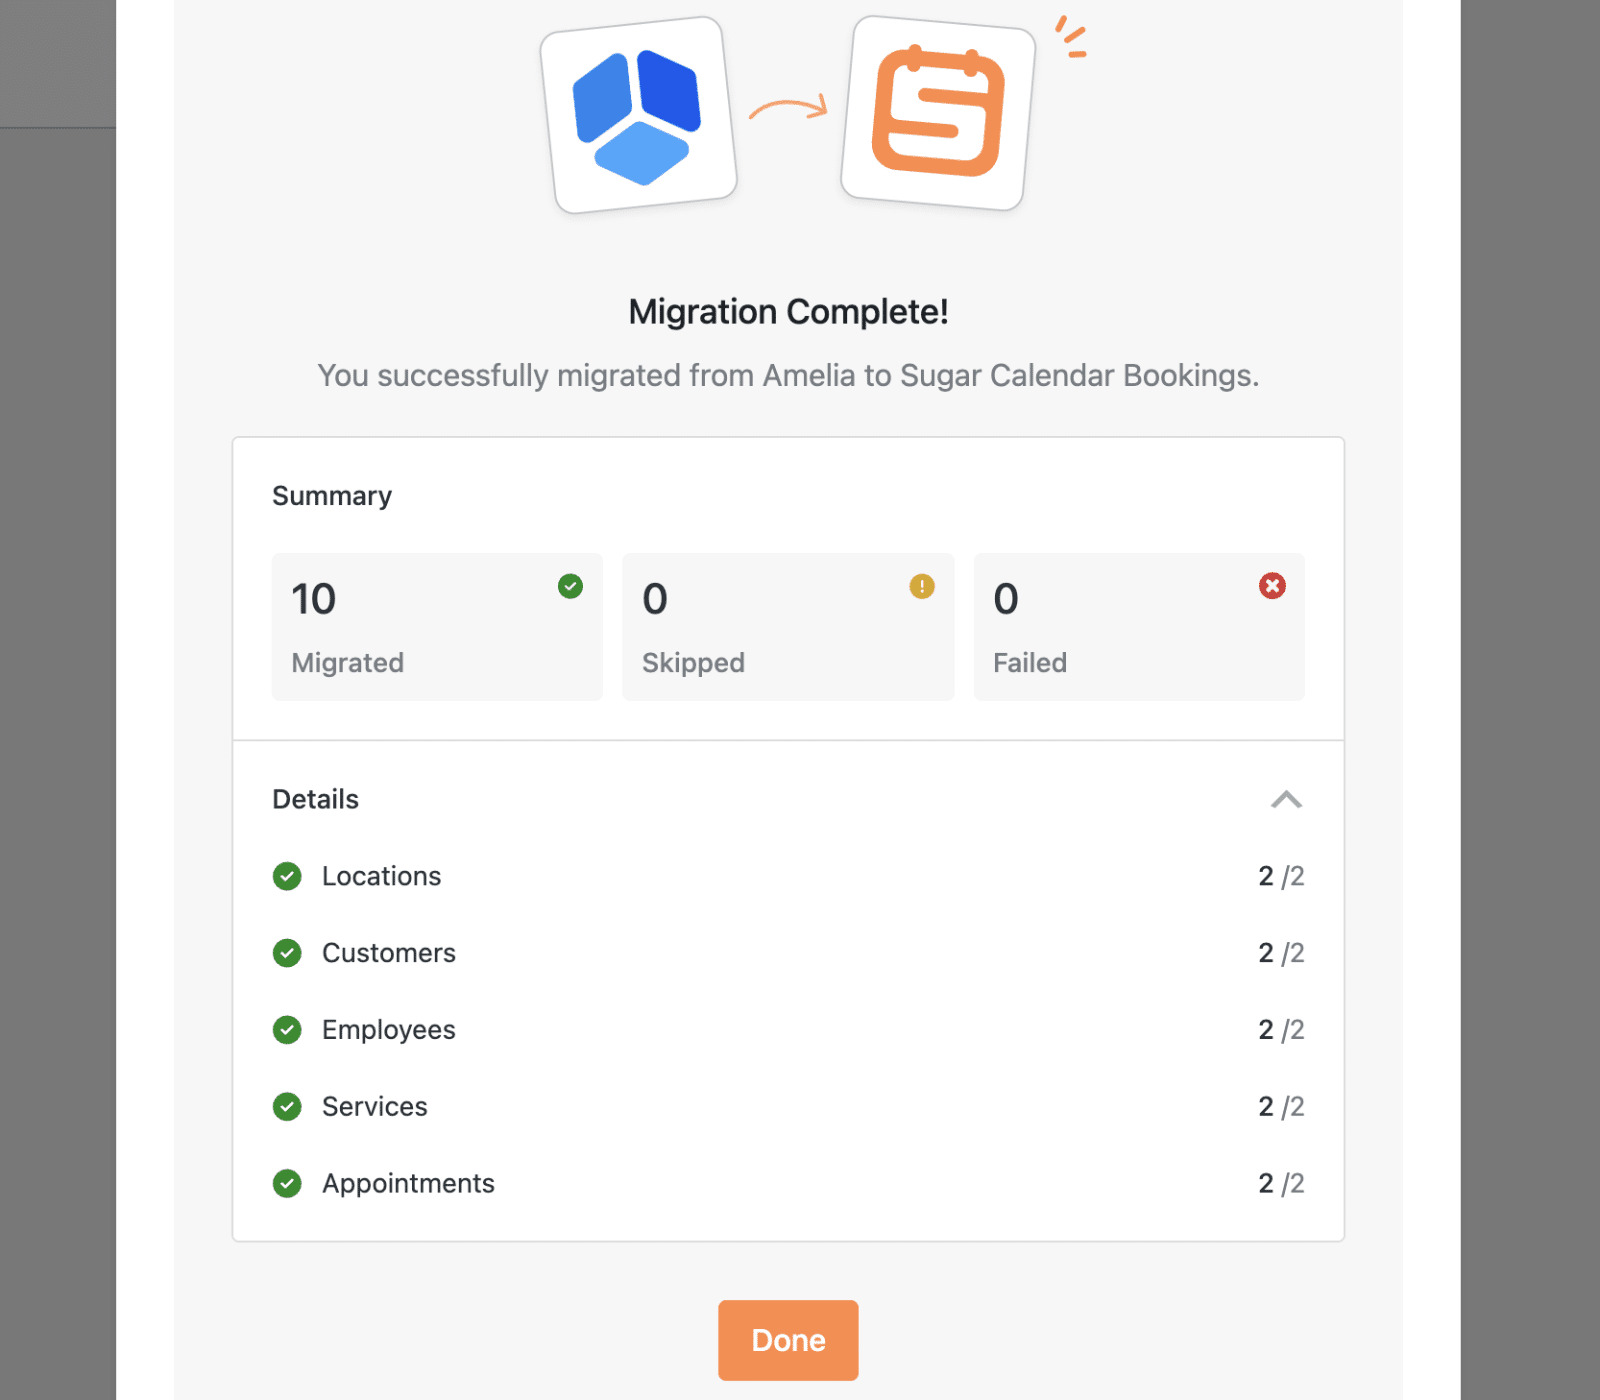
Once the migration completes, you’ll see a detailed report showing the results of the import process.
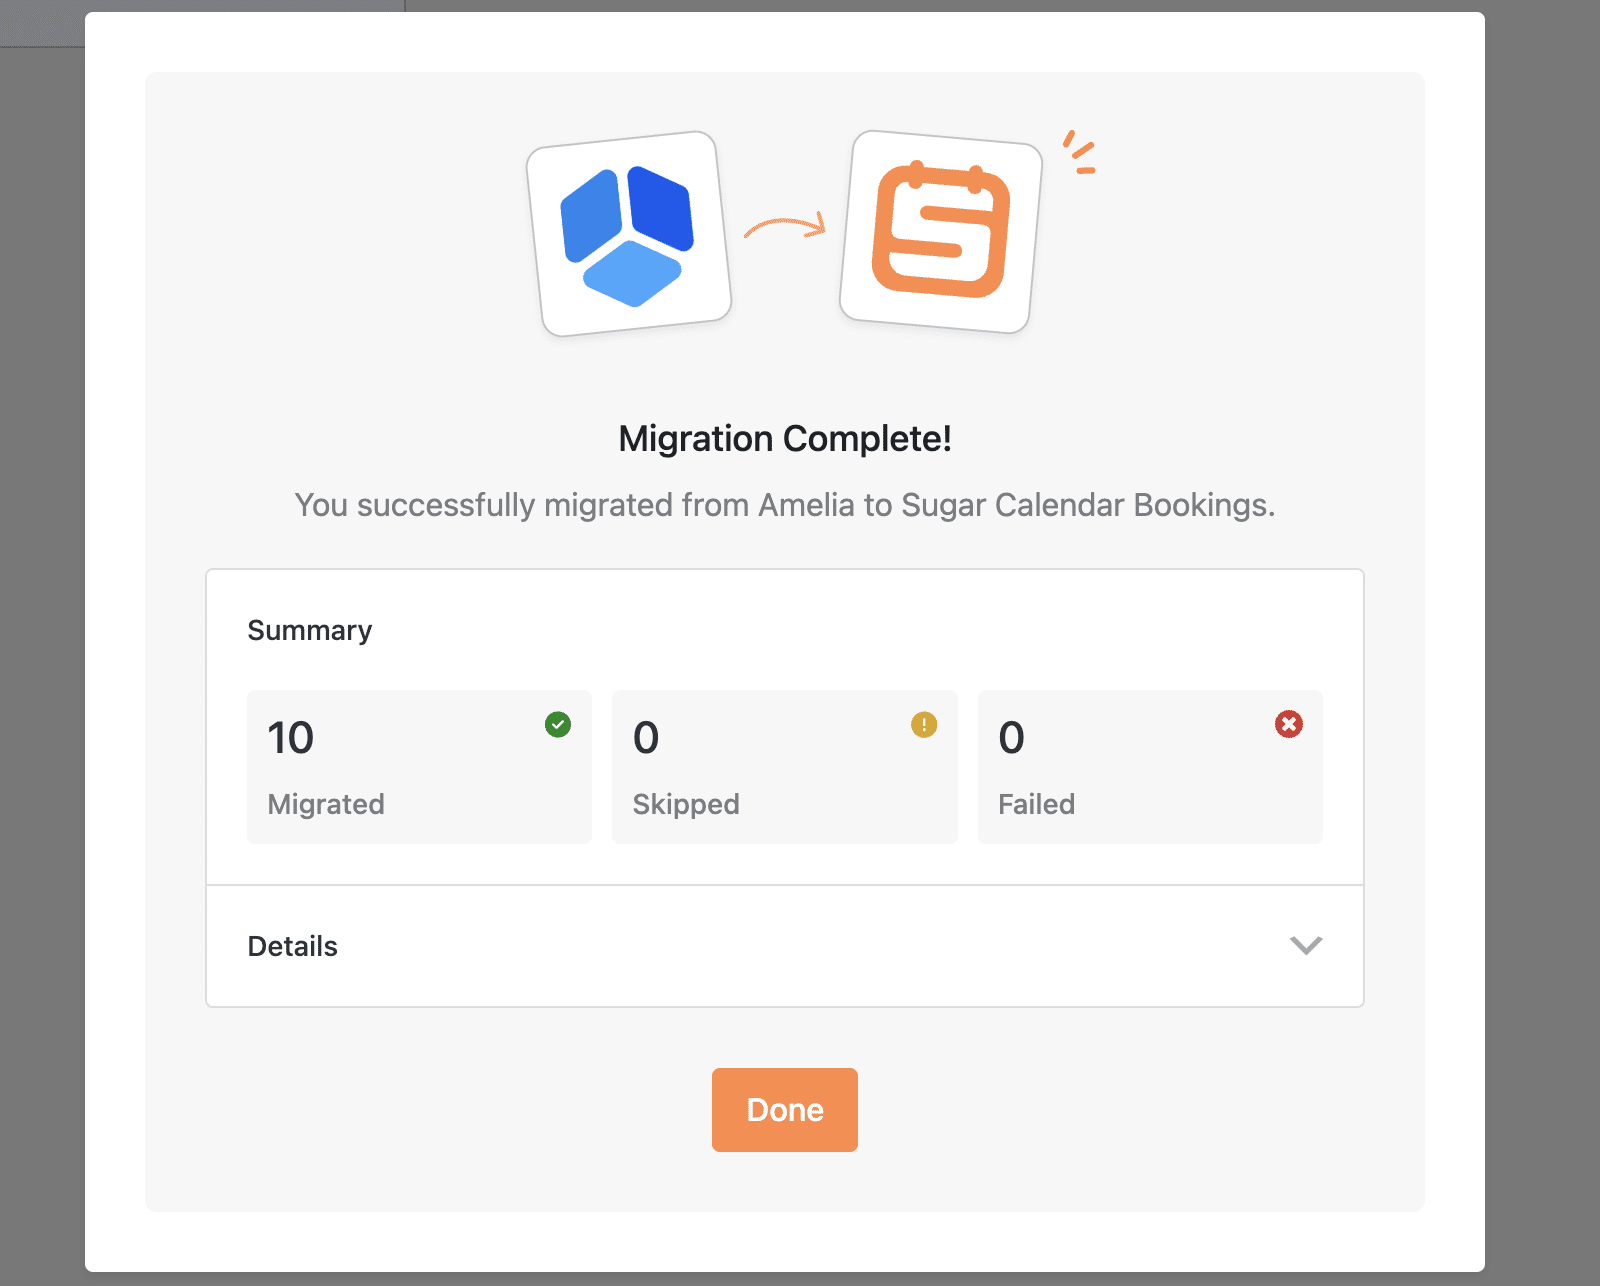
Migration Summary
The Summary section displays an overview of the migration results with three key metrics:
- Migrated: The number of items successfully imported (indicated with a green checkmark icon)
- Skipped: The number of items that were skipped during import (indicated with a yellow warning icon)
- Failed: The number of items that failed to import (indicated with a red error icon)
Reviewing Migration Details
Click on the Details section to expand and view a breakdown of what was migrated for each data type.
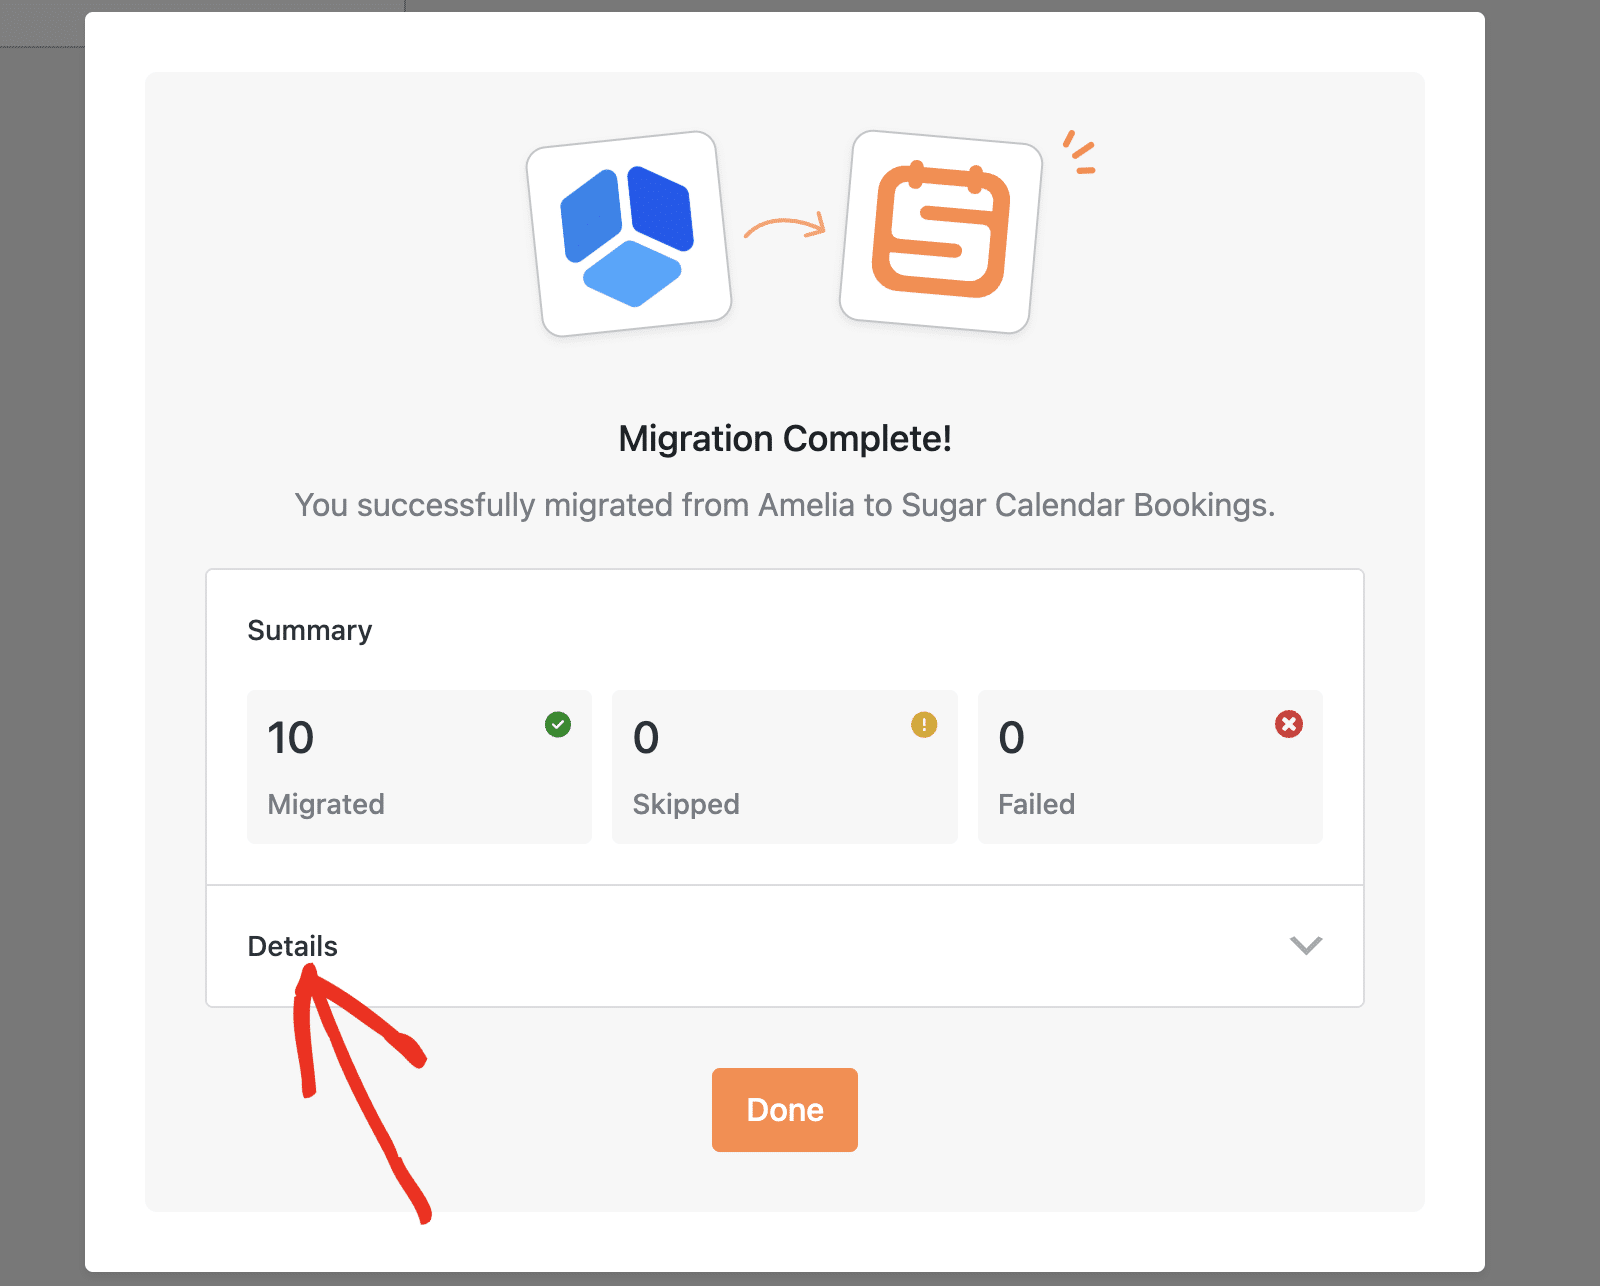
The detailed view shows the migration status for:
- Locations: Shows how many locations were successfully migrated
- Customers: Displays the number of customer records imported
- Employees: Shows staff member migration status
- Services: Indicates how many services were transferred
- Appointments: Shows the number of appointments migrated
Each item shows the number successfully migrated alongside the total number available. For example, “2/2” means 2 out of 2 items were successfully migrated.
Note: Some items may not be imported due to differences in compatibility between Amelia and Sugar Calendar Bookings. Check the detailed report to see which items were skipped or failed, and refer to our documentation for assistance.
You should get a success notification after importing all data.
Downloading the Migration Report
If some data wasn’t migrated, you can download a detailed migration report for your records. This report contains comprehensive information about what was migrated, skipped, or failed during the import process.
To download the report, click the Download Migration Report link in the Summary section.
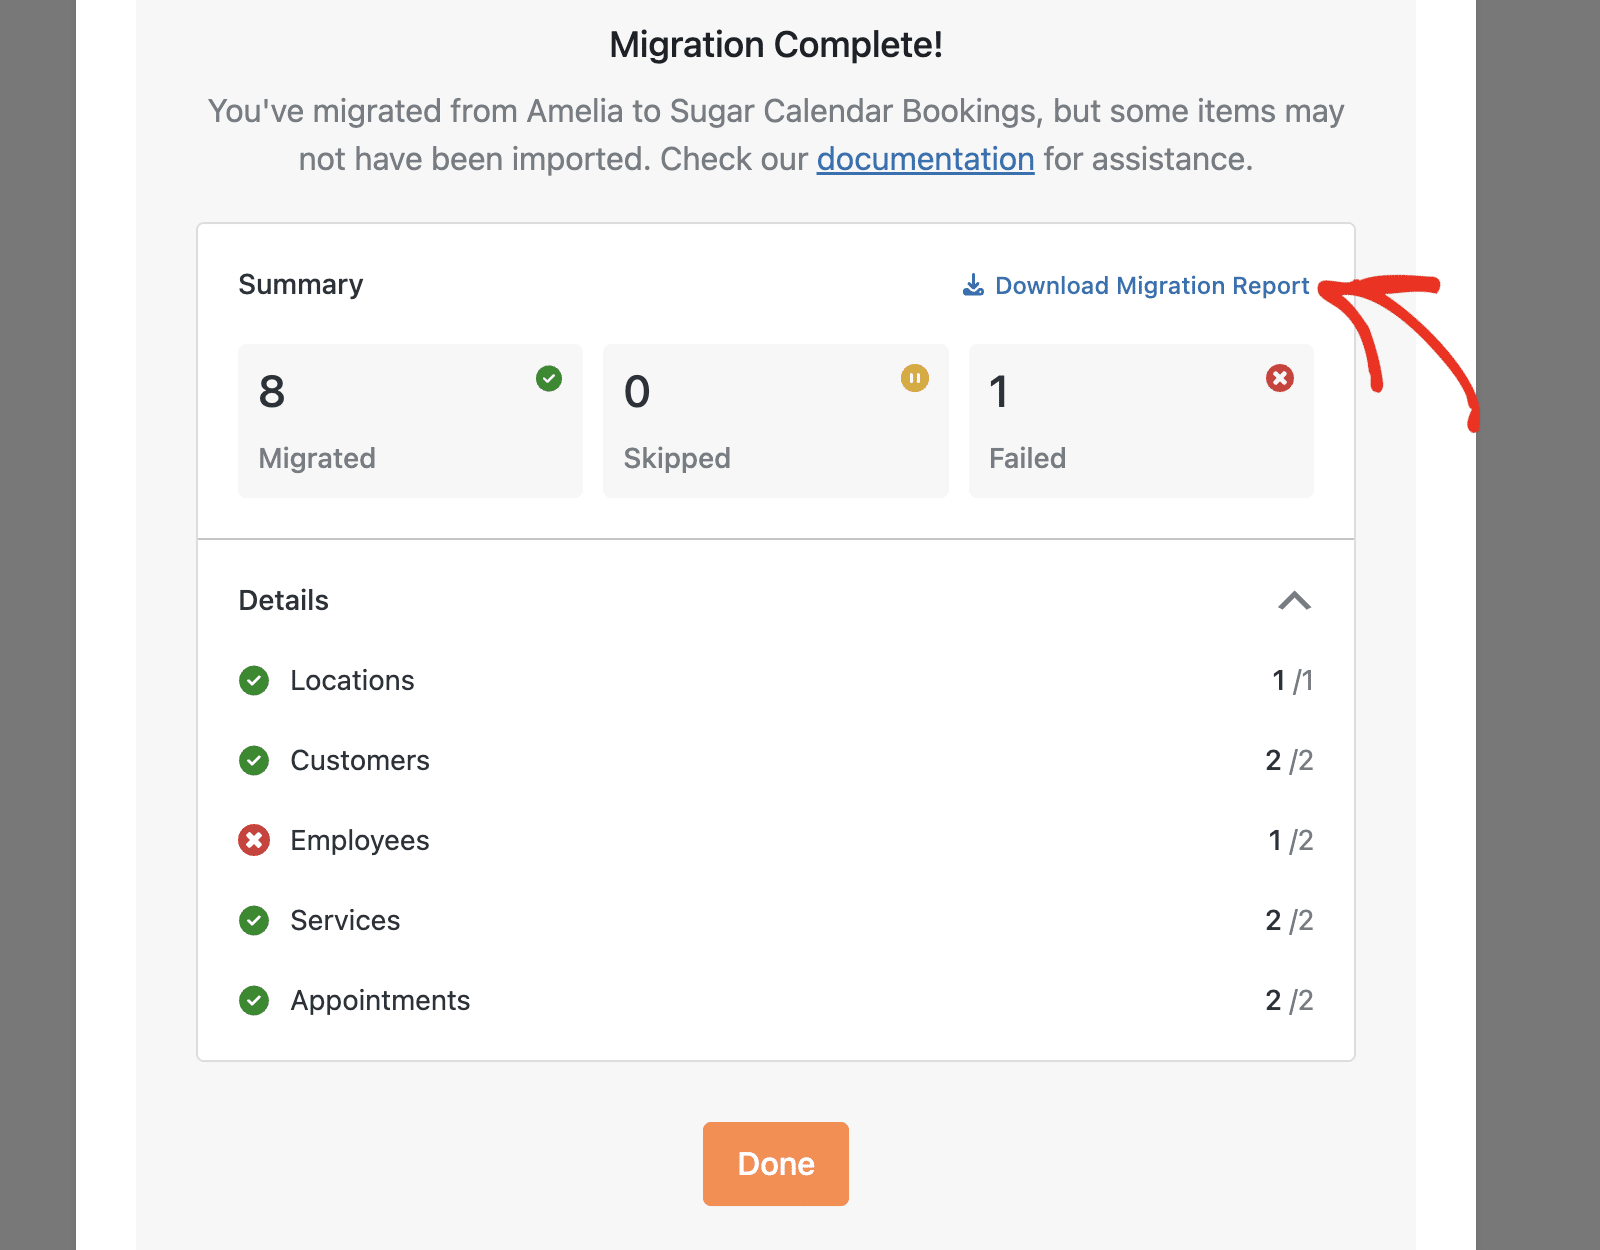
This will download the report to your device as a CSV file. You can review the migration logs or share them with support if needed.
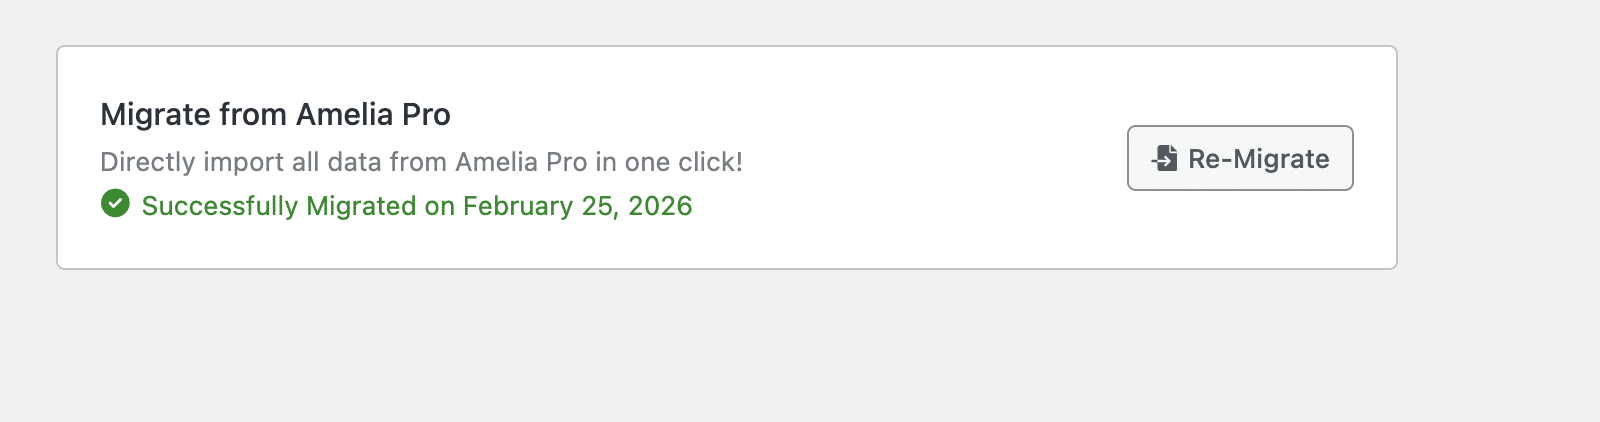
Re-Running the Migration
If some items failed to migrate or if you need to import additional data added after the initial migration, you can re-run the migration process.
After a migration completes, the Import/Export settings page will display the migration status, including any failures. To start a new migration, click the Re-Migrate button.
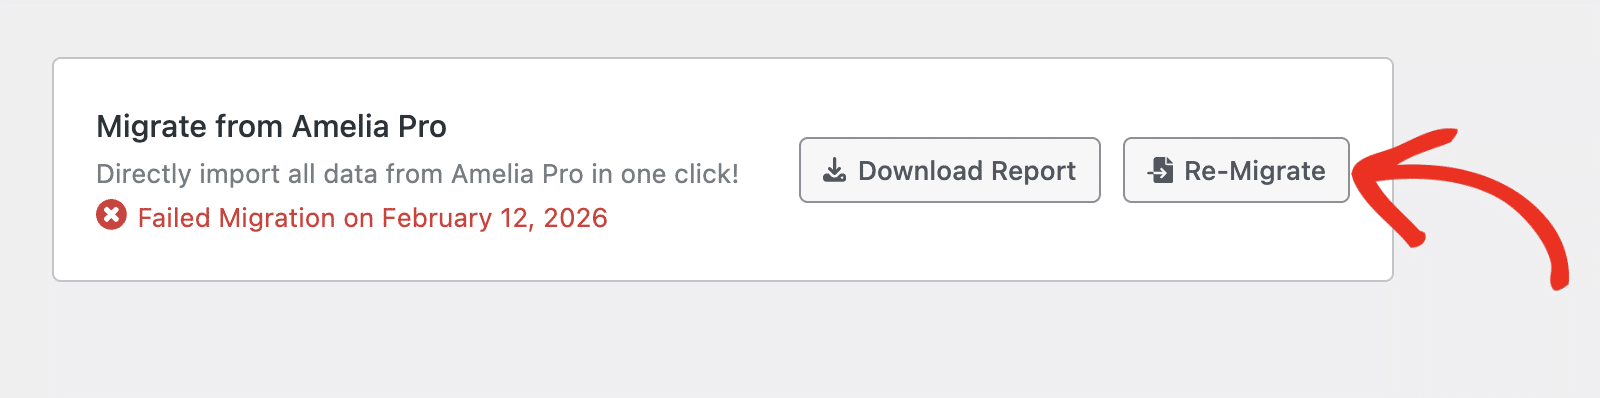
You can also download the previous migration report by clicking the Download Report button before re-running the migration.
Note: Re-running the migration will not create duplicate entries. The migration tool is smart enough to detect existing data and will only import new or updated items.
Frequently Asked Questions
Below, we’ve addressed some of the most common questions about migrating from Amelia to Sugar Calendar Bookings.
Will the migration delete my Amelia data?
No, the migration process only copies data from Amelia to Sugar Calendar Bookings. Your original Amelia data remains intact.
What happens if some items fail to migrate?
If items fail to migrate, they will be listed in the migration report with details about why they failed. You can review the report and contact our support team for assistance with resolving any migration issues.
Can I migrate data multiple times?
Yes, you can run the migration process multiple times. The migration tool doesn’t duplicate entries, so you can safely re-migrate data if needed.
Do I need to keep Amelia installed after migration?
After verifying that all your data has been migrated successfully, you can deactivate and uninstall Amelia if you no longer need it. However, we recommend keeping it installed until you’re completely satisfied with the migration results.
What data types does the migration tool support?
That’s it! You’ve successfully migrated your booking data from Amelia to Sugar Calendar Bookings.
Next, would you like to learn how to manage your imported services? Check out our guide on creating and managing services to customize your bookable offerings.