Would you like to configure your settings in the Sugar Calendar Bookings plugin? The Bookings plugin includes settings that help you specify global configurations for booking-related activities on your site.
This guide will walk you through the available options in Sugar Calendar Bookings settings page.
In This Article
Before you begin, make sure the Sugar Calendar Bookings plugin is installed and activated on your website.
Accessing Settings
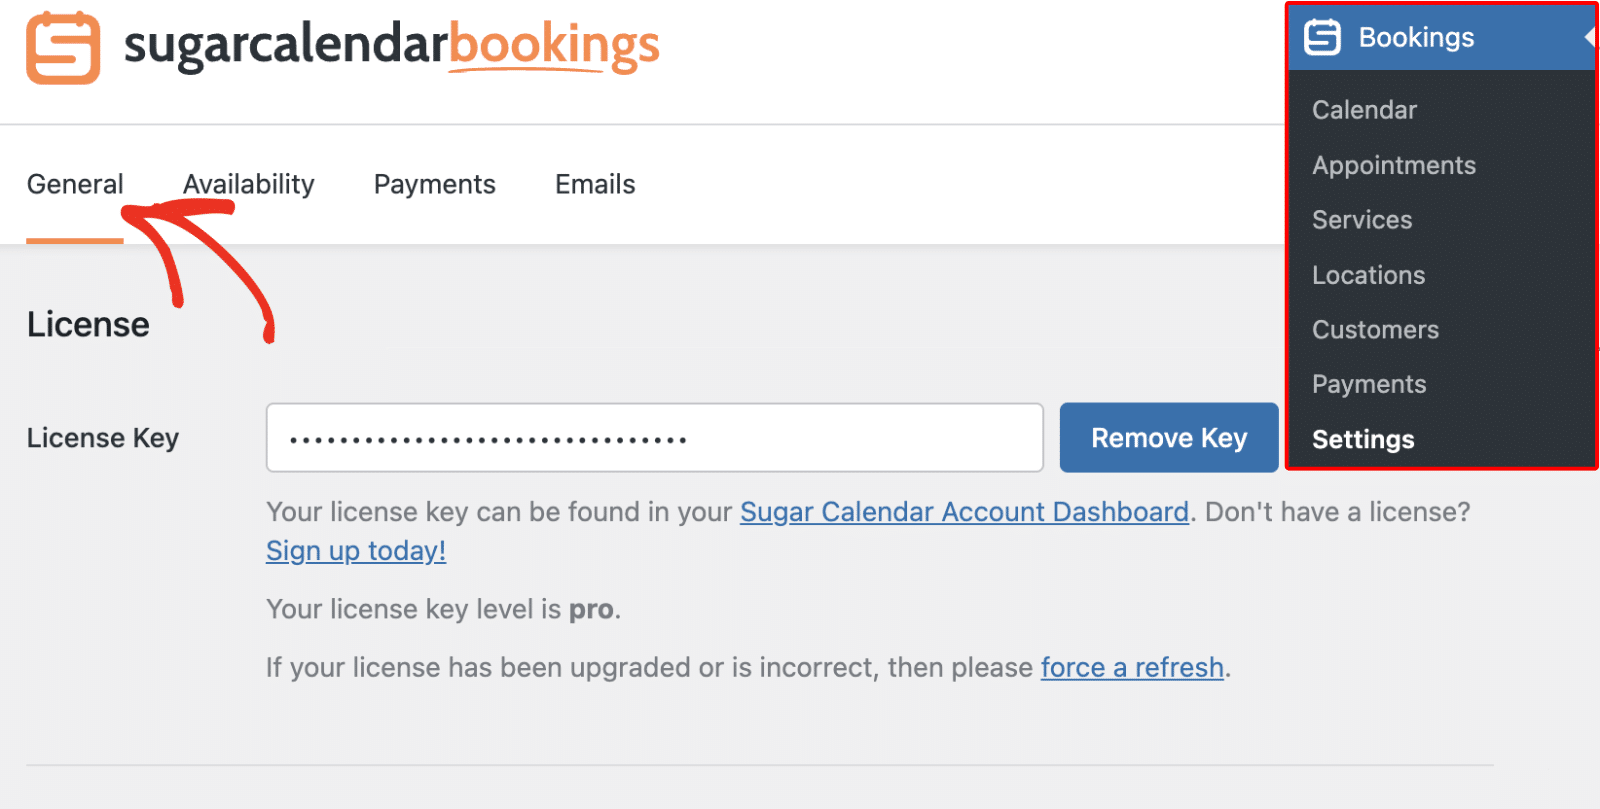
To open your settings, go to Bookings » Settings from your WordPress dashboard. You’ll see several tabs at the top of the screen, including General, Availability, Payments, and Emails.
Below, we’ll cover the available settings.
General Settings
The General tab is where you’ll manage your plugin license and other core options.
License
The license key section is where you’ll verify your plugin to access premium features and automatic updates. You’ll need to enter your license key in the License Key field to activate your plugin.
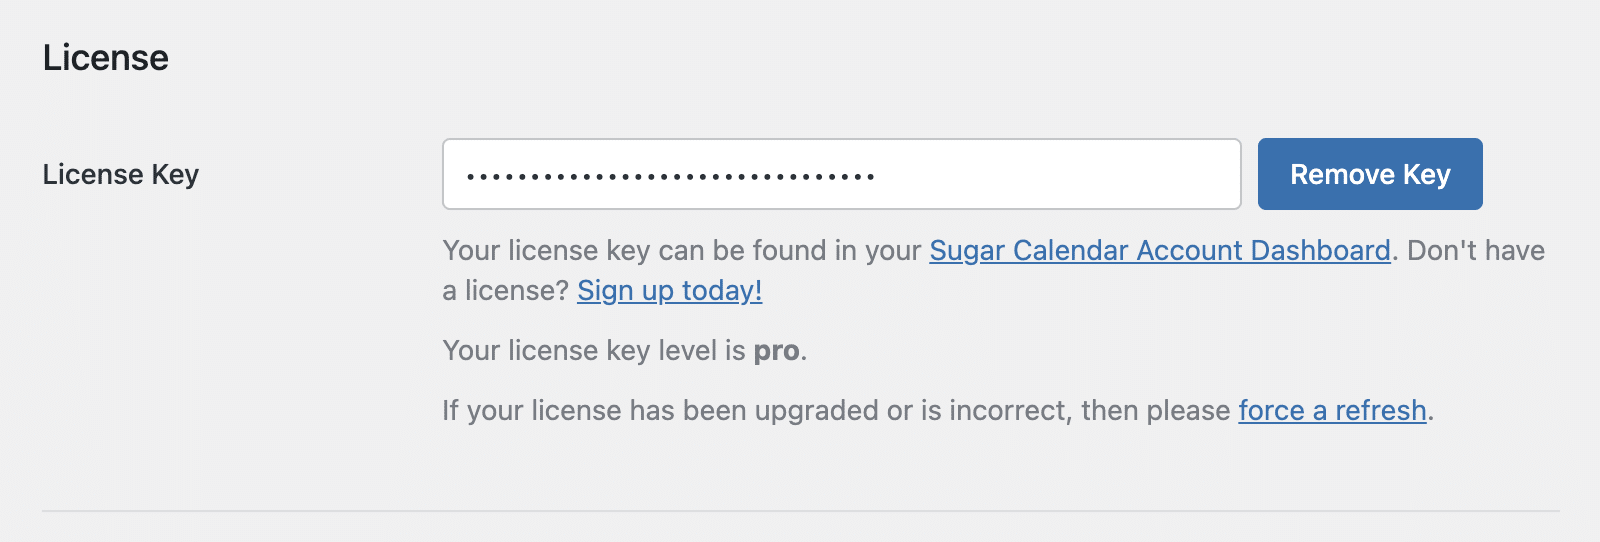
Your license information will display below, confirming whether your key is active and what level of access (Pro or Basic) you have.
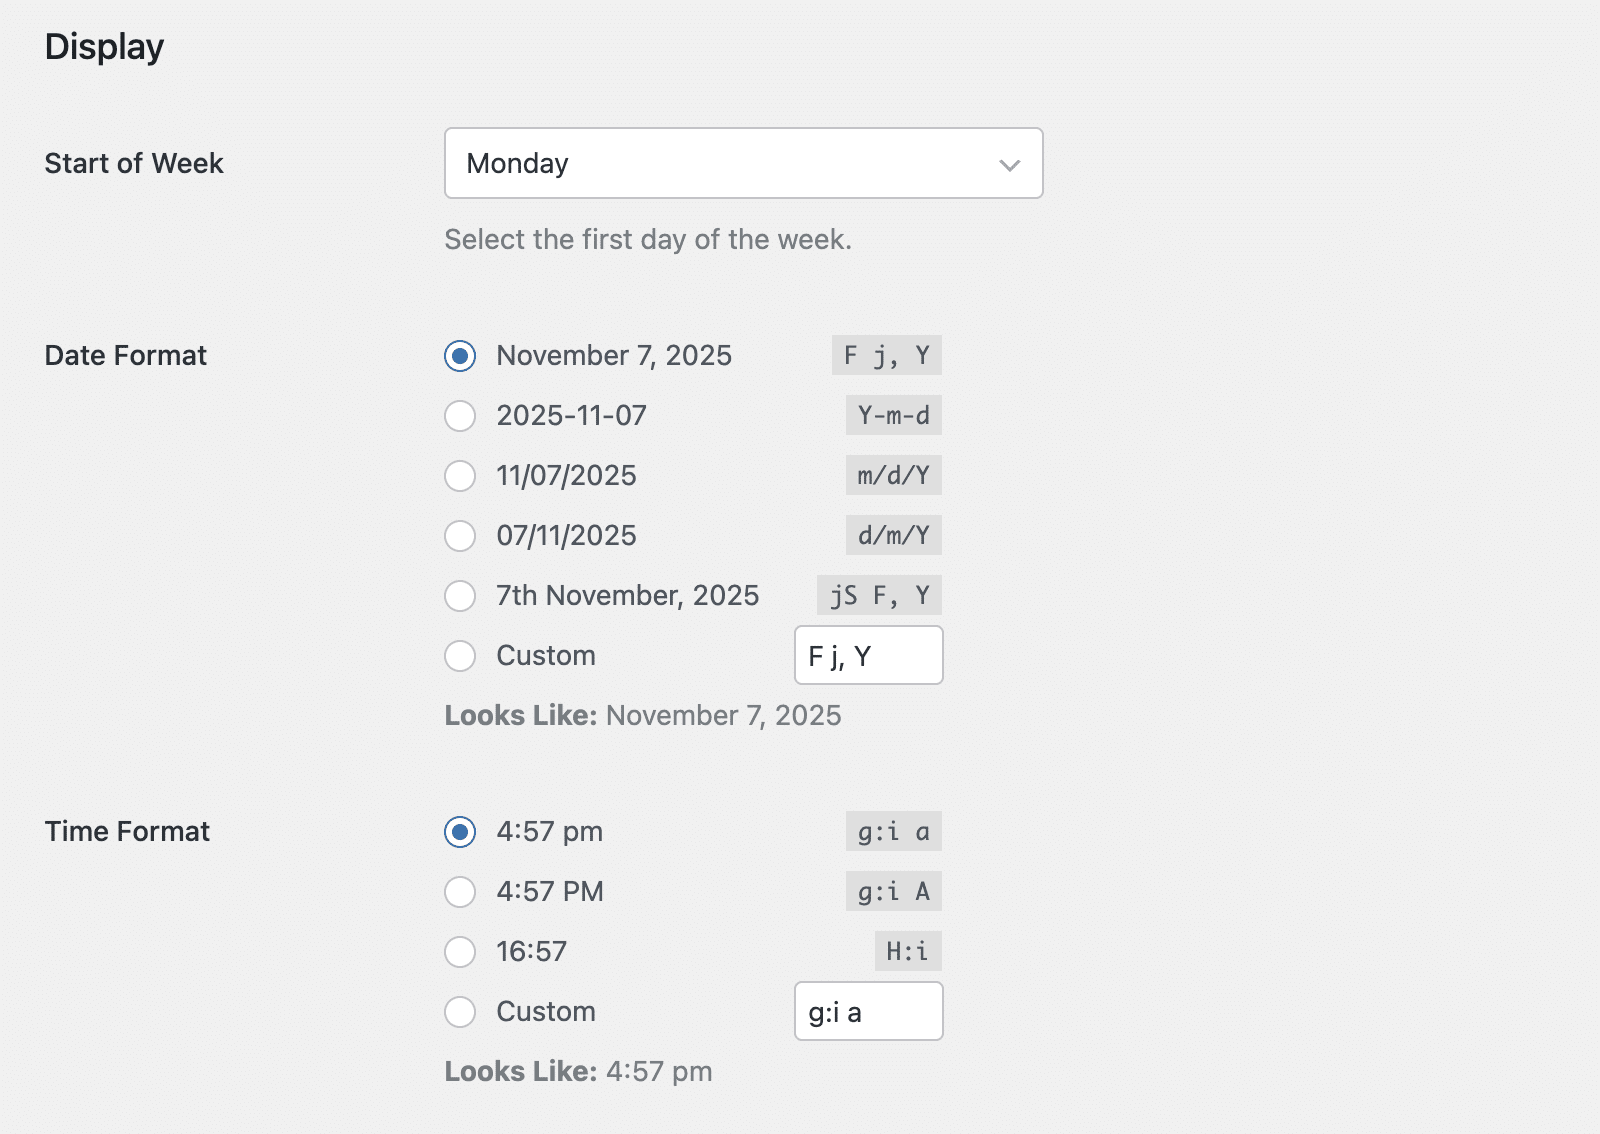
Display Settings
The Display section allows you to customize how dates and times are displayed throughout the plugin. Choose your preferred start day of the week, date format, and time format that best suits your region or business preferences.
Customer Settings
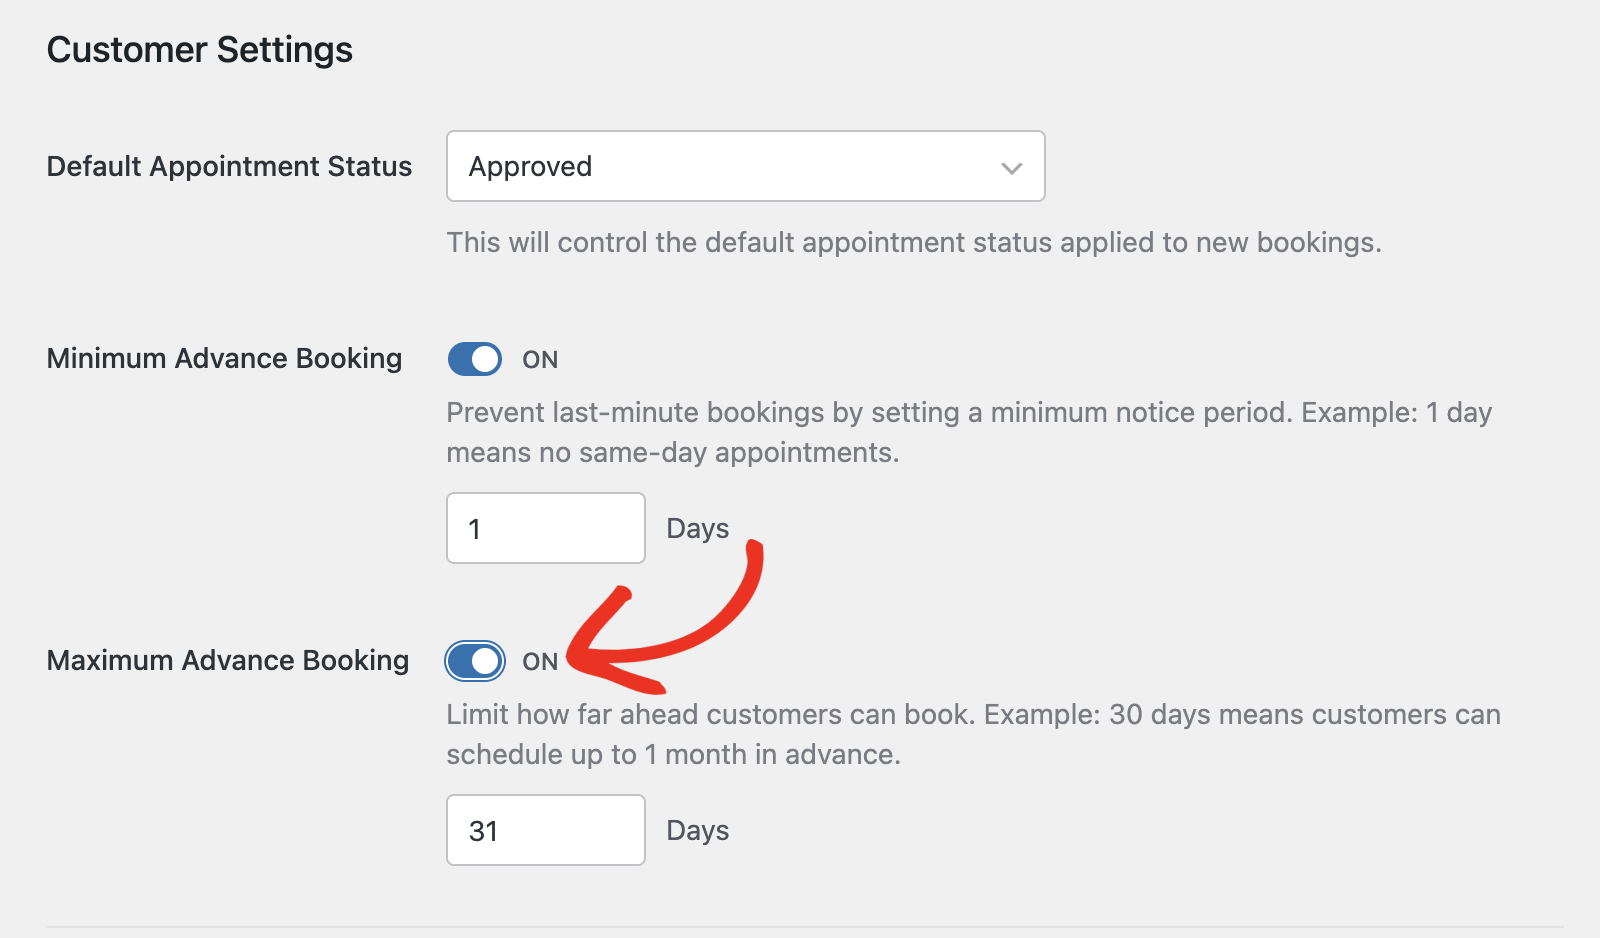
Under the Customer Settings section, you can control how appointments behave for your clients. You’ll be able to set a default appointment status and manage booking notice periods.
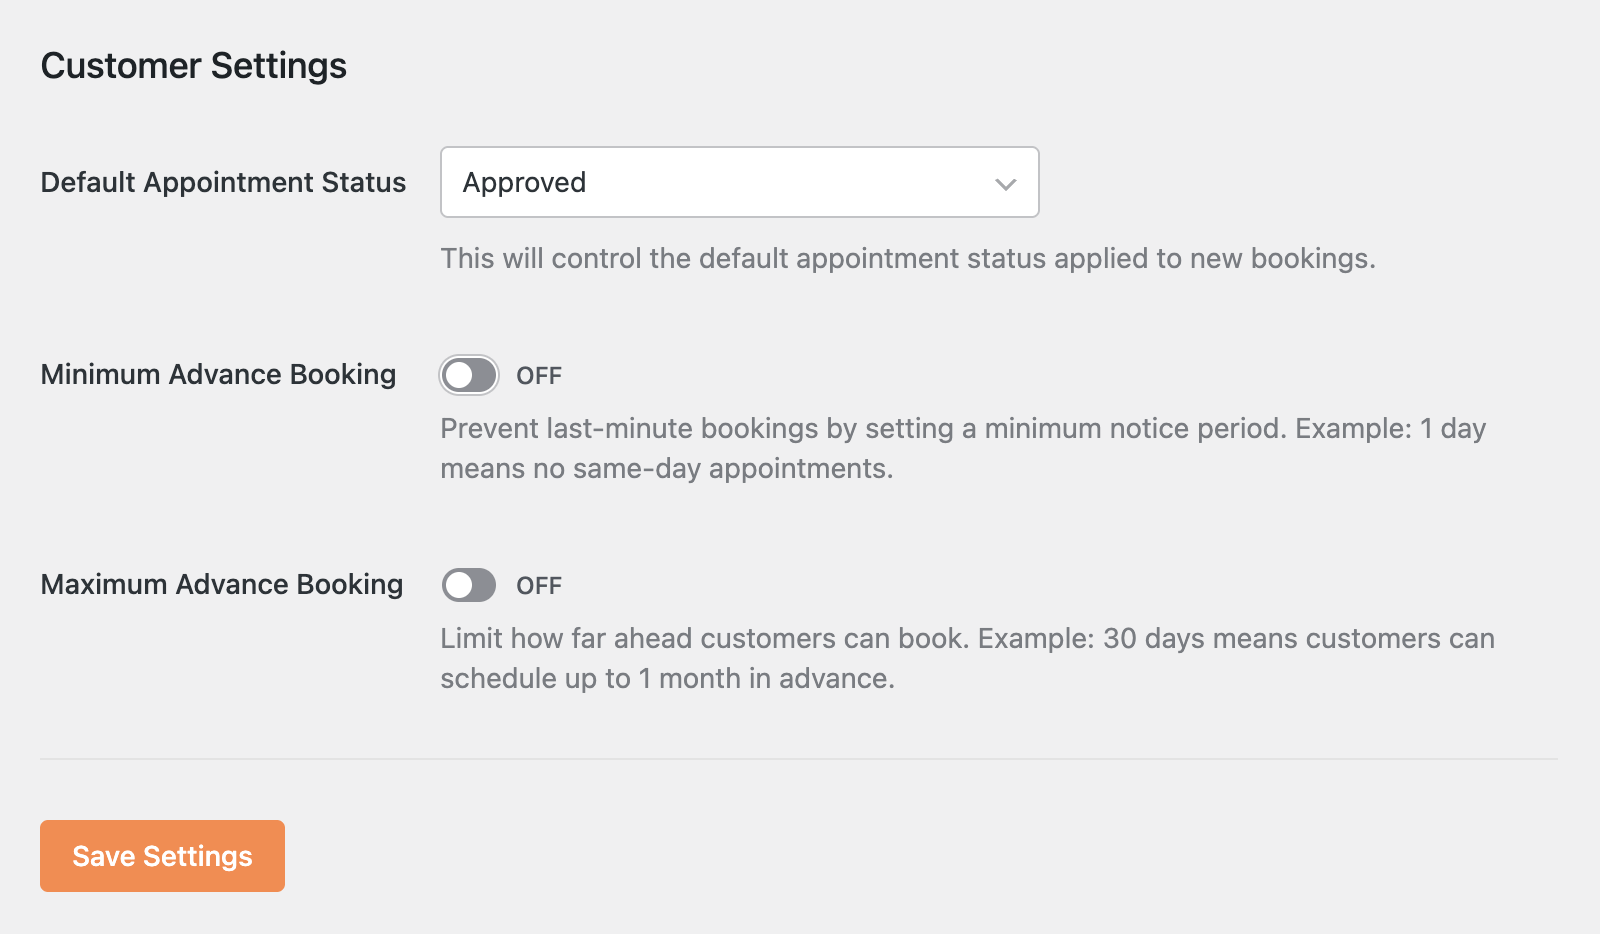
Turn on Minimum Advance Booking to prevent same-day appointments. For example, setting it to “1 Day” means clients must book at least one day in advance.
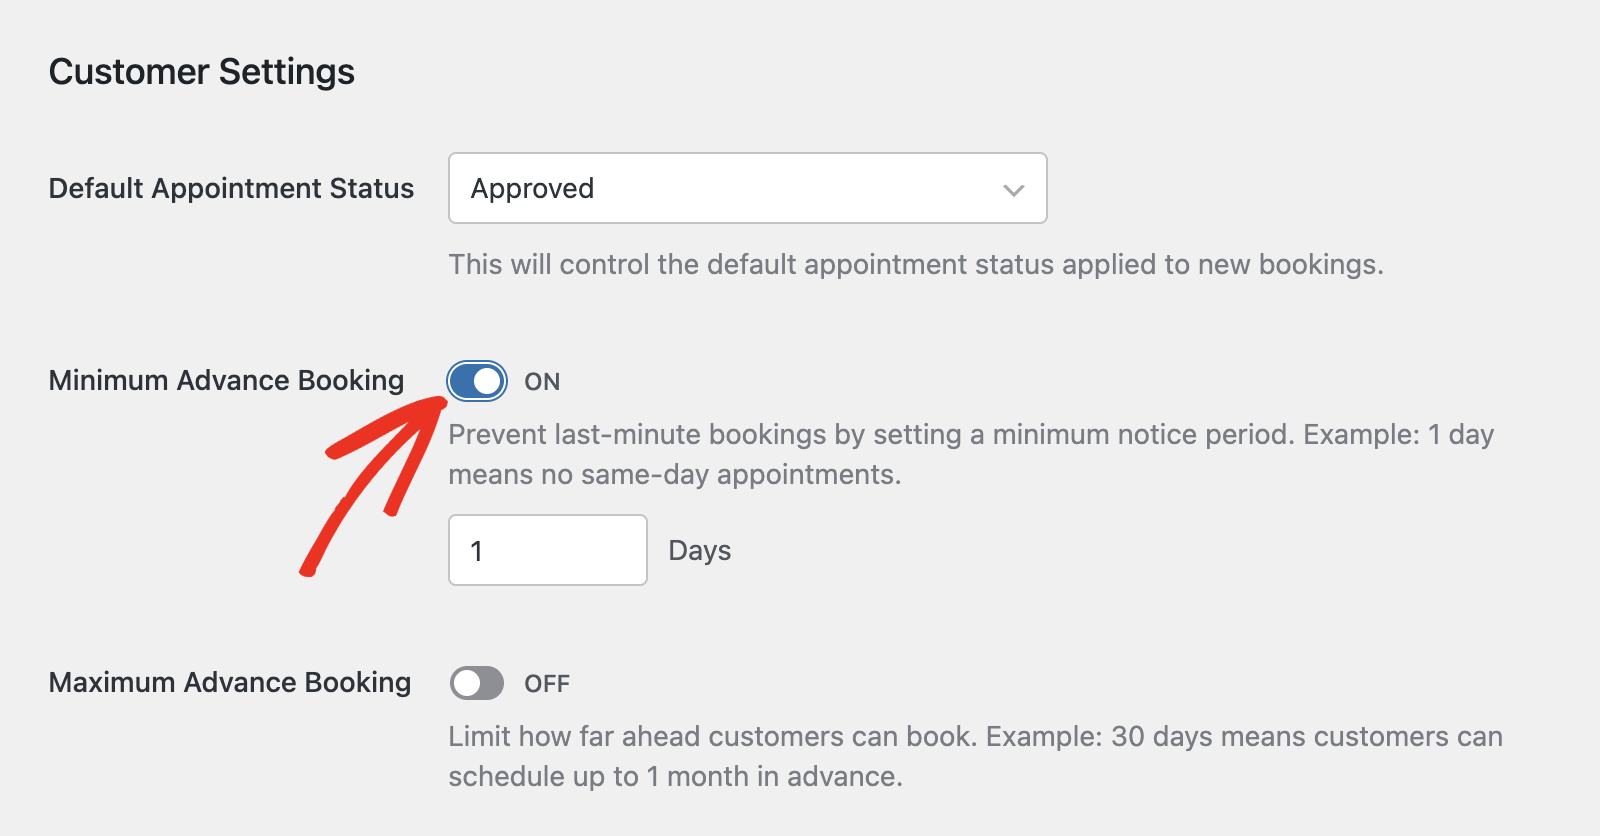
You can also turn on Maximum Advance Booking to limit how far ahead clients can book appointments (e.g., up to 31 days in advance).
Availability Settings
On the Availability tab, you’ll be able to define your working hours and default schedule. These settings will apply to all new services unless you override them in individual service configurations.
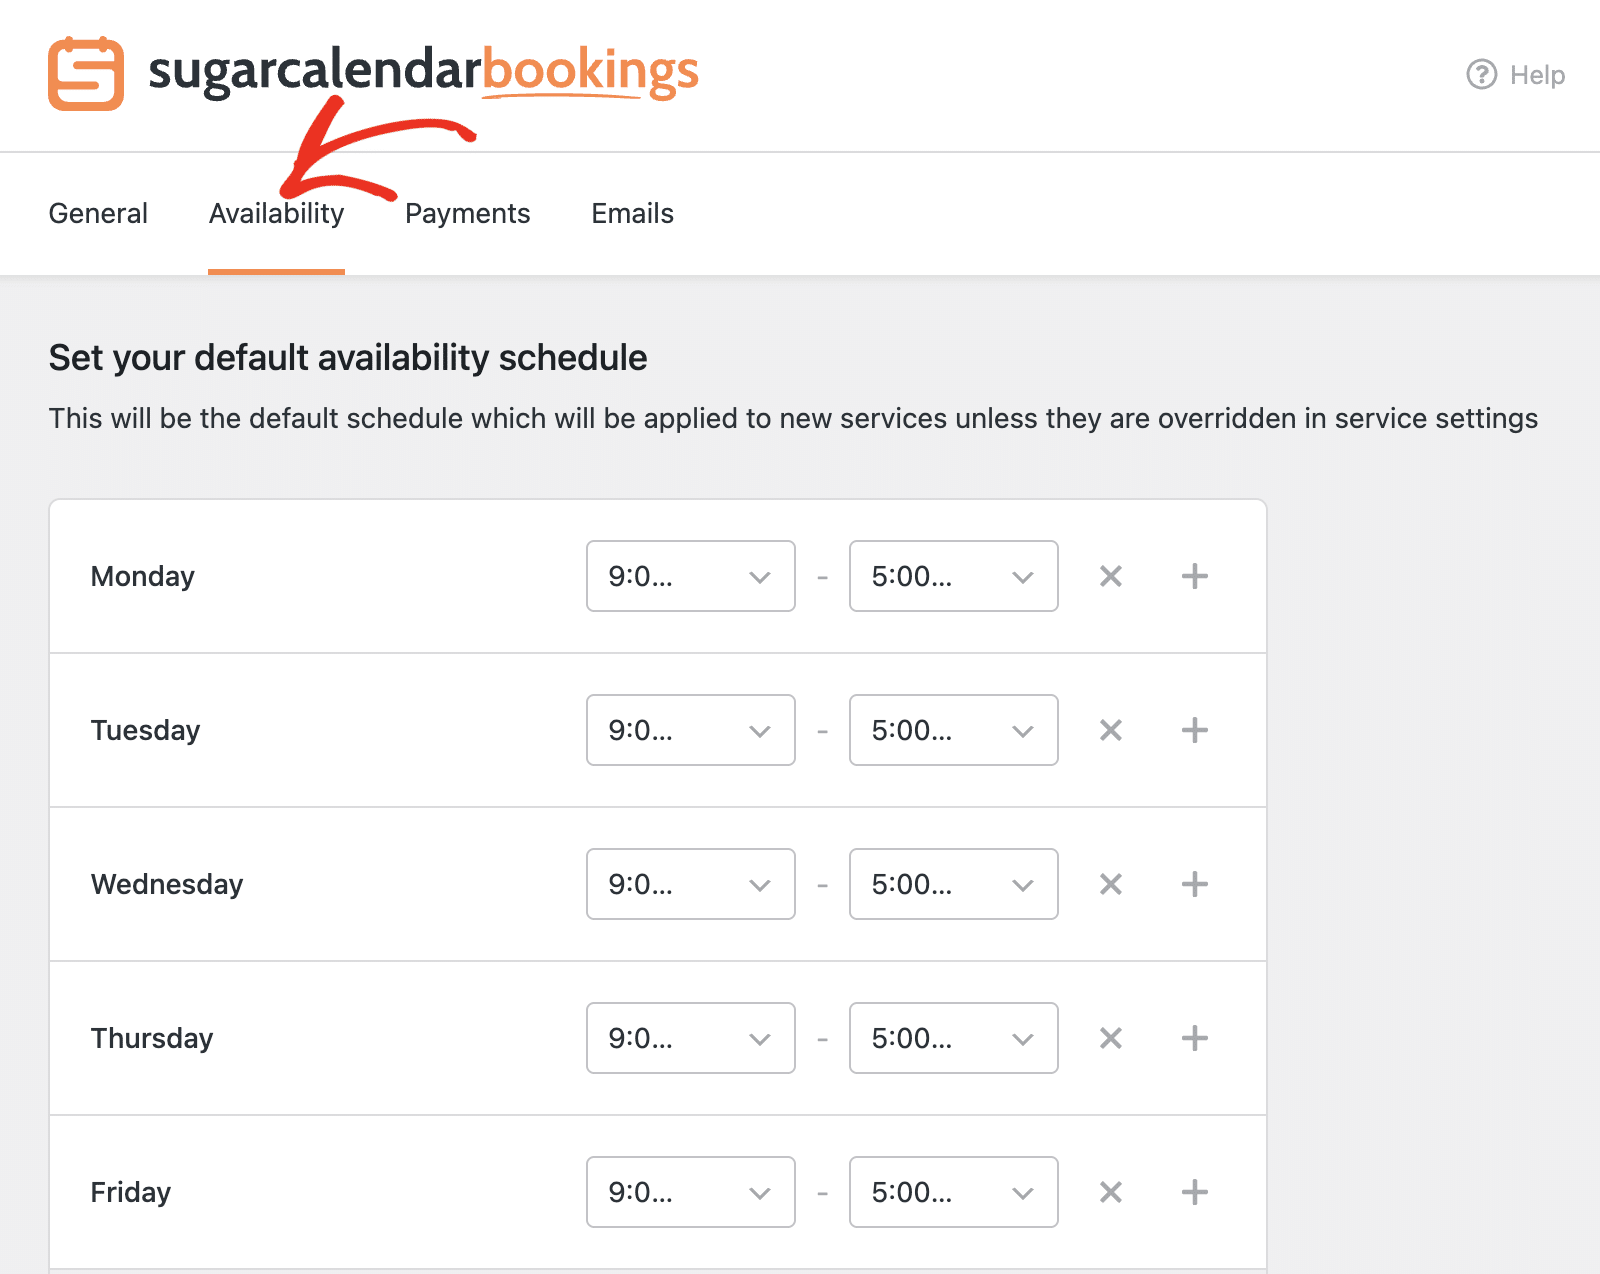
Set your standard working days and times. For example, you can set weekdays from 9:00 AM to 5:00 PM, and mark weekends as unavailable.
Payment Settings
The Payments tab lets you manage your accepted payment methods. You can enable offline payments (On Site) or allow online payments through Stripe.
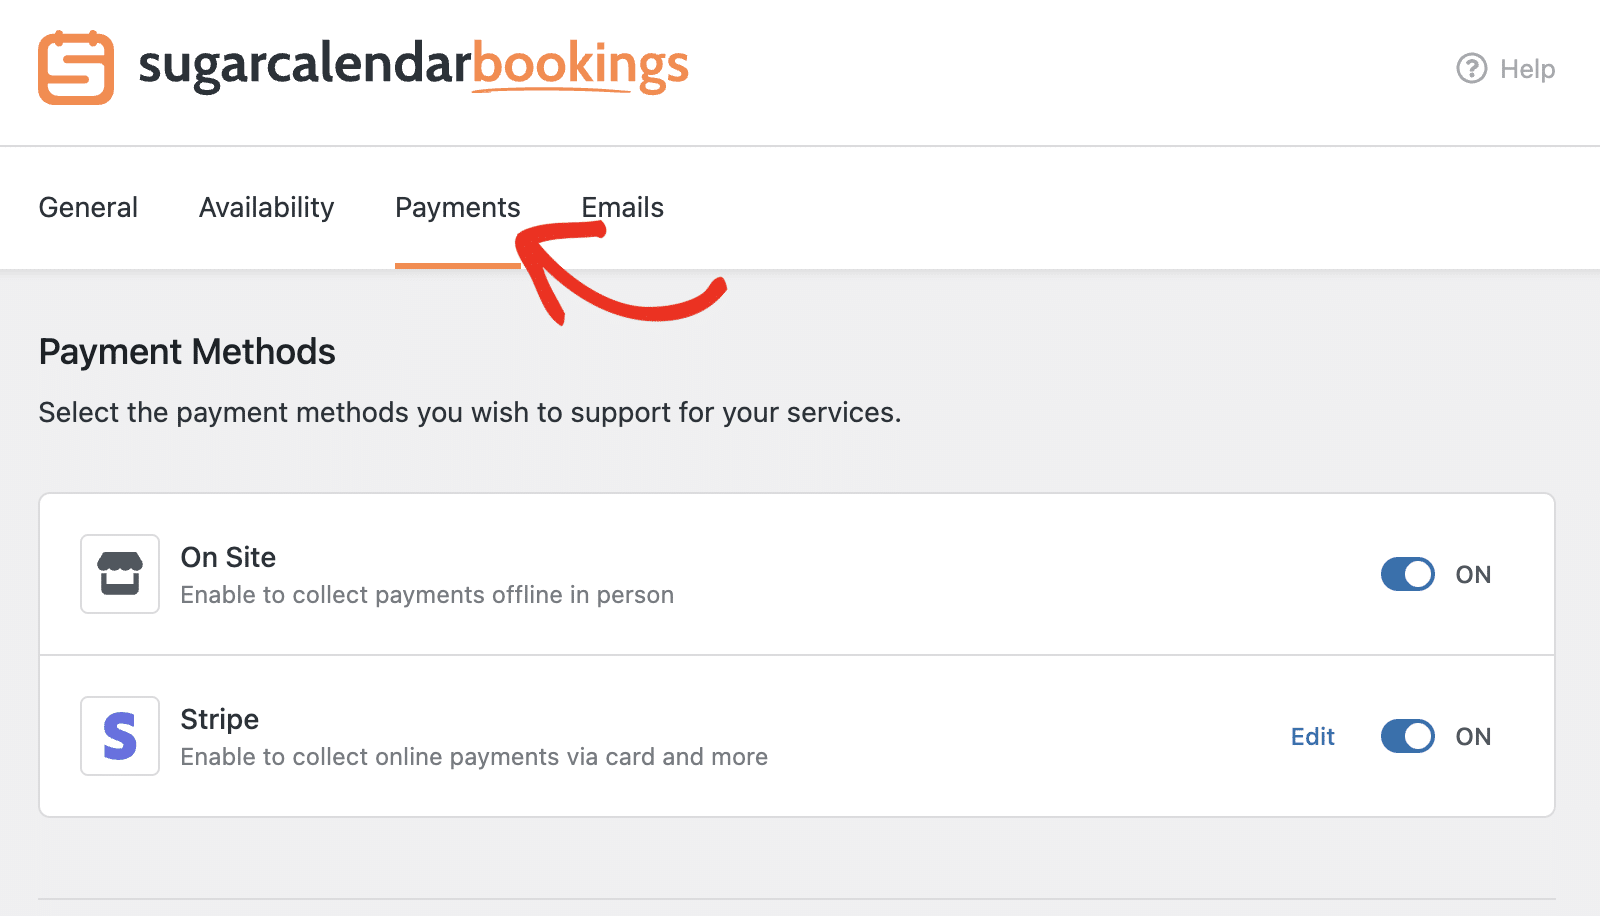
If you’d like to connect Stripe for online payments, click Edit and follow the prompts to connect your Stripe account. Our tutorial on setting up payment options provides a detailed overview of all the steps.
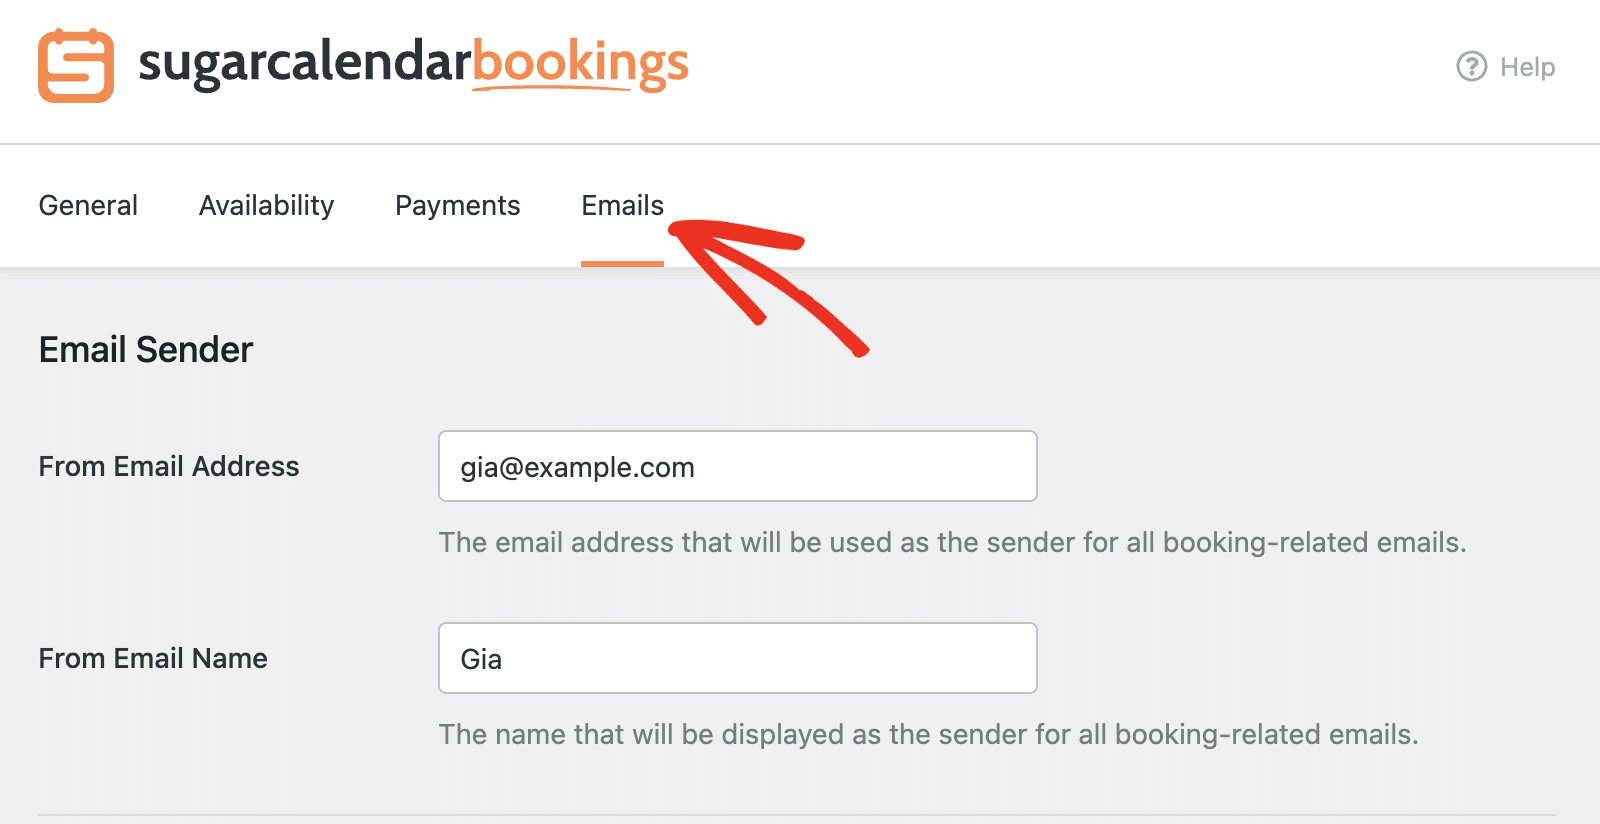
Email Settings
The Emails tab lets you configure all booking-related notifications. You’ll first need to set the sender name and email address under Email Sender.
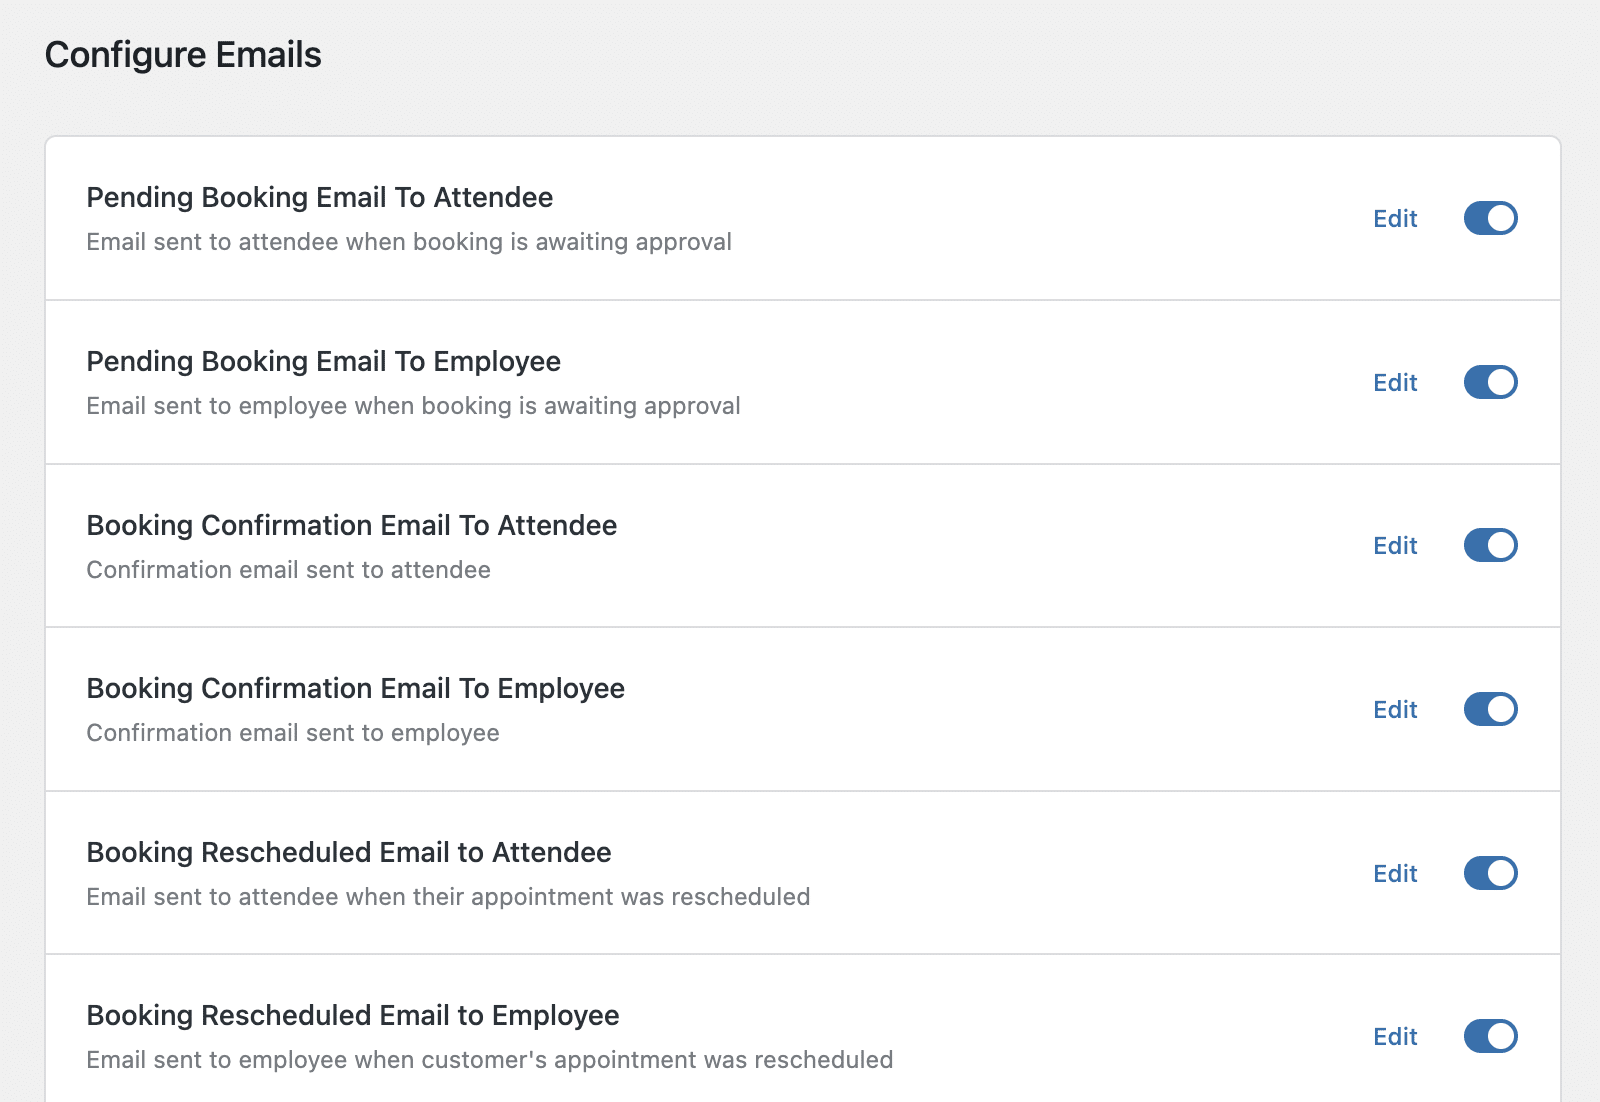
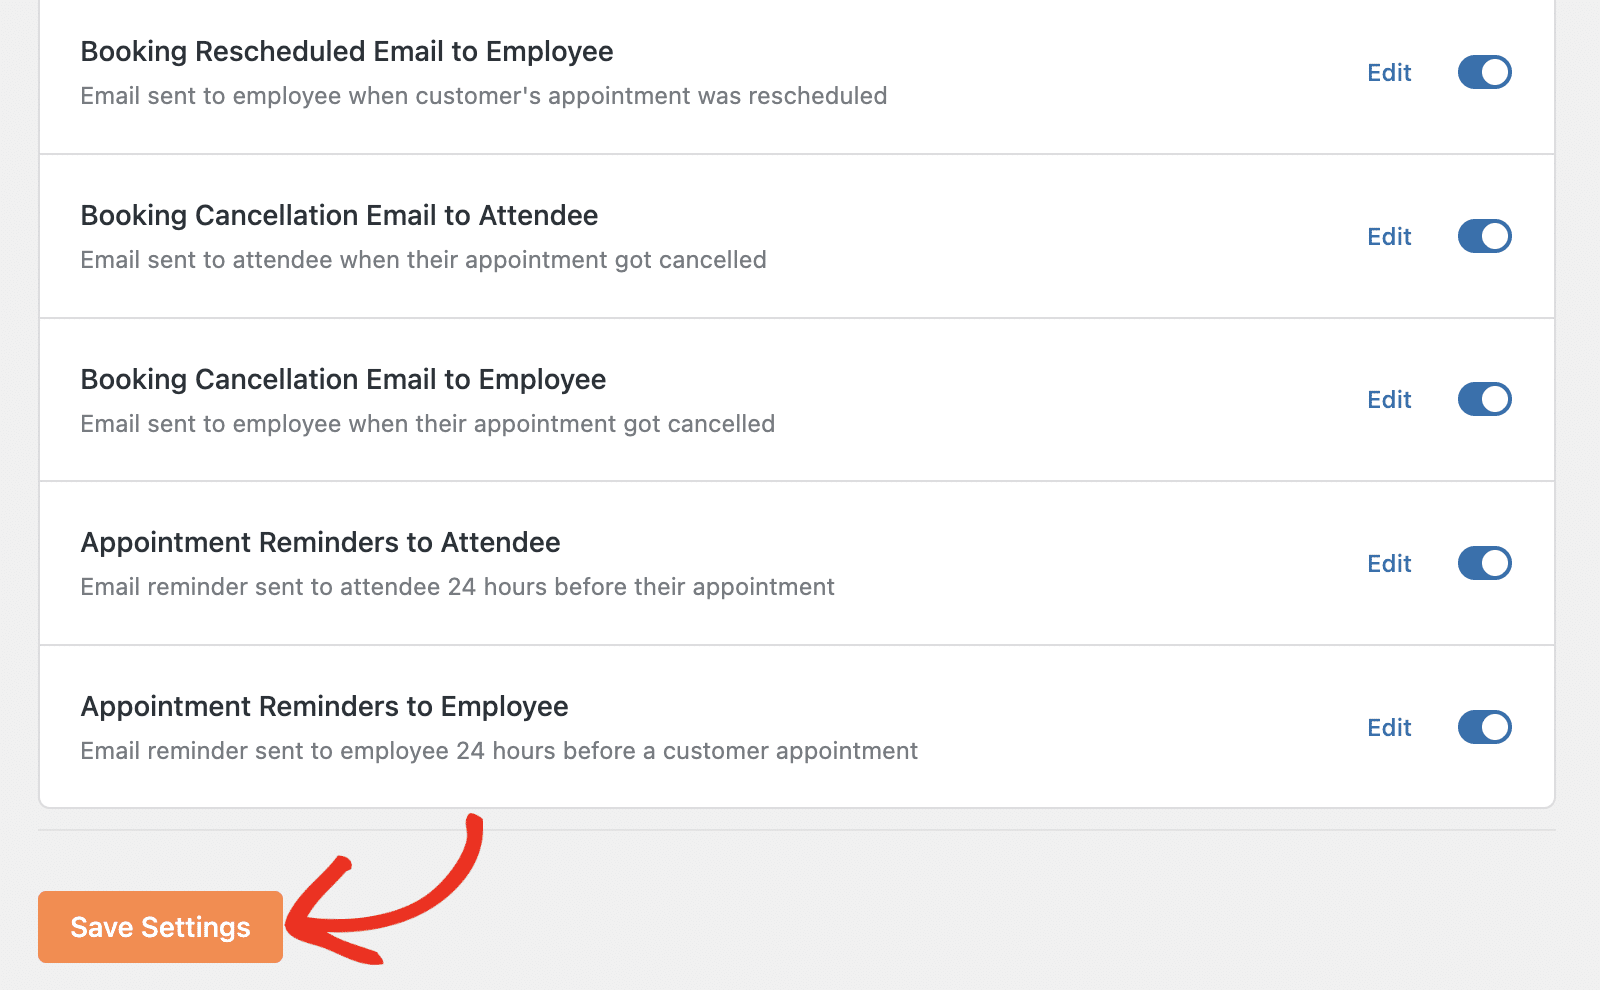
Then scroll down to enable or edit the templates for various automated messages.
Saving Your Settings
After adjusting your preferences in each tab, don’t forget to click Save Settings to ensure all your changes are applied.
That’s it! You’ve successfully configured your settings in Sugar Calendar Bookings.
Next, would you like to create your first service? Be sure to check our tutorial for details on creating bookable services in Sugar Calendar Bookings.