Need to generate an invoice for your Sugar Calendar Bookings purchase or renewal? You can easily create a detailed invoice right from your Sugar Calendar account in just a few steps.
In this tutorial, we’ll walk you through how to create and download an invoice for your Sugar Calendar Bookings payments.
To get started, log in to your Sugar Calendar account.
Once you’re logged in, click on the Billing tab in your account dashboard.
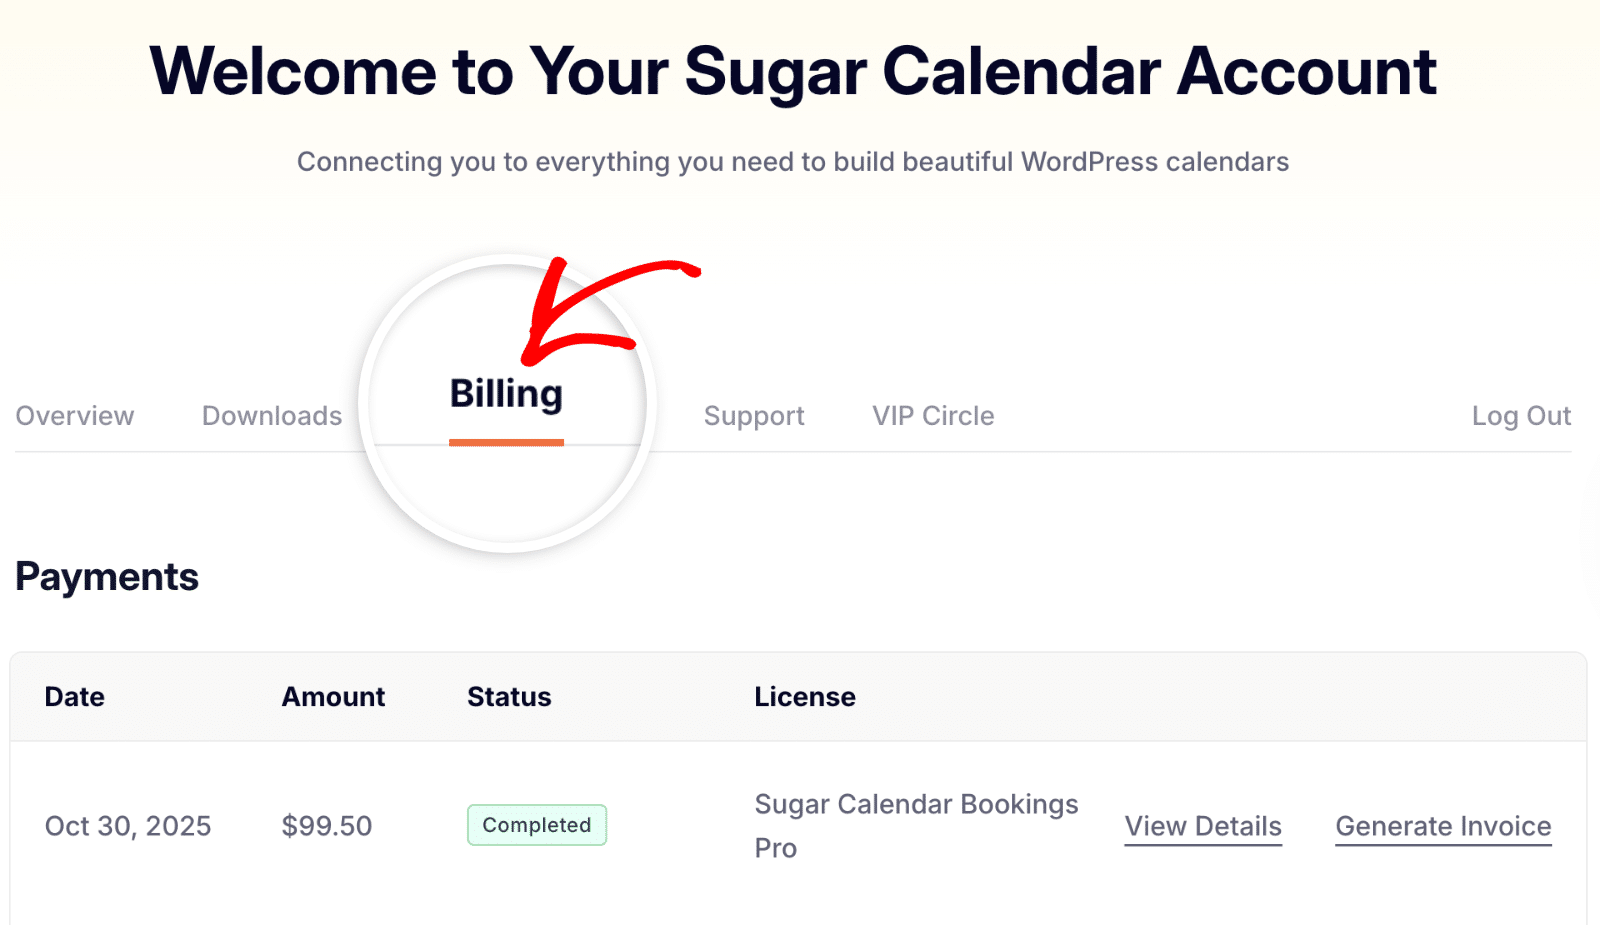
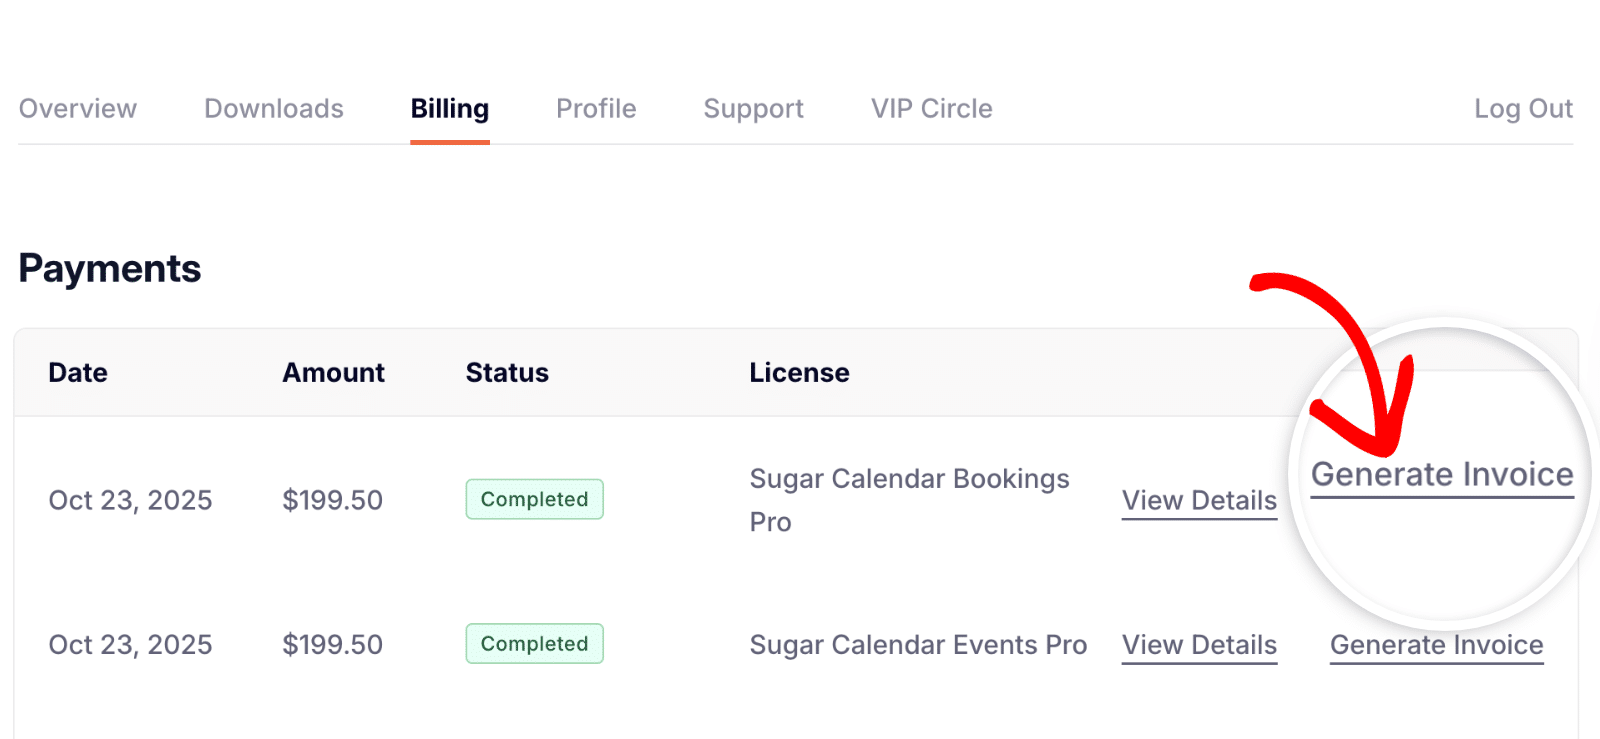
Here you’ll see a list of all your payments and licenses. To create an invoice, click the Generate Invoice link next to the license you’d like an invoice for.
This will open the Generate Invoice page. Fill in the fields with the billing details you want to appear on your invoice. The available fields include:
- Billing Name
- Billing Address (Line 1 and Line 2)
- City
- State / Region
- Zip / Postal Code
- Country
- Phone
- Tax / VAT Number (if applicable)
- Custom Notes (optional field for additional info)
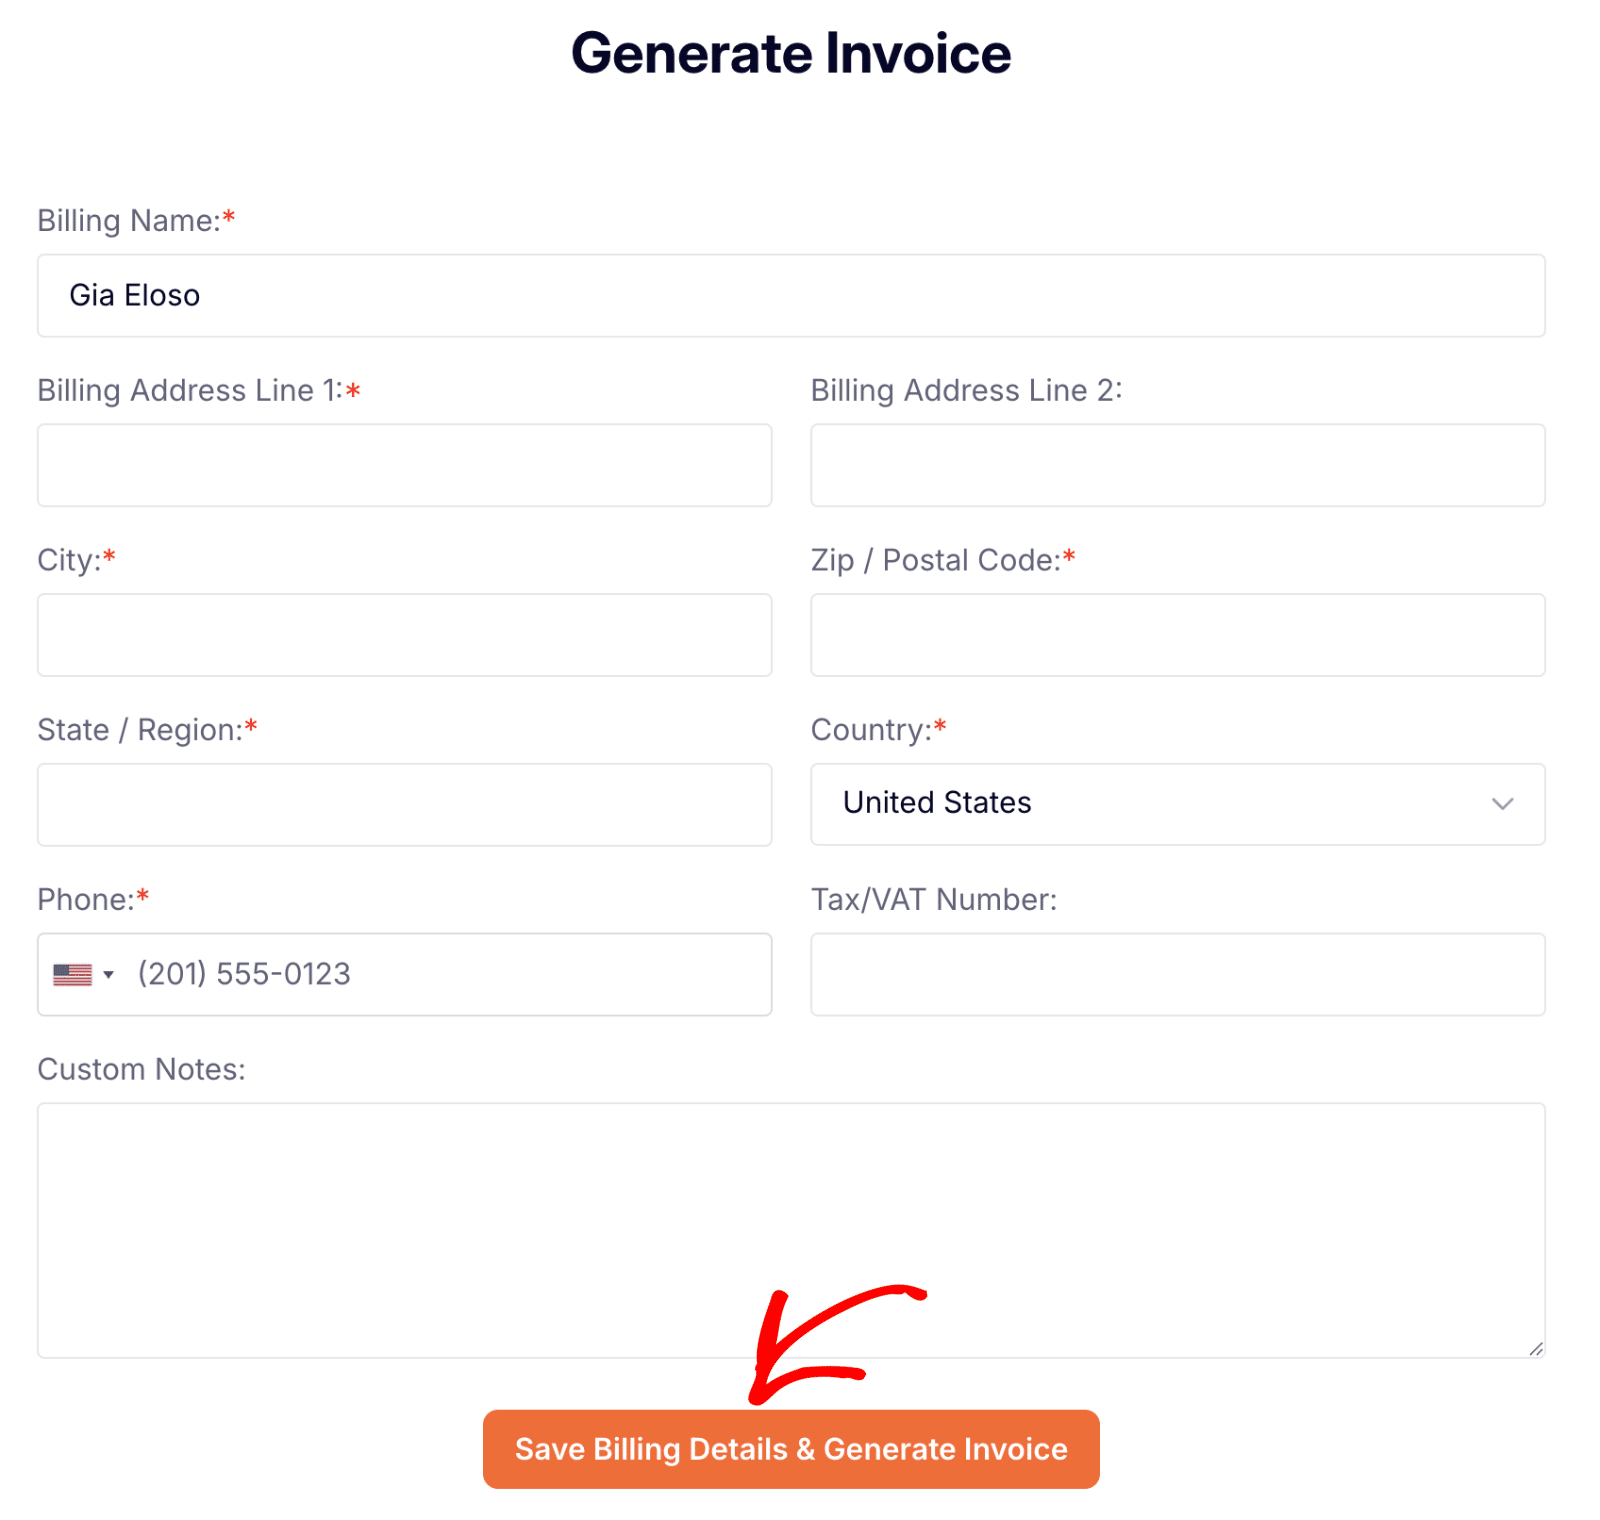
Once you’ve entered your information, click the Save Billing Details & Generate Invoice button.
That’s it! Your invoice will be generated instantly. You can download or print it for your records directly from your account.
Next, would you like to manage bookings on your WordPress site? See our guide on managing appointment bookings.