Would you like to see how your events are doing without opening each screen? The Sugar Calendar Events Dashboard shows your events, attendees, orders, and revenue on one page, along with your integrations, upcoming events, and helpful resources.
In this tutorial, we’ll show you how to navigate the Sugar Calendar Events Dashboard.
In This Article
Before you get started, make sure Sugar Calendar Events is installed and activated on your WordPress site.
Note: Only administrators see the Dashboard. Other users who manage events still land on the Events list when they open the Events menu.
Accessing the Dashboard
To open the Dashboard, click Events in your WordPress admin menu, or go to Events » Dashboard.
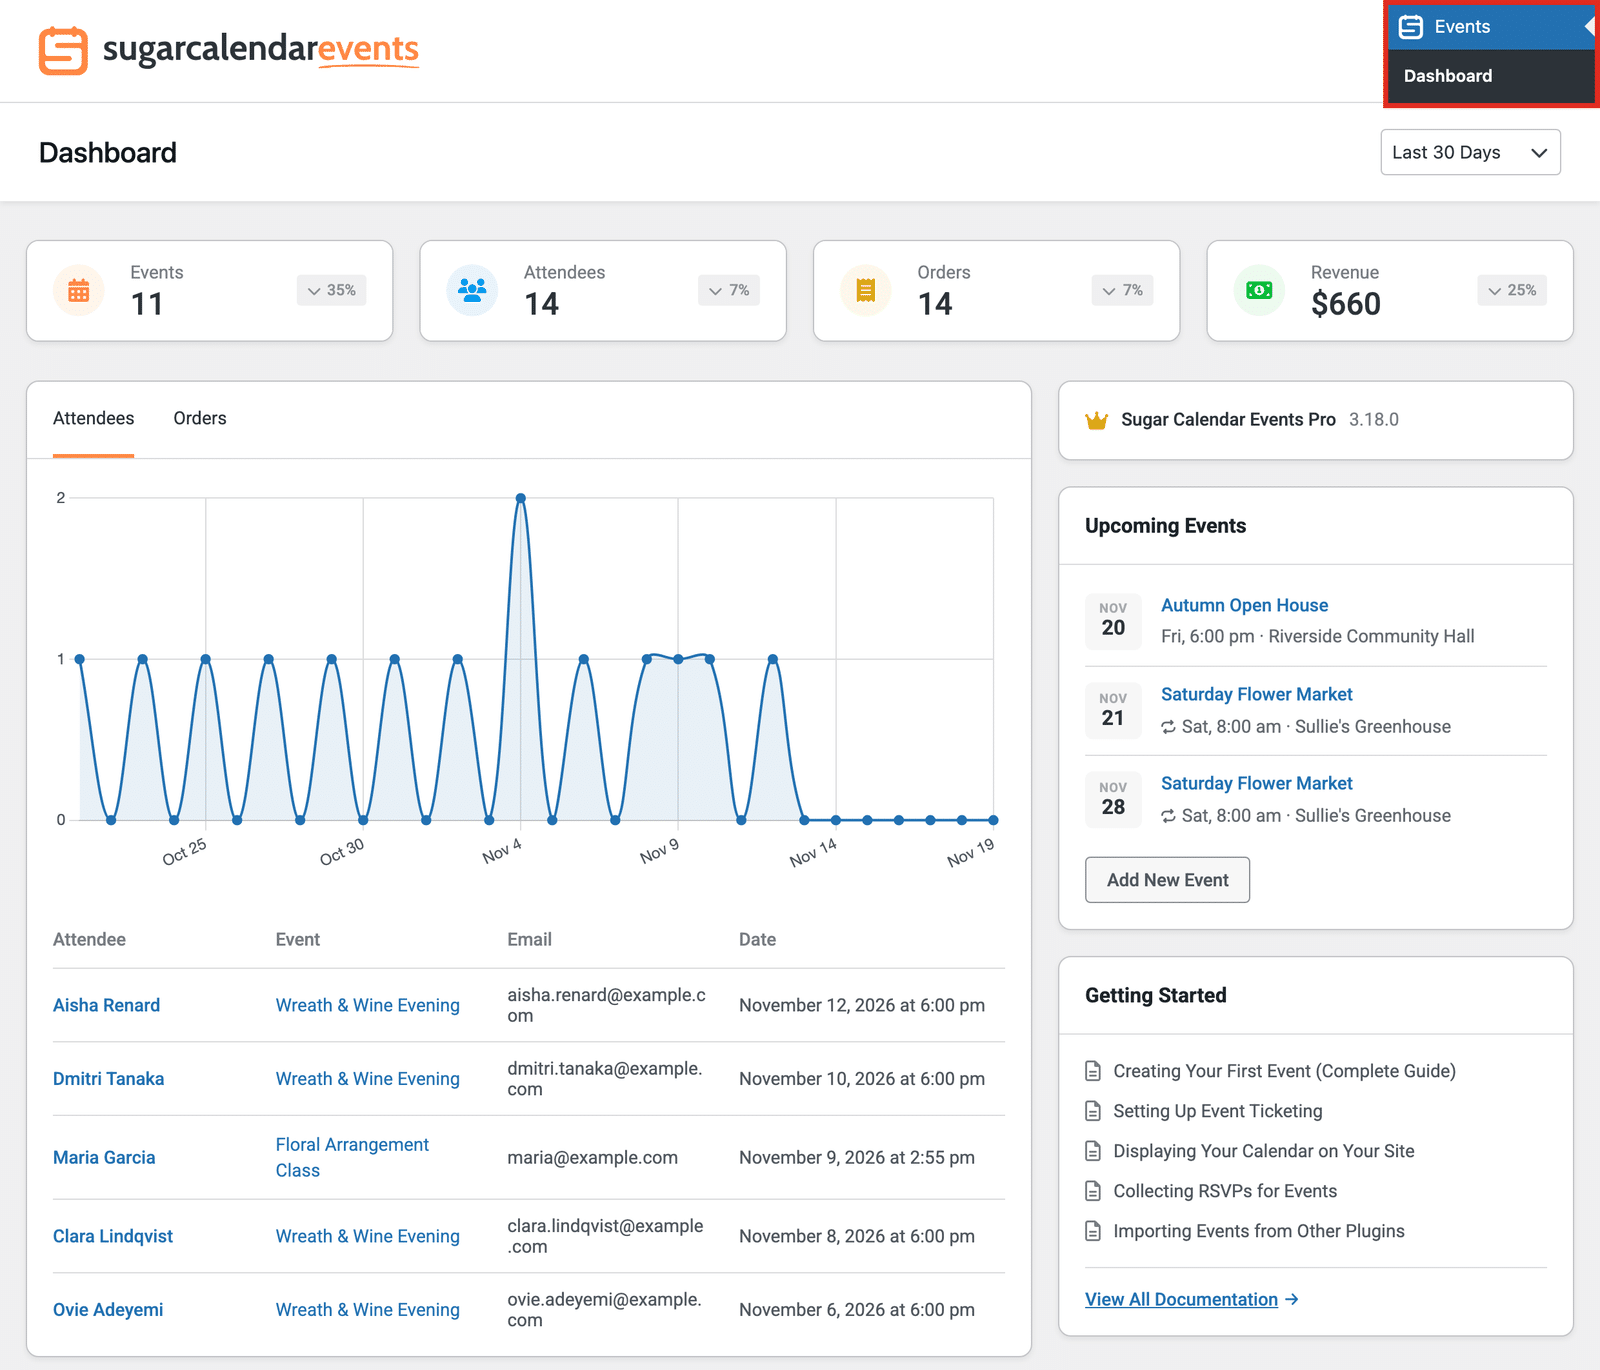
The Dashboard has three areas:
- The header: the page title and the date range dropdown.
- The main column: the stat cards, the Attendees and Orders panel, and your integrations and addons.
- The sidebar: your license, upcoming events, setup progress, guides, and recommended plugins.
Choosing a Date Range
The date range controls the numbers in the stat cards and the graph in the Attendees and Orders panel. To change it, click the dropdown in the top-right corner of the Dashboard and choose Last 7 Days, Last 14 Days, or Last 30 Days.

To pick exact dates, choose Custom Range and select a start and end date in the calendar. A custom range covers up to 366 days.
Understanding the Stat Cards
The four cards at the top of the Dashboard give you a quick summary of the selected period:
- Events: the number of event dates in the period.
- Attendees: the number of people who bought a ticket or RSVPed “going.”
- Orders: the number of paid ticket orders.
- Revenue: the total amount from those orders.
Each card also shows a percentage badge. It compares the selected period with the period of the same length right before it, so an up arrow means the number grew.

Note: The Events card counts each date of a recurring event. For example, a weekly event that happens four times in the period counts as four events.
Viewing Attendees and Orders
The panel below the stat cards has two tabs: Attendees and Orders.
Attendees Tab
The Attendees tab shows a graph of attendees per day, followed by your five most recent attendees. It counts ticket holders and “going” RSVPs, and each plus-one appears as its own row.
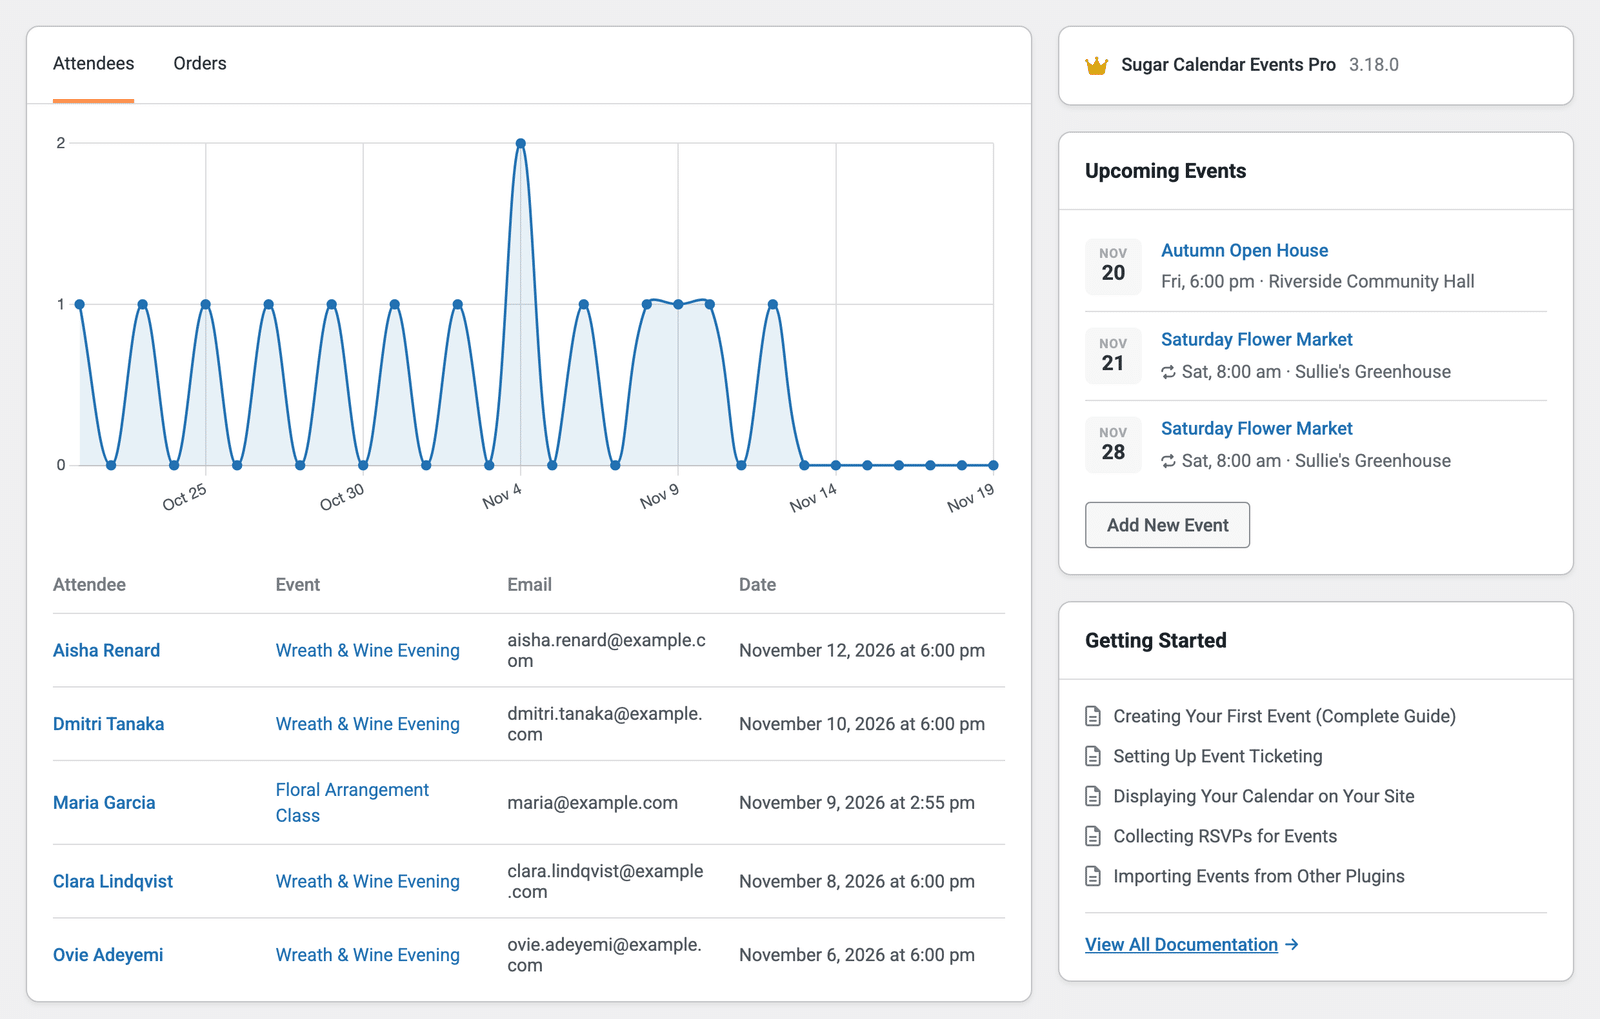
Click an attendee’s name to open their order or RSVP, their email address to send them an email, or the event name to open the event.
Note: Refunded, pending, and deleted orders don’t count toward attendees, orders, or revenue.
Orders Tab
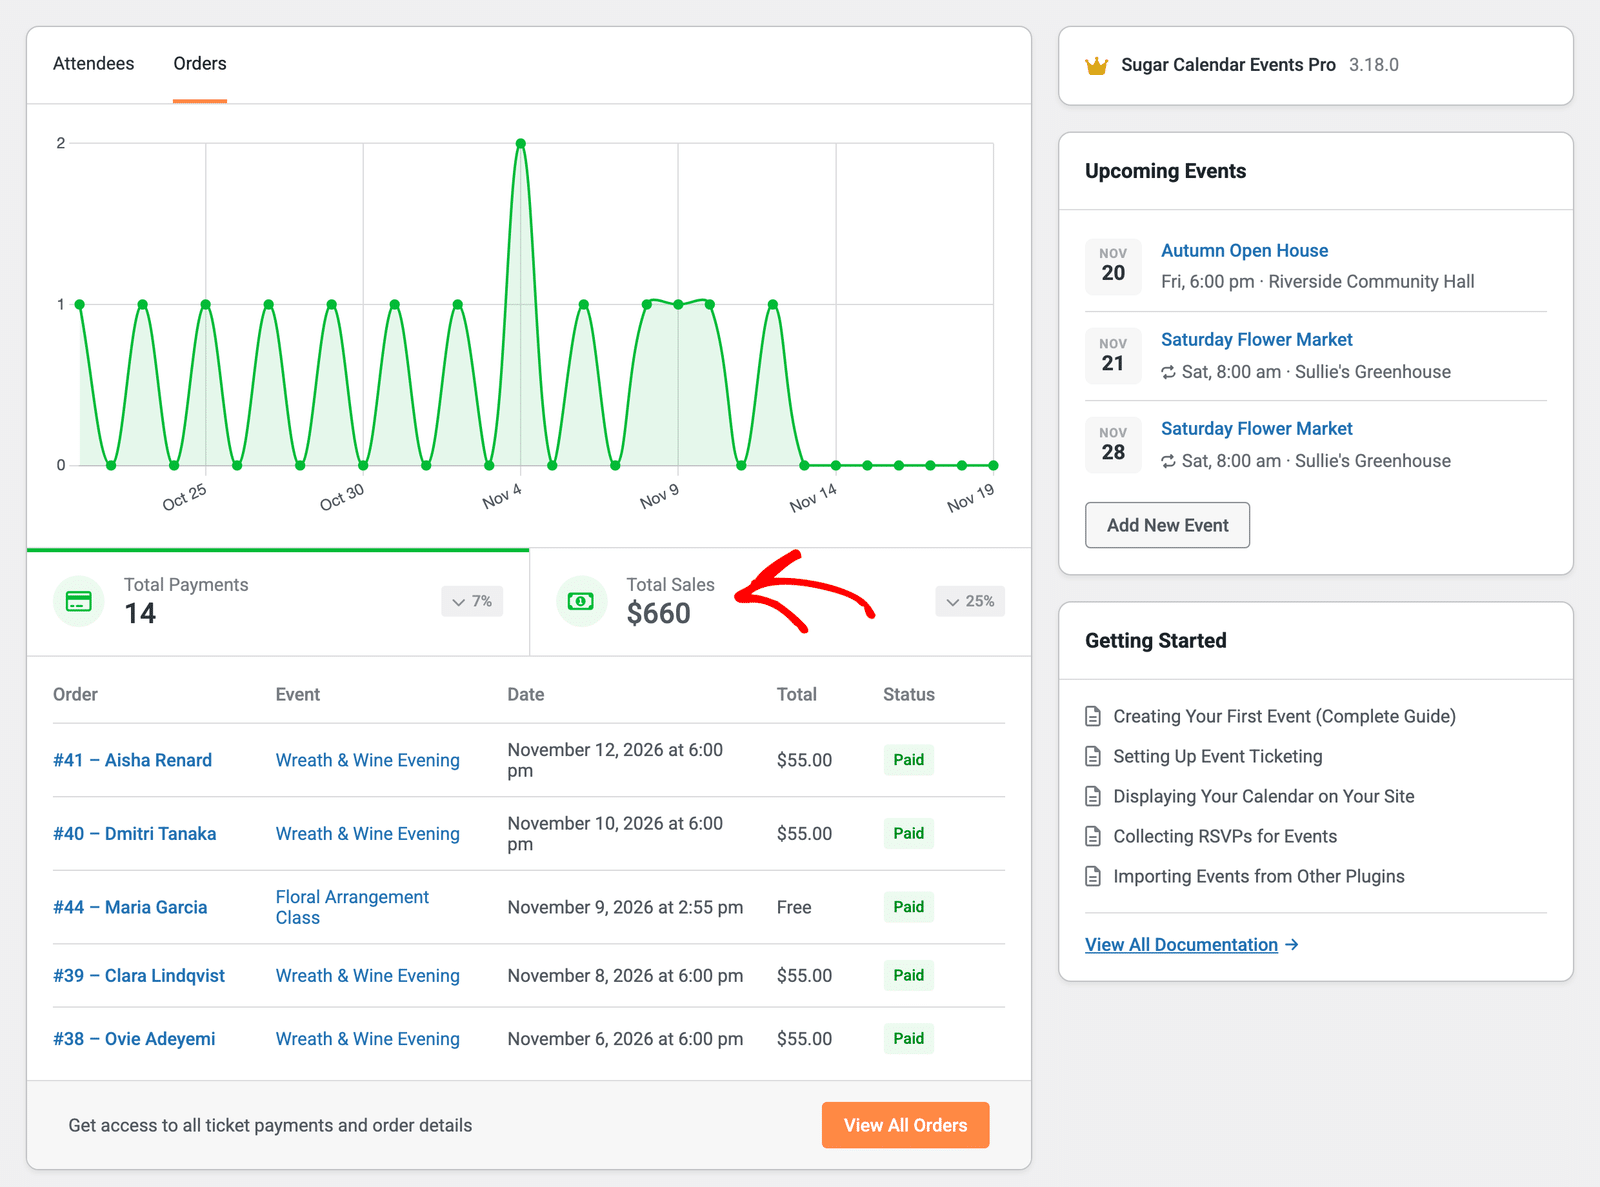
The Orders tab graphs your orders per day. Below the graph, click Total Payments to graph the number of orders, or Total Sales to graph the amount.
Your five most recent orders appear below that, and the View All Orders button opens the full list of orders.
Messages in the Panel
Depending on your setup, you might see one of these messages in the panel:
- No Attendees Yet or No Orders Yet: nobody has registered or bought a ticket on your site so far.
- No Attendees in This Period or No Orders in This Period: there’s no activity in the selected date range. Choose a longer range to see more.
- Accept Payments with Stripe: you haven’t connected a payment method yet. Click Connect with Stripe to start selling tickets. The graph behind this message shows example data only.
- Reconnect a Payment Method: your site has past orders, but Stripe is no longer connected.
Connecting Integrations and Addons
The “Streamline Your Workflow with Integrations and Addons” section lists the integrations and addons available for Sugar Calendar Events, including Google Calendar, Zoom, Stripe, Advanced Event Ticketing, RSVP, and Zapier.
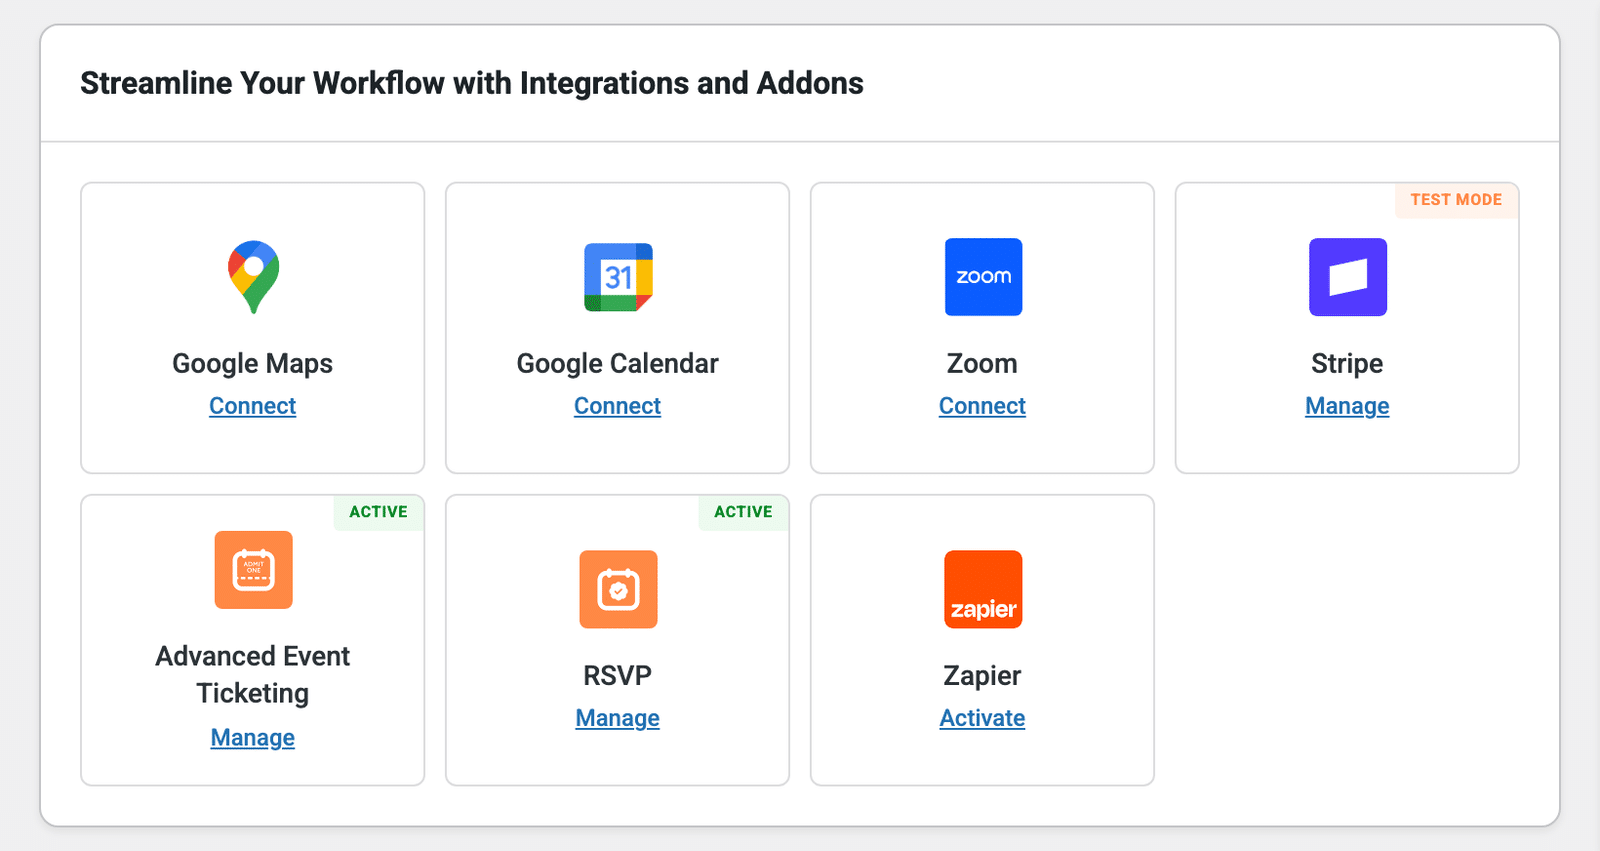
Each card’s link shows what to do next:
- Connect: opens the settings page for that integration so you can set it up.
- Manage: opens the settings for an integration or addon that’s already set up.
- Install or Activate: installs or activates the addon right from the Dashboard.
- Upgrade: the addon needs a higher Sugar Calendar Events license.
Badges such as Active or Test Mode show the current status of each card.
Using the Sidebar Widgets
The sidebar on the right holds several widgets.
- License: your Sugar Calendar Events version. When an update is available, click Update Now. If your license has expired, click Renew Now.
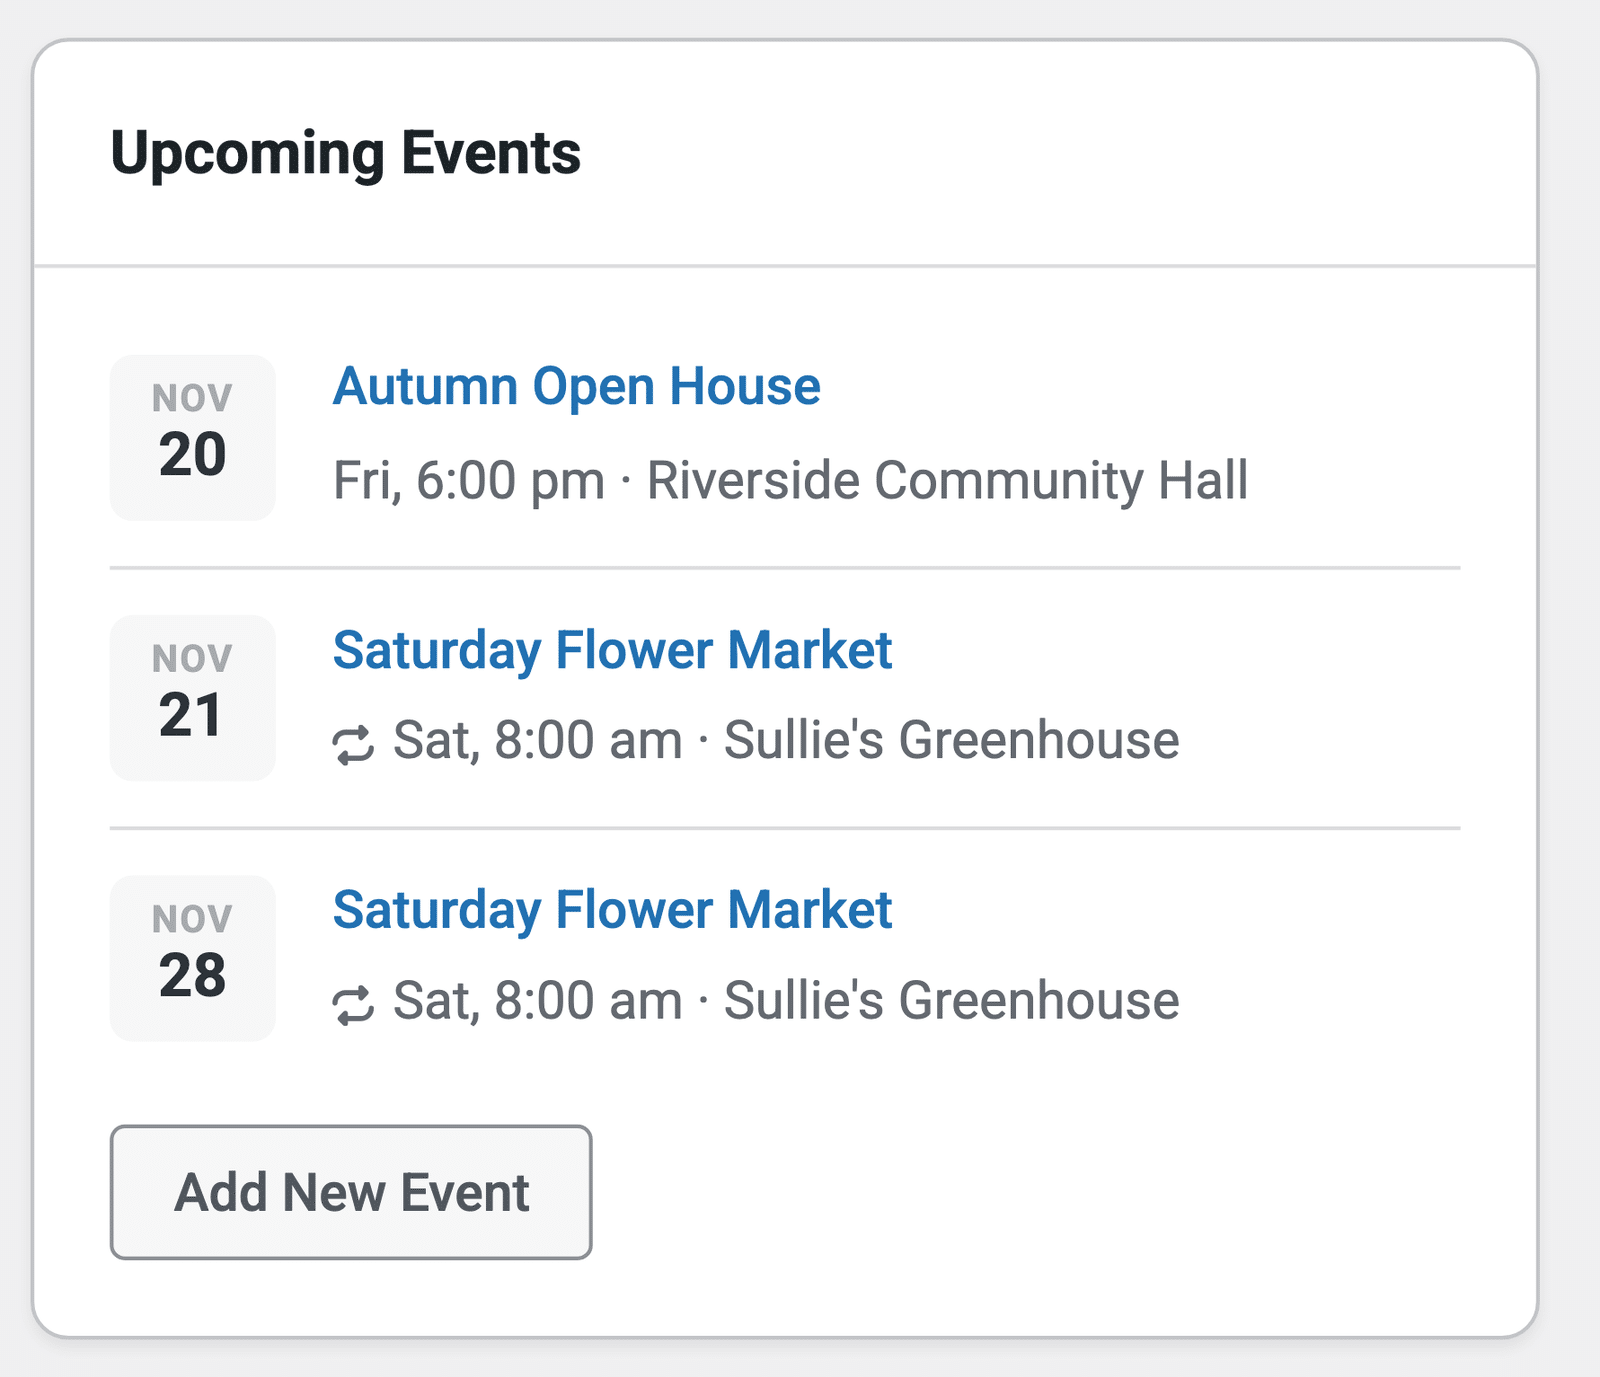
- Upcoming Events: up to five upcoming event dates, starting today. Events that sell tickets or take RSVPs show the number sold against the capacity, such as 12/50. The count turns red when an event sells out. Click Add New Event to create another event.
- Setup Checklist Overview: your next setup steps, with the incomplete ones first. Click View Setup Checklist to open the full Setup Checklist. This widget disappears once you dismiss the checklist.
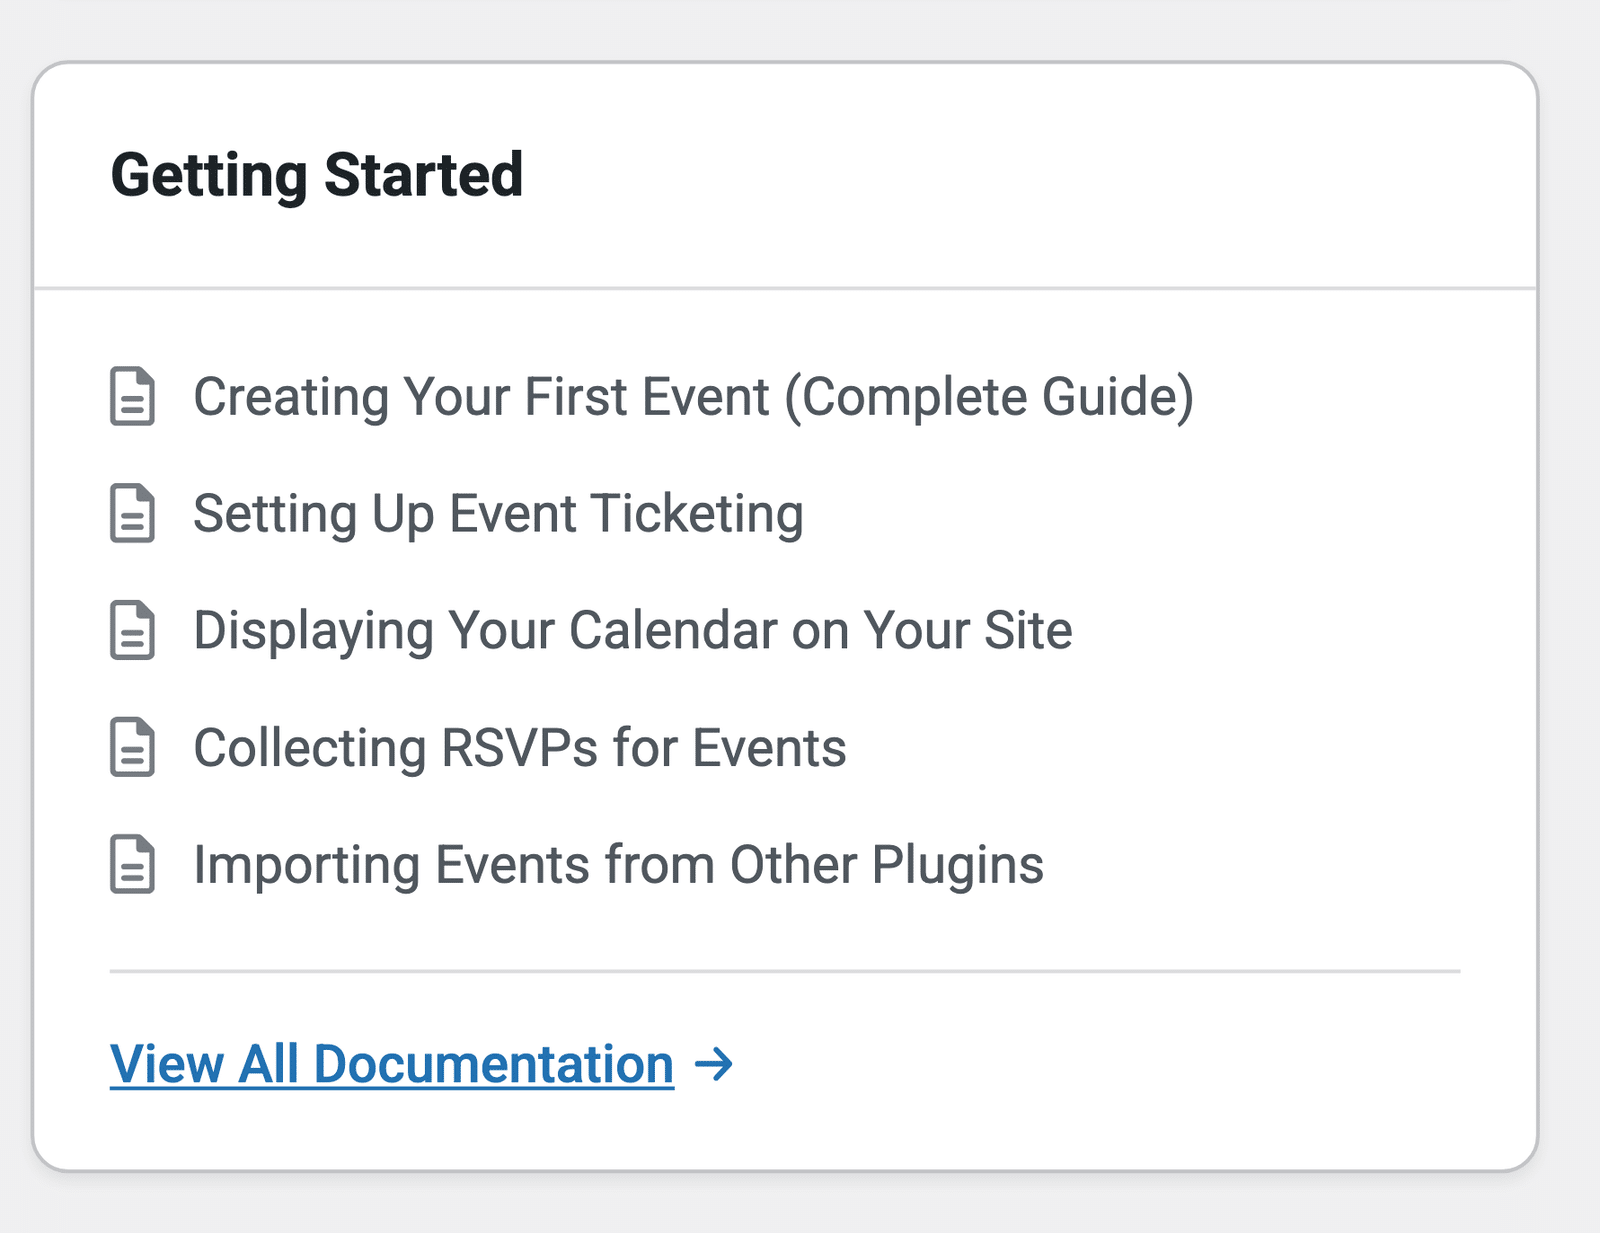
- Getting Started: links to our most popular guides. Click View All Documentation to browse every guide.
The Recommended Growth Tools widget lists other WordPress plugins you can install with a single click.
If your site doesn’t have any events yet, the Dashboard also shows a Finish Setting Up Sugar Calendar message. Click Launch Setup Wizard to create your first event and set up payments and emails.
Frequently Asked Questions
These are answers to some of the top questions we see regarding navigating the Sugar Calendar Events dashboard.
Can I make the Events list open first again?
Yes. Add this snippet with a plugin like WPCode, and the Events menu will open the Events list instead of the Dashboard:
add_filter( 'sugar_calendar_admin_pages_dashboard_is_landing_page', '__return_false' );
For help adding snippets, see our tutorial on getting started with Sugar Calendar hooks.
Why can’t other users see the Dashboard?
The Dashboard needs administrator access. Users with other roles can still open the Events list from the Events menu.
Why don’t my numbers include some orders?
The Dashboard counts only paid orders and excludes refunded, pending, and deleted orders. Also, check the date range, since the stat cards and graph only cover the selected period.
That’s it! You now know how to navigate the Sugar Calendar Events Dashboard.
Next, would you like to set up the rest of your calendar? Check out our guide to using the Setup Checklist.