Would you like to easily manage attendee responses for your events? With the RSVP addon, you can collect and organize RSVPs directly within Sugar Calendar Events, making planning for virtual or in-person events easy.
This guide covers the steps to set up and use the RSVP addon for Sugar Calendar Events.
The RSVP Addon Is a Premium Feature
Unlock RSVP Addon and other powerful features to enhance your events.
In This Article
Installing the RSVP Addon
Before getting started, make sure Sugar Calendar Events is installed and activated on your WordPress site and that you’ve verified your license.
Once that’s complete, go ahead and install and activate the RSVP addon from your Sugar Calendar account.
Enabling RSVP for Events
Before you can add attendees to an event, you’ll need to enable the RSVP option for that event. To do so, create a new event or edit an existing one to access the event editor.
In the Event editor, click on the RSVP tab and then toggle the RSVP option to the ON position.
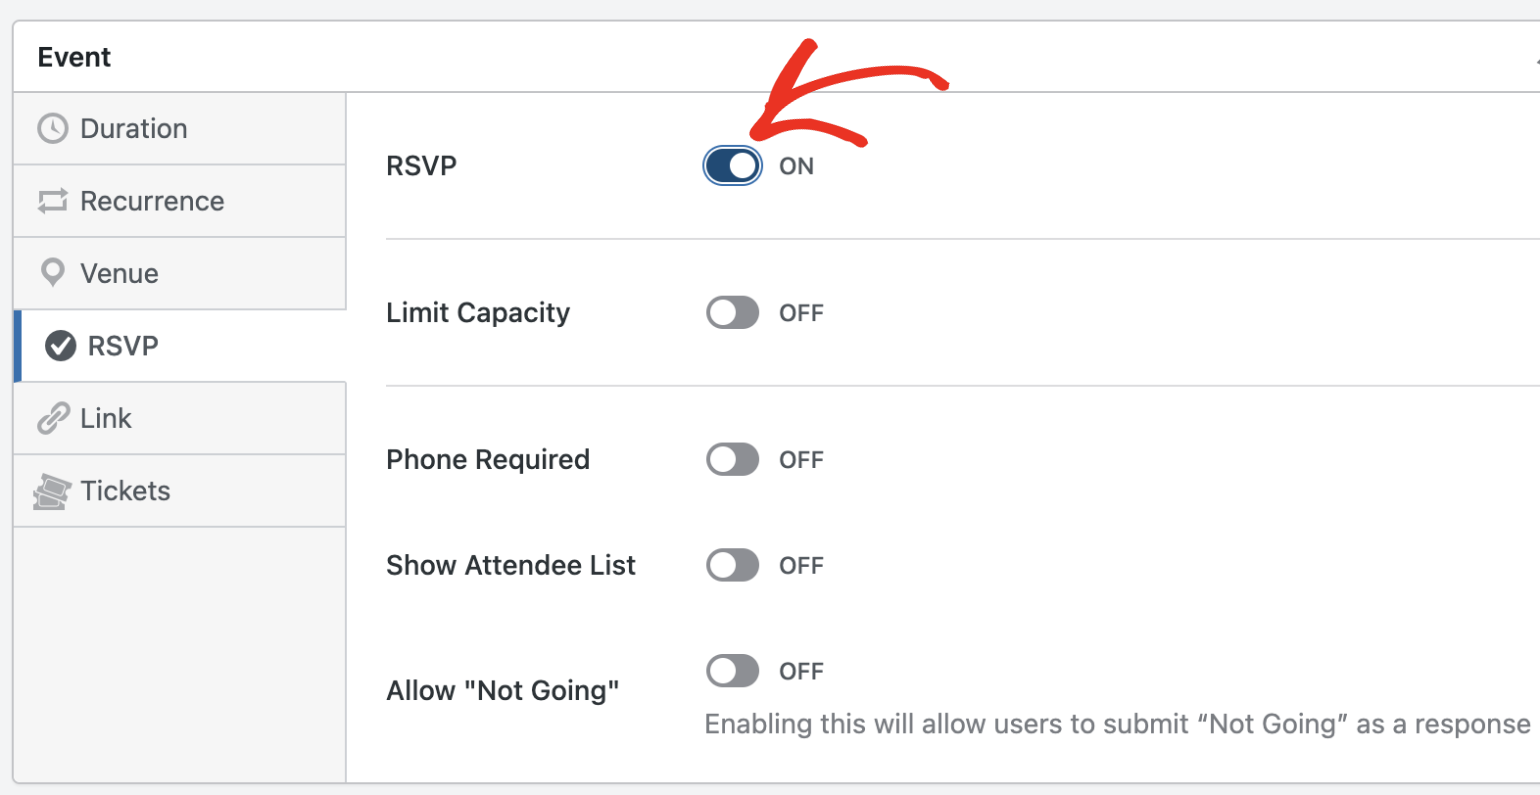
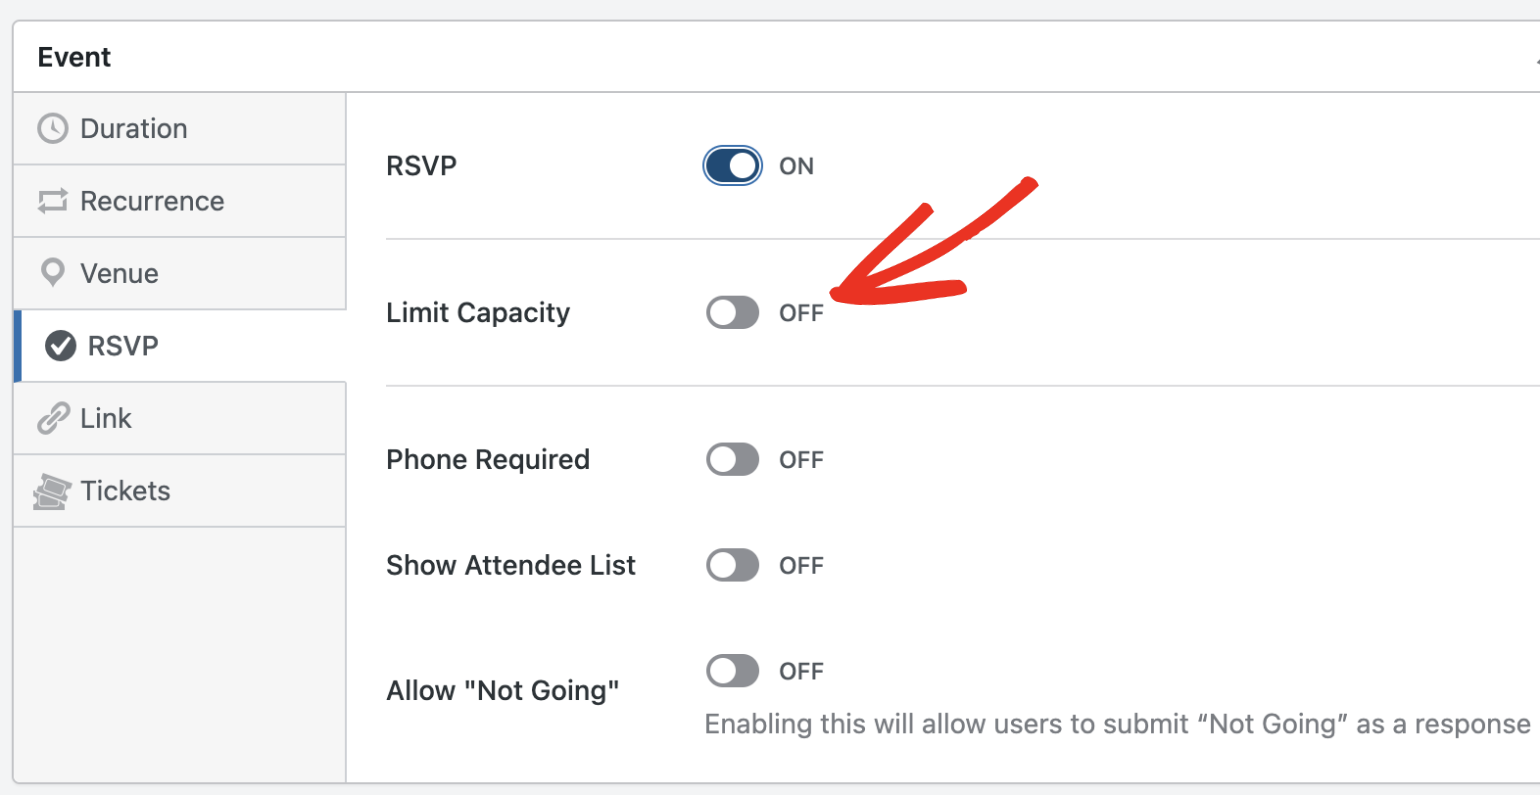
If you’d like to limit the number of attendees, toggle the Limit Capacity switch to the ON position.
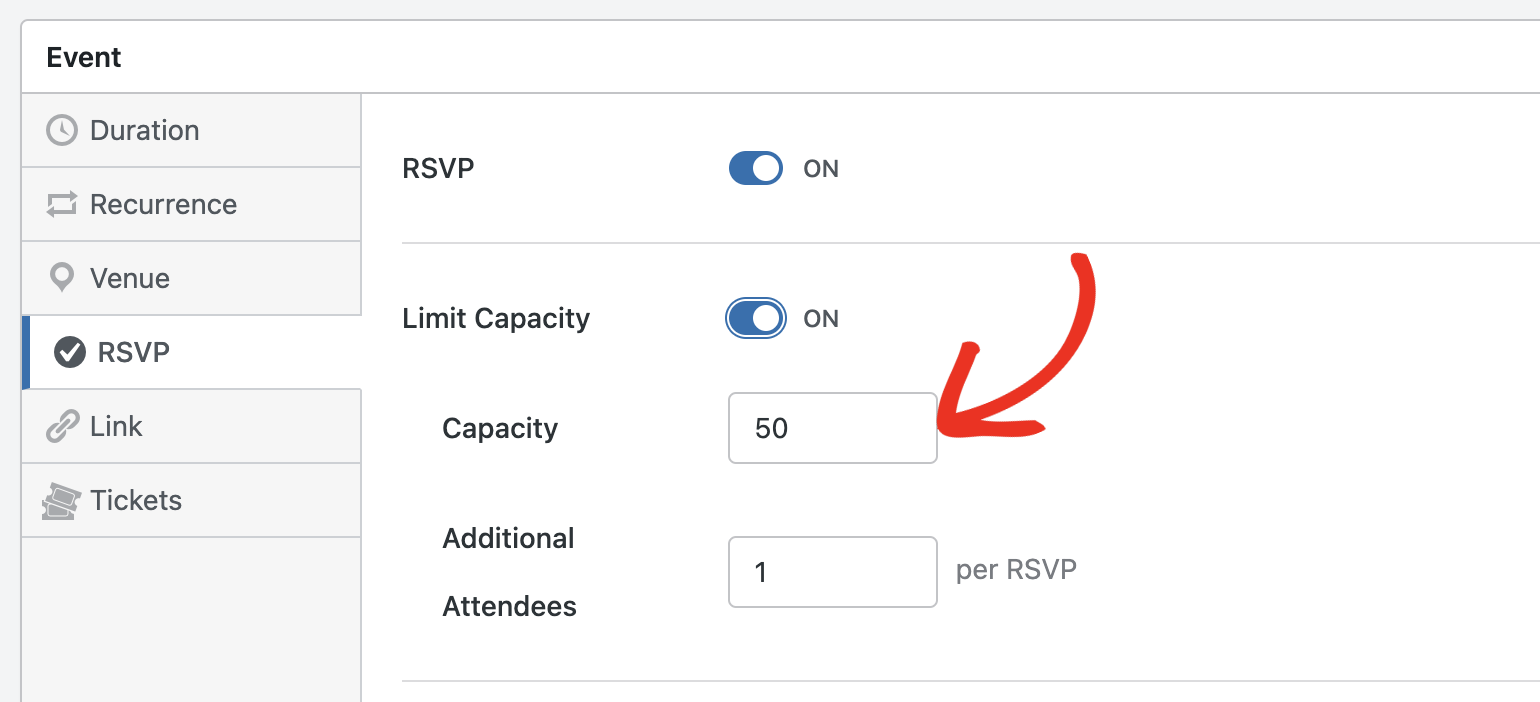
After that, additional options will appear. You’ll need to enter the maximum number of attendees you’d like to allow in the Capacity field.
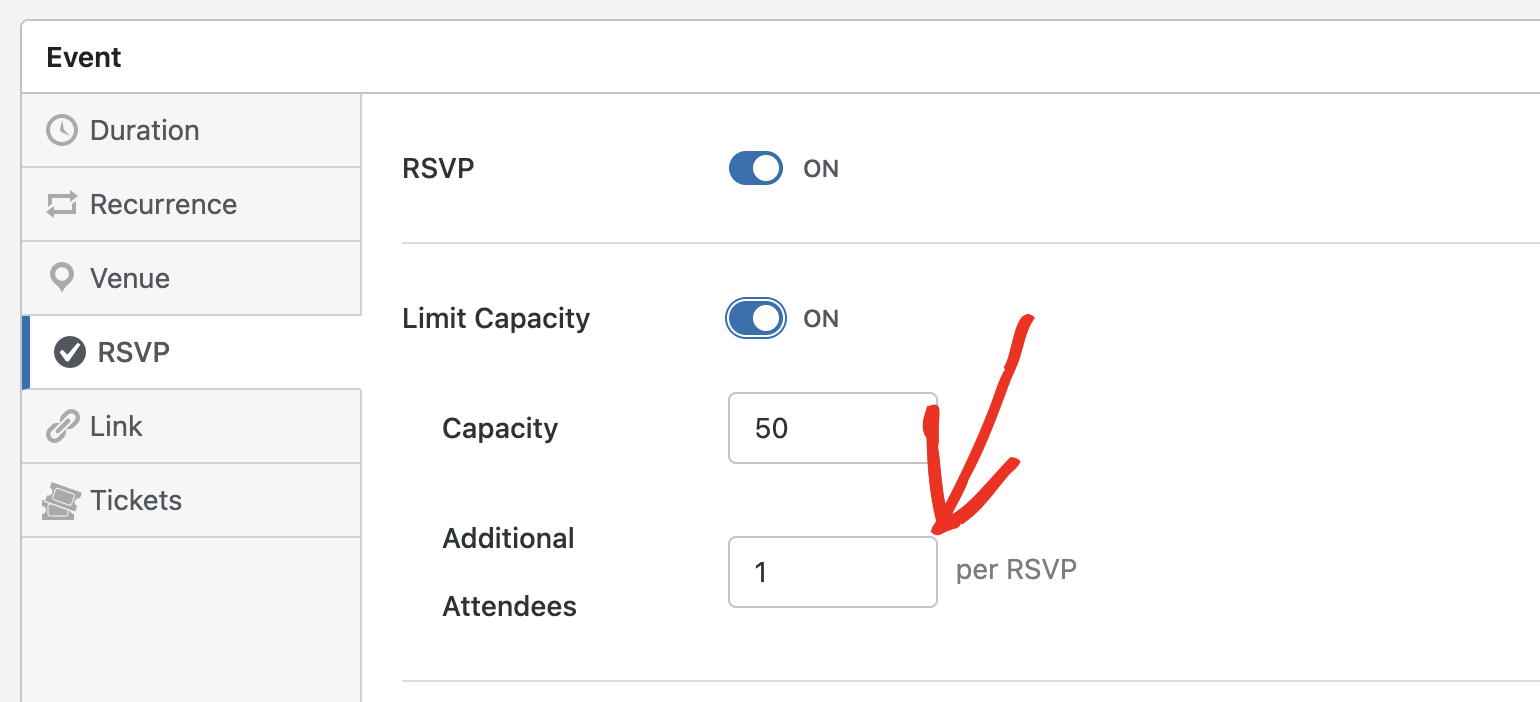
You can also allow RSVPs to include additional guests. To do so, specify how many guests each RSVP can add in the Additional Attendees field.
There are other optional settings you can enable to further customize the RSVP for your event.
If you’d like to require phone numbers from attendees, toggle the Phone Required option to the ON position.
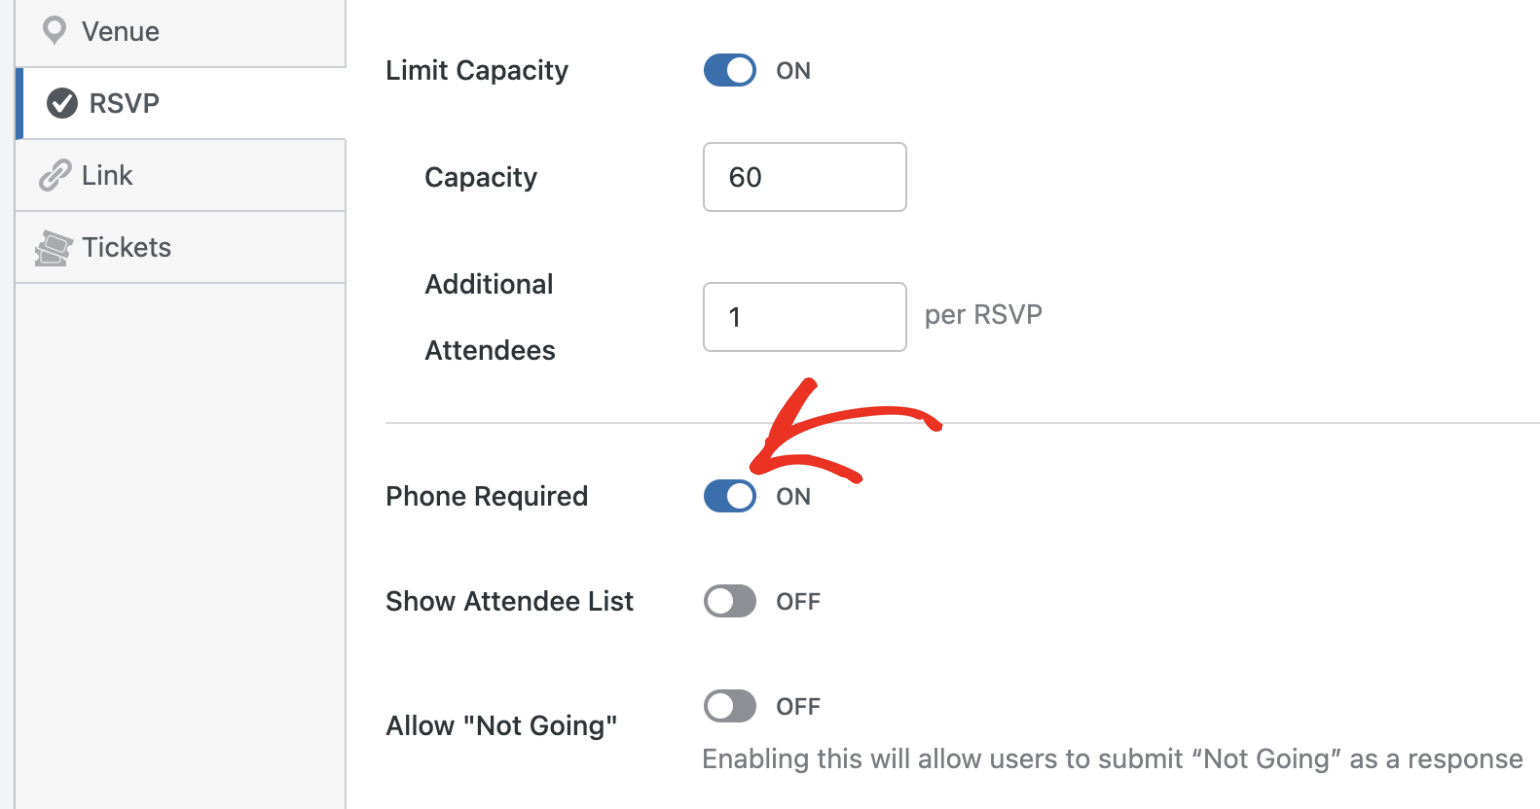
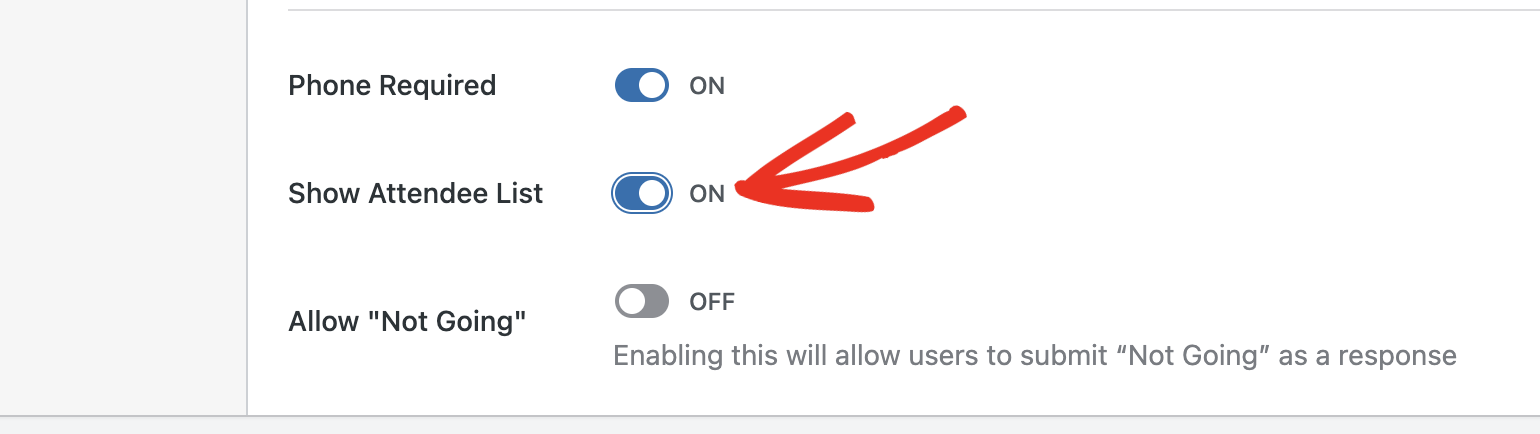
To display the public attendee list on your site’s frontend, toggle on the Show Attendee List option. This will display a table with all attendees on the event detail page.
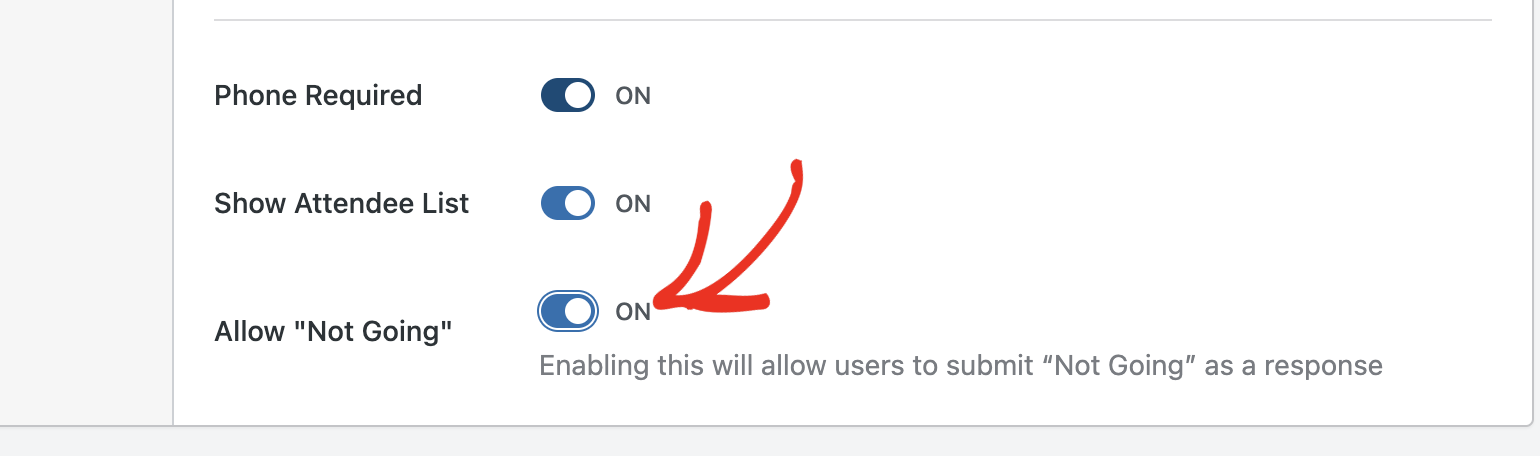
You can also allow users to decline attending a specific event from the frontend. To do so, toggle the Allow “Not Going” option to the ON position.
Once you’re done configuring your RSVP options, be sure to update or publish your event to save your changes.
The Registration Form tab sits next to the RSVP tab in the same Event section. Turn it on to collect additional details from RSVPs, such as dietary requirements or session preferences.
Requirements: Collecting registration answers on an RSVP event requires the RSVP addon version 1.5.0 or later.
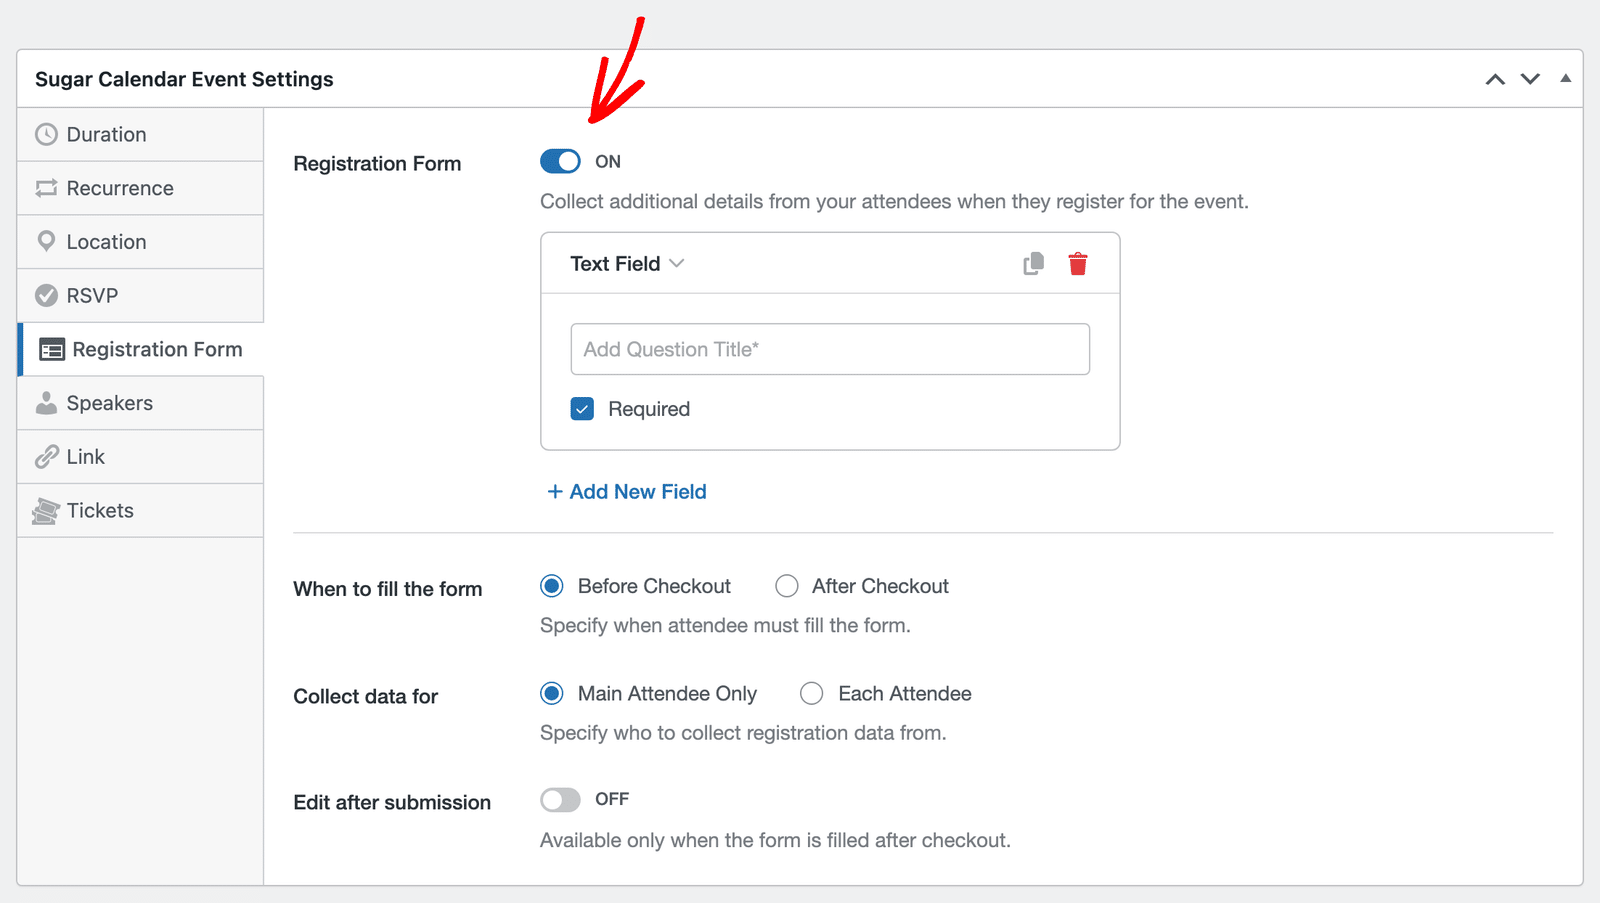
See our guide on creating a registration form for your events for the full walkthrough.
Note: The registration form only appears for attending responses, so anyone who declines never sees it. Ticket type targeting does not apply to RSVP events, because RSVP has no ticket types.
Viewing RSVP Event in the Frontend
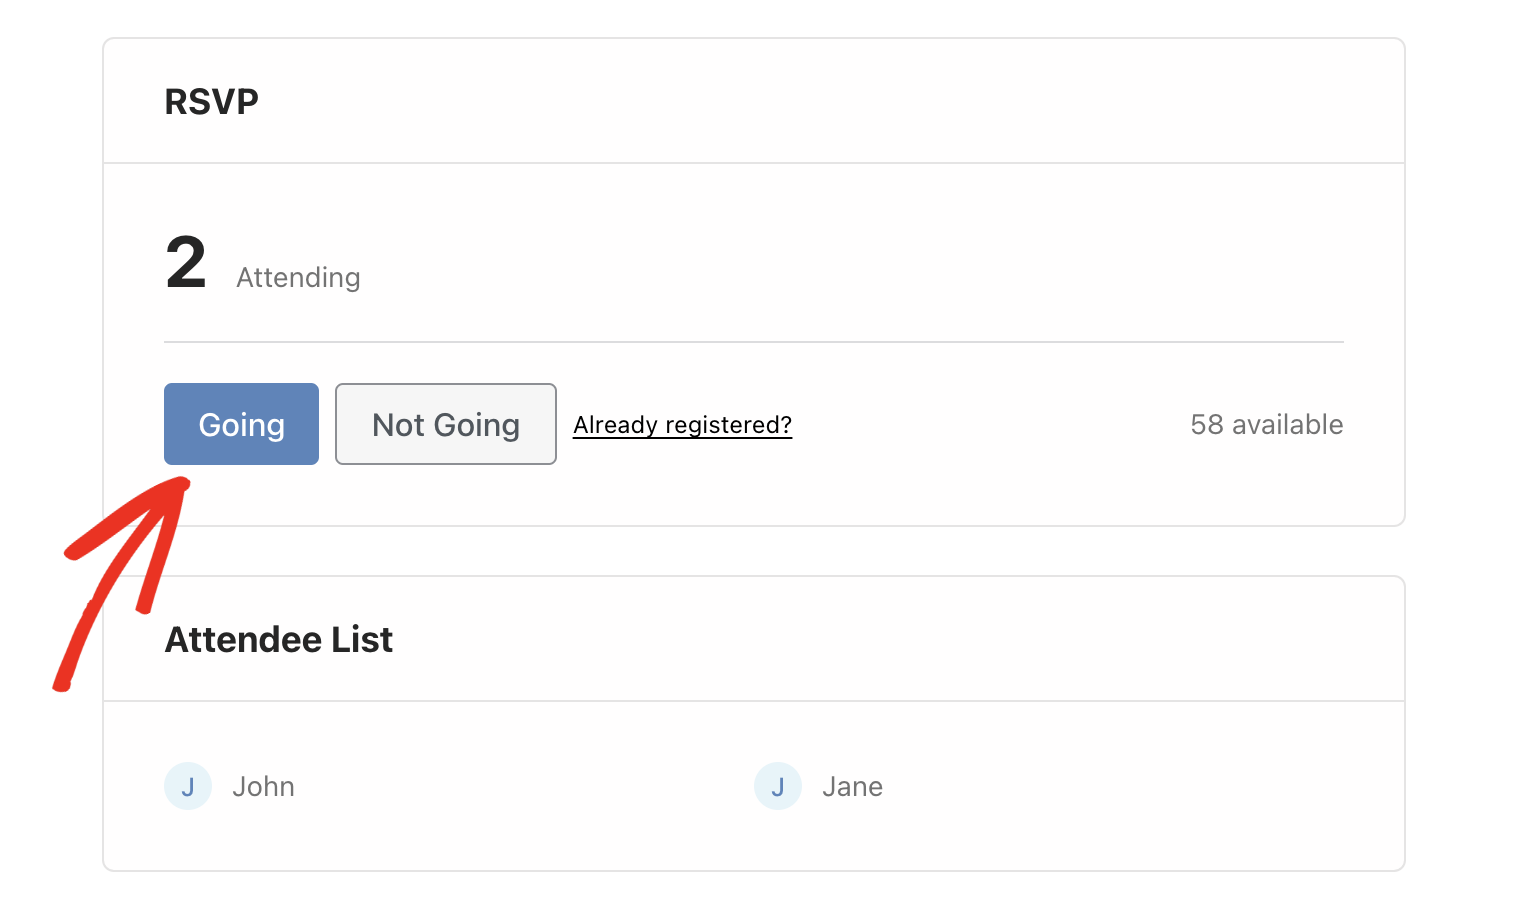
When RSVP is enabled, visitors will see RSVP options on the event’s detail page.
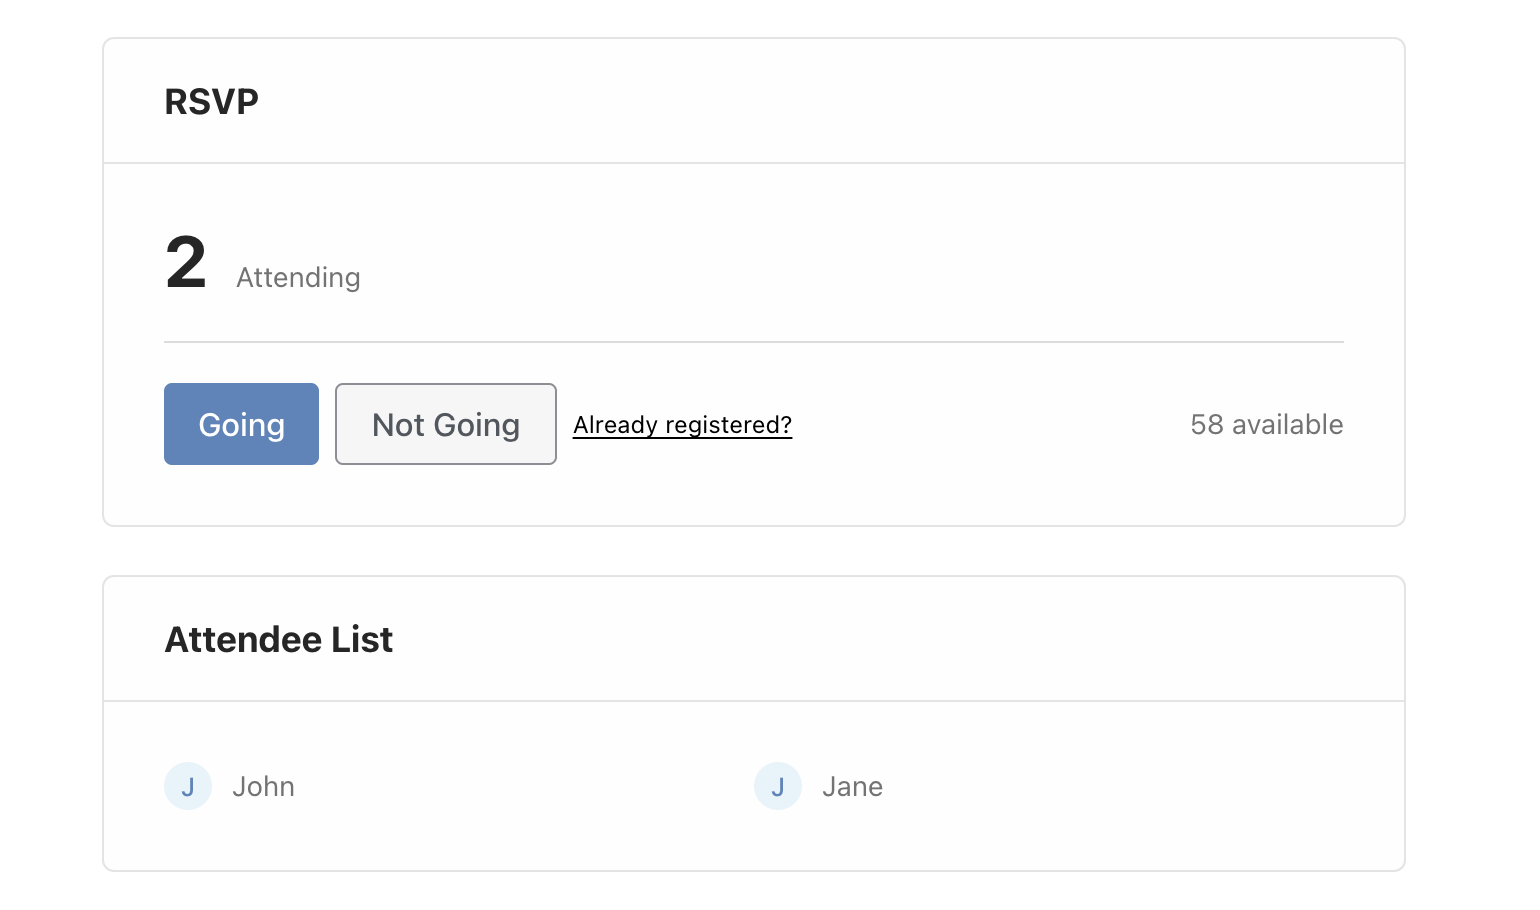
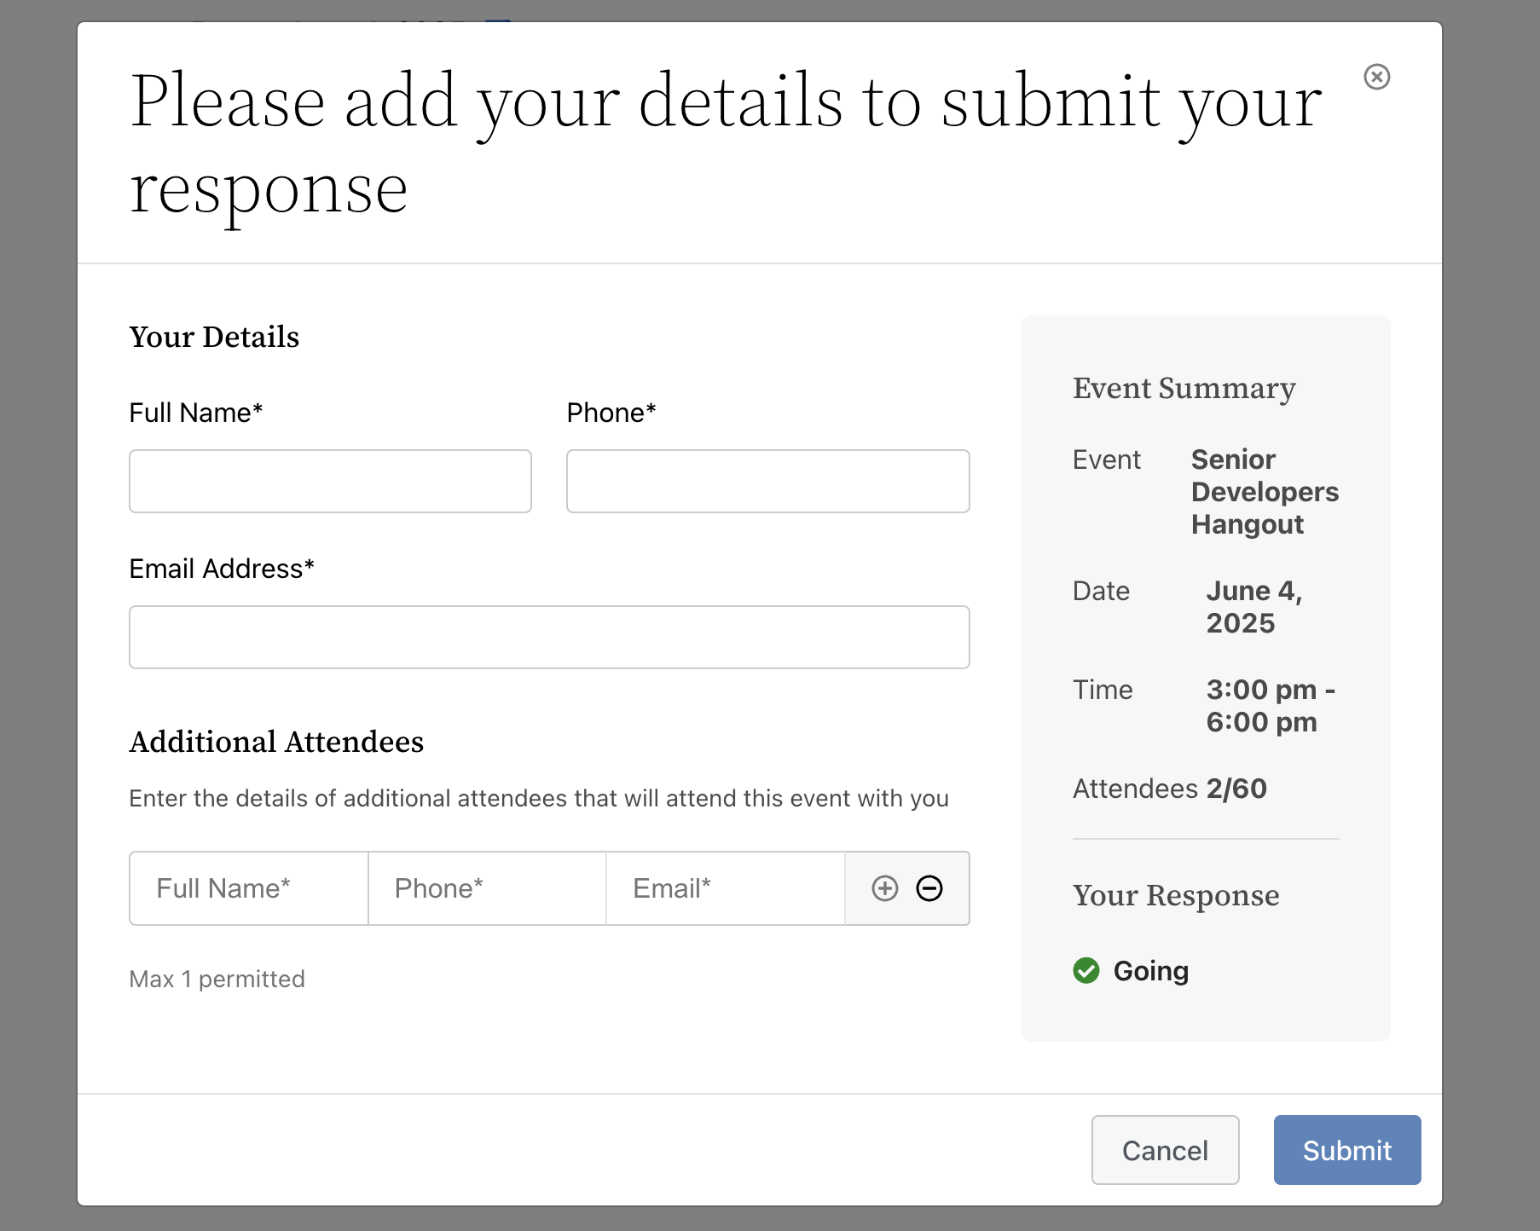
Clicking the Going button will pop up a form where users will need to fill in their details.
If you enabled Additional Attendees, users will be able to specify their details in the Additional Attendees field.
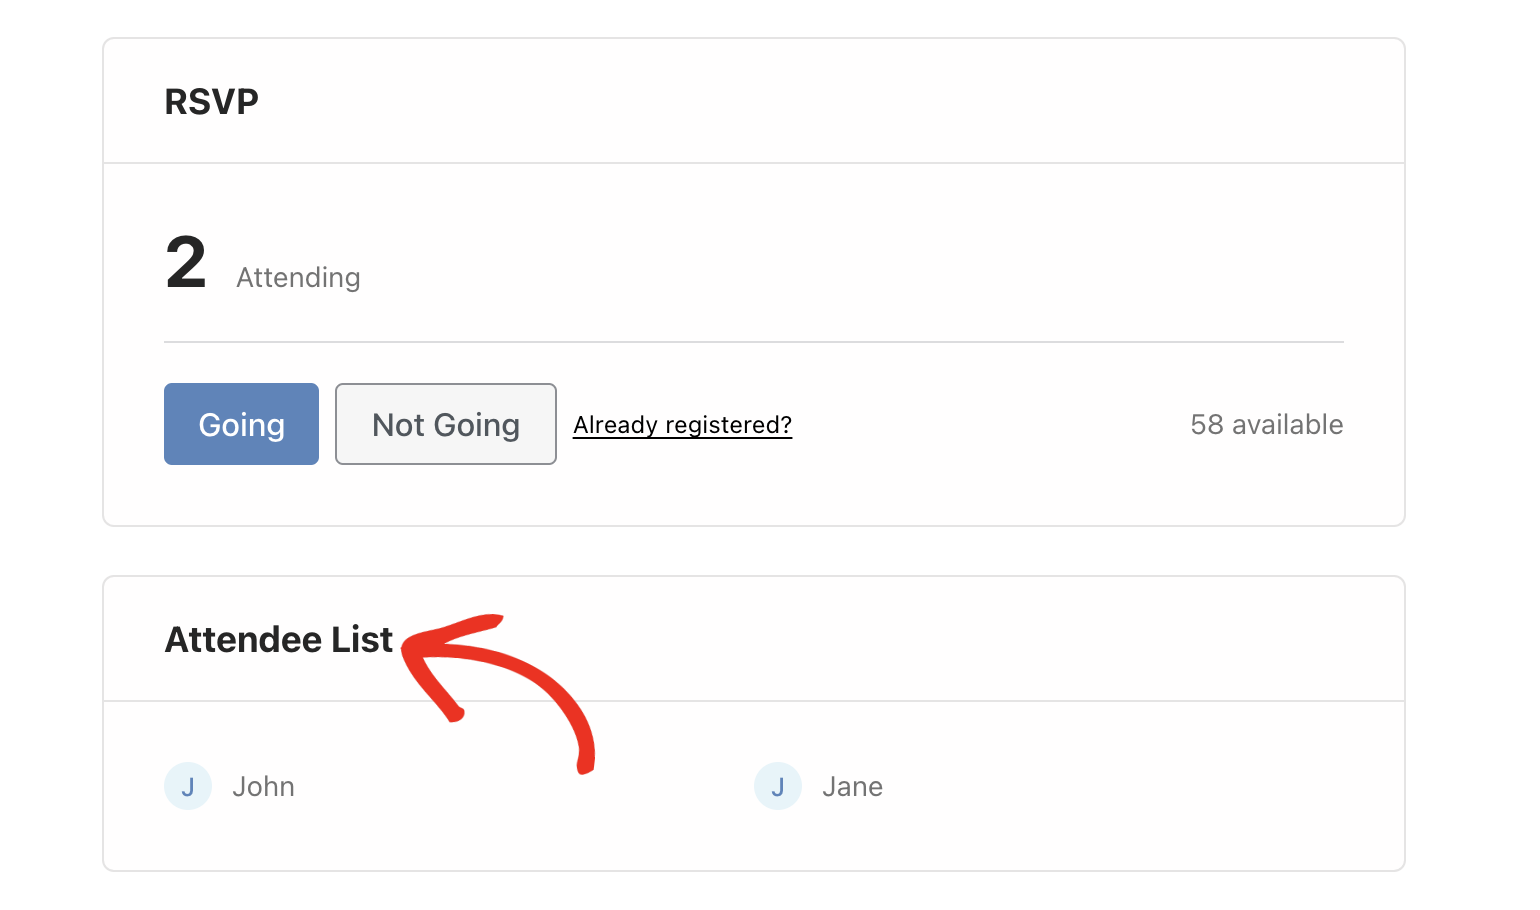
After completing the RSVP form and clicking Submit, the new attendee will be added to the Attendee List section.
If you enabled the Allow Not Going option, users will be able to decline attending your event by clicking the Not Going button.
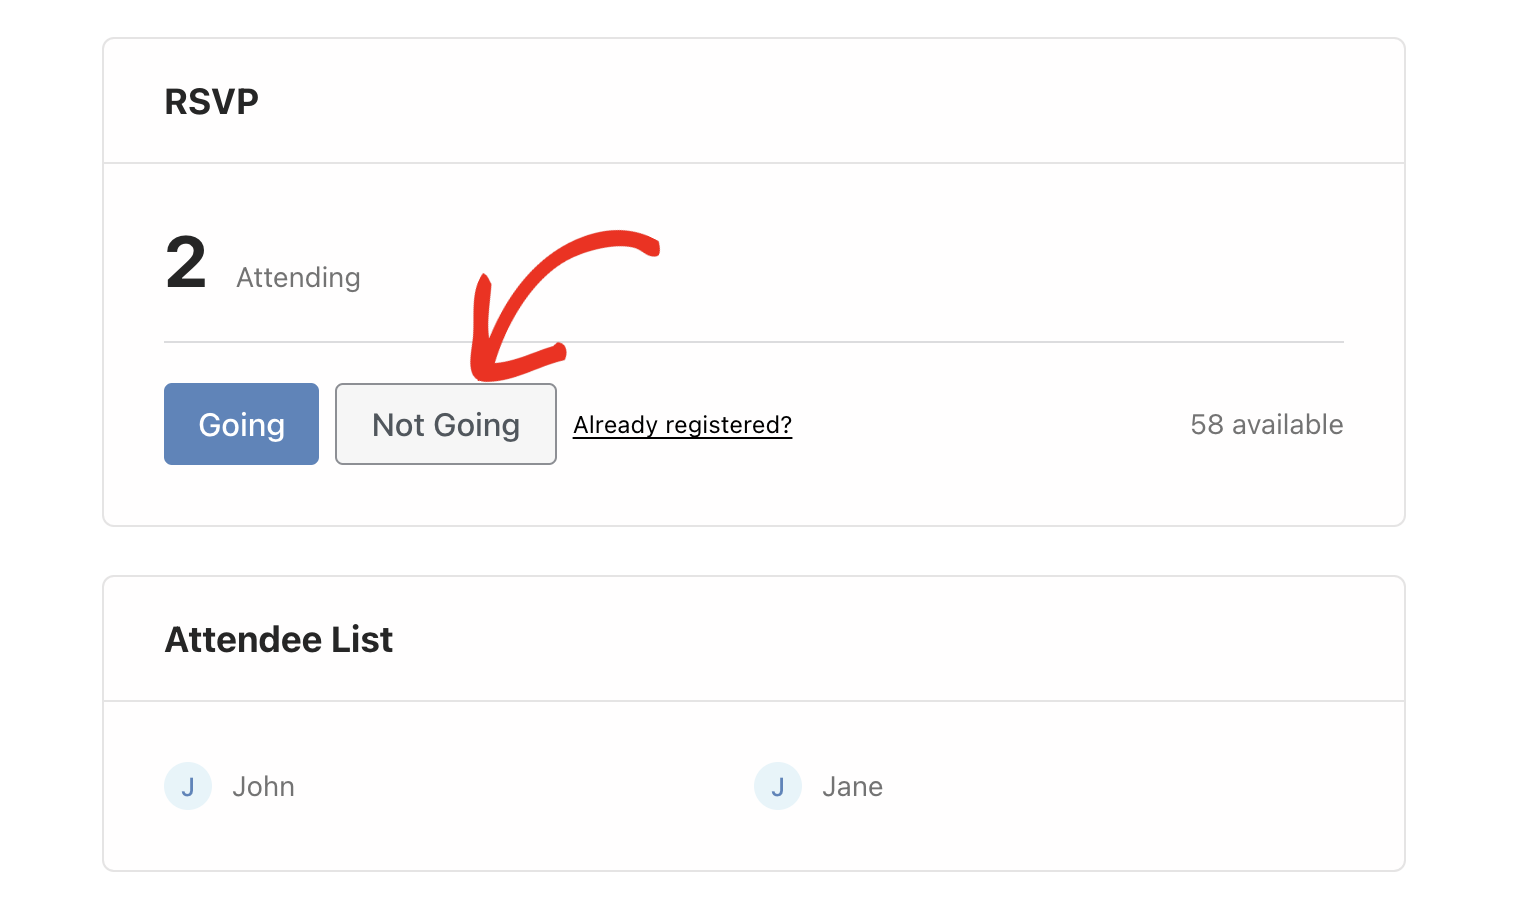
This will pop up a form that the user needs to fill out with their details.
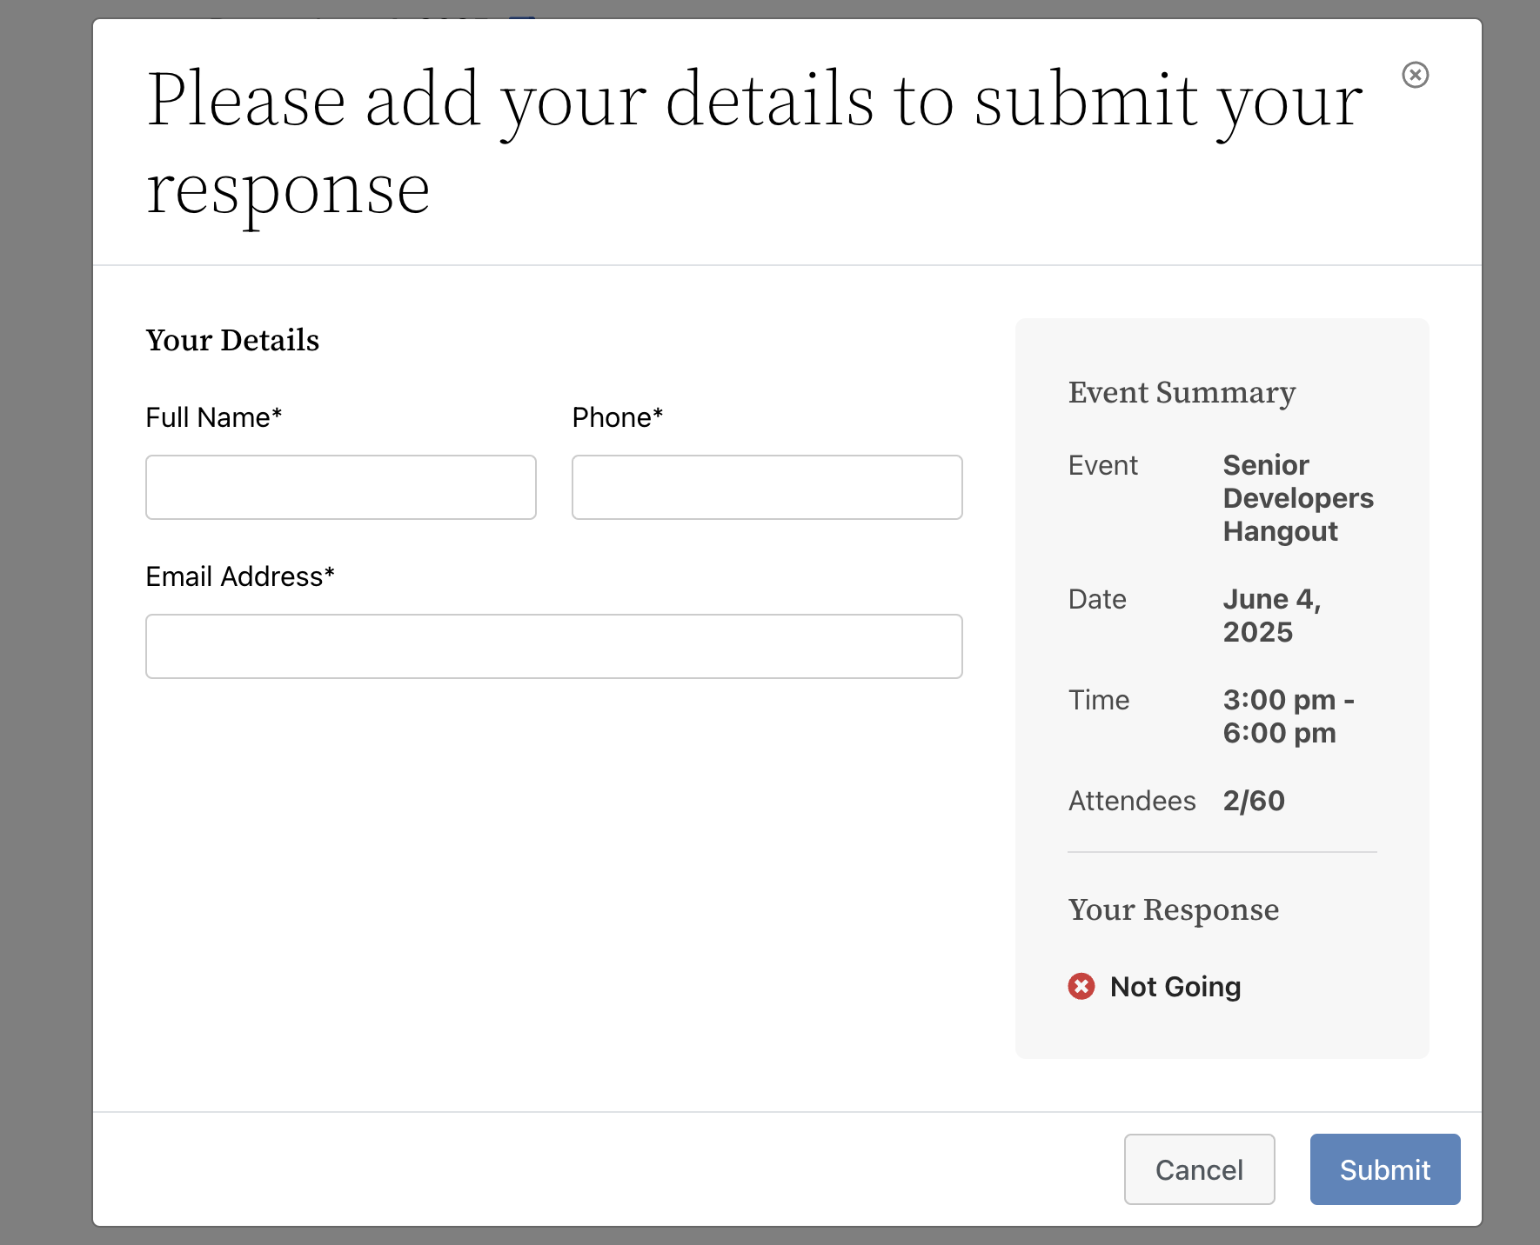
There is also real-time tracking of RSVP availability. It shows the total number of available RSVP seats and the number of users who have registered for the event.
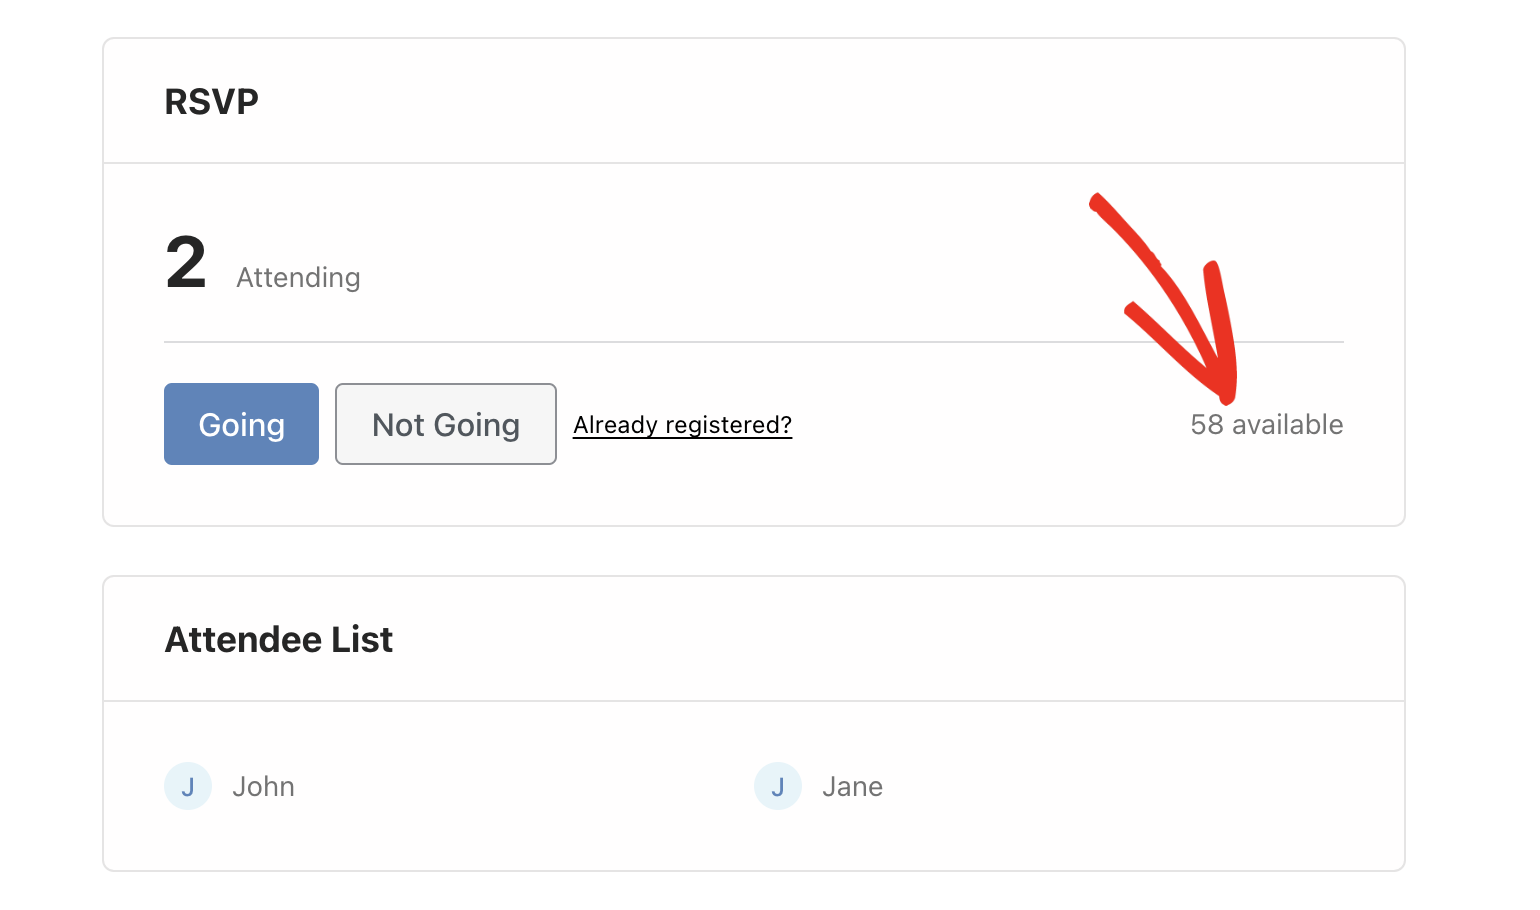
Users who’ve registered for the event can confirm their RSVP status by clicking the Already registered? link.
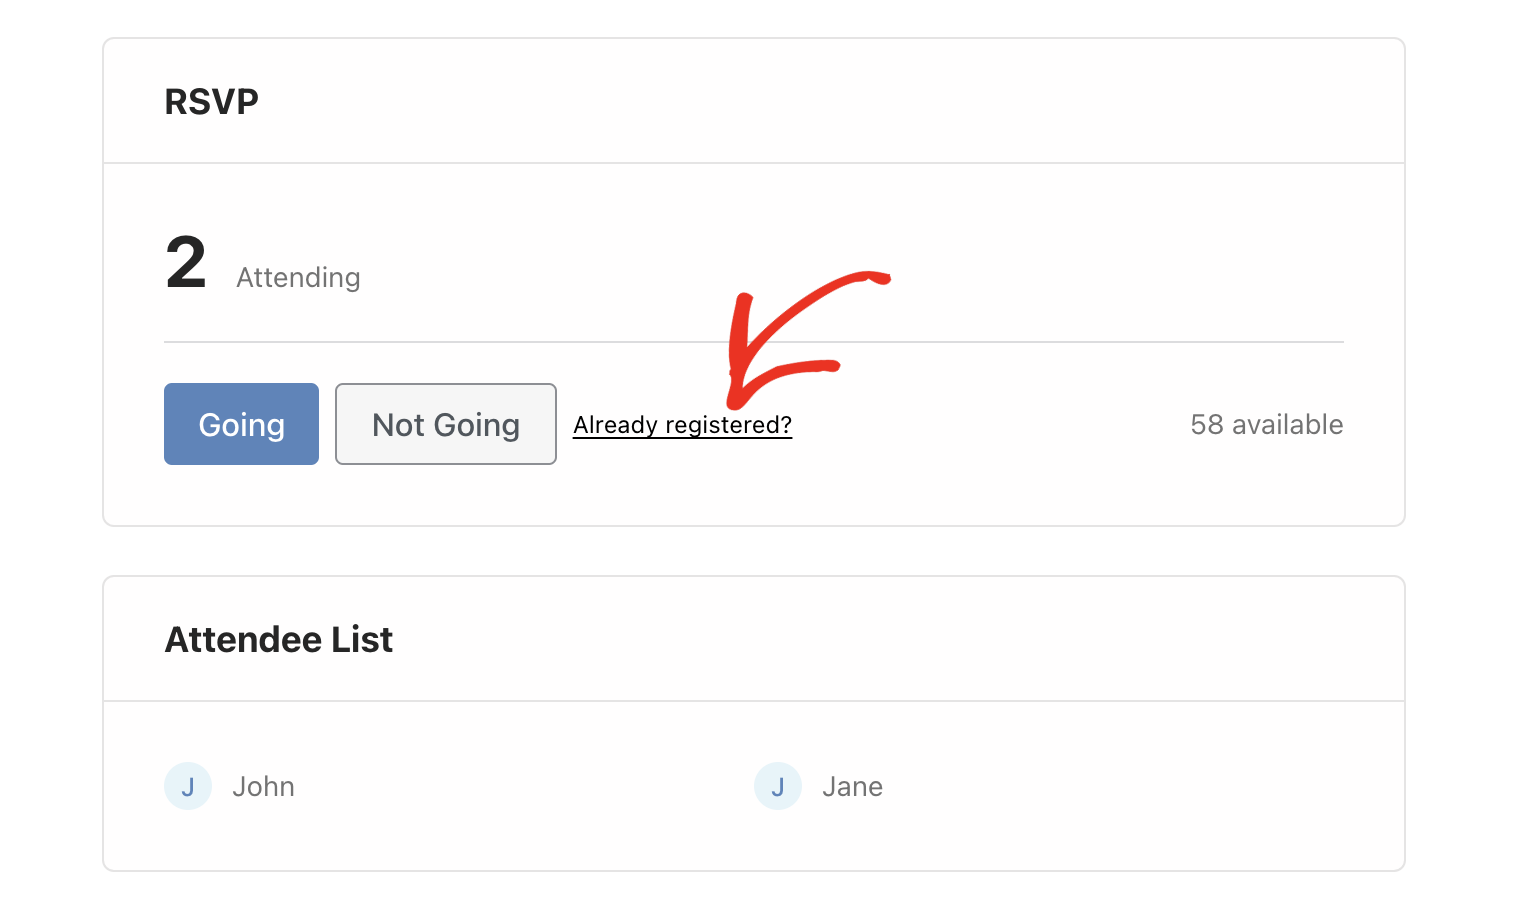
Then enter the email address used to RSVP for the event.
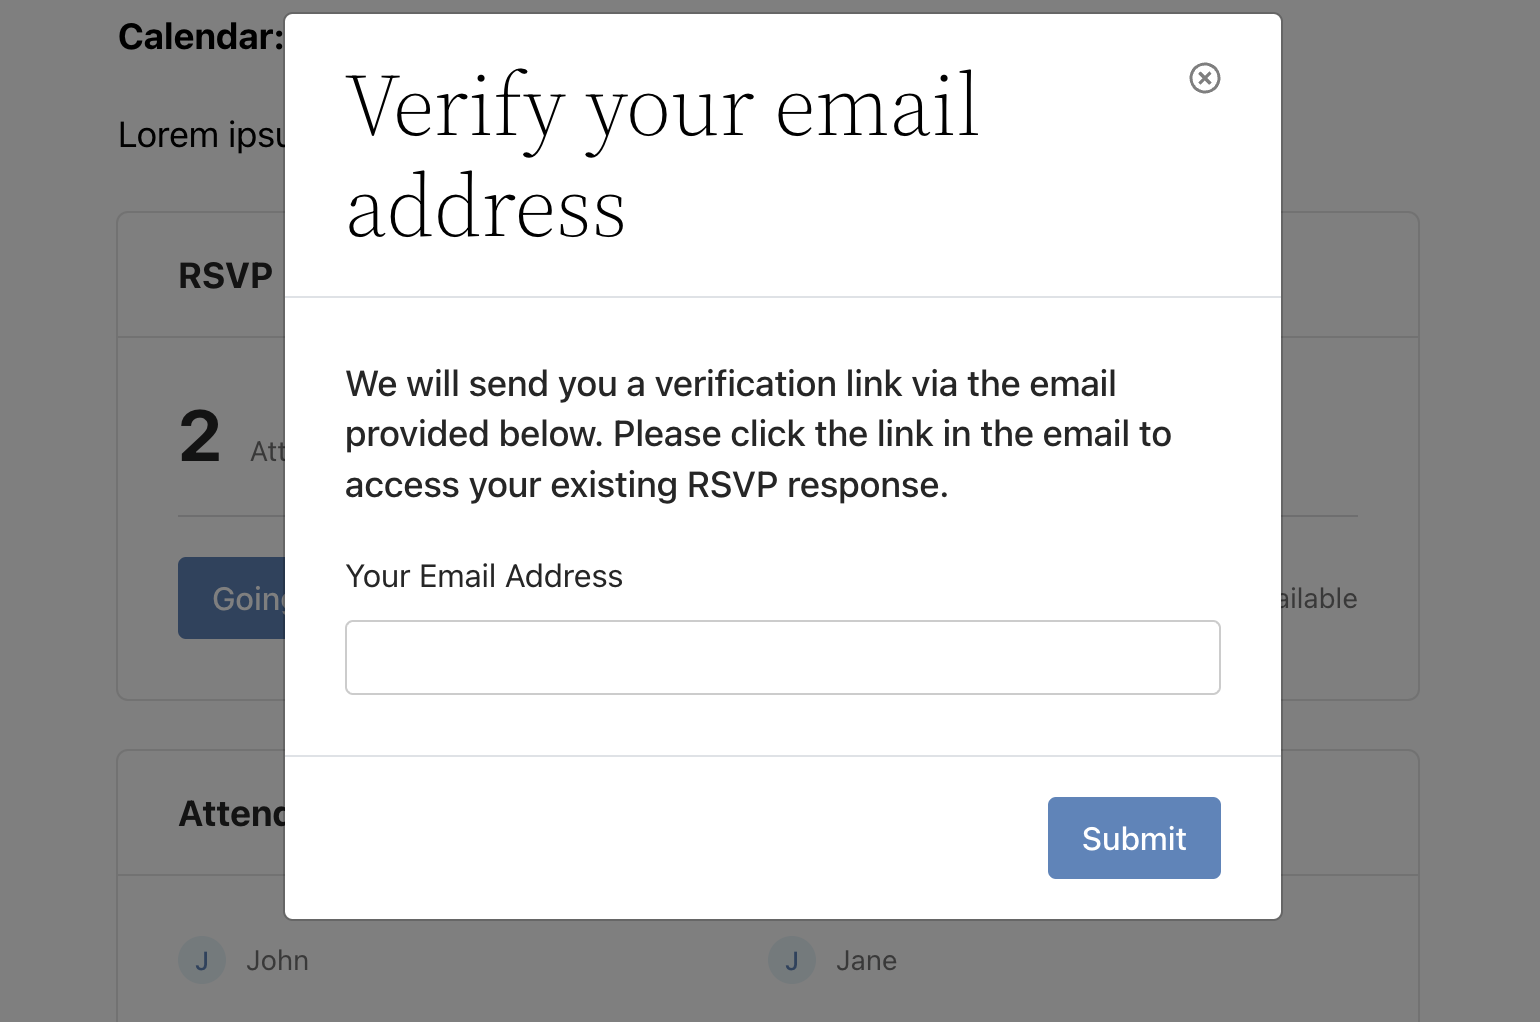
A verification email will be sent to the user’s email if they’ve previously registered for the event.
Managing RSVP Responses
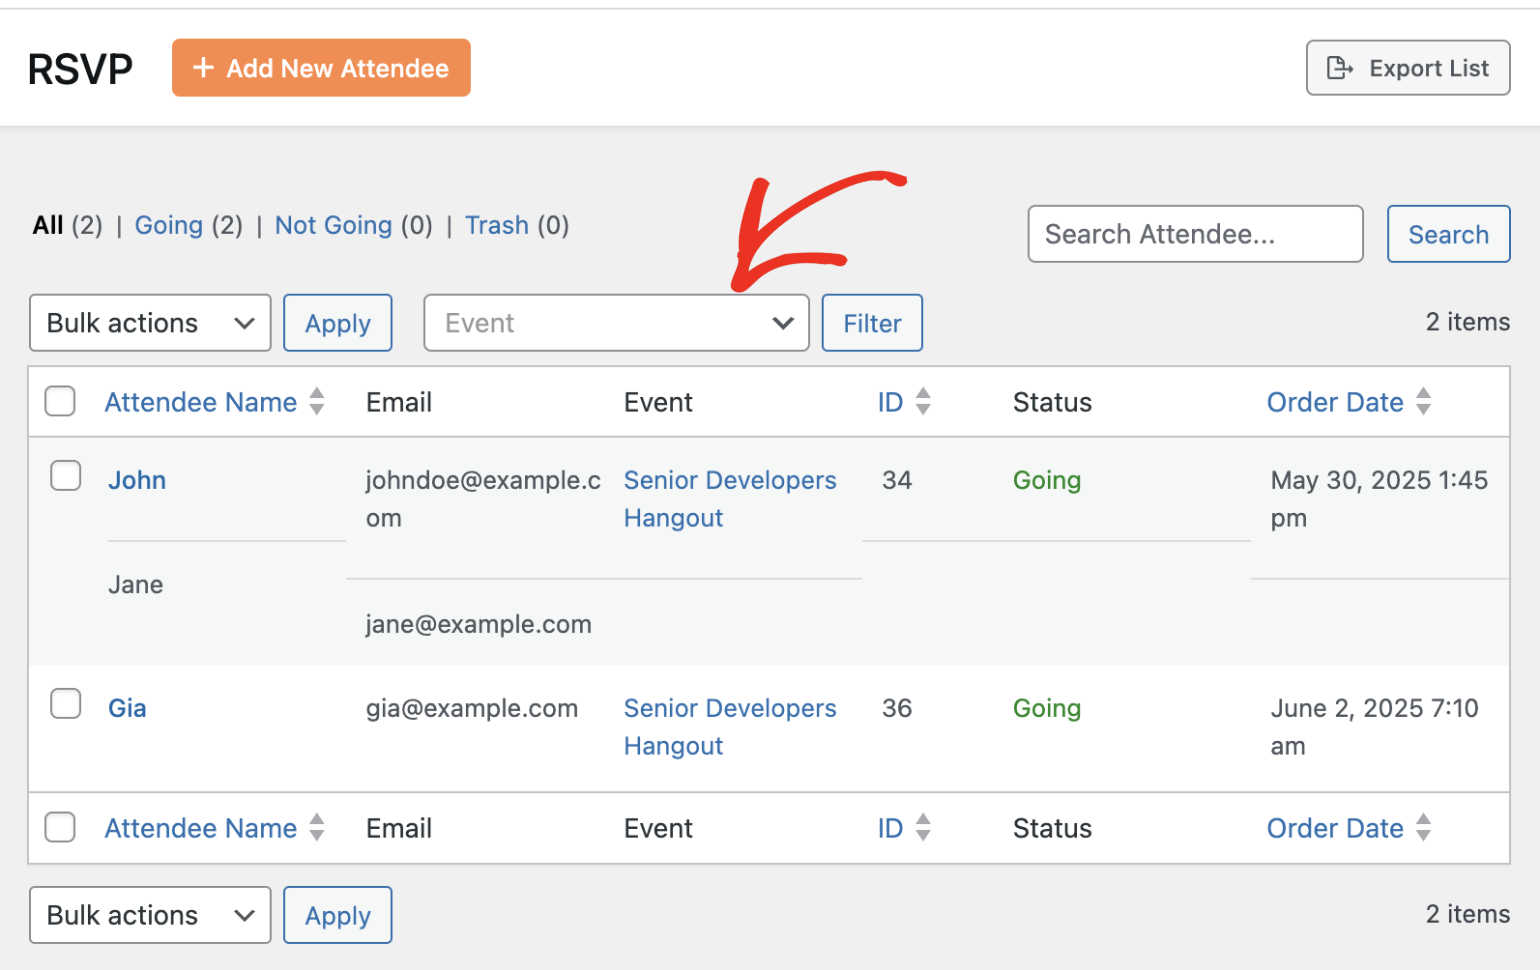
You can manage all RSVP responses by navigating to Events » RSVP in your WordPress admin area.
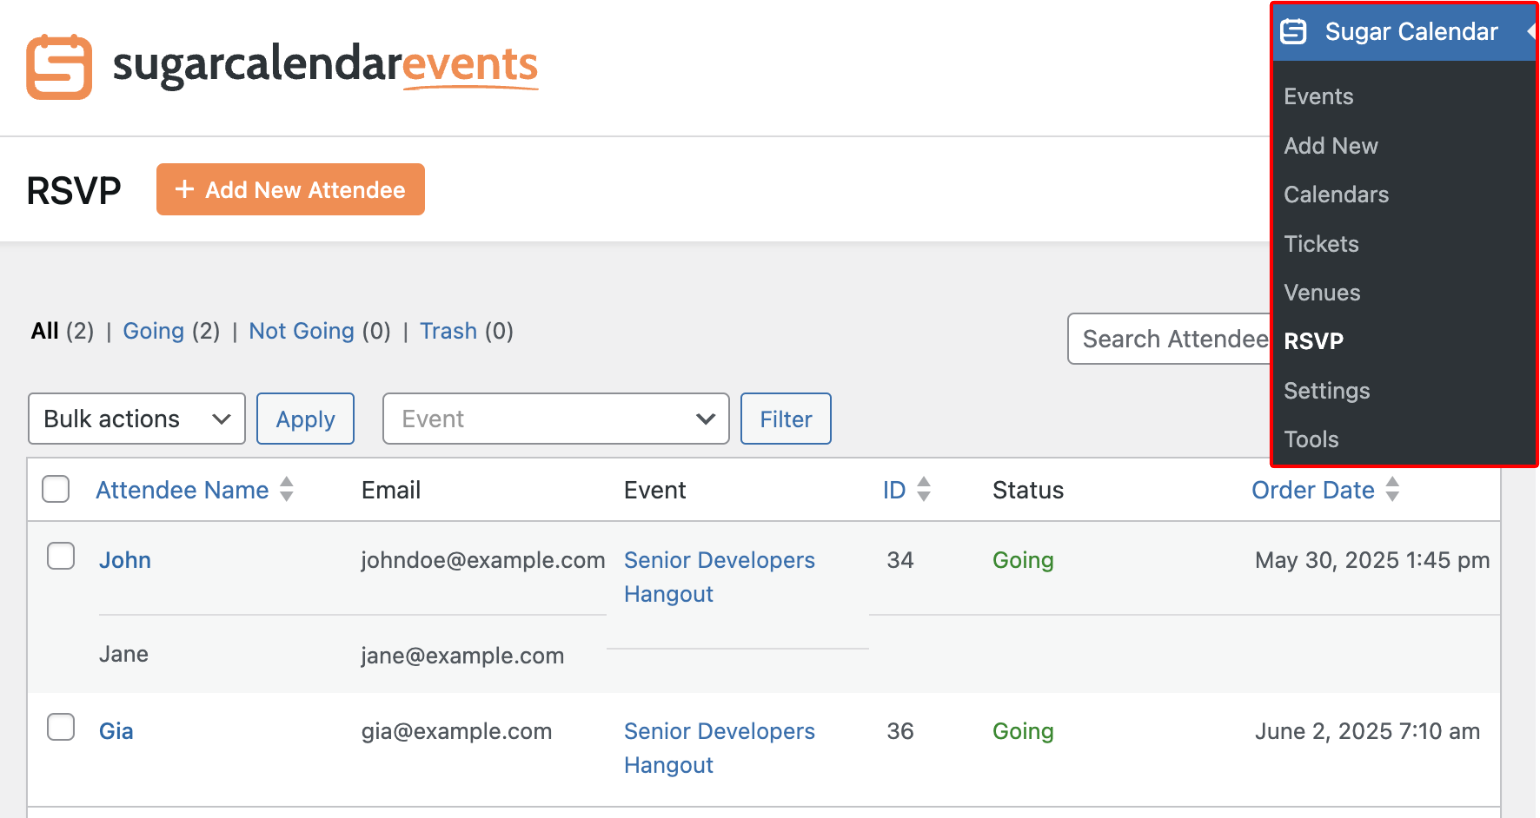
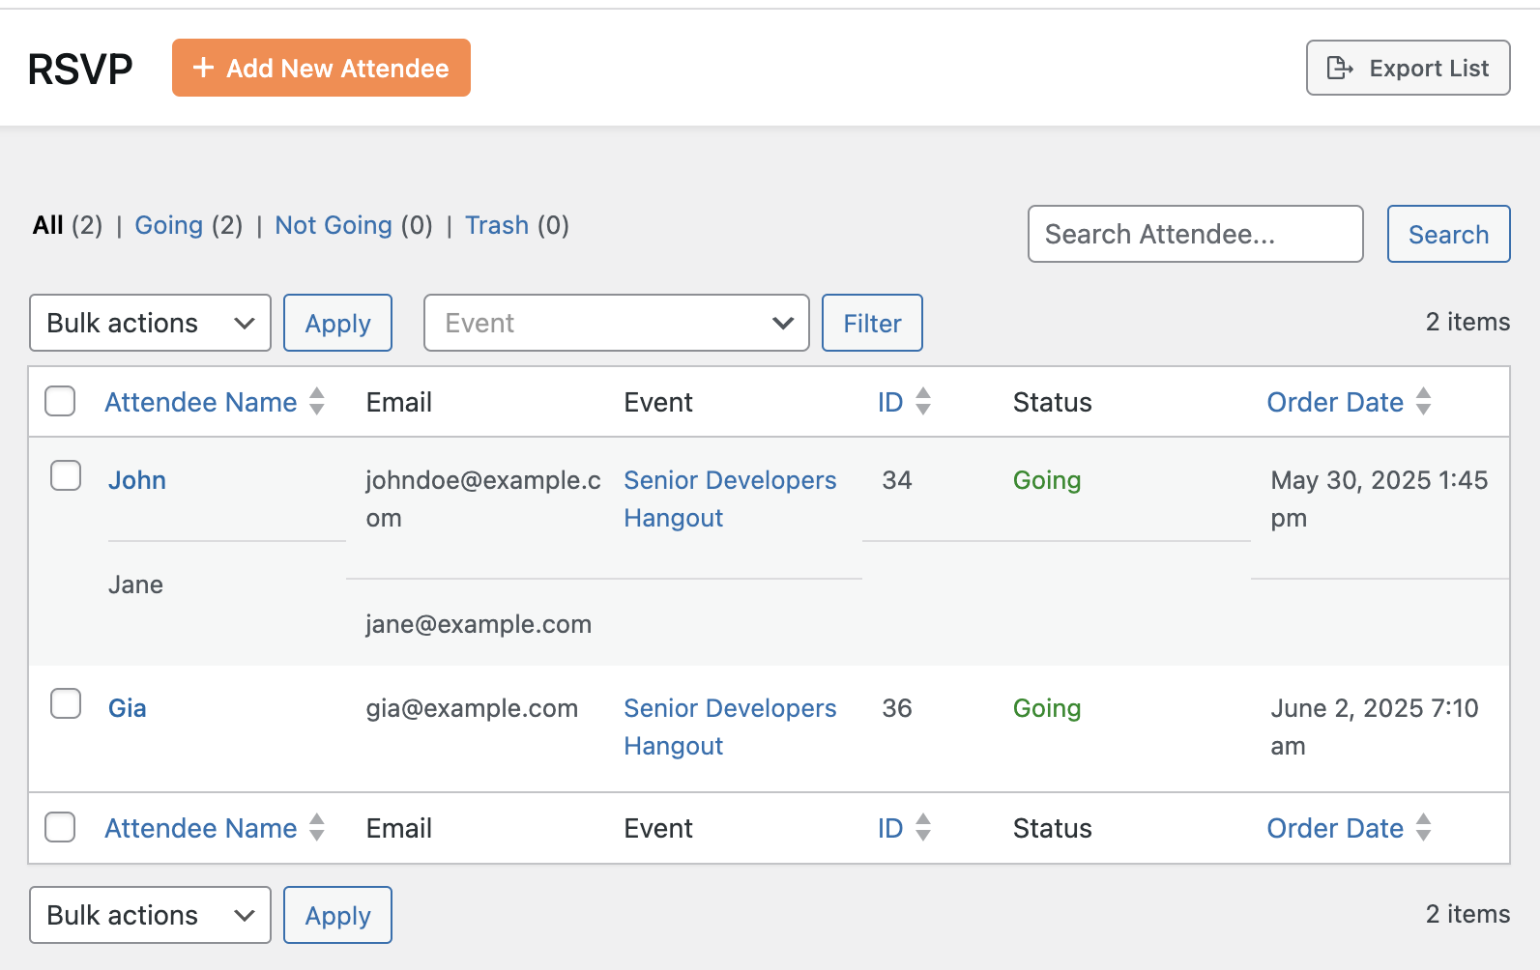
Here, you’ll see all attendees, their email addresses, RSVP status (e.g., Going, Not Going), event name, and submission time.
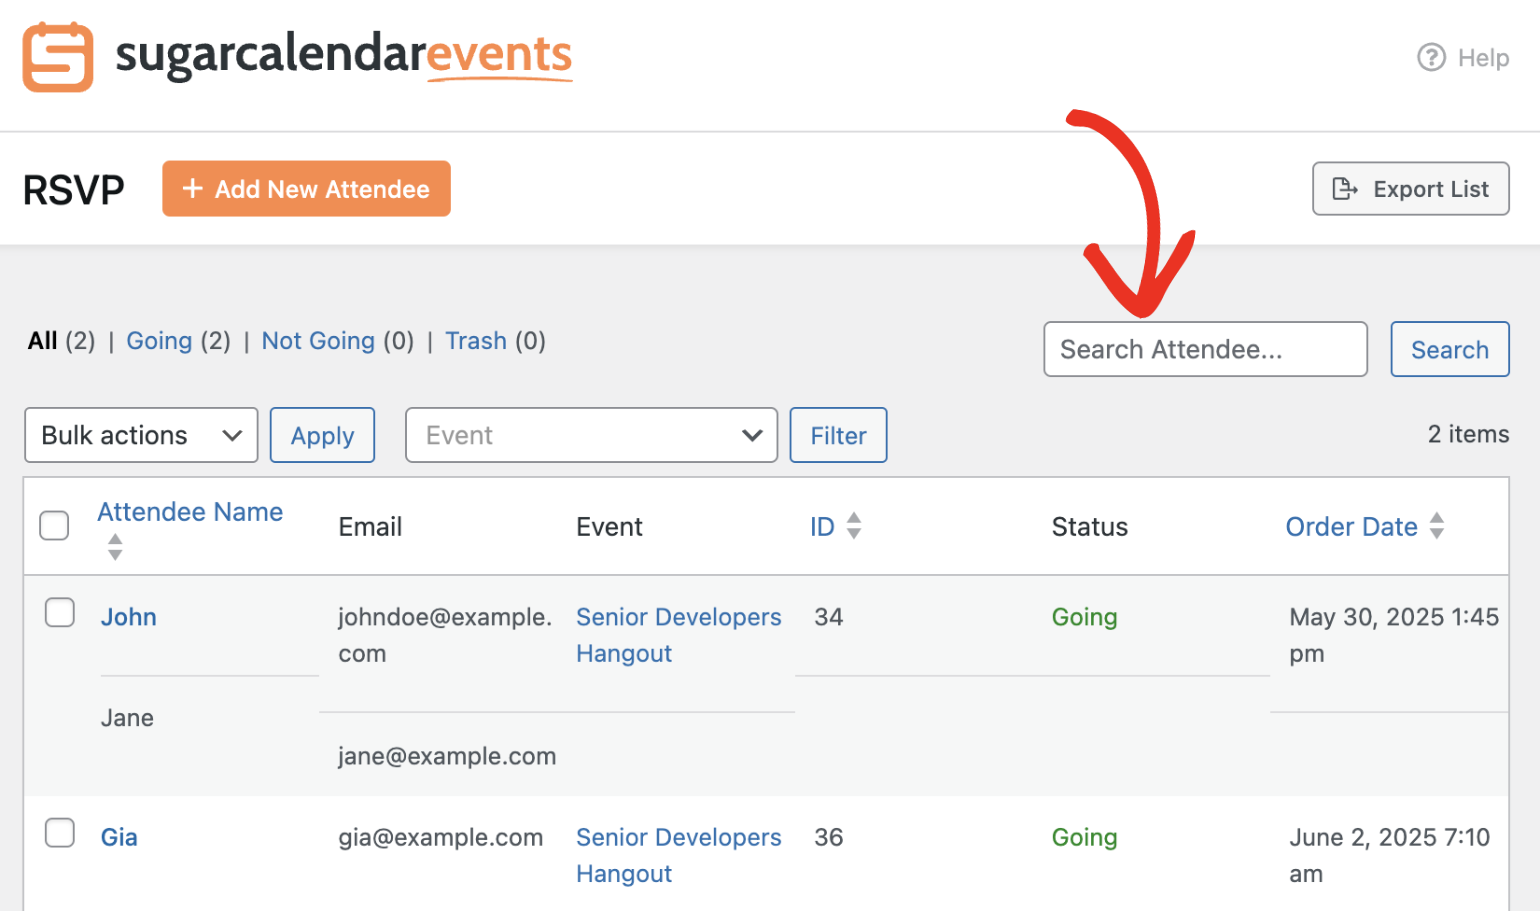
You can use the Search Attendee field to find specific attendees by name.
The Event filter lets you filter the RSVP list by specific events.
Adding Attendees Manually
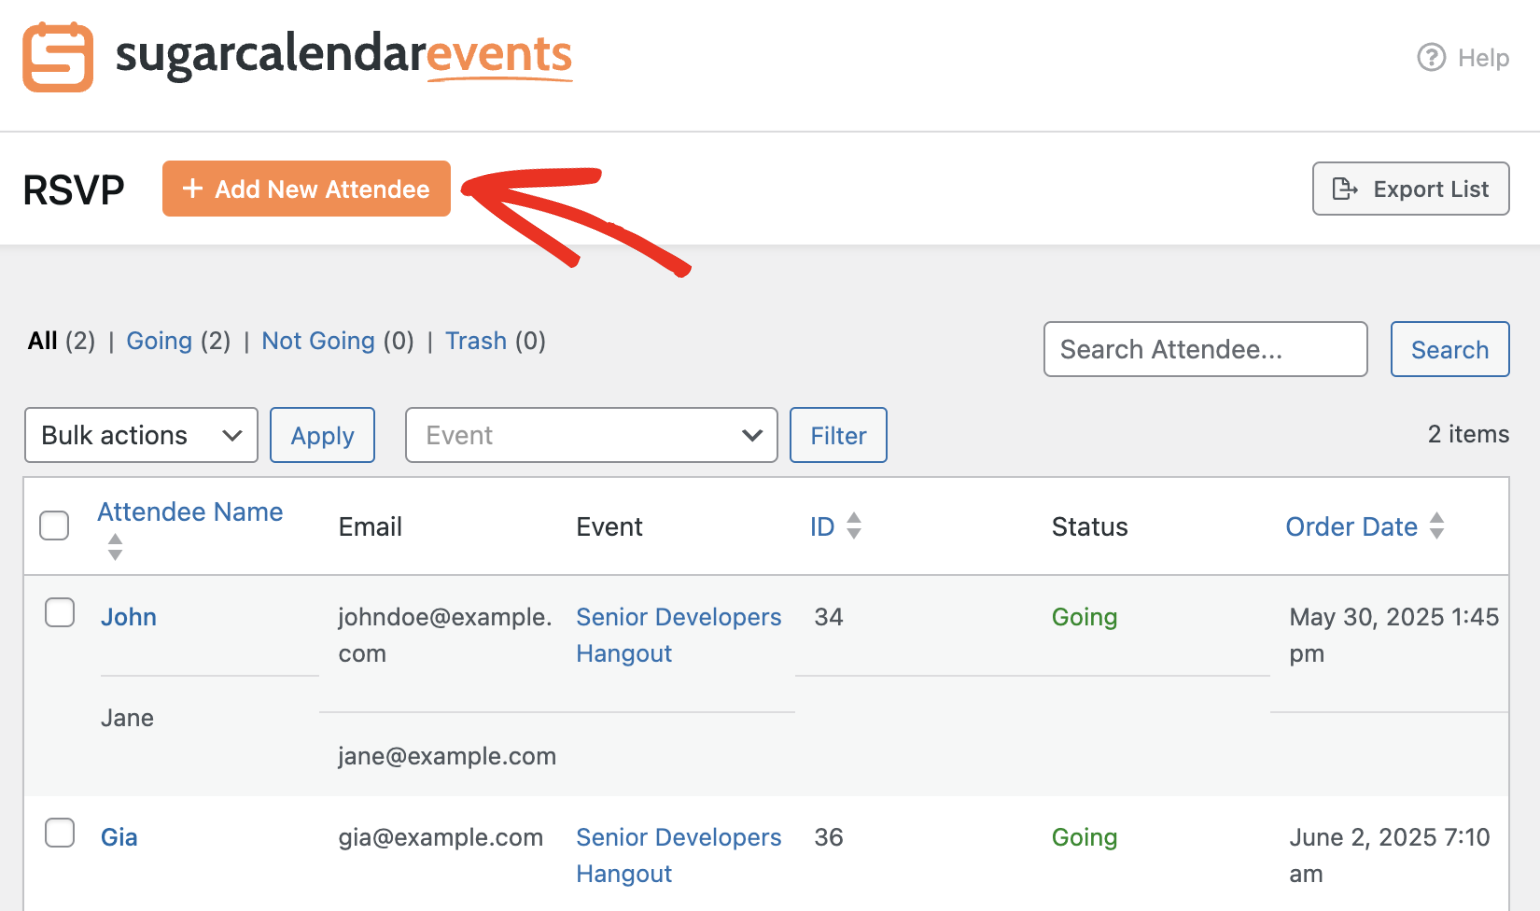
The RSVP addon in Sugar Calendar also lets you add attendees manually. To do so, click the Add New Attendee button from the RSVP dashboard.
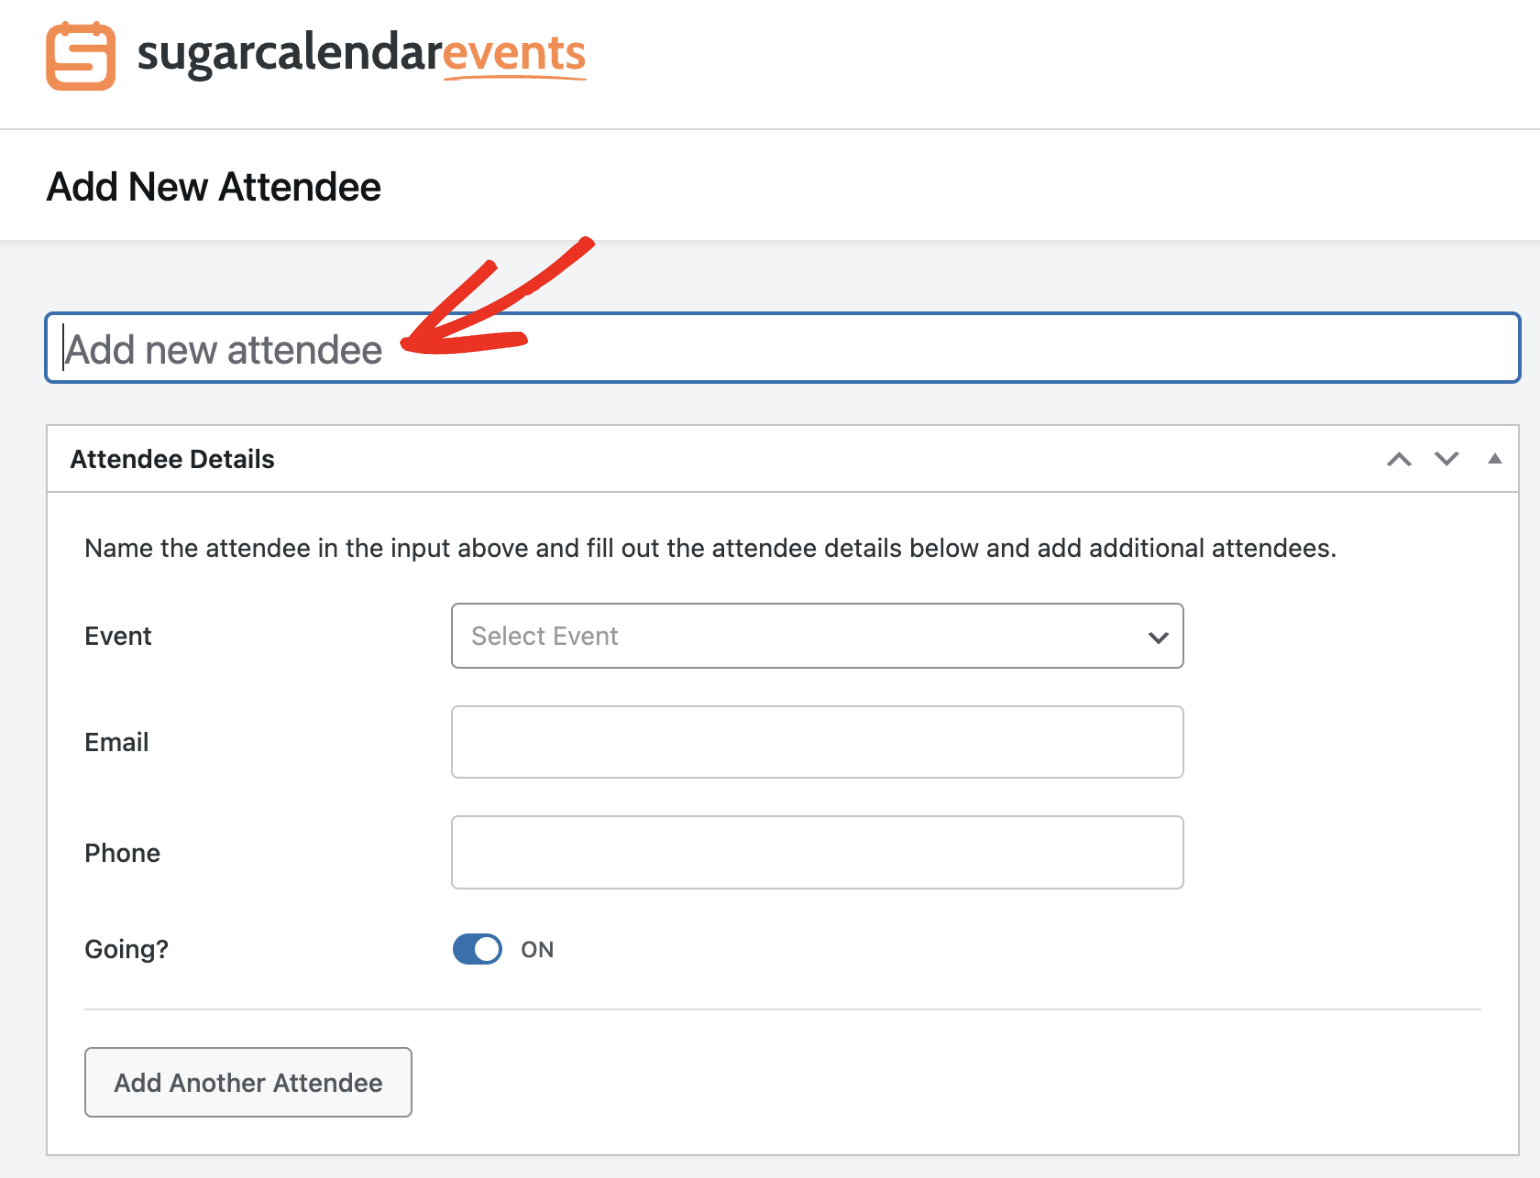
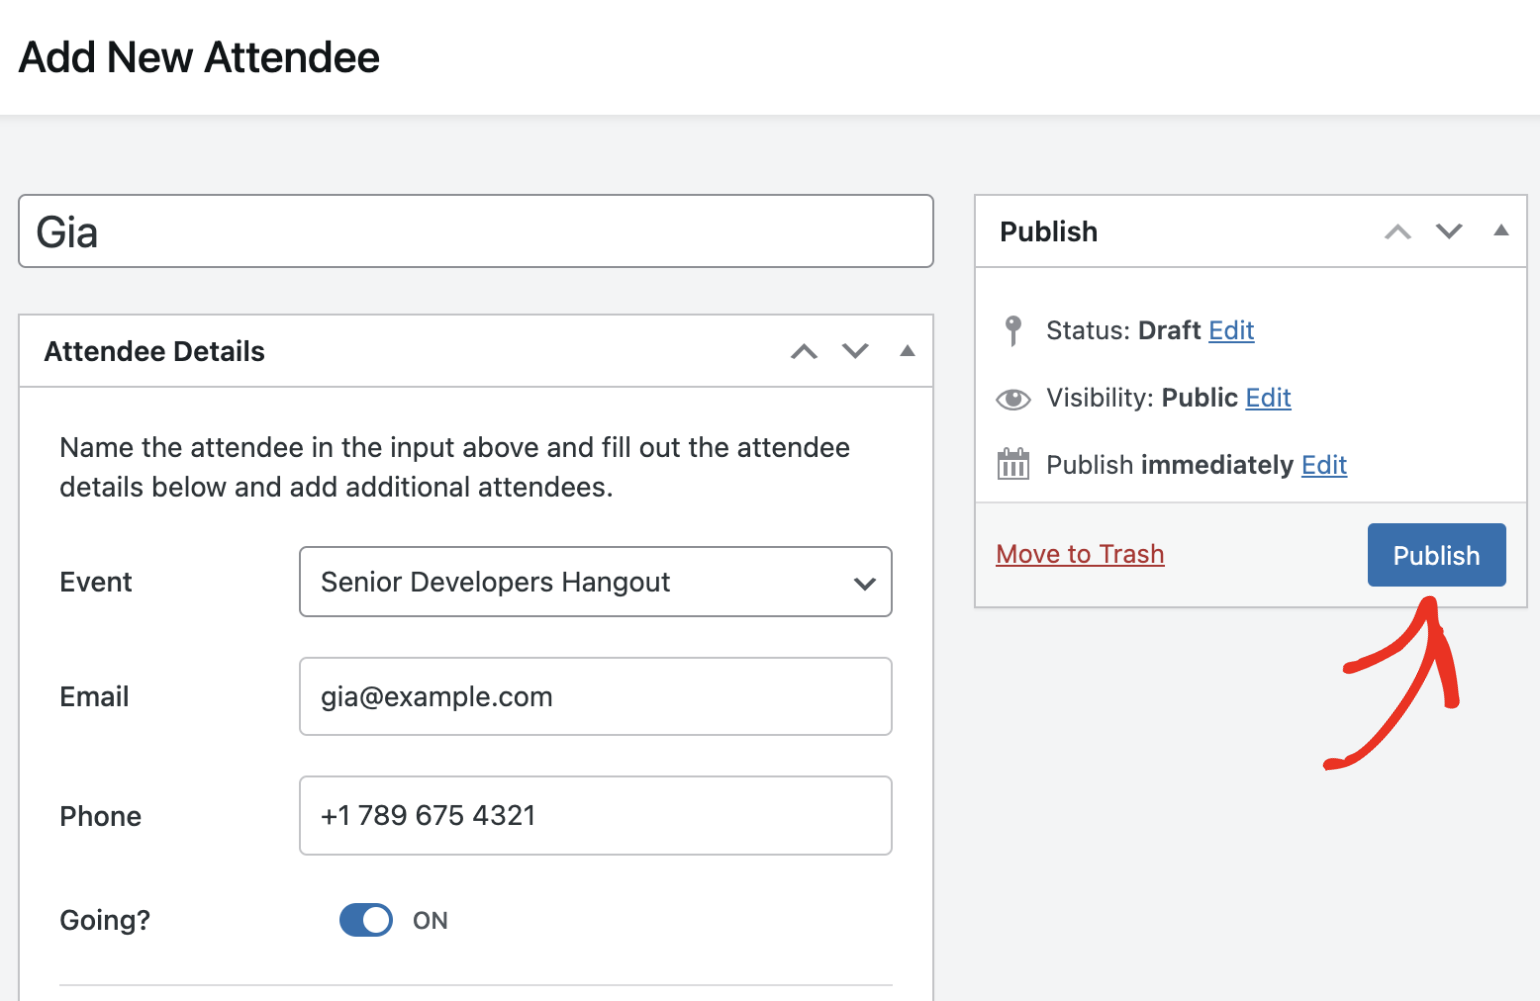
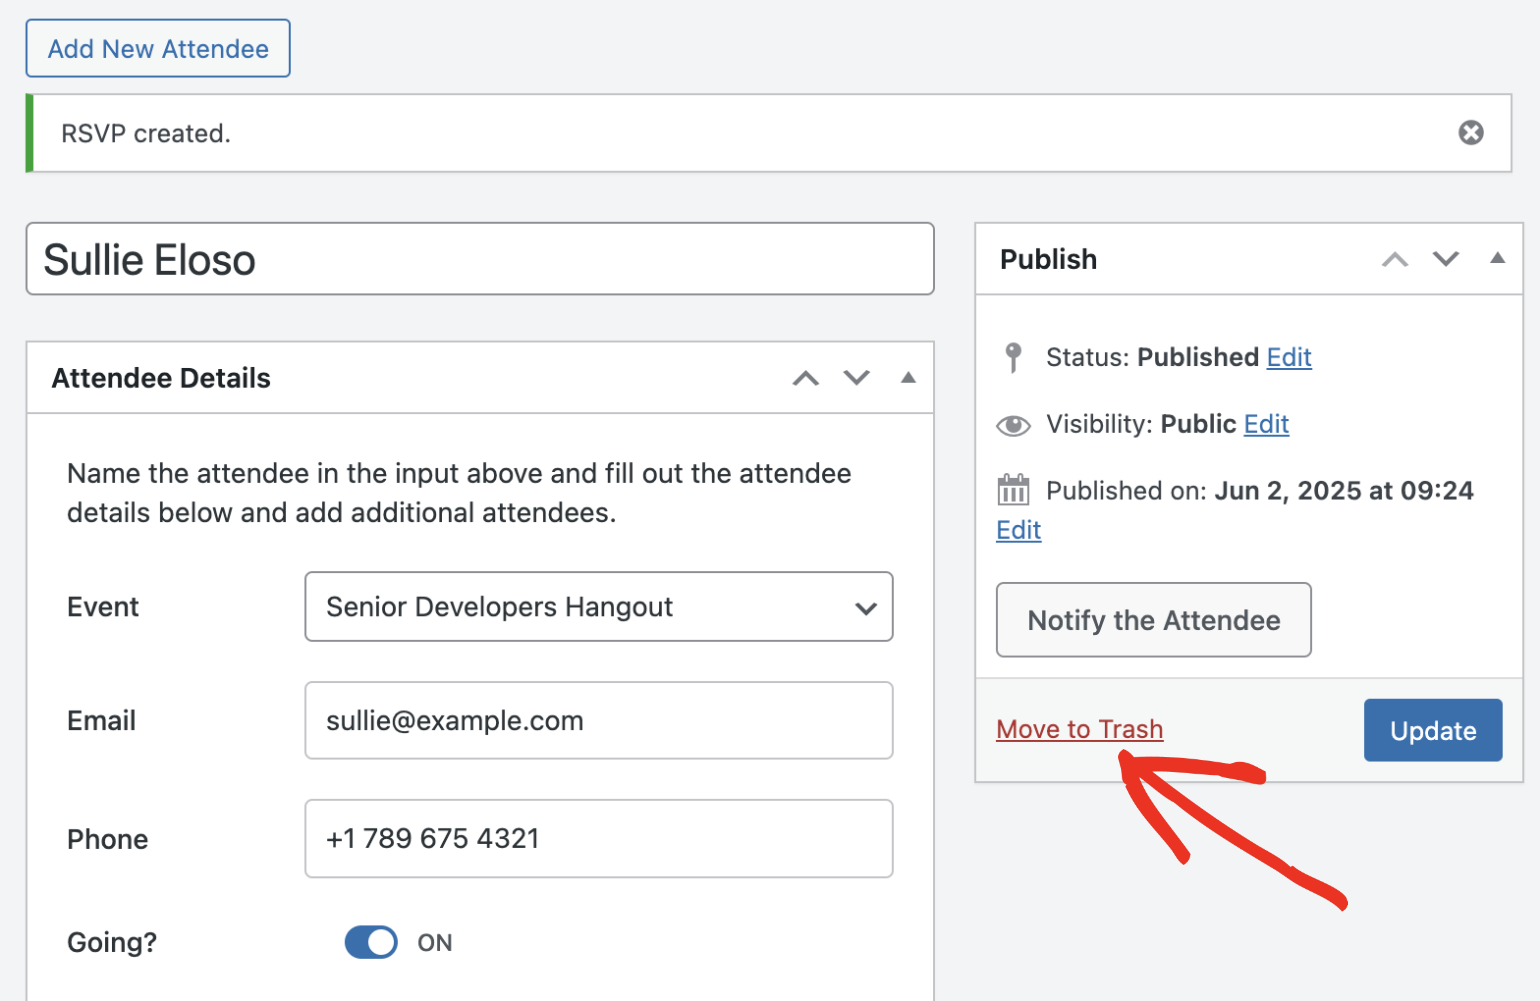
This will direct you to the RSVP editor. First, you’ll need to specify the attendee’s name.
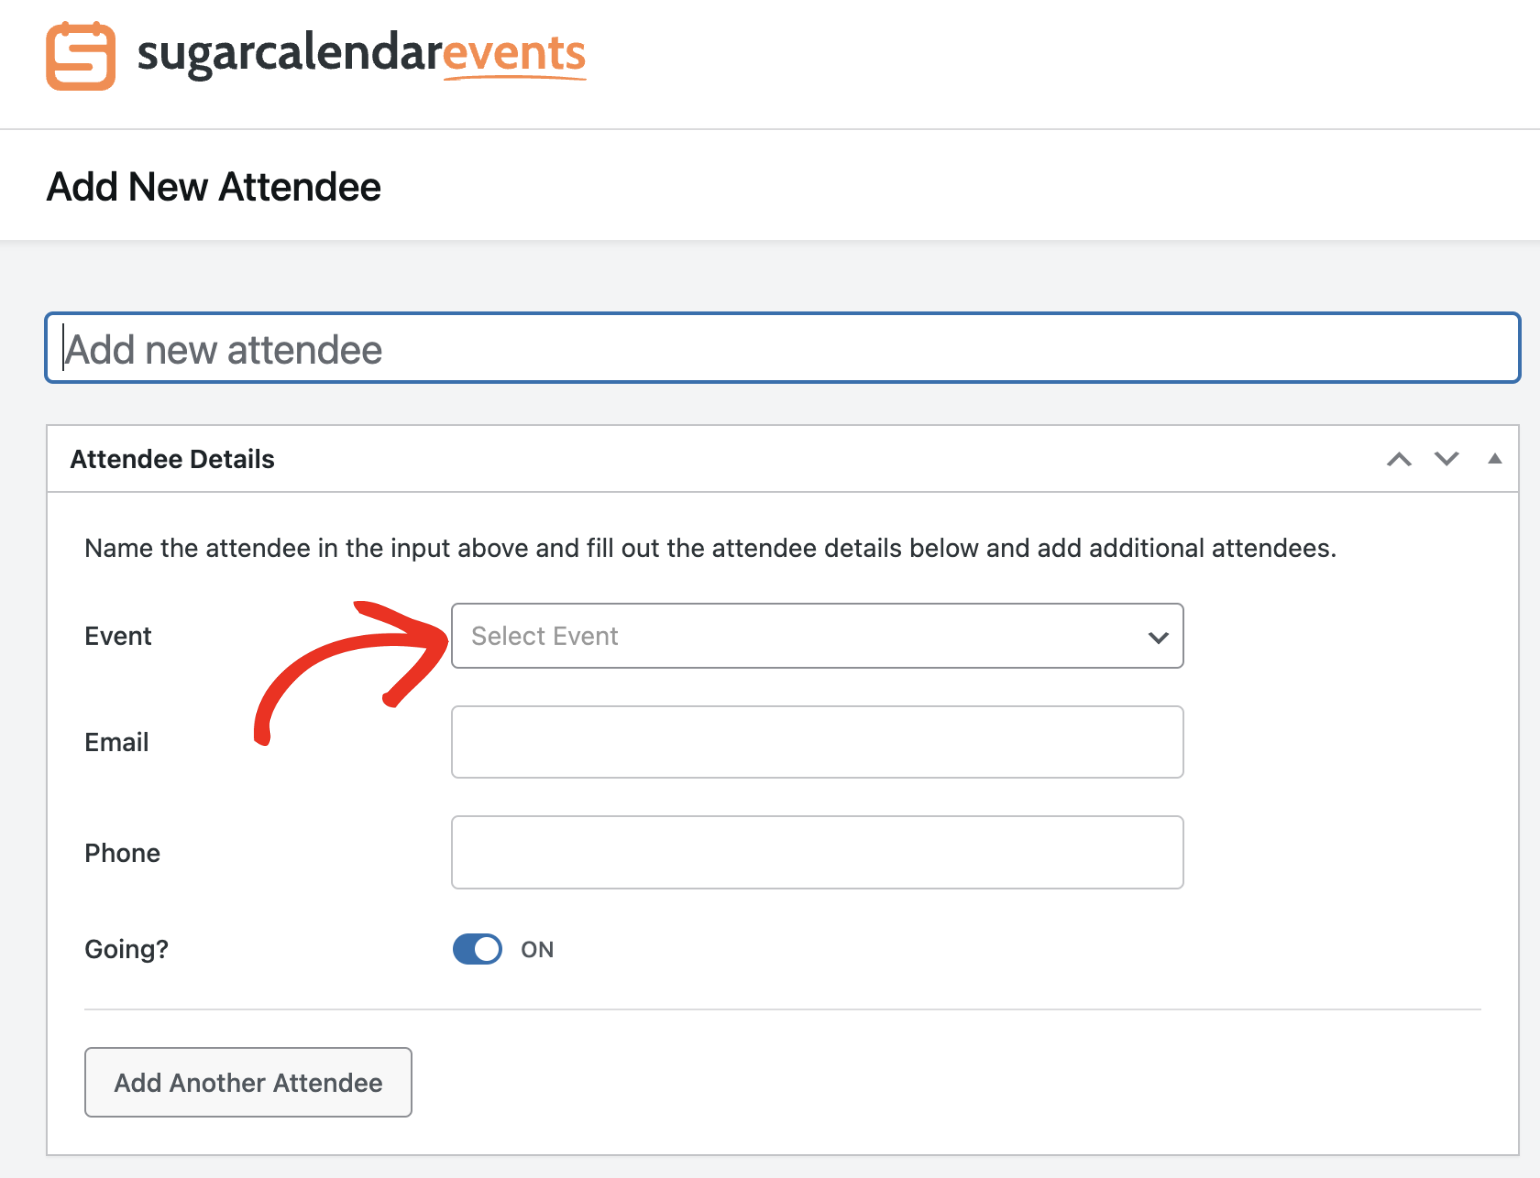
In the Attendee Details section, you’ll need to fill in the required fields. First, select the event you’d like to associate the attendee with from the Select Event dropdown.
Then enter the attendee’s email address and phone number in the Email and Phone fields, respectively.
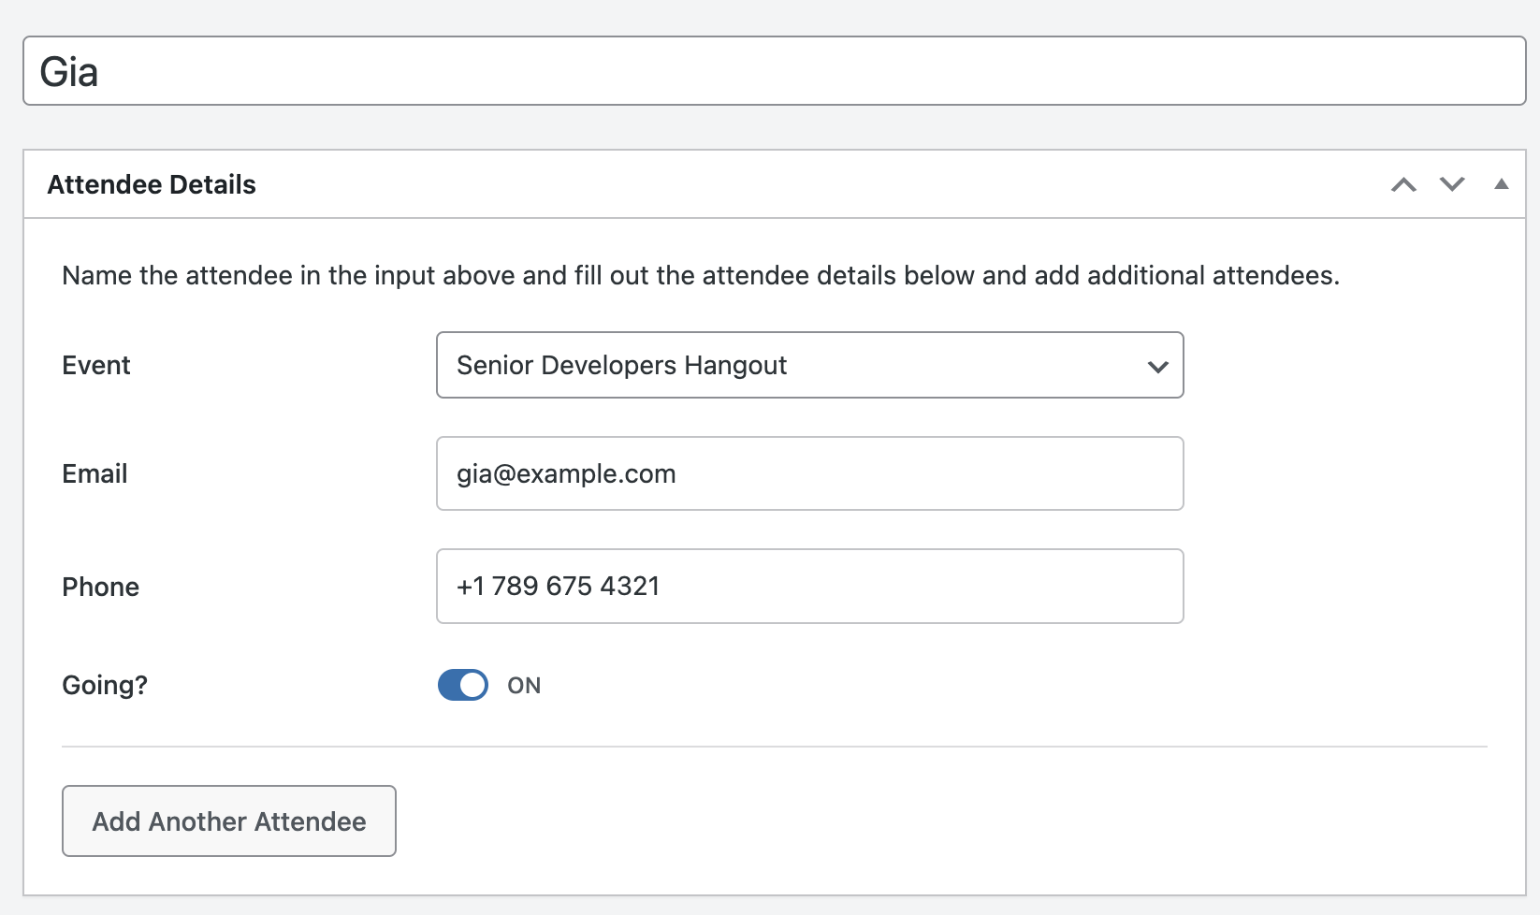
After that, toggle the Going? option ON or OFF to set the RSVP status.
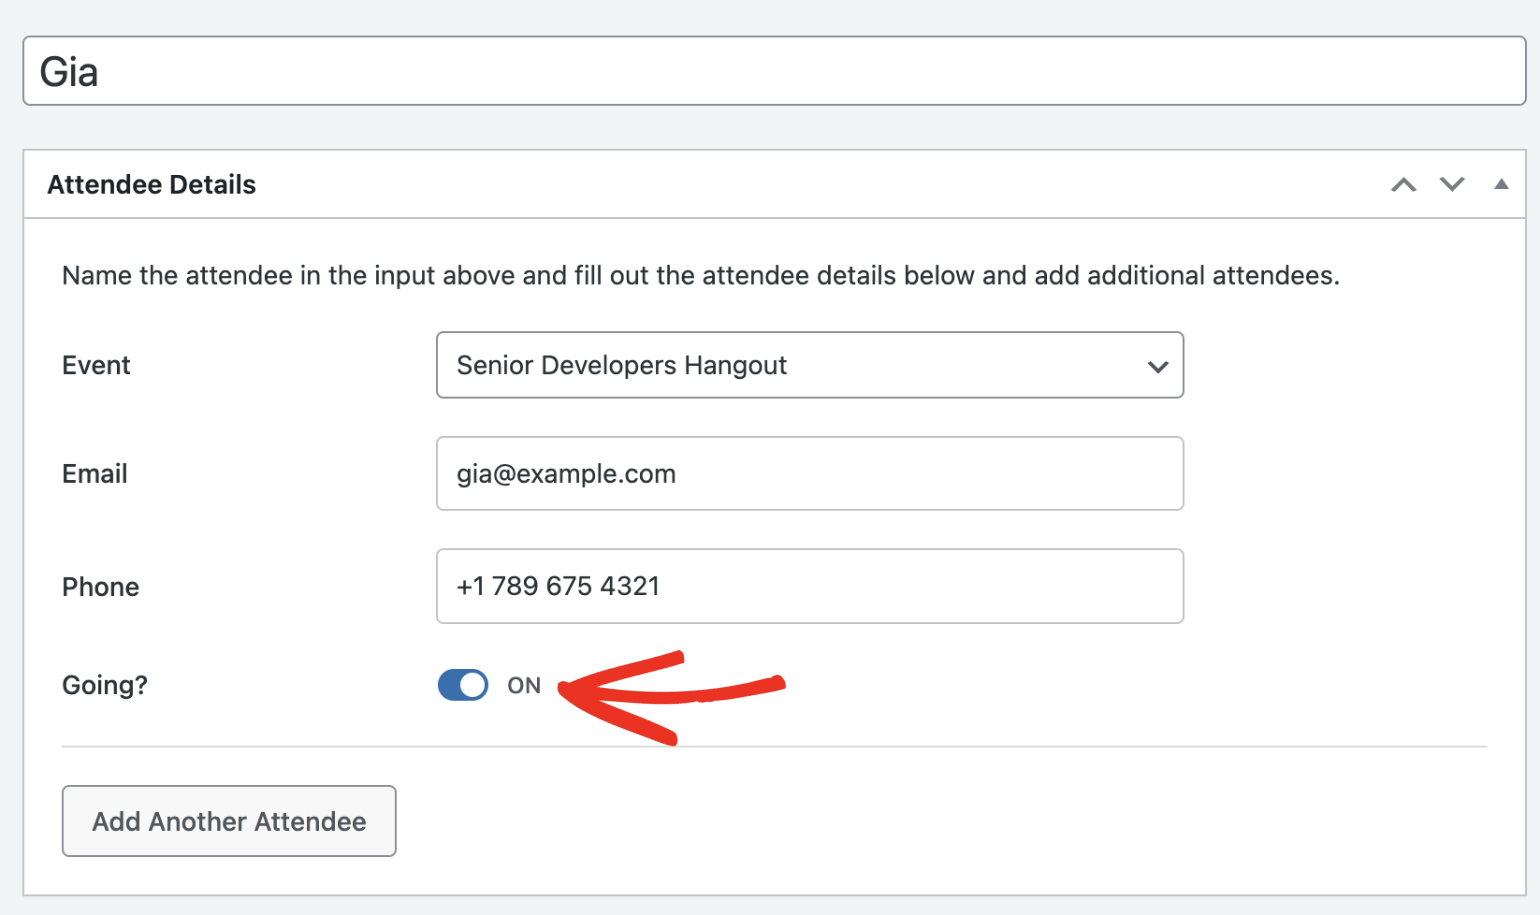
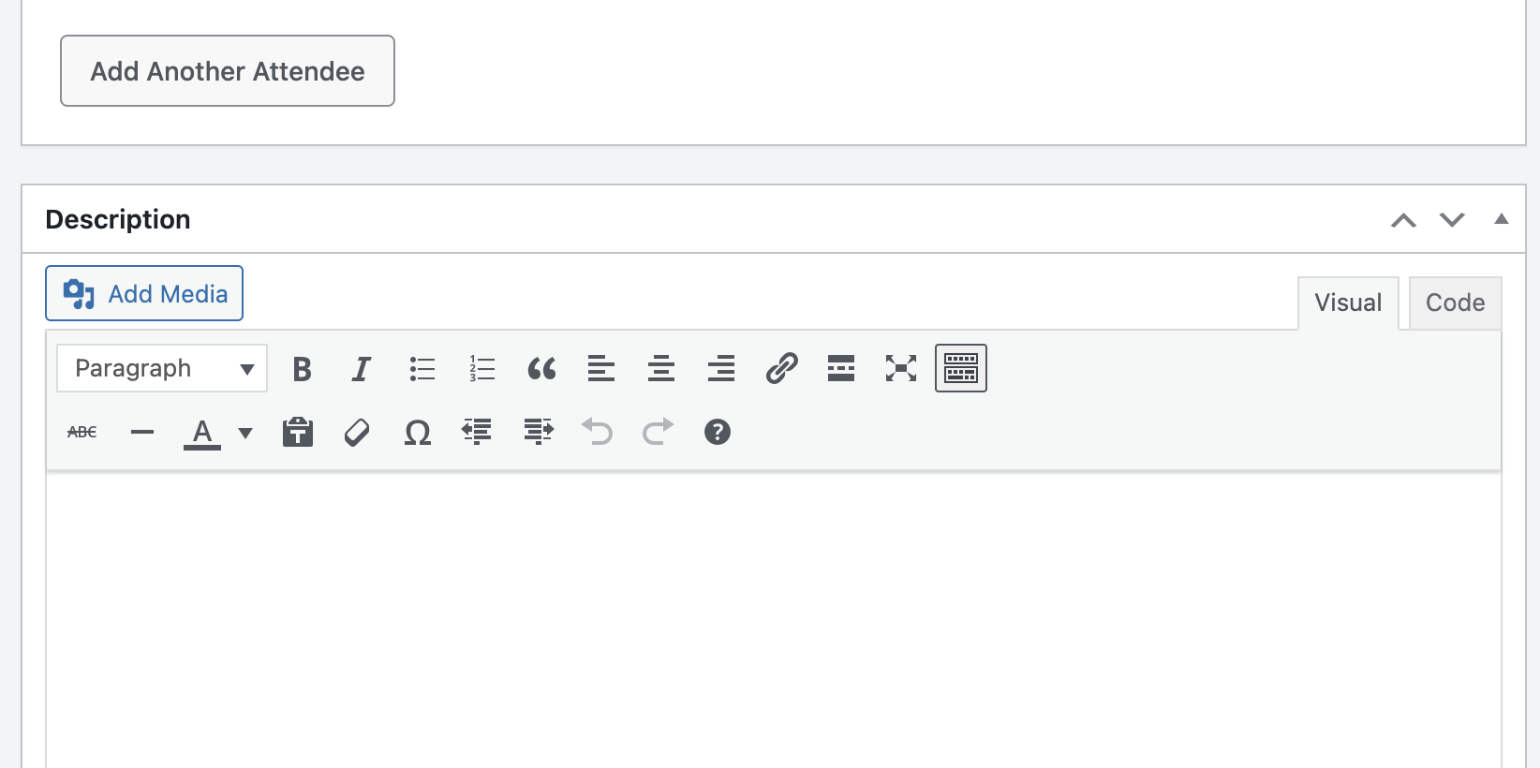
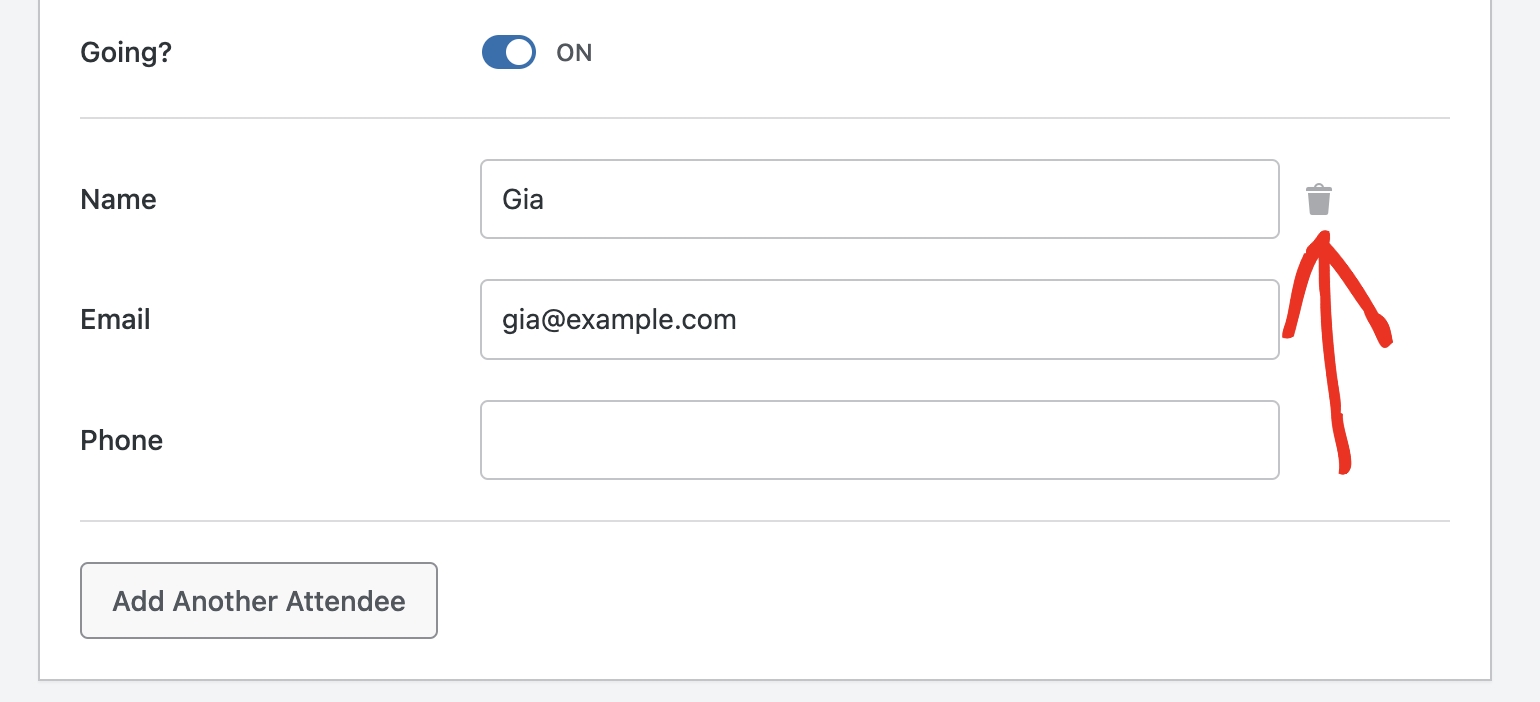
You can also specify additional attendees to the same entry by clicking the Add Another Attendee button.
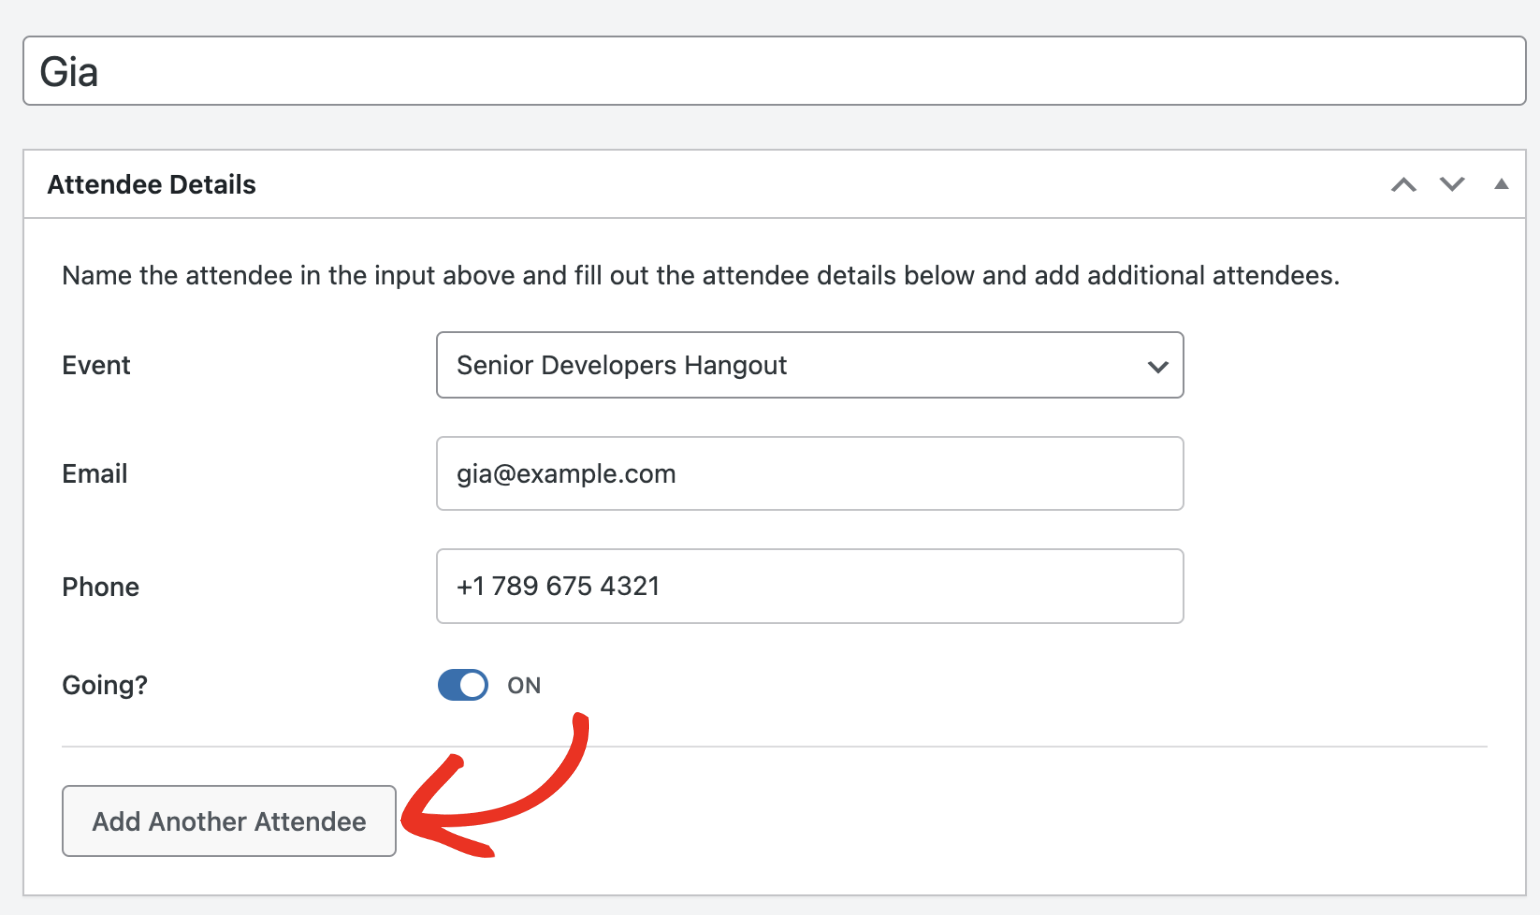
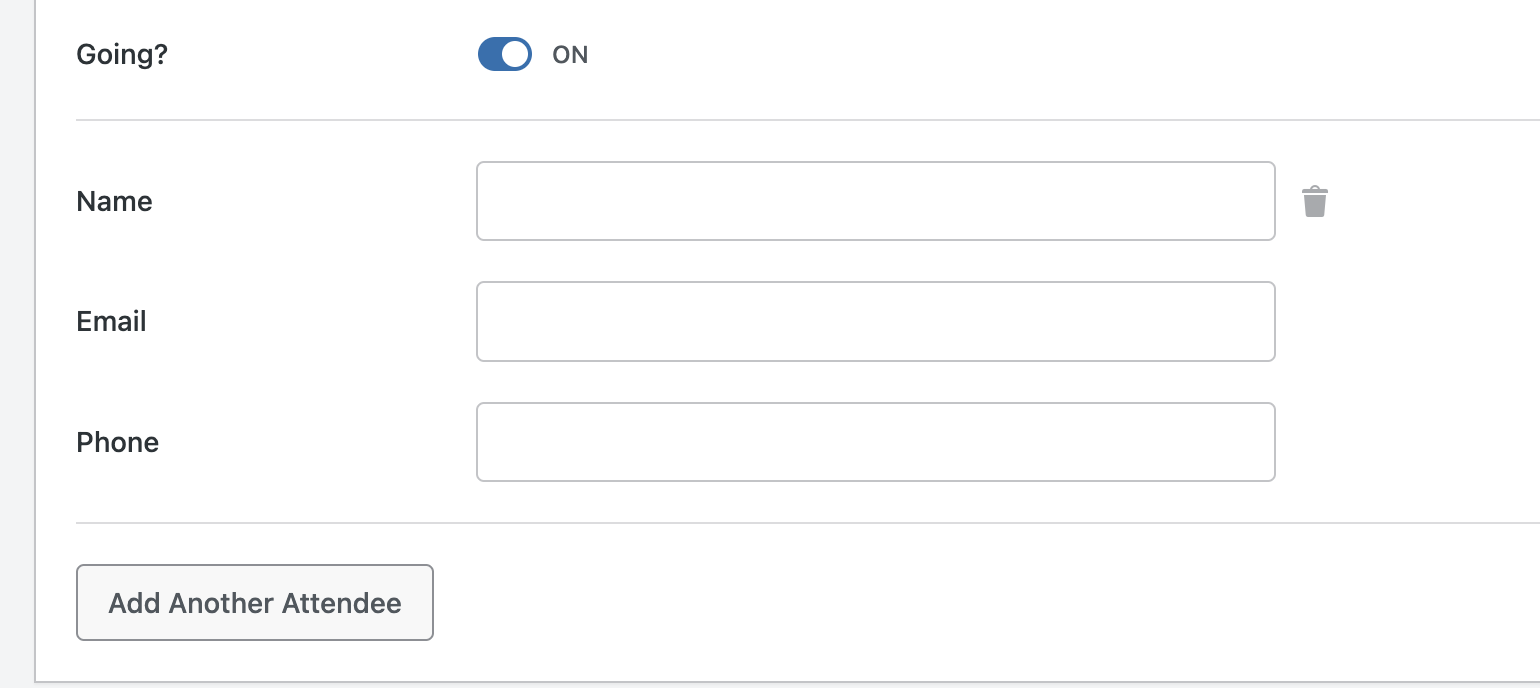
This will display a form where you’ll need to fill out the Name, Email, and Phone number of the additional attendee.
In the Description section, you’ll be able to add additional details about the attendee you’re creating.
Once you’re done, click Publish to save your changes.
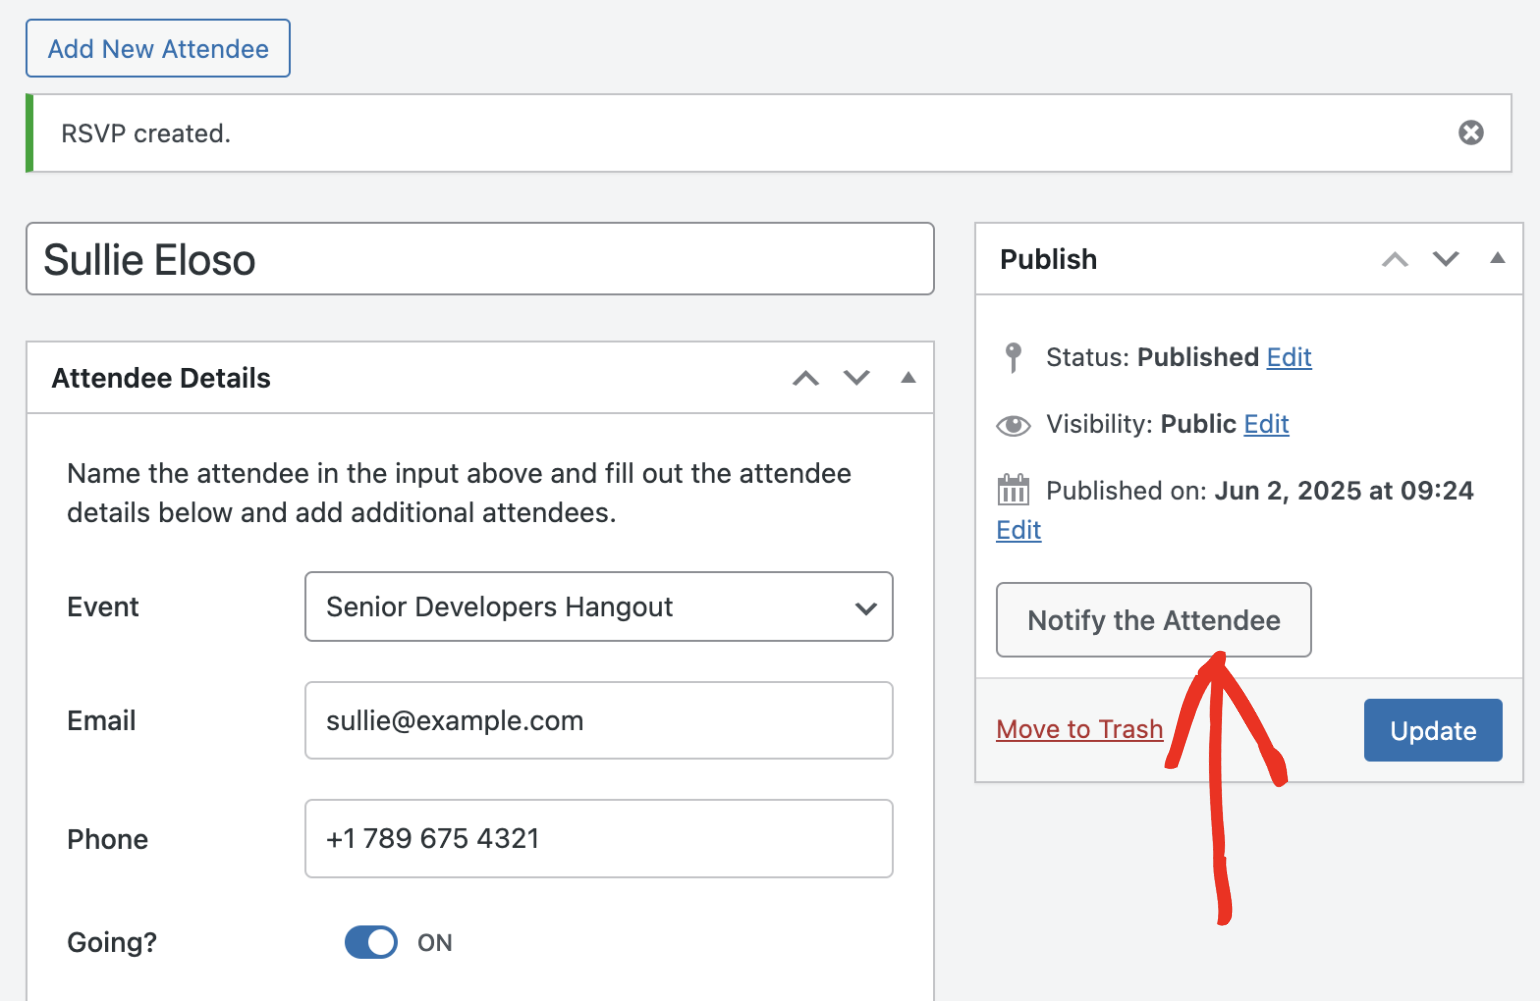
After creating the attendee, you can notify the user via email by clicking the Notify the Attendee button.
Editing an RSVP
To edit an attendee’s details, click their name from the RSVP list.
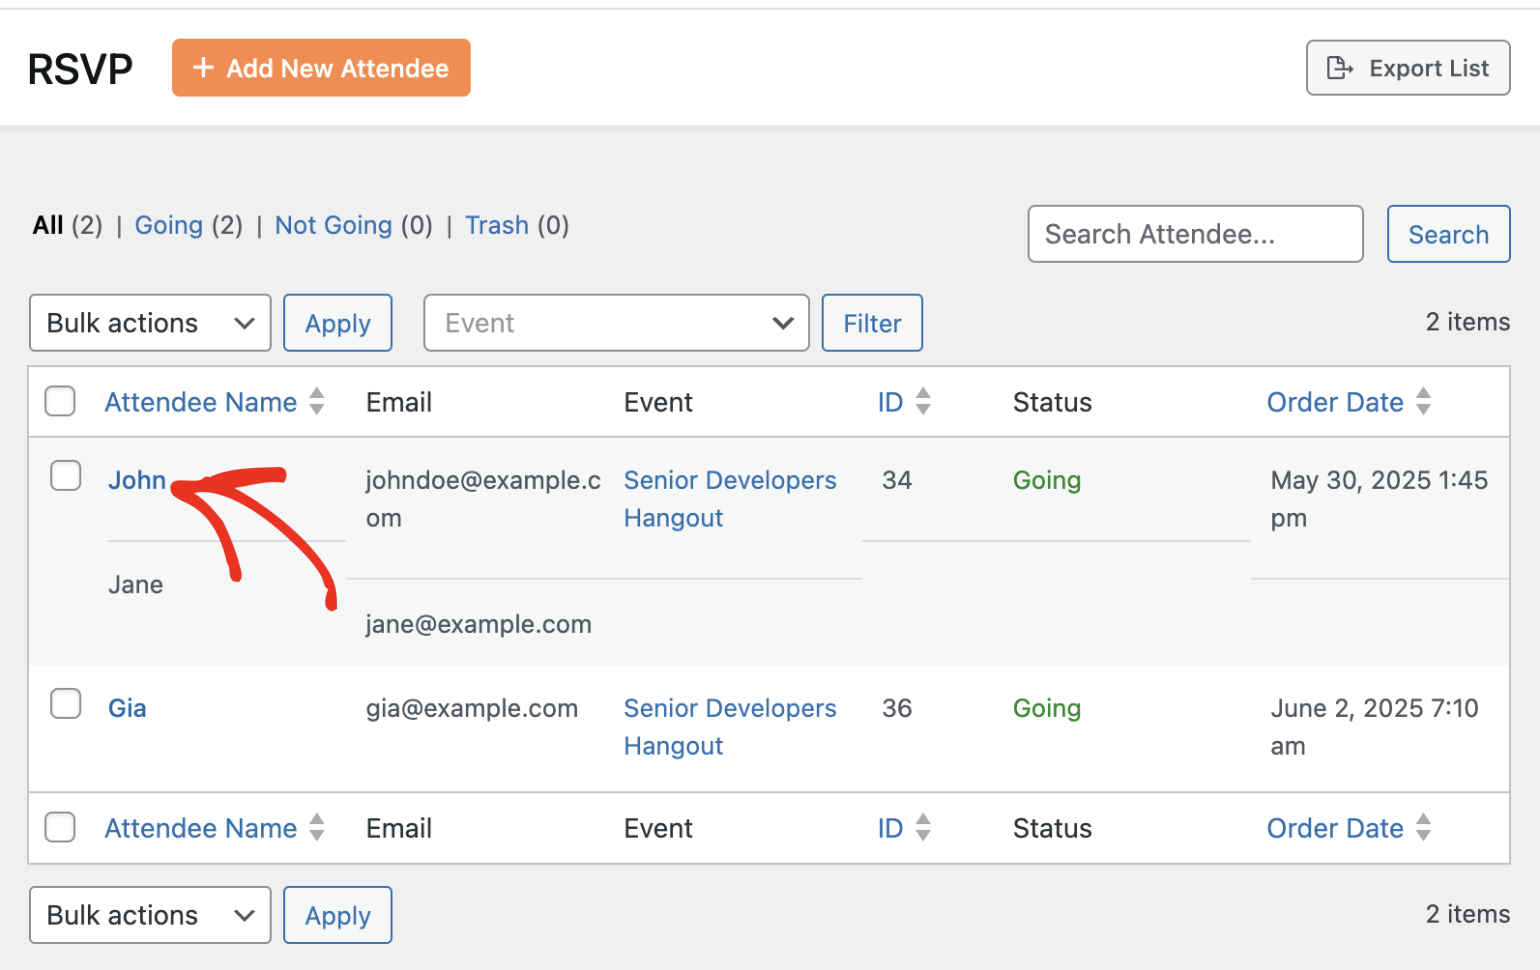
In the RSVP editor, you’ll be able to update their details, including email, phone number, RSVP status, and additional guest info.
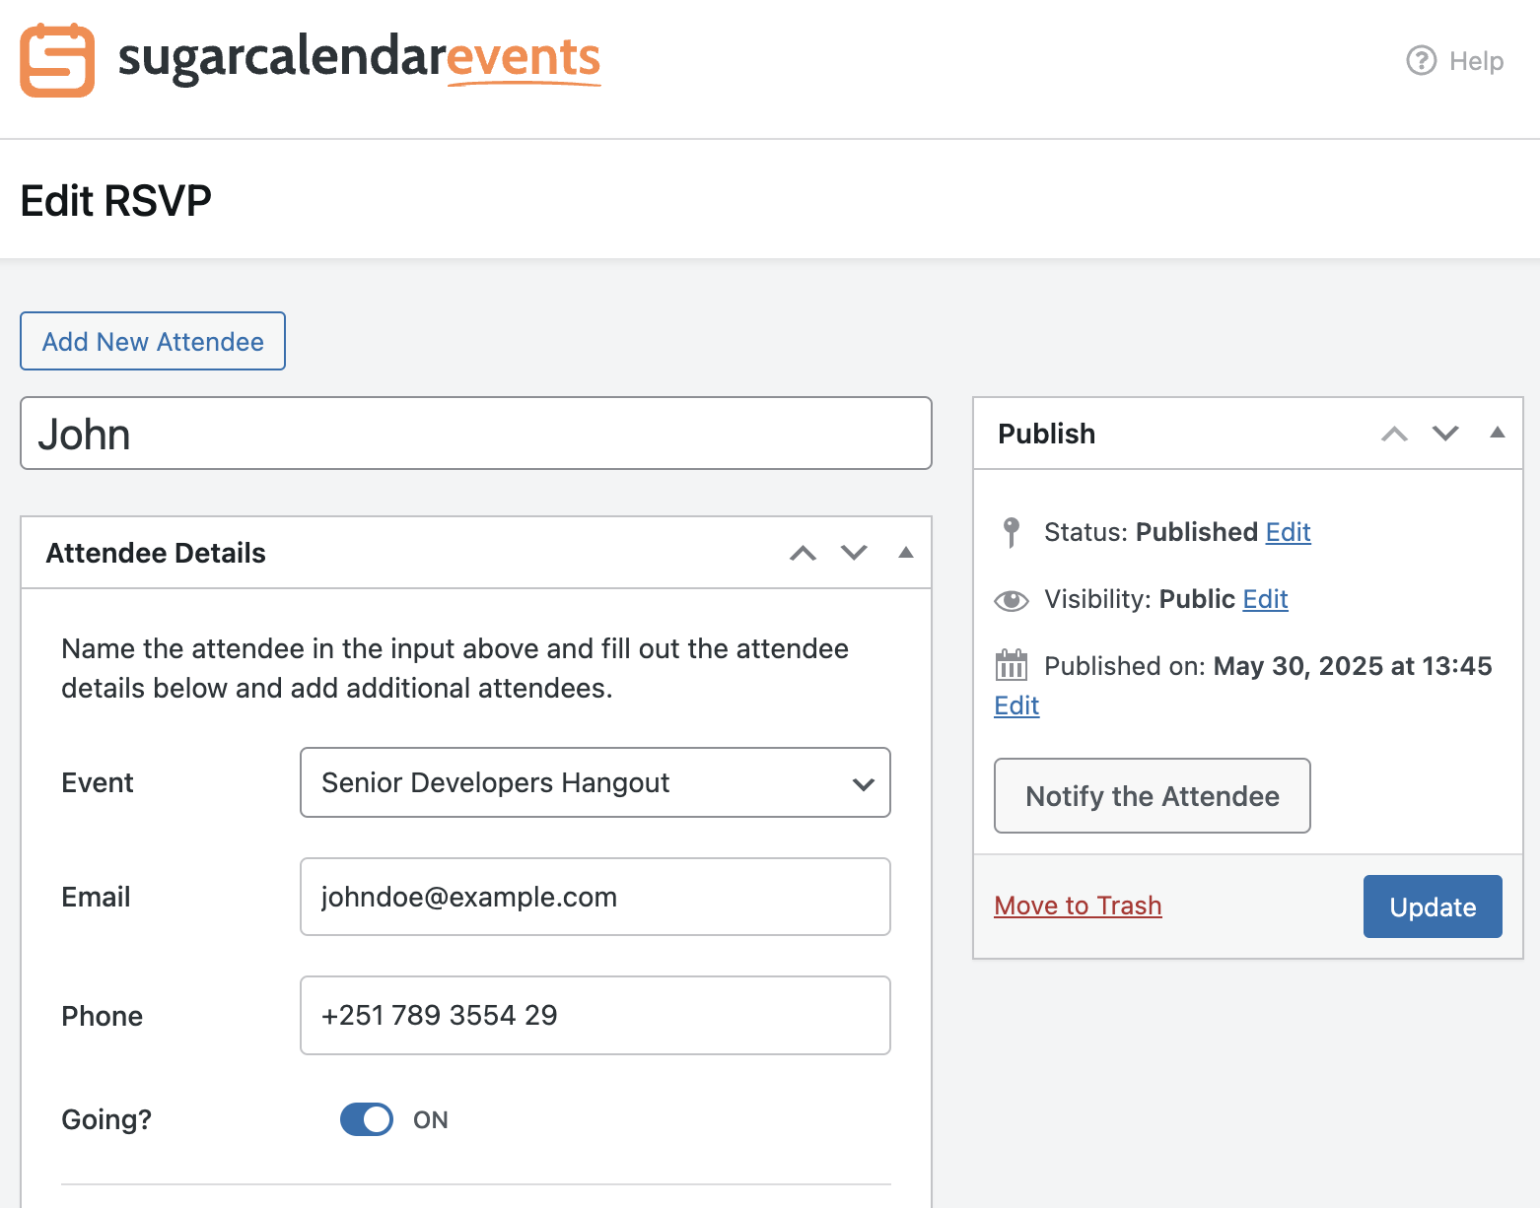
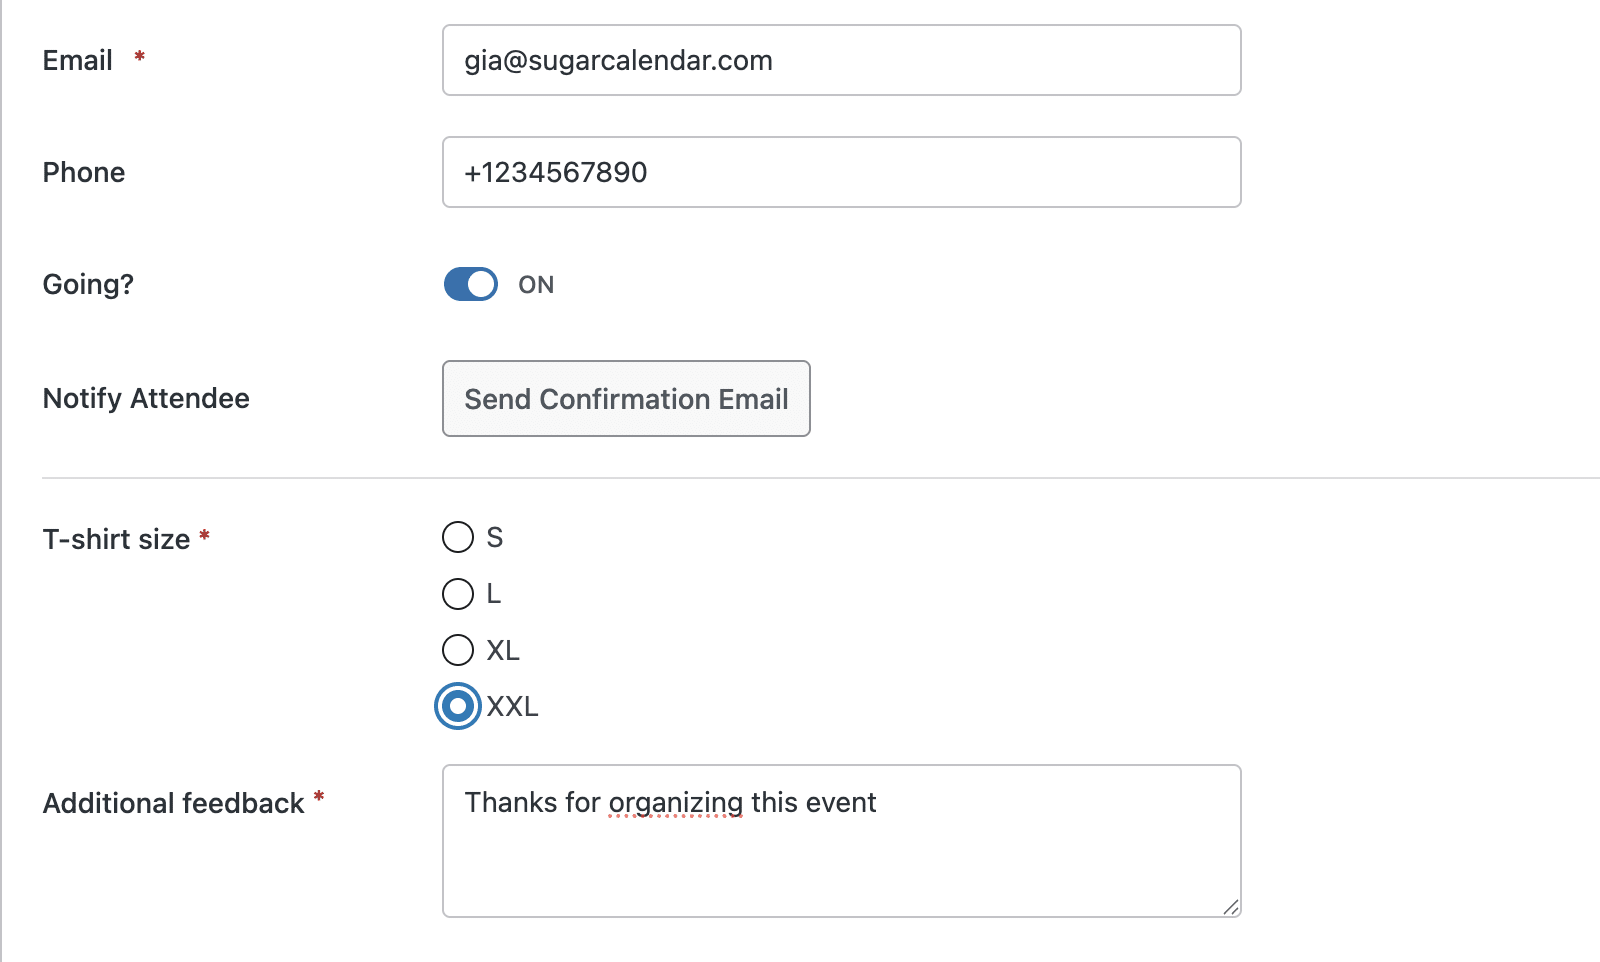
When the event collects registration answers, each attendee’s answers appear alongside their details in this editor, and the same fields appear when you add an attendee manually. Update an answer here, and it will be saved with the RSVP.
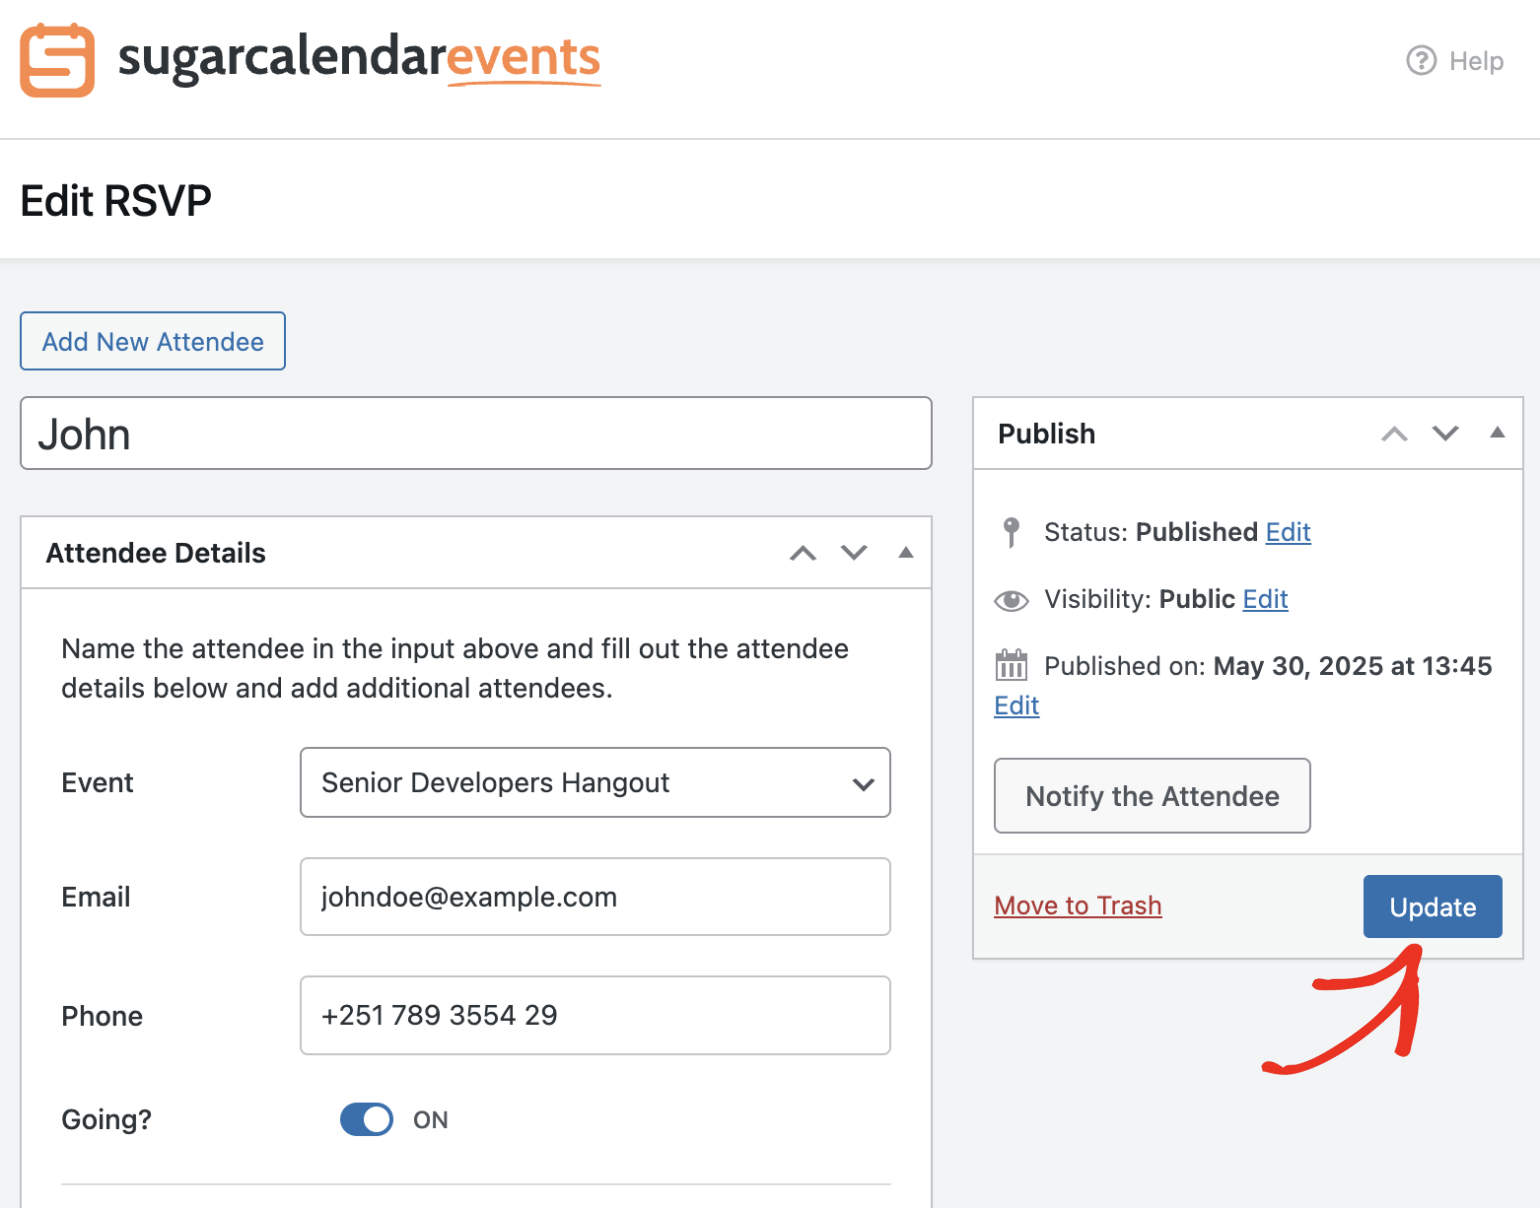
After making updates, click Update to save changes.
Deleting Attendees
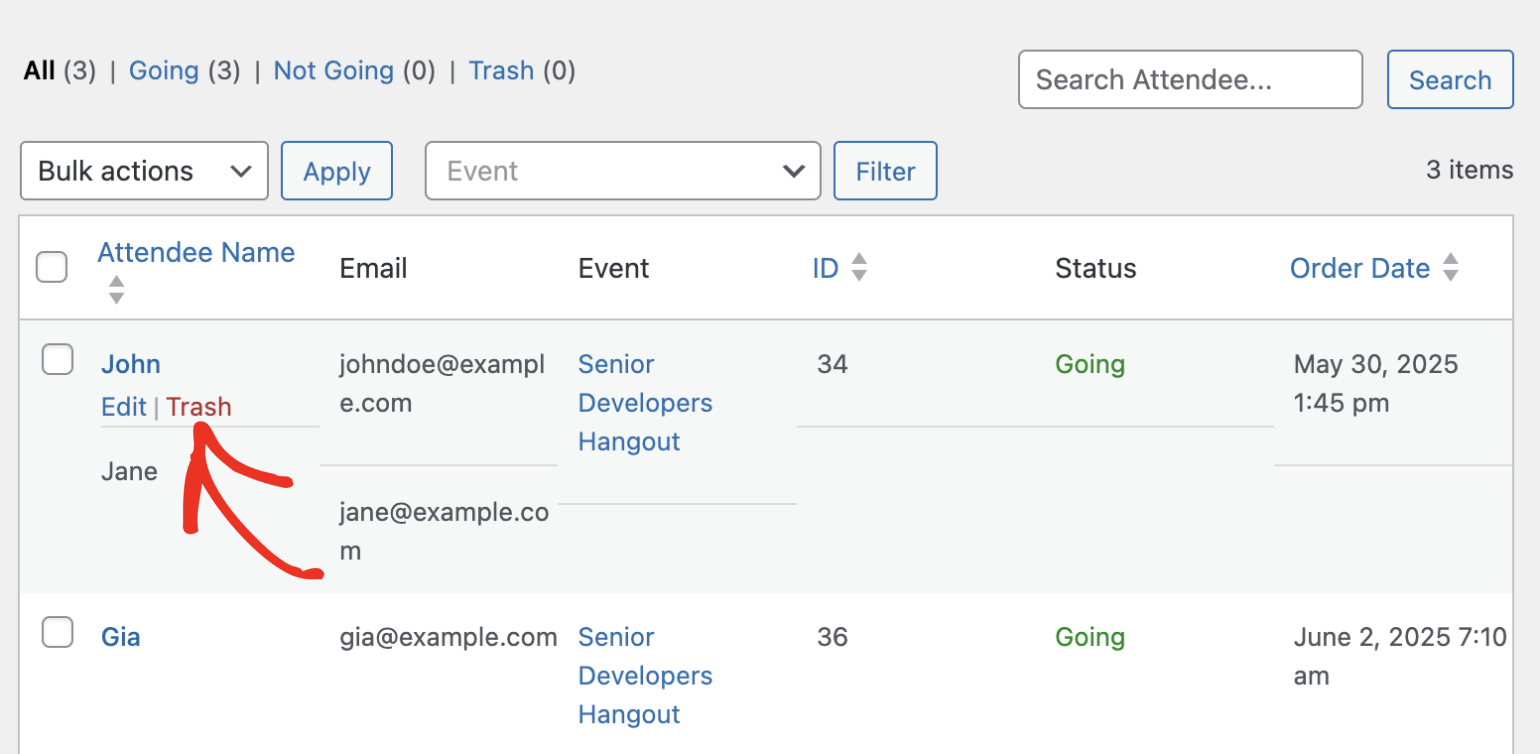
There are various ways to delete attendees who RSVP for your event. From the RSVP dashboard, hover over the guest you’d like to delete and select Trash.
If you’re in the RSVP editor, click the Move to Trash link to delete the attendee.
To delete additional guests only, click the trash icon next to the attendee’s name in the RSVP editor.
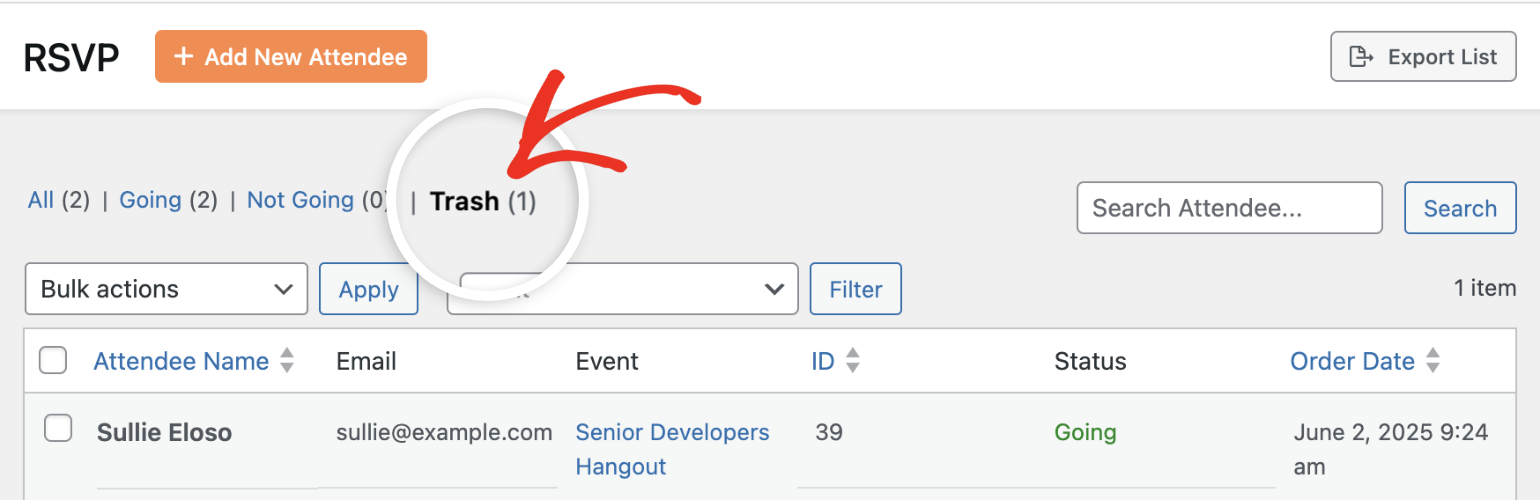
Using this method will move the deleted RSVPs to the Trash folder. Here, you can either restore them to your RSVP list or delete them permanently.
RSVP Notification Emails
Sugar Calendar emails both your attendees and you whenever someone responds to an event. You can customize the emails by navigating to Events » Settings and selecting the Emails tab.
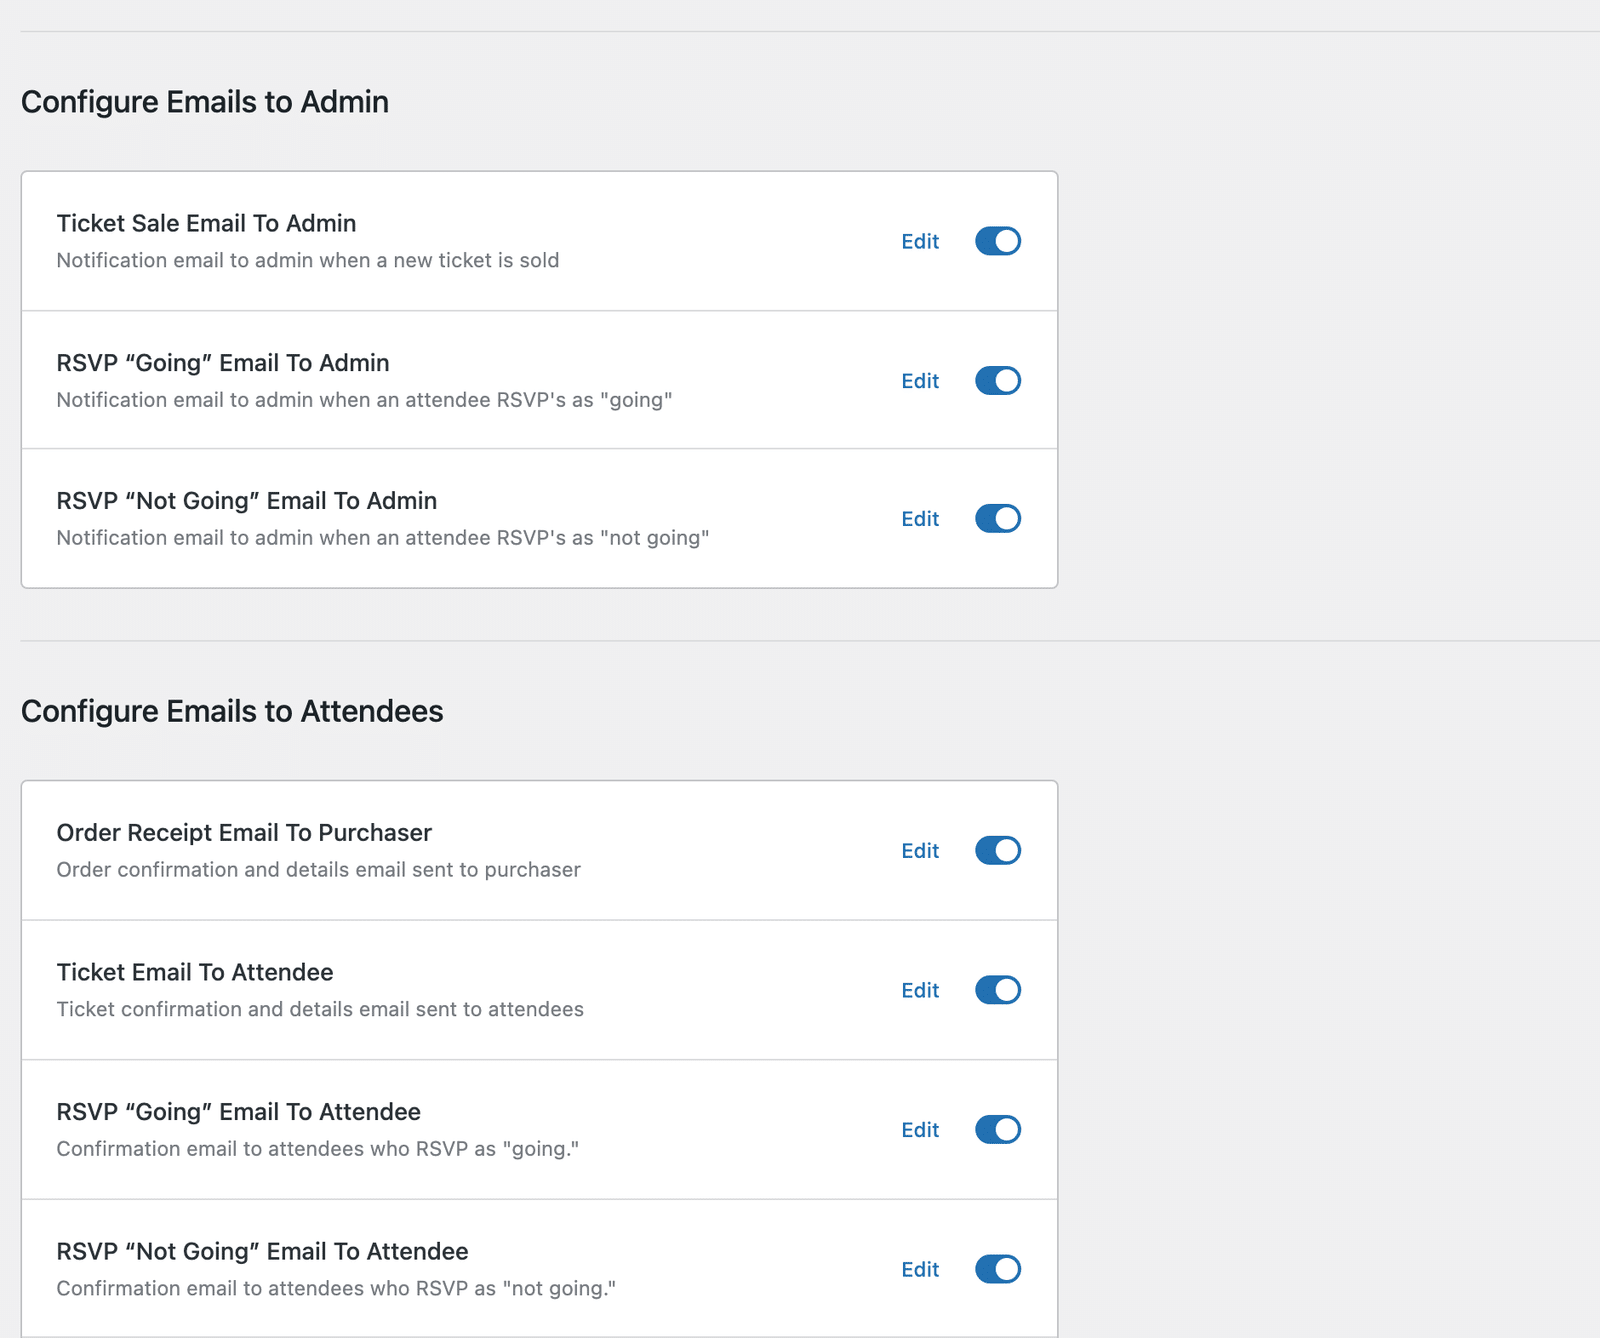
Under Configure Emails to Admin:
- RSVP “Going” Email To Admin tells you when an attendee RSVPs as going.
- RSVP “Not Going” Email To Admin tells you when an attendee RSVPs as not going.
Under Configure Emails to Attendees:
- RSVP “Going” Email To Attendee confirms the response and includes the event details.
- RSVP “Not Going” Email To Attendee acknowledges the response and invites the attendee to update their RSVP if their plans change.
Click Edit on any row to change its subject and message, and use the toggle on each row to control whether that email sends.
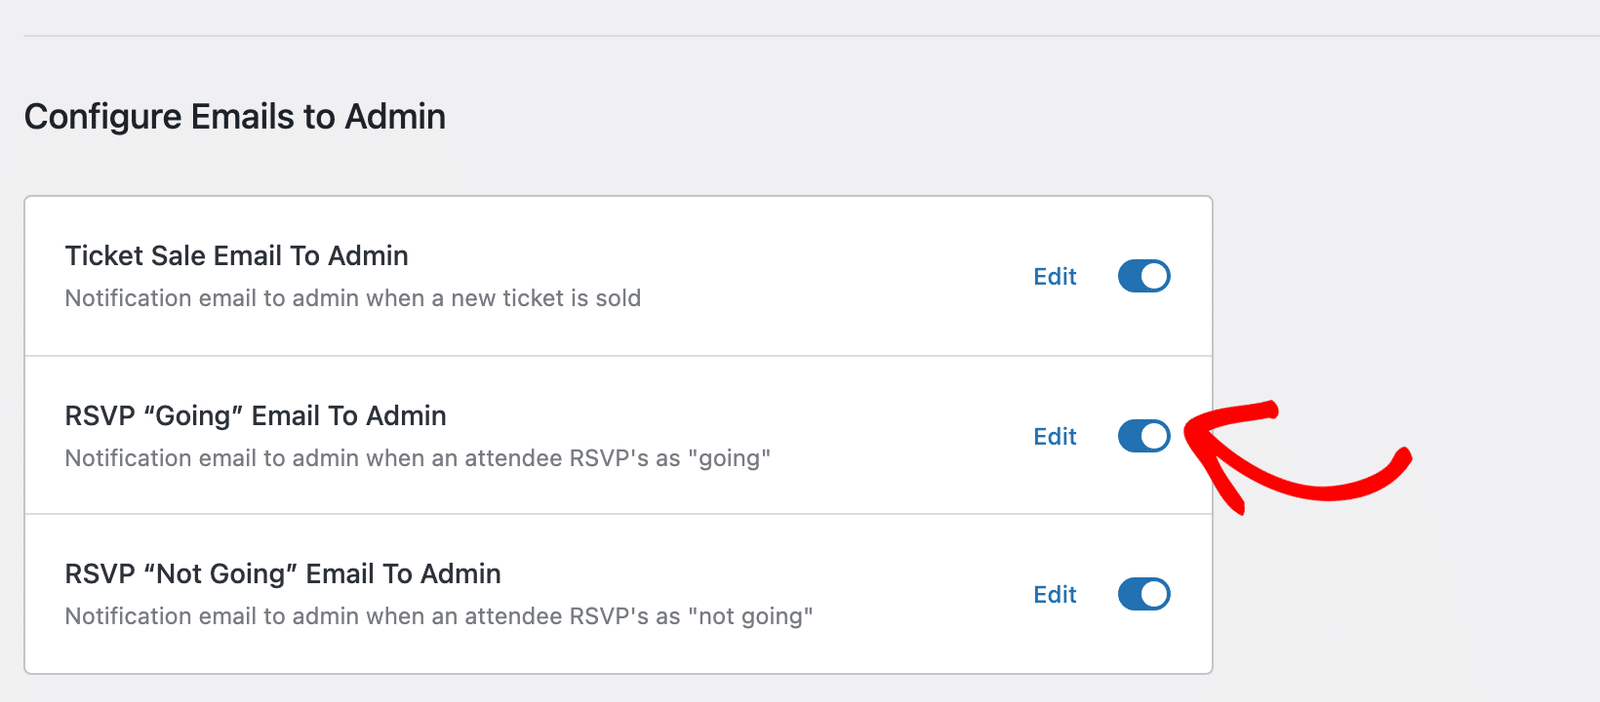
Switching a row off stops the automatic email, and the Notify the Attendee button in the RSVP editor keeps working either way.
Inside an email’s edit screen, click the Smart Tags icon at the right end of the editor toolbar to insert dynamic values such as the attendee’s name or the event date. Then click Preview to see the rendered email in a new tab.
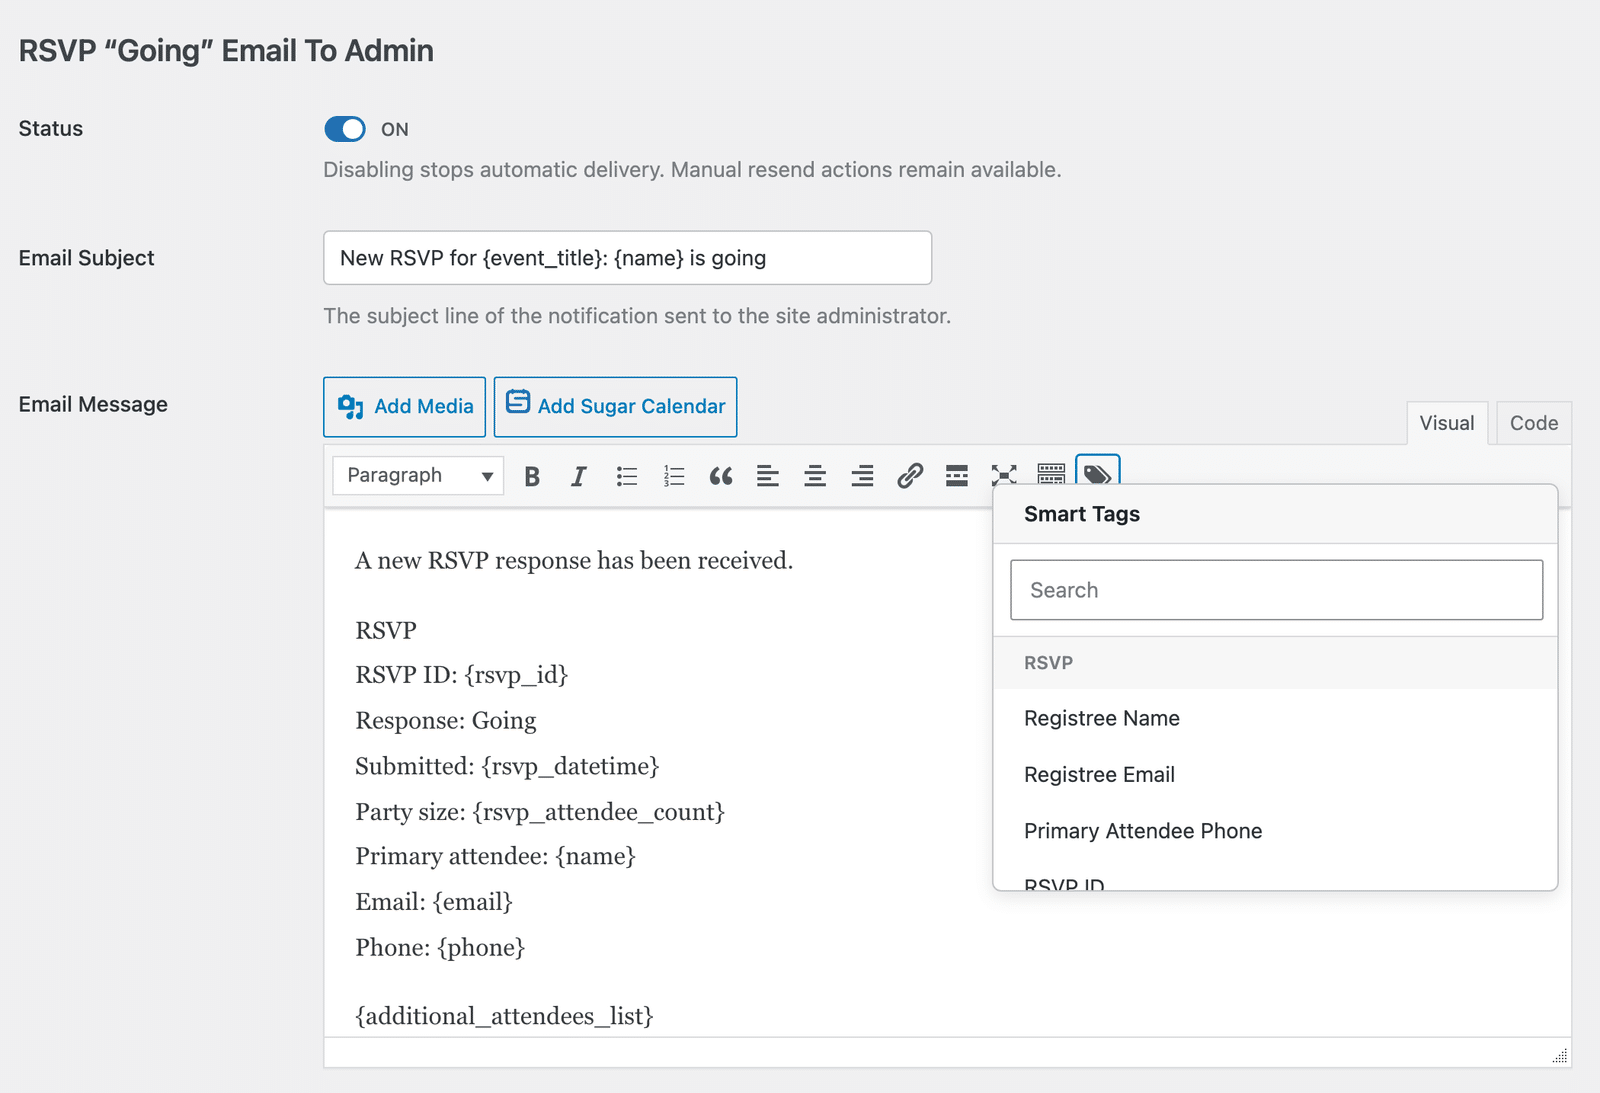
For the full list of available Smart Tags, see our guide on Sugar Calendar event emails.
Note: To send your own message to every attendee of an event at once, use the Notify Attendees button on the Events screen. See our guide on notifying attendees.
Frequently Asked Questions
These are answers to some of the top questions we see about using the RSVP addon with Sugar Calendar Events.
Can I allow attendees to RSVP for more than one person?
Yes! The RSVP addon allows you to specify the number of Additional Attendees per RSVP. This option is available in the RSVP tab when creating or updating an event.
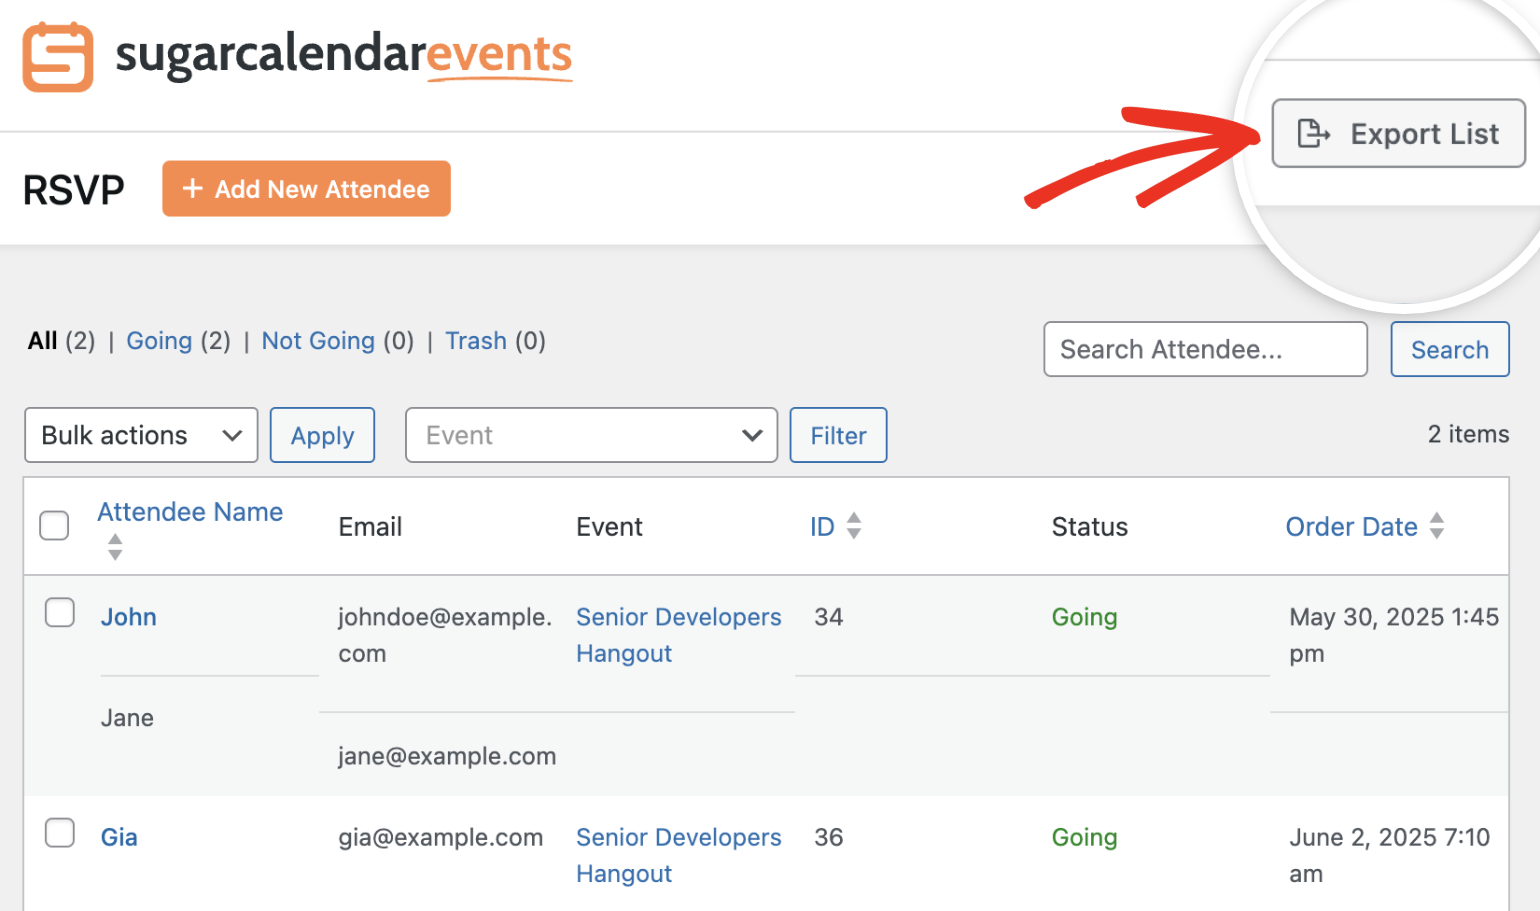
Can I export the attendee list?
Yes. To do so, go to Events » RSVP, then click the Export List button to download attendee data in CSV format.
What happens when capacity is full?
Once the RSVP capacity is reached, no additional RSVPs will be accepted unless existing ones are deleted or edited to reduce the total count.
Can I turn off the RSVP emails?
Yes. Go to Events » Settings » Emails and switch off the toggle on any RSVP row. That stops the automatic email while leaving the Notify the Attendee button available for sending one by hand.
How do I prevent spam submissions on my RSVP forms?
To protect your RSVP forms, use one of our CAPTCHA solutions. Sugar Calendar Events lets you add a Google reCAPTCHA or Cloudflare Turnstile widget to your form. For more information, see our tutorial on preventing RSVP registration form spam.
That’s it! You’ve now learned how to set up and manage RSVPs for your events using the RSVP addon with Sugar Calendar Events.
Next, would you like to learn how to display events on your site’s frontend? Our guide on displaying event lists covers the available options for showing events on your website.