Would you like to easily sell tickets for your events? With the Event Ticketing add-on, you can manage ticket sales for both virtual and in-person events right from your WordPress site.
This guide will help you install, set up, and use the Event Ticketing addon for Sugar Calendar.
The Event Ticketing Addon Is a Premium Feature
Unlock the Event Ticketing Addon and other powerful features to enhance your events.
In This Article
Requirements:
You’ll need the Plus license level or higher to access the Event Ticketing addon.
Installing the Event Ticketing Addon
Before you get started, you’ll first need to ensure Sugar Calendar is installed and activated on your WordPress site and that you’ve verified your license.
After you’ve done that, you’ll be able to quickly install and activate the Event Ticketing addon.
Connecting Stripe to Your Site
To process payments for your event tickets, you’ll need to connect your Stripe account. Stripe handles the payment transactions, ensuring that your customers can securely purchase tickets using their credit cards.
Note: Stripe is only required for paid tickets. When every ticket on an event is free, attendees complete checkout without a payment step, so you can publish a free ticketed event before connecting Stripe.
Once the Event Ticketing addon is ready to go, you’ll need to open Events » Settings in the left menu of your WordPress site. From there, click on the Payments tab.
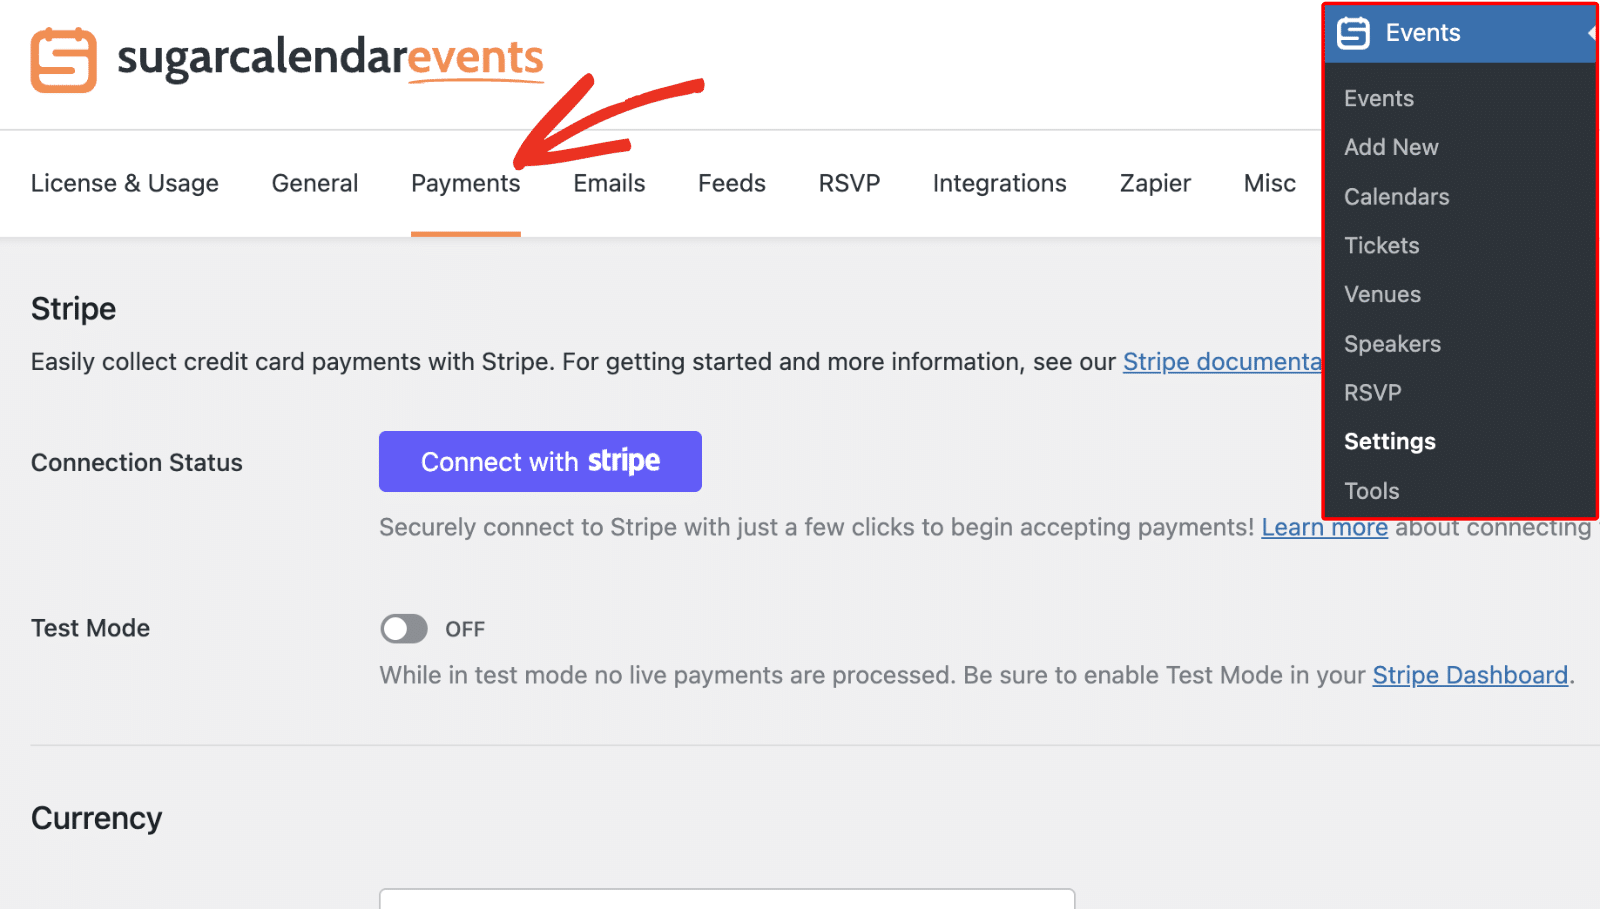
When you’re ready, scroll down to the Stripe section. Here, click the Connect with Stripe button.
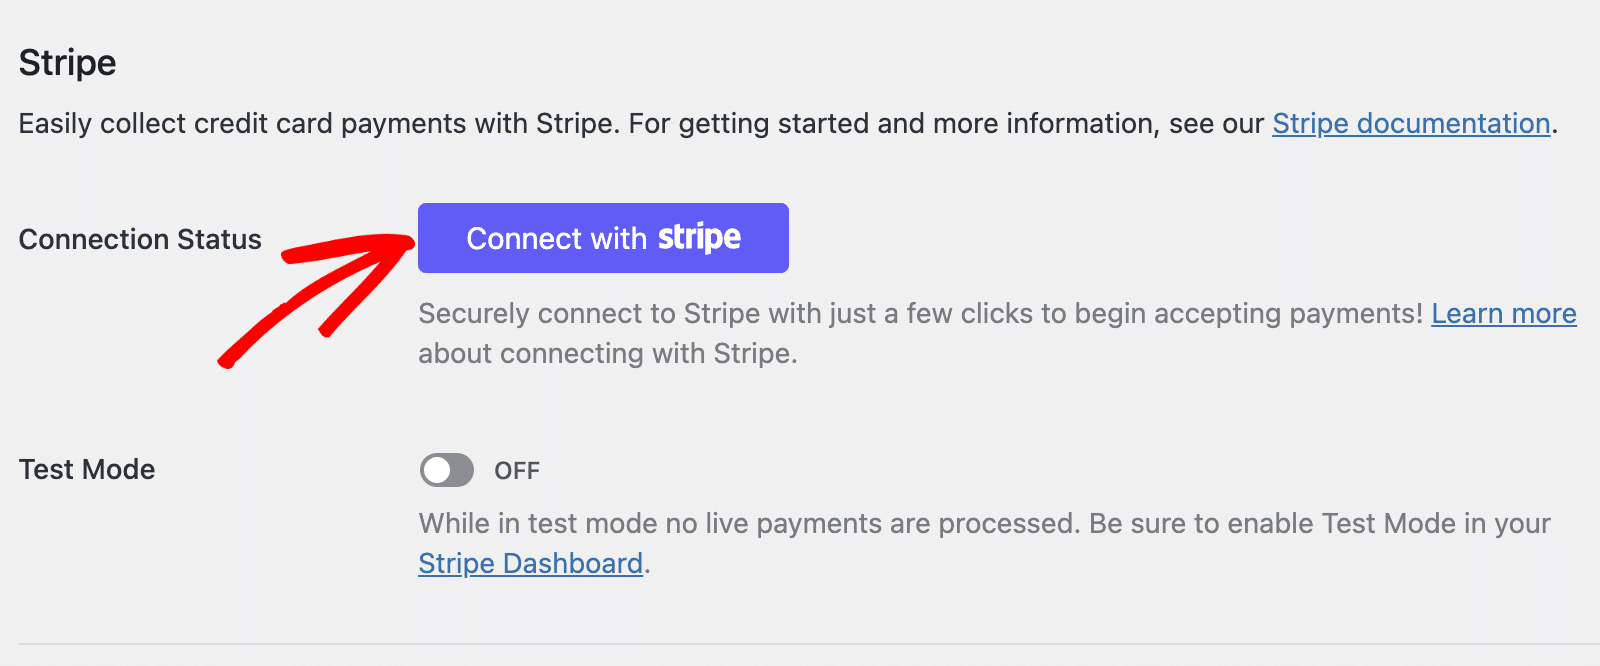
Note: Test and Live modes must be connected separately. If you’re currently using Test Mode, please be sure to repeat this connection process with the Test Mode option turned off when you’re ready to start selling event tickets.
Next, you’ll be asked to authorize the connection between your calendar and Stripe. The exact content you see on this page will vary based on whether your Stripe account is already activated.
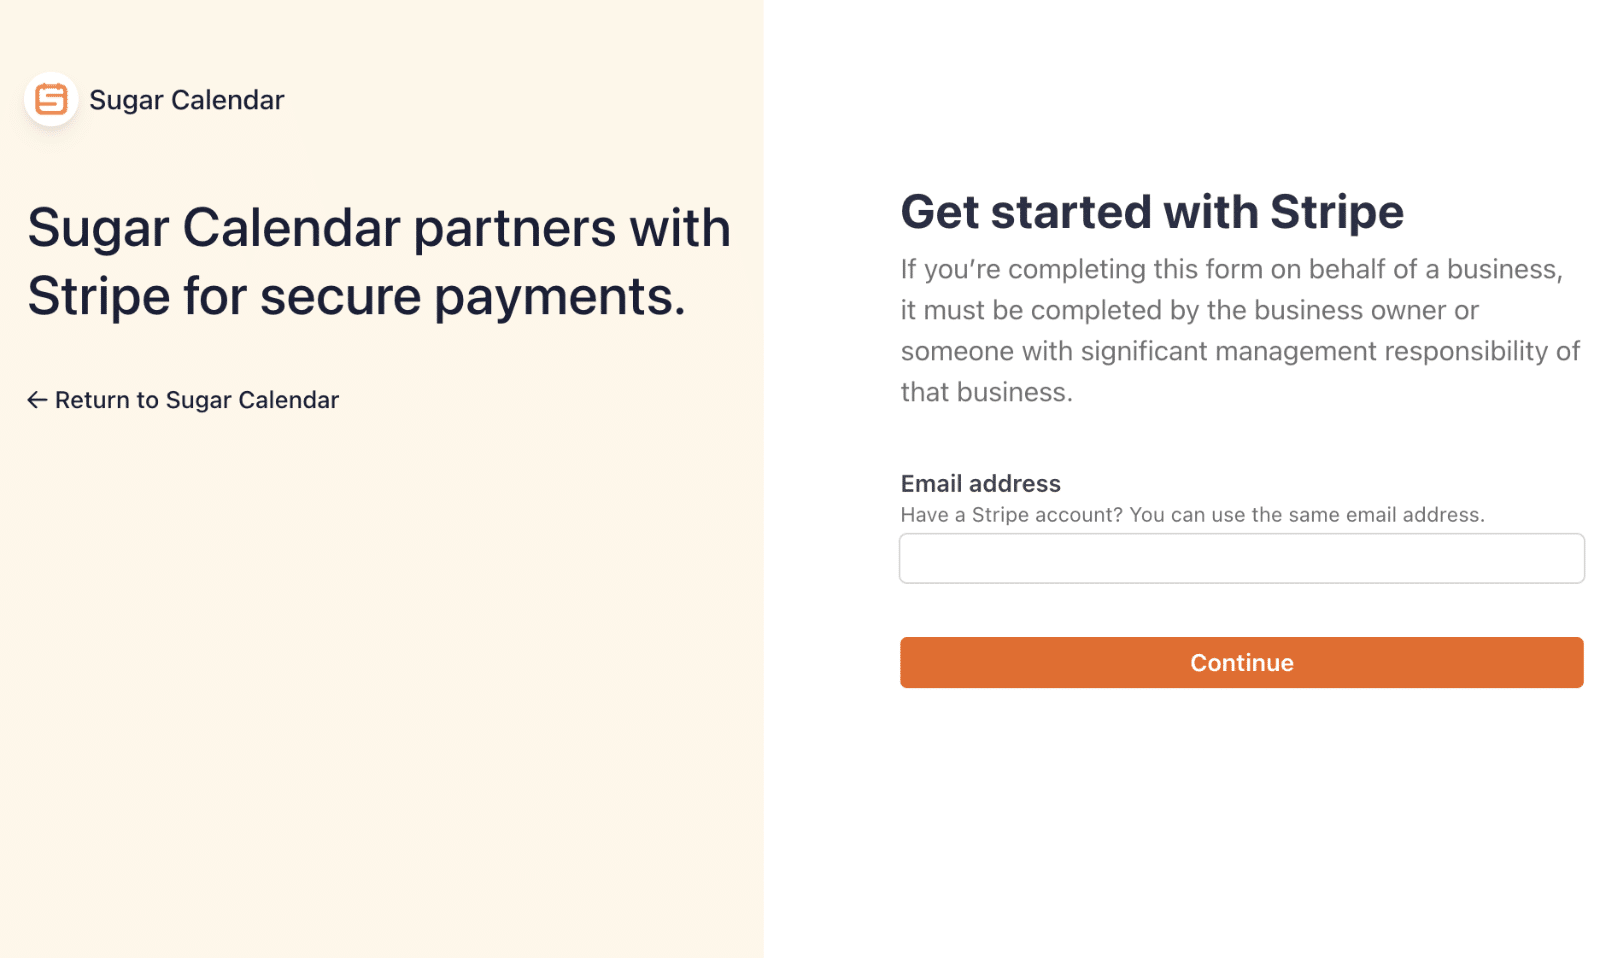
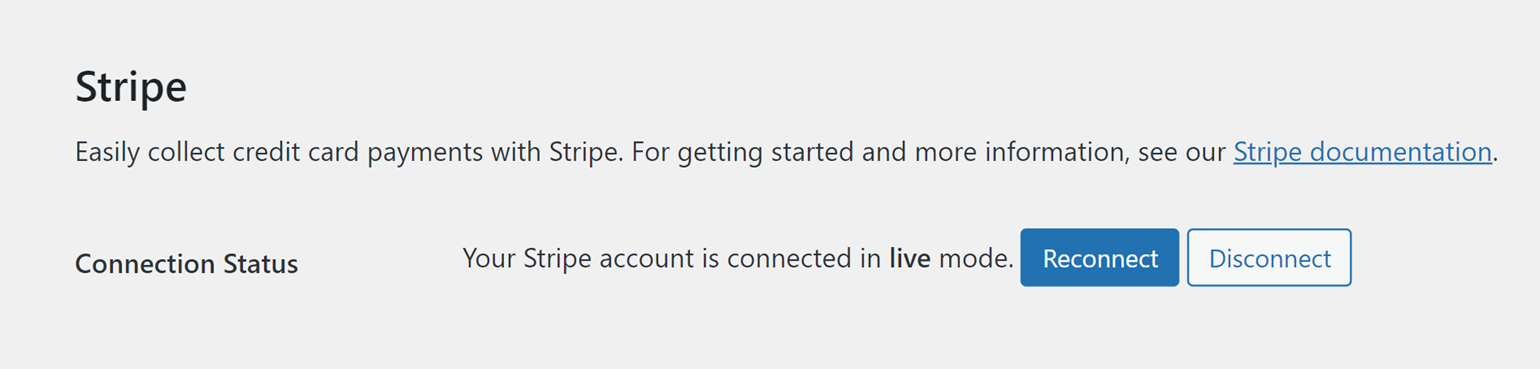
Once you’ve followed all the steps in the Stripe Connect wizard, you’ll be redirected back to your site’s admin area with a confirmation message next to Connection Status.
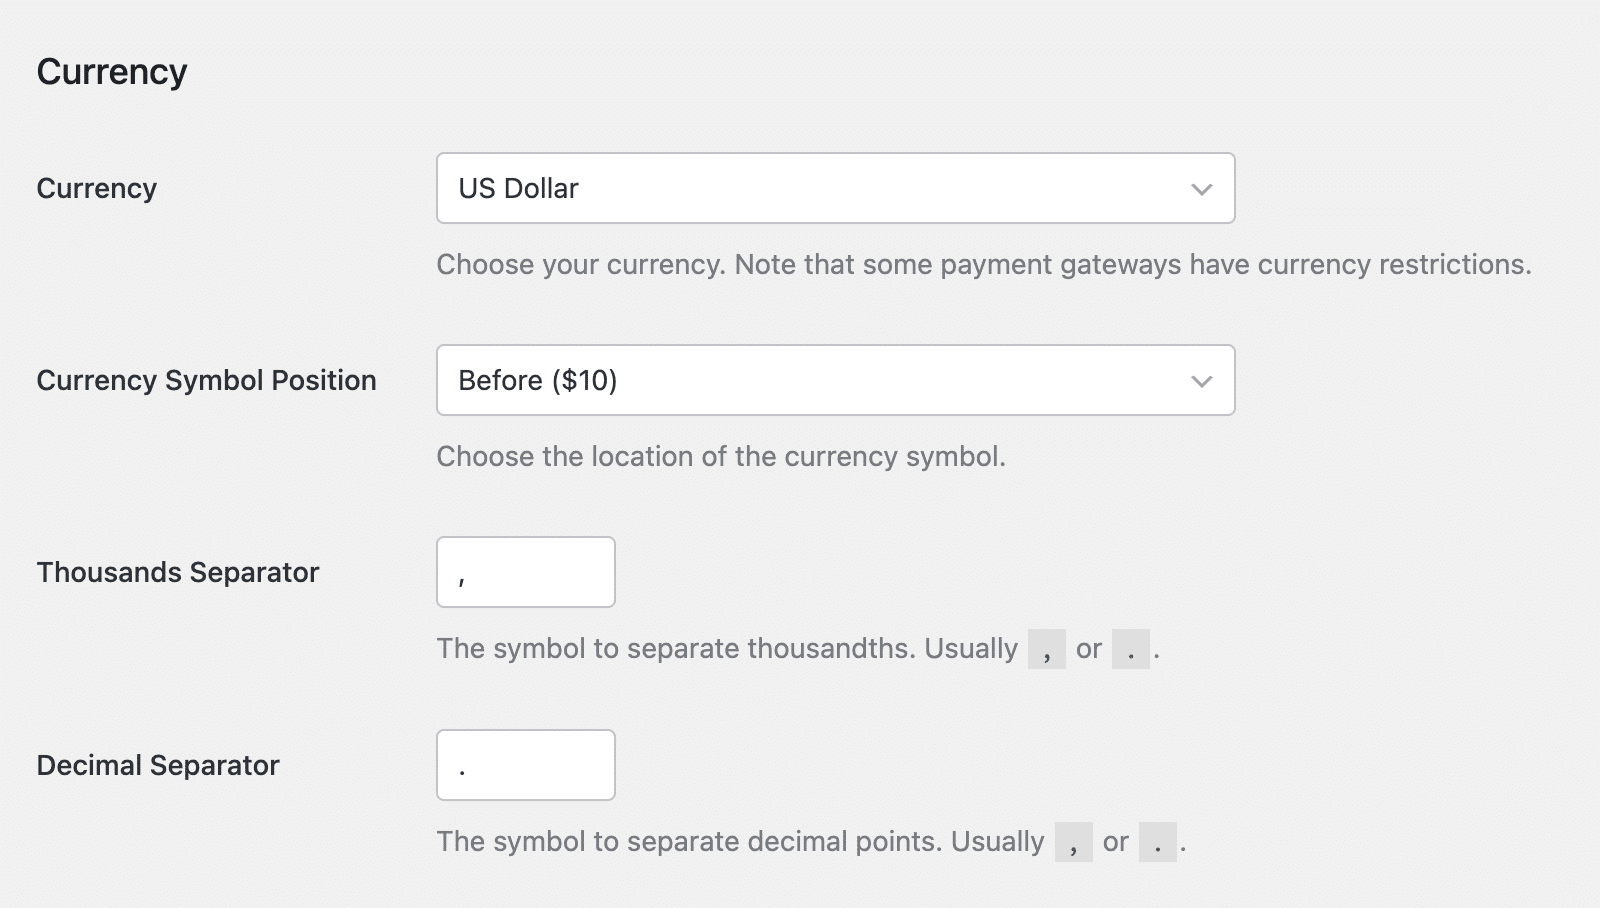
The Currency section lets you customize the default currency and separator your site will use for ticket sales.
Enabling Tickets for Events
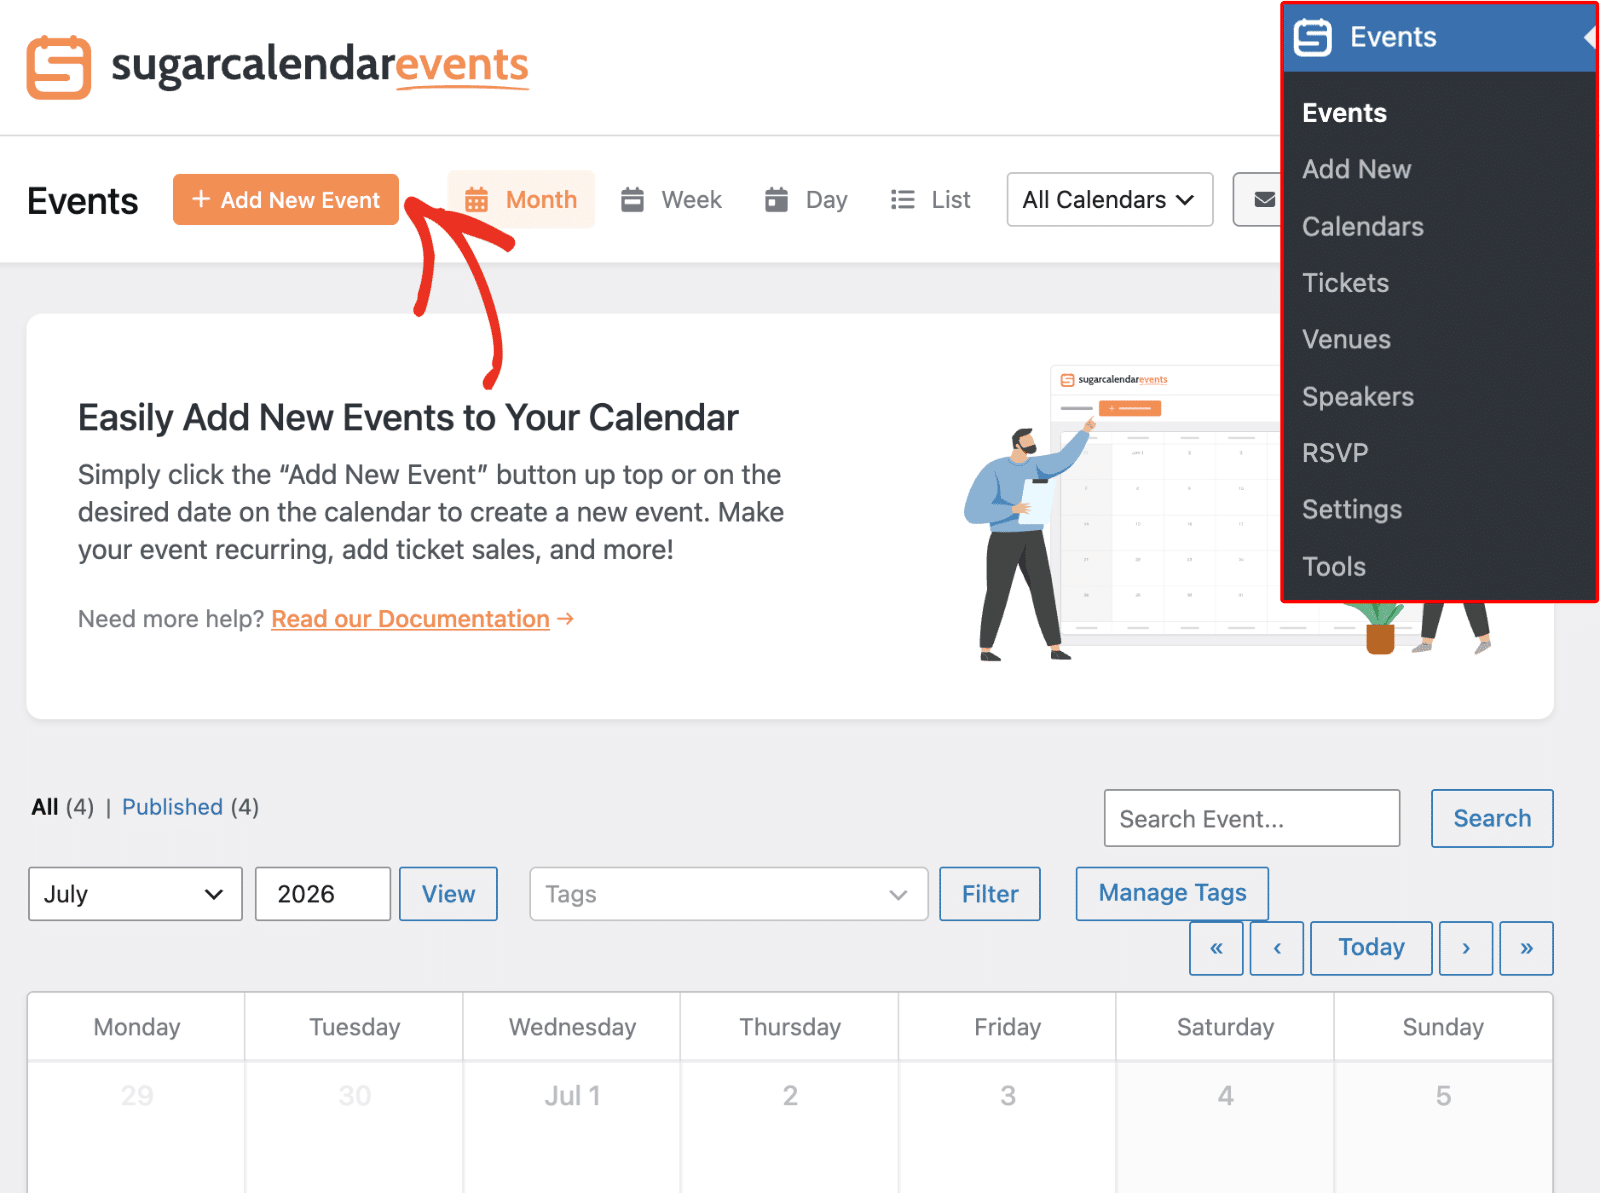
To enable tickets for an event, navigate to Events » Add New to create a new event or edit an existing event.
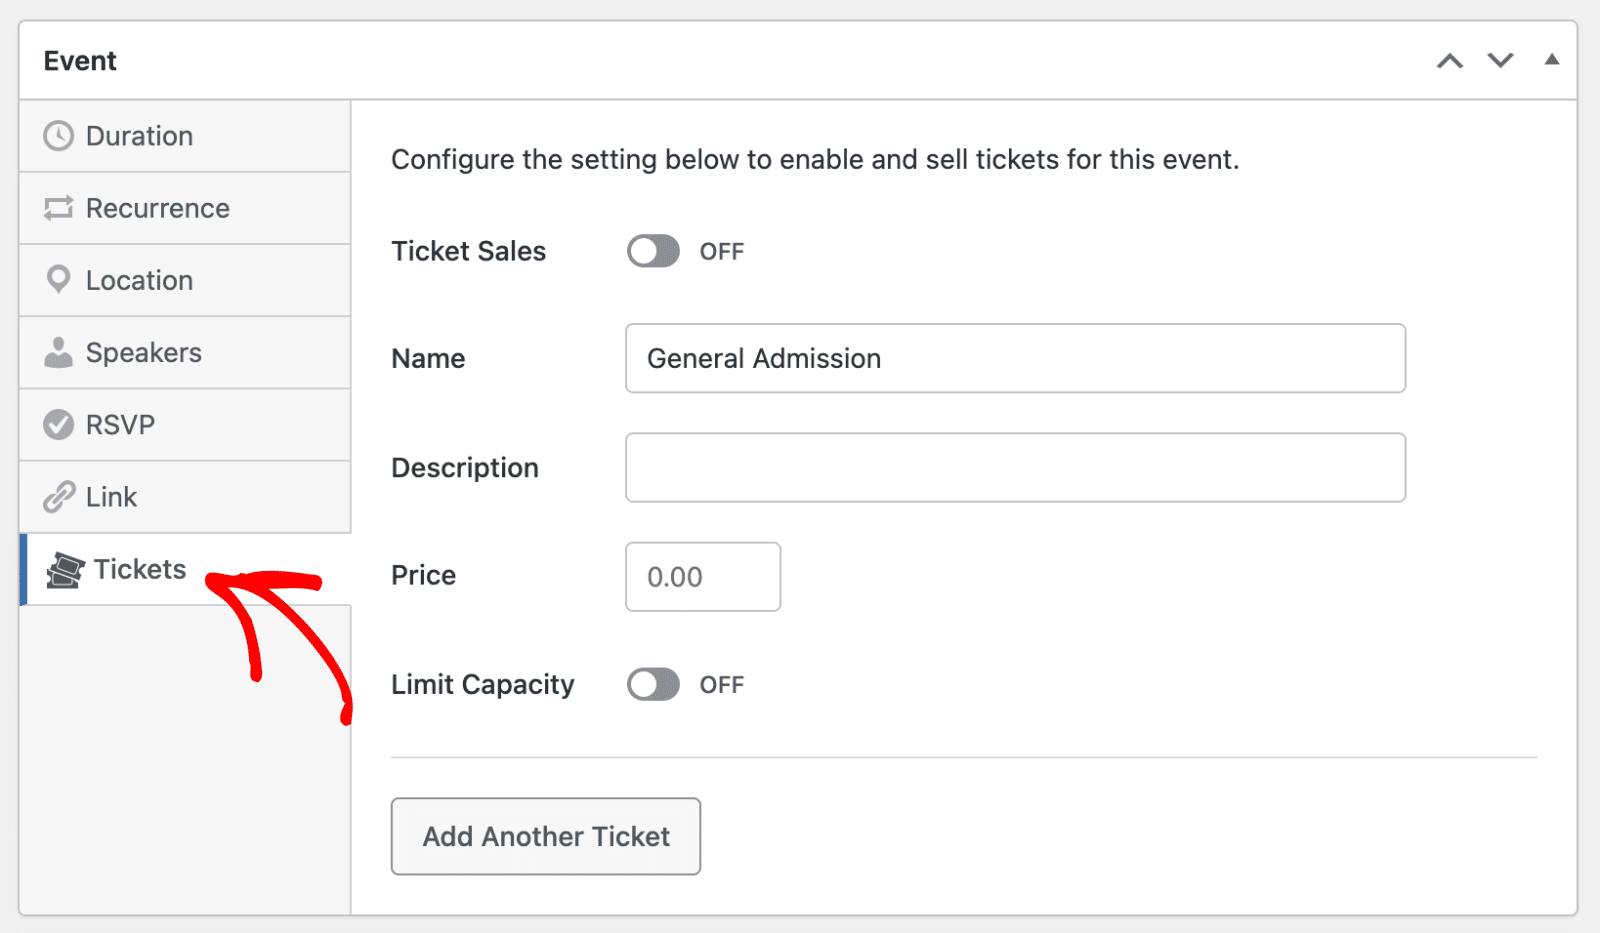
Then, click on the Tickets tab from the Add New Event page.
After that, you’ll need to toggle the Ticket Sales option to the ON position.
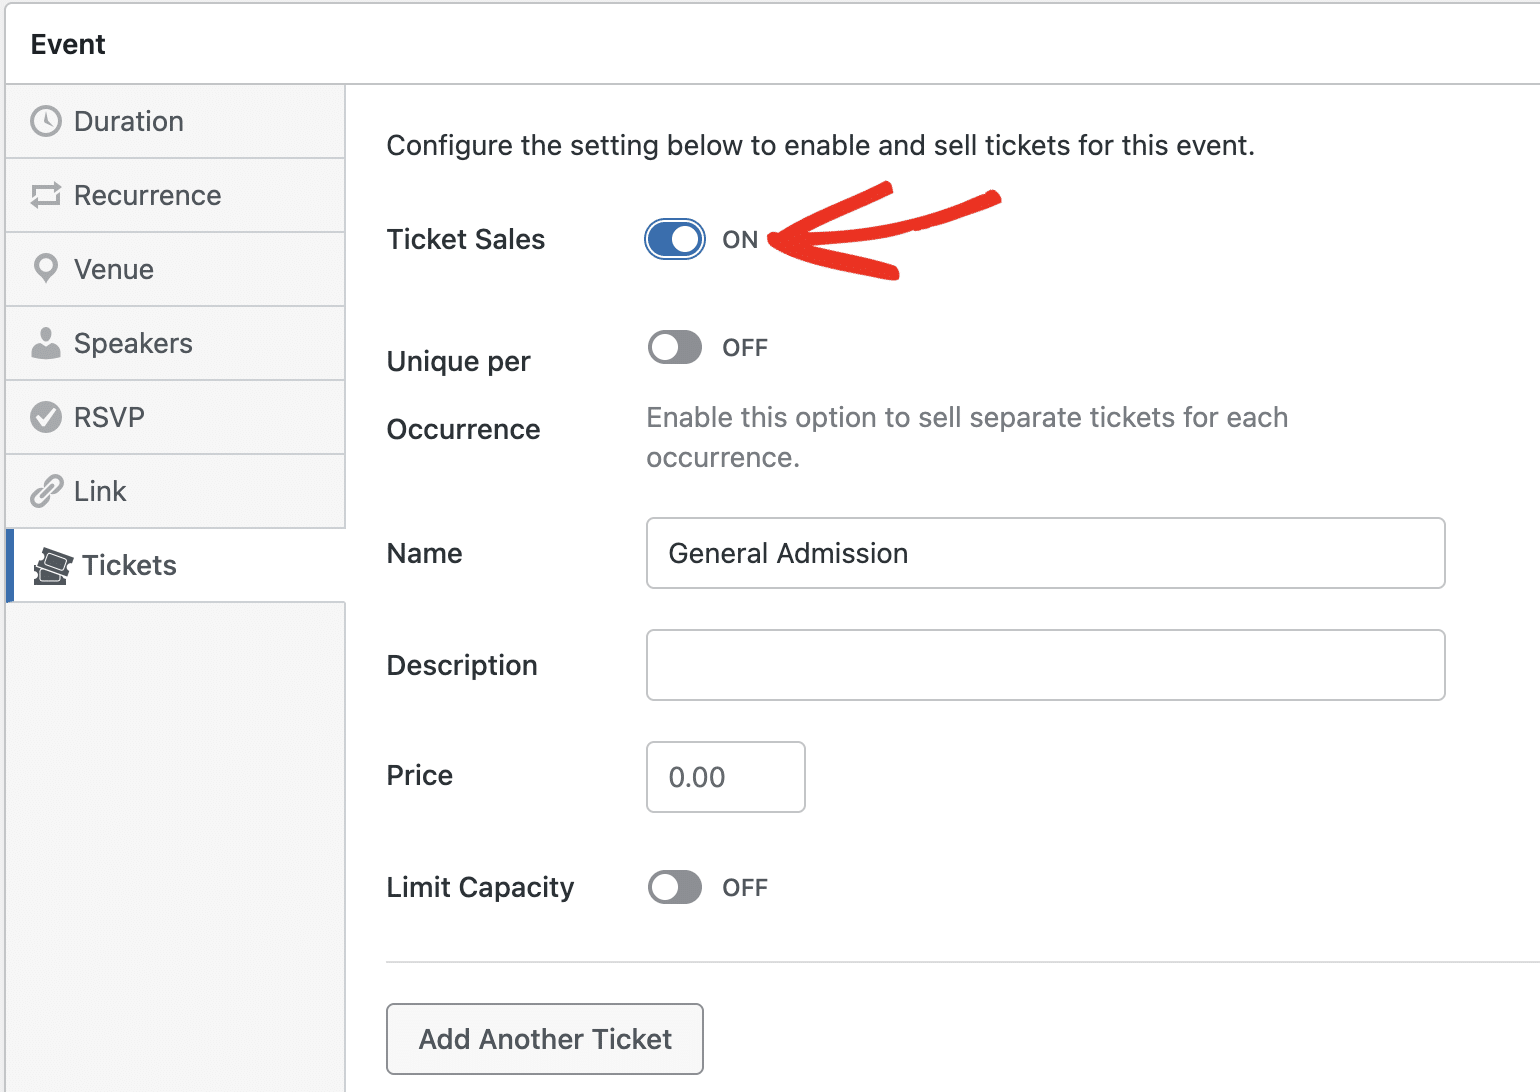
If you’re setting up a recurring event, you’ll be able to accept ticket sales for each recurrence. To do so, toggle the Unique per Occurrence option to the ON position.
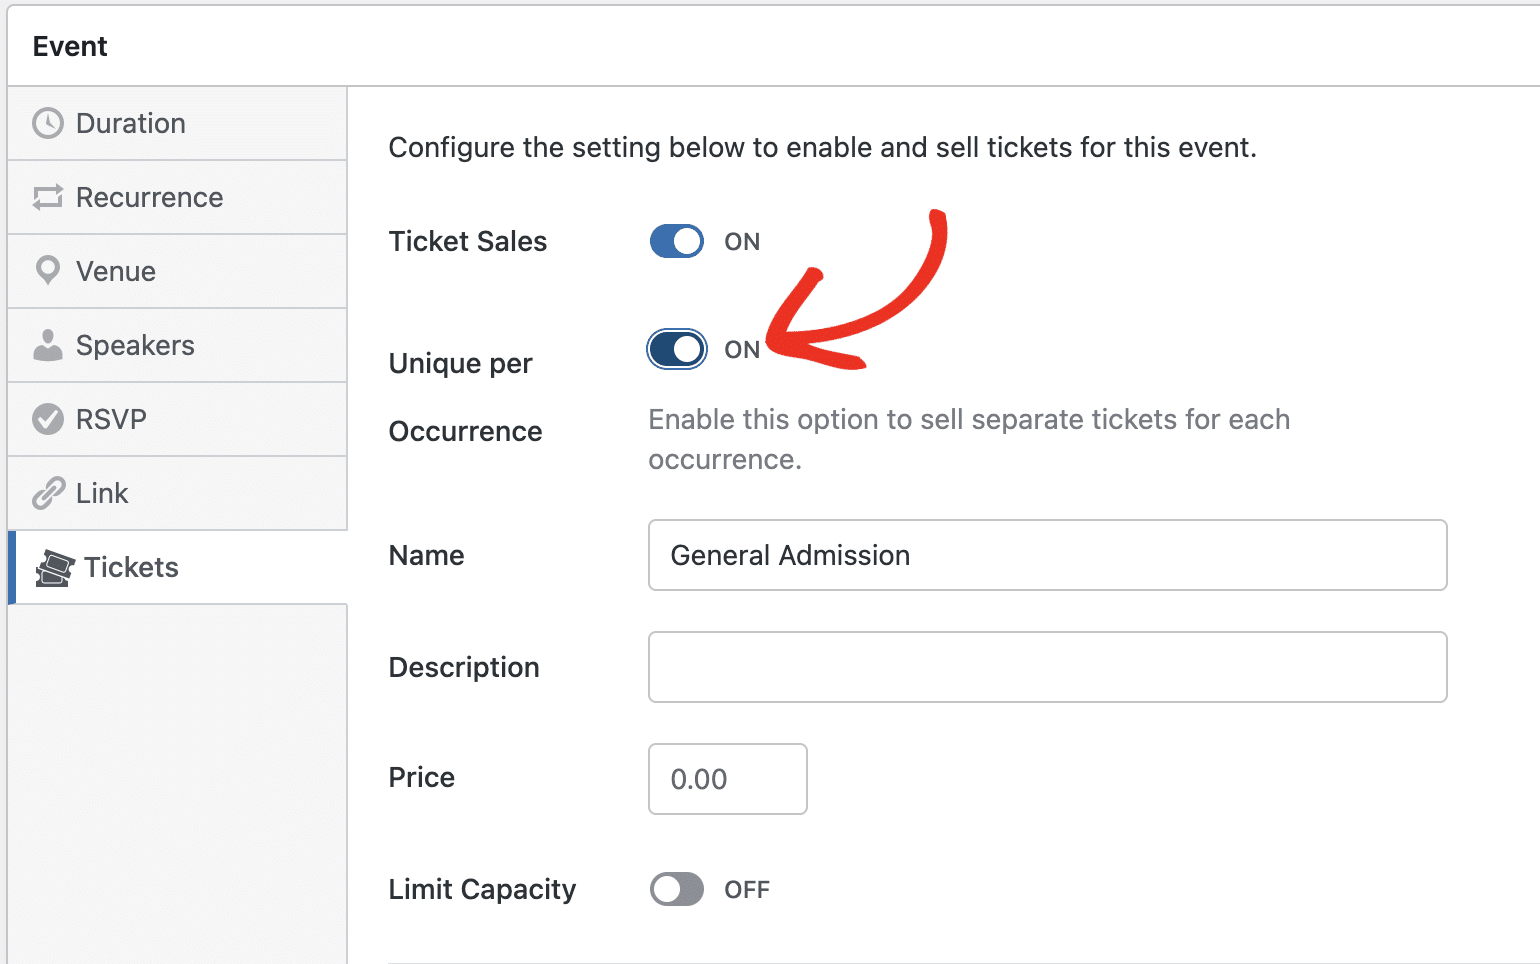
Enabling the Unique per Occurrence option will set the ticket sale limit for each recurrence to the value you’ve specified in the Capacity field.
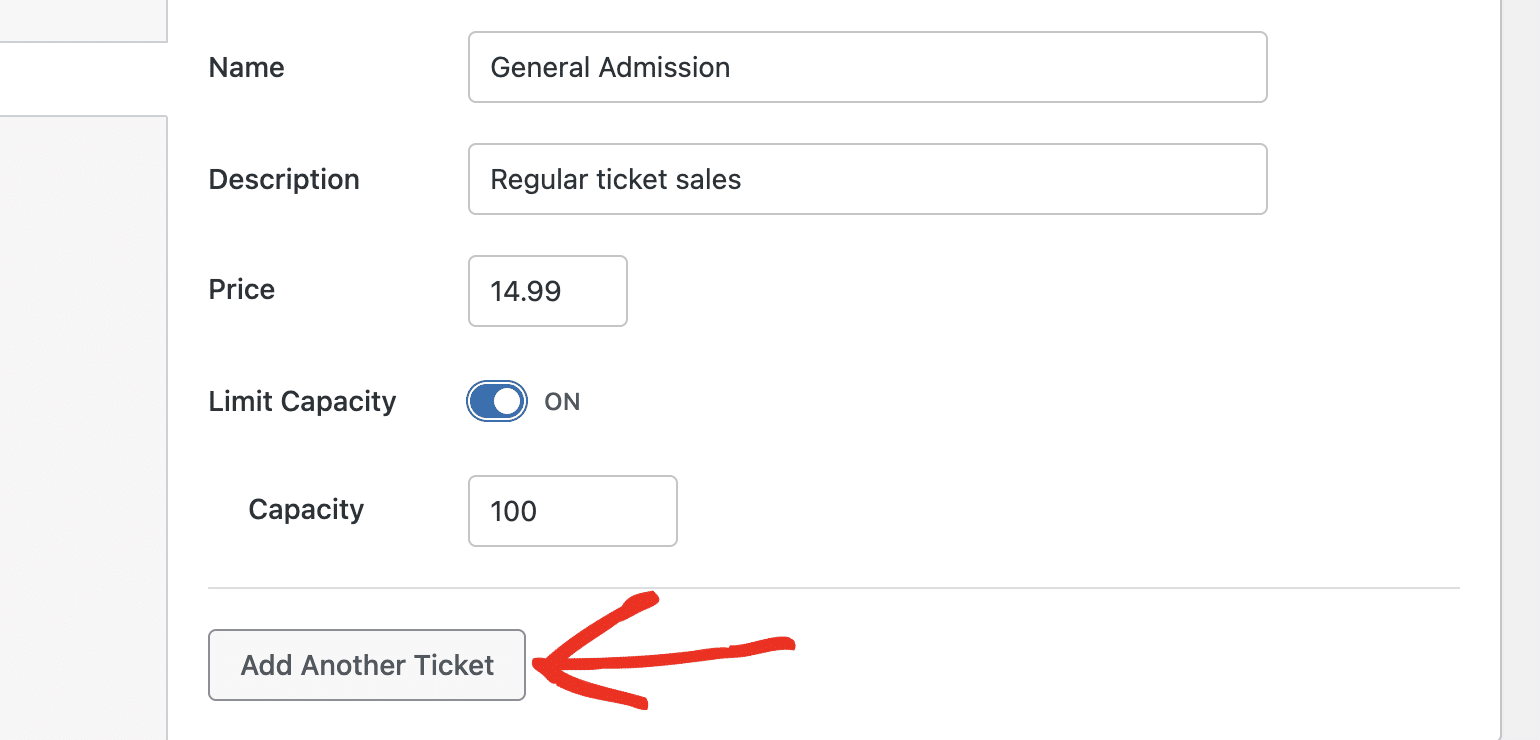
Next, enter a name and brief description for your ticket in the Name and Description fields, respectively.
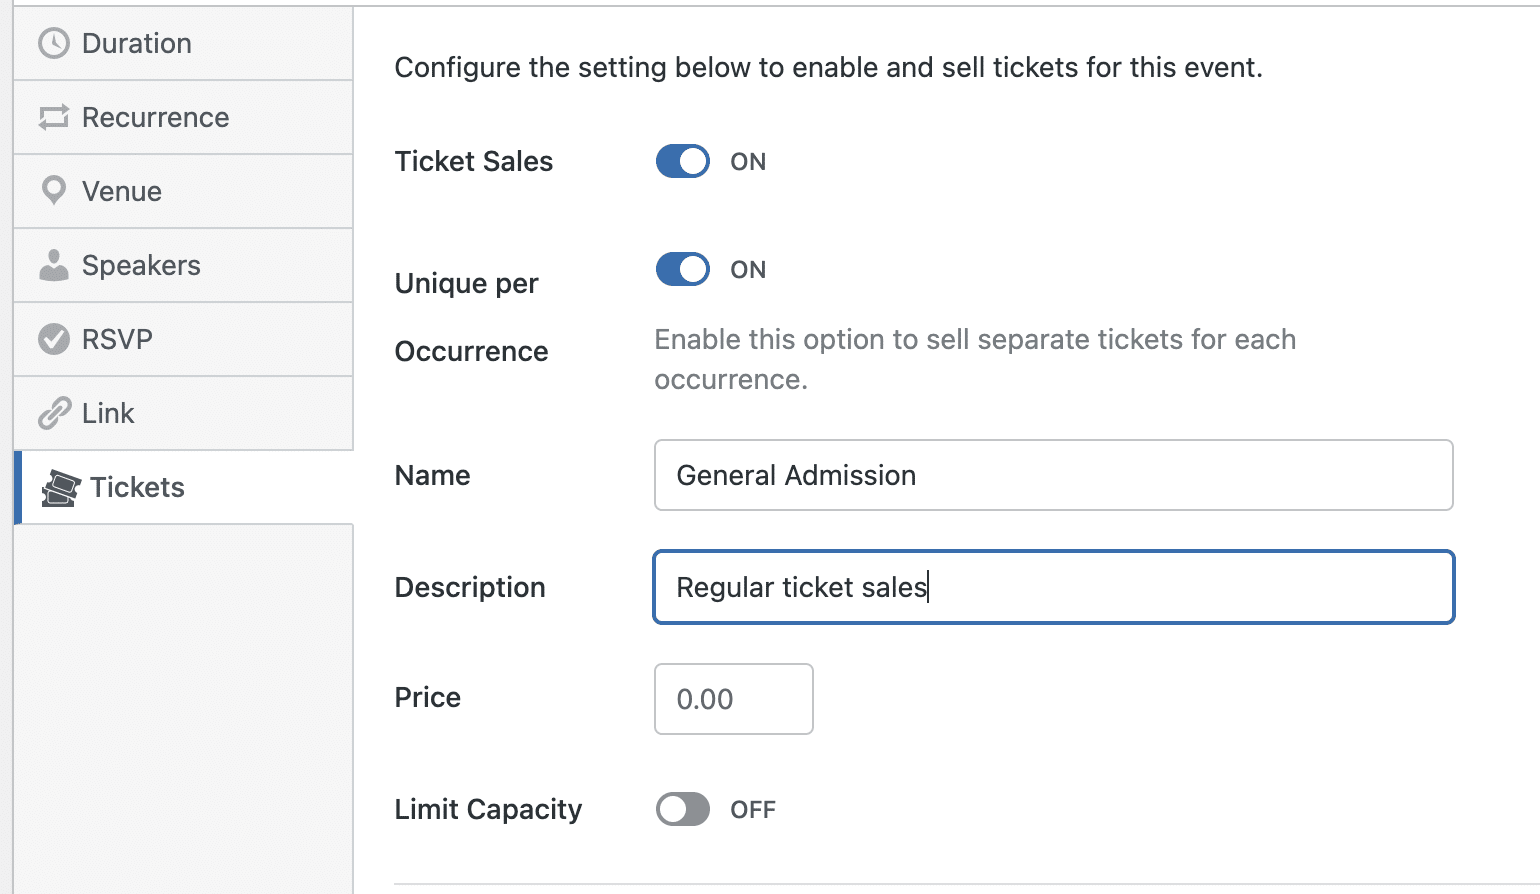
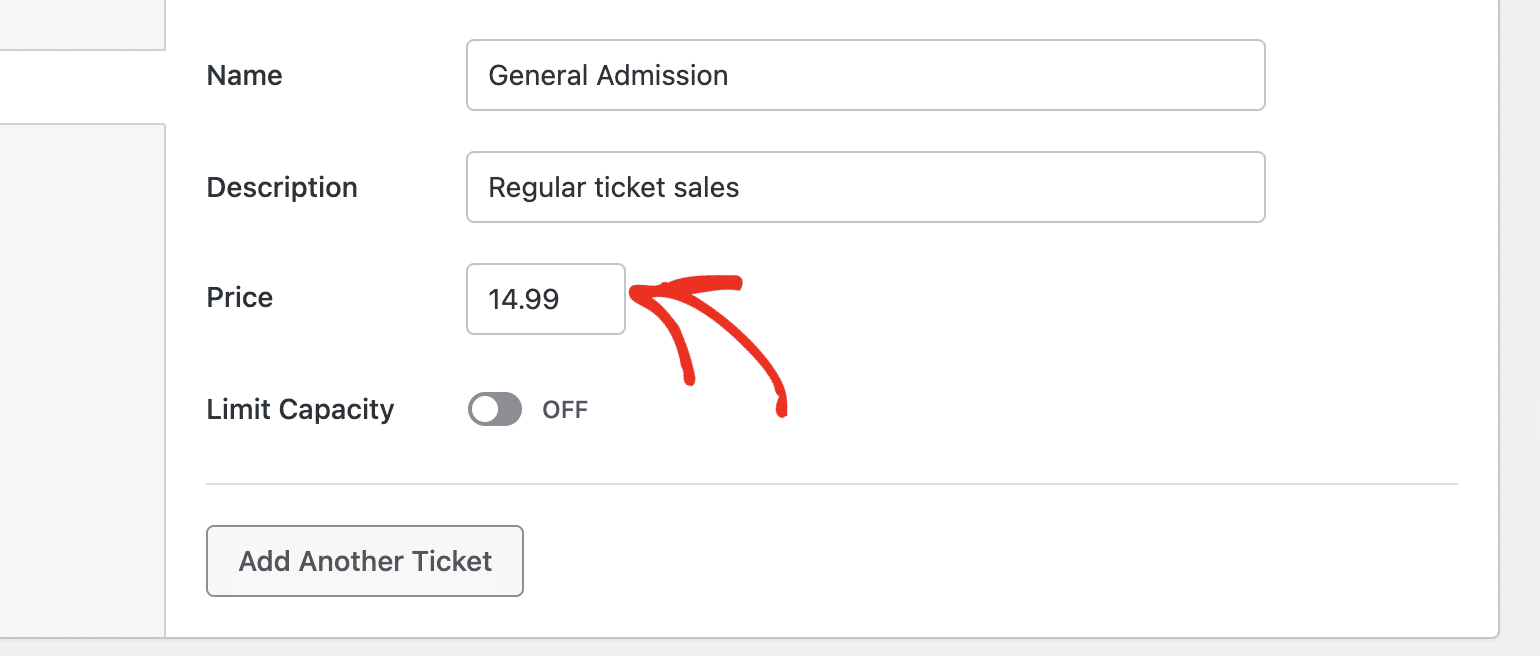
Then specify the amount you’d like to charge for the ticket sale in the Price field.
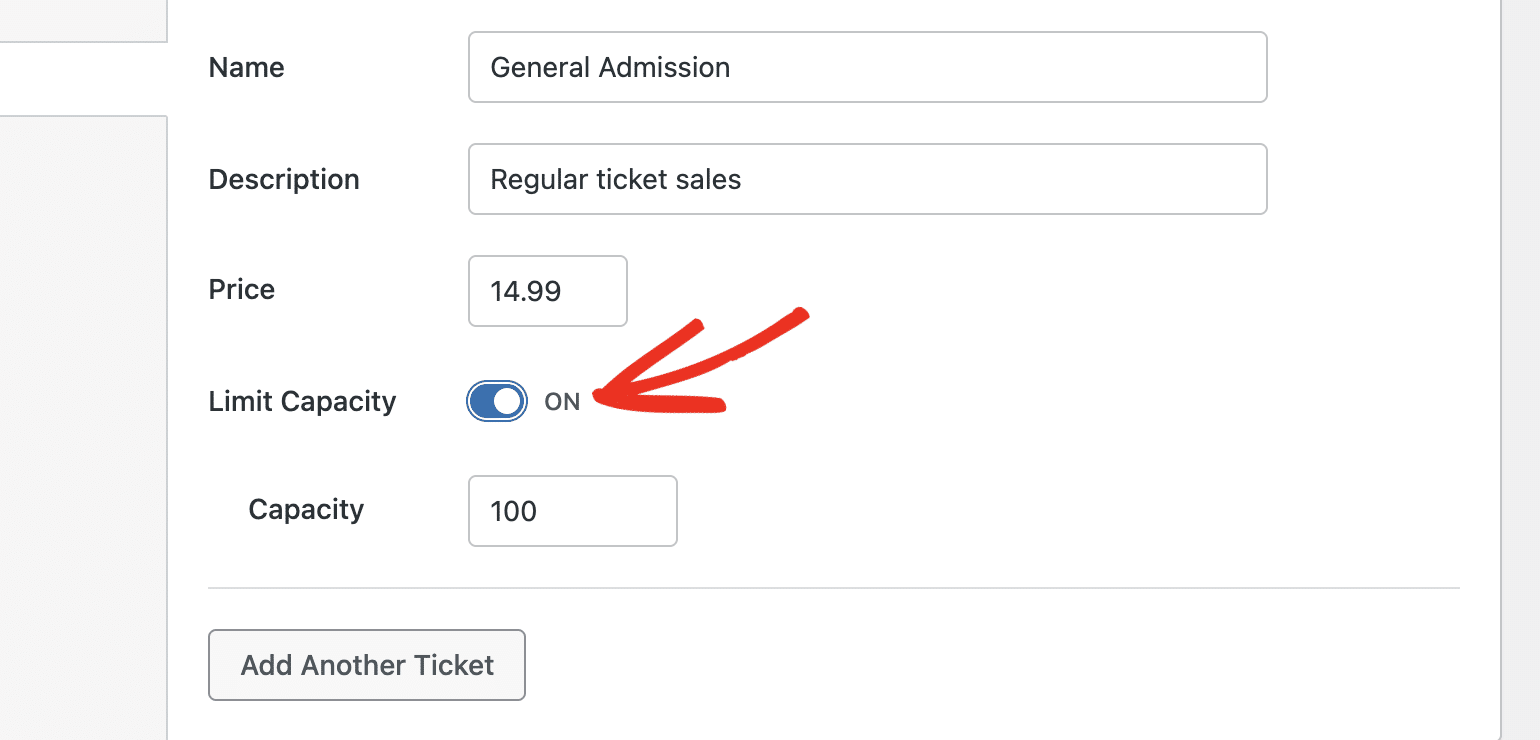
By default, the ticket will be unlimited. But you can limit the capacity by toggling the Limit Capacity option to the ON position. Then specify a number in the Capacity field.
You can add multiple ticket options for each event on your site. This can be useful for events that need VIP tickets or something similar. To add more tickets, click the Add Another Ticket button.
This will display the ticket detail page. Go ahead and add the Name, Description, and Price for the additional ticket you’re creating.
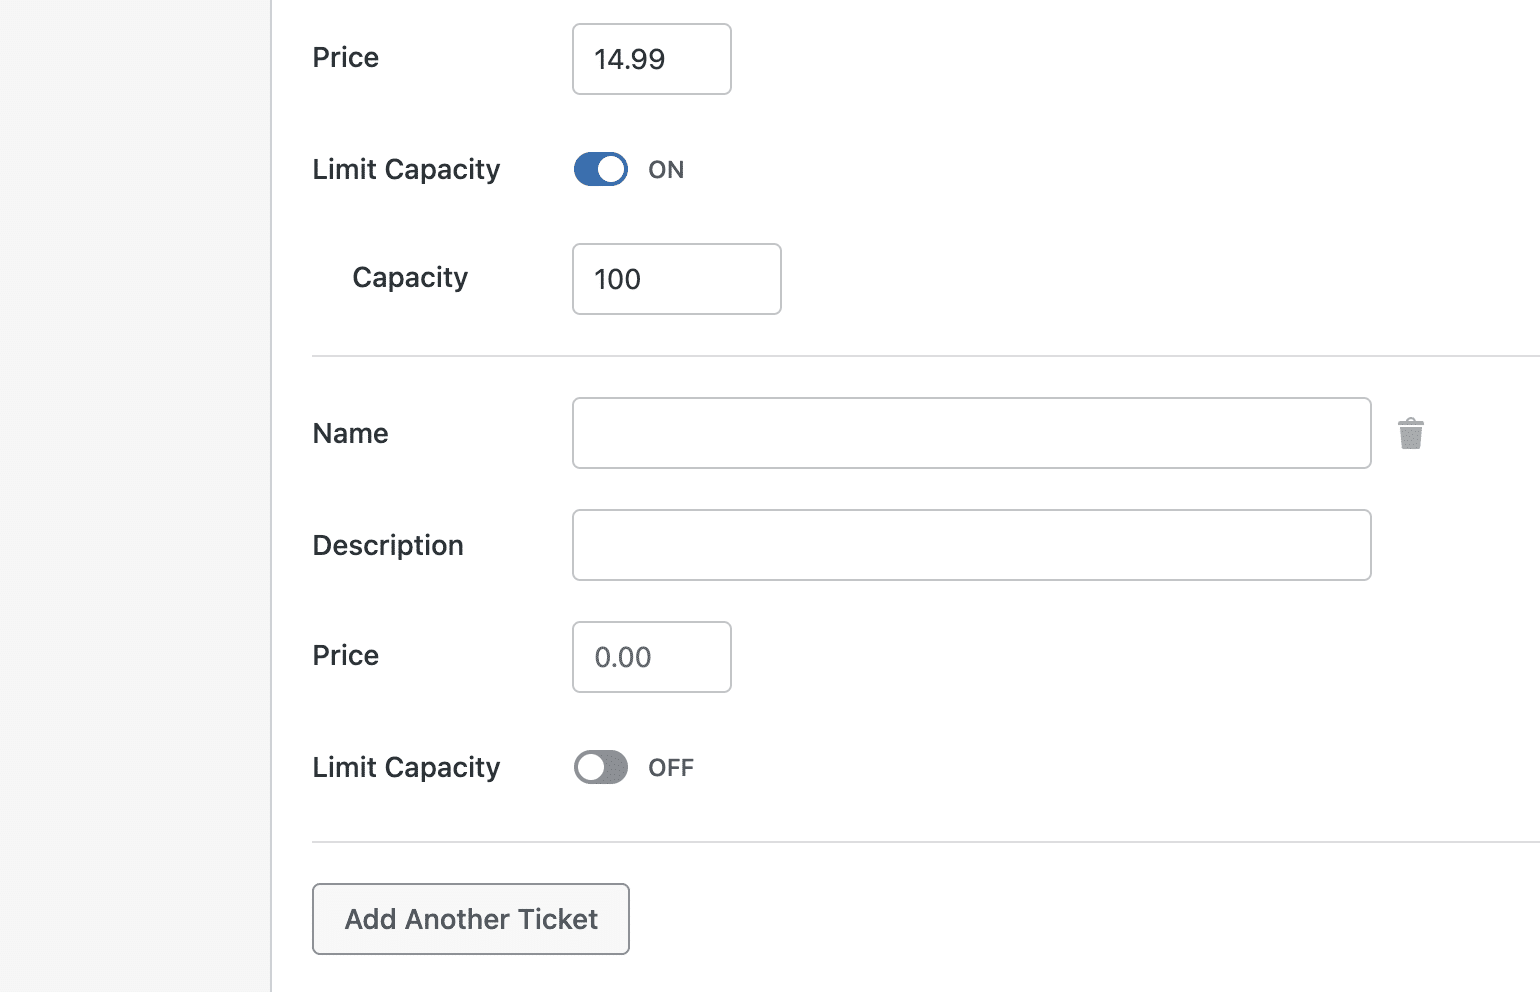
After adding the ticket details, be sure to save or update the event page. This will add a purchase option to the bottom of the event details page, allowing attendees to buy tickets directly from your site.
You can collect extra details from each attendee at checkout, such as a meal choice or a session preference. To do so, switch on the Registration Form option in the same Event section.
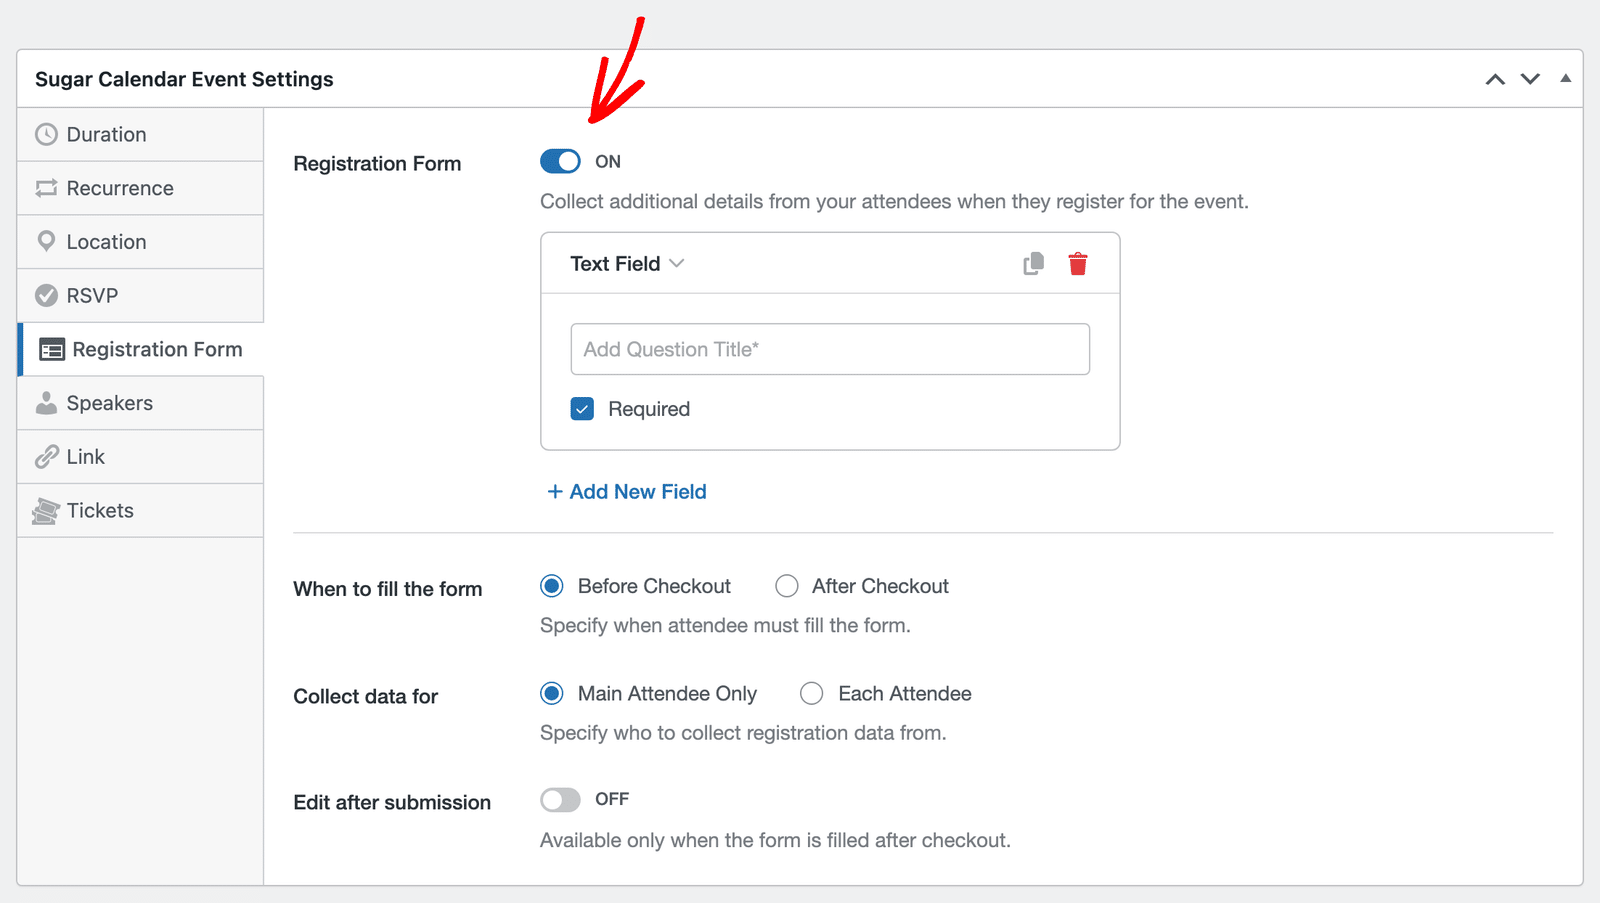
See our guide on creating a registration form for your events for the full walkthrough.
Managing Ticket Orders
You can manage your ticket orders from the Events » Tickets section in your WordPress admin area.
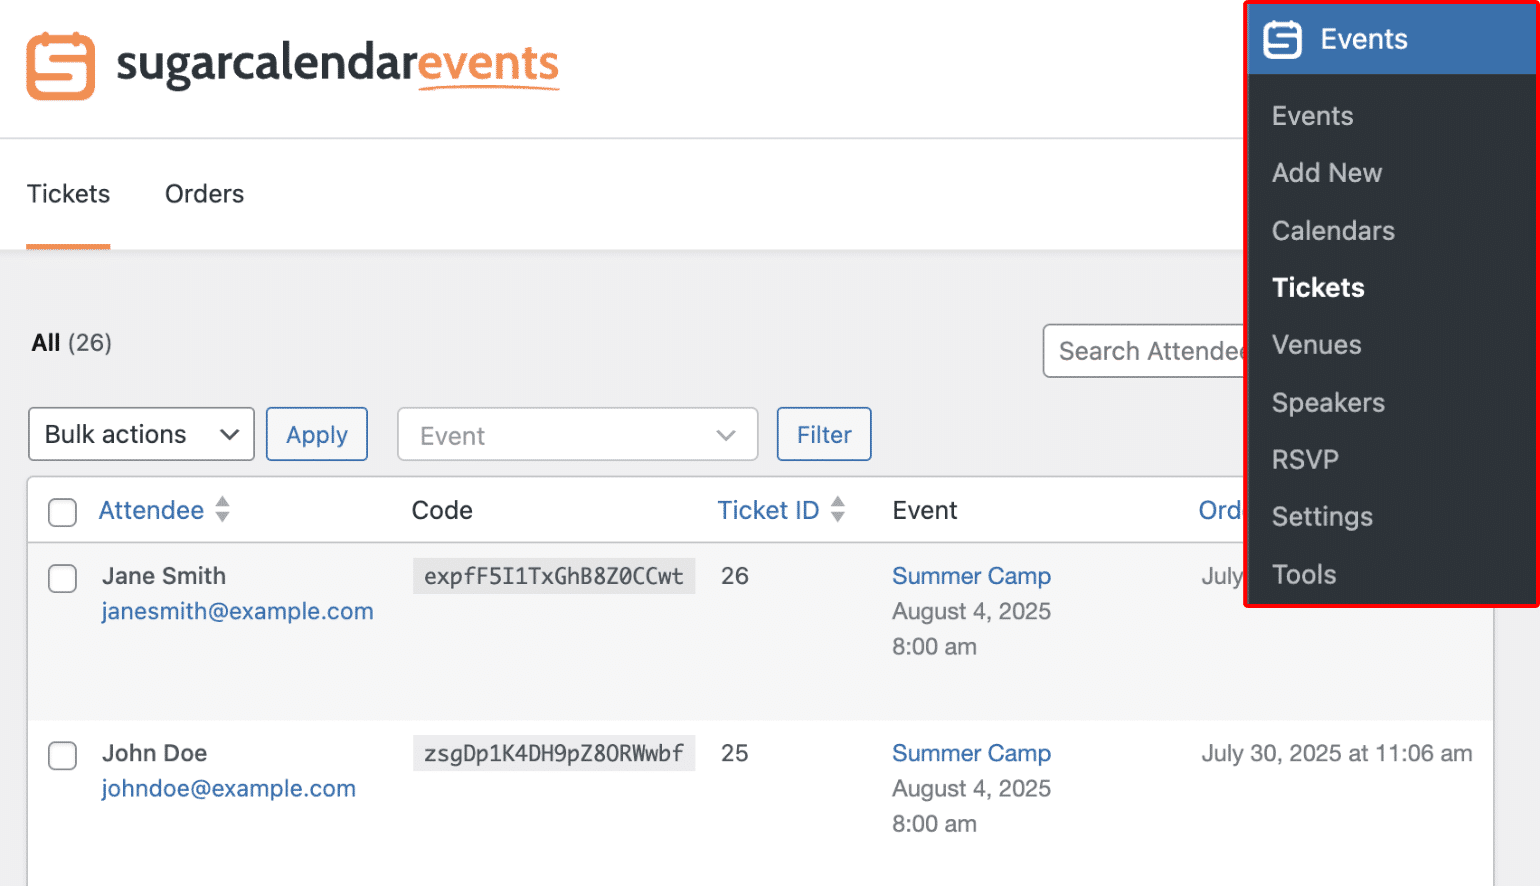
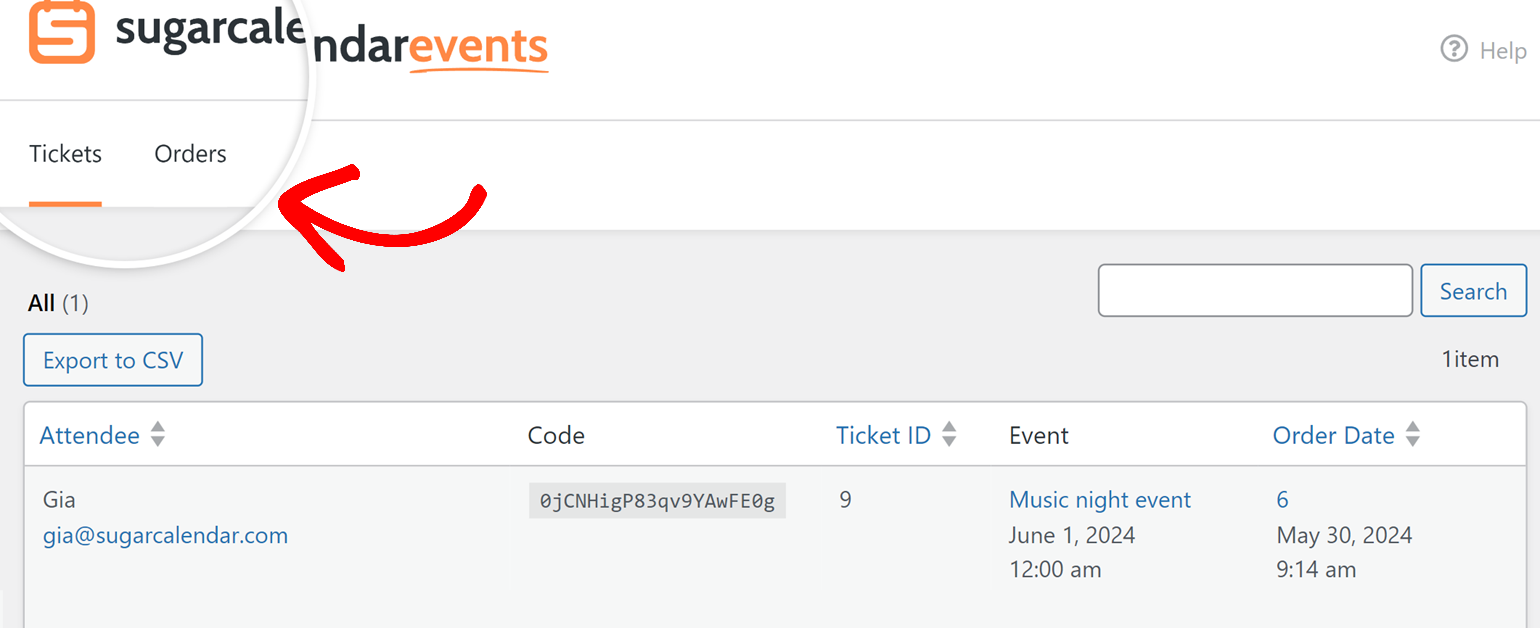
This section is divided into two main tabs: Tickets, where you can view all attendees and their ticket details, and Orders, where you can see a summary of all ticket orders and their statuses.
Tickets Overview
The Tickets tab displays a comprehensive list of all attendees who have purchased tickets. Here, you can view detailed information about each ticket, including the attendee’s name, email, ticket code, ticket ID, event, and order date.
To view or edit the details of a ticket, hover over the ticket name under the Attendee column and select View Order Details.
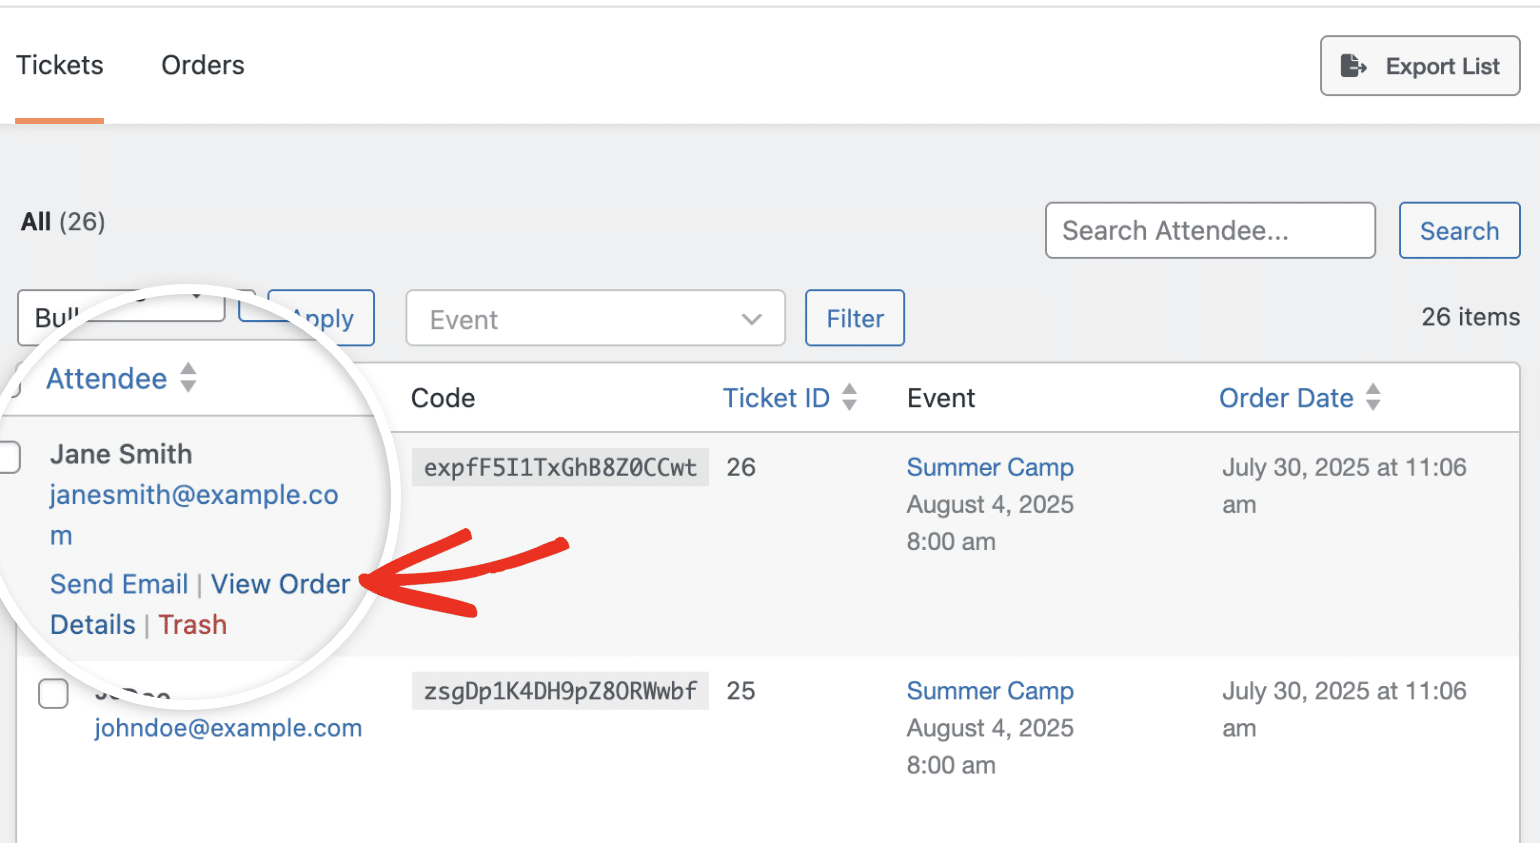
This will open the individual ticketing page where you can update the order status, resend the email receipt, or delete the order.
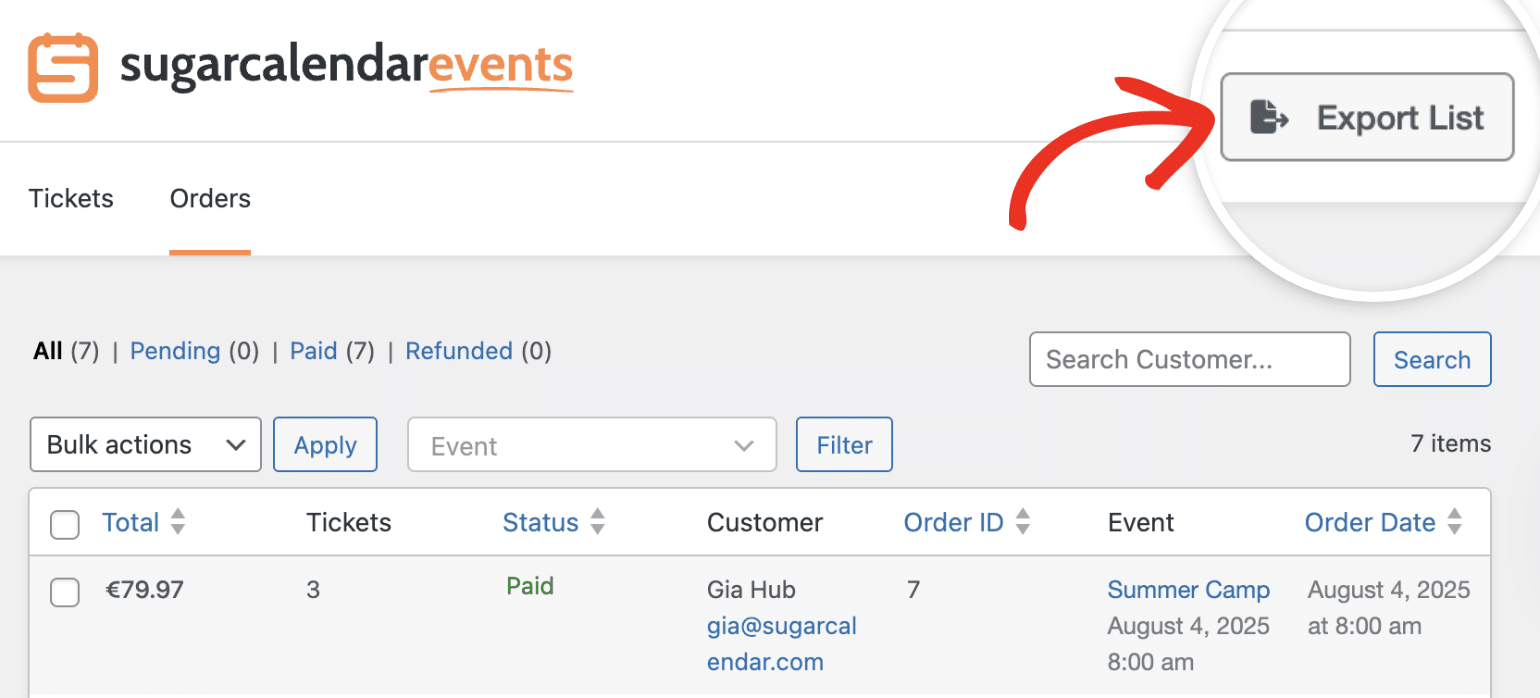
Additionally, you can export the list of tickets to a CSV file by clicking the Export List button.
Orders Overview
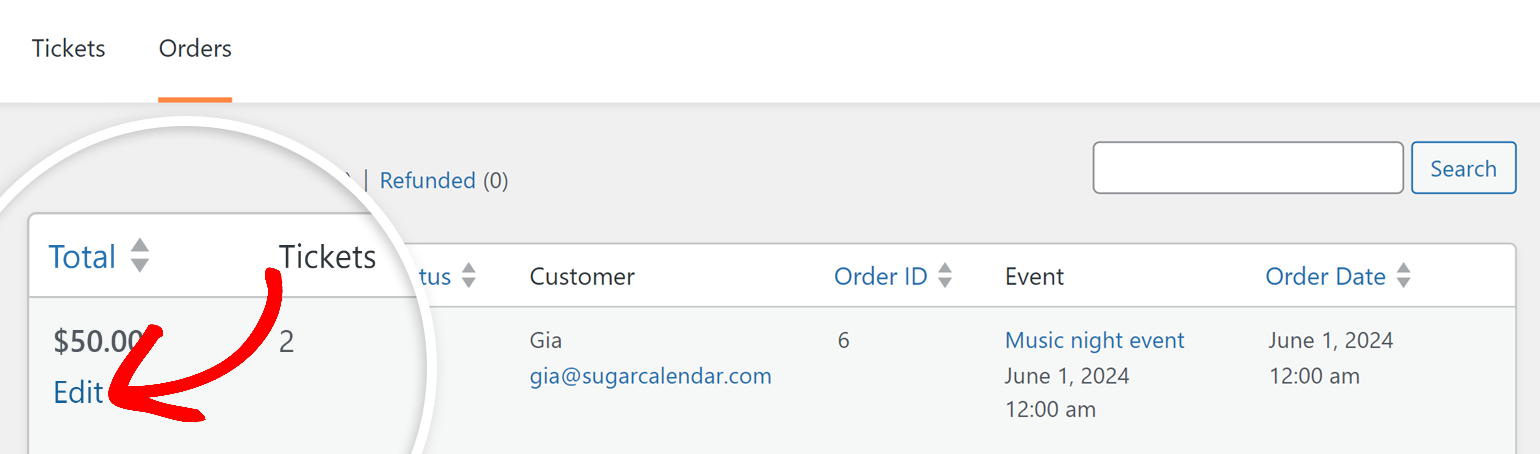
The Orders tab provides a summary of all ticket orders. This tab allows you to view key details such as the total amount, number of tickets, status, customer information, order ID, event, and order date.
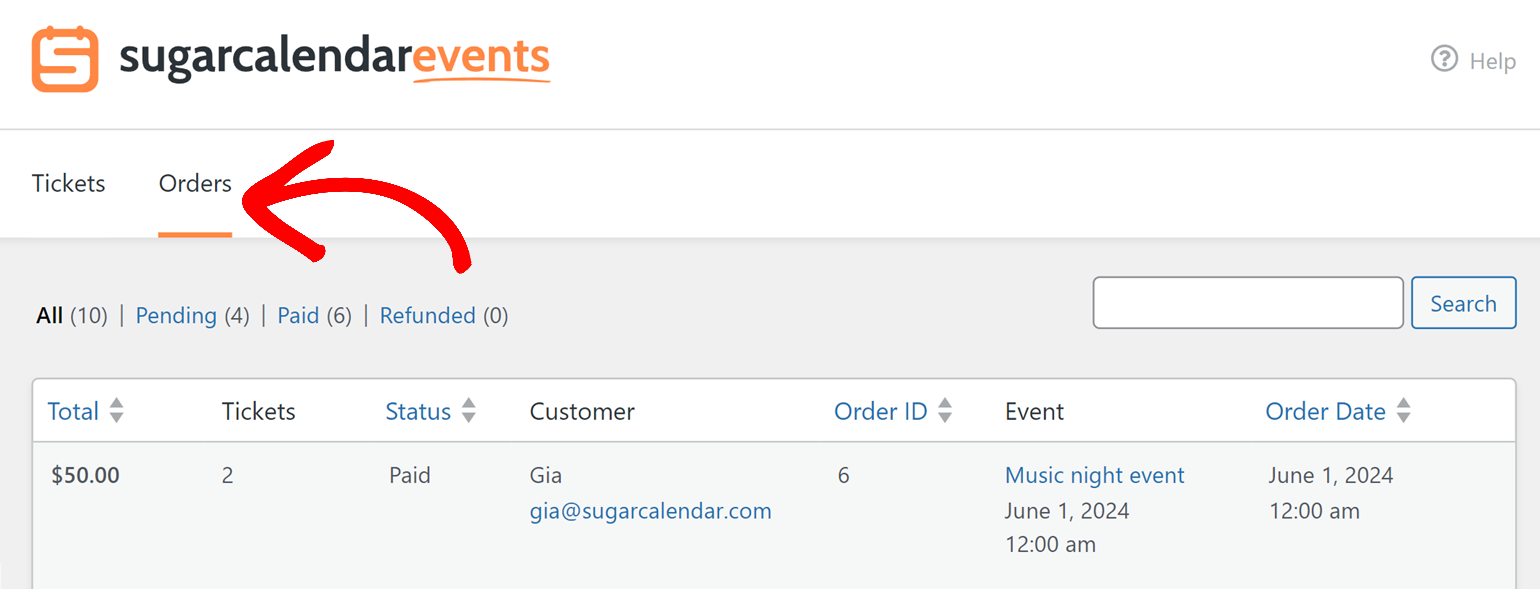
To edit an order, click the Edit link under the Total column. This will open the individual ticketing page where you can view and update order details, resend email receipts, and delete orders.
Viewing Individual Ticket Details
Once you have opened the individual ticketing page, you’ll see all the details you need about that ticket.
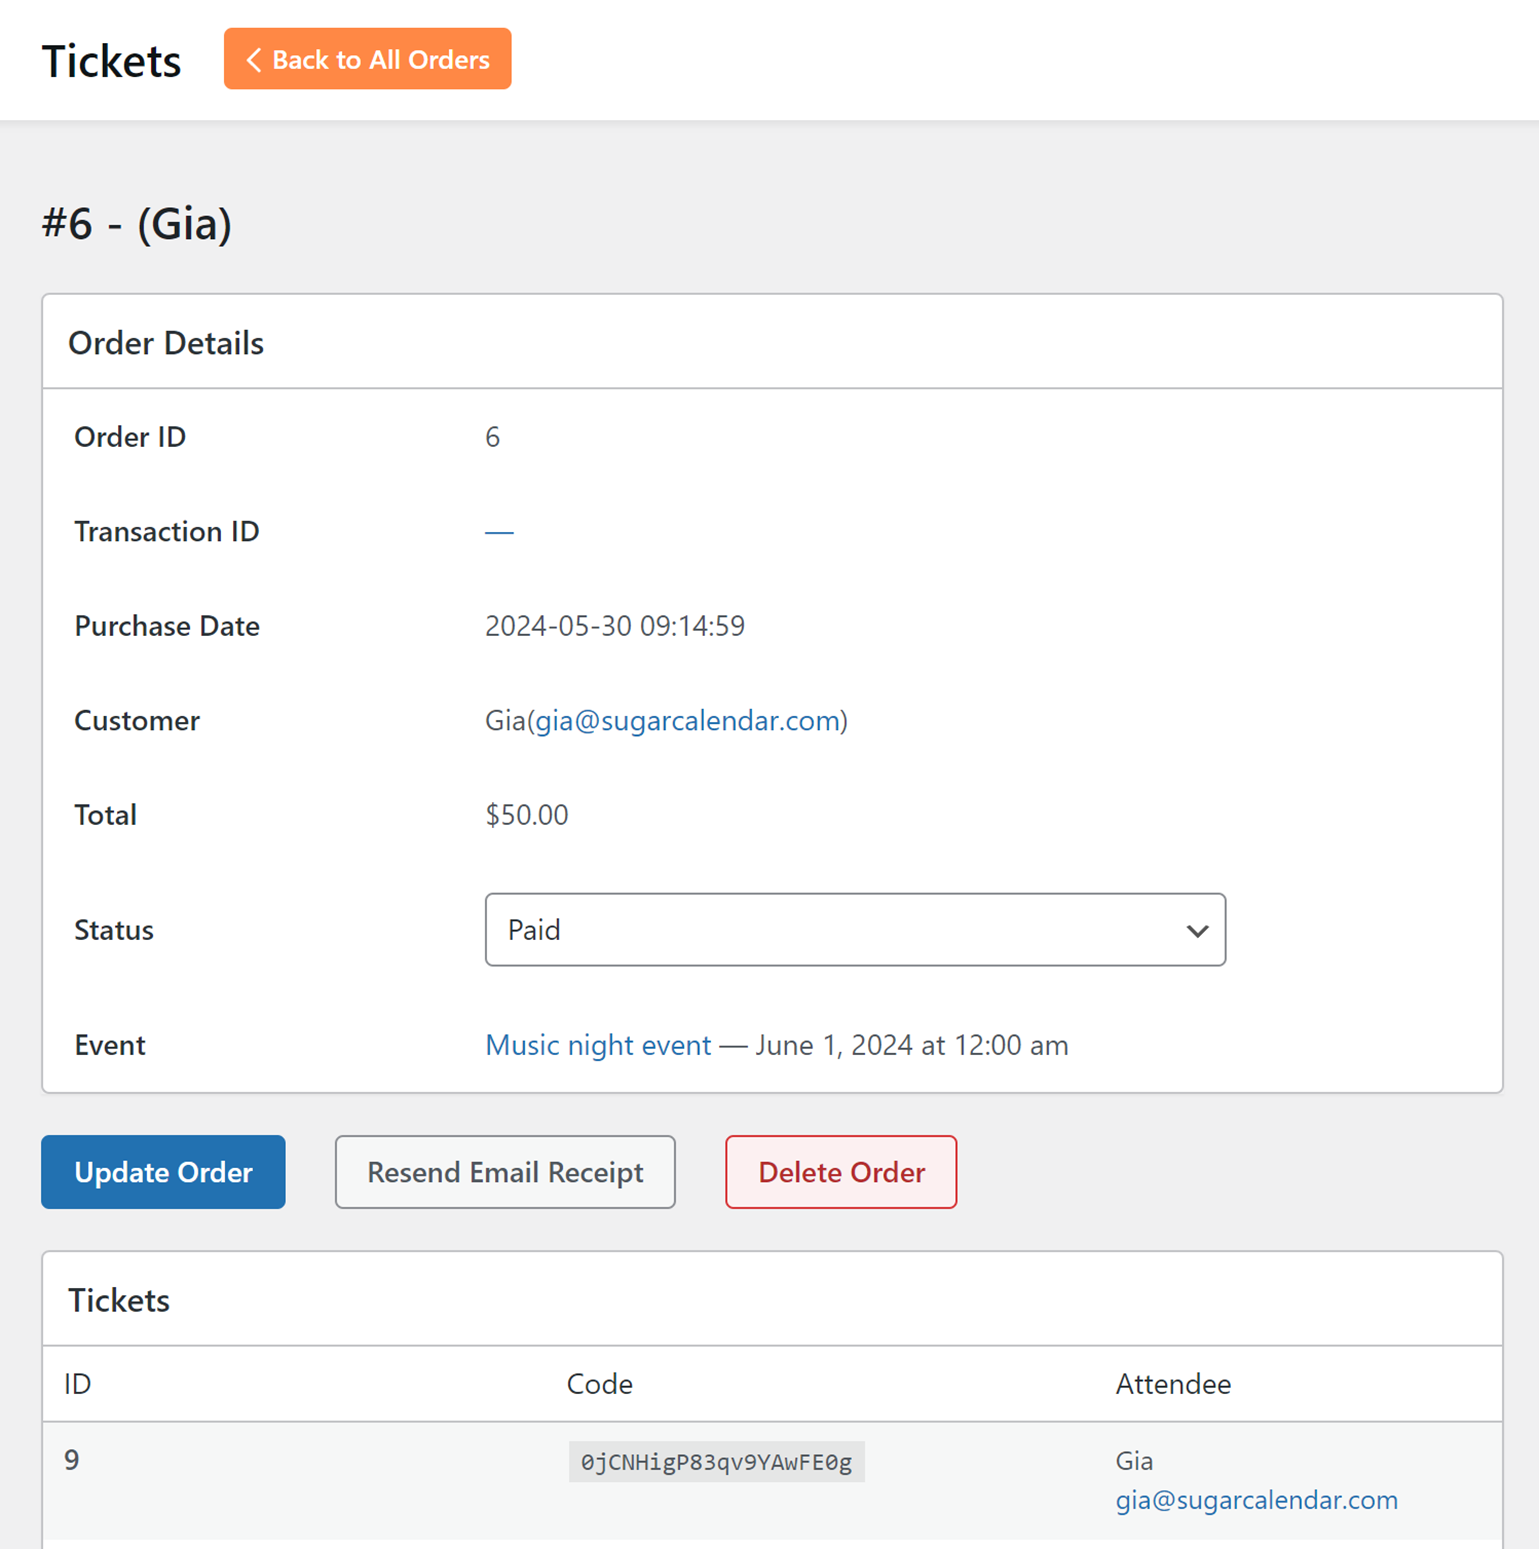
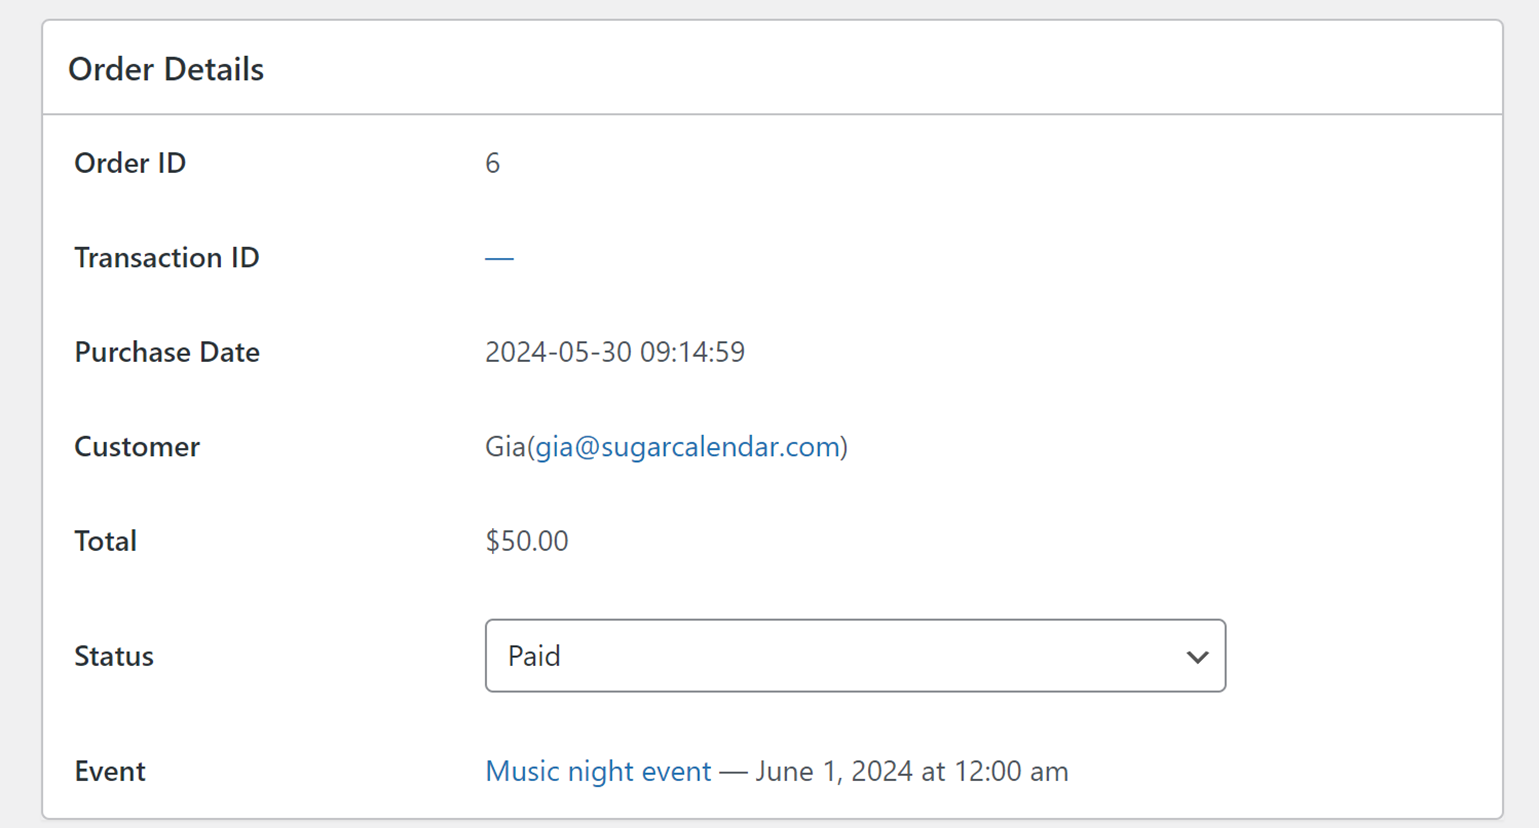
At the top of the page, you’ll find the Order Details section, providing key information about the order, including the order ID, transaction ID, purchase date, customer information, total amount, status, and event details.
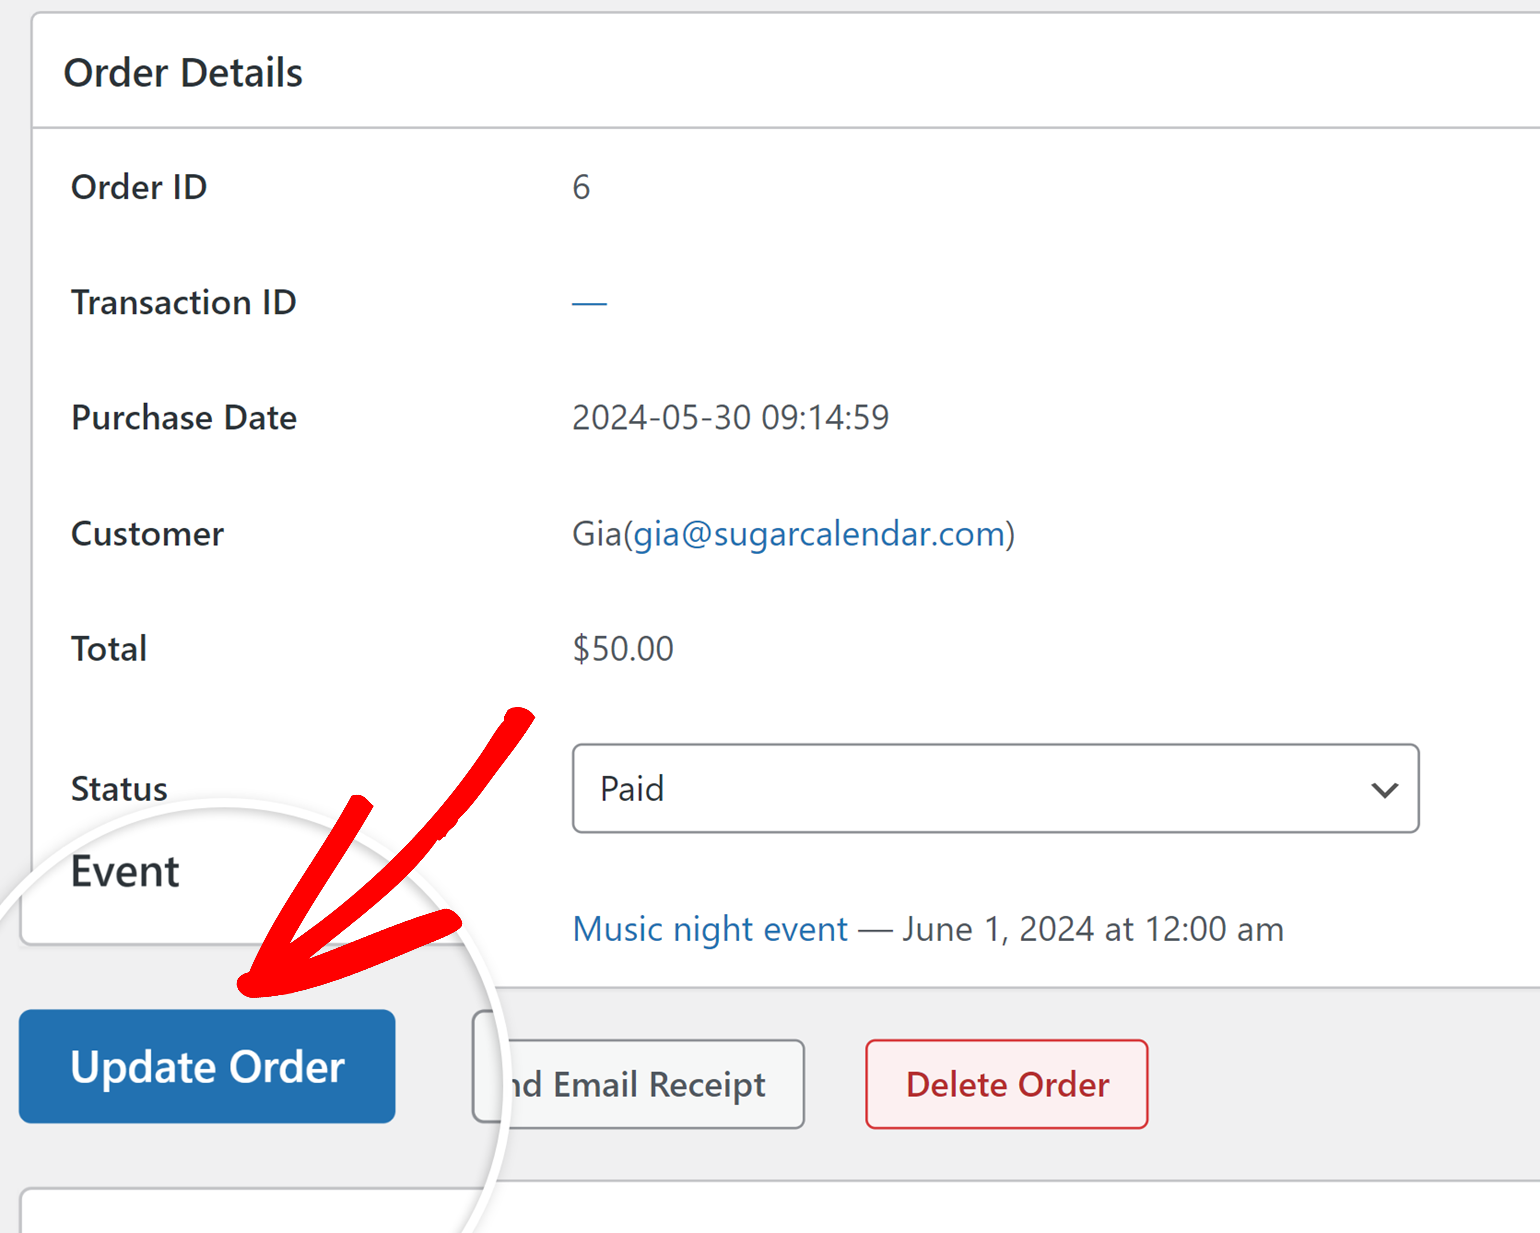
From here, you can change the payment status from the Status dropdown.
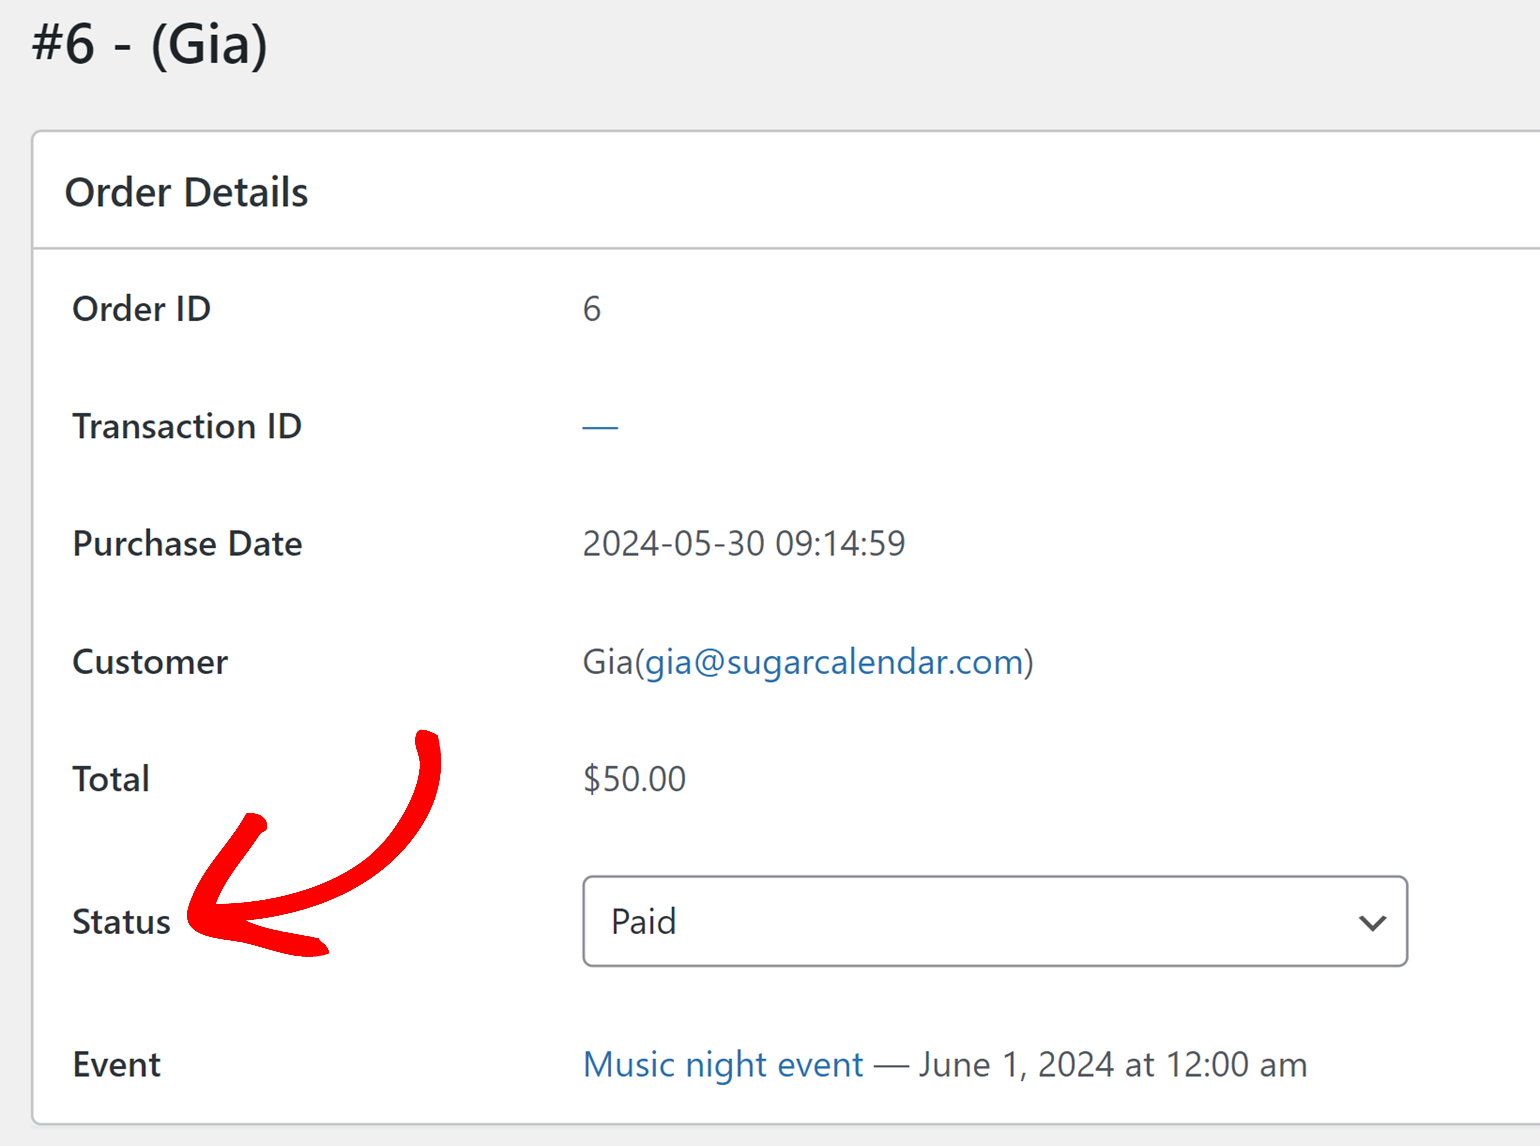
Make sure to click the Update Order button once you’ve changed the payment status.
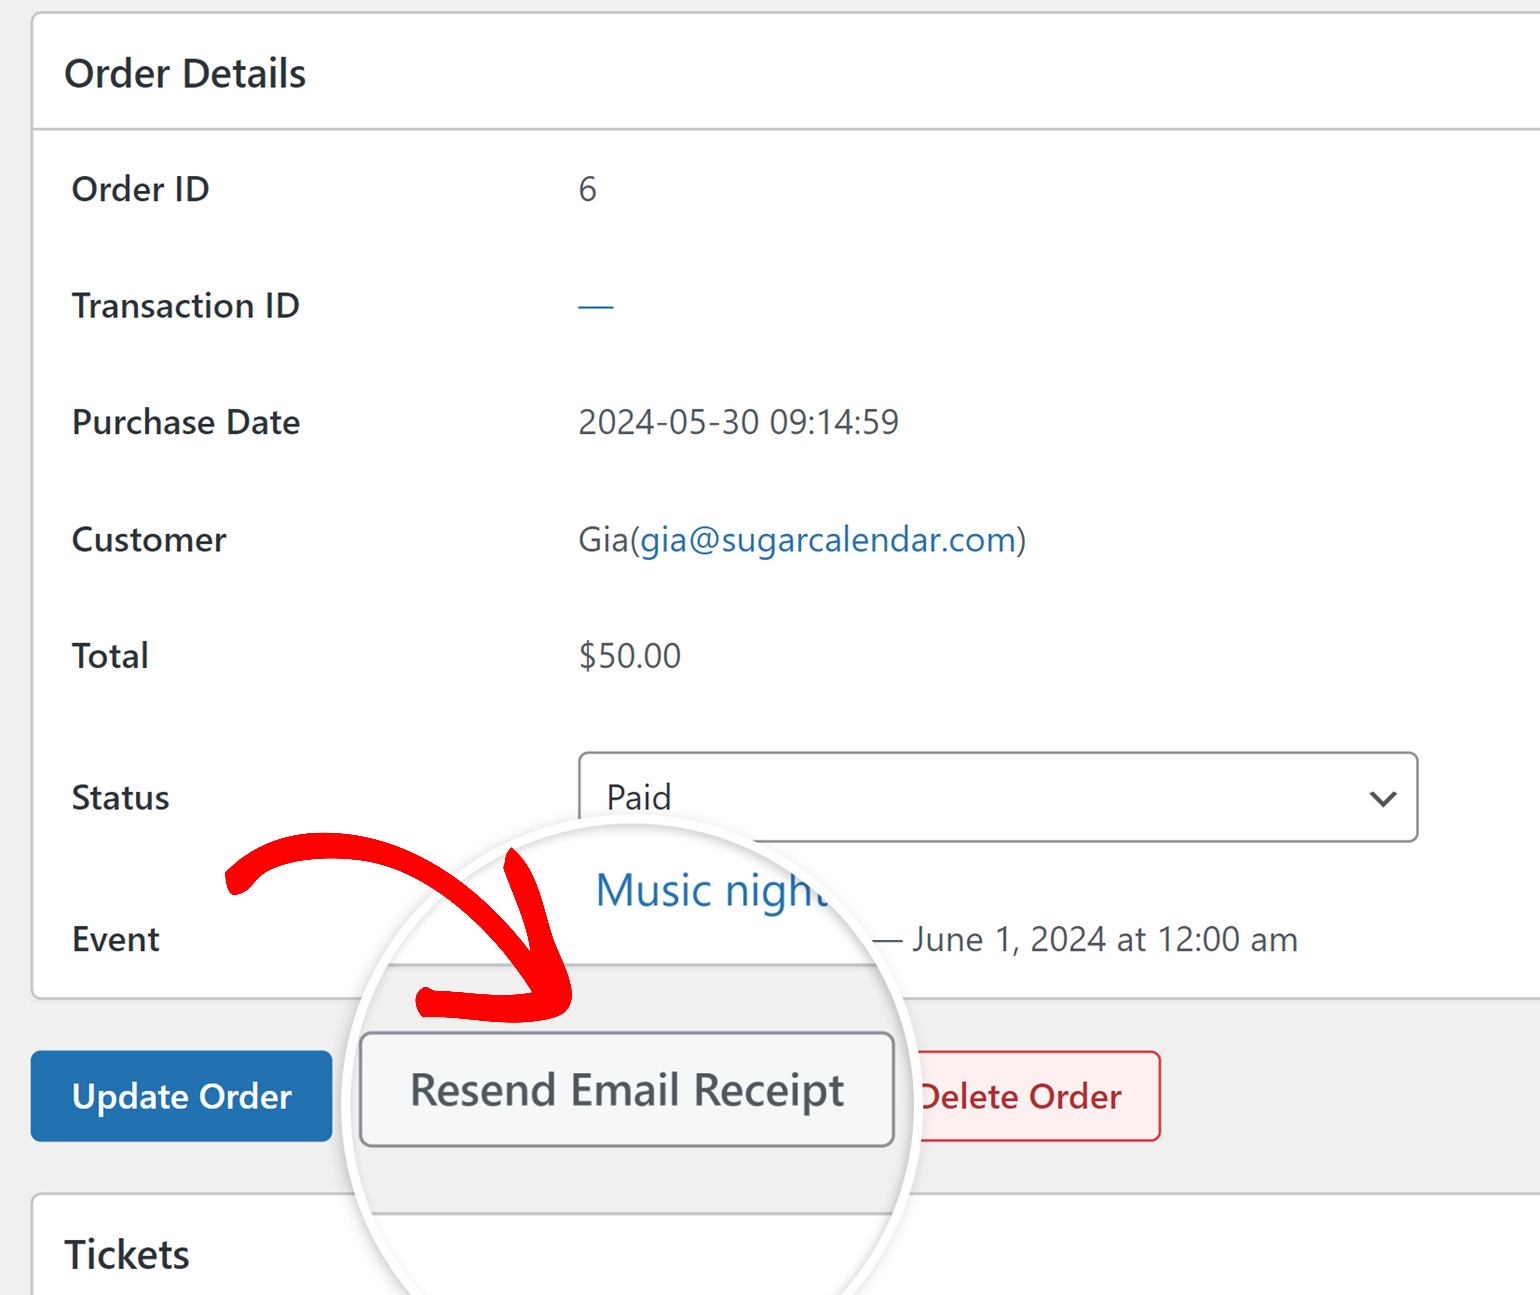
To resend the email receipt to the customer, click the Resend Email Receipt button.
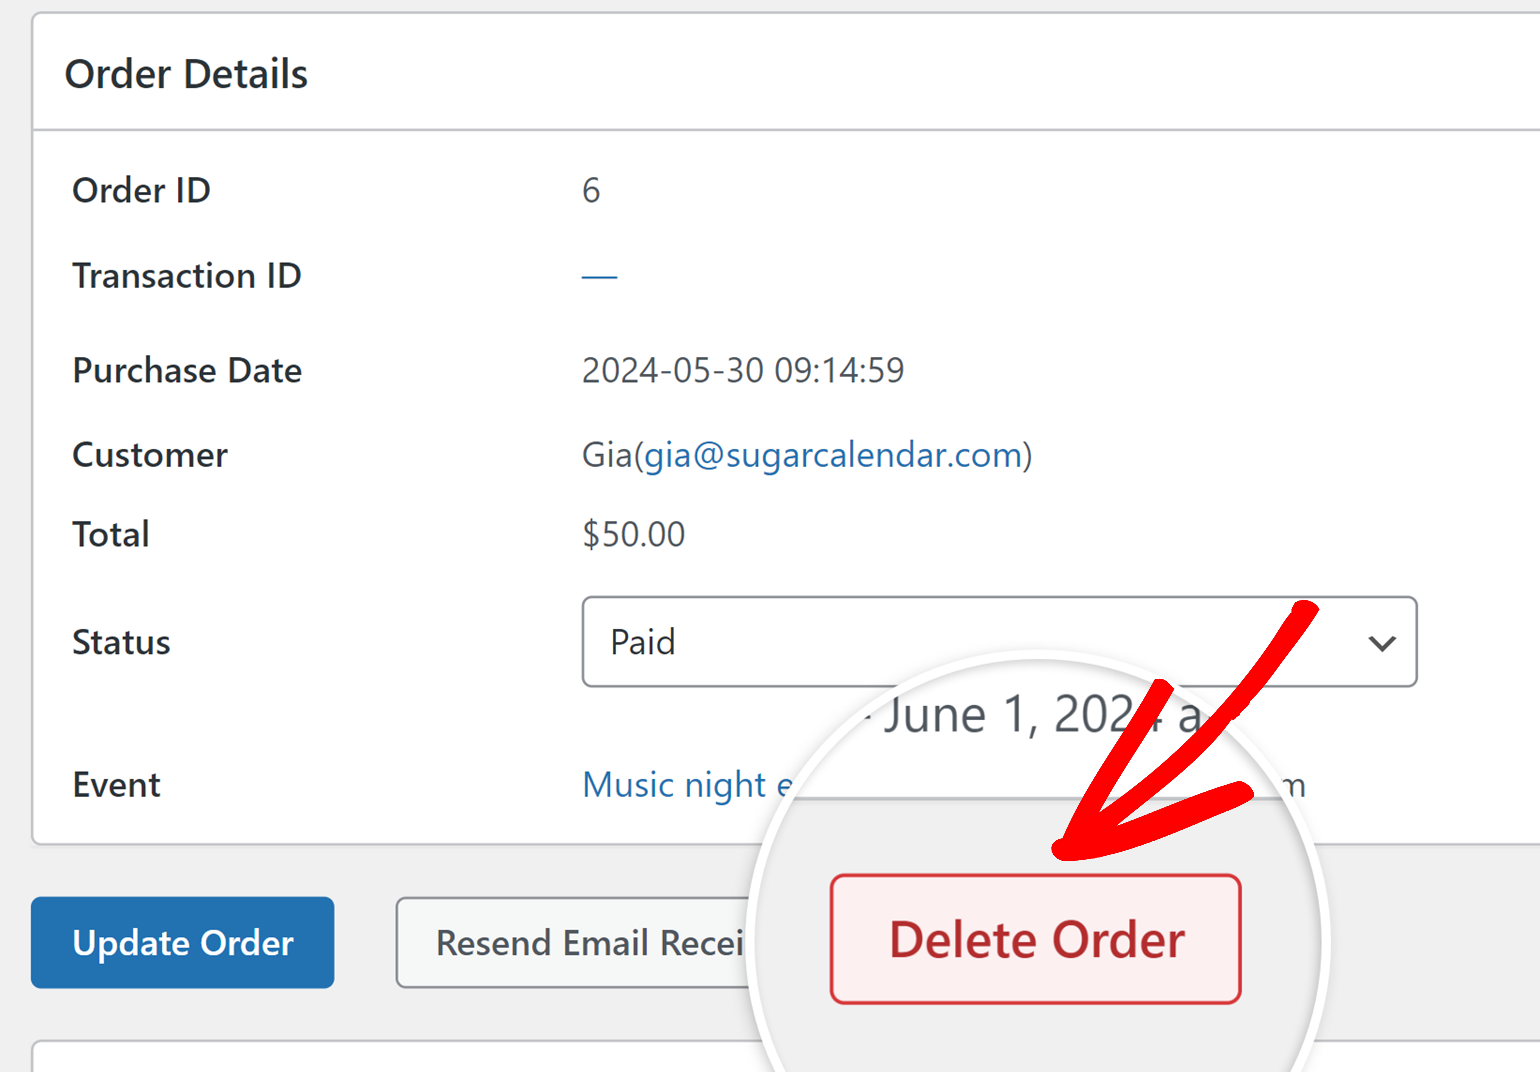
You can also permanently delete the order and associated tickets by clicking the Delete Order button.
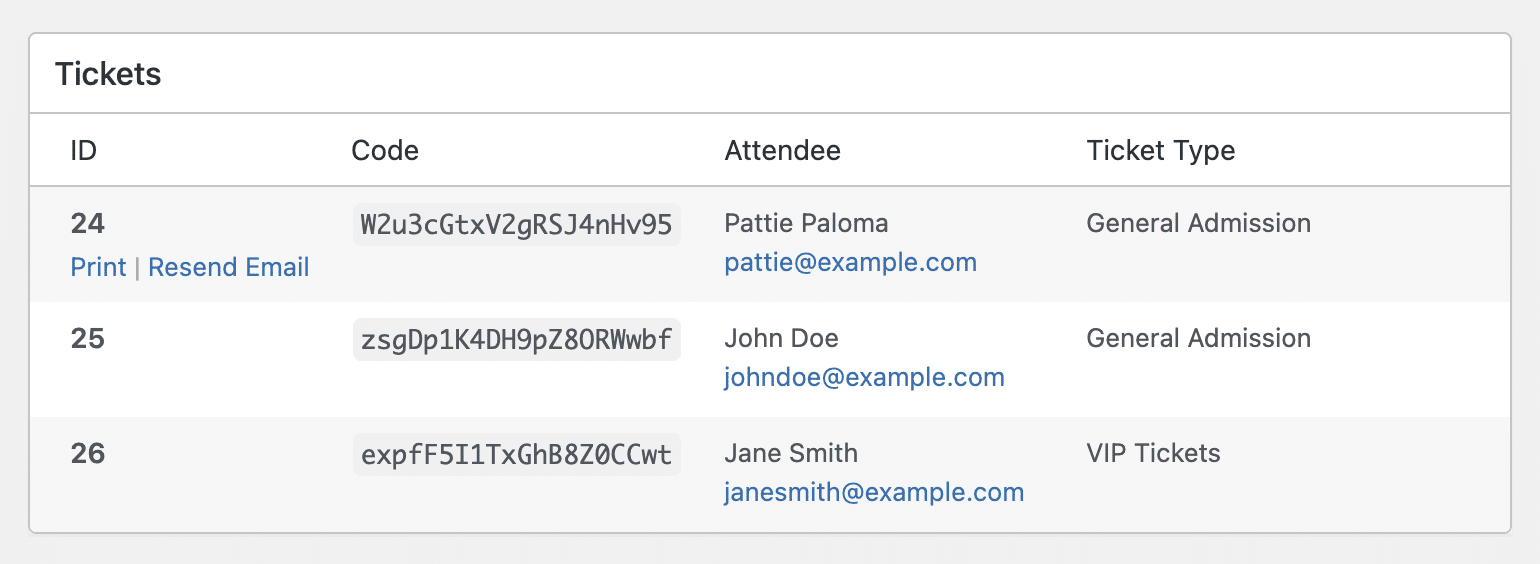
Below the Order Details section, you’ll find the Tickets section. This section includes specific ticket details in a table such as the ticket ID, code, attendee information, and ticket type. You can print or resend email tickets by clicking the respective links under the ID column in the table.
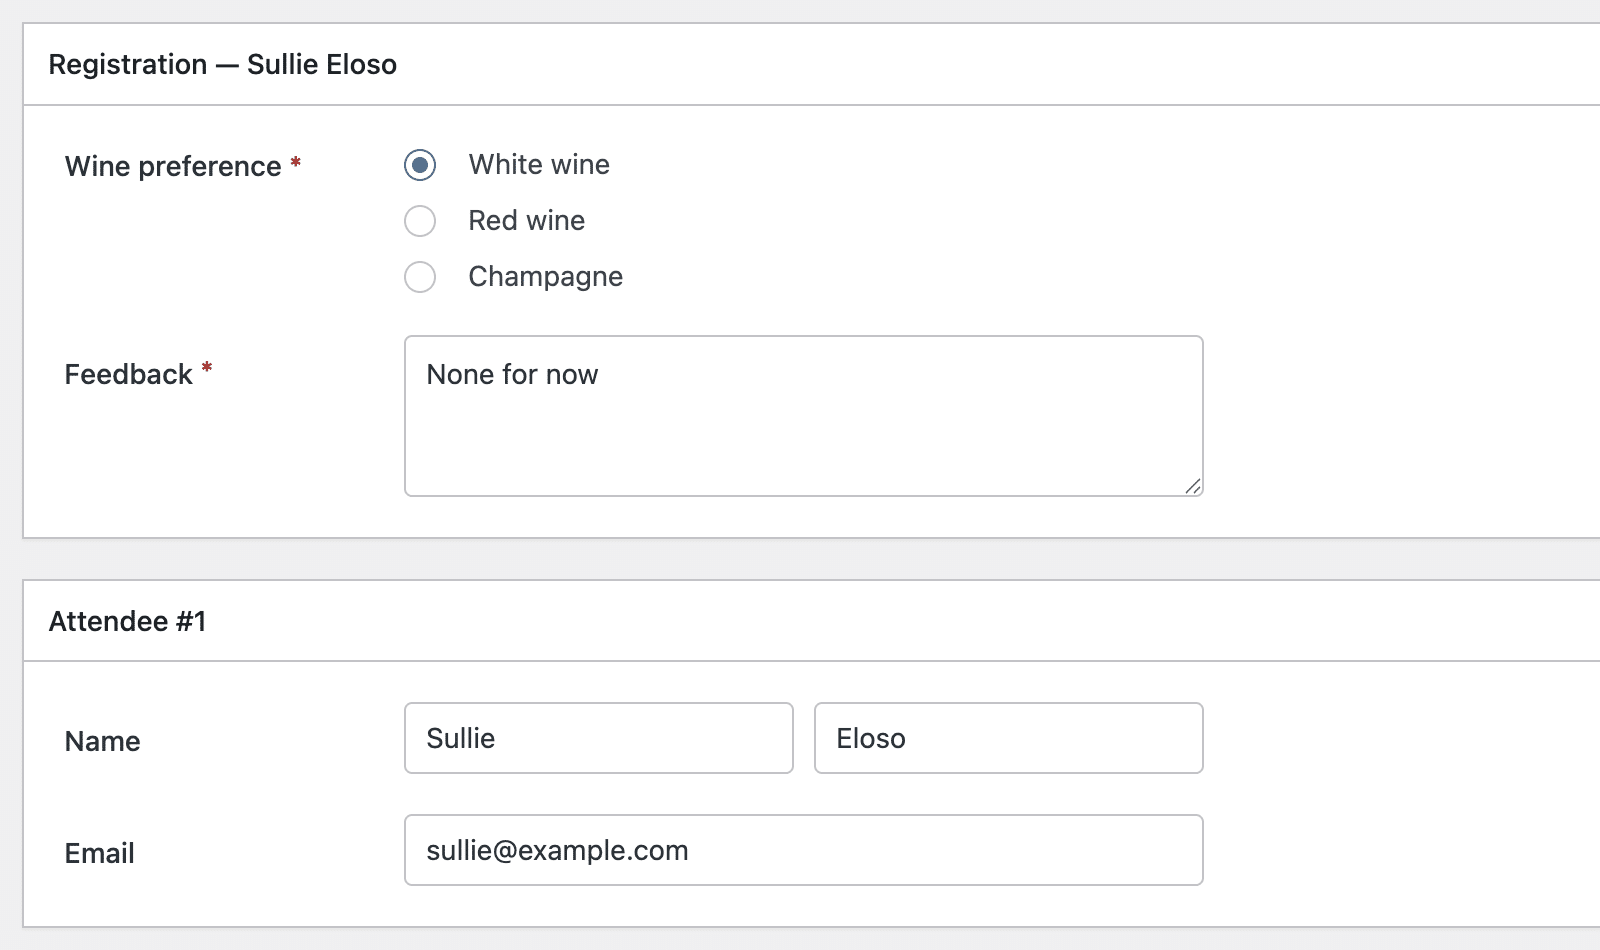
When the event collects registration responses, this page lists them below the Tickets section, with one panel per attendee. Each ticket row also gains an Edit link that jumps straight to that attendee’s panel, where you correct an answer and save it with the order.
What Your Customers See After Buying
Sugar Calendar Events 3.14 introduced modern designs for the ticket pages. It uses a card layout that follows the colors you set under Tickets Page Configuration.
The Ticket Receipt Page
After checkout, buyers land on your Payment Success Page. It confirms the purchase and lays out the order:
- The order number, purchaser name and email, purchase date, amount paid, and transaction ID
- The event name, linked to the event page, with its date and time
- One row per ticket, showing the ticket number and the attendee’s name and email
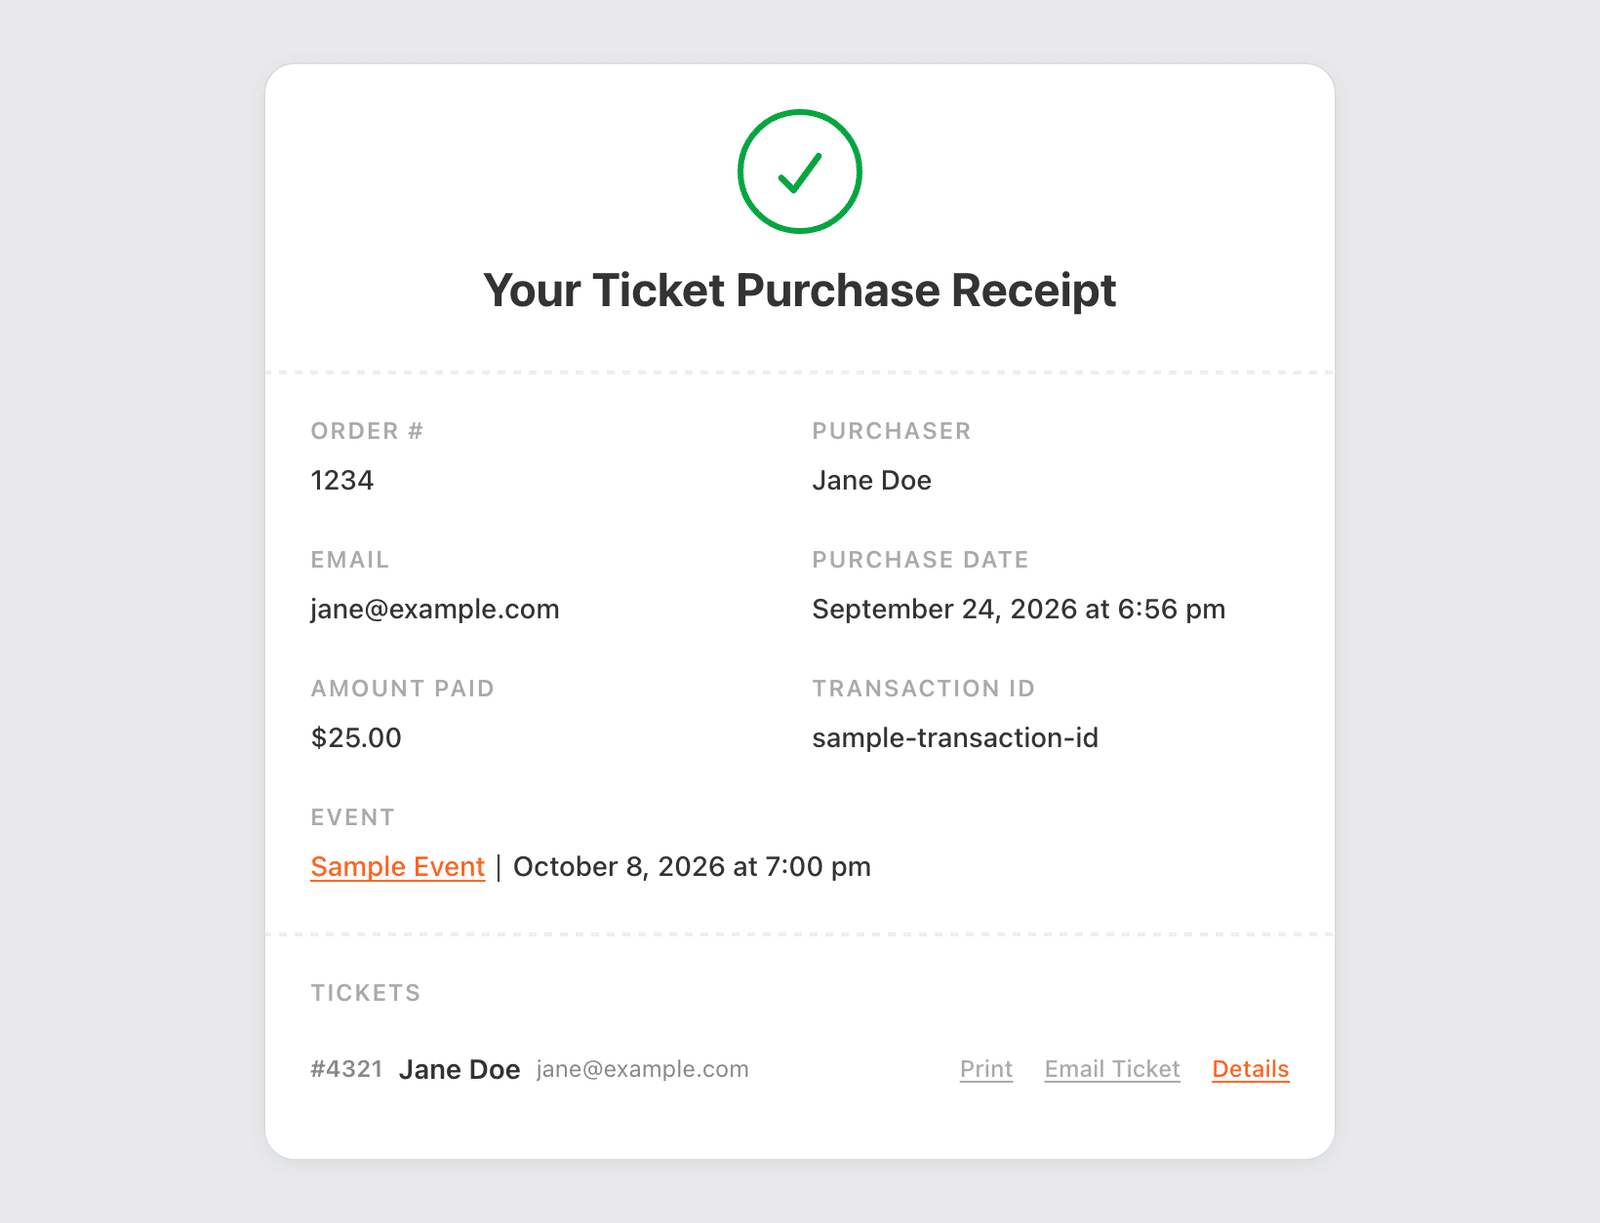
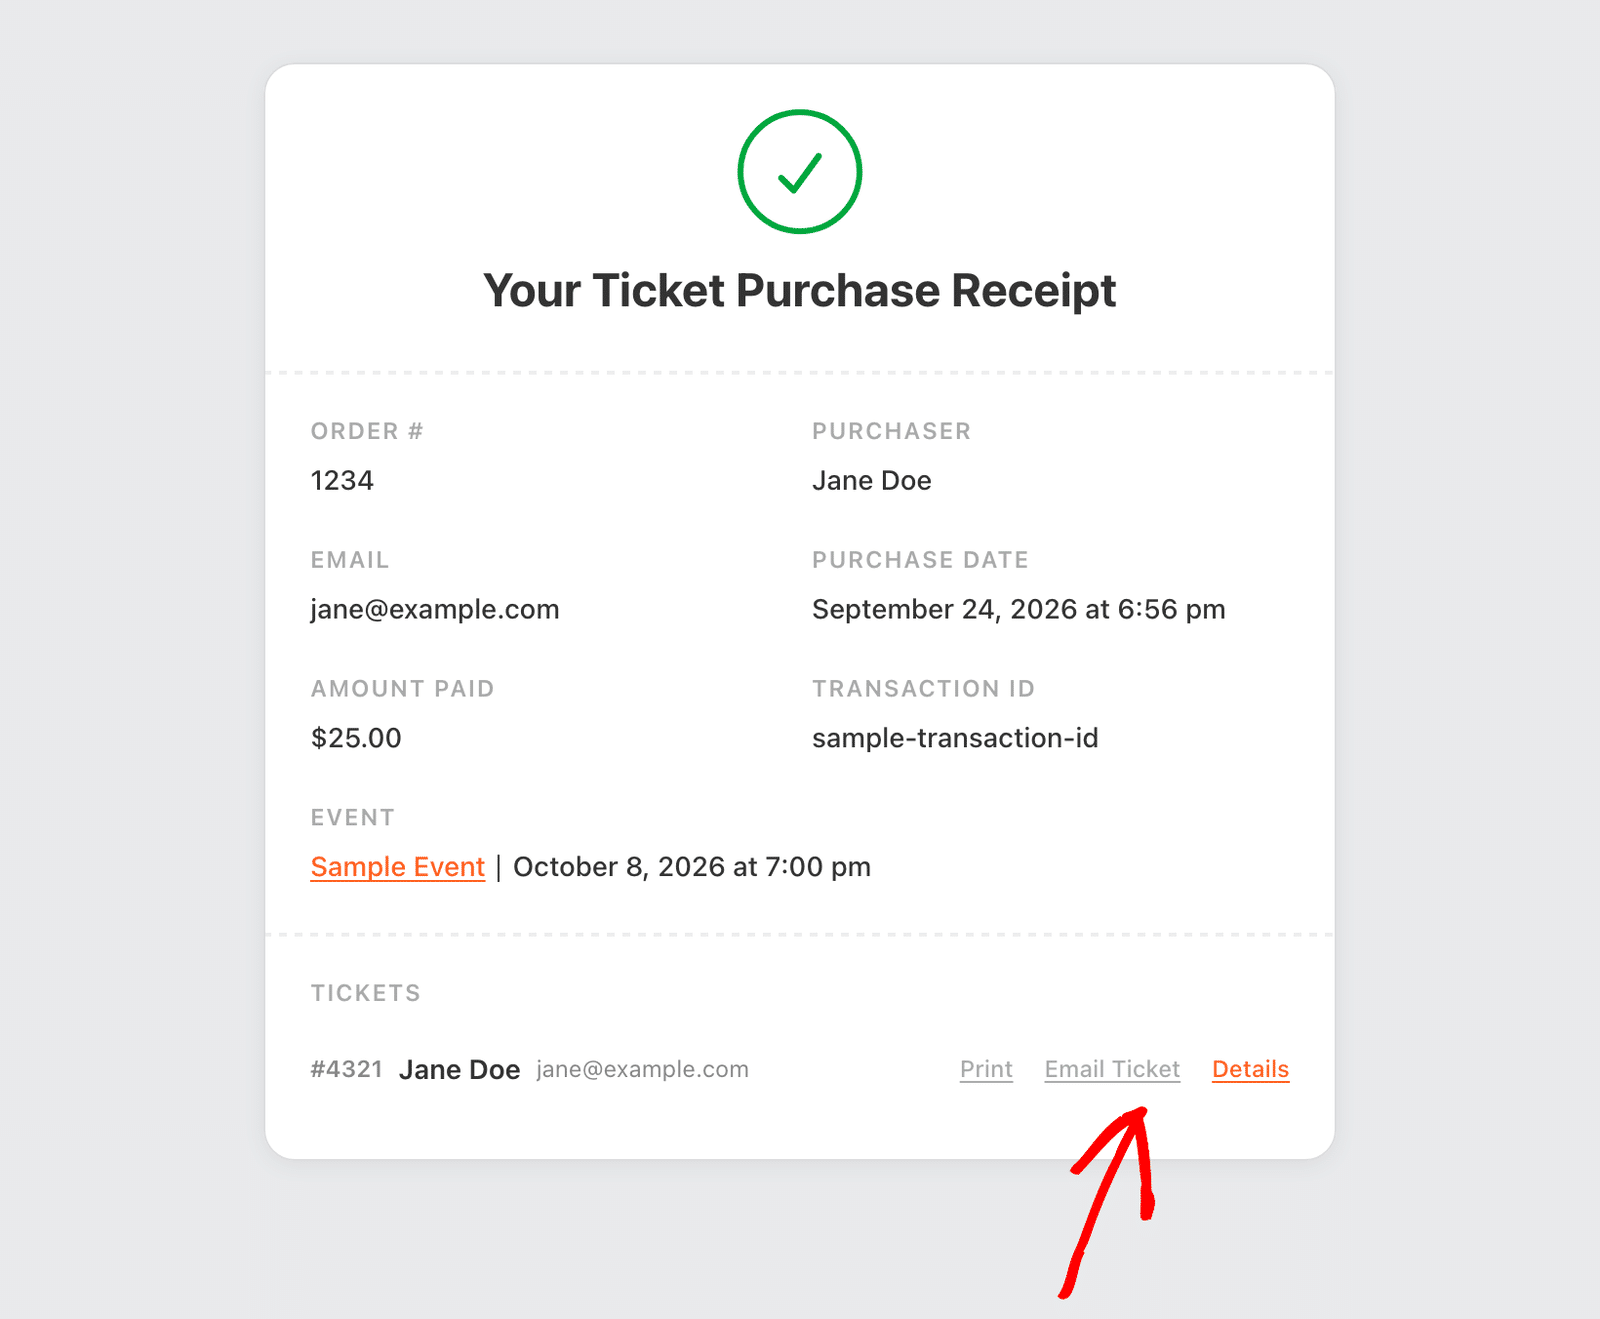
Each ticket row carries its own Print, Email Ticket, and Details actions, so a buyer who purchased several tickets can send each attendee their own.
The Ticket Details Page
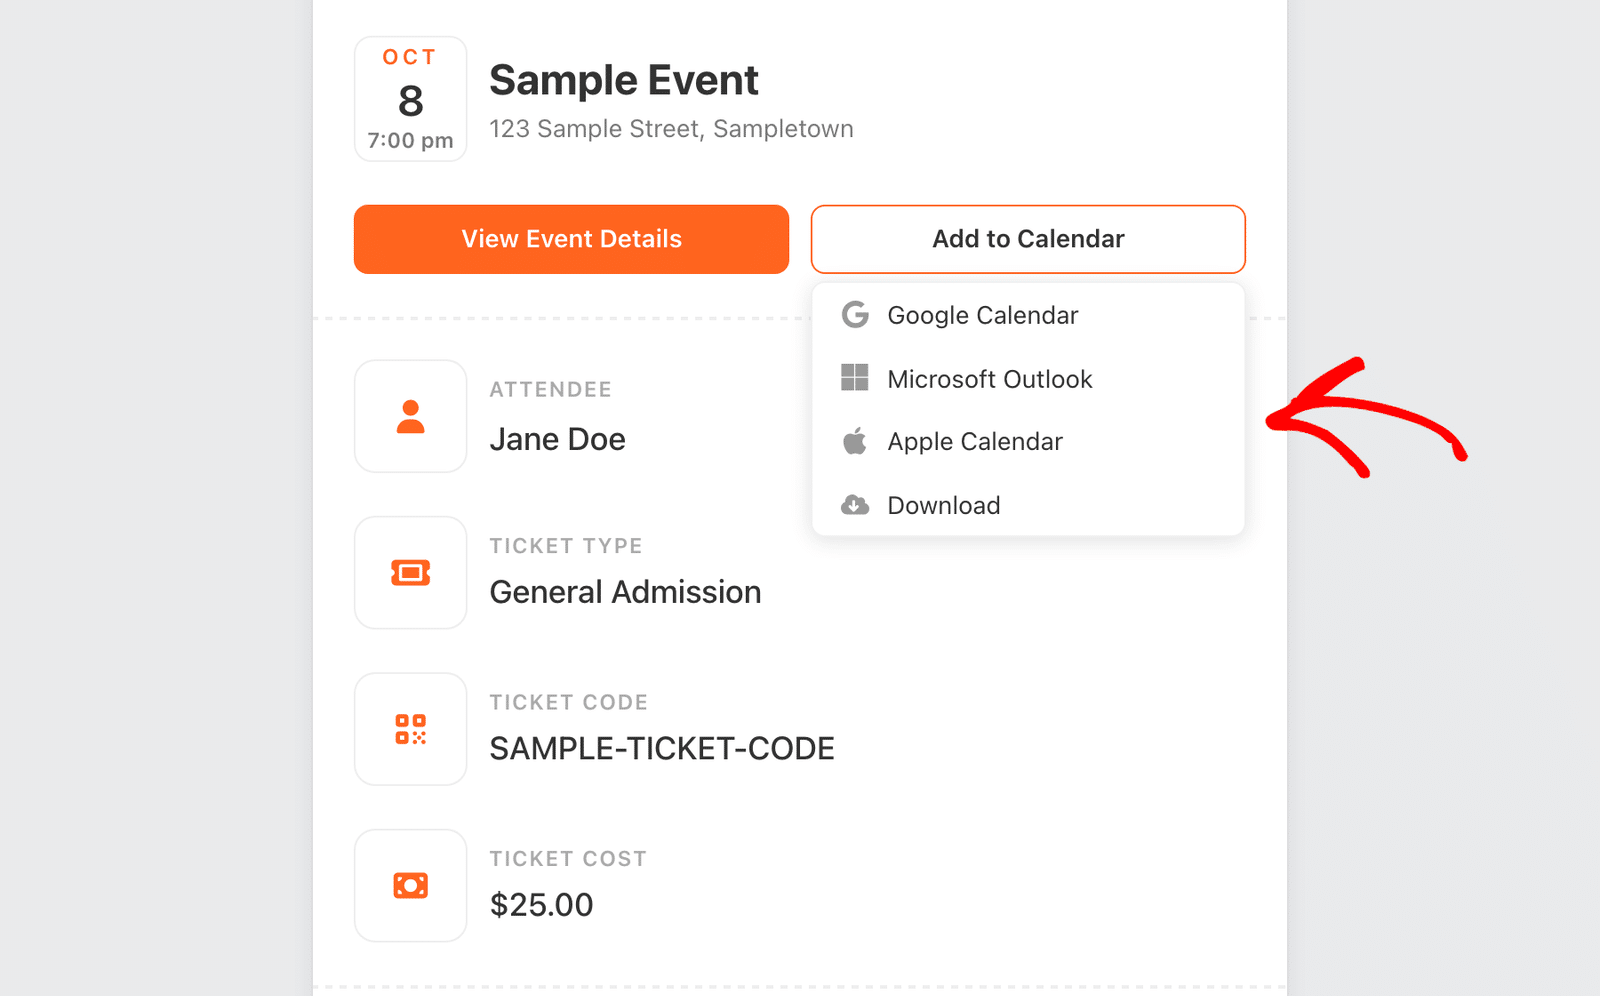
The Details action opens a single ticket on your Ticket Details Page:
- The event’s featured image, when the event has one
- The event date, name, and venue address
- View Event Details, which links to the event page
- The attendee name, ticket type, ticket code, and ticket cost
- Any answers from the event’s registration form, under Registration Details
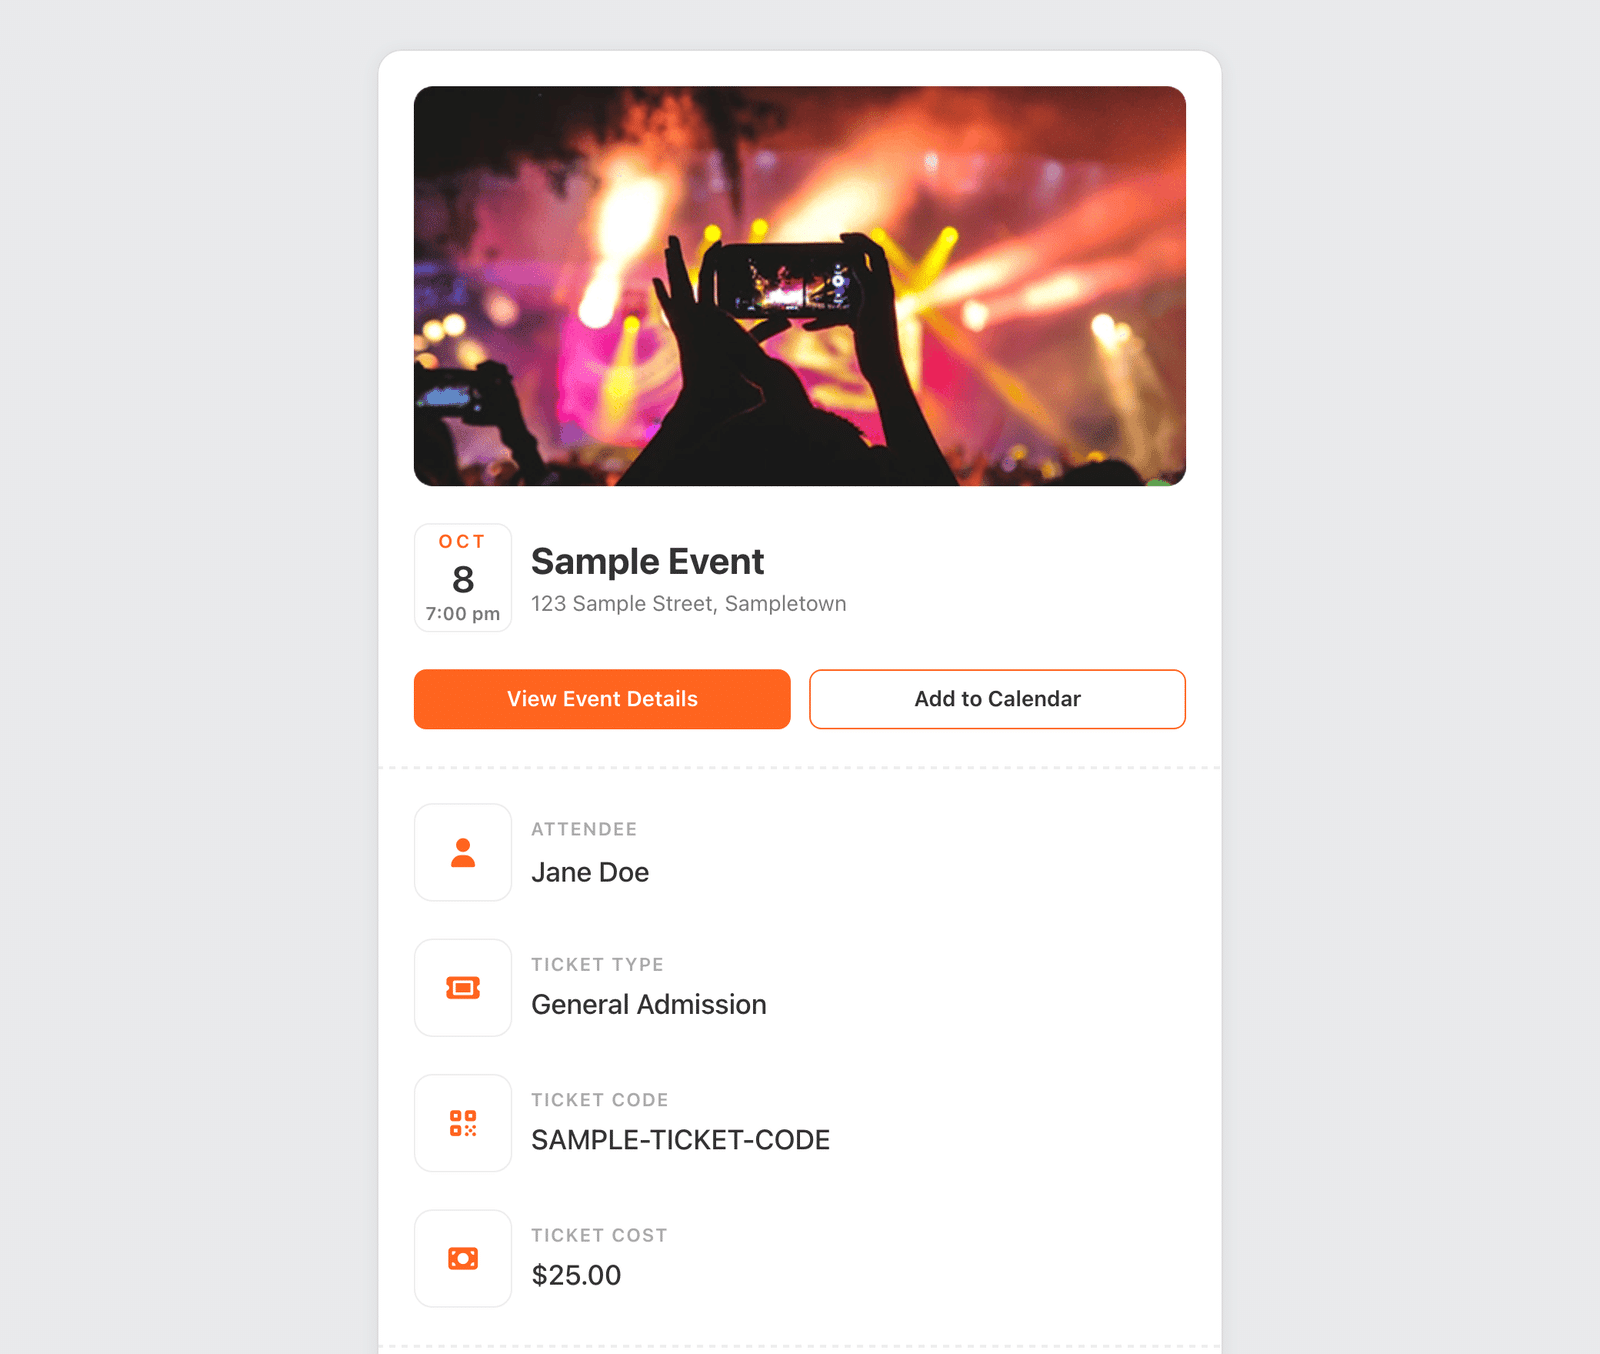
Sugar Calendar Pro adds an Add to Calendar button here. It lets attendees add the event to Google Calendar, Microsoft Outlook, or Apple Calendar, or download it as a calendar file. This uses the calendar feeds feature, so it doesn’t appear on Lite.
Note: To see either page without making a real purchase, use the Preview button beside its page selector under Events » Settings » Payments.
Configuring Event Ticketing Settings
The Event Ticketing addon for Sugar Calendar offers a variety of settings to help you customize and manage your ticket sales efficiently. These settings allow you to configure email notifications and other key aspects of your event ticketing system.
Tickets Page Configuration
To access these settings, go to Events » Settings and click on the Payments tab.
Then scroll to the Tickets Page Configuration section. Here you can customize the payment success and ticket details pages.
These pages are automatically created once you install the Event Ticketing addon to your site. So you don’t need to make any changes here.
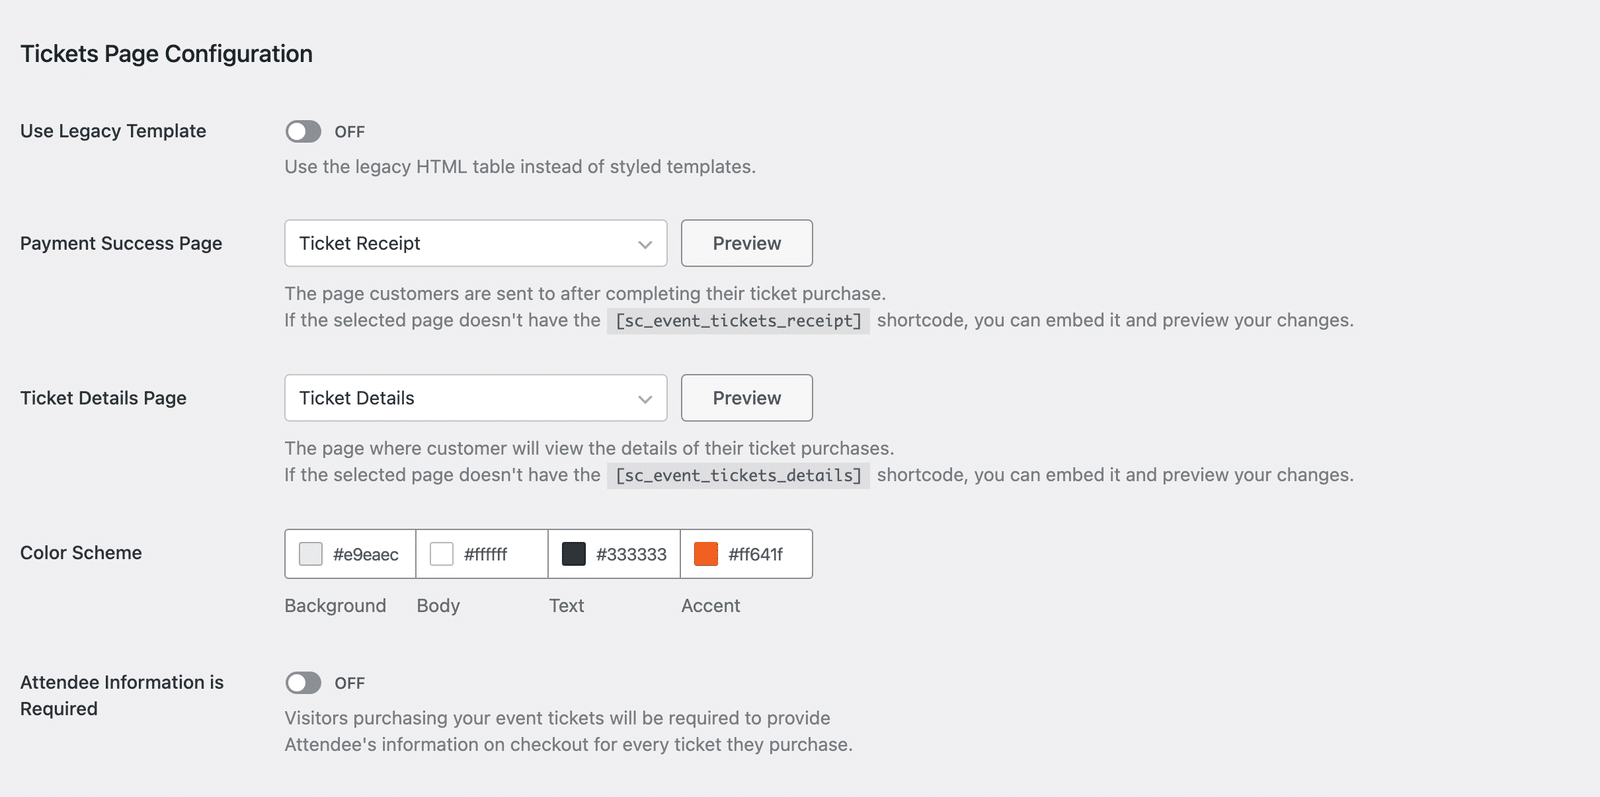
To use a different page for the order confirmation, click the Payment Success Page dropdown and choose a page from the list. The page must contain the [sc_event_tickets_receipt] shortcode.
The Ticket Details Page contains details about the user’s ticket purchase. The addon creates this page on install too, and the Ticket Details Page dropdown lets you select any page instead. The page you select must contain the [sc_event_tickets_details] shortcode.
Next to each dropdown sits an action button. It reads Preview when the page already holds the right shortcode, and opens the page in a new tab filled with sample data, so you see the layout without making a test purchase. It reads Embed when the shortcode is missing, and adds it to the page for you.
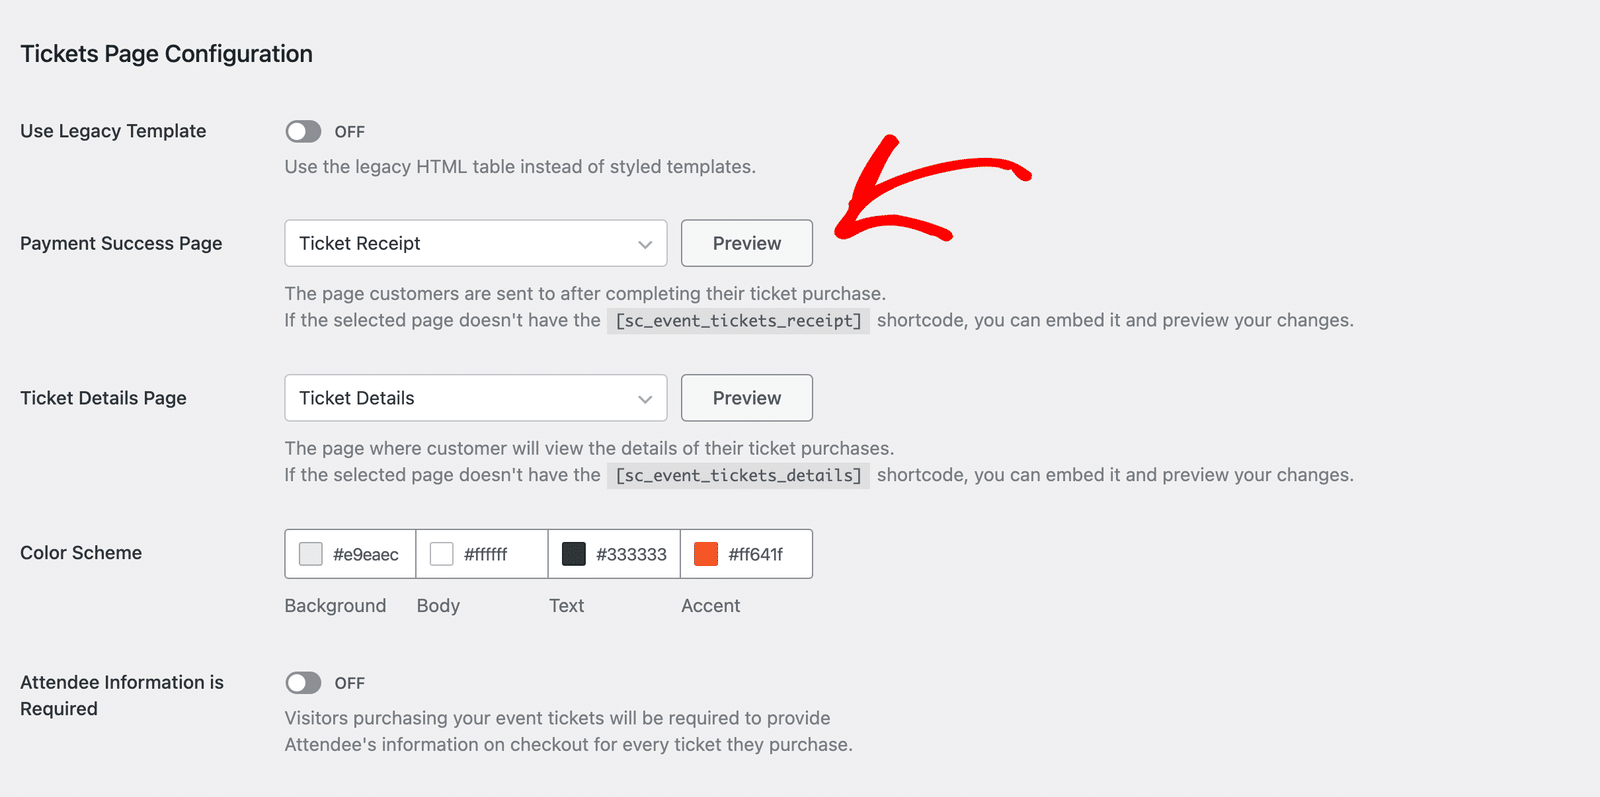
To require attendee information before users can purchase tickets, toggle the Attendee Information is Required option to the ON position.
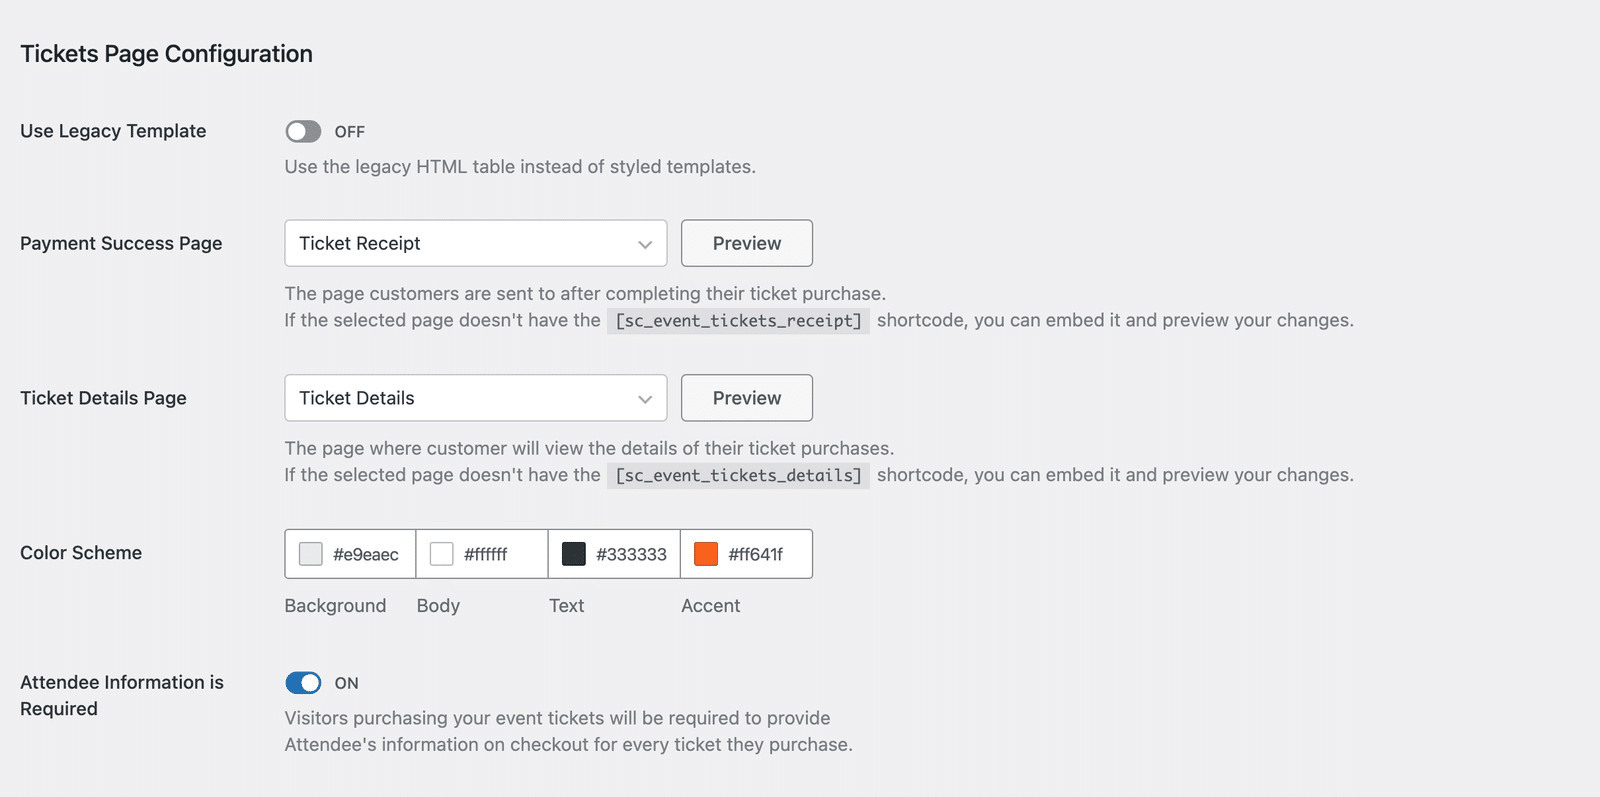
Use Legacy Template returns both pages to the plain HTML table layout Sugar Calendar used before 3.14. Turn it on only if you’ve written custom CSS against the old markup and the styled layout breaks it.
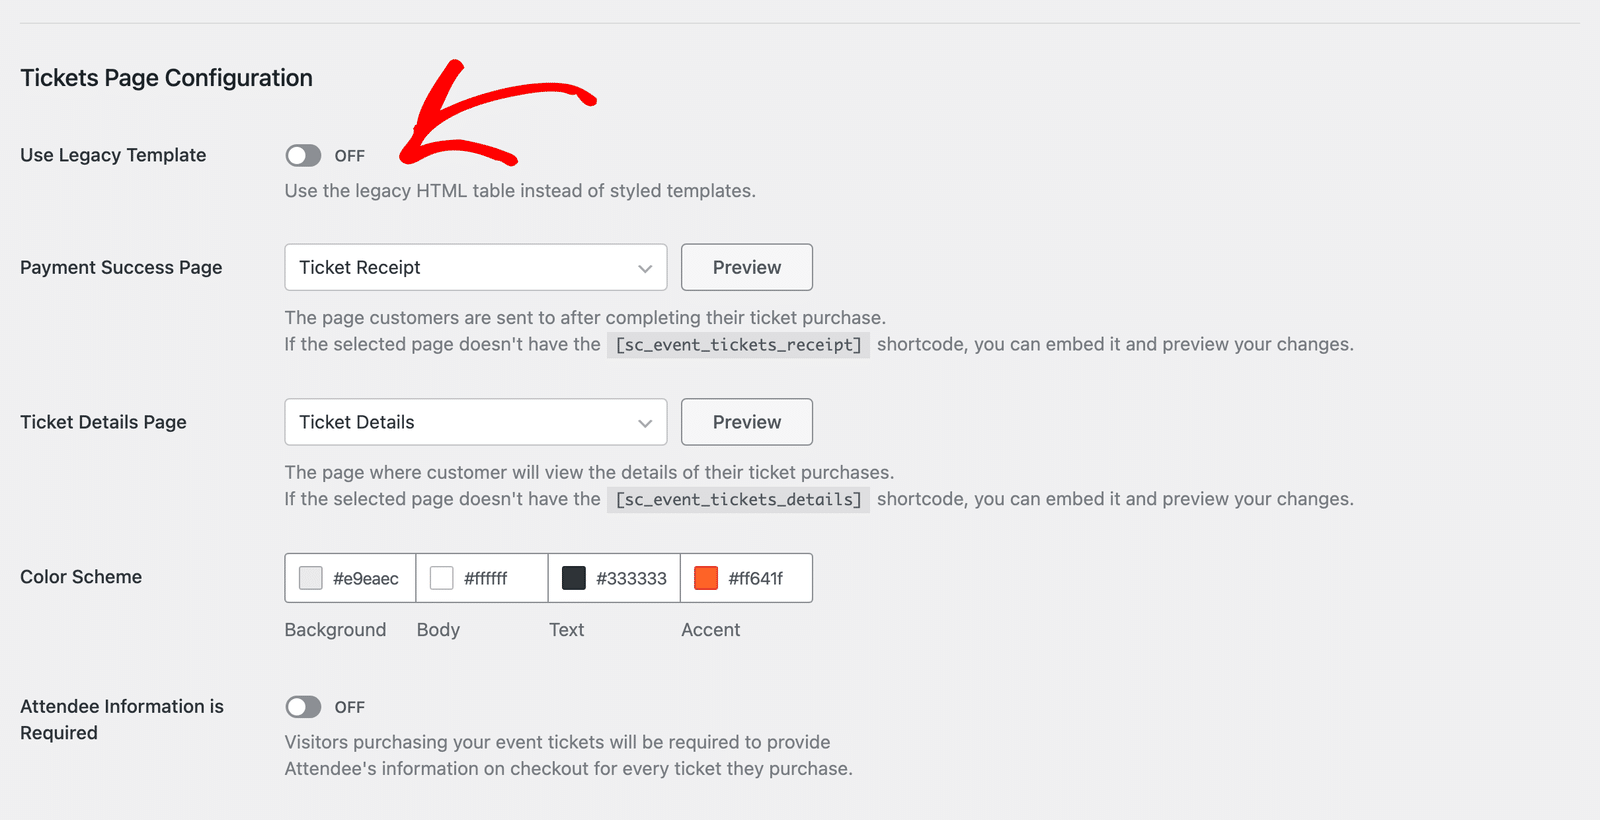
Color Scheme sets four colors for the styled pages: Background, Body, Text, and Accent. Switching Use Legacy Template on disables them, since the legacy layout doesn’t use colors.
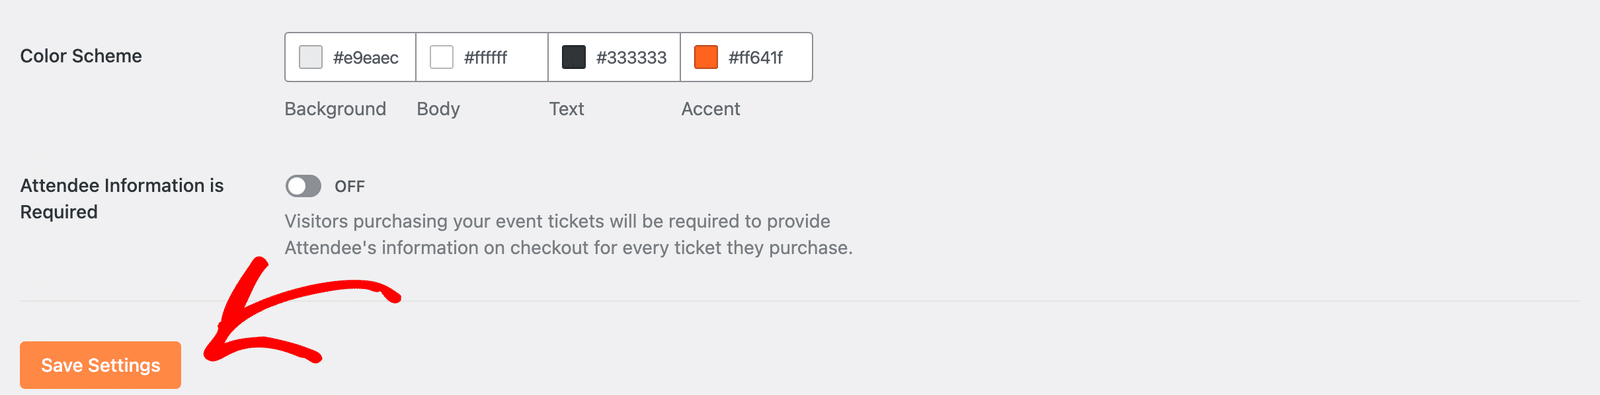
After updating the pages configuration, click the Save Settings button to update your changes.
Ticket Emails
To configure email notifications, navigate to Events » Settings and select the Emails tab.
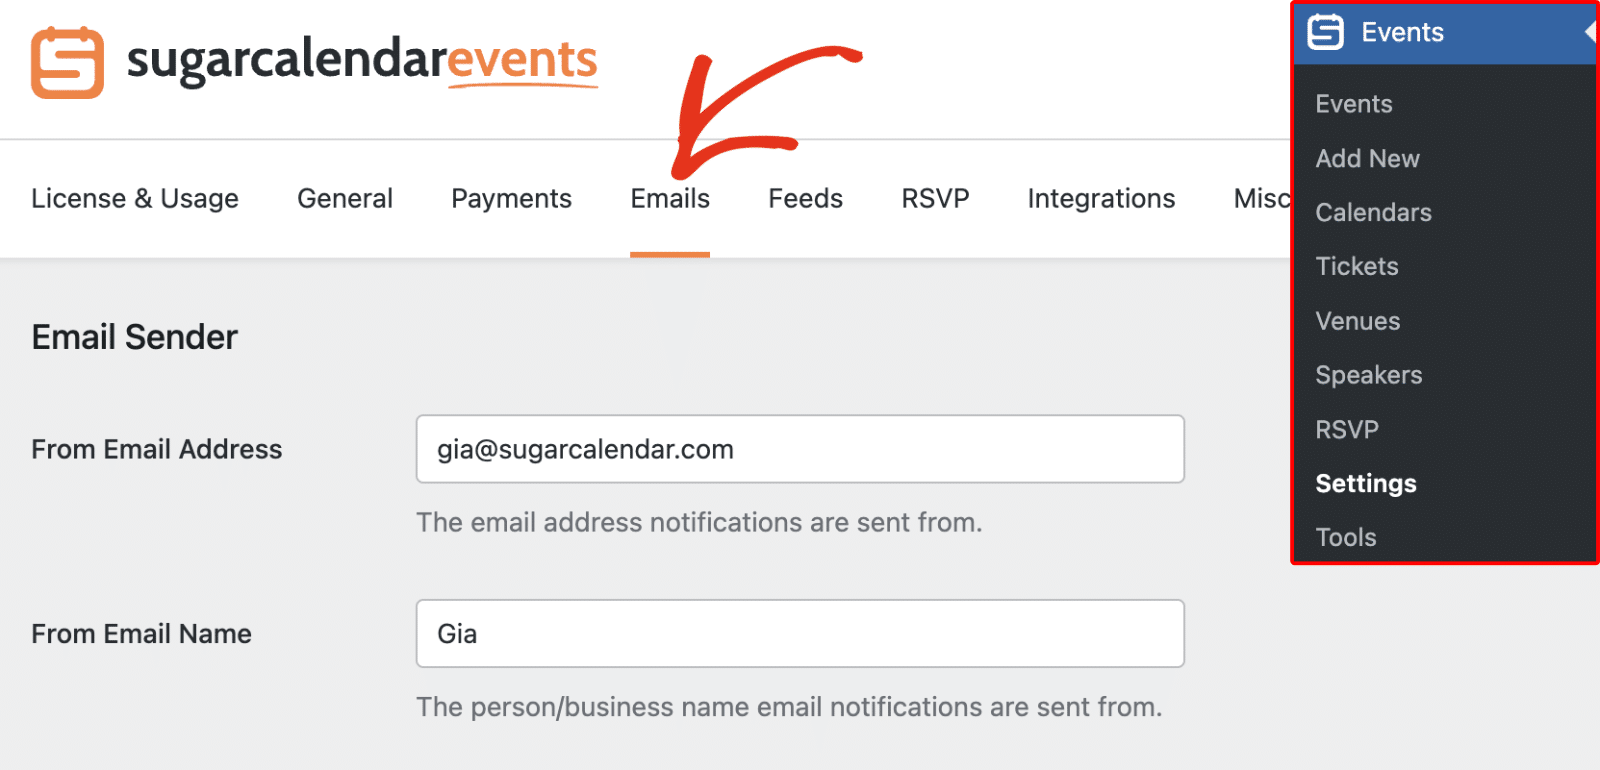
Here, you’ll be able to set the default email sender and name for all event-related emails.
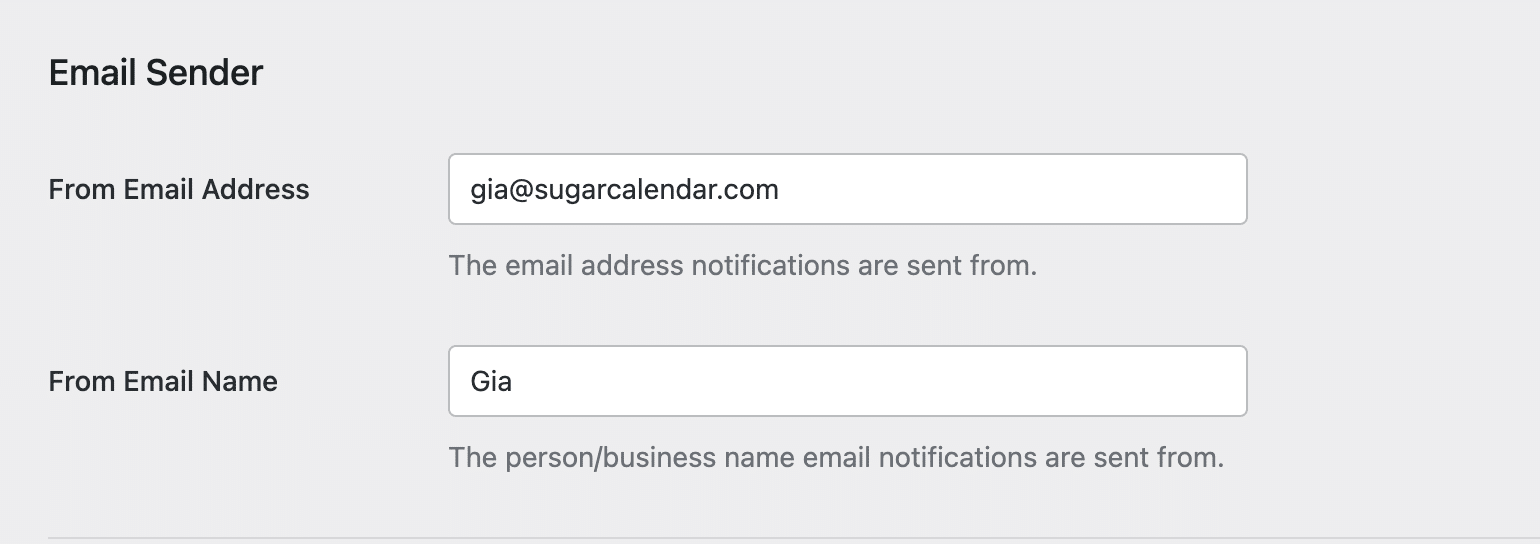
- From Email Address: This is the sender email address for event-related emails.
- From Email Name: The name users will see as the sender.
Below the sender settings, Sugar Calendar lists every email it sends, split into Configure Emails to Admin and Configure Emails to Attendees.
The Attendee Email Styling section sits at the bottom of the tab and sets the template, logo, and colors for all of them.
Emails sent to your site administrator:
- Ticket Sale Email To Admin
- RSVP “Going” Email To Admin
- RSVP “Not Going” Email To Admin
Emails sent to attendees:
- Order Receipt Email To Purchaser
- Ticket Email To Attendee
- RSVP “Going” Email To Attendee
- RSVP “Not Going” Email To Attendee
- Incomplete Registration Reminder
- Registration Confirmation
Every row has a toggle that controls whether that email sends.
Frequently Asked Questions
Below, we’ve answered some of the top questions we see about using the Event Ticketing addon with Sugar Calendar Events.
Can I test ticket sales for my events?
Yes! Our Event Ticketing addon includes a test mode that lets you accept trial transactions for ticket sales. To use this feature, you’ll need to enable Stripe Test Mode on the Sugar Calendar payment settings page. Please see our tutorial to learn more about testing event ticketing.
My ticket pages looked different before. Can I get the old layout back?
Yes. Sugar Calendar 3.14 restyled the Ticket Receipt and Ticket Details pages. Switch Use Legacy Template on under Events » Settings » Payments to return both pages to the previous HTML table layout. This exists for sites with custom CSS written against the old markup.
That’s it! You’ve now learned how to set up and manage event ticket sales with the Event Ticketing addon for Sugar Calendar.
Next, would you integrate WooCommerce and Sugar Calendar for ticket sales? Be sure to check out our tutorial on enabling WooCommerce Checkout for event ticketing.